
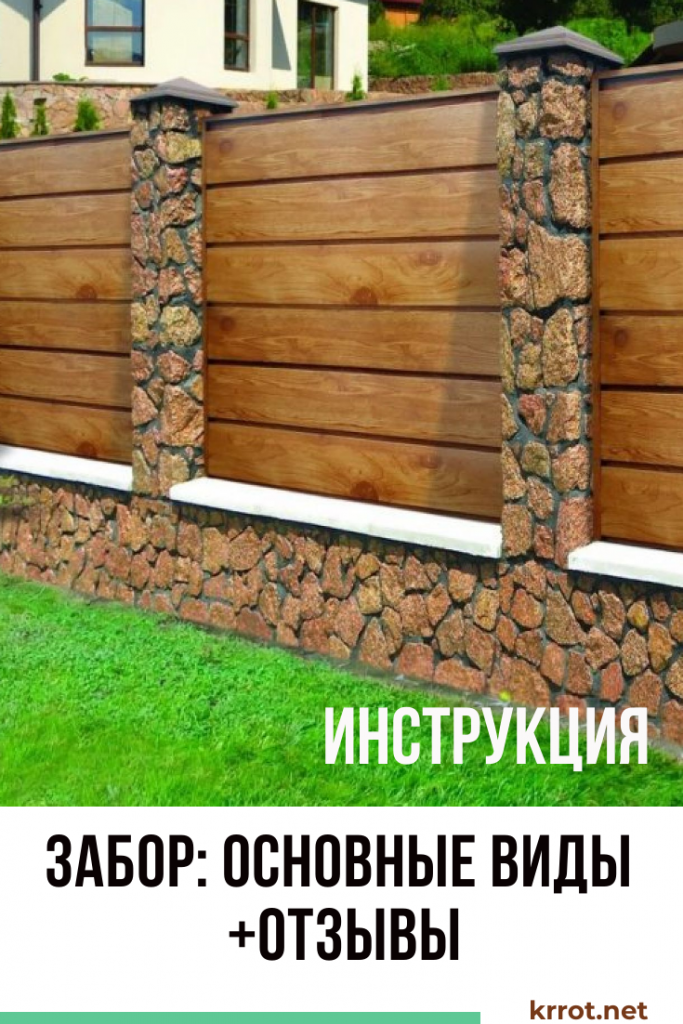
The fence performs several basic functions: hides the plot from prying eyes, protects from hooligans, thieves, stray animals. The building materials market offers many options, but to save the budget, you can make a fence with your own hands. The text of the article will introduce the types of fences, installation methods, and our photos will help determine the design.
Content:
 Read also: Projects of country houses for 6-10 acres: 120 photos, description and requirements | The most interesting ideas
Types: their pros and cons
Before starting installation work, you need to determine what material to put the fence from. Each of them has its pros and cons.
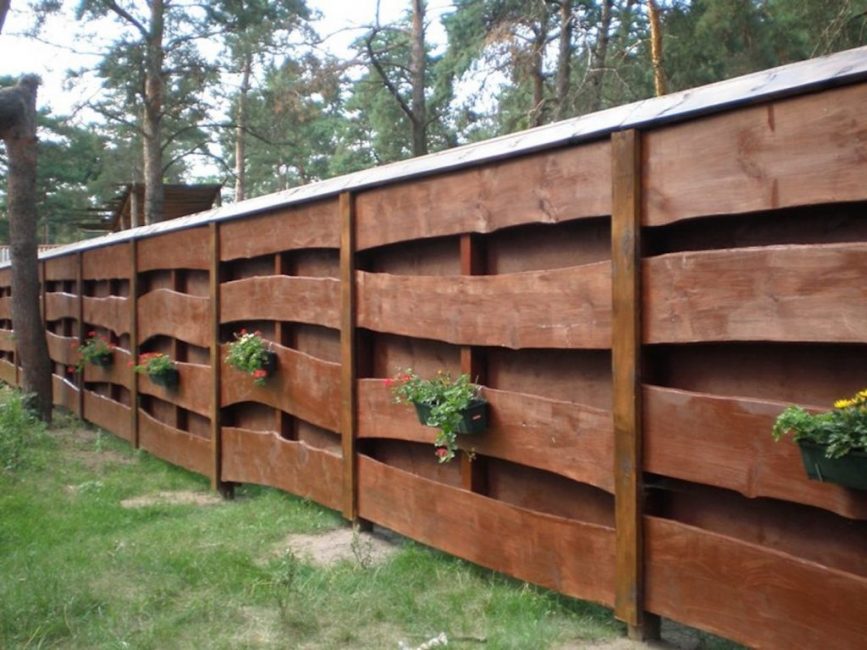
Wood
wooden version
- The advantages include the availability of wood, its low price. Boards are sold in construction markets, specialized stores. They can be ordered at the sawmill
- However, this material is short-lived and requires regular maintenance. It must be painted, treated with anti-rotting agents
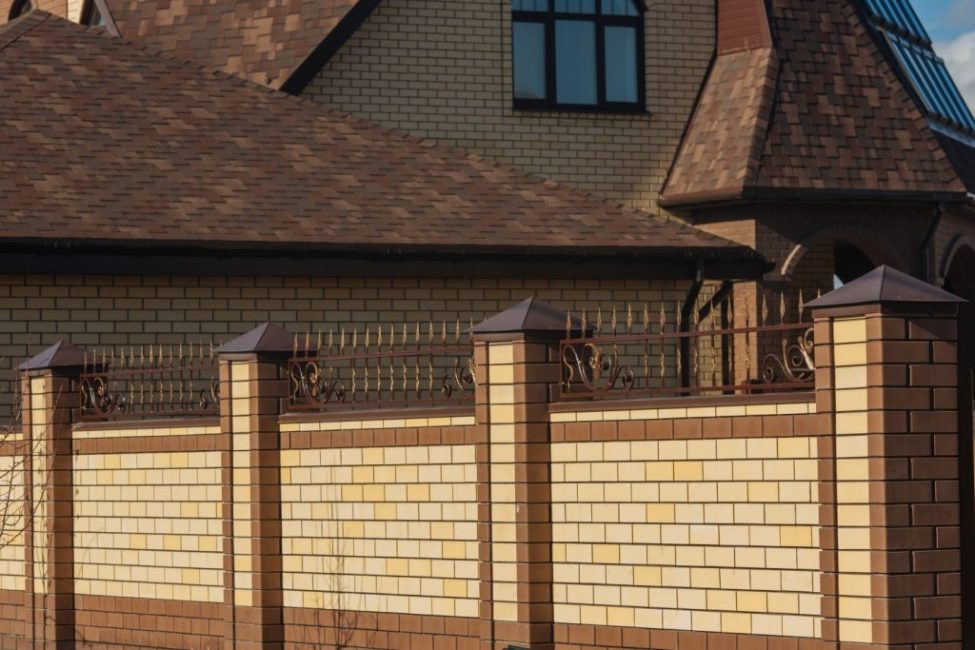
Brick

Brick variant
- Seduces the material with its strength
- A brick fence will look aesthetically pleasing and respectable
- Its service life is approximately 50 years, while it is not demanding to care
- The minus of a brick fence is its cost, if funds are limited, then this option will not work. Before erecting such a fence, a foundation is made, which must be reliable and durable.
From corrugated board
Option from corrugated board
- The material is sold in a wide range. You can choose the appropriate color and wave size
- Its installation is quite simple, it does not require pouring foundation. This fact saves money
- At the same time, the service life reaches 30 years
- The disadvantages include a low decorative appearance, especially from the side of the courtyard. To decorate such a fence, they often resort to combining with bricks.
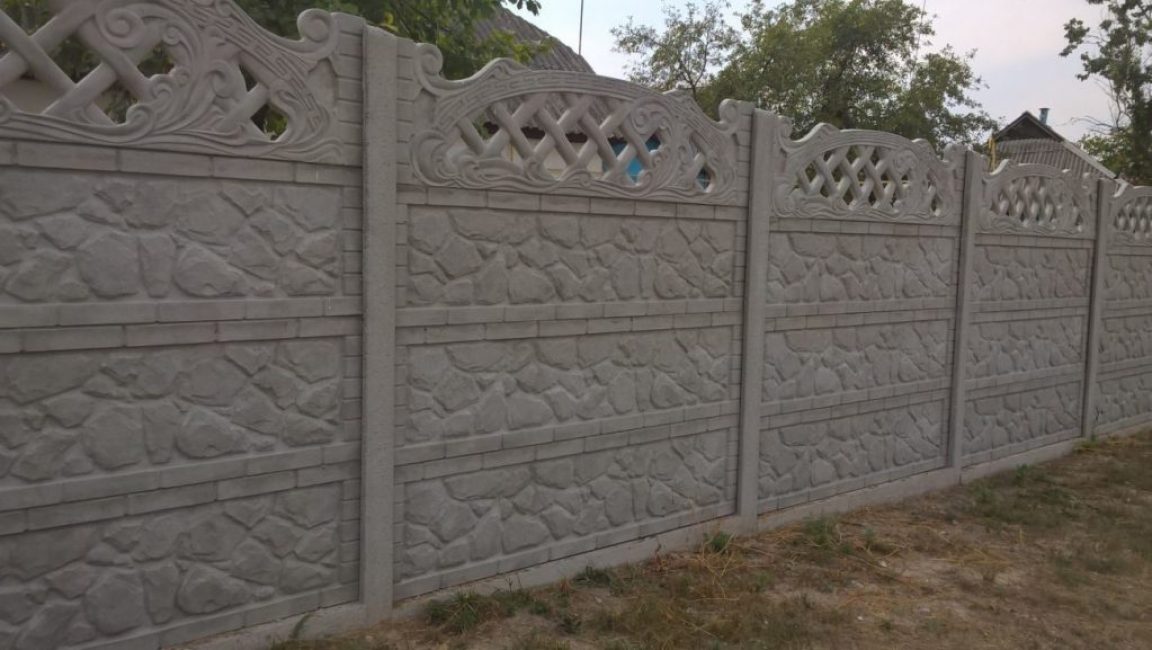
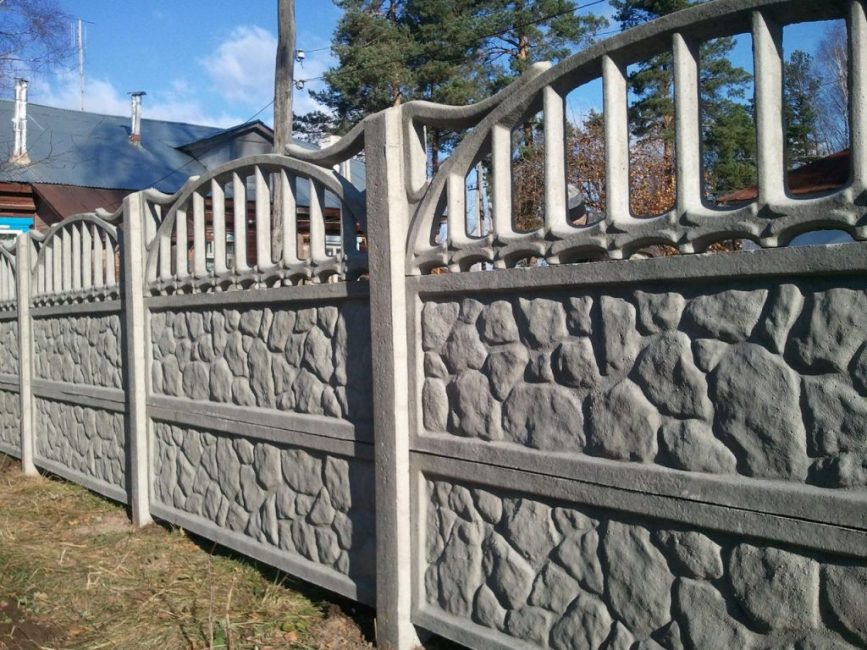
Concrete

Concrete option
- they are among the most durable types of fences and reliable protection against intruders
- such structures do not collapse even under long-term exposure to adverse natural factors (wind, rain and snow)
- able to withstand heavy loads, so they can be mounted on any add-ons, including lighting equipment
- modern buildings look quite decorative: on their surface they often imitate the texture of natural materials: stone, brick or wood; ready-made concrete slabs can be decorated with decorative curly details
- the simplest fences do not require additional maintenance - annual painting, plastering
- The disadvantages of concrete structures include the complexity of installation.
- The use of construction equipment is required to move and install ready-made (monolithic) concrete slabs.
- Decorative on one side only
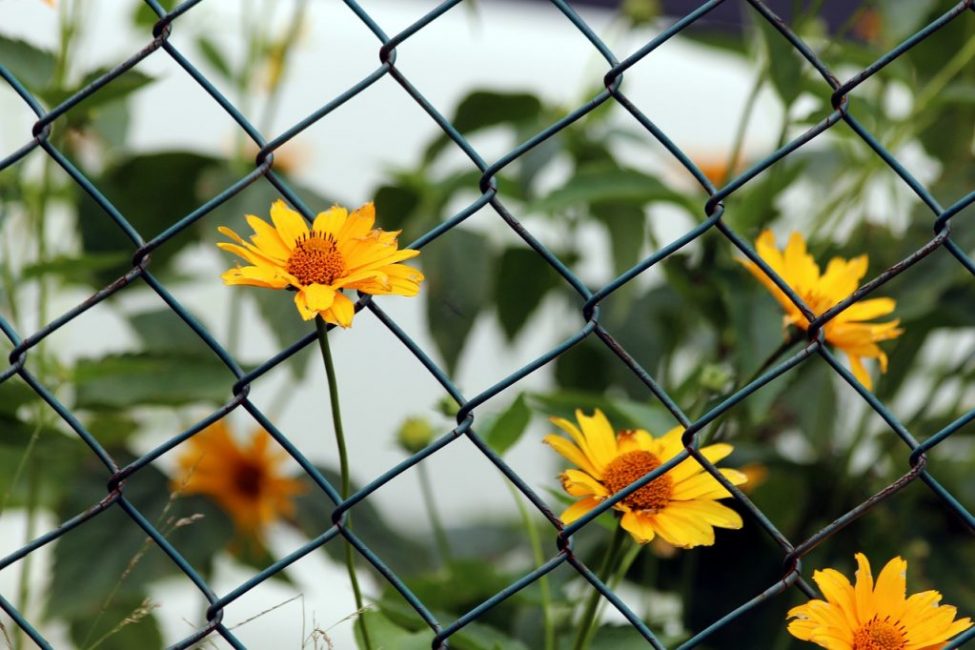
From the netting
Chain link option
- The mesh does not give shade, which is a huge plus for growing sun-loving plants.
- Fences made of metal rods will last 30 years
- But it is impossible to hide the site from prying eyes with its help.
Made of plastic
Plastic variant
- The material is available for people with a modest budget
- Polycarbonate panels are easy to install
- This fence will last long enough
- Large selection of modern polymer products
- The disadvantage of a plastic fence (polycarbonate) is its low strength, unlike brick, concrete, etc.
 Read also: Veranda attached to the house - expanding the living space: projects, tips on how to create your own hands (200 original photo ideas)
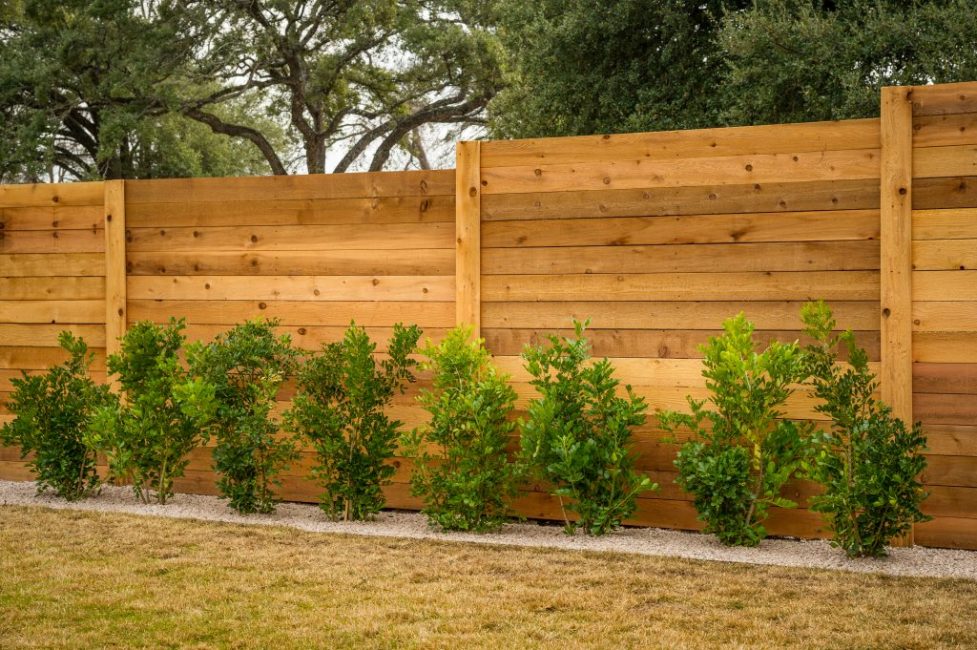
 Wooden fence
Wooden fence
Any construction begins with the choice of material. For a fence made of wood, you need to choose high quality wood, then it will last a long time.
Boards from:
- Duba
- Aspens
- ash tree
- Alders
- mulberries
- Larches
An important condition for quality will be reliable supports. For them, the best material should be selected. If it is not difficult to change a board in a span, then it will be difficult to change a support post.
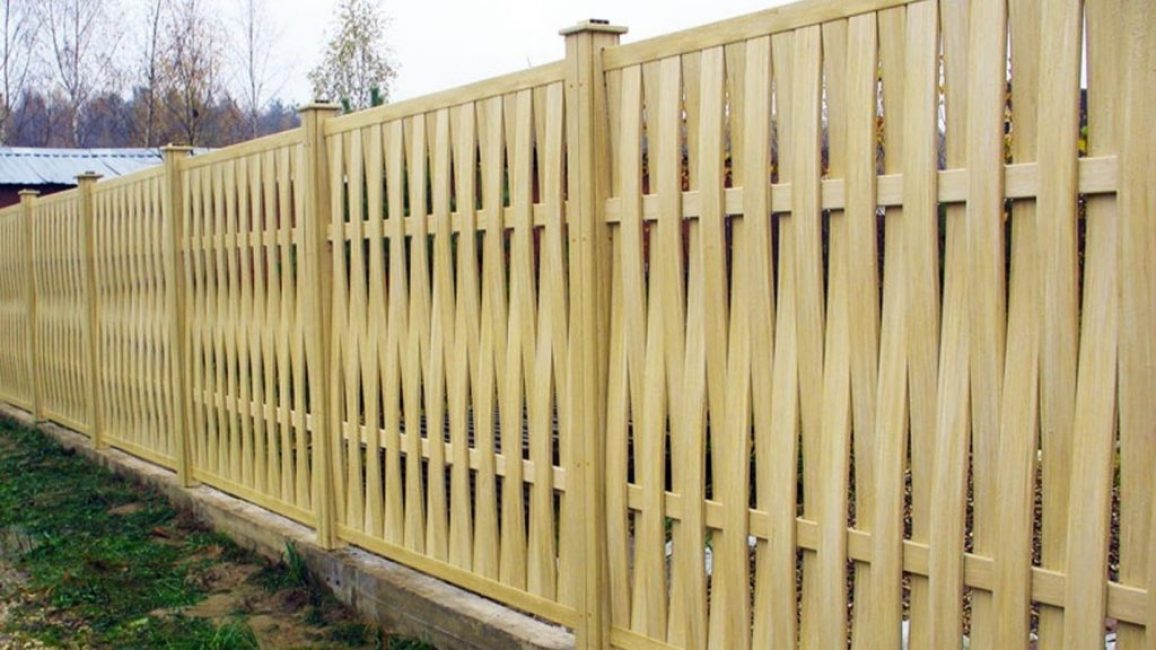
beautiful wooden fence
The fence can be made vertical and horizontal. The technology is similar, except for laying boards. consider the example of a vertical fence
Installation instructions:
- Boards are cut to the desired length or bought ready-made required size. Usually the height of a wooden fence is made from 150 to 250 centimeters.
- Next, polishing is carried out on both sides. It is done to remove notches and give the surface smoothness.
- Be sure to treat with an antiseptic. It will protect the tree from decay and damage by harmful insects and fungal organisms.
- After the material is prepared, it's time to make markings around the perimeter of the site. For this, pegs with a pointed end are prepared. Height 60 centimeters. Are driven into the ground
- A rope is stretched between the stakes. Its tension should be maximum
- In the place where the supports will stand, you need to dig holes. Their depth should be 50 to 80 centimeters. The distance between them should be approximately 2 meters
- Supports are made of timber with a section of 7.5x7.5 or 10x10 centimeters. The lower part is abundantly impregnated with an antiseptic and treated with resin. This measure will protect against decay. To increase the degree of protection, you can wrap it with plastic wrap
- A bar is installed in prepared turnouts and poured with concrete mixture. In the case when the fence is planned to be light, it is enough to compact the soil tightly
- Nails are driven into the upper part of the supports. And pull them with a rope. This will pull them together, which will allow you to make the sheathing exactly at right angles to the soil surface.
- Horizontal crossbars are attached to the supports with nails. Between them, a step of 20-30 centimeters is observed
- Vertical boards are nailed to the crossbars. They can be closely adjacent to each other or located at an equal distance. It depends on which fence model is chosen. To ensure they are even, you need to measure along the upper rope.
- After the sheathing is finished, the ropes and pegs are removed
- The last step is painting. The shade is chosen according to personal preferences. Possessing artistic skills, you can apply a drawing or ornament to it
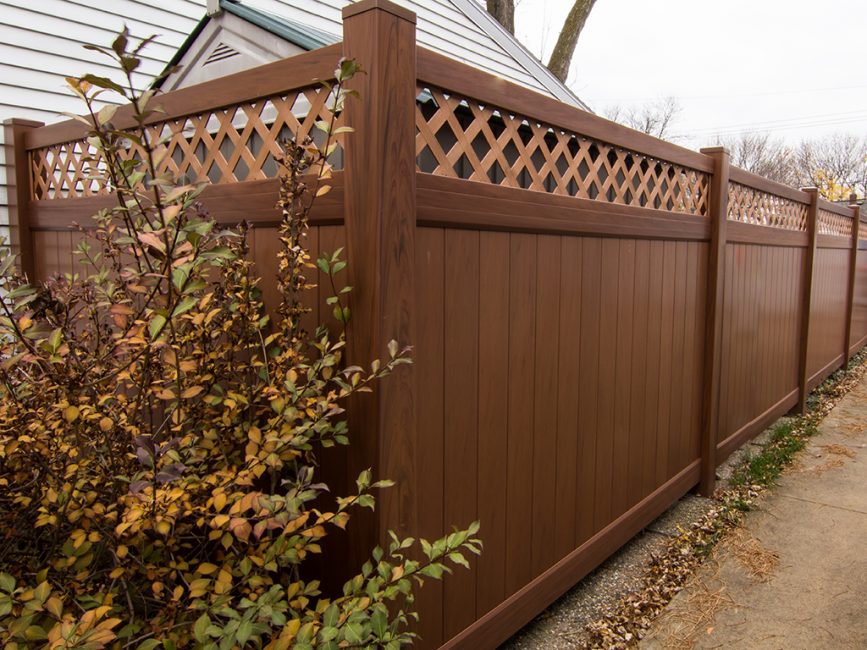
The original fence will turn out if you use non-standard fastening methods. These include a fence assembled according to the principle of blinds. Boards are laid vertically with a slope to the outside. Such a fence will reliably protect the site from prying eyes, while increasing resistance to strong winds.
 Read also: How to make a beautiful and inexpensive fence in the country with your own hands: wood, metal and polycarbonate | (70+ Photos & Videos) + Reviews
brick fence
brick fence
Before laying a brick wall, you need to prepare all the necessary tools and materials:
- Large container for mixing concrete mix or concrete mixer
- Rope for marking the territory
- Bulgarian
- fittings
- Hammer
- Roulette
- Level
- Master OK
- Buckets
- rubble
- bricks
- Cement
- Sand
- Water
You need to calculate the number of brick blocks in advance. It depends on the size and thickness of the masonry. The thinnest is half a brick, and the thickest is two. With an average masonry of 1 brick per square meter, 100 pieces will be needed.
The height of the fence is selected individually. Recommended maximum up to 3.5 meters.
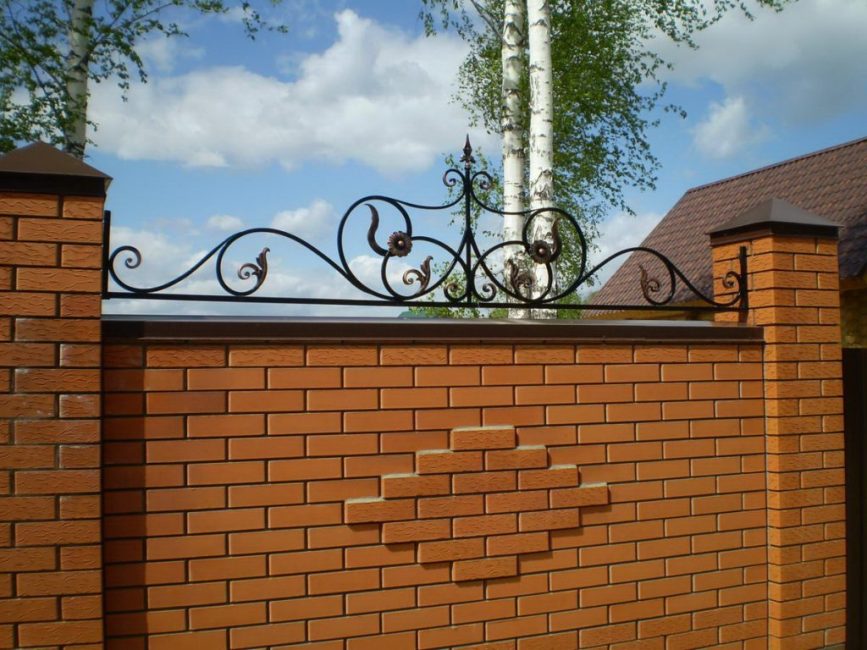
brick fence
Construction instructions:
- You need to start work with markings, stakes are driven in the corners, a rope is pulled over them. The angles must be strictly 90 degrees. A square will help with this.
- Next, prepare a trench for the foundation. She breaks out on the markup. Width 50-70 centimeters, depth from 70 to 100 centimeters
- Sand is laid at the bottom, the layer should be at least 10 centimeters. It performs 2 functions: cushioning and drainage
- It's time to make the formwork. The boards must stand so that the poured concrete has a flat surface.
- Reinforcement is carried out according to size, for this, connected reinforcement is used
- The preparatory work is completed, you can pour the foundation. You can prepare the concrete mixture yourself, or buy ready-made. Here the choice depends on the available funds. The proportion for preparation should be 4 parts cement, 2 parts sand and 2 parts water. The surface is leveled so that air does not accumulate inside, punctures are made around the perimeter with reinforcement. It takes 3-4 weeks to dry. Formwork can be removed after 10 days. To prevent cracking, the foundation must be watered, especially on hot days.
- Before laying, a layer of roofing material or a polyethylene film folded several times is laid on the foundation
- Bricks, before laying, are placed in water for a minute. It will nourish the pores and prevent moisture from being drawn out of the adhesive solution.
- The pillars are erected first. To strengthen them, reinforcement is installed inside the cavity and poured with a concrete mixture. Only then will the walls begin to rise.
- The cement mixture is laid in the first layer, it must be thick to compensate for the possible unevenness of the foundation. Subsequent ones need to be applied thinner
Next, the bricks are laid out. So, alternating layers, the entire fence is built. In order for it to be durable, the masonry should be carried out around the entire perimeter immediately row by row.
After the construction is completed, drainage systems are installed. So that natural precipitation does not damage the fence over time. If desired, you can plaster and whitewash the brickwork.
 Read also: How to make flower pots with your own hands: outdoor, indoor, hanging | Step by Step Charts (120+ Original Photo Ideas & Videos)
 Combined fence
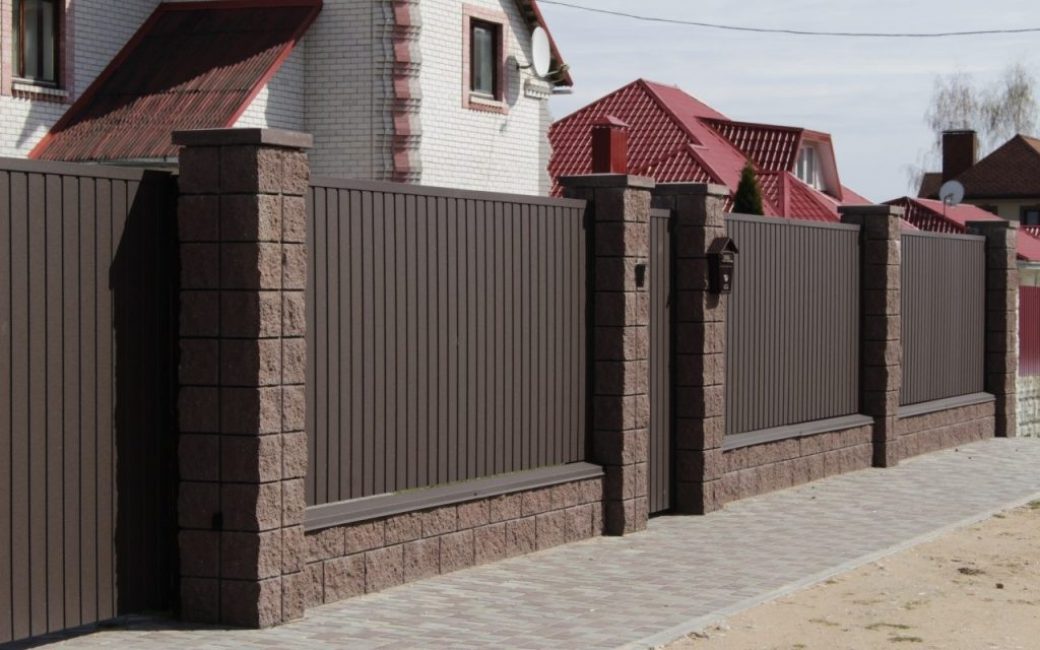
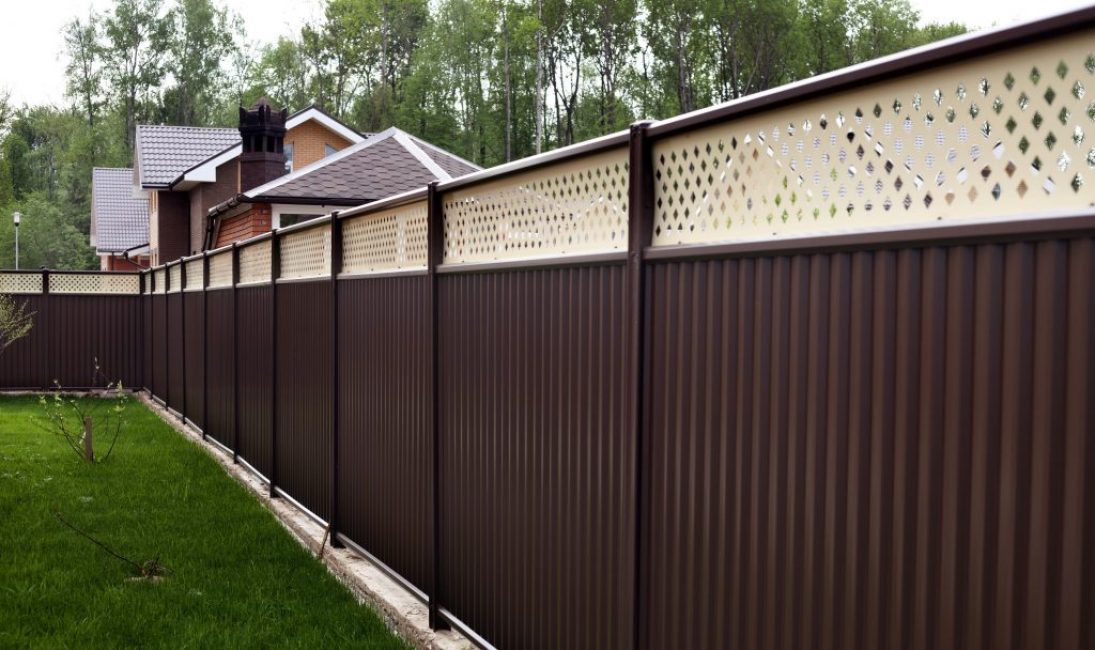
Combined fence
Fences made of brick and corrugated board look original. They are becoming more and more fashionable. In addition to the aesthetic appearance, this is a budget saving.
Construction work begins in the same way as with fully brickwork:
- Marking around the perimeter of the fenced area
- Pouring concrete foundation
- The erection of supporting pillars of brick and the laying of the plinth
When the turn of the walls comes, they are erected, fixing sheets of corrugated board. It is important that its color is in harmony with the color of the base and supports.

Corrugated fence
Brick pillars are connected by crossbeams. For them, you can use metal pipes. They will support the installed sheets, they will be attached to them.
The base must be covered with metal plates for drainage. The tops of the pillars are also covered with visors.
 Read also: How to make a children's house with your own hands: from wood and other materials. Dimensional drawings | (80 Photo Ideas & Videos)
plastic fence
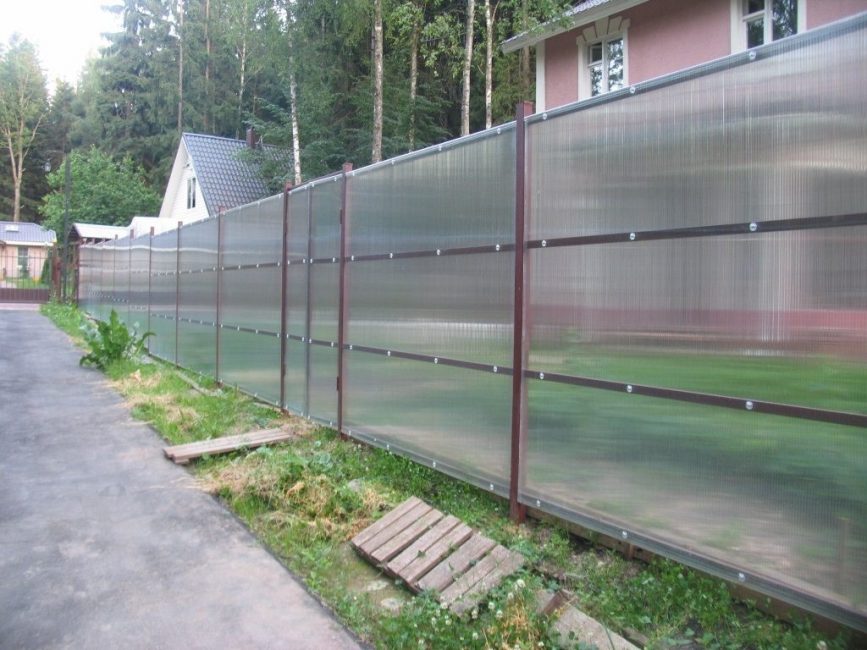
Polycarbonate fence
Plastic has become widespread, it is replacing more familiar materials. Its main advantage is high wear resistance. This material is not afraid of corrosion, decay and harmful insects.
The PVC fence is easy to install. Installation is available to a person without experience.
Step-by-step instruction:
- Site marking and installation of beacons
- Installation of bearing supports. They must be strictly level, checked with a level
- Fastening crossbeams in runs
- The structure is fixed with a railing
- The last step will be the installation of plastic panels
- Special caps are attached to the tops of the pillars to prevent water and dust from getting inside.
- The assembled structure must be washed from contamination formed during installation.
The construction of such a fence will take a little time. At the same time, it will look stylish and neat.
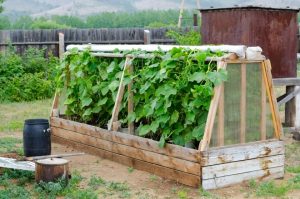 Read also: How to make a greenhouse with your own hands: for seedlings, cucumbers, tomatoes, peppers and other plants. From polycarbonate, window frames, plastic pipes (75 Photos & Videos) + Reviews
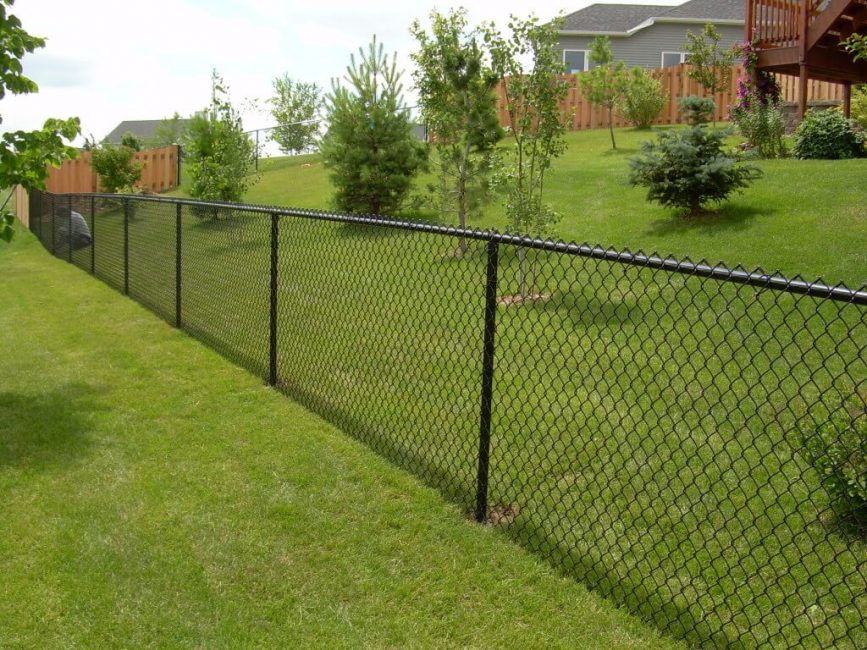
 From the netting
Chain-link mesh is one of the most affordable materials
It is suitable for putting up a fence in the suburban area.
What is required for installation:
- Rabitz
- Bearing supports
- Cement
- Sand
- Water
- fasteners
- Rope
Installation instructions:
- Construction begins with markup. To do this, you need twigs and rope. It should be straight and tight
- Then pits for supports are prepared. At the bottom you need to pour sand or fine gravel for drainage
- Metal poles are lowered into them. The bottom must be wrapped with roofing felt or film to protect against corrosion.
- Pits with supports are filled with concrete mix. It is prepared in the same proportions as for the foundation 4:2:2
- As the concrete hardens, a chain-link is pulled over the poles. It must be screwed to each pole. It is important to monitor the tension, the weak will quickly sag and the fence will have to be redone
![[Instruction] Do-it-yourself laminate on a wooden floor: a complete description of the process. Laying schemes, what materials should be used (Photo & Video) + Reviews](https://iherb.bedbugus.biz/wp-content/uploads/2018/05/laminat-300x200.jpg) Read also: [Instructions] Do-it-yourself laminate on a wooden floor: a complete description of the process. Laying schemes, what materials should be used (Photo & Video) + Reviews
Read also: [Instructions] Do-it-yourself laminate on a wooden floor: a complete description of the process. Laying schemes, what materials should be used (Photo & Video) + Reviews From the slab
Slab fence
Slab is the material that remains after sawing the boards. One side of it is flat, the other with small knots and remnants of tree bark.
This material is low cost. The more knots, the lower it is. Suitable for eco-style adherents or for people with a limited budget for construction.
For the construction of the fence, poles are installed in the marked area. As a support, you can use metal pipes, a wooden beam.
Next, the cross beams are installed. For them, you can use boards, slabs or fittings.
In the spans, the slab is laid in several ways:
- Horizontally
- Vertical
- overlap
- With a gap
The choice depends on the imagination of the master. When installing with an overlap, it must be taken into account that the material will dry out by about one and a half centimeters. If the installation is decided to be carried out vertically, then you can beat the upper edge: make it smooth or embossed.
Fence made of slab, as well as wooden needs to be treated with an antiseptic, followed by painting.
When choosing a material it is preferable to choose boards of medium width. Large ones will crack over time, this will disrupt the aesthetic appearance and can become a breeding ground for fungus and rot.
 Read also: Do-it-yourself furniture and other wood products: drawings of benches, tables, swings, birdhouses and other household items (85+ Photos & Videos)
 Concrete fence
Concrete fence
Concrete is a high-strength material that is not afraid of natural disasters. He is not afraid of any temperature changes, no rotting, no rusting. Structures made of it can stand for more than half a century.
concrete fence
- Mounting methods
The manufacturing technology of such products depends on their type. Let's describe each of them in detail.
- Such a structure requires a solid foundation.
- For the manufacture of the foundation, a trench is being prepared into which the formwork is mounted.
- To enhance the strength characteristics of the structure, reinforcement is laid.
- Formwork for pillars can be prepared separately.
- The filling of the fence itself is done in small portions, in layers.
- The height of each layer is 25-30 cm.
- The concrete structure needs to be thoroughly strengthened, so further work (installation of lighting fixtures, gates) is started after a couple of weeks.
- Concrete block masonry is similar to brick masonry.
- The only difference is in the block sizes.
- They are quite massive, so you will need the help of a second person.
- You can make such blocks at home.
- The foundation for such concrete structures is most often tape.
- It is reinforced with reinforcement and deepened below the freezing of the soil.
- They consist of ready-made panels, which are installed using lifting equipment.
- Poles (supports) are included with the fence itself.
- They are deepened into the ground by 0.7-1.0 m.
- To protect against moisture, sand and crushed stone are pre-filled at the bottom of the pit.
- Each of the supports is equipped with special grooves on both sides, with the help of which concrete panels are attached.
- The location of the pillars must be calculated exactly - otherwise the installation will simply be impossible.
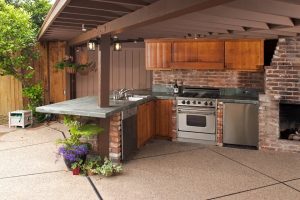 Read also: Do-it-yourself construction and arrangement of a summer kitchen in the country: projects, design, device, with barbecue and barbecue (60+ Photos & Videos) + Reviews
 From improvised materials
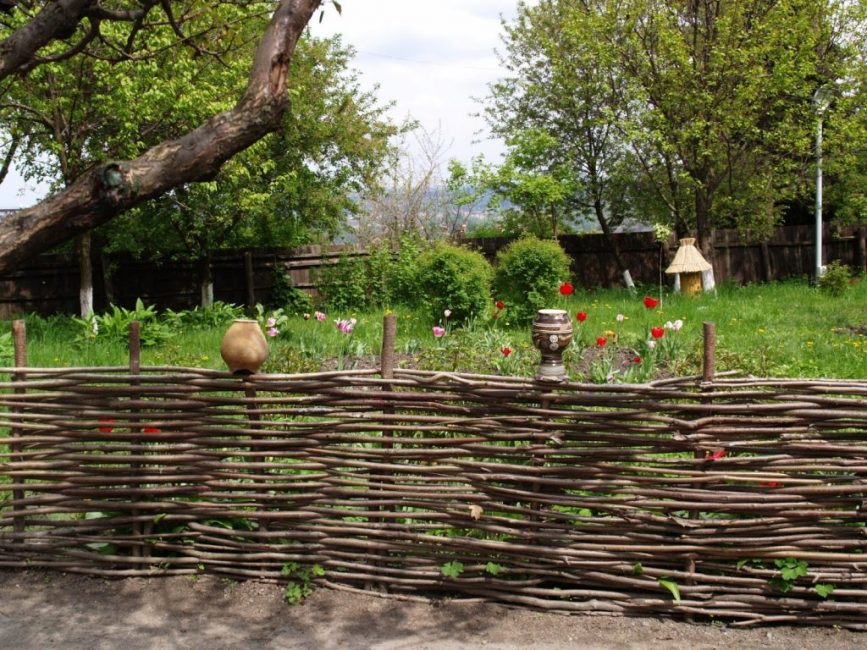
Wattle
In each household there is a large number of different materials, at first glance, seemingly unnecessary. These include plastic bottles, wooden pallets, old tires, and more. When building a fence, they can come in handy. The fence will look unusual and individual, as if a professional designer has worked on it.
Pallet fence
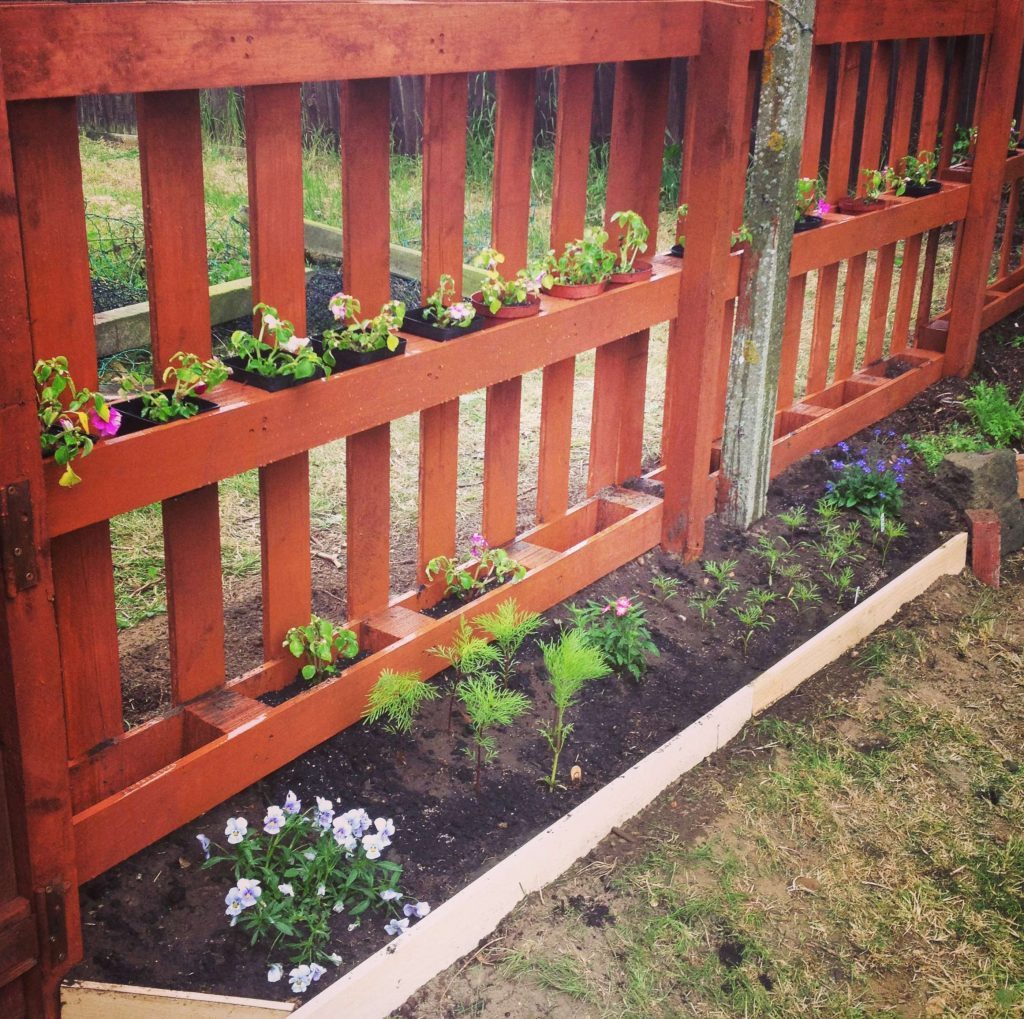
Pallet fence
You need to start by measuring the pallets, this will help determine what area can be fenced. After that, marking is carried out.
Pits must be prepared at the installation sites of the supports. Install poles in them, pour concrete or tamp the soil very tightly so that they stand evenly and do not stagger. Strengthening can be carried out using broken bricks or rubble. These components will strengthen the rammed earth.
Pallets are fastened to the supporting structure, as well as to each other with screws.
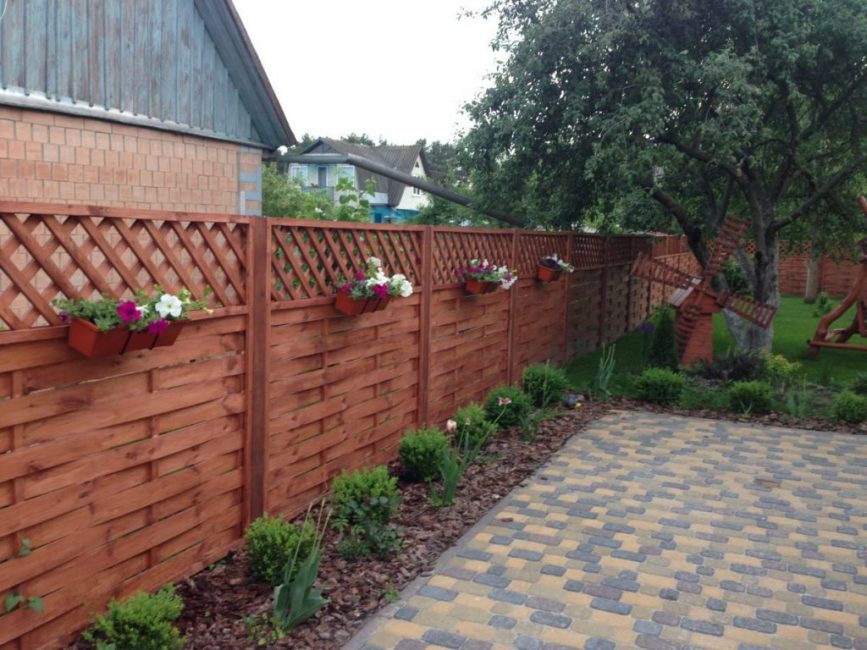
The final step will be decoration. The fence can be painted. Or place flowers on it by arranging vertical flower garden.
plastic bottle fence
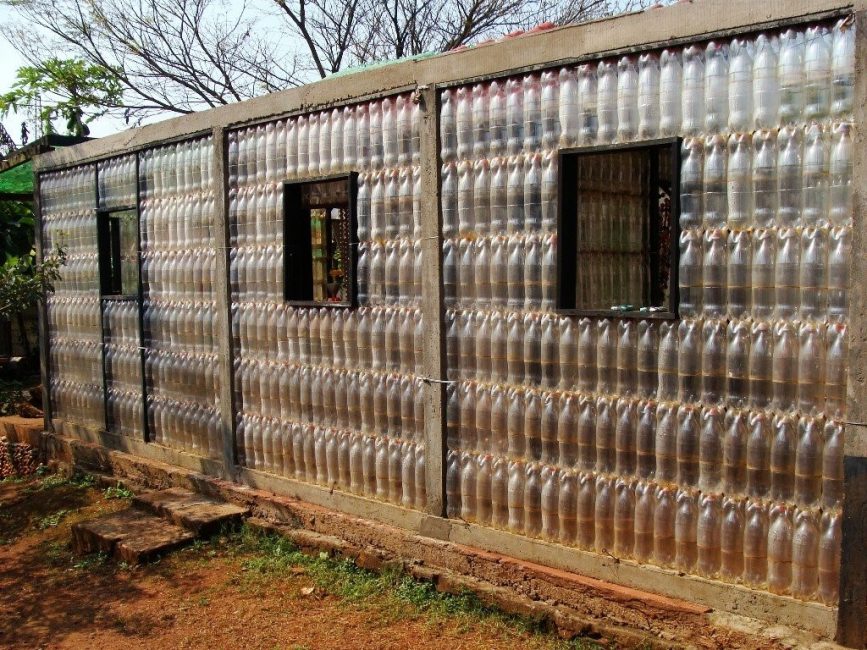
plastic bottle fence
Bottles open up a huge field for the imagination. They can be used whole or cut into pieces.
- Durability, they persist for about 180 years
- Affordable price - every day, when buying water, vegetable oil, dairy products in the store, there is a huge amount of plastic containers
- Water resistance - their direct purpose is to store liquids, so they do not let moisture through
- Elasticity – bottles are easy to cut
- Fragility - the fence can be easily broken under the influence of mechanical stress
- It will not provide protection from hooligans and thieves.
Step-by-step instructions for assembling a picket fence:
- The container must be washed, labels and traces of glue removed
- Trim the bottom
- Place the bottles one on top of the other. Drill holes through which to put reinforcement or wire. At the docking points, put on the previously cut bottoms
- Assembled spans are attached to pre-installed support posts
- From bottles you can lay out a fence like a brick. For weighting, sand is poured inside. They are connected with a cement mixture.
- Another option is weaving. For him, you need to cut the bottles, weave spans.Attach to supports.
- This type of fence is not recommended for use as a main fence. They are suitable for zoning a personal plot.
Of the various types of fences, everyone can choose which one to install to protect their home or cottage. The main condition for successful construction will be the skills of the master. Beginners in this business need to choose an easier option or involve more experienced comrades for help.

VIDEO: How to install a FENCE POST FOR AGES
Fence: main types, made of wood, brick, profiled sheet, plastic, netting, concrete. DIY Construction Instructions (105+ Photos & Videos) + Reviews


