

Owners of private houses and summer cottages the problem of choosing materials for enclosing the territory is well known. In some situations, the best solution would be to build a solid solid fence, but in many cases it makes sense to build a light mesh structure that does not shade the plants. Fence you can build from a chain-link with your own hands by choosing the appropriate installation option.
Content:
 Read also: Terrace attached to the house: 150+ Best photo ideas | Do-it-yourself step-by-step arrangement
Introduction
Originally woven wire mesh, which was invented at the end of the 19th century by the bricklayer Karl Rabitz, used in construction wall plastering - she replaced a lattice of shingles strips. Over time, the mesh has become widely used for the installation of light fences.
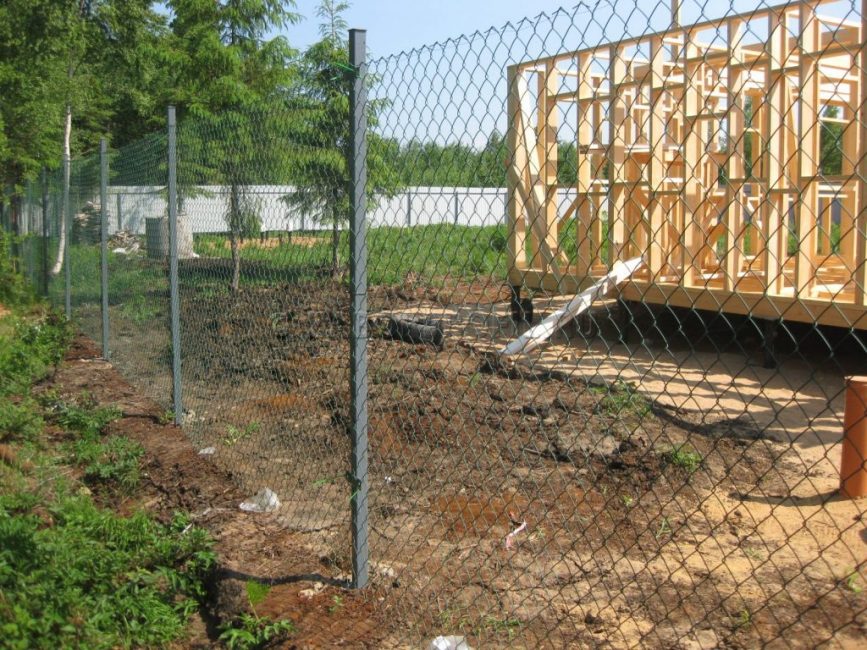
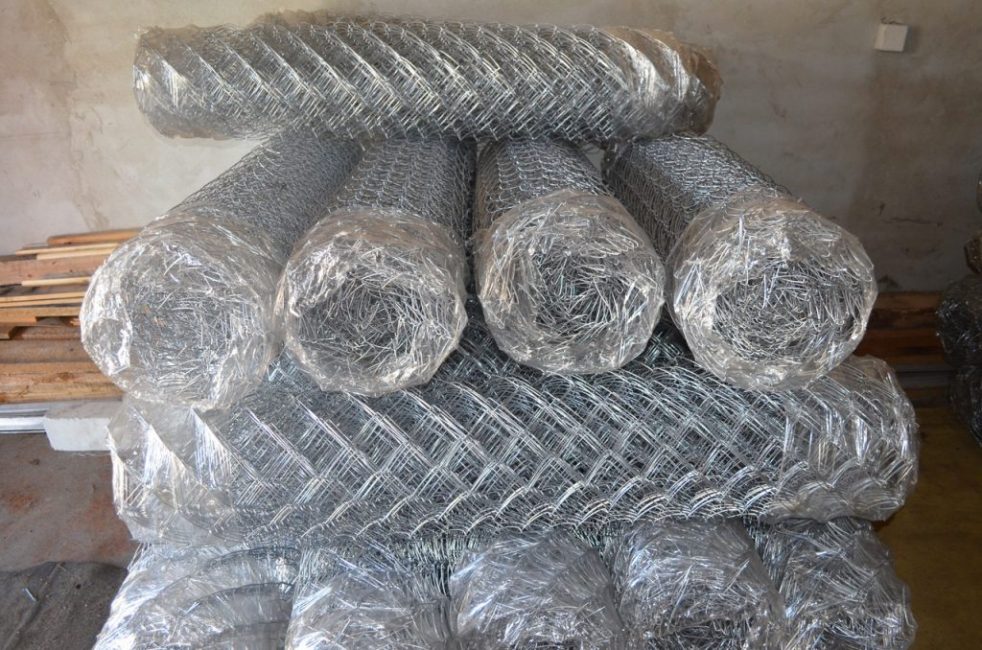
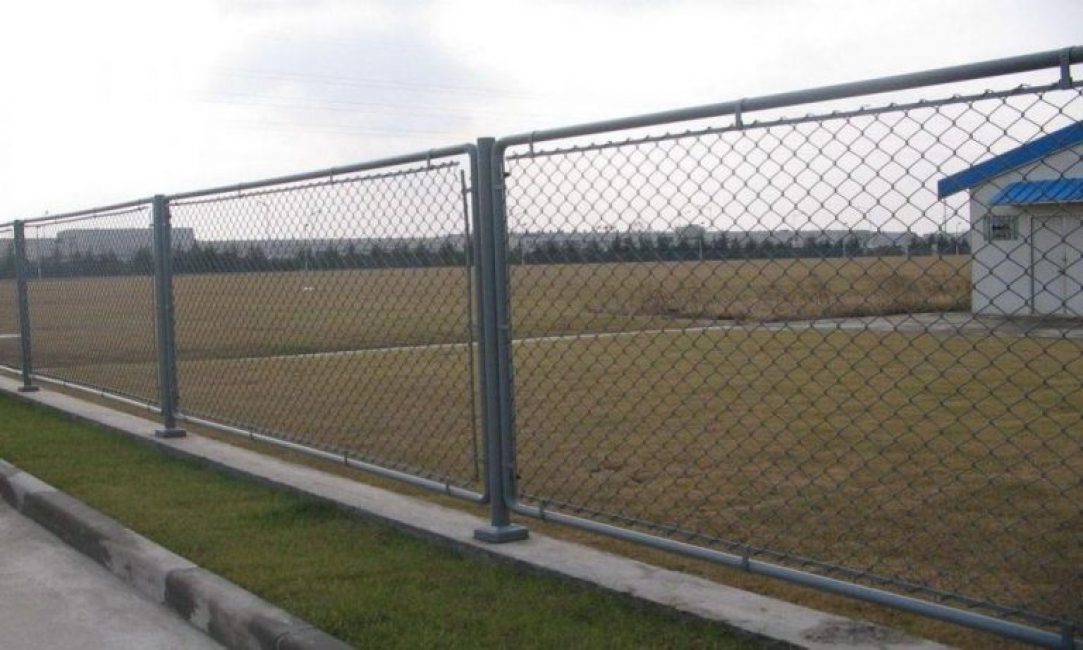
Temporary chain link fence
The classic chain-link is made of low-carbon wire with a diameter of 1 to 6.5 mm. The cells have the shape of a square or rhombus, the side length can be from 2.5 to 100 mm. The scope of the material depends on the thickness of the wire and the size of the cell - a fine mesh is used for the manufacture of cages, aviaries, a coarse mesh is used for the construction of fences.
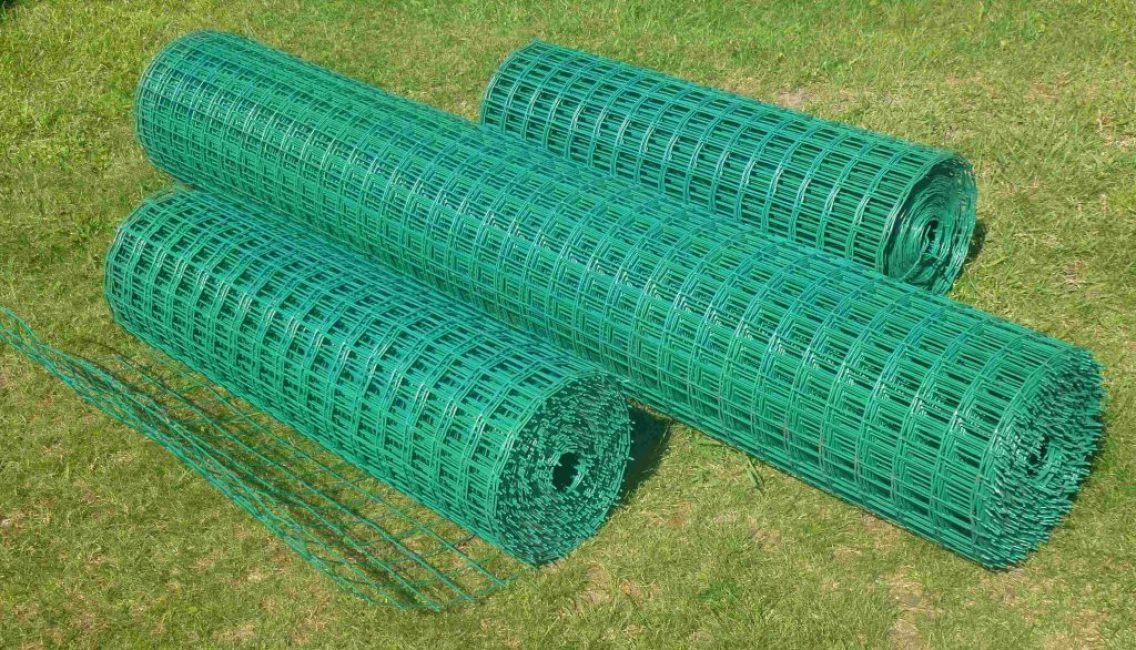
In recent years, a chain-link made of polymer materials has appeared on the market. It is less resistant to loads and is most often used to delimit plots with neighbors, for fencing inside your yard.
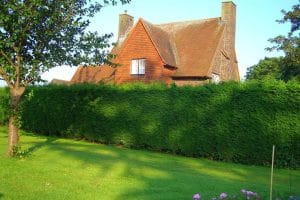 Read also: Fast-growing perennial hedge: plant selection, planting, growing and care rules (Photo & Video)
 Types of metal chain-link
Mesh wire can be treated to increase its resistance to external influences.
According to this criterion, the chain-link is distinguished:
Non-galvanized mesh
galvanized mesh
plasticized mesh
When buying a plasticized chain-link, pay attention to the presence of a material quality certificate. In a low-quality mesh, the coating quickly cracks under the influence of temperature changes, and it rusts.
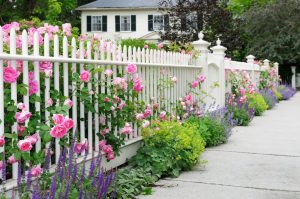
Benefits of a chain-link
decorative fencing
Using mesh for mounting fences has several advantages:
- low cost of material - saving the budget for construction;
- due to the low weight of the mesh fabric and the absence of windage, it is not necessary to build massive supports;
- the material is resistant to mechanical stress, so the fence will last a long time, subject to high-quality installation;
- the absence of a shadow has a beneficial effect on the development of plants planted close to the fence;
- the fence does not need special care (with the exception of the use of non-galvanized chain-link, which requires painting);
- fencing work does not take much time
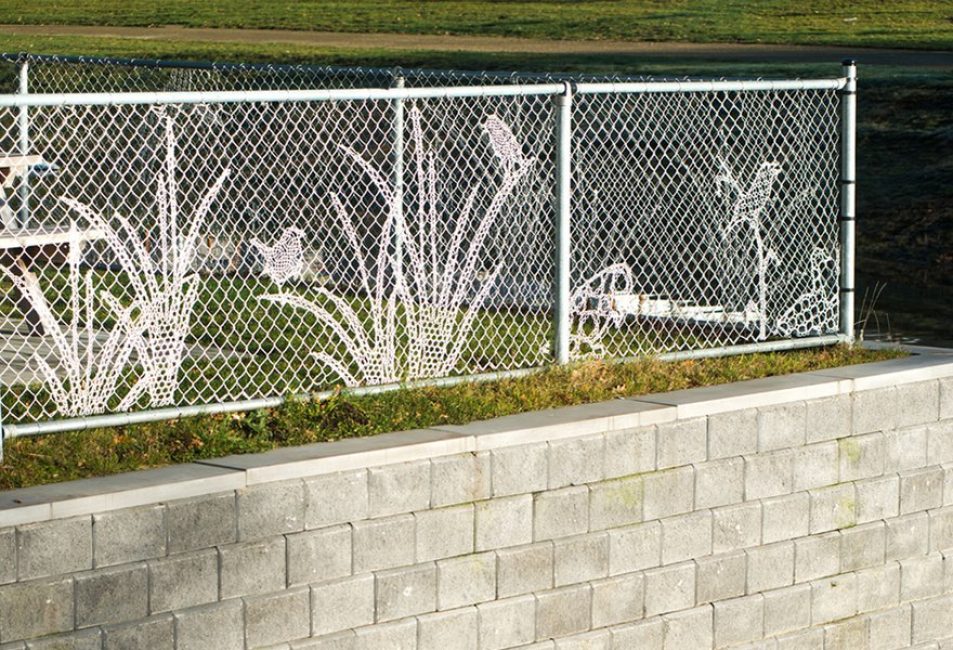
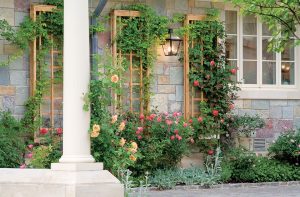
Neatly made chain-link fencing looks aesthetically pleasing. It can be used as a support for climbing plants to create a spectacular hedge. In addition, the mesh fence is suitable for decorating using a wide range of materials - the chain-link serves as a canvas for weaving from thin wire, plastic strips, nylon cords, wires in colored insulation, etc.
 Read also: How to make a tapestry with your own hands? Original ideas and drawings (110+ Photos & Videos) + Reviews
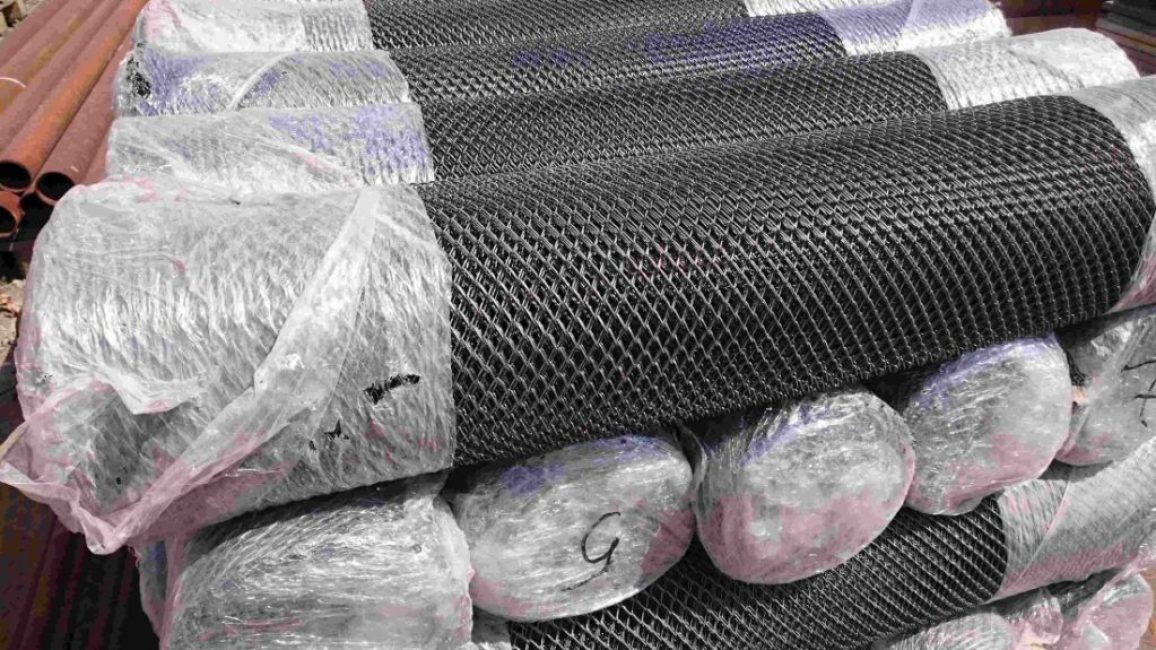
 Material selection
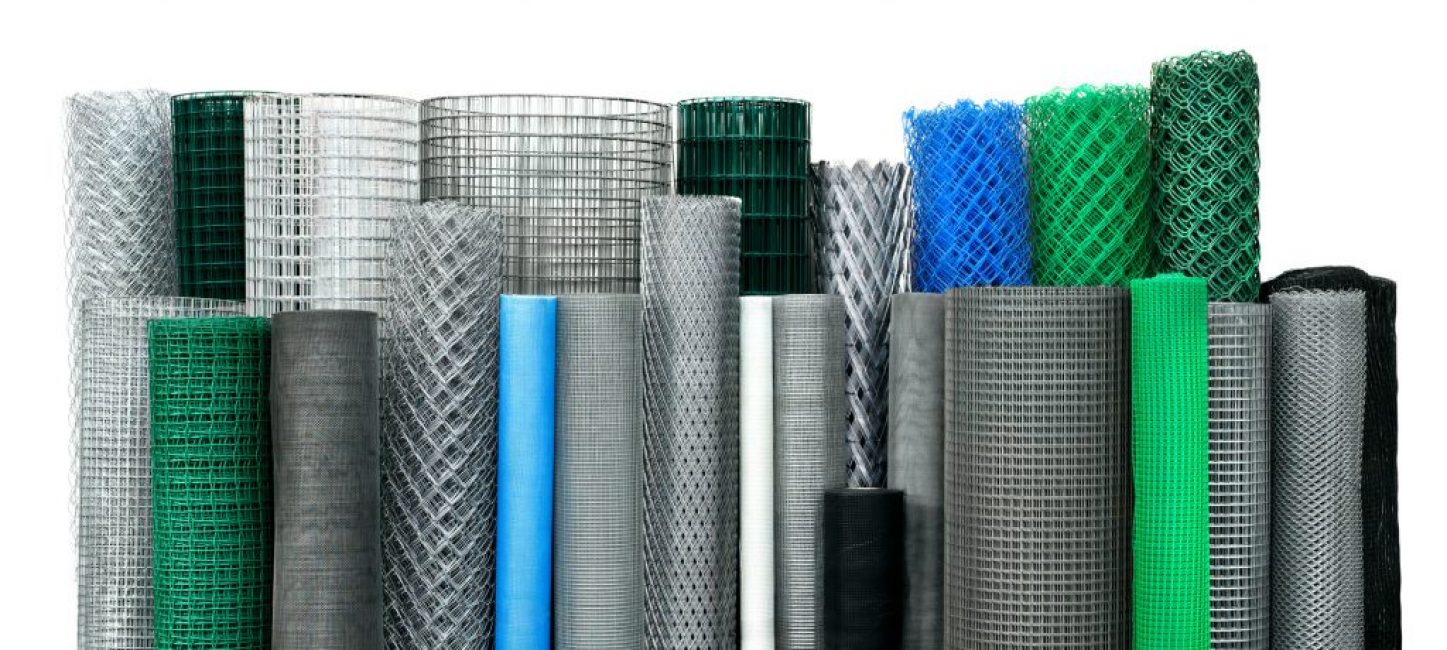
Variety of choice
When choosing a chain-link for mounting a fence, consider:
- wire diameter (not less than 2.5 mm)
- cell size (optimally 40-60 mm)
- width (1.5 meters)
- presence and type of coverage
The larger the cells, the thicker the wire should be, otherwise the fence will not be strong enough, prone to deformation. The height of the fence depends on the width of the chain-link. Manufacturers offer a mesh fabric with a width of 1.2 m, 1.5 m, 2 m, you can find a width of 3 m or 4 m, but for a summer cottage, such a fence height is excessive. The standard roll length is 10 meters.
When buying a chain-link, pay attention to the quality of the mesh. The roll must not have dents or other damage or deformations. The ends of the wire should be bent and be about half the length of the cell - this indicates that the material was made by a large manufacturer with good equipment. Small workshops do not have a wide fleet of machines and produce cheap mesh with protruding "tails".
 Read also: How to make a children's house with your own hands: from wood and other materials. Dimensional drawings | (80 Photo Ideas & Videos)
Support structures
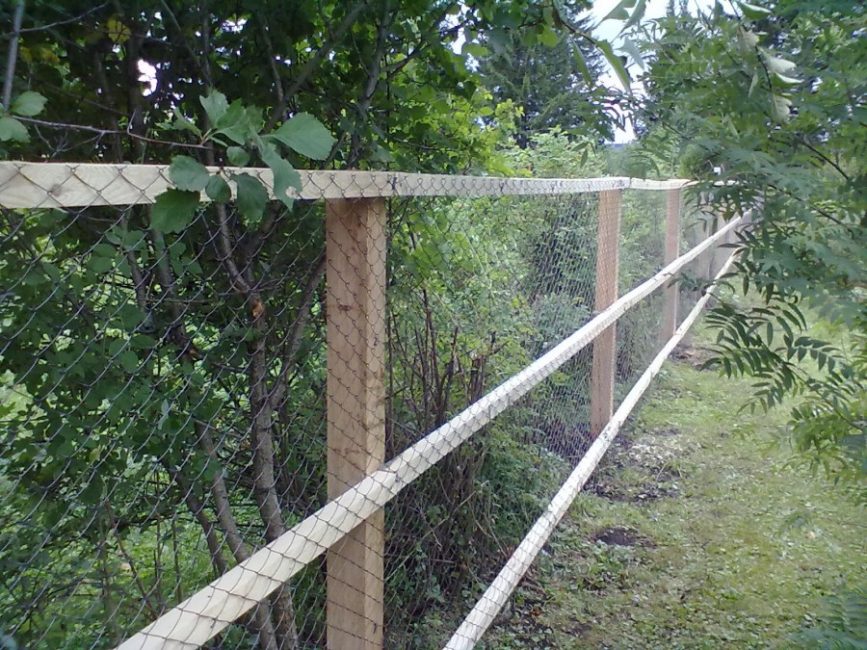
Fencing with wooden poles
For the installation of a chain-link fence, it is required to select reliable supports. The main criteria are durability, ease of fastening the mesh fabric, accessibility. Supports can be made of various materials:
- Tree. Wood does not differ in durability, therefore, in order to extend the service life, it is necessary to treat the pole with an anti-rotting compound, waterproof the underground part of the pole, and paint the above-ground part every two to three years. The advantages of wooden poles include low cost and simple installation of the netting with nails, staples or wire. For the manufacture of wooden supports, a bar with a section of at least 100x100 mm or round timber of similar sizes is used.
- Metal. Pipes with a diameter of at least 60 mm or a square profile with a cross section of 25x40 mm are used. The thickness of the metal is from 2 mm. This is the optimal type of support for a chain-link fence due to its high strength and durability, ease of fastening elements by welding. Such a fence looks aesthetically pleasing. Pillars from a metal profile are treated with an anti-corrosion compound, primed, painted. A plug is attached to the upper end to prevent moisture from entering inside, causing corrosion. Manufacturers offer special poles equipped with hooks for attaching a chain-link, but this option is more expensive.
- Concrete. Reinforced concrete poles are rarely used in conjunction with a chain-link. Monolithic supports are labor-intensive to manufacture; special equipment is required for the delivery and installation of finished products due to their large weight - this increases the cost of construction. In addition, it is difficult to attach the mesh sheet to the concrete pillar.
- Asbestos-cement pipes. This is a relatively inexpensive material, easy to install. But to fasten the chain-link, you will need to use clamps or wire twists, which is not very convenient. A plug must be installed on the upper end, otherwise the moisture that has got inside may freeze and the pole will burst
- brick or a rock. The construction of supports made of brick or stone requires the arrangement of the foundation, and the construction material itself is not cheap. But the combination of such pillars with frames covered with chain-link looks aesthetically pleasing. For fixing sections by welding, it is required to provide embedded parts
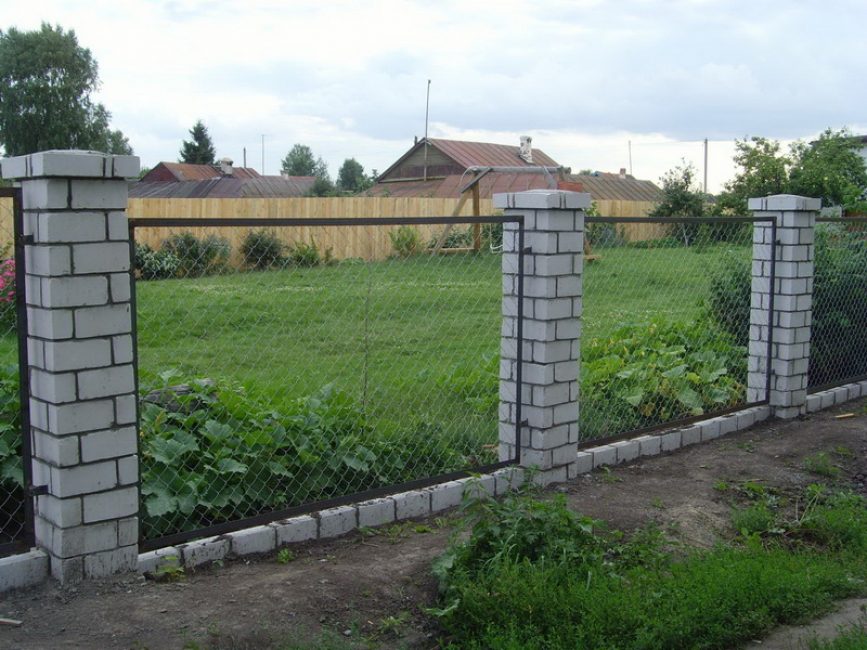
Brick supports
 Read also: How to make and decorate beautiful beds in the country with your own hands: simple, tall, smart. For flowers and vegetables. Original Ideas (80+ Photos & Videos)
 Types of structures
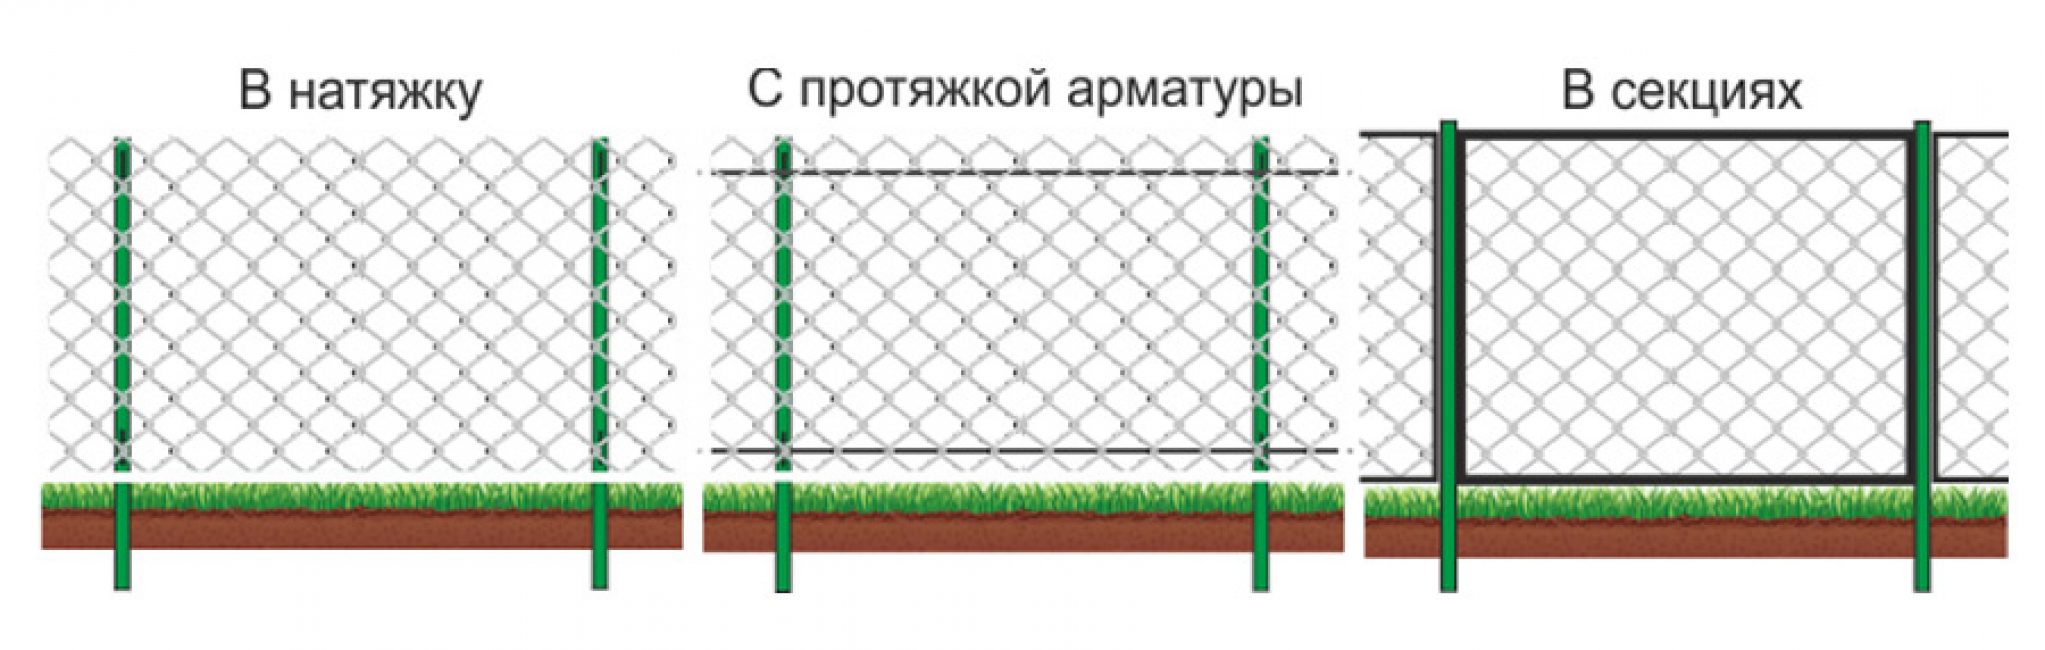
Options for attaching the mesh to the supports
There are several ways to build a chain-link fence. The choice of installation technology depends on the purpose of the fence, the budget and even the topography of the site.
- Tension fence without guides. The mesh is stretched between the installed pillars and fixed on them with a wire. The advantages of the technology are the simplicity and speed of installation, the minimum consumption of materials, the possibility of using supports of almost any type (except for brick ones). Typically, a stretch fence is placed as a temporary fence or for zoning your site.
- Tension fence with guides. Mounted according to the same principle, but reinforced with one, two or three longitudinal guides, which can serve as a wooden bar or metal profile. Such a fence is more reliable and looks more solid. But a structure with metal poles and horizontal profile or reinforcement elements welded to them is not suitable for installation on heaving soils - rigid ties can break when moving
- sectional fence. The most time-consuming and expensive option, but it looks the most aesthetically pleasing. For its construction, it is required to make frames from a metal corner and weld the filling from a mesh fabric. The frames are fastened between the supports by a welded method, which requires the use of metal poles, or brick, concrete with metal embedded parts. A sectional fence is the best choice if the fence needs to be made on a site with a strong relief difference - it is convenient to mount it in “steps”, placing the frames at a given height relative to the ground
![[Instructions] How to make beautiful and unusual wall shelves with your own hands: for flowers, books, TV, kitchen or garage (100+ Photo Ideas & Videos) + Reviews](https://iherb.bedbugus.biz/wp-content/uploads/2018/05/19-6-300x213.jpg) Read also: [Instructions] How to make beautiful and unusual wall shelves with your own hands: for flowers, books, TV, kitchen or garage (100+ Photo Ideas & Videos) + Reviews
Read also: [Instructions] How to make beautiful and unusual wall shelves with your own hands: for flowers, books, TV, kitchen or garage (100+ Photo Ideas & Videos) + Reviews Preparatory stage
At the preparatory stage, a fence project is developed with reference to a specific site. It is important to know the exact dimensions of the site in order to calculate the optimal installation step for the supports and calculate the amount of materials needed for installation. You should also choose in advance the location of the entrance gate and gate.
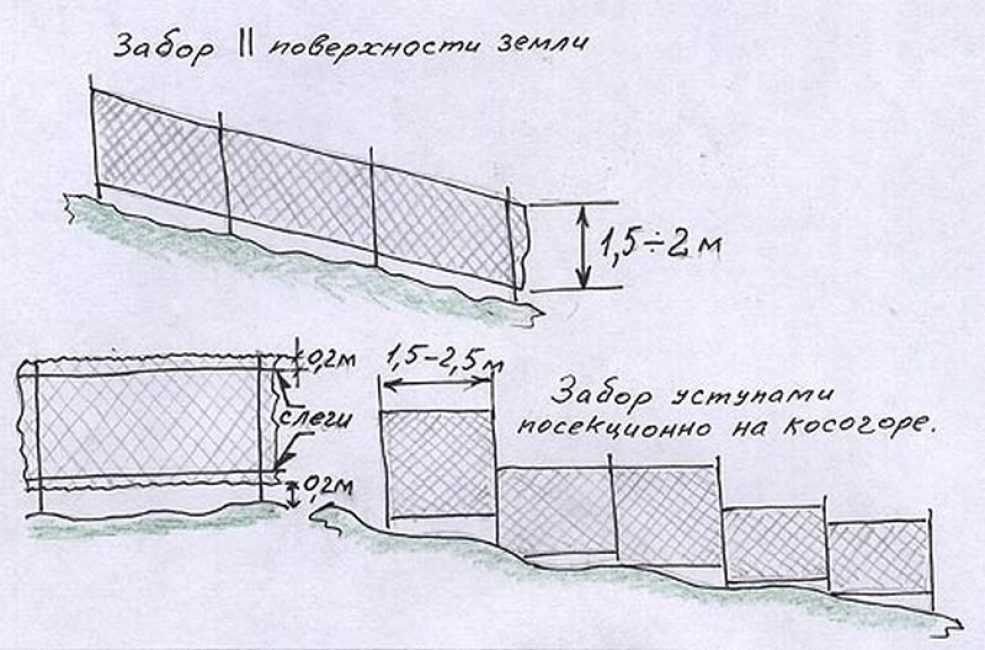
To do this, they measure the perimeter of the territory, draw a sketch, which indicates access roads, buildings, large vegetation. If there is a noticeable elevation difference on the site, the construction of the fence is carried out in a cascade (steps). With a relatively small drop, the mesh can be stretched parallel to the ground.
Fence Mounting Options
For measurements, it is most reliable to use a cord stretched between pegs driven in around the perimeter of the site. 2-3 meters are added to the measurement result of the cord to find out how much chain-link you need to purchase.
The step for the tension fence of the installation of pillars is from 2 to 2.5 m so that the mesh does not sag. If guides are used or a sectional fence is mounted, supports can be placed in increments of up to 3 meters. The exact value is selected depending on the length of the straight section of the fence, the posts should be evenly spaced. After counting the number of supports, you can calculate the number of fasteners.
Tools and materials
To equip a chain-link fence, you will need:
- mesh in rolls, the total length should correspond to the perimeter of the site with a small margin
- pillars
- steel wire for fixing the mesh on the supports
- fasteners - bolts with nuts, clamps, brackets, plates, nails (the choice depends on the type of poles and installation technology)
- wire cutters
- pliers
- hammer
- grinder with cutting disc
- welding machine with universal electrodes 3 mm + sleeves and mask (if the installation technology requires welding)
![[Instruction] Do-it-yourself laminate on a wooden floor: a complete description of the process. Laying schemes, what materials should be used (Photo & Video) + Reviews](https://iherb.bedbugus.biz/wp-content/uploads/2018/05/laminat-300x200.jpg) Read also: [Instruction] Do-it-yourself laminate on a wooden floor: a complete description of the process. Laying schemes, what materials should be used (Photo & Video) + Reviews
Read also: [Instruction] Do-it-yourself laminate on a wooden floor: a complete description of the process. Laying schemes, what materials should be used (Photo & Video) + Reviews markup

Marking the area for supporting pillars
Along the perimeter of the site, it is necessary to remove debris, if necessary, cut shrubs or cut down interfering trees. Then pegs are driven in at the corners and a fishing line, building thread or strong cord is pulled between them. Pegs are driven in along the cord in place of future poles, with a step provided for by the project.
 Read also: Do-it-yourself furniture and other wood products: drawings of benches, tables, swings, birdhouses and other household items (85+ Photos & Videos)
 Pole installation
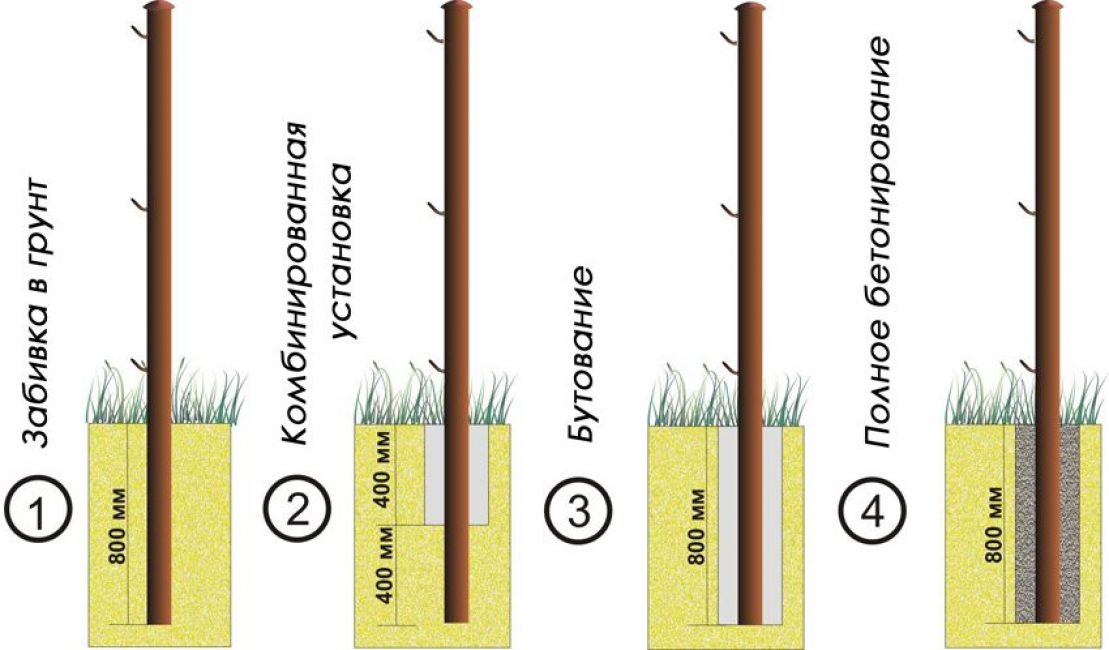
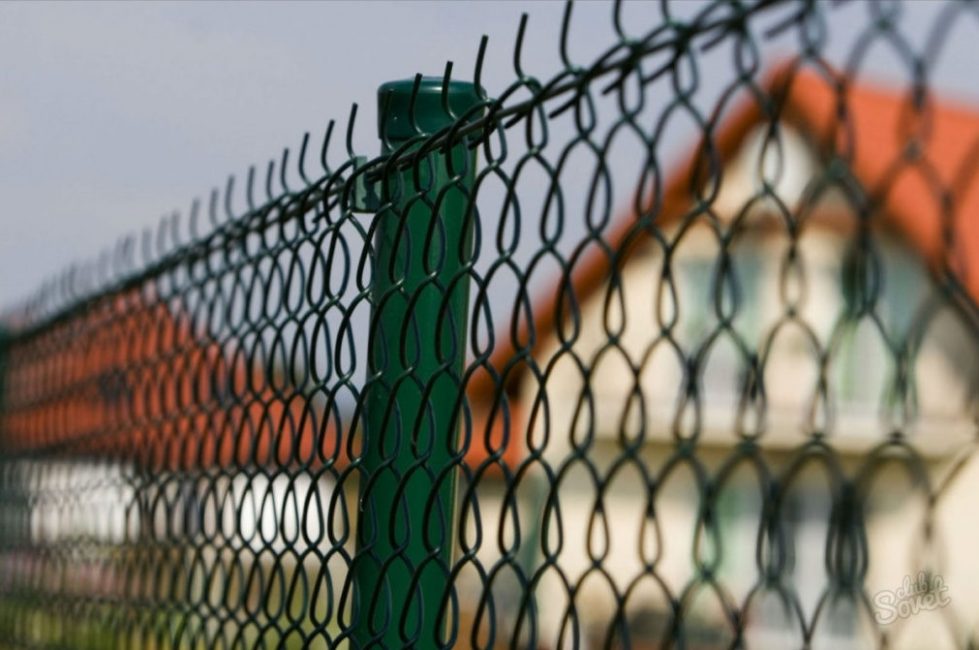
Pole installation methods
In order for the supports to be on the same line, it is necessary to follow the installation order:
- Corner poles. Since when pulling the mesh, they will experience the maximum load, the corner supports are reinforced with spacers
- Pillars at the breaks of the fence contour (if the site has a complex geometric shape)
- Gate supports and gates (must be concreted for reinforcement)
- Intermediate supports with the same installation pitch on straight sections
The lower part of the wooden poles is treated with an antiseptic and waterproofed before installation. To protect wood from moisture and decay, you can use used engine oil, heated bitumen, bitumen-polymer mastic. You can burn the wood at the stake - this also protects against decay.
For metal supports, the lower part is cleaned of traces of rust and treated with a composition, protected against corrosion, primed or applied with a layer of bitumen. A plastic plug is put on the upper end or a metal plate is welded.
Work progress
In places where the location of the pillars is marked, pits are prepared with a drill or a shovel. The depth depends on the level of soil freezing in the area, but it should be about a meter so that the fence does not sag under loads. An exception is dense clay soil, not prone to heaving, supports can be immersed in it by 80-90 cm. For heaving, as well as loose soils, the bottom of the pit should be 15-20 cm below the freezing point - this will protect the supports from being pushed up.
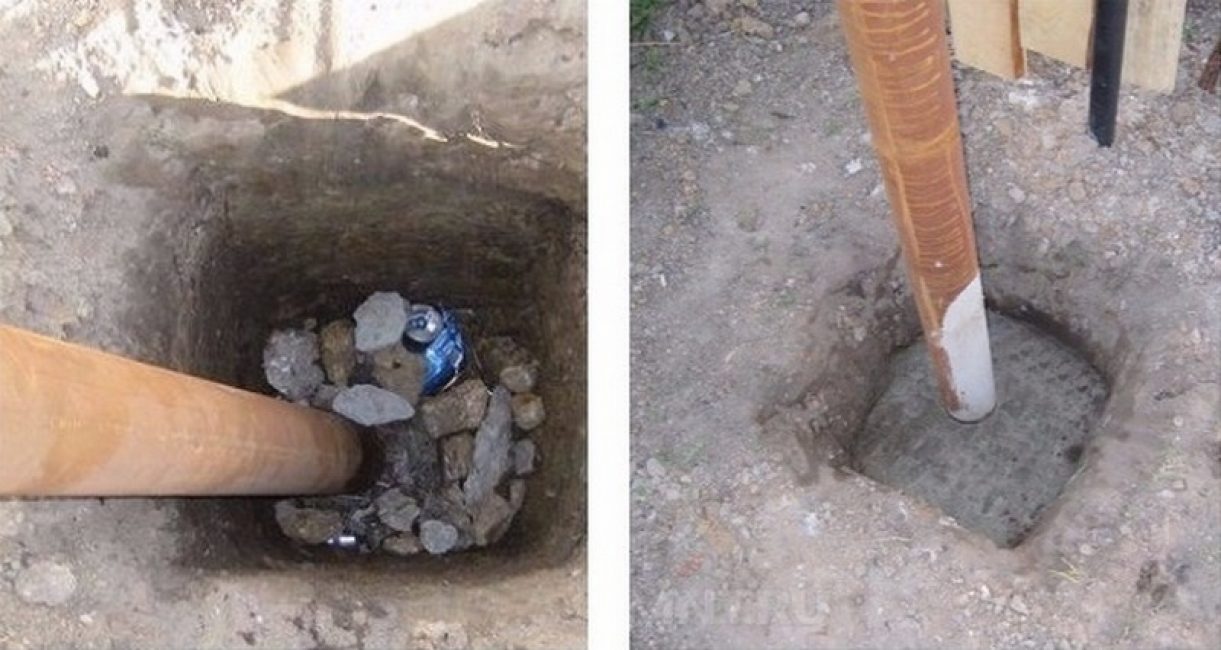
Butting and concreting
At the bottom of the pit, a layer of sand of 10 cm and a layer of gravel of 10 cm are poured, both layers are well rammed - it is a drainage that promotes the flow of water. Then a prepared pole is installed in the pit.
The free space between the support and the walls of the pit is filled with crushed stone and small stone, interspersed with layers of soil, and each layer is well rammed. If a sectional fence is being erected, the weight of which is noticeably higher than the tension due to welded frames, the supports are additionally concreted to 40 cm of the pit height or completely filled with concrete instead of backfilling.
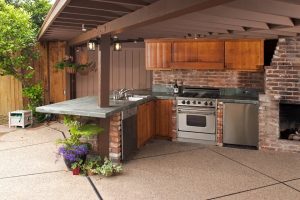 Read also: Do-it-yourself construction and arrangement of a summer kitchen in the country: projects, design, device, with barbecue and barbecue (60+ Photos & Videos) + Reviews
 concreting
The concrete mixture is poured into a pit around the post. First, the support should be fixed with spacers from pieces of reinforcement so that it is located strictly vertically (checked by level) and does not lean under the influence of concrete.
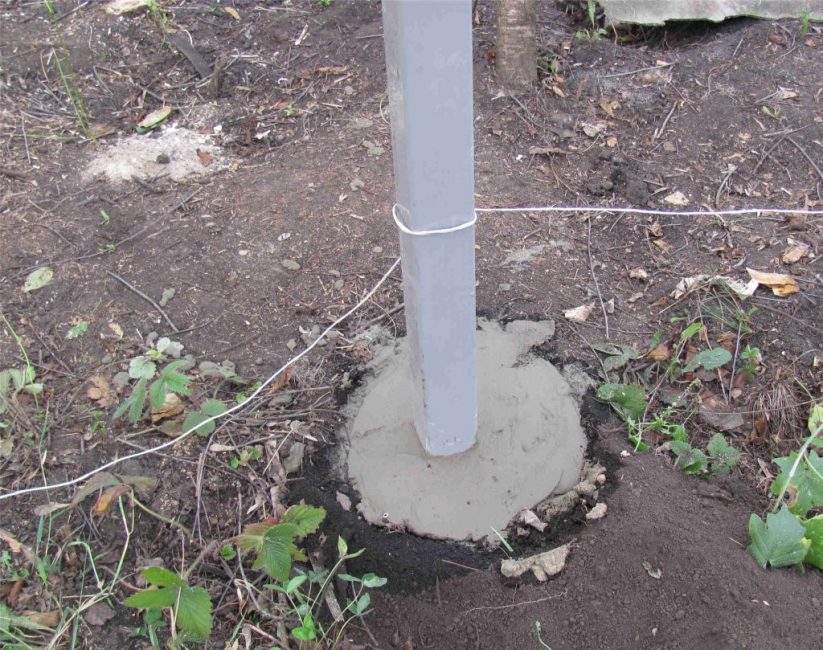
Pillar concreting
For concreting, a working mixture of sand (one part), cement (two parts), crushed stone (two parts) is used. Crushed stone is added after mixing cement with sand. Water is added in such a way that the solution does not turn out to be too liquid. For high-quality mixing of the components, it is desirable to use a compact concrete mixer.
The poured concrete is compacted with a reinforcement rod or a bayonet shovel, achieving the disappearance of large air bubbles. Then you need to let the concrete set, gain strength - this takes about seven days.
To install the supports of the sectional fence, you can make a strip foundation. This will significantly increase the cost of construction, but such a design is as reliable, durable, and visually attractive as possible. The strip foundation is suitable for metal and brick supports.
Fencing on a strip foundation
Tension mesh installation
The choice of fastening the chain-link with a tension mounting method depends on the type of poles:
- wooden - nails, wire, staples
- metal - hooks, welding, wire
- concrete and asbestos-cement - wire, clamps
Installation begins with a corner post. Having fixed the edge of the canvas, the mesh is deployed to the next support. It is more convenient to work with three people to fasten a well-stretched mesh - then it will not sag in the future. A reinforcing bar is threaded through the cells across the canvas - this will help two assistants to pull the chain-link as much as possible, and keep it in that position while the third person fastens the mesh to the pole in the chosen way.
Fence with tension rod
If the end of the roll fell on the gap between the supports, it is necessary to bend the bent tails on the extreme spiral element and remove it. Then, the edge of the new canvas is overlapped on the mesh and the removed element is inserted back.
To get rid of sagging, strengthen the tension fence, in the upper part of the web, a wire or reinforcement is threaded, which is attached to the supports. You can do the same at the bottom.
If the installation is carried out without welding, the supports are painted in advance. Having completed the fastening of the mesh and broaches by welding, it is necessary to treat the metal structures with an anti-corrosion compound, prime, paint in two layers.
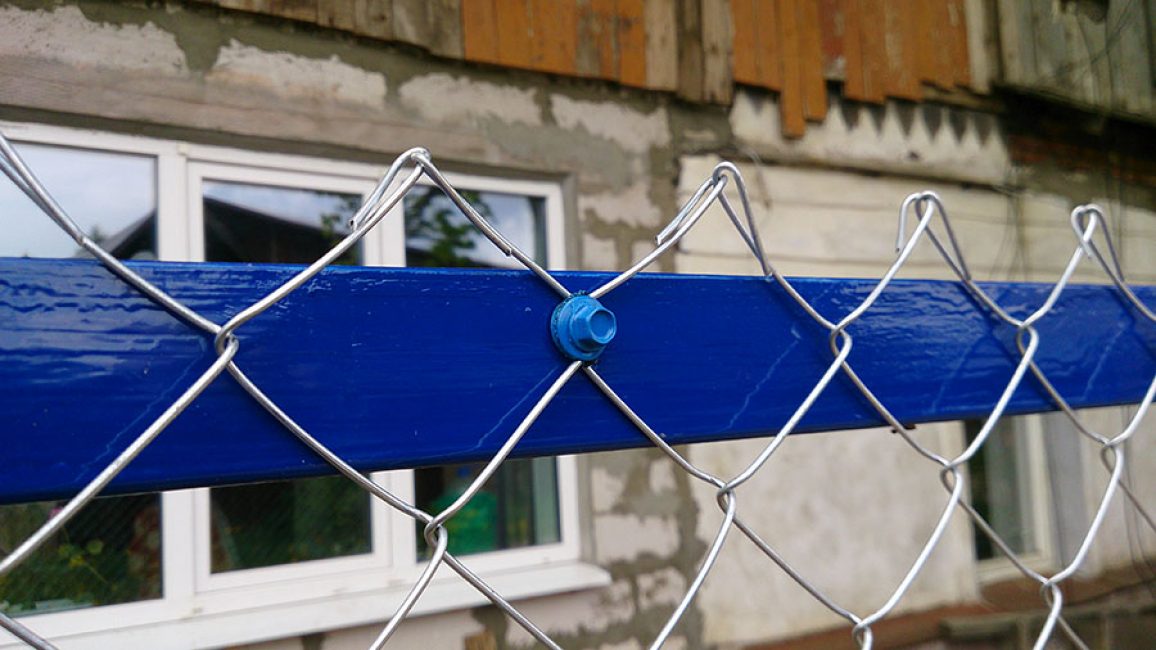
Attaching the mesh to the guide
The construction of a fence with guides is carried out according to the same principle, only in this case, longitudinal elements are welded to the pillars, on which the chain-link is fixed.
Installation of a sectional fence
Steel plates 5 mm thick are welded to the installed metal poles at a distance of 20-30 cm from the upper and lower edges. The width of the plates is 5 cm, the length is from 15 to 30 cm. Appropriate mortgages must be provided in the brick supports.
Mesh attachment methods
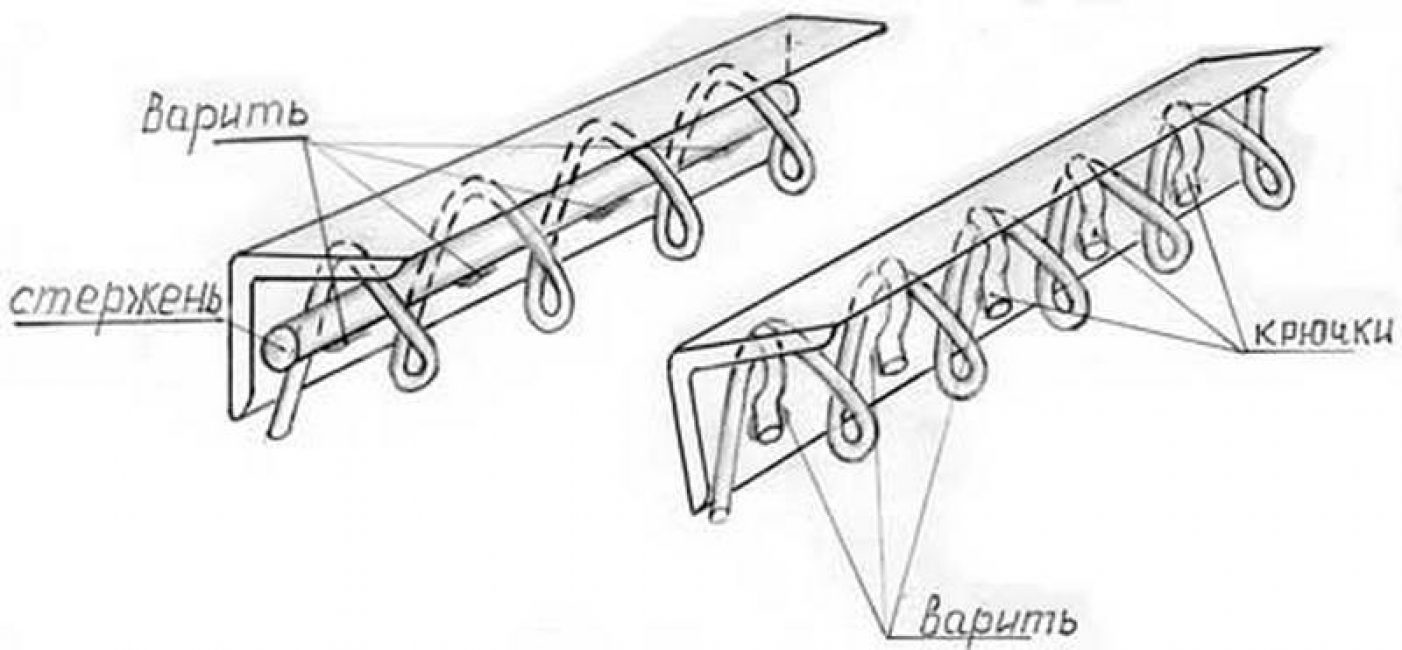
For welding rectangular sections, a metal corner 30x40 mm or 40x50 mm is used. Pieces of chain-link fabric are welded into the frames, along the edges of which reinforcement rods are inserted - it is the reinforcement that is caught by spot welding to the inside of the corner. Or inside the corner, hooks are welded, for which the mesh is hooked.
The finished sections are welded to the plates on the pillars, trying to keep the same gap between the edge of the frame and the support. The finished structure is treated with an anti-corrosion compound, primed, coated with enamel for metal in 2 layers with intermediate drying.
Conclusion
For the construction of a capital fence using a chain-link, one cannot do without a welding machine and the skills to use it. But the mesh fabric can be mounted on almost any support using ordinary wire - such a fence will successfully stand for several years.
Video: How to hang a chain-link mesh yourself.

How to hang a netting yourself.
Do-it-yourself chain-link fence (Photo & Video) Practical fencing + Reviews


![[Instructions] How to make a beautiful and inexpensive fence in the country with your own hands: from wood, metal and polycarbonate (70+ Photos & Videos) + Reviews](https://iherb.bedbugus.biz/wp-content/uploads/2018/04/bg5-2000x1325-e1524401759133.jpg)