
Today, life without the Internet is hard to imagine. And many of us have met with a situation where, for example, at our favorite dacha we could not use its services due to a weak Wi-Fi signal. Therefore, the topic of do-it-yourself wi fi antennas is so topical.
 Read also: Cyclamen - bulb violet: description, growing from seeds at home, plant care, reproduction and transplantation (75+ Photos & Videos) + Reviews
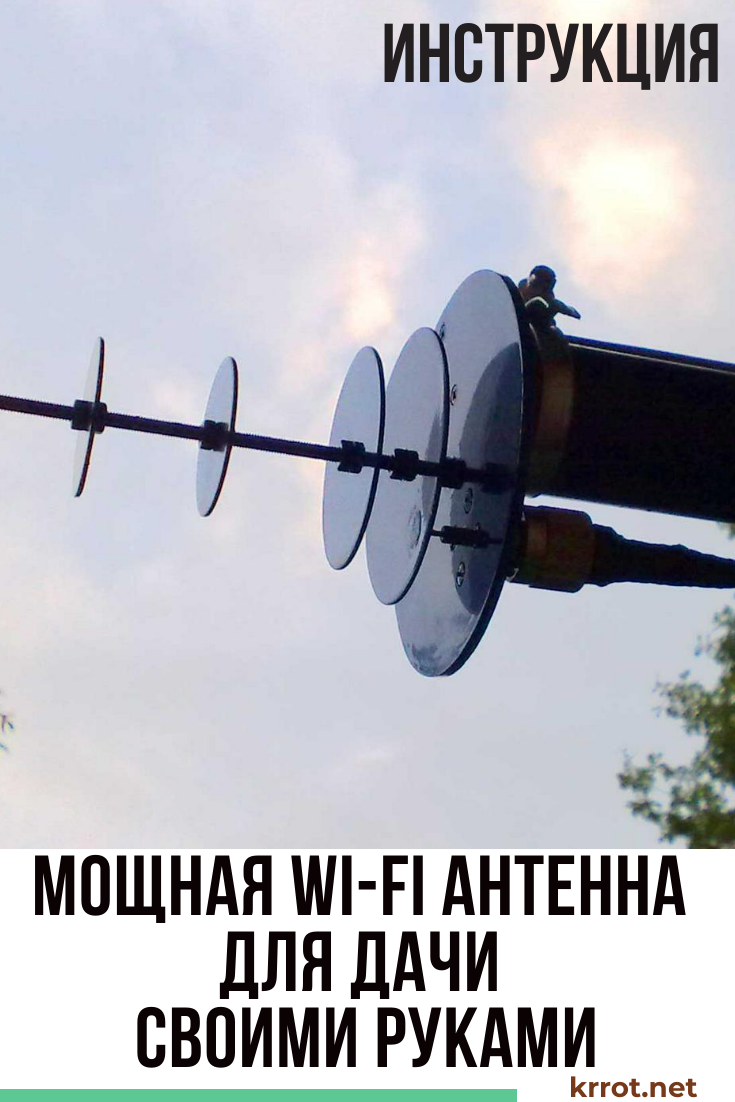
Powerful antenna device
wifi gun
There are several options for homemade antennas that allow you to stably catch radio waves, but the favorite is the so-called wi-fi gun.
Almost everyone who knows how to hold a soldering iron is able to make it. Its scheme is quite simple, it does not require a lot of materials.
Scheme of wi-fi gun
For manufacturing you will need:
- threaded stud with a diameter of 8-10 mm
- 14 nuts for the diameter of the stud
- scissors
- wifi adapter
- soldering iron
- thin-walled metal sheet
It is better to use copper foil with a thickness of 0.3-0.5 mm, - it is easier to cut.
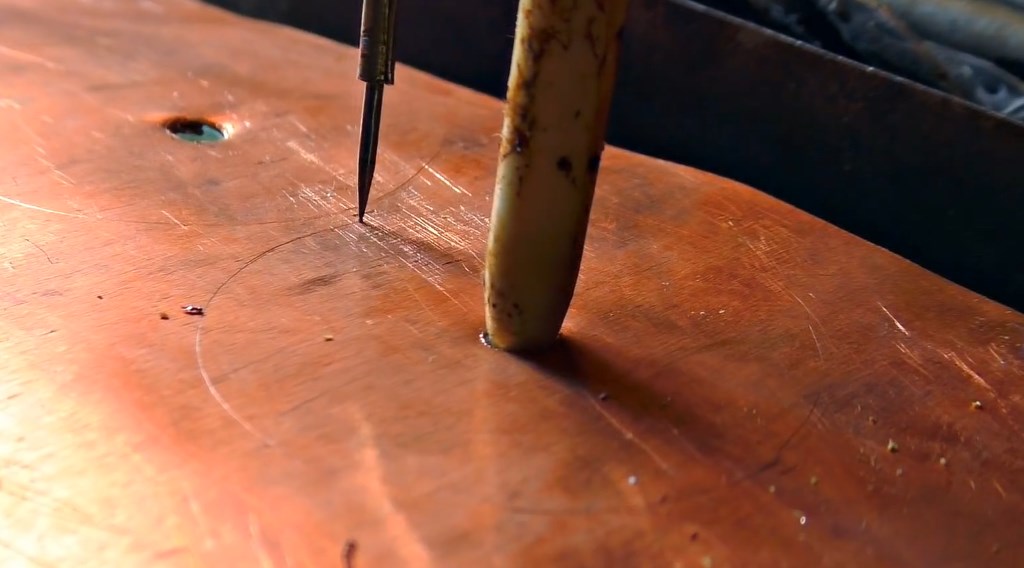
Step number 1 - making circles
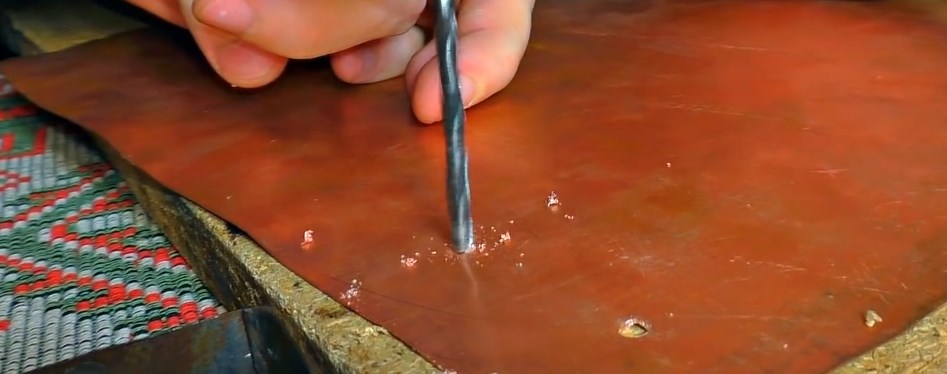
Centering uncut circles by drilling through the copper sheet
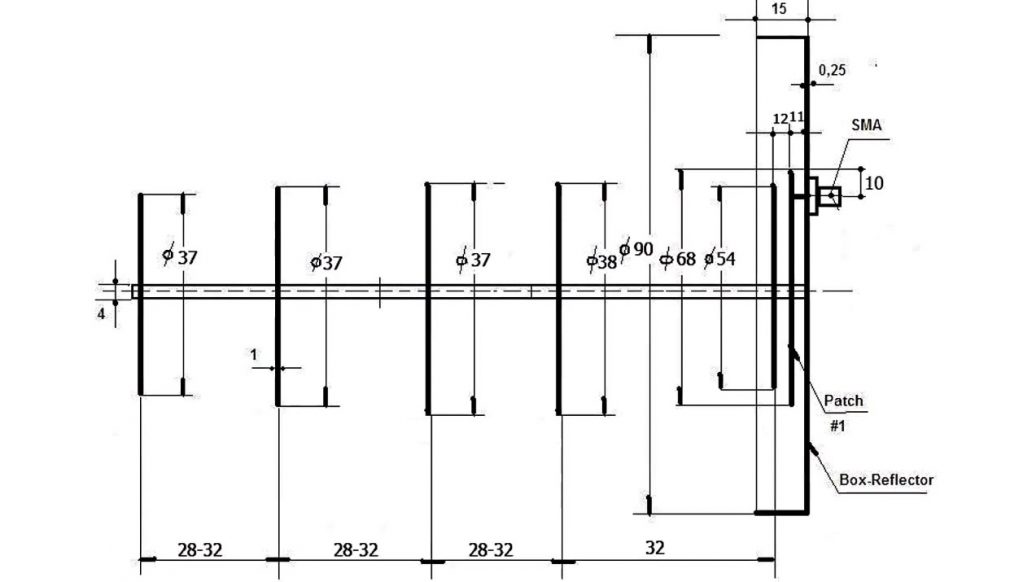
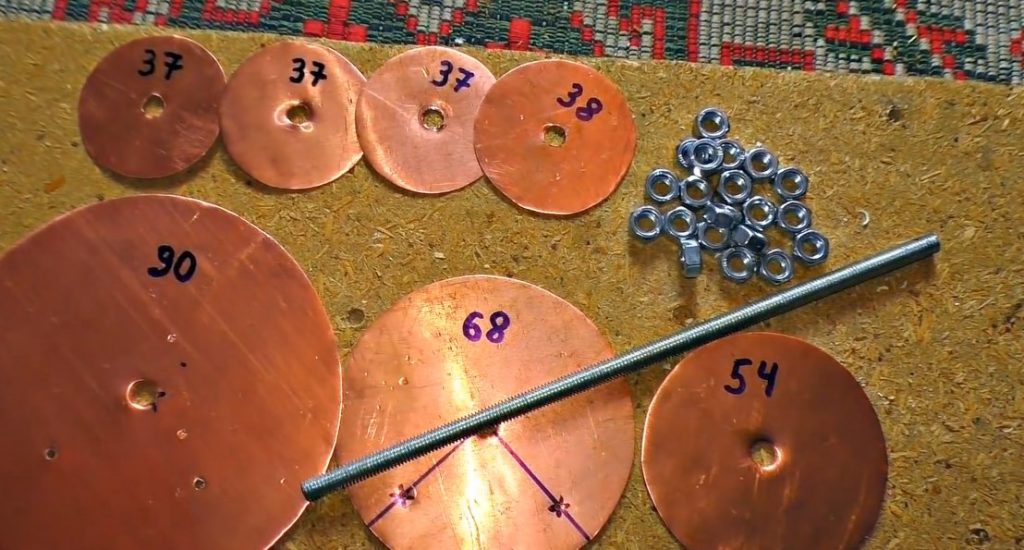
According to the copper foil drawing, seven circles need to be cut.
We drill holes in the sheet (the center of the circles). This must be done at the beginning - if you first cut out the circles, and then drill the center, you can miss. And this is not permissible, since an error of even 1 mm gives a noticeable decrease in the level of signal reception.
Using a compass, draw circles on the copper foil. Circle sizes:
- 3 circles - 37 mm
- 1 circle - 38 mm
- 1 circle - 54 mm
- 1 circle - 68 mm
- 1 circle - 90 mm
Marking with a compass
Carefully cut out circles with scissors.
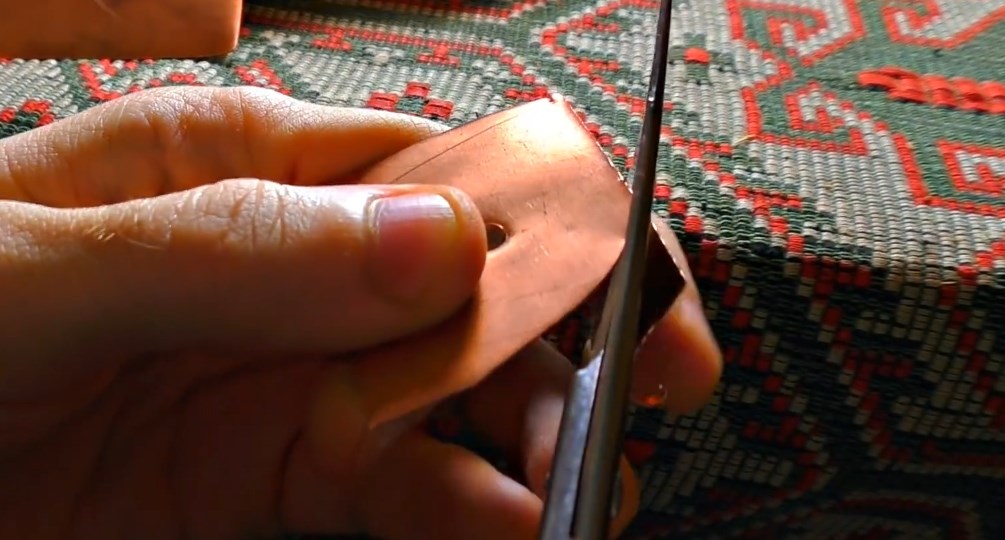
Regular scissors cut copper foil well
The fewer defects and inaccuracies, the better the antenna will catch the Wi-Fi signal.
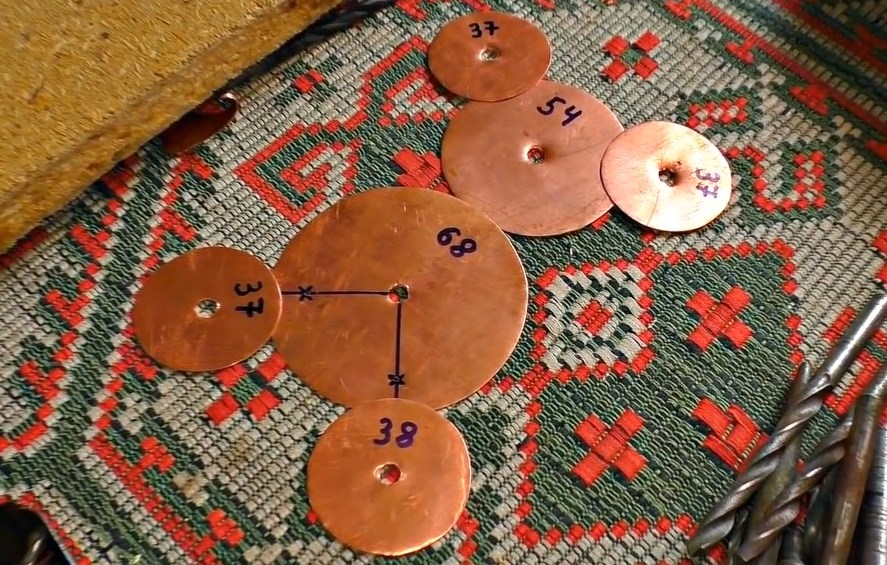
Seven cut out circles for the antenna
Step number 2 - prepare the threaded stud
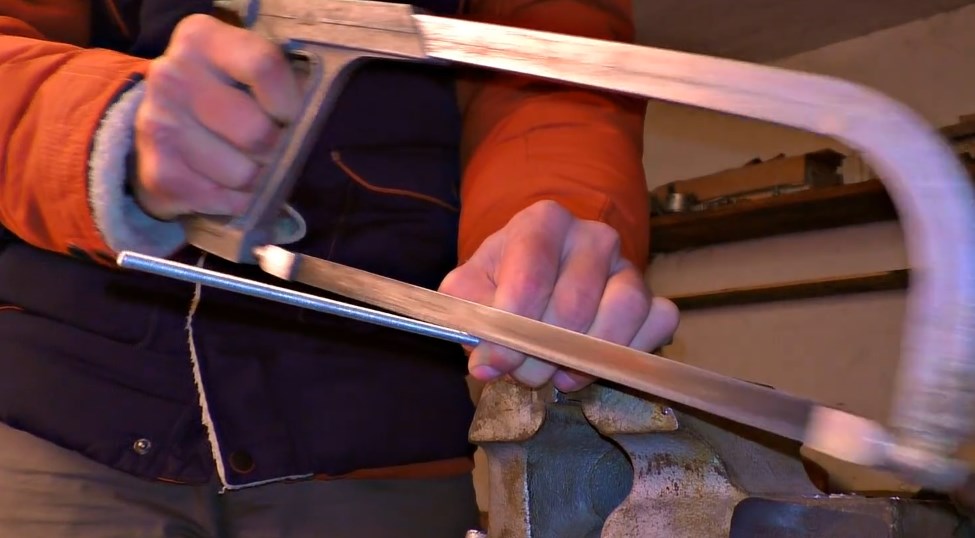
A couple of minutes and the hairpin is cut off
With a hacksaw for metal, cut a length of 135 mm. We remove the burrs with a file.
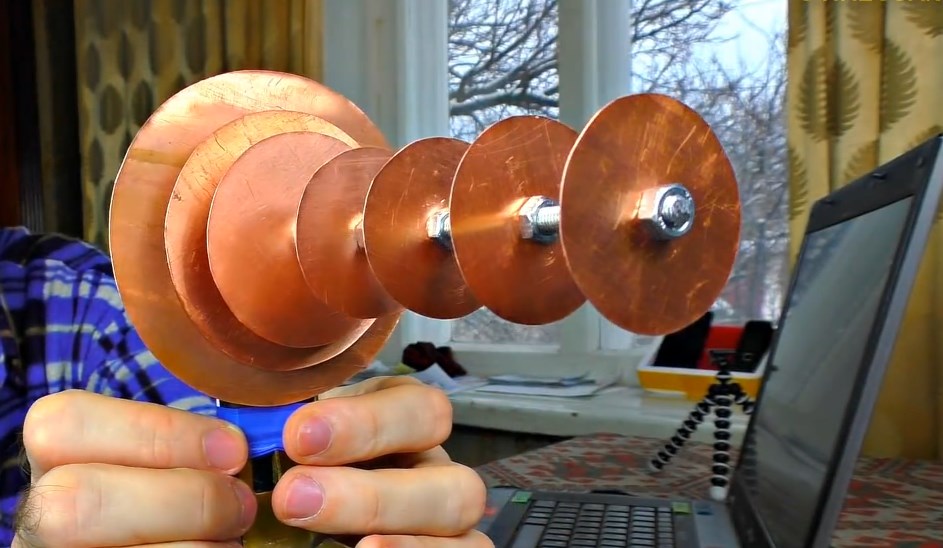
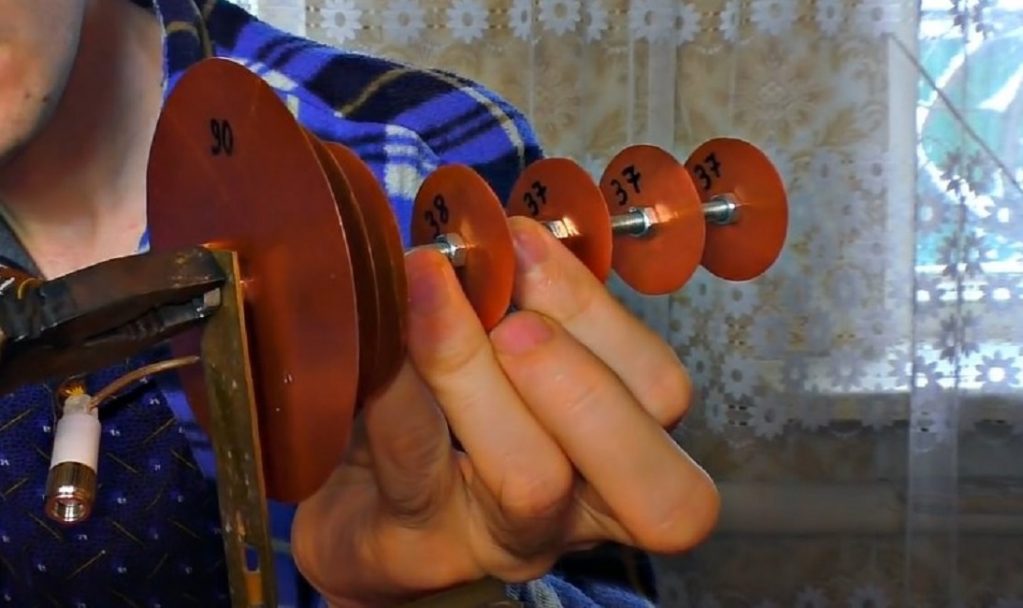
All elements are ready
In total, it should turn out as shown in the photo above.
Step number 3 - assembly
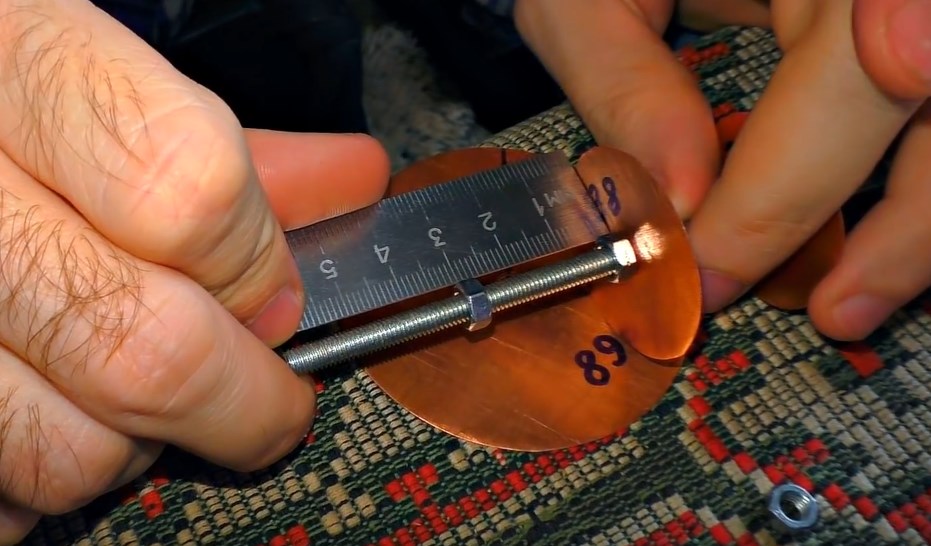
Tightening the nuts, adjust the distance between the circles
Assembling the antenna is easy. Threaded connections allow you to set elements with an accuracy of up to mm.
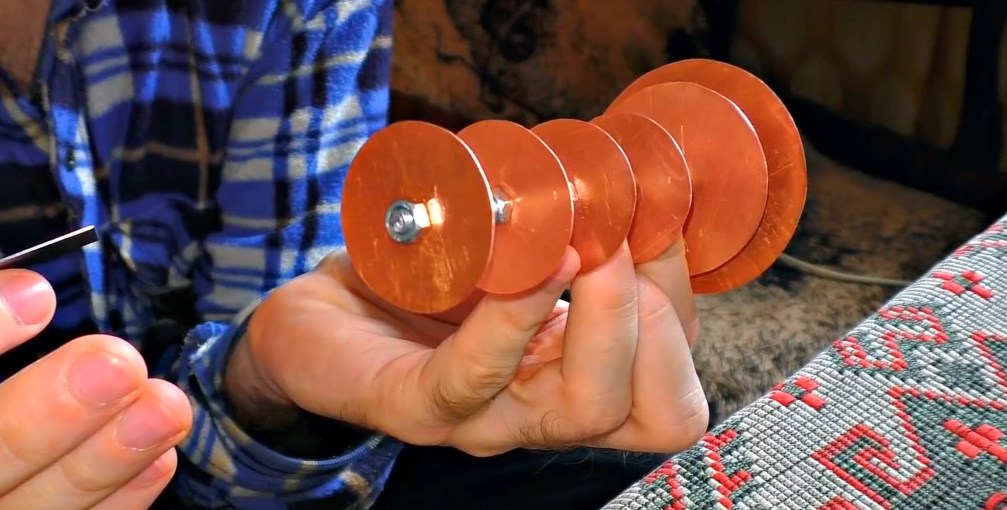
"Cannon" assembled
It takes about 10 minutes to assemble the antenna.
Step number 4 - connect the wi-fi adapter
Drilling holes for the adapter
We prepare the connection points of the antenna and adapter.
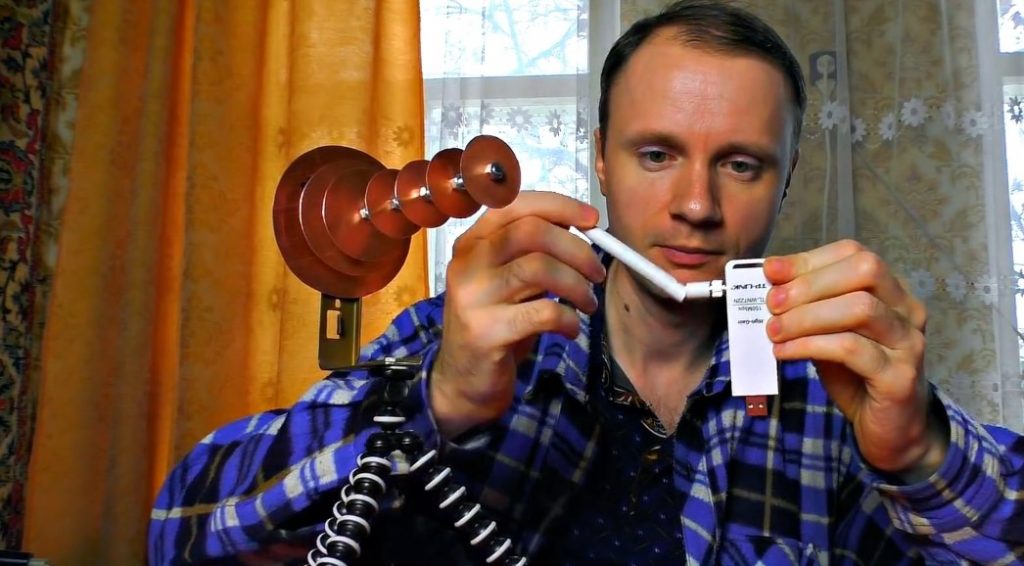
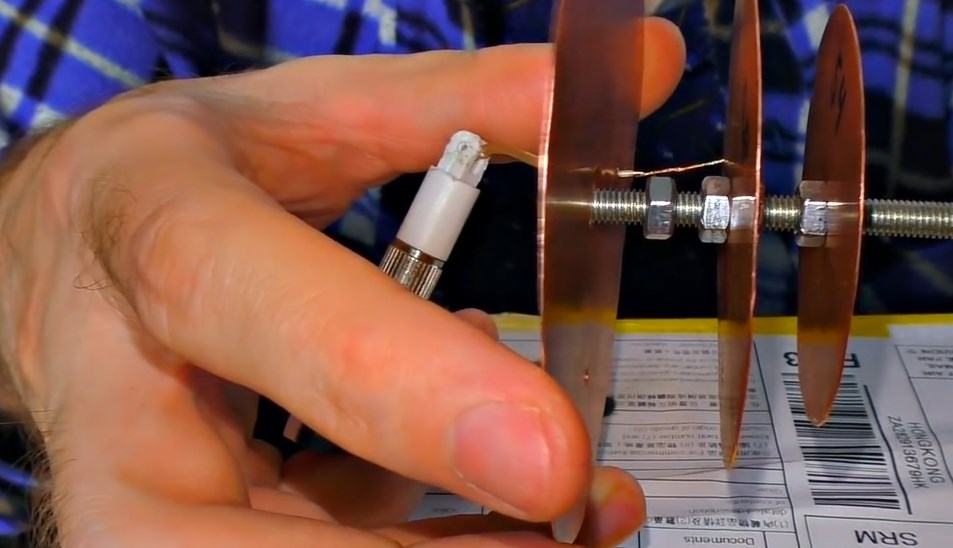
We remove the antenna from the 4g Internet adapter
At a distance of 1 cm, we drill a hole 1-1.5 cm on the two largest circles (68 and 90 mm).
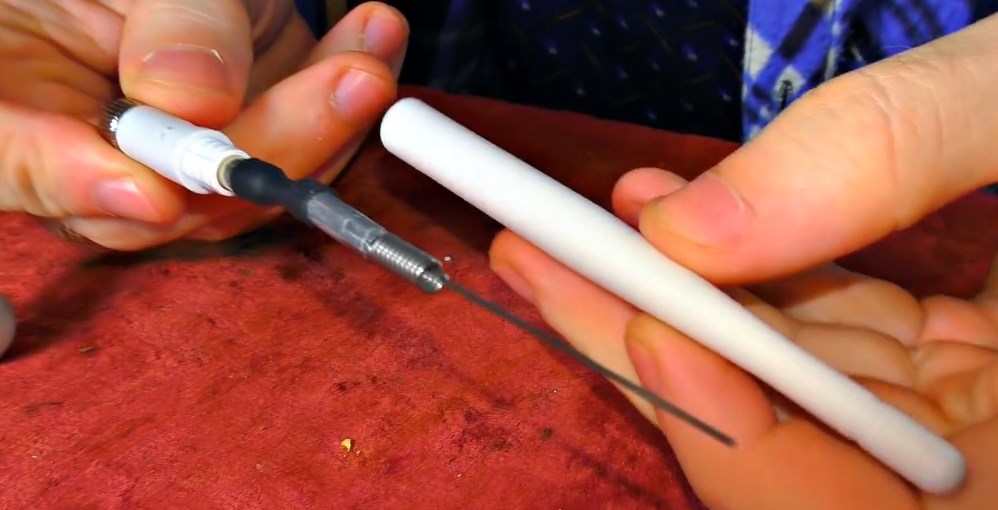
Removable cap
We disassemble the Wi-Fi adapter.
Remove the plastic cap from the antenna.
Removing everything you don't need
We get to the main core of the antenna. You may need to use a soldering iron.
A drop of rosin and solder
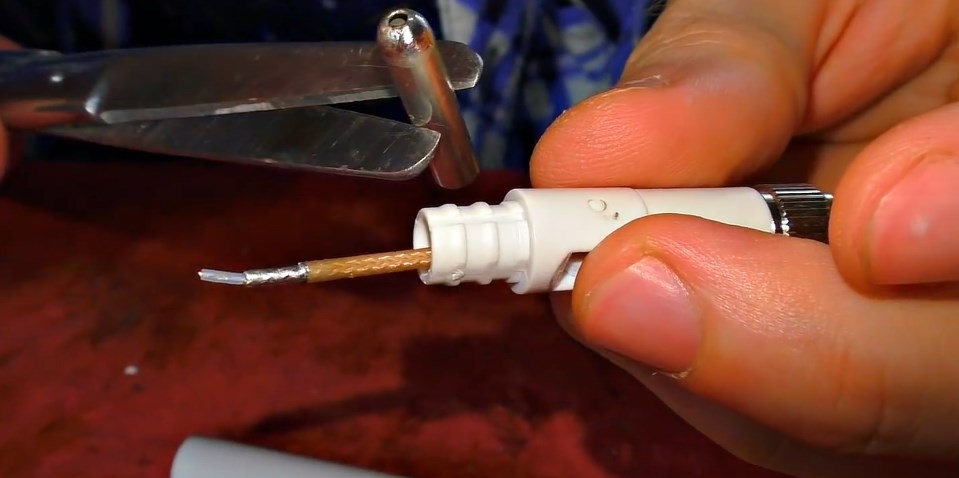
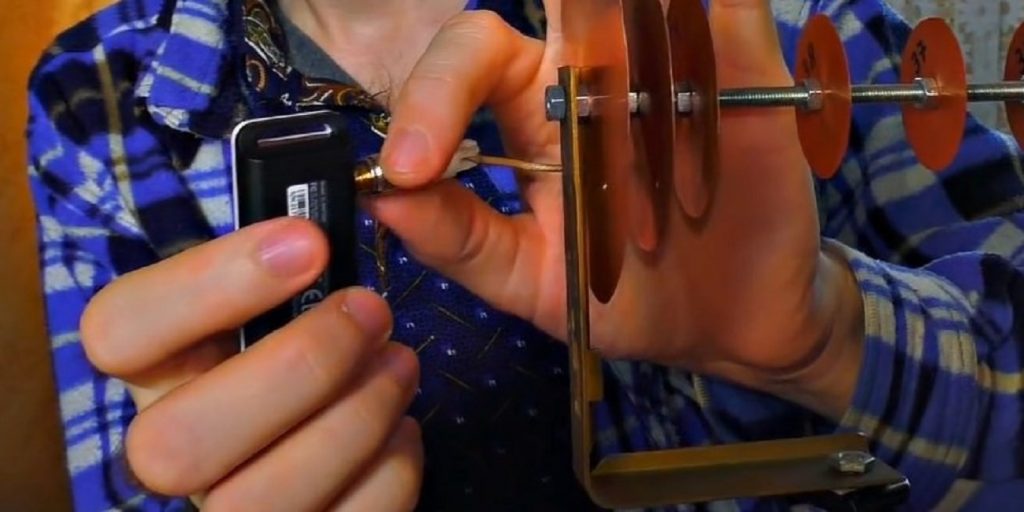
With a soldering iron, we tin the previously drilled holes for connecting the antenna to the adapter.
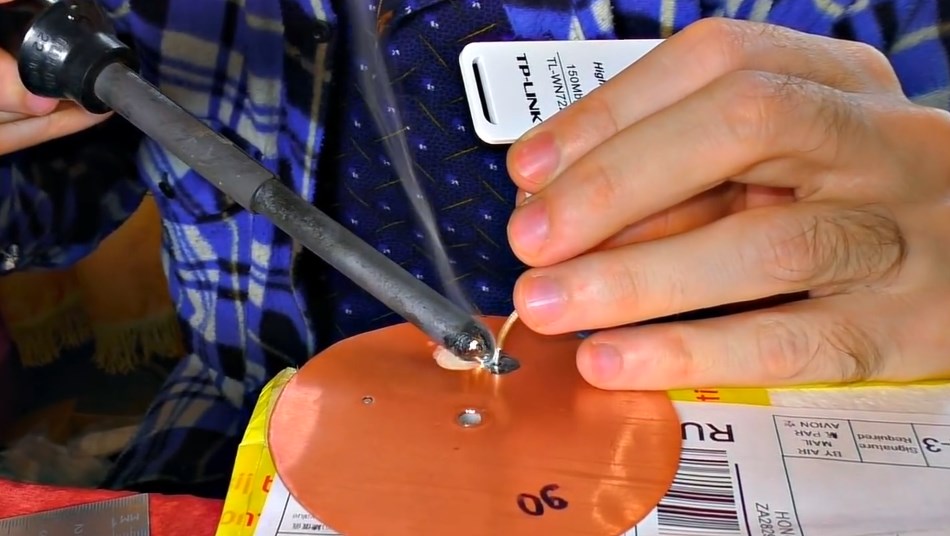
The outer braid is soldered to the circle of the largest diameter
For a mug with a diameter of 90 mm. solder the outer braid of the Wi-Fi adapter antenna wire.
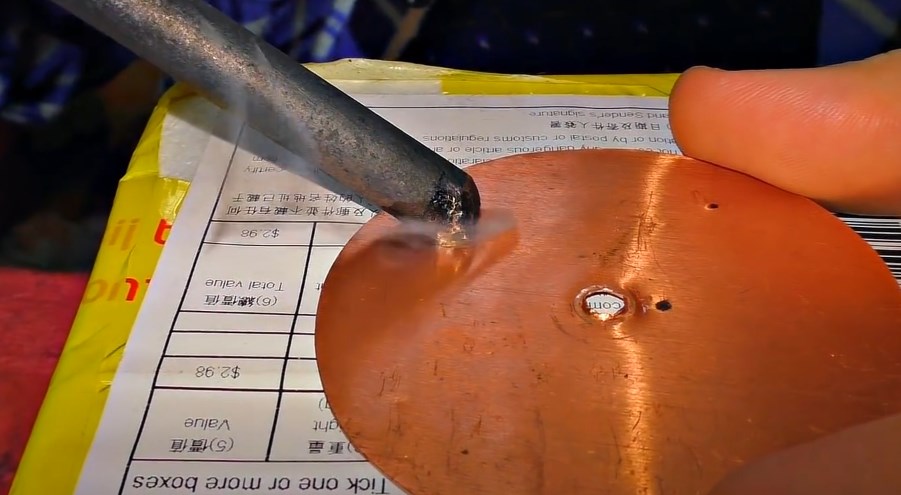
Putting the circle back in place
We install the circle on the rod so that the central core of the adapter antenna falls into the hole of the next circle (68 mm).
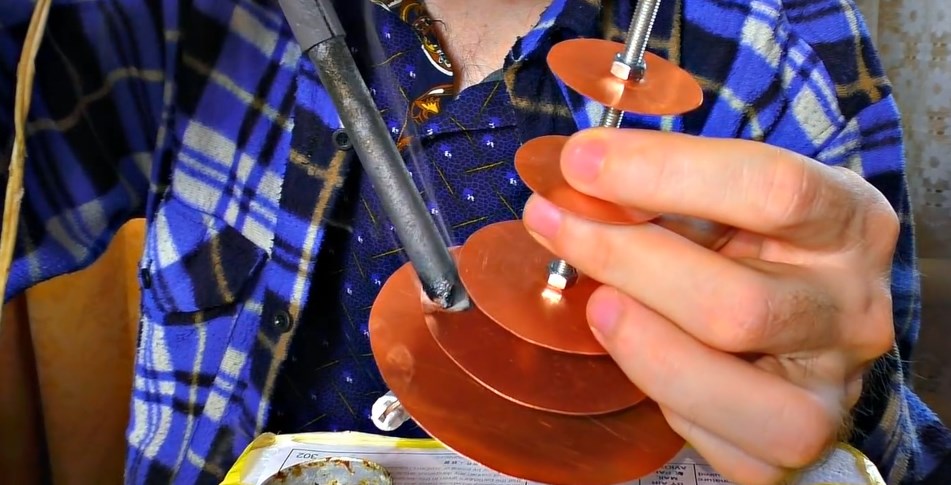
It doesn't take long to warm up
Solder the main wire to the second circle (68mm).
Step 5 - final assembly
Fasten to the nut
For the convenience of using the “gun”, we mount it on a tripod.
Step #6
We connect the Wi-Fi adapter with a new antenna
Connect the Wi-Fi adapter. Attach to a tripod.
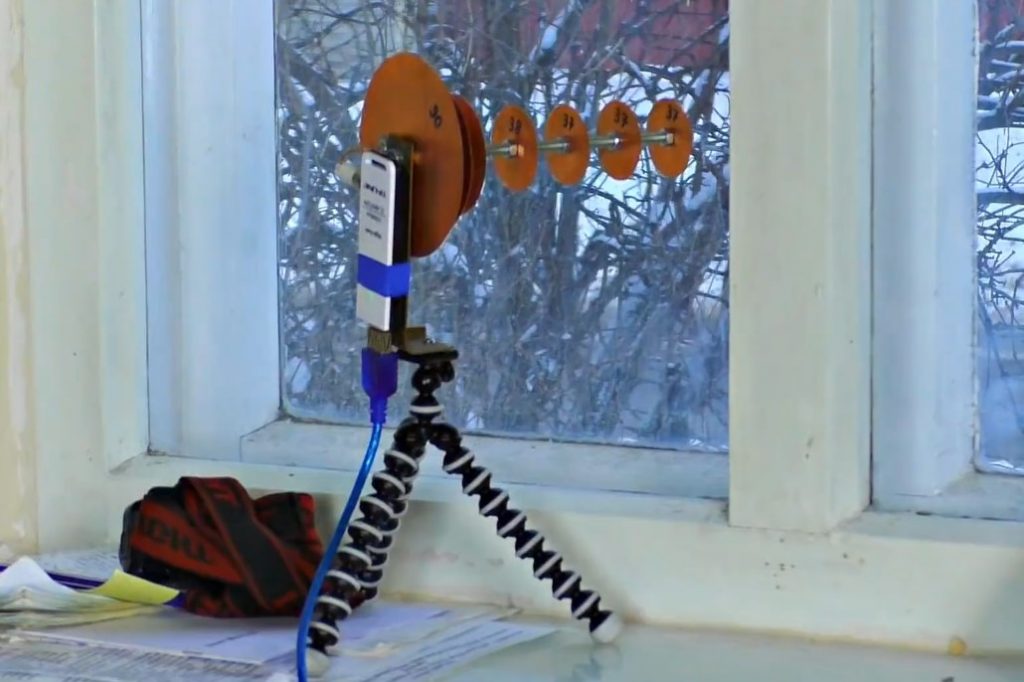
Compact and highly efficient window sill antenna
 Read also: Peat tablets: how to use it correctly, a mini-greenhouse device for seedlings (20 Photos & Videos) + Reviews
 Completion
If the signal source is nearby, then it is enough to install a home-made antenna on the window sill indoors. Its power will be more than enough to receive a strong signal.
If the source is more than 500 meters, then the Wi-Fi gun must be placed on the street, on a hill.
VIDEO: ✅ Homemade Wi-Fi gun? Powerful do-it-yourself WiFi signal antenna

✅ Homemade Wi-Fi gun? Powerful do-it-yourself WiFi signal antenna
Powerful Wi-Fi antenna for do-it-yourself cottages


Do-it-yourself Wi fi antennas: step by step instructions
Clear, understandable and accessible. The simplicity of the design is commendable. Thank you. 10 points.
Joining the comment!