
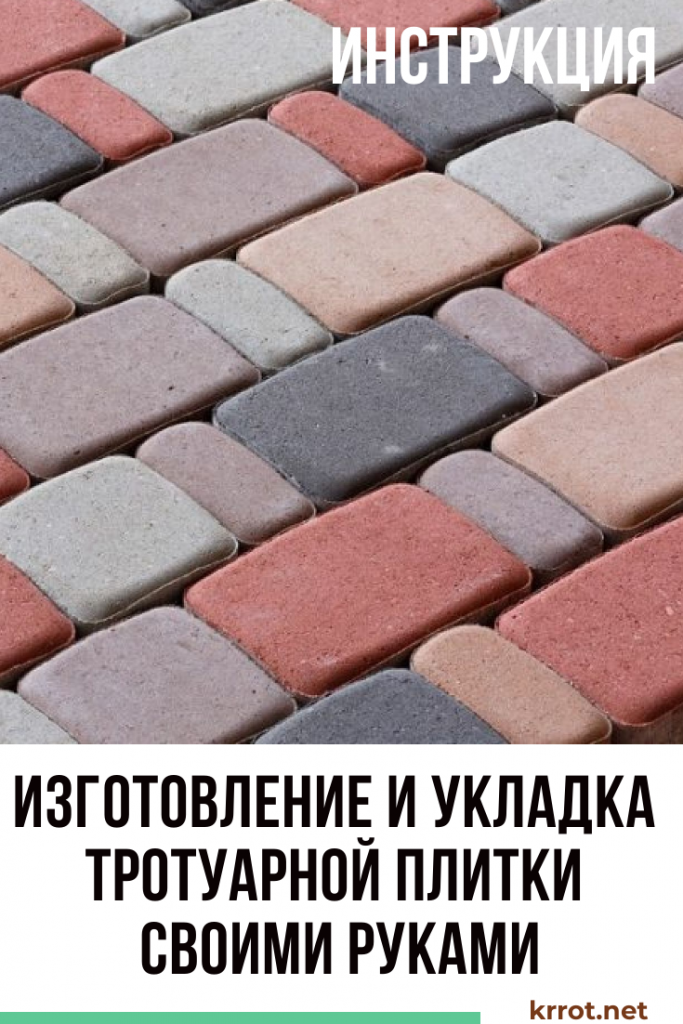
Paved garden paths not only look attractive, but also increase the comfort of movement. There are several ways to lay paving slabs with your own hands. We will describe each of them in detail. Moreover, it is not at all necessary to buy tiles in the store - you can also make it yourself.
Content:
- Types of materials for covering paths and sidewalks
- Methods for making concrete tiles
- Types of laying
- Is it necessary to use a drainage system?
- How to make a mold?
- Homemade vibration actuator
- Making a vibrating table
- Making tiles at home step by step
- Dry laying on a sand bed
- Wet laying on mortar
- The main mistakes made in the manufacture of tiles
 Read also: Projects of country houses for 6-10 acres: 120 photos, description and requirements | The most interesting ideas
Types of materials for covering paths and sidewalks
This type of coating first appeared in the 19th century in Holland. It began to be used due to the lack of natural stone. It turned out that it looks no less decorative, and in terms of strength it is not so inferior to it. Subsequently, concrete, and then tiles made of other materials, appeared in other countries.
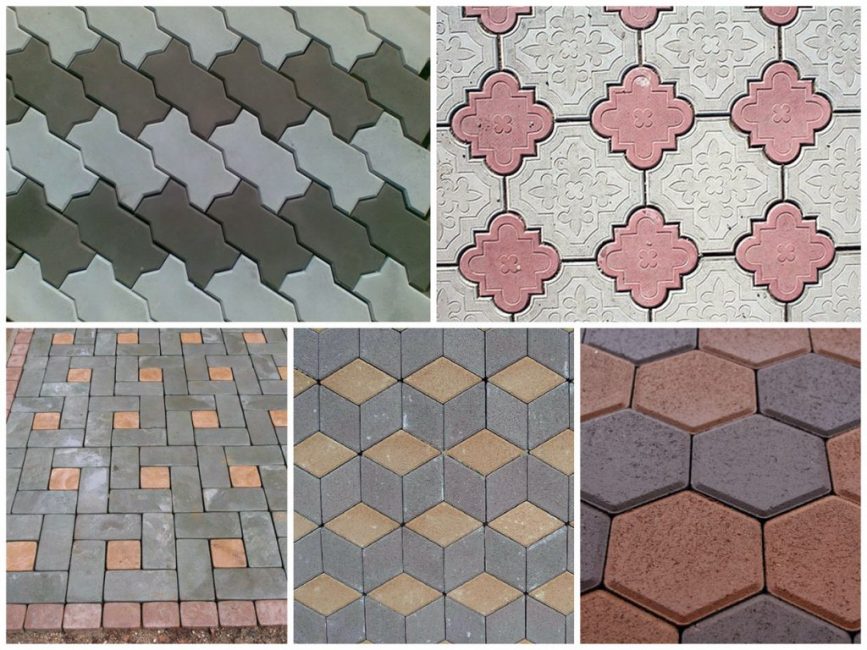
Types of paving slabs
Today it has many varieties and is made from:
- concrete: mixtures of cement, filler (most often sand) and water; able to withstand heavy loads, but less decorative than other types
- baked clay clinker: more expensive material with a minimum number of pores, obtained by thermal firing; unlike concrete, it is almost not susceptible to moisture and temperature changes and has great strength; does not wear out and does not lose color
- crumb rubber, obtained in the process of tire recycling: anti-slip bright attractive products are more often used in playgrounds, areas around swimming pools, sports centers
- pavers: small-sized products made of processed natural stone - granite, marble, basalt, labradorite; have the highest strength
- wooden bars and saw cuts, coated with an anti-slip layer and impregnated with antifungal compounds, for example, heated drying oil
- polymer (plastic): inexpensive material that quickly fades in the sun and has increased abrasion; for protection against slipping are made corrugated
In addition to rectangular and square, paving tiles tracks may have a different, more complex shape, for example, in the form of a wide wave, scales, hexagons, polygons, and even clover leaves. In one set, there may be products of several configurations at once, from which a drawing is laid out in the future.
The greatest demand is for tiles measuring 200-400 mm by 140-250 mm. Standard thickness 30-80 mm. The thinnest is used only for laying on paths with low traffic, including in private households. Products of medium thickness are trimmed with city squares and sidewalks. The thickest tiles are used in parking lots and roads.
 Read also: How to make flower pots with your own hands: outdoor, indoor, hanging | Step by Step Charts (120+ Original Photo Ideas & Videos)
 Methods for making concrete tiles

Vibropressed tiles are more durable and last longer
There are only three main methods of its manufacture:
 Read also: How to make a patio in the country with your own hands: a variety of design options, decoration and arrangement (85+ Photo Ideas & Video)
Types of laying
Dry laying
Paving slabs are laid in two ways:
- dry on a sand bed
- wet on cement mortar
Laying on cement is not a cheap pleasure. But the surface turns out to be high-strength, even a truck can easily drive through it. In private households, it is sufficient to use the dry method. We will describe the process of laying dry and on cement mortar in detail in the following sections of the article.
 Read also: How to make a children's house with your own hands: from wood and other materials. Dimensional drawings | (80 Photo Ideas & Videos)
 Is it necessary to use a drainage system?
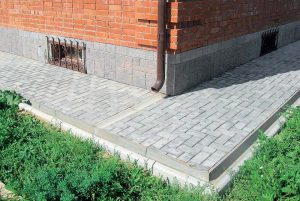
If water stagnates on the paths, people walking along them will not have fun - the likelihood of injury will be very high. Plus, when making a blind area from paving slabs, water from surfaces adjacent to buildings will drain under the foundation. Therefore, the paths are always made with a slope of 1-2 °. Moreover, it must be done in the direction of the places of water drainage - drainage.
Arrangement of a drain
Drainage pipes are mounted every 2-3 m across the track. Water should move along them by gravity, so laying should be done at a slope of 2-3 degrees. You can also use special drains. In fact, this is a special type of tile in the form of gutters.
If the site is dry, a complex system of drains is not needed - it is enough to dig small trenches to drain water and fill them with gravel or gravel, and mask them with soil on top. On swampy soils, complex drainage systems will need to be installed. Particular attention should be paid to the drainage of rainwater when laying tiles near the blind area of buildings.
 Read also: How to make and decorate beautiful beds in the country with your own hands: simple, tall, smart. For flowers and vegetables. Original Ideas (80+ Photos & Videos)
How to make a mold?
For forms (formwork) of paving slabs, wood is most often used. Metal products are more durable - it is much easier to remove tiles from them and clean the mold from the frozen solution. The use of gypsum is also allowed - however, this inexpensive material is fragile, and such formwork will not last long.
Products of complex shapes are easier to purchase in the store. Plastic or rubber products are easy to use, but it is difficult to make them at home. It is better to buy polyurethane formwork - silicone is fragile and will not last long.
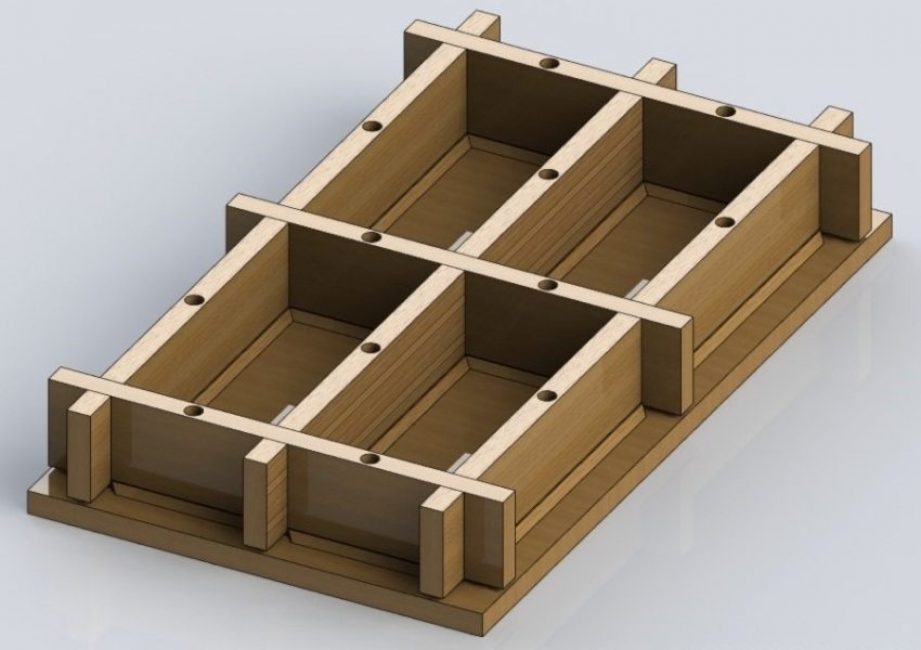
Press form
Wooden molds are collapsible. It is more convenient to use a form measuring 50x50 cm, into which 4 tiles can be poured at once. Its standard height is 6-7 cm.
All formwork elements must be tightly joined to each other. Otherwise, when liquid flows out of the solution, the strength of the tiles will decrease. The location of the parts is verified by the building level. You can strengthen the formwork with metal corners.
Handles can be welded to metal molds on the sides. It will be easier to transfer already finished products into them. For the production of small quantities of tiles, molds can be made from tin. To do this, it is cut to size, adding a small allowance to it, and wrapping it with a wooden formwork. Tin sheets are adjusted with a hammer. Irregularities and bulges should not be paid attention to. They will only give the tile an original pattern and make it less slippery. It is worth aligning the form only on the sides - otherwise it will be difficult to dock the tiles to each other.
Gypsum products are poured into a pre-prepared wooden frame, which is lubricated with oil. Filling is made in several layers. To strengthen the structure, it is additionally reinforced with wire. A day after complete drying, the formwork is lowered into the water, and then the finished products are disassembled and pulled out.

Formwork manufacturing
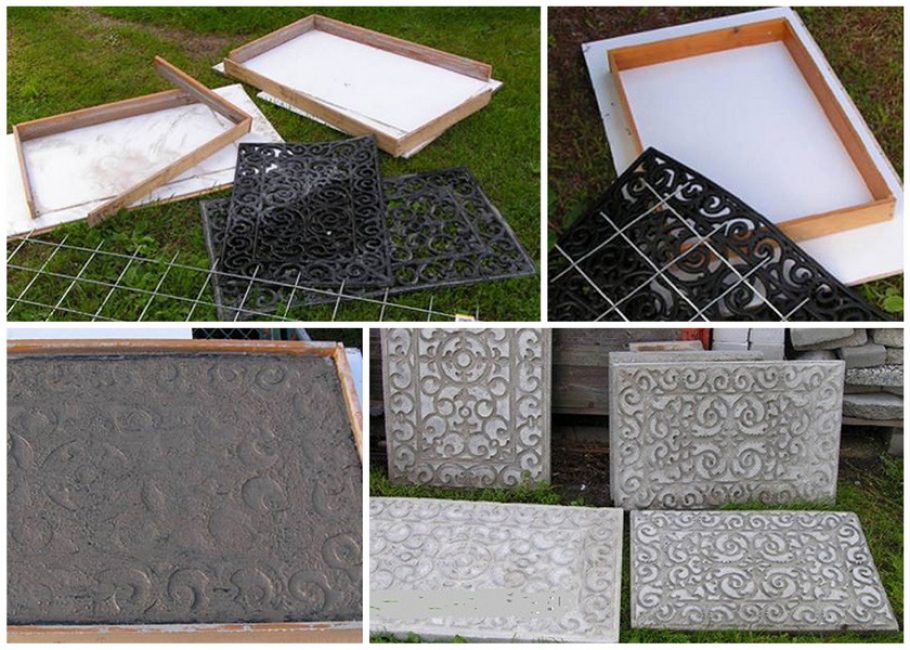
For the manufacture of a small number of paving slabs, you can use improvised means. You can replace the molds with fragments of plastic bottles, pieces of pipes, food storage containers, glass containers, flower pot stands, cardboard packaging, etc.
An interesting tile is obtained by using silicone molds with convex patterns.intended for baking confectionery products.
![[Instruction] Do-it-yourself laminate on a wooden floor: a complete description of the process. Laying schemes, what materials should be used (Photo & Video) + Reviews](https://iherb.bedbugus.biz/wp-content/uploads/2018/05/laminat-300x200.jpg) Read also: [Instruction] Do-it-yourself laminate on a wooden floor: a complete description of the process. Laying schemes, what materials should be used (Photo & Video) + Reviews
Read also: [Instruction] Do-it-yourself laminate on a wooden floor: a complete description of the process. Laying schemes, what materials should be used (Photo & Video) + Reviews Homemade vibration actuator
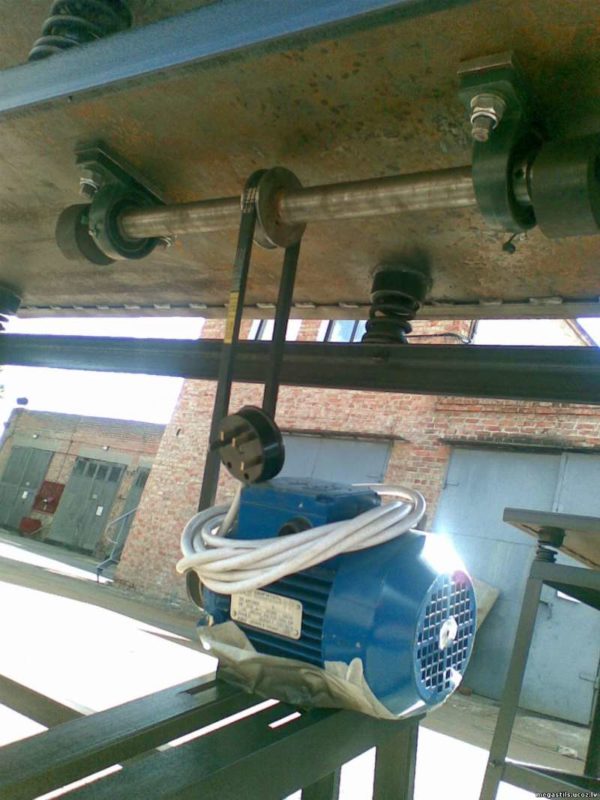
As a basis, you can take a conventional engine, for example, from a washing machine. But it will need to be upgraded by adding an eccentric assembly with an asymmetrically located axis. You can use any other engine with a power of 0.5-0.9 kW, for example, from a pumping station.
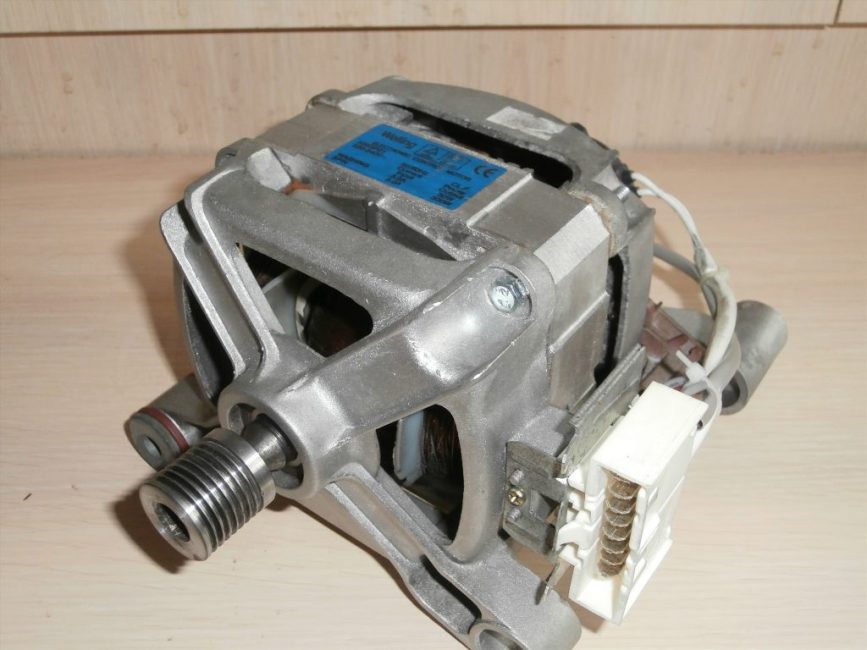
Washing machine engine
To create an unbalance of the engine and the appearance of vibration, you only need to shift the axis of rotation. To do this, 2 metal pancakes with an offset axis are attached to the shaft key.
The range of motion will need to be adjusted. To do this, one of the pancakes is prepared in one, and in the second - 3-4 holes (see photo), through which they are interconnected using a metal strip 2x6 cm and bolts.
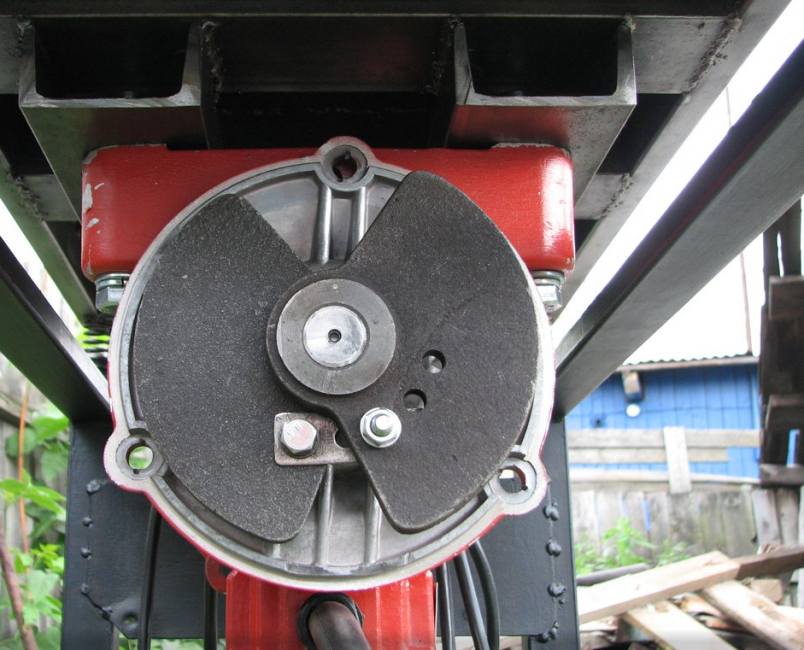
Unbalance adjustment
First, a distance of 38.5 mm is made between the holes of the pancakes. To measure the oscillation amplitude, a pencil is attached to the platform with adhesive tape, drawing a curve. If the amplitude is insufficient, the distance between pancakes is increased. Please note that the vibration must be uniform, otherwise the cement mixture will be compressed in jerks and delaminate.
 Read also: Do-it-yourself furniture and other wood products: drawings of benches, tables, swings, birdhouses and other household items (85+ Photos & Videos)
 Making a vibrating table
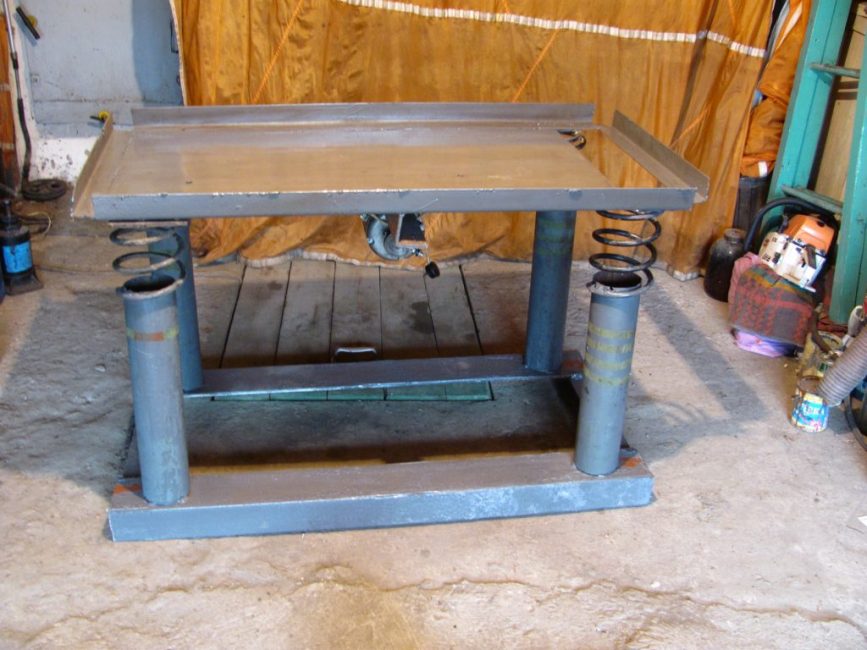
Homemade vibrating table
If you take a cement mortar and simply pour it into a mold and then dry it, you will get not very high-quality products. In the manufacture of paving slabs without a vibrating table, due to the high porosity of the product, under the influence of moisture and temperature changes, they will crack much faster.
You can remove the air gaps between the layers of cement and compact the solution using special vibrating equipment - a vibrating table. It can be of two types:
- molding: for sealing grout in tiles
- disbanding: used to extract (knock out) products from molds
Outwardly, they are indistinguishable. The difference lies only in the presence of nozzles with holes on the forming products, on which the form is attached.The vibration direction of the forming vibrating table must only be horizontal.
Vibrating table, bottom view
The vibrating table should consist of the following parts:
- steel sliding table
- control panels
- engine with unbalance (asymmetrically located axle); we talked about the method of its manufacture a little higher
So, the process of manufacturing a vibrating table for pressing paving slabs, in stages:
- Its standard dimensions are 1x2 m. You can make it a little smaller than 0.8x1.6 m. Too large dimensions are undesirable - due to overload, the engine can quickly fail.
- The height is selected individually depending on the height of the person. On average, together with a spring-loaded platform, it is 0.9 m.
- The frame of the table is welded from metal corners or a round pipe. It is much easier to install springs on pipes.
- For the manufacture of spring seats, pipe sections are welded to the side posts of the frame. Their dimensions should be such that the springs can enter them in 2-4 turns. Springs can be simply welded to the metal corners.
- Sometimes the springs are replaced with belt loops with which the top plate is attached. Such loops are hung on rails welded to the corners of the structure. However, this design is less reliable.
- To strengthen the supports, you can weld the crossbars - stiffeners.
- The platform cover is removable.
- The vibration platform is mounted on the frame with the help of springs.
- The vibrator (motor) is attached with clamps to the bottom of the plate or installed first on a metal platform, and then mounted on countersunk screws.
- Protect the structure by grounding the vibrating table. It is also desirable to install an RCD switch in front of the power cord.
- To ensure vibration, the motor is connected to a shaft attached to the bottom of the table by means of an eccentric bearing.
- To mount the socket and switch, it is necessary to weld a metal plate to one of the side parts of the frame.
- After finishing work on the manufacture of tiles, the vibrating platform can be used as a table top of a circular machine.
If you decide not to bother with making a vibrating table, you can simply buy it. The cost of such equipment varies from 12 to 55 thousand rubles.
 Read also: Do-it-yourself construction and arrangement of a summer kitchen in the country: projects, design, device, with barbecue and barbecue (60+ Photos & Videos) + Reviews
 Making tiles at home step by step
Of course, the process of its manufacture is quite laborious and time-consuming. But, if you don't like standard things and like to work with your hands, you can save quite a decent amount if you make paving slabs with your own hands.
Required tools and materials
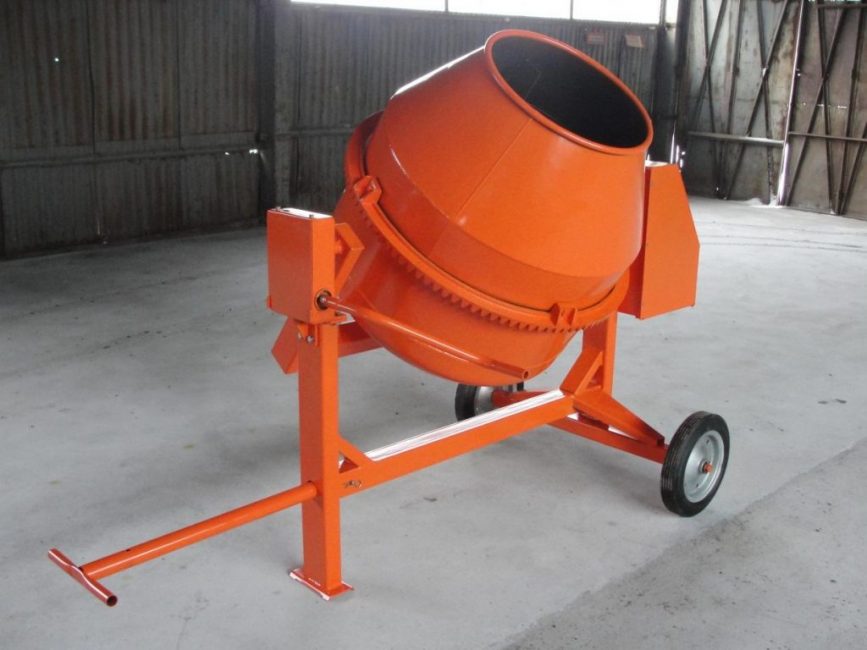
A concrete mixer is needed if you need to make a large number of tiles
To make tiles you will need:
- mold for casting: you can make them yourself from wood, metal, plaster
- vibrating table that provides thorough compaction and gradual compaction of concrete, due to which it becomes more dense and uniform
- for a large number of products, it is better to purchase or rent a concrete mixer: the solution in it will be mixed more evenly, and the products will turn out to be of better quality; if you need a little tiles, you can prepare the solution in an ordinary old bathroom or any other large container
- pallets for storing and drying products: stacking them directly on bare ground is not recommended
Cement is better to take M500.The M400 brand, which is recommended by some experts, is still not worth using. After all, if you adhere to the standards adopted once in the USSR, today most of the “commercial” M400 cement corresponds in quality to the M300 brand.
Sand must be taken dry and carefully sifted. It should not contain impurities of clay, grass, leaves and stones. Otherwise, it will affect the quality of the tiles.
Use only clean water. Stagnant, foul-smelling liquid from irrigation barrels with an admixture of garbage will not work.
Production of paving slabs in stages
Any pattern can be printed on top of the tile
So, a step-by-step instruction for the manufacture of paving slabs:
- When using cement M500, it is mixed with sand in a ratio of 1: 3. This must be done dry. Thus, the mixture will mix more evenly. Water is added later.
- Purchase cement only from trusted manufacturers. If the products begin to crumble, most likely this is not a violation of technology, but bad cement. If you doubt its quality, purchase a small amount first and make a few test pieces out of it.
- Notice the color of the cement. It should not be too dark and have a marsh hue. Standard cement has only a gray tint. It also should not be lumpy. This means that the storage was carried out at high humidity or the shelf life has already expired.
- To increase the strength of the products, add a plasticizer and a waterproofing additive to the solution. Additionally, you can strengthen the tile with a small amount of fiberglass.
- Sometimes crushed stone of small fractions is added to the solution (the proportions in this case will be 1: 3: 1). But most experts agree that this reduces the strength of products.
- Make the consistency of the solution pasty - it should not be too liquid and not slide off the trowel. It is difficult to calculate the exact amount of water - after all, the humidity of sand and cement is different. Therefore, the consistency will have to be selected empirically.
- Before pouring the solution into the mold, it must be lubricated. For these purposes, you can use any vegetable oil or soap solutions. There are also special lubricants that can be purchased at hardware stores. Working off is used with caution - it leaves dark spots on the surface of the track.
- After filling the mold with a solution, it is necessary to pierce it so that there are no voids left in it. To get rid of them, the form can also be slightly shaken by hand. There is no point in smoothing the top perfectly - this side will adjoin the ground. If there is unevenness, the tile will only better adhere to the surface when laying.
- In the manufacture of large products (including borders), it is desirable to strengthen them with reinforcement - small pieces of metal or a metal mesh. For small items, you can use pieces of wire. In this case, they will turn out stronger and last longer.
- The duration of continuous vibration depends on the mass and dimensions of the products. On average, it is 1.5-2 minutes.
- In order for the products to turn out to be equal in thickness (and this is the main trouble for molders, when the tiles are thinner at one end than at the other), be sure to unfold the mold during vibration.
- The tile is removed from the molds only after the solution has solidified in a day.
- Finished forms are stacked. Each row should contain no more than 15 pieces. Before storage, each product is wrapped in plastic wrap. The tile wrapped in this way will “steam” and gain strength. You can fold it onto sheets of stainless steel - it will be easier to remove products that are still half-damp.
- Dry the tiles under a canopy so that direct sunlight does not fall on it.
- It will be possible to work with it and lay it only after a month, when the concrete will fully gain strength.
- Borders are made in a similar way. Making molds of suitable sizes for them will not be difficult.
 Read also: We make vertical beds with our own hands: the best ideas of 2018. For vegetables, berries, herbs and flowers (65+ Photos & Videos) + Reviews
 Dry laying on a sand bed
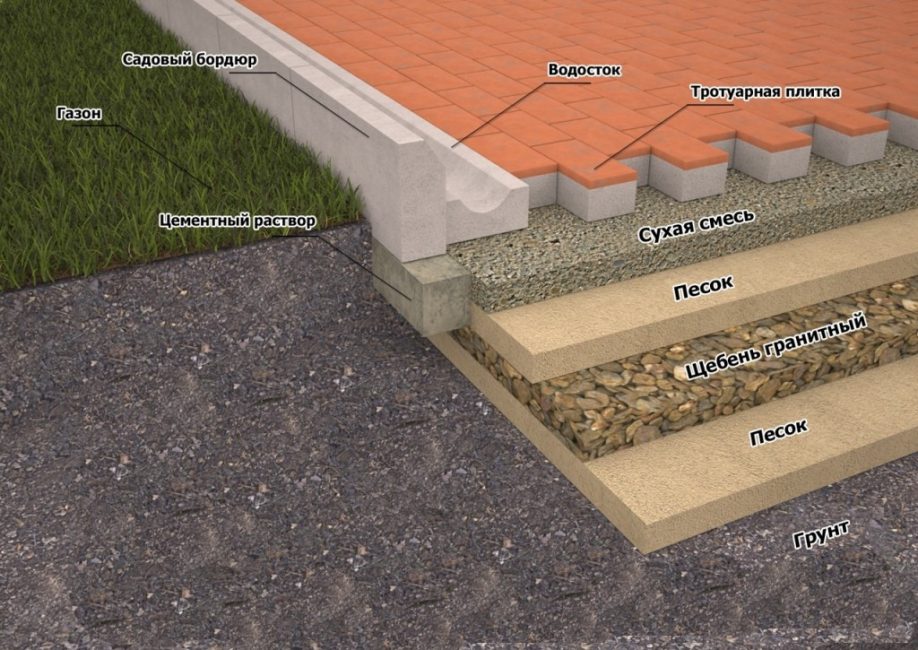
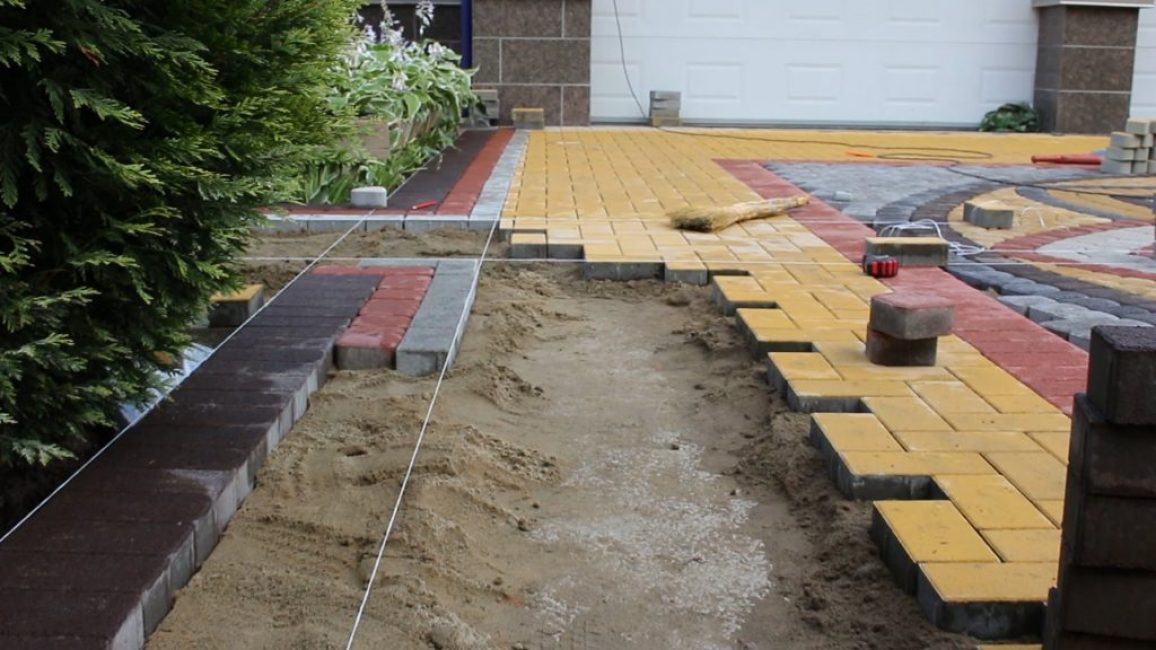
Laying scheme
Such a pillow protects the tile from the damaging effects of moisture. It is made in three layers:
- the first 15 cm high should consist of gravel (crushed stone) of the middle fraction
- screening height 7-8 cm
- sand
Each of the layers must be well compacted. If a path with curbs is planned, they are laid even at the level of the gravel layer. They require a separate, deeper trench.
Before starting work, we suggest that you carefully study the step-by-step instructions for laying paving slabs dry:
- At the location of the path, it is necessary to remove all the sod and remove the roots of the plants. The base must be carefully leveled.
- Before starting laying, the location of the path or sidewalk is marked with a string and small pegs. They should be placed more often so that the rope does not sag.
- To protect against moisture seepage, a film or geotextile is laid at the bottom of the prepared pit.
- After backfilling the last sandy layer, it is spilled with water, rammed and leveled with a rake so that a slight slope of 1-2 degrees is formed for water flow.
- Laying is carried out according to the selected scheme with a minimum gap. To reduce it, each tile is tapped on the side with a mallet (rubber mallet).
- Without gaps - expansion joints - you should not make a track. Otherwise, in the process of expanding the material, it will be damaged.
- It is more convenient to cut it with a grinder with a diamond disc. To prevent the material from dusting, it is not necessary to cut the tile to the end - a small seam is made, and then it simply chipped off.
- To prevent water from stagnating on the paths, it is not worth raising the curb high. It should be flush with the track or go a little lower by 1-2 cm.
- After the laying is completed, the seams are covered with sand (on a gray path, you can fill it mixed with cement). To compact the sand, they are shed with water and left to dry. If voids are found, the procedure is repeated.
- For grouting, you can also use a cement-sand mixture. It is covered dry, and then spilled with water and rubbed into the seams with a brush.
 Read also: The blind area around the house: views, device, schematic drawings, instructions on how to do it yourself (30 Photos & Videos) + Reviews
 Wet laying on mortar
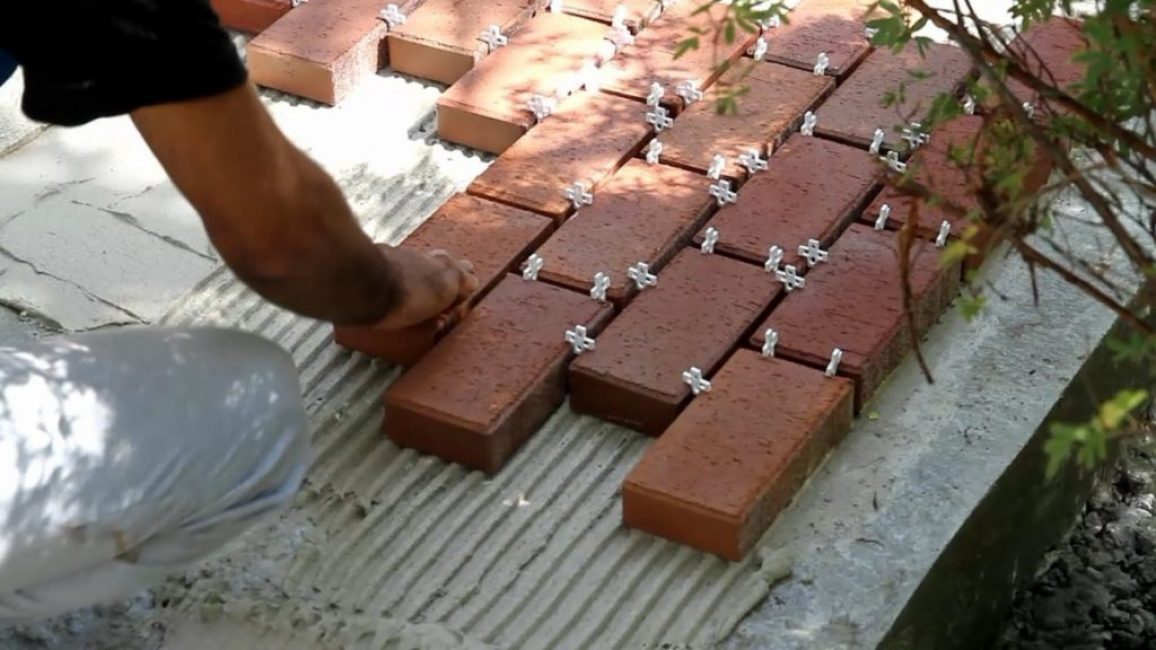
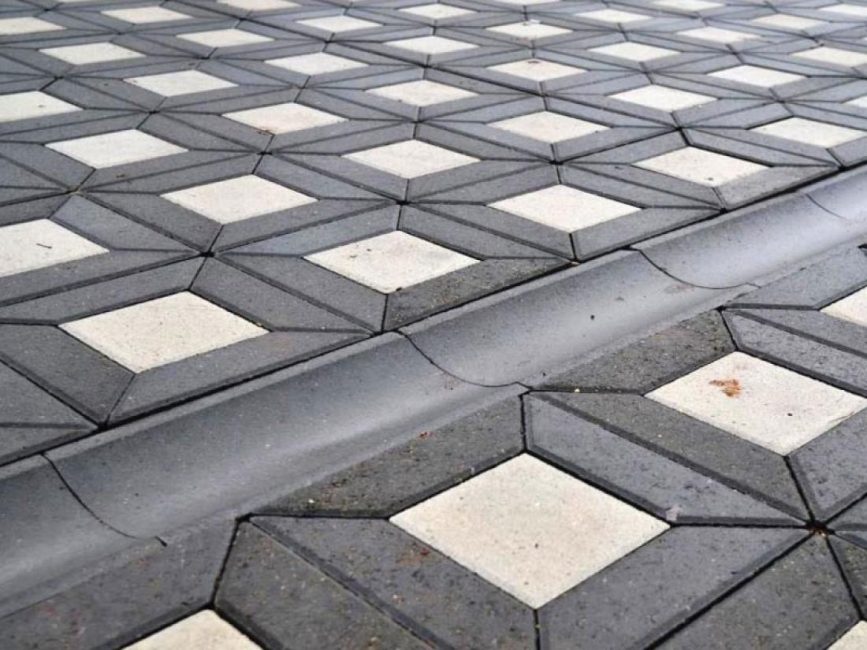
Use plastic crosses to get even seams.
The process of such laying is similar to the dry method. The only difference is the absence of sand in the layers of the pillow. That is, only crushed stone and screenings are poured into the base.
So, step-by-step laying of paving slabs on the mortar:
- In order to determine the pattern, laying is first done dry. It is more convenient to do it on your own.
- Cement-sand mortar is applied to each tile. It needs to be slightly pressed into the surface.
- It is better to apply and level the solution with a comb spatula, which allows you to more thoroughly level the mixture.
- When laying out solid paths, they can first be shed with a small amount of mortar, and then lay tiles on them.
- To obtain a minimum gap, each of them is gently tapped from the side with a rubber mallet.
- The cut tiles are laid last.
- When installing curbs, it is necessary to coat each of them with a solution, and not pour it immediately into the trench. You can replace the borders with larger tiles.
- Grouting is done with the same solution. This can be done with a rubber spatula or a special gun. The drying time of the seams is about an hour. After that, its excess is removed with a stiff brush.
- If laying curbs is not planned, they can be replaced with metal formwork. Before laying paving slabs, install such formwork along the edges of the path.
- In order for rainwater to drain freely from it, metal sheets are laid flush with or slightly below the sidewalk.
The main mistakes made in the manufacture of tiles
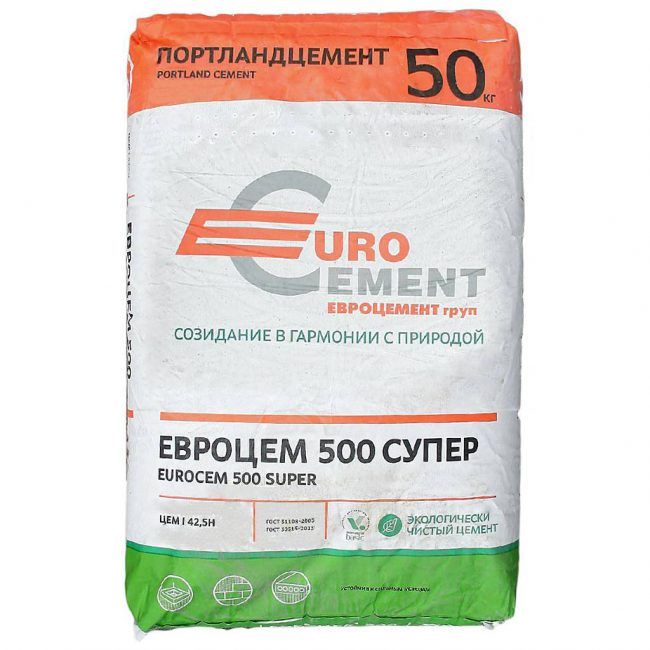
It is necessary to choose good quality cement, not lower than m500
If you have started the production of paving slabs for the first time, you can expect many unpleasant surprises.
We briefly list the main errors due to which products are of poor quality:
- poor choice of cement: it is necessary to use material grades of at least M500, capable of withstanding significant loads; he is not afraid of the impact of aggressive environments
- unsifted sand: the presence of small foreign inclusions or lumps of clay significantly reduces the strength of products
- excess or lack of moisture: in both cases, the tile will turn out to be of poor quality; in a solution that is too dry, remnants of dry cement may remain, which in the future will simply fall out; if there is excess water in the solution, the products will turn out to be unnecessarily fragile
- no self-compacting plasticizers in solution, increasing frost resistance and strength of products; outwardly, such a defect is not visible, but such a tile will last much less
- lubrication of molds with used machine oil: a defect in the form of dark blurry spots affects only the appearance of products; neither paint over them nor wash them off; the use of new engine oil leads to the formation of voids - shells; in order to avoid such defects, use vegetable oil, soap solutions or special compounds such as "Emulsol" for lubrication
- savings on fittings in the manufacture of borders: the chance that you have to collect them from the wreckage is very high in this case
- incorrectly calculated time and vibration strength: with its excess, the solution will move away from the walls of the mold; with a lack - a little compacted
- lack of drying time or incorrectly selected temperature regime: although drying lasts no more than a day, it is forbidden to stack finished products in a pile of more than 3 pieces for the first 3-4 days, otherwise they will burst; the tile must gain strength; in extreme heat, cover it with a damp cloth, otherwise, due to uneven drying, the tile may crack
- laying ahead of time: products must gain strength within 28-30 days after manufacture; only then can they be laid in the ground
This video shows the laying of paving slabs in stages. Its authors also give some useful recommendations for working with it:

Paving slabs
Making and laying paving slabs with your own hands: step-by-step instructions for dry and wet mix. Making a mold, vibrating table (Photo & Video) + Reviews


