
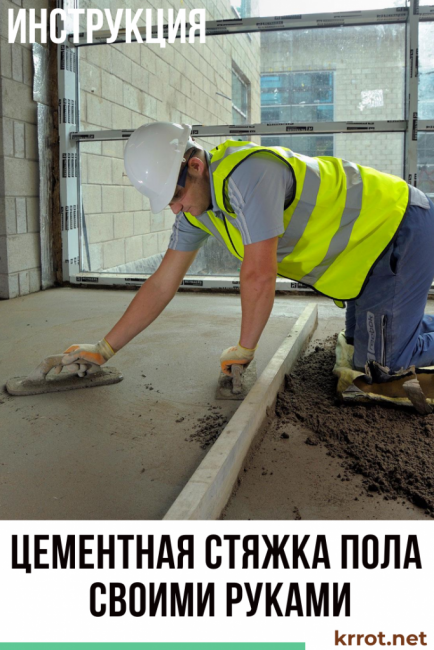
How smooth and durable the floor finish will primarily depend on the quality of the screed. The topic of this step-by-step photo instruction is do-it-yourself floor screed.
Content:
 Read also: How to make a children's house with your own hands: from wood and other materials. Dimensional drawings | (80 Photo Ideas & Videos)
Step number 1 - garbage collection and priming
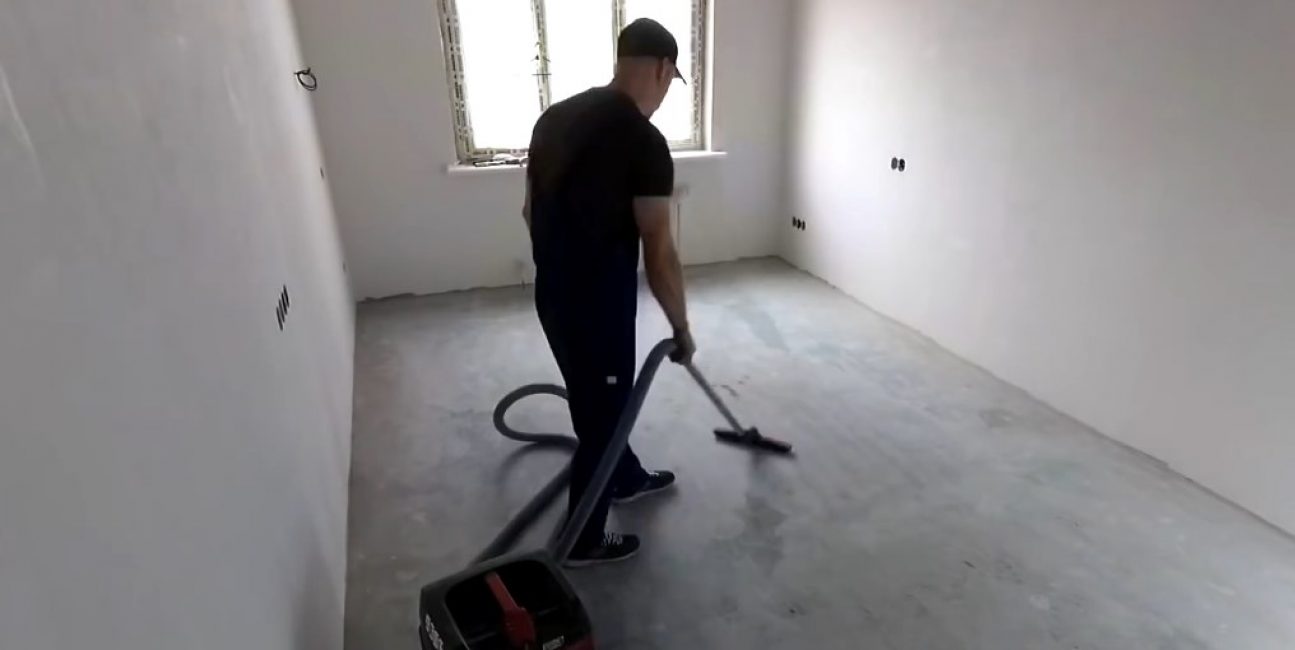
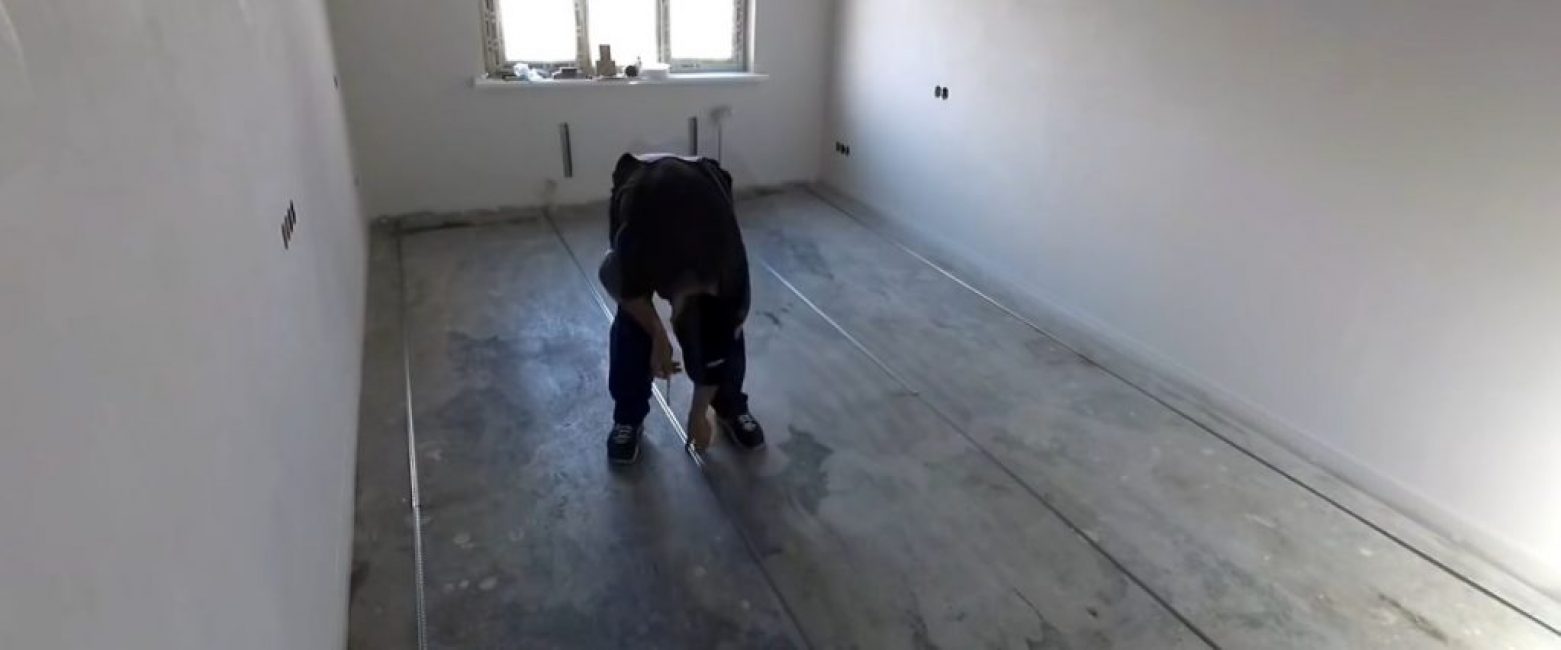
We remove debris and dust from the floor
Before you start pouring the floor screed, you need to prepare the floor surface to be treated. To do this, you need to sweep it or vacuum it.
Many builders ignore this stage, but in vain. After all, the less dust, the better the adhesion between the layers, the more durable the coating will be.

Roller priming
After all construction debris and dust have been removed, we proceed to priming. The primer can be applied with a fly brush, pulverizer or roller.
When working with a roller or flywheel to speed up the process, the primer is poured onto the floor and smeared over the surface.
 Read also: How to make a booth for a dog with your own hands: building a home in the yard and in the apartment. Drawings, dimensions and original ideas (55+ Photos & Videos) + Reviews
 Step #2 - setting the horizon
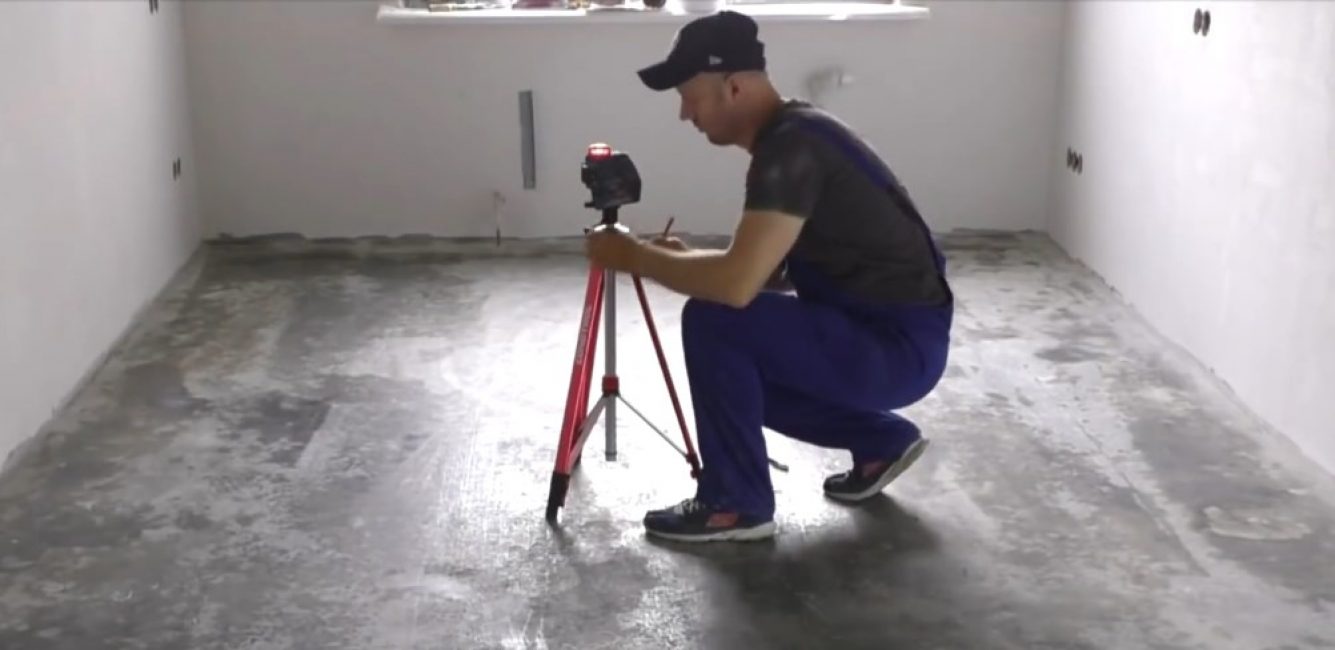
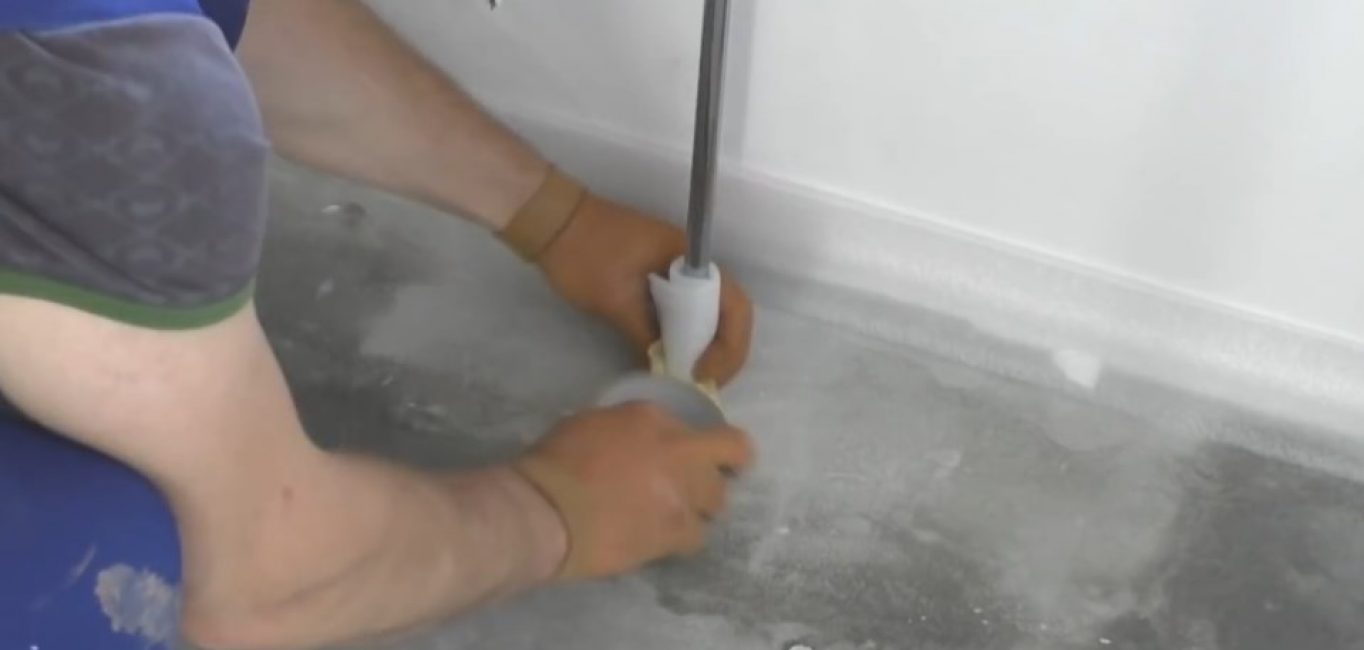
We install the level in the center of the room and calibrate it
Now you need to set the beacons, but first you need to find the top point of the floor. To do this, it is better to use a laser level. If not, then a long bubble level will do.
Although even if the screed is done one-time, you should still purchase a laser tool - today it is not so expensive, and then it will still come in handy on the farm.
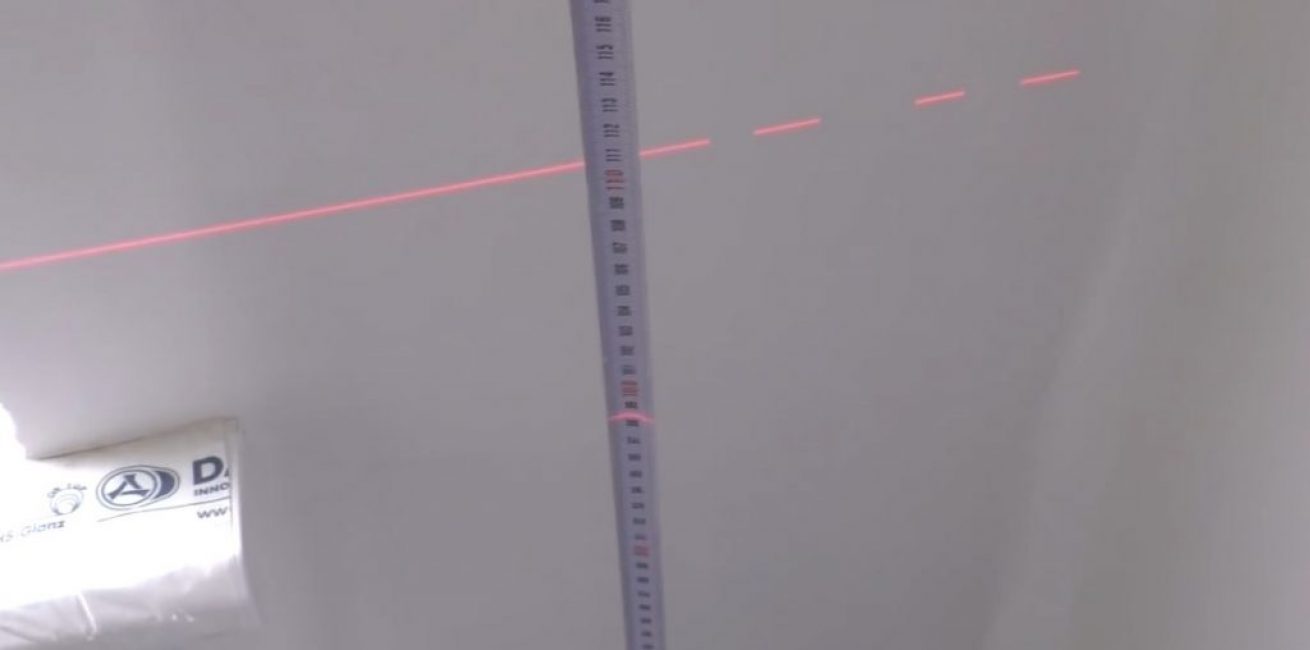
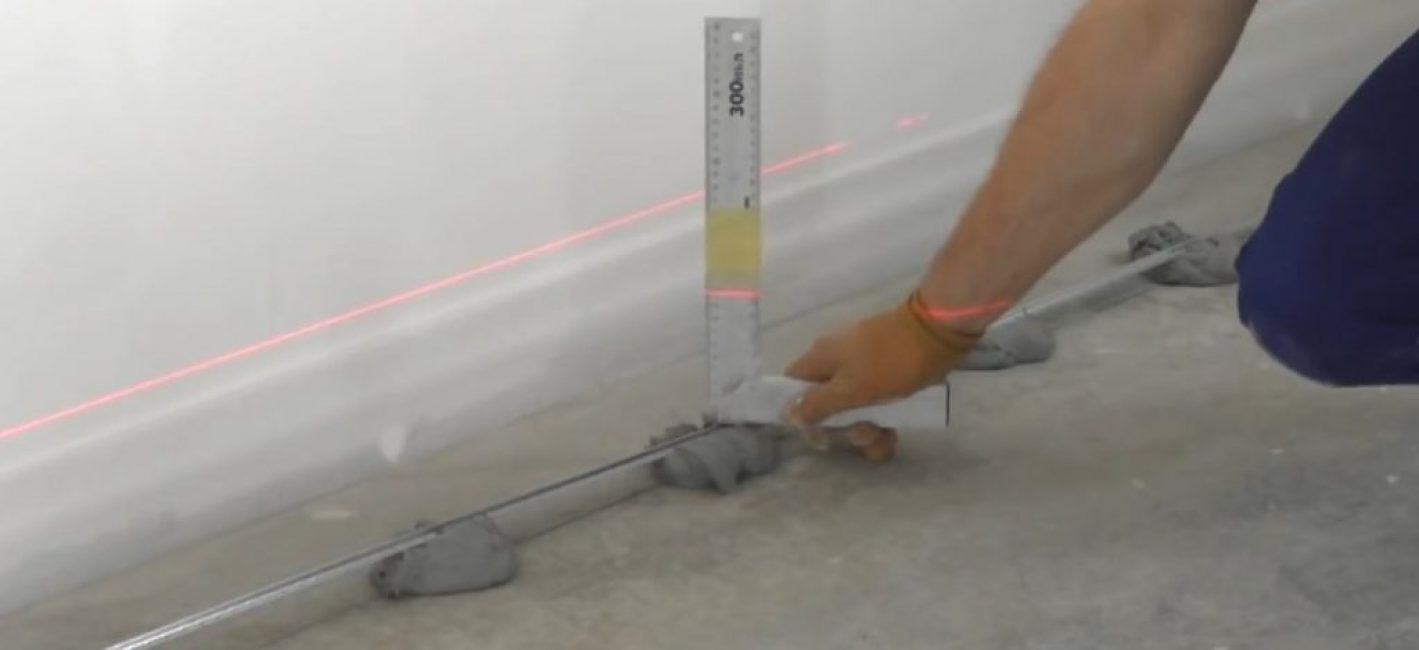
On the roulette wheel you can clearly see the set level
To check the horizon of the floor, you still need a tape measure. The following is done:
- the laser level is placed in the center of the room, set to a convenient height for work (1-1.2 m)
- The tape measure is unwound by 1.5 m, and the beginning of the tape is placed on the floor. Record readings where the laser mark will cross the measuring tape
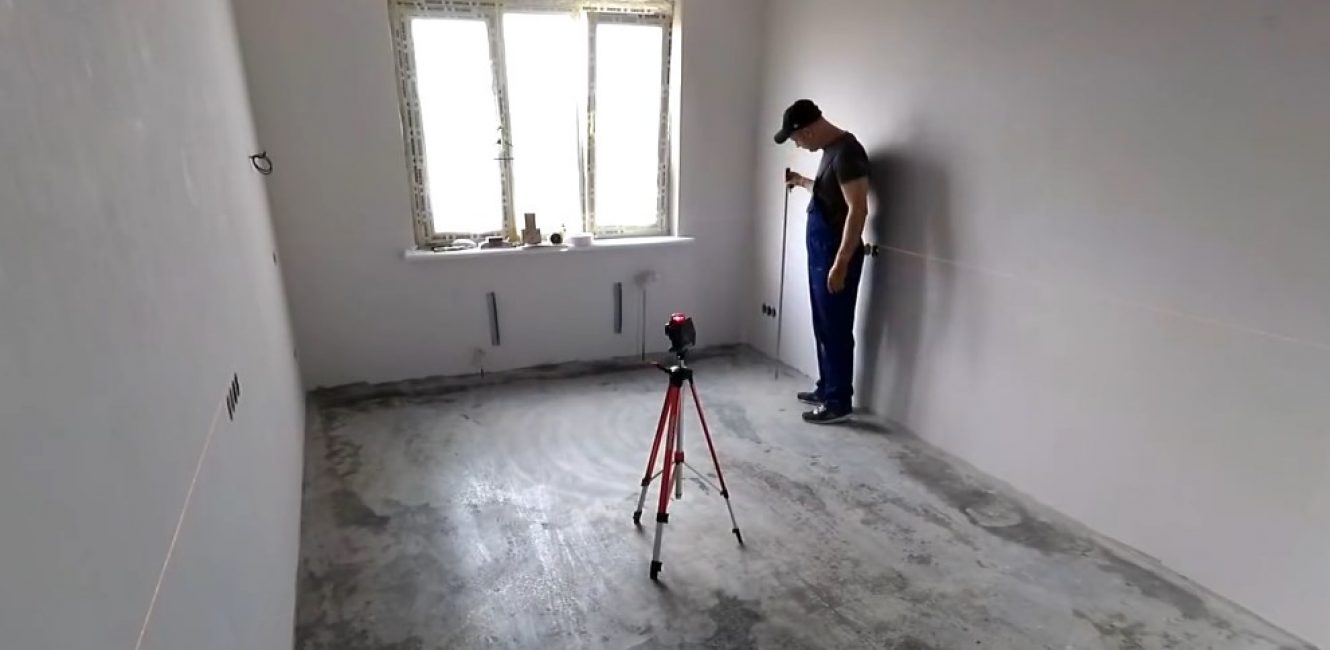
Using a laser and a tape measure, we reveal floor differences along the horizon
In this way, they take readings of the state of the floor horizon - they go around the whole room with a tape measure. Indications may vary - where the dimensions are smaller, there is an elevation on the floor, where there is more - a pit.
This step is needed for analysis, in order to find out if there are large differences, what thickness of the screed will be required.
![[Instructions] Do-it-yourself laminate on a wooden floor: a complete description of the process. Laying schemes, what materials should be used (Photo & Video) + Reviews](https://iherb.bedbugus.biz/wp-content/uploads/2018/05/laminat-300x200.jpg) Read also: [Instructions] Do-it-yourself laminate on a wooden floor: a complete description of the process. Laying schemes, what materials should be used (Photo & Video) + Reviews
Read also: [Instructions] Do-it-yourself laminate on a wooden floor: a complete description of the process. Laying schemes, what materials should be used (Photo & Video) + Reviews
Step number 3 - "coastal" tape
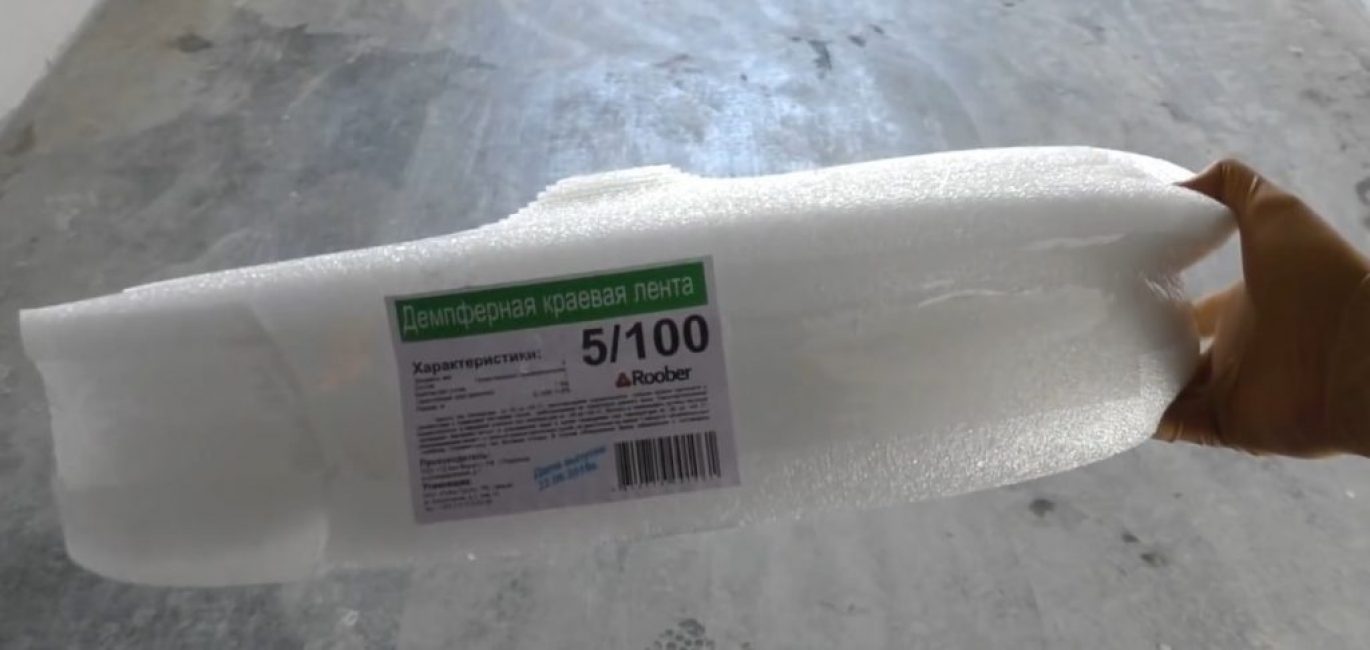
Tape for thin screed
The damper tape is fixed at the base of the room around the entire perimeter. It is needed in order to:
- compensate for line pressure when the screed sets
- increase sound insulation
- do not stain the walls when forming the floor screed
The “coastal” tape is 5 cm wide - for thin screeds, and 10 cm - for full-fledged, thick ones.
We fasten the tape - in our case, the walls are made of concrete slabs, so we will fix it on liquid nails. If the walls are made of GVL, plywood or wood, then it is better to use a construction stapler.
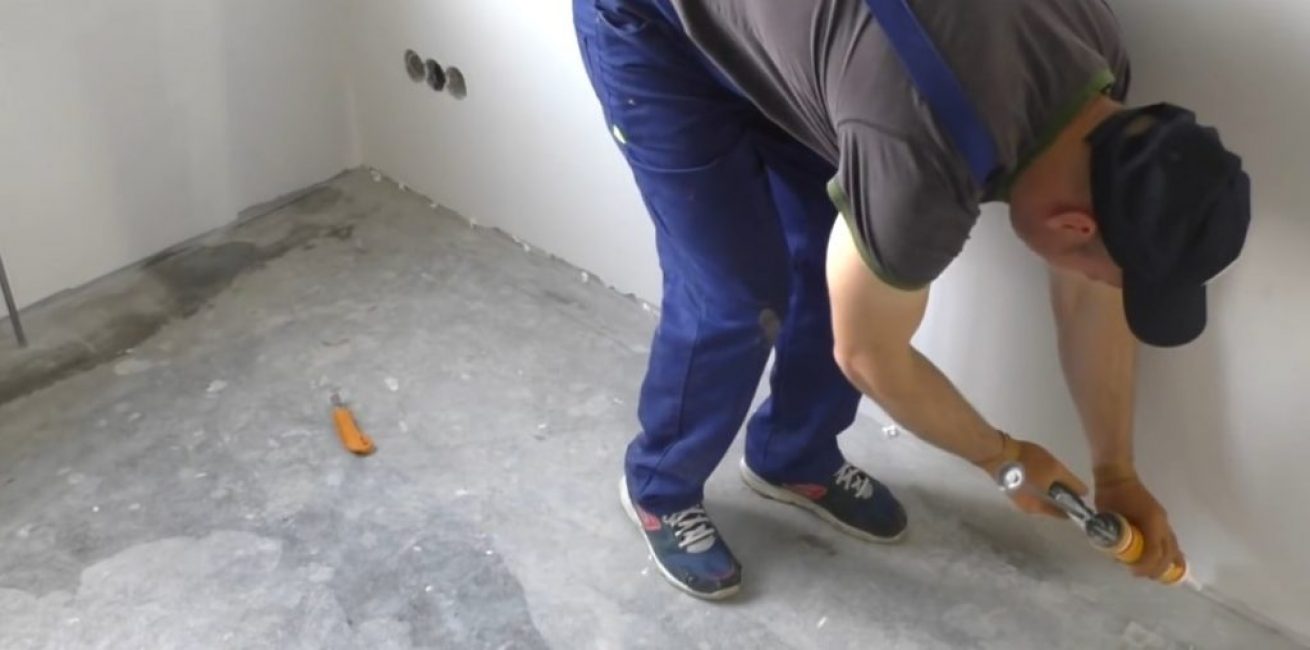
Glue is applied pointwise
We apply liquid nails pointwise, closer to the base of the floor, so as not to stain the walls.
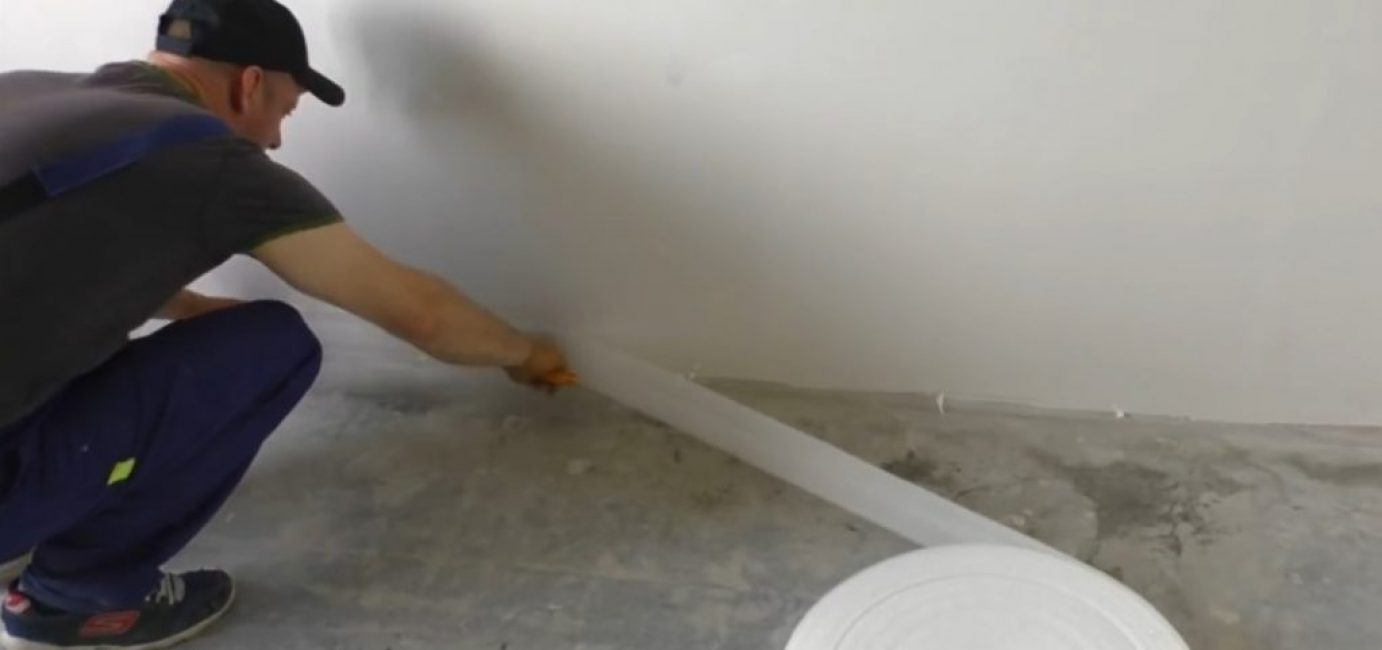
We press the tape to the base of the wall
Apply damper tape to the base of the wall.
Wrap and fix with construction tape
Heating pipes also need to be protected with tape.
 Read also: Do-it-yourself furniture and other wood products: drawings of benches, tables, swings, birdhouses and other household items (85+ Photos & Videos)
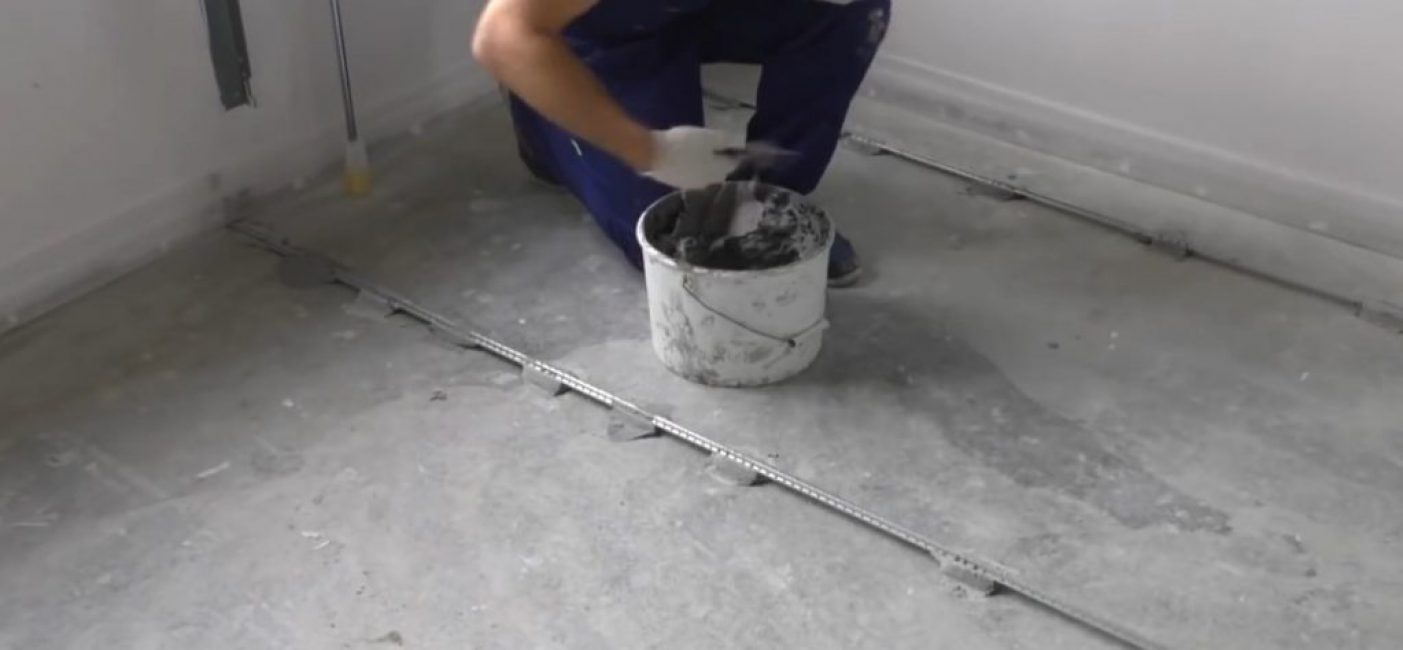
 Step number 4 - set the beacons
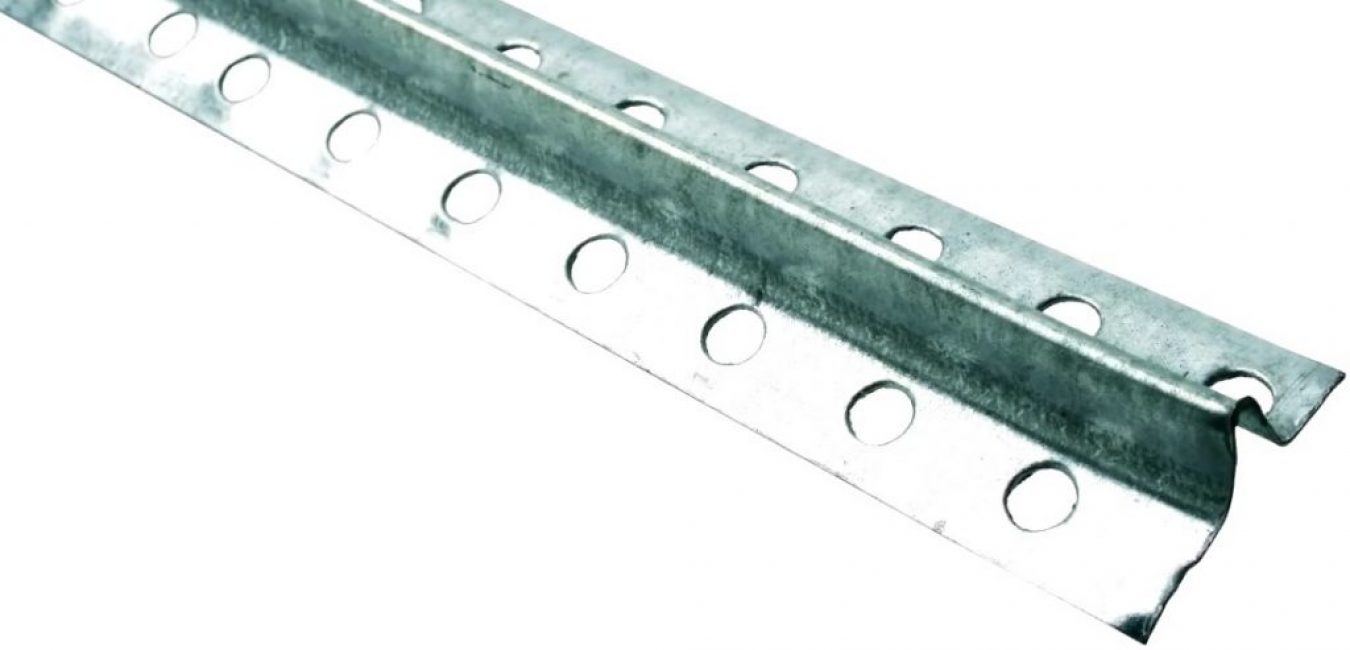
metal lighthouse
For thin screeds, metal beacons 6 mm thick are used. For thick screeds, it is more rational to use beacons of large sizes with increased rigidity.
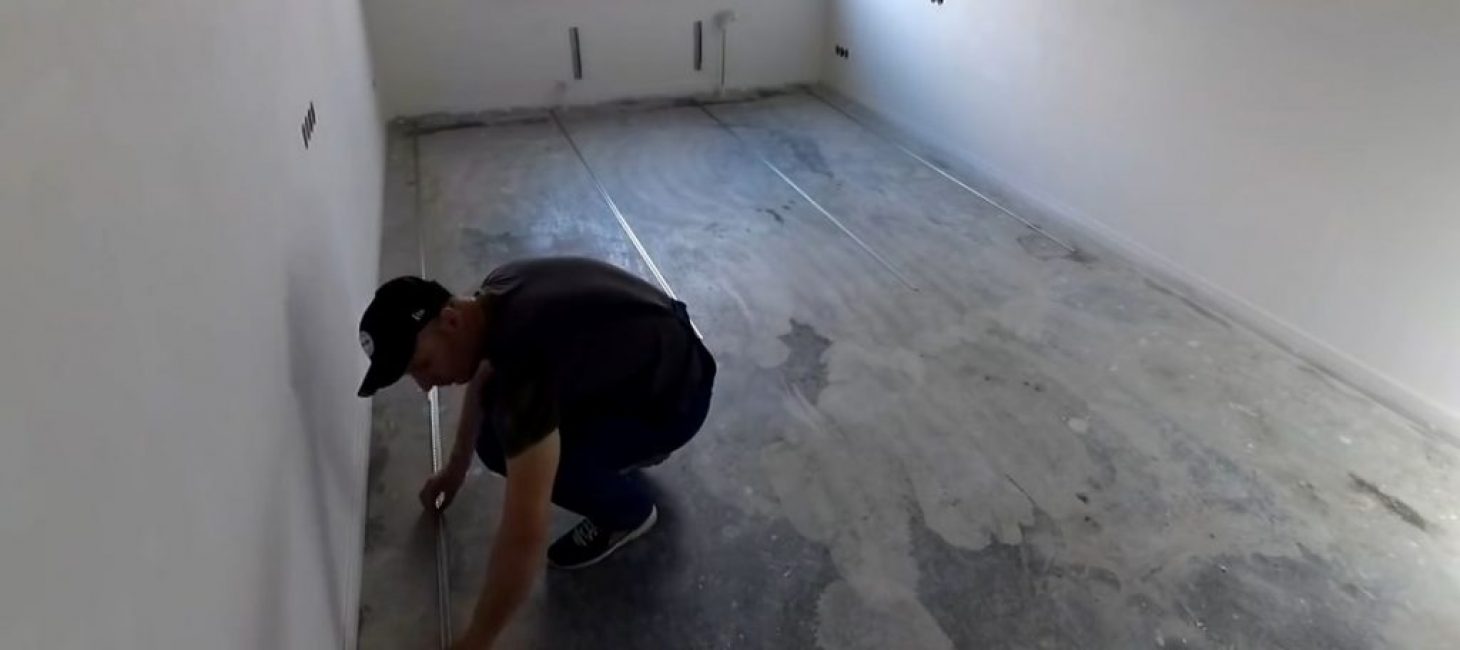
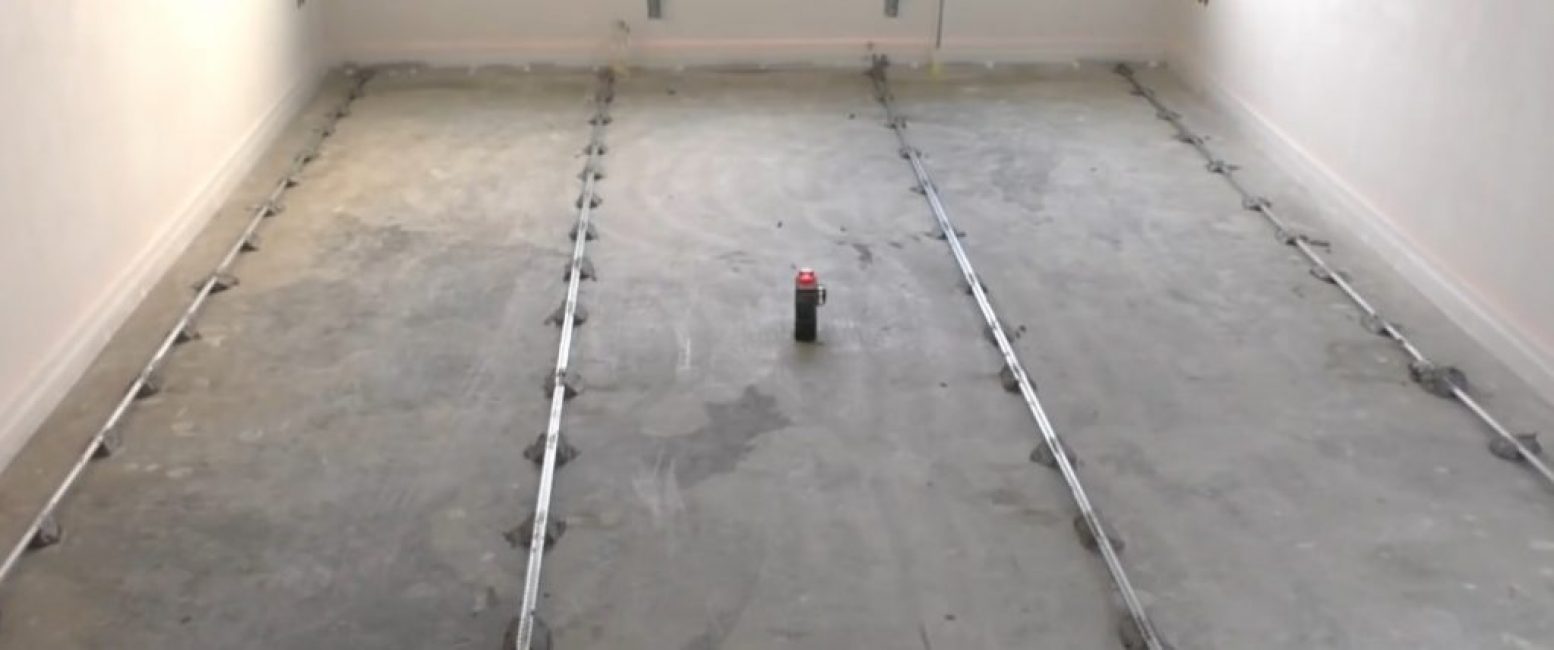
Between the beacons the distance is about 1 meter
Lighthouses are laid out on the floor so that the distance between them is about 1-1.2 meters. It is not recommended to lay out wider, because then the screed may have large sags.
When smoothing the solution, the rule may sag, and it is more difficult to align wide stripes.

Two lighthouses sawed together
If the beacons need to be built up, then they are cut in length and in place. They are combined, i.e. impose on each other and saw through them with a grinder - an even connection is obtained.
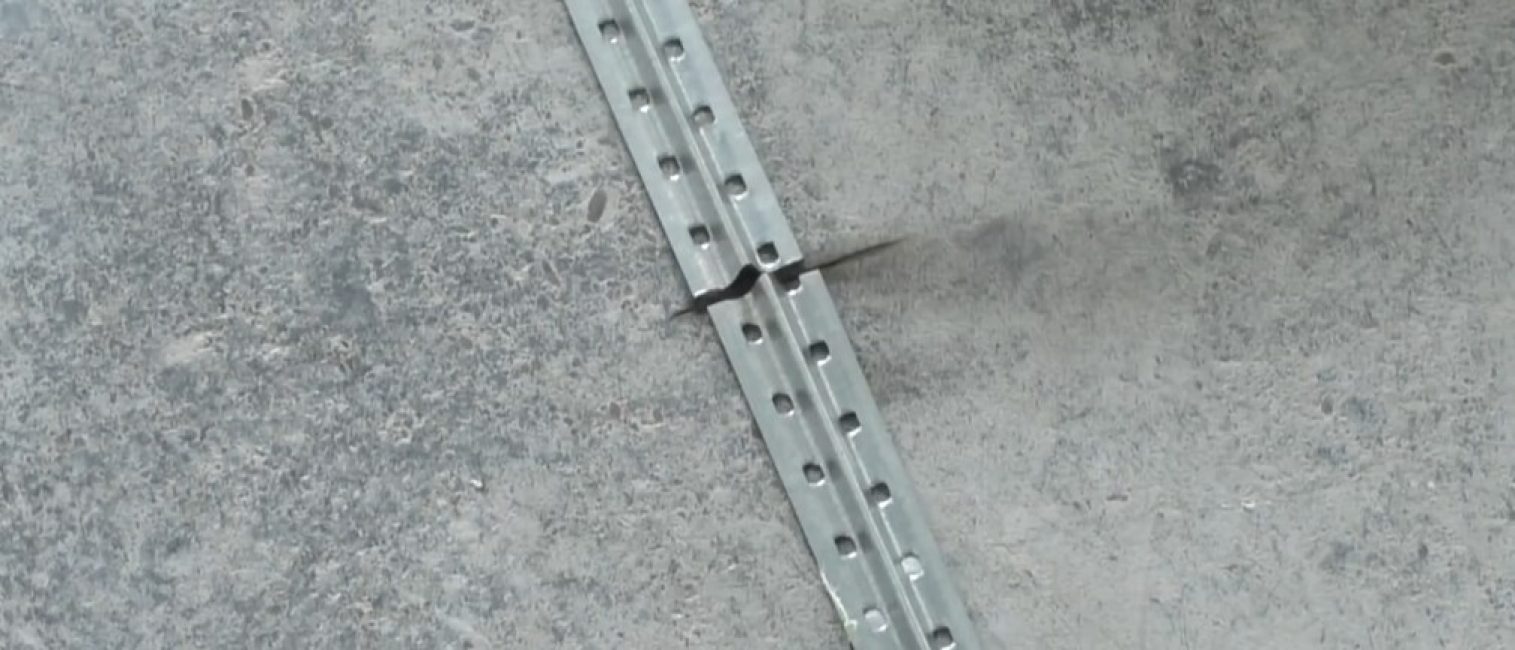
Makes a neat connection
When the guides are laid out and filed, they are drawn on one side with a pencil. This line will help to mount them to the floor.
On the one hand, each lighthouse is drawn with a simple pencil
In our case, the lighthouses will be exposed to plaster. In some other situations, it is more rational to use a cement-sand mixture or special fasteners.
"Frogs" for fixing the beacon
According to the markings made earlier, a gypsum mixture is pointwise applied at a distance of 30-40 cm.
You can wind a tape on the square, make a control mark of the level - it greatly facilitates the work
The lighthouse profile is placed back on “. Set up a laser level. They put a square to the lighthouse from above, and press the lighthouse into the plaster according to the drop.
Gypsum mix rises quickly
If the profile is thin and not rigid enough (flexes under pressure from above), the number of plaster supports must be added.
Need to grease the beacons
 Read also: We make vertical beds with our own hands: the best ideas of 2018. For vegetables, berries, herbs and flowers (65+ Photos & Videos) + Reviews
Step number 5 - choose the composition of the mixture and the tool
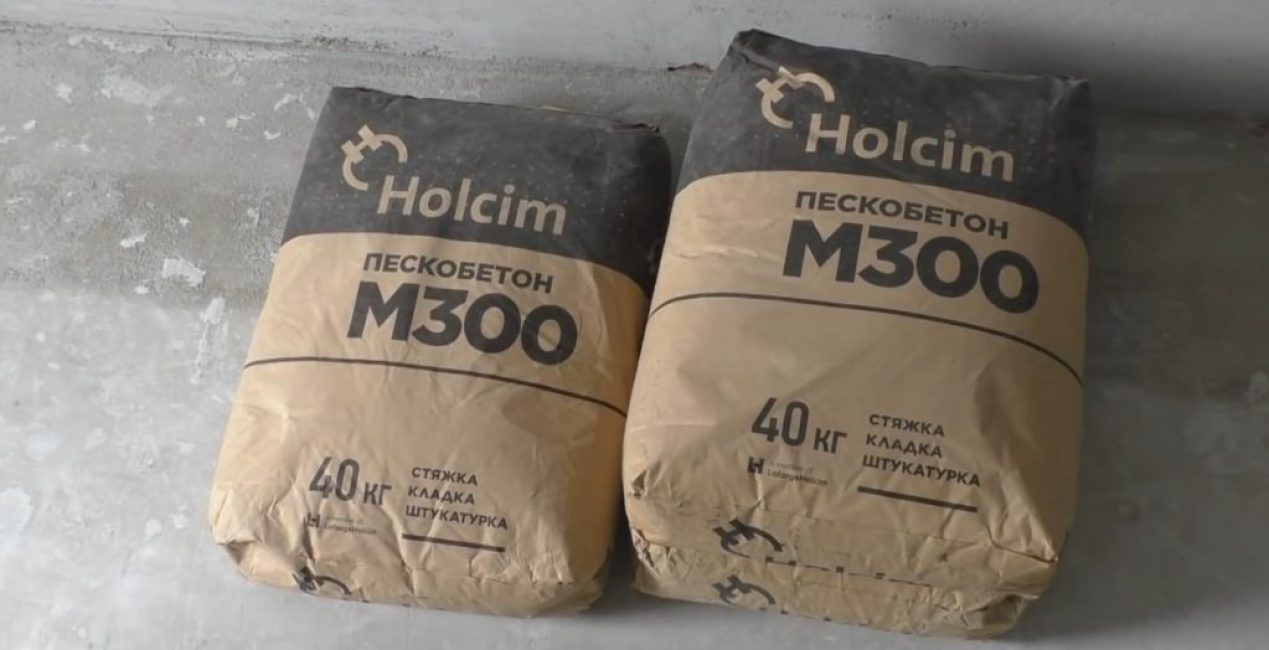
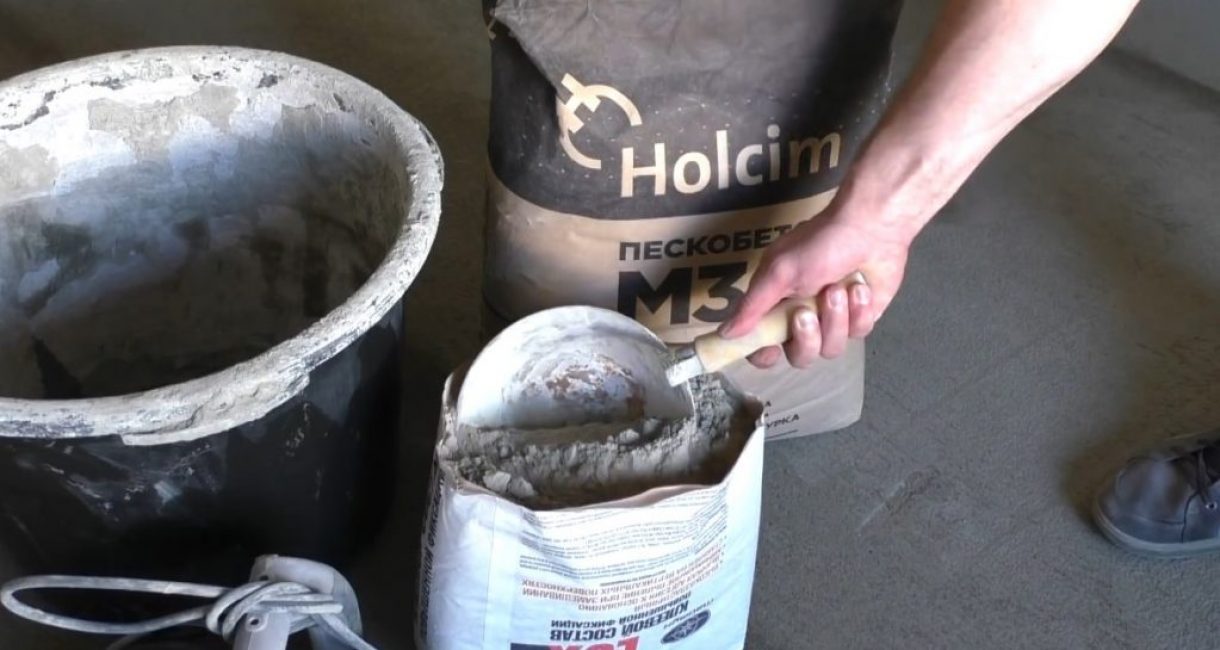
Convenient packaging, reasonable price and quality
Many, in order to save money, prefer to make cement-sand mixtures for screeds on their own, guided by frugality. This sometimes really helps to save money, but for small volumes it does not work.
Transportation, storage space, cooking - not economically feasible for small spaces. As a result, it turns out that it is better to choose ready-made dry mixes.
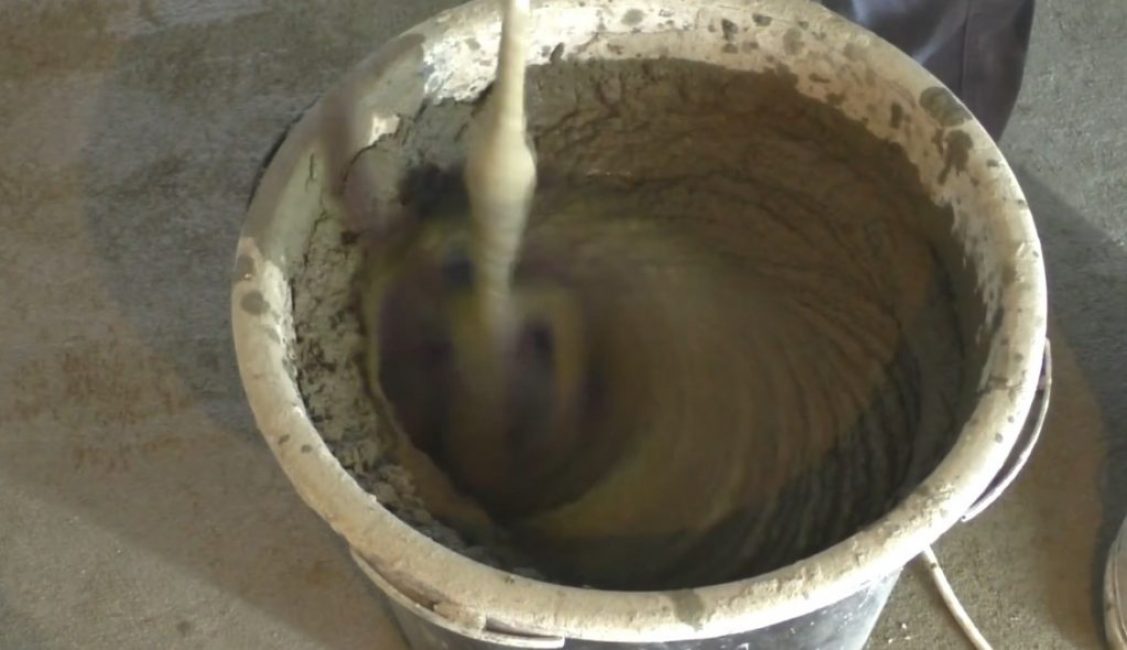
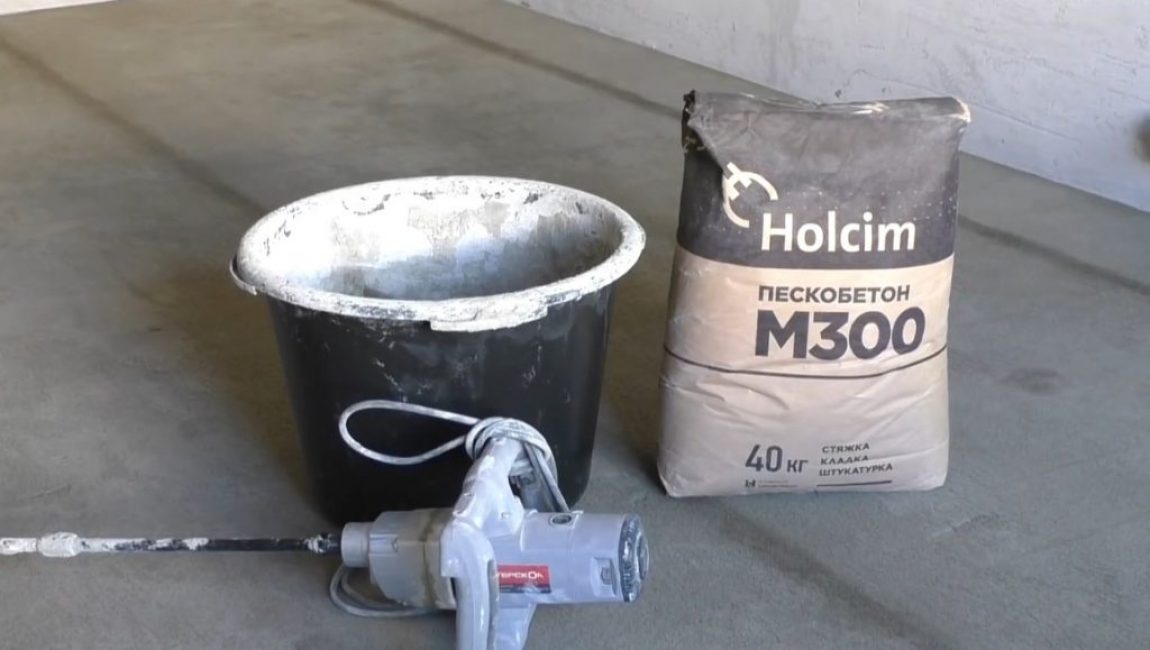
Mixing one bag of “Pescocrete” is easy
Whatever is chosen, a tool is needed to dilute the dry mixture. If there is a concrete mixer, it is suitable for both large volumes and small ones. A special mixer is convenient for preparing mixtures, especially for small areas.
But you can’t use an electric drill and a hammer drill here - they don’t have enough power, they will burn out.
Water, sand concrete - the composition of the mixture for thick screeds
Speaking of it should be noted that it is suitable for the formation of screeds with a thickness of 2 cm.
For a thin layer, you need to add 20% glue
If the screed is thinner than 2 cm, then it is better to supplement the mixture with tile adhesive: 1 part glue, 5 parts sand concrete.
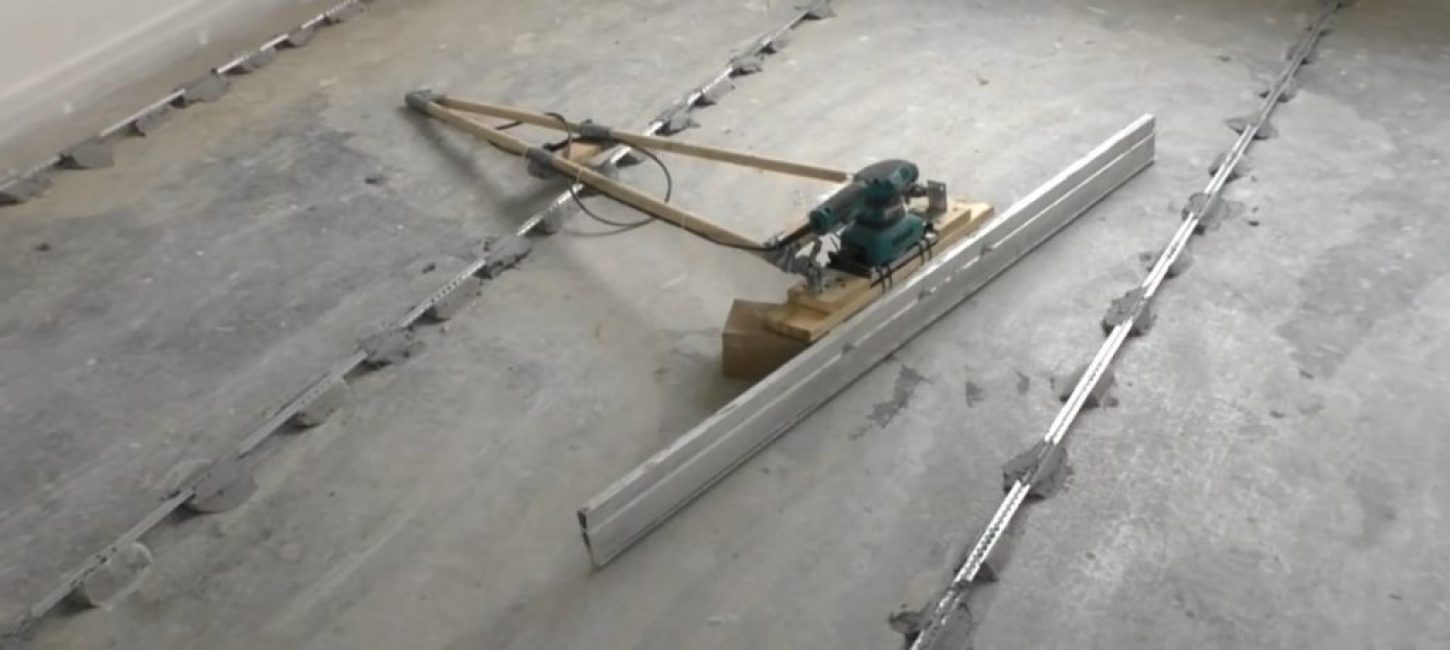
With a vibrating screed, work will be easier, faster and better
To form a screed, a rule is required. To make the work go faster and easier, you can make a simple adaptation - a vidrorail. It is made from a rule, a manual grinder, two cuttings, a pair of short boards, loops and self-tapping screws.
 Read also: Self-leveling floor: device, recommendations and step-by-step instructions on how to do it yourself (50 Photos & Videos) + Reviews
 Step number 6 - make a screed
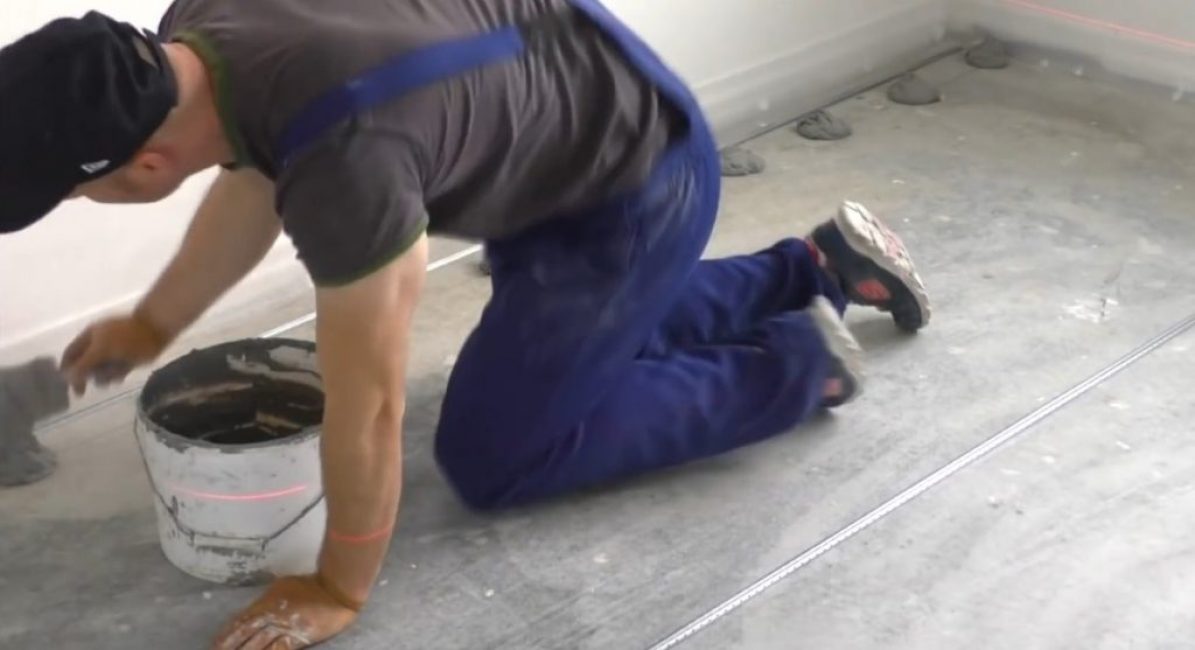
Applying tile adhesive with a roller
The screed mixture is poured onto the primed floor. If the layer will be formed with a thickness of no more than 2 cm, then it is better to prime the floor with diluted tile adhesive. Apply it with a roller, do not wait for solidification.
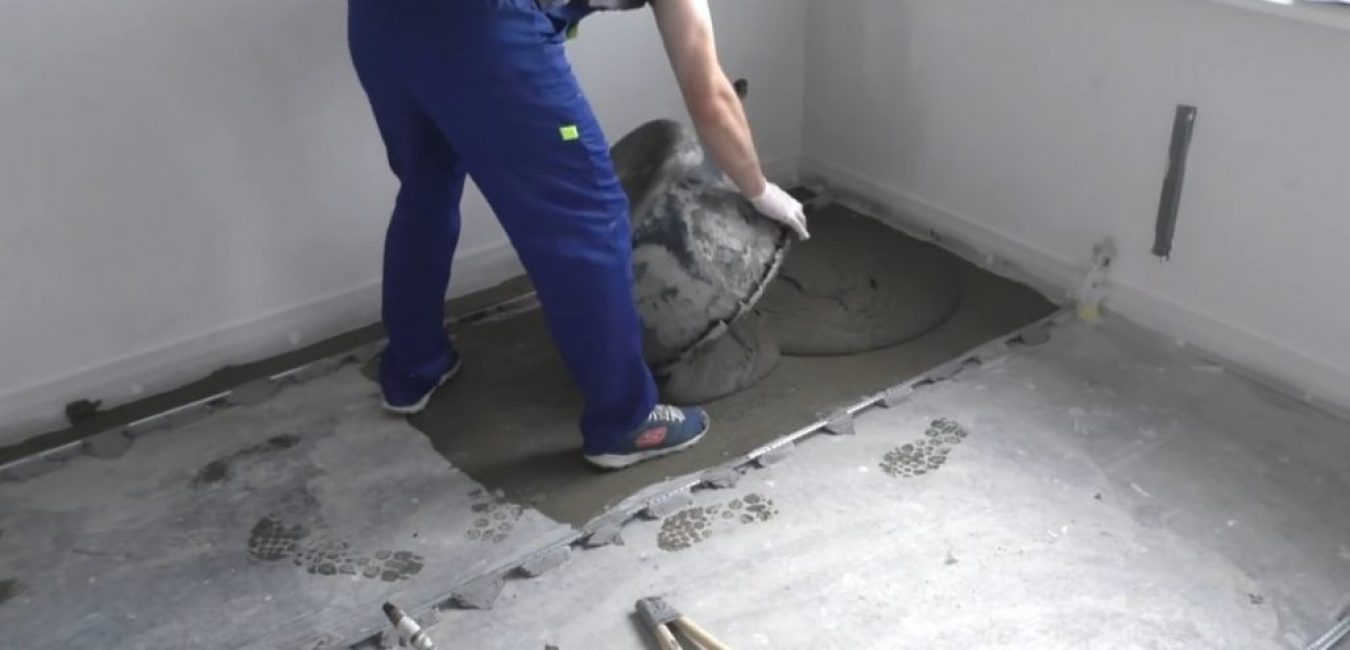
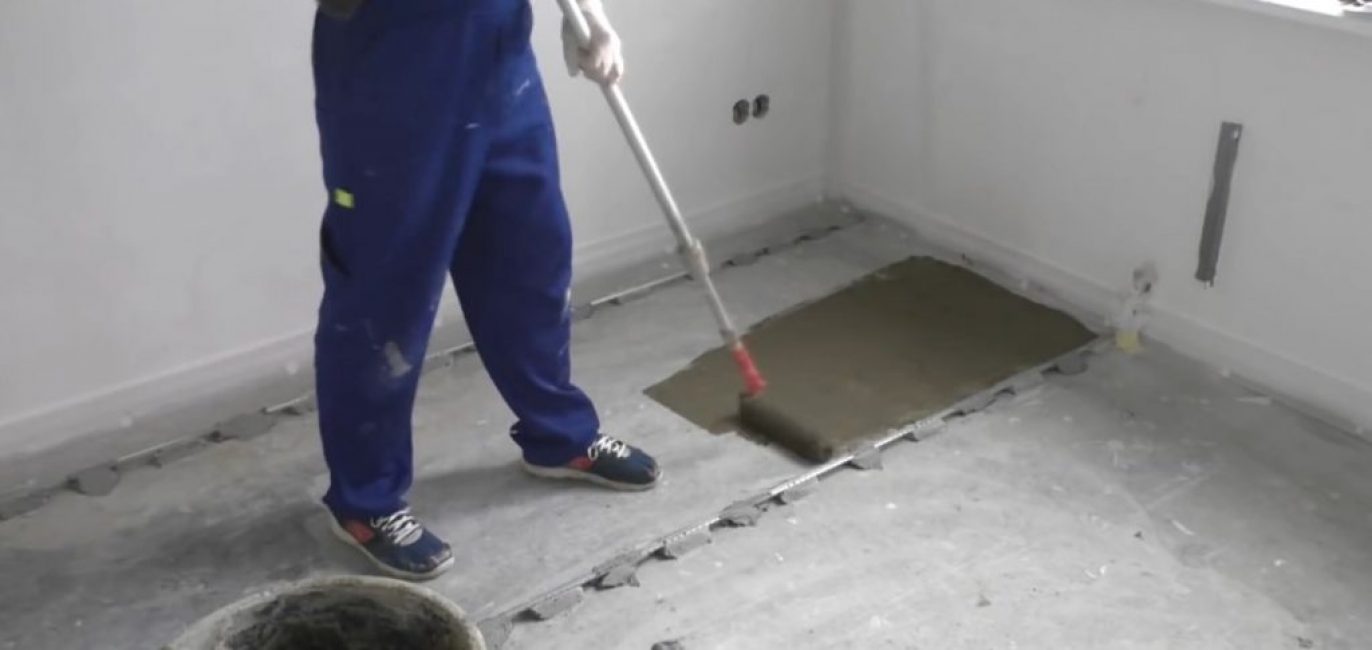
Make small sections so as not to get dirty
The cement-sand mixture is poured into a small area between two lighthouses immediately after applying the adhesive primer.
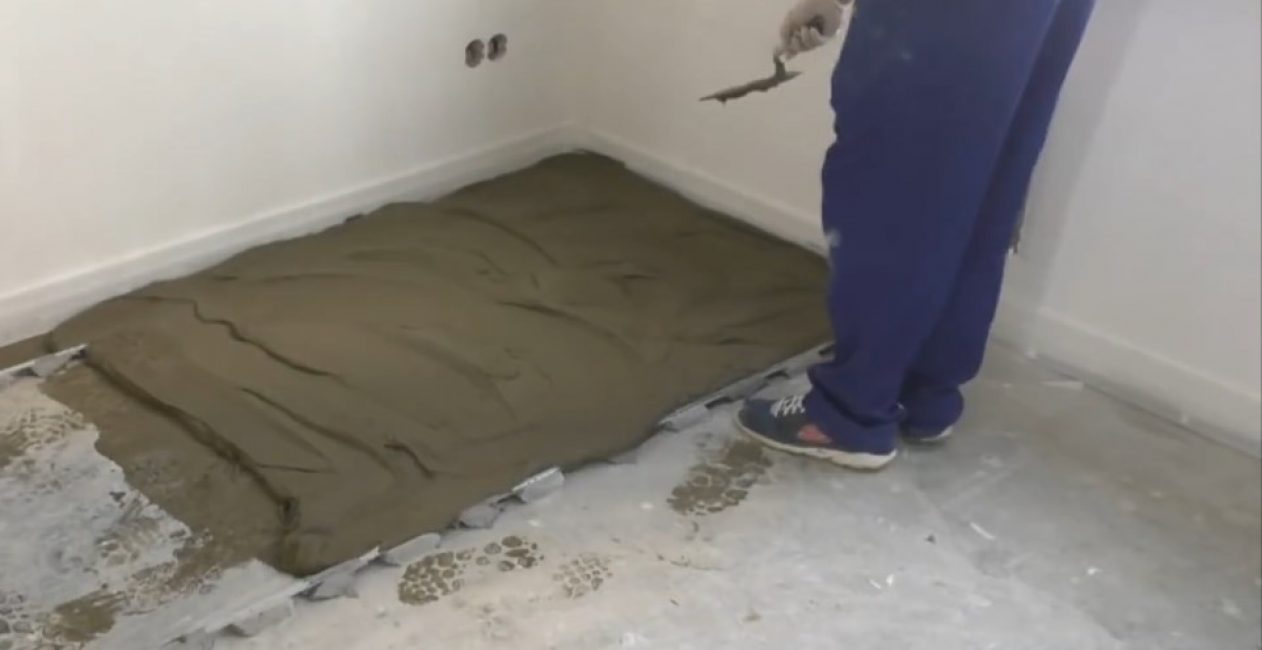
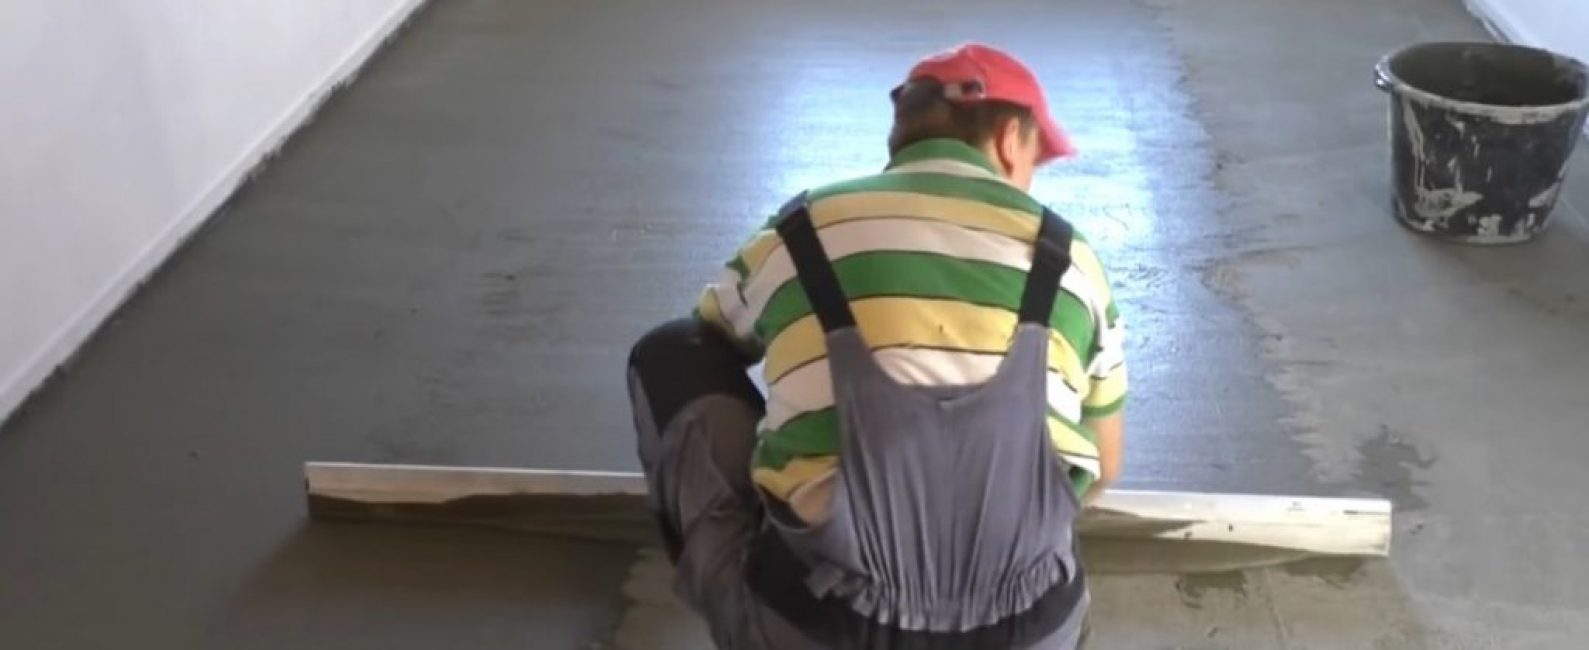
Smooth out the mixture with a trowel
Level with a construction trowel approximately level.
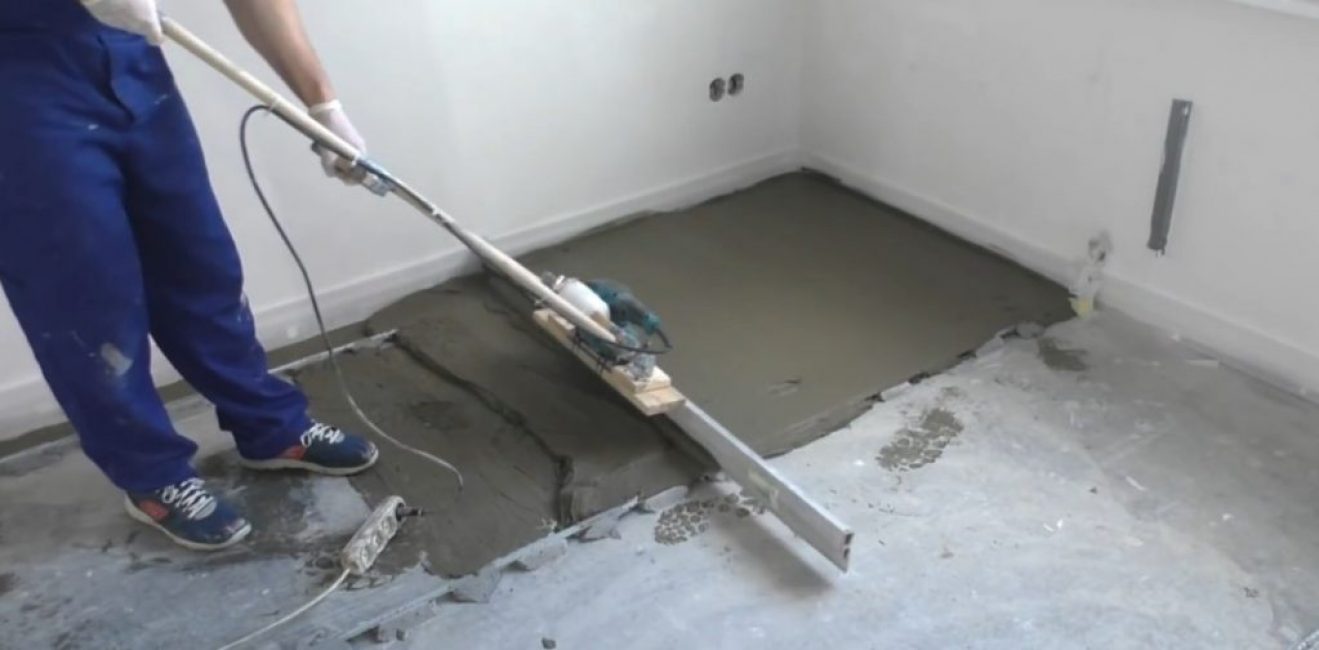
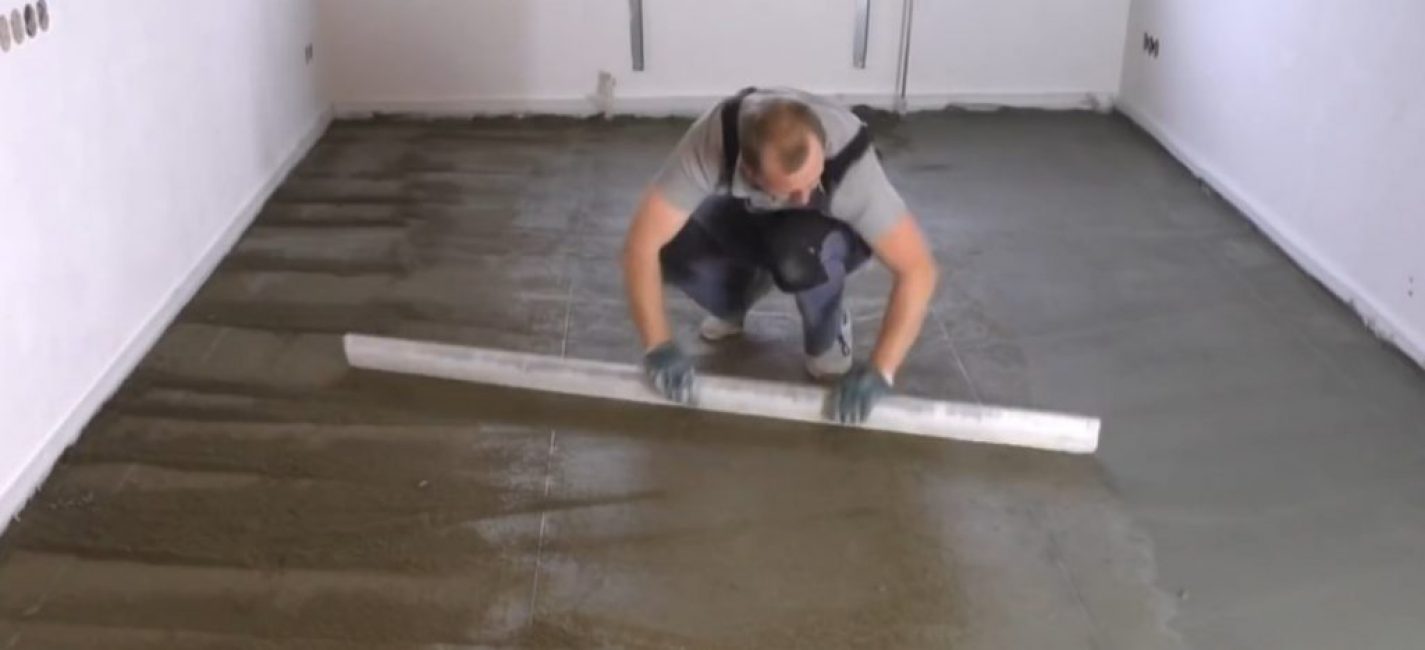
Fast, high quality and do not get tired
They pass the site with a vibrating rail or a rule. If done in manual mode, then the rule is moved from side to side by 10 cm, gradually moving it towards you. The vibrorail only needs to be slowly led towards you.
small plots
Moving in small sections, a 3x5 m room can be made alone in a couple of hours.
Not zero, but about
It is not necessary to bring the screed to zero at this stage. She will still shrink.
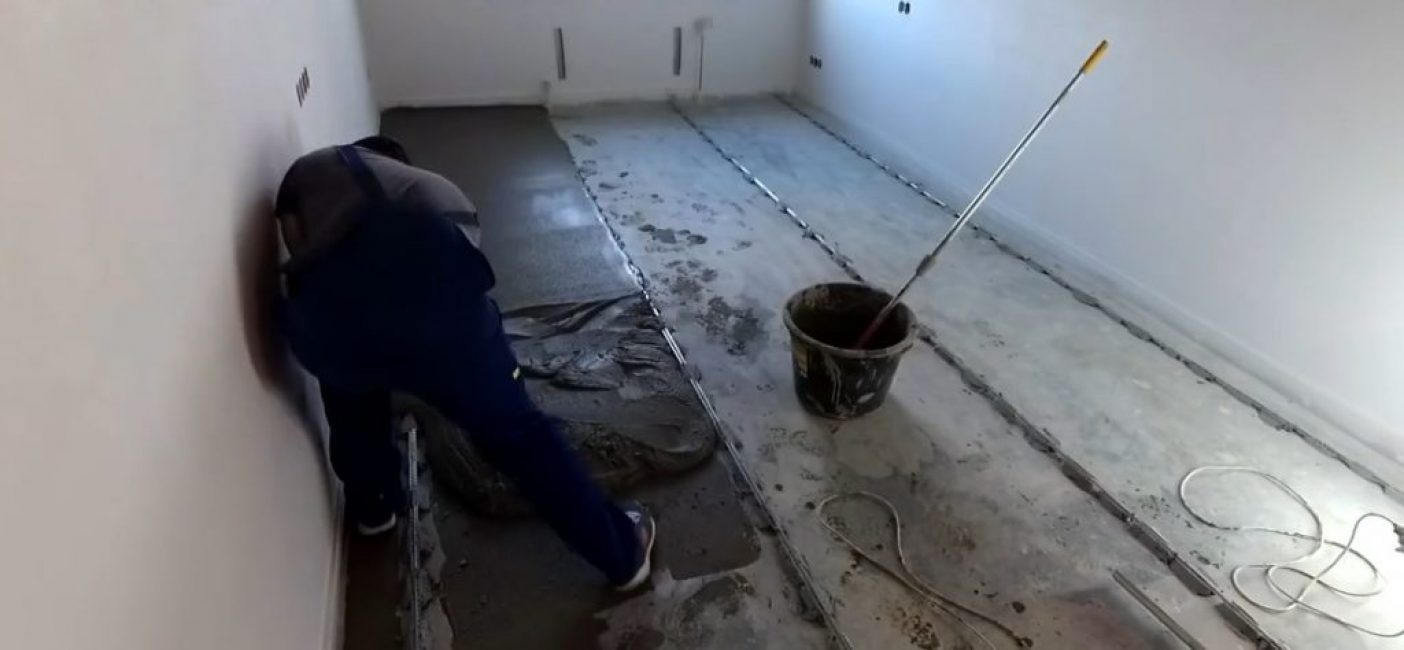
We knock down defects with the rule
The next day, you need to use the rule to knock down all defects from the screed. You can already walk on it, but it is still soft and can be processed. If you wait another day, then you will not be able to process it. You can't miss this moment.

Vacuum cleaner
This work is not finished. You need to bring the floor to zero, but for this you need to sweep.
Usually, after hardening, the screed shrinks. This is clearly seen if we apply the rule to beacons. This needs to be corrected.
Inevitable shrinkage
However, if the tile is laid out further, then this quality is quite enough.
 Read also: Building a garage with your own hands: details about each of the stages. Description, step-by-step instructions, drawings of the roof, inspection pit, interior arrangement (75 Photos & Videos) + Reviews
 Step number 7 - floor to zero
for linoleum, laminate etc. screed with defects is not needed.
Rule and tile adhesive
It does not take much time to bring it to zero, because the layer must be applied very thin. Use tile adhesive as a finishing layer. Pass at one time as a rule.
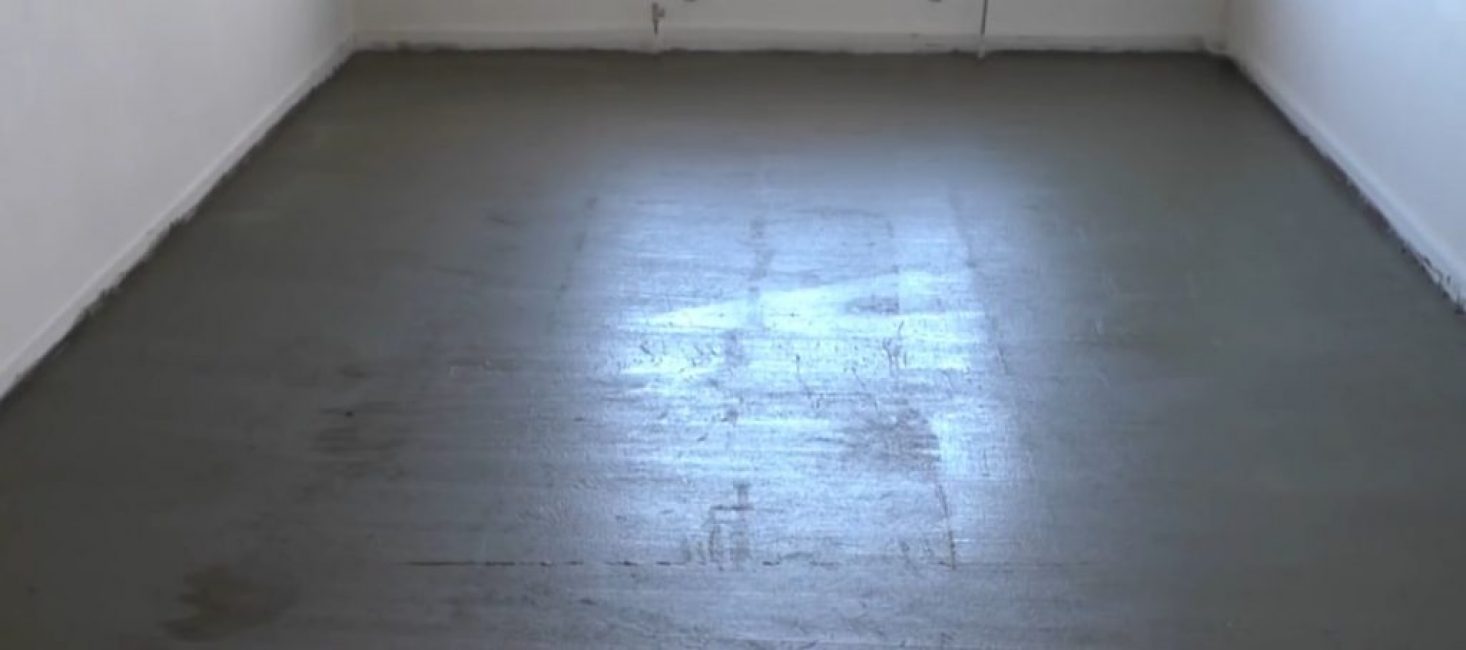
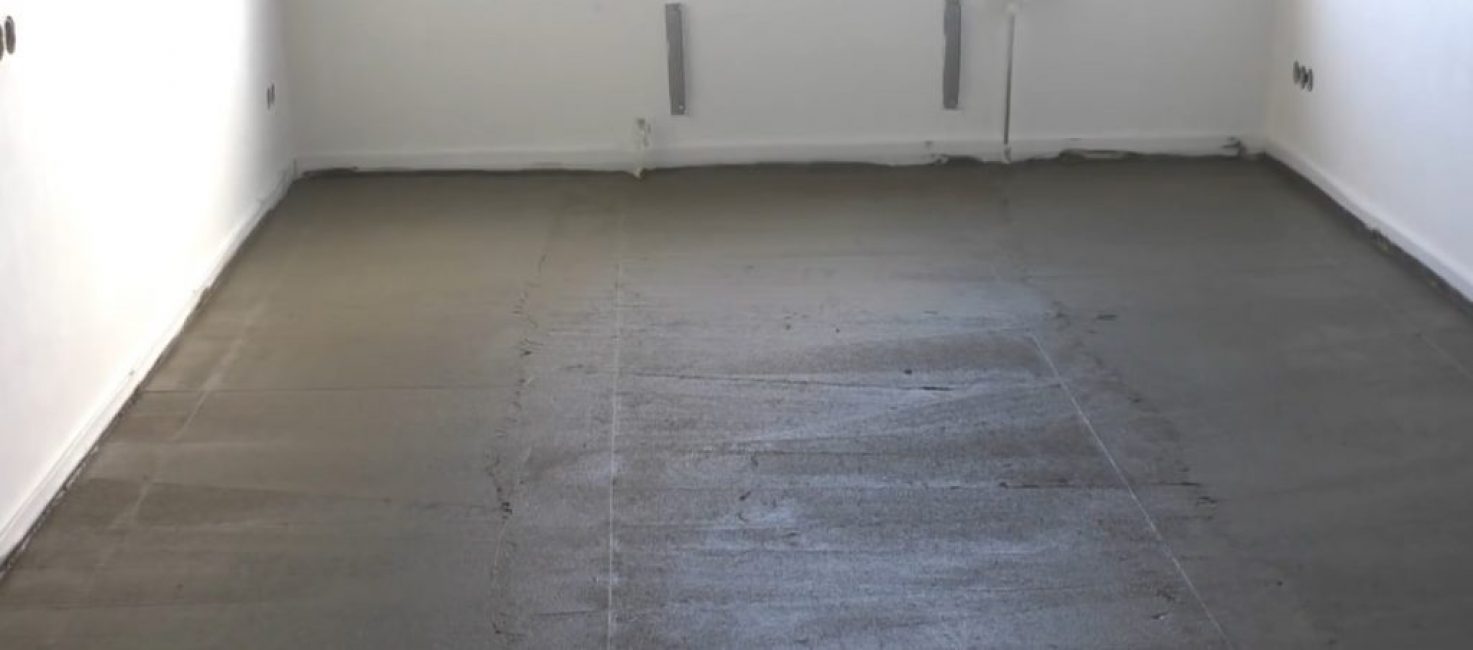
Good result
A high-quality screed is ready.
VIDEO: Screed from A to Z. Flat floor. Subtleties of work. All stages

Screed from A to Z. Smooth floor. Subtleties of work. All stages
Do-it-yourself cement floor screed: instructions for dummies


