

Bulgarian along with a drill has long been included in the arsenal of any home master. But even experienced craftsmen have a problem how to cut a sheet of metal evenly or cut a workpiece at the right angle. We will tell you how to make a cutting machine from a grinder with your own hands. It will make your work much easier.
Content:
 Read also: Do-it-yourself furniture and other wood products: drawings of benches, tables, swings, birdhouses and other household items (85+ Photos & Videos)
Materials for manufacturing
In order to make a machine from a grinder, you will need:
- two old car shock absorbers;
- two closed bearings and a piece of pipe, with an inner diameter slightly larger than the bearings;
- metal pipe for the clamping handle;
- metal corners of different sizes;
- metal brush;
- vise;
- welding machine;
- Bulgarian;
- drill;
- marker;
- construction hairpin;
- bolts, nuts and washers;
- magnetic square;
- furniture gas lift (a device with a shock absorber used in cabinets with horizontal opening);
- protractor.
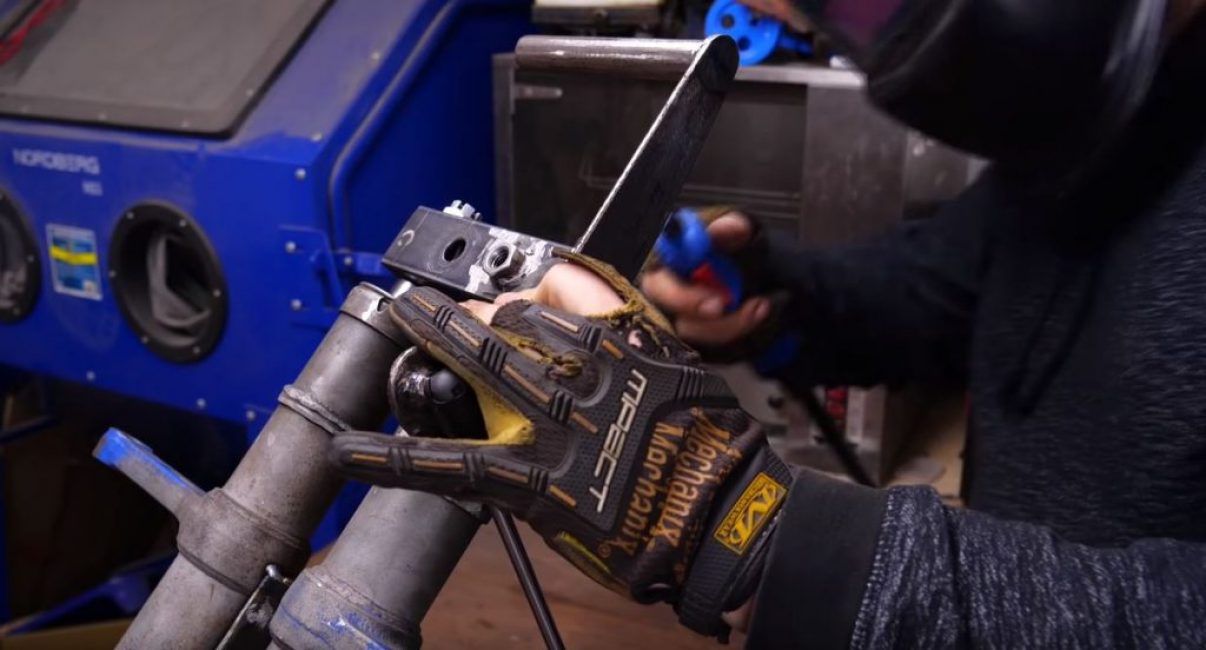
Step 1. Making a swivel mechanism with a bracket
Using a metal brush, we clean the shock absorbers from dirt.
We cut the metal pipe along, slightly part it and insert bearings from both sides.
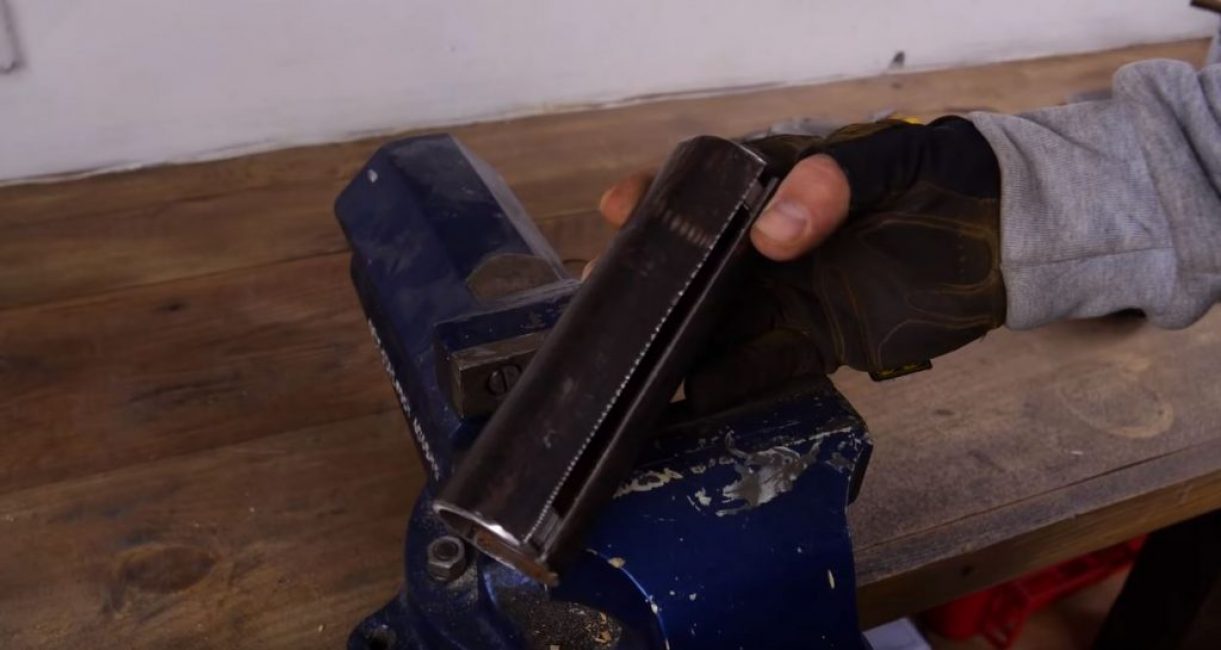
We clamp the pipe in a vice and weld the cut line.
We weld a U-shaped channel from large metal corners. At one end, with a grinder, we make recesses for a pipe with bearings and weld it.
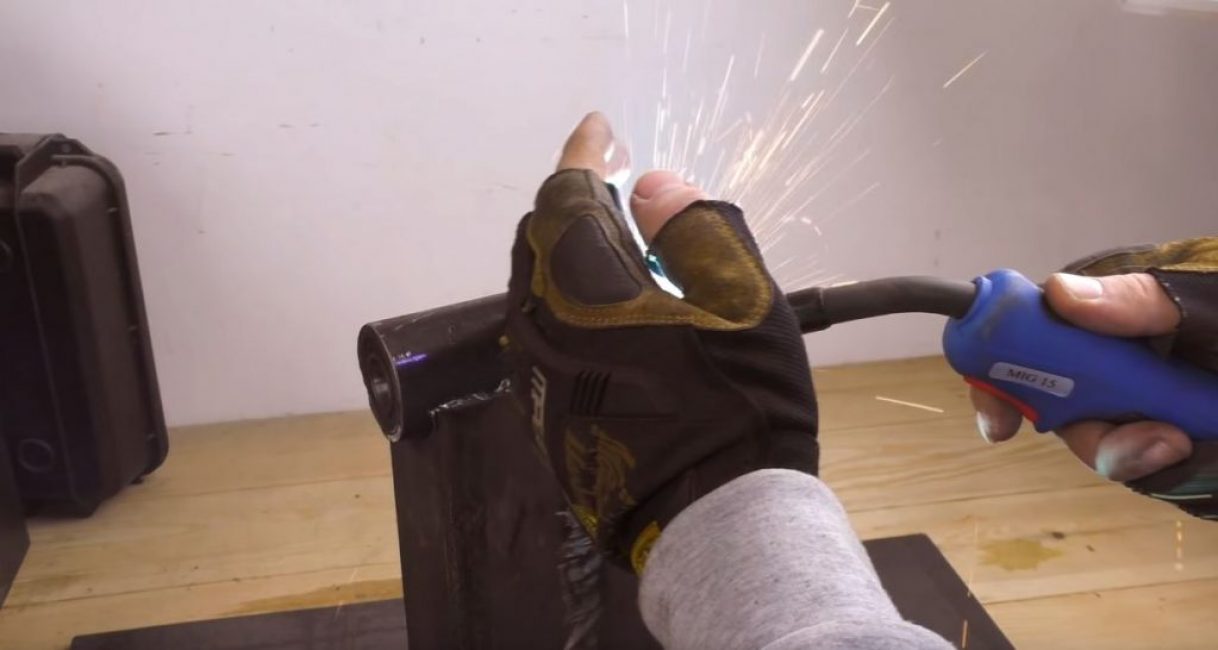
We weld two smaller corners vertically to the other end of the channel.
We insert shock absorbers into them and weld them.
To create a symmetrical bracket, spot weld two corners.
Drill a hole in the center for the axle. With a marker we outline the shape of the bracket and cut it with a grinder.
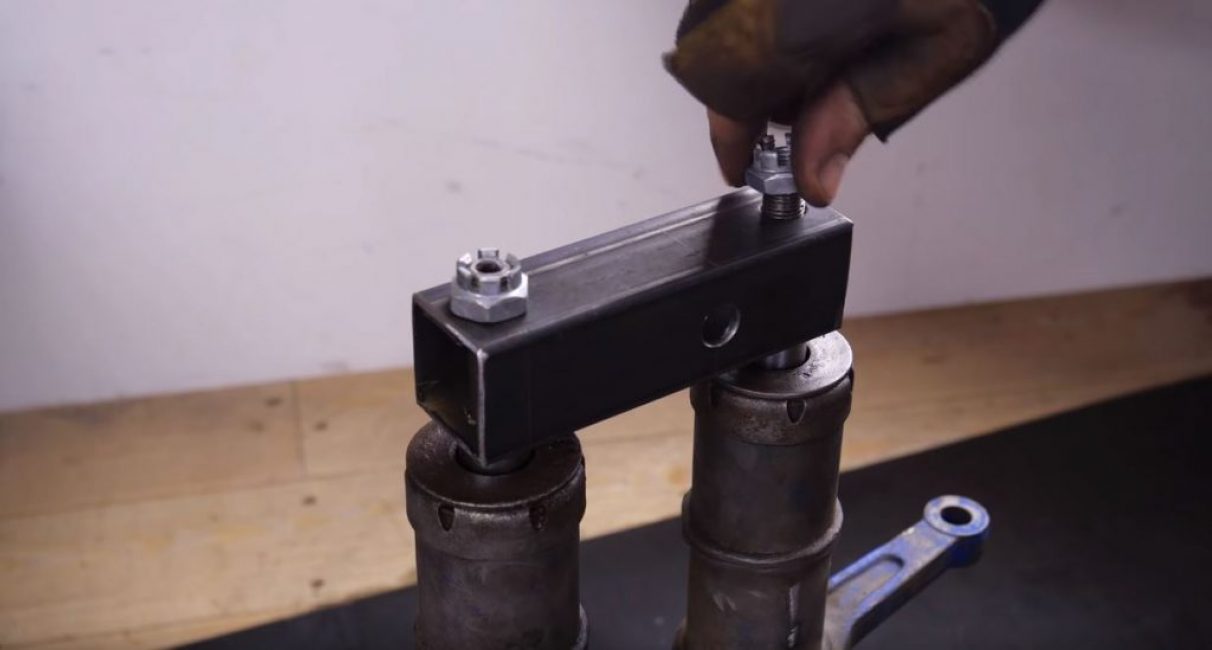
From the construction stud we cut off a piece for the future axis. We put a nut on one end of it and insert it sequentially into one corner of the bracket + washer, then into the pipe with bearings + washer and, finally, we put on the second corner of the bracket. We tighten everything with a nut.
We weld the even ends of the corners together.
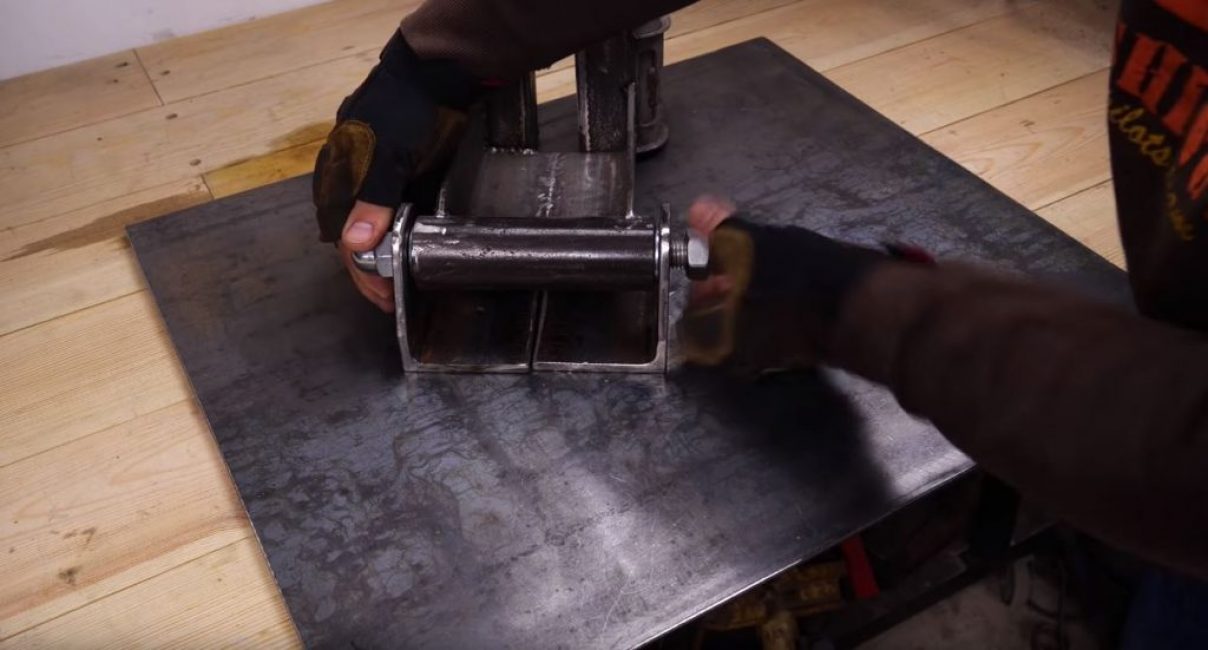
We connect the shock absorber rods to each other with a piece of a profile pipe, with holes drilled under them, and tighten them with nuts.
Step 2. Making the frame of the machine
From the profile pipe we cut off two long pieces and two shorter ones.
We weld a rectangular frame out of them. We grind all the irregularities.
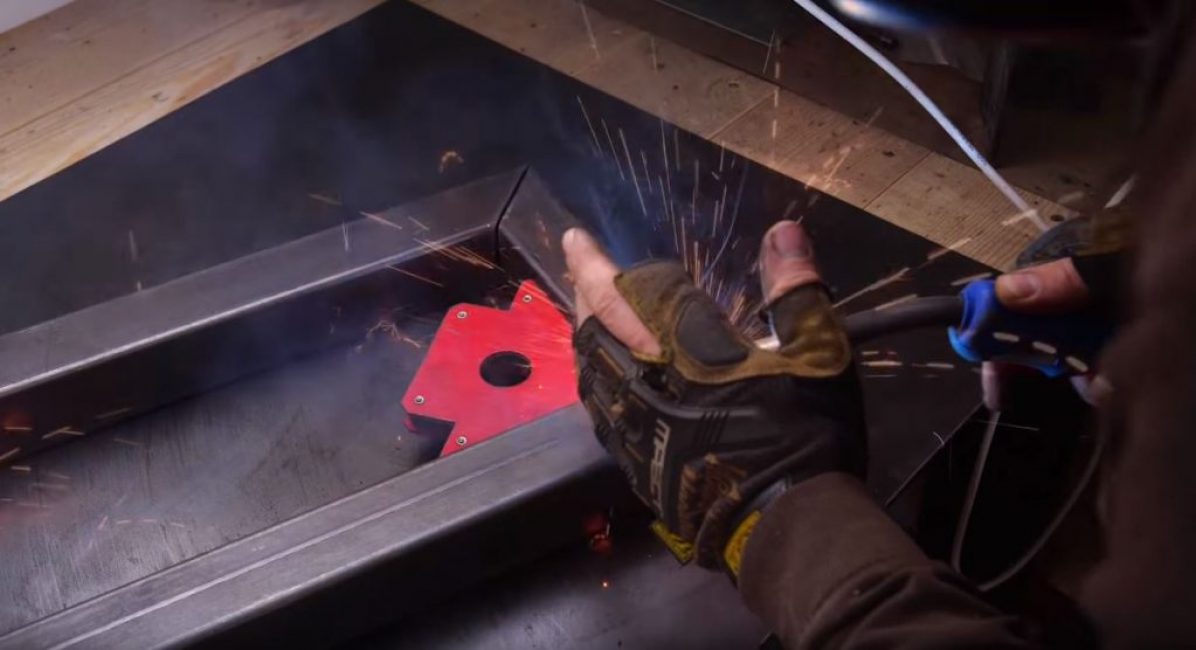
Inside the smaller side, we weld a piece of a profile pipe for attaching the rotary mechanism.
We remove the bracket obtained in step 1, outline and drill the places of its attachment to the frame.
We install the bracket in place and fasten it with bolts, nuts and washers.
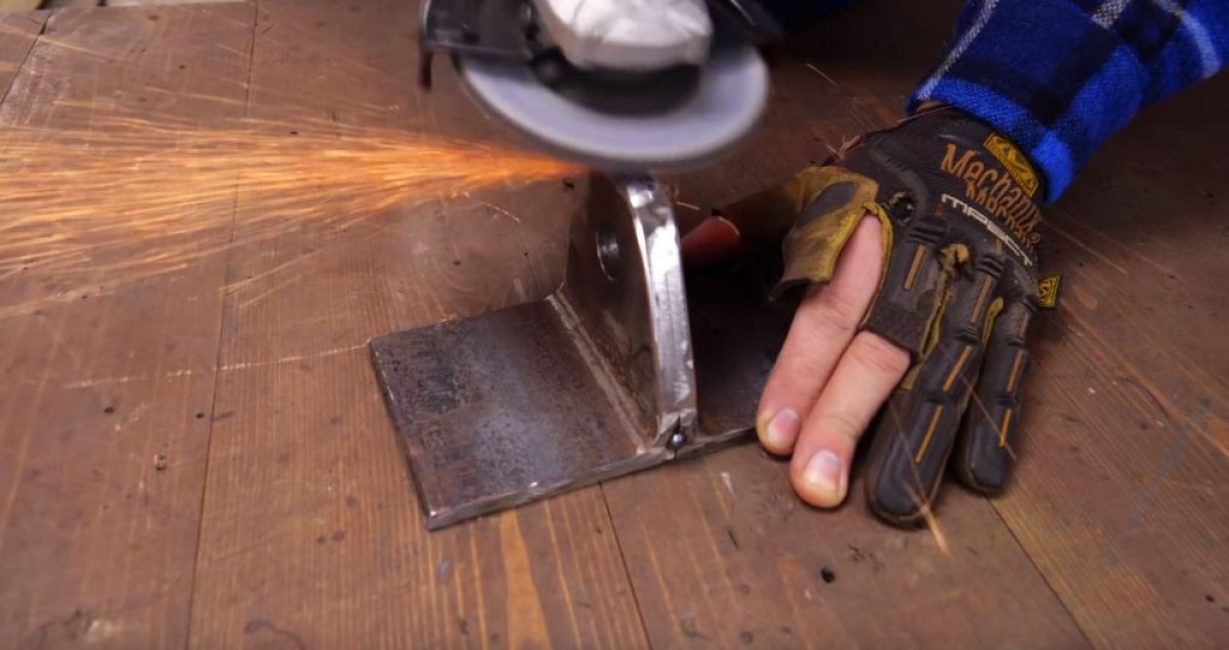
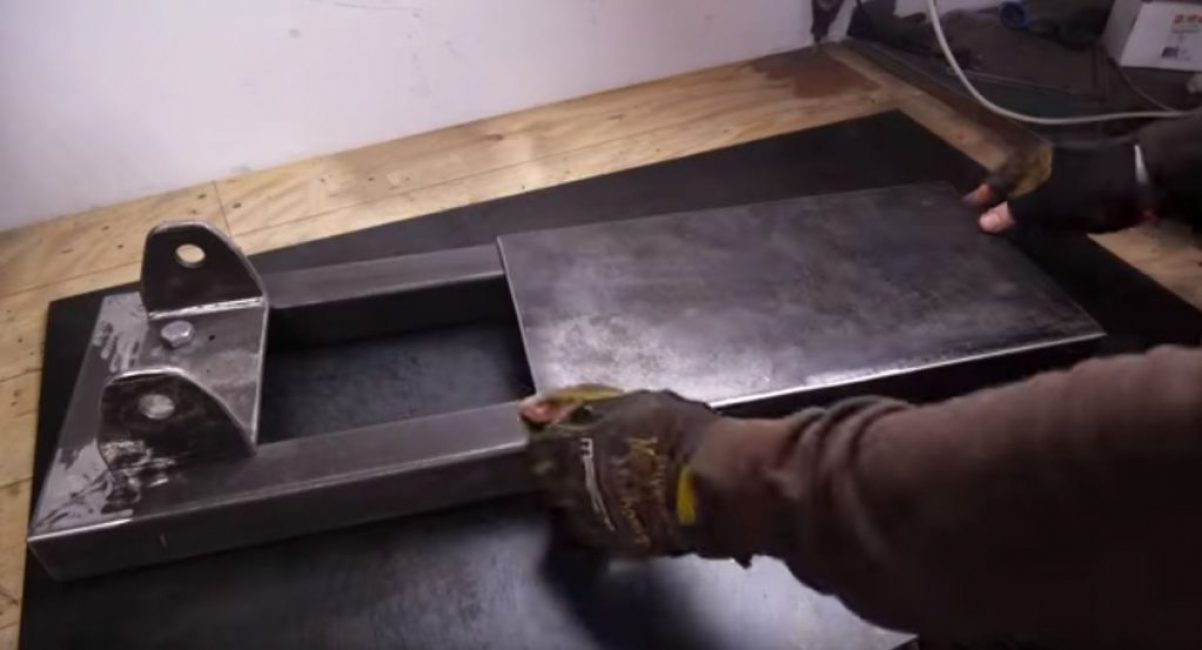
We cut off a plate from a piece of sheet metal along the width of the frame and weld it on the side opposite from the bracket.
We cut off two triangles from a sheet of metal and, by welding them, we make a stiffener for shock absorbers.
For further fastening of the grinder, we drill 2 holes in the profile pipe connecting the shock absorber rods. We insert a bolt with a nut into one of them and weld it.
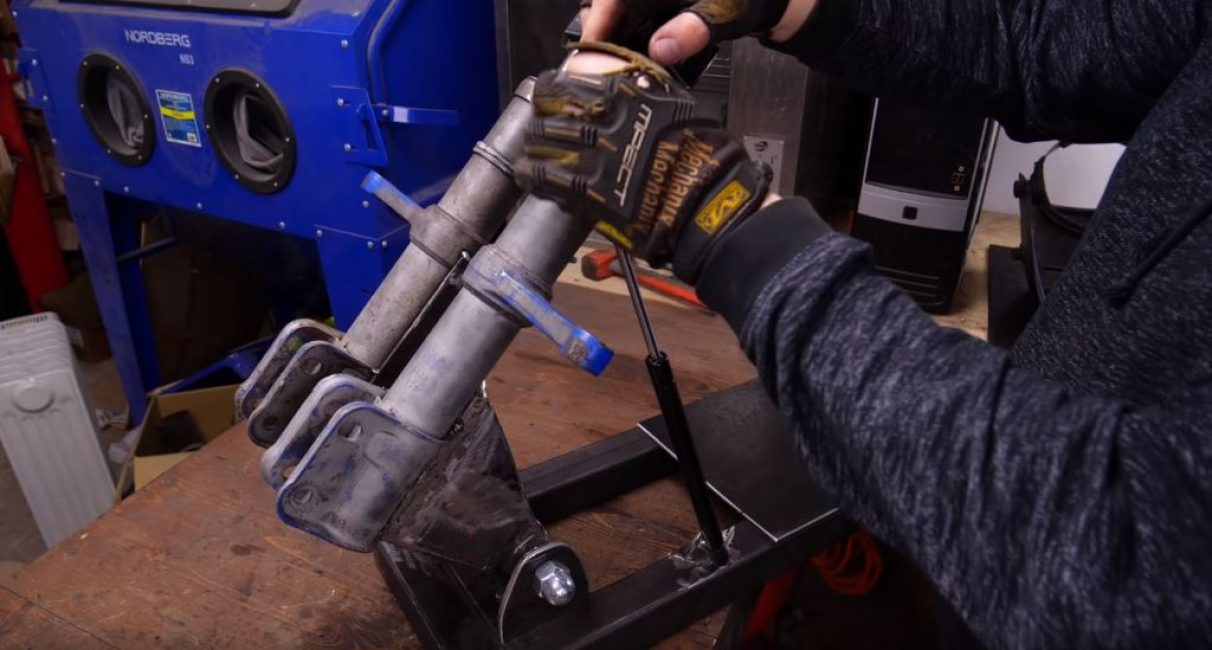
We install the block with shock absorbers in the bracket.
At the end of the bracket, we drill a hole for the output of the power wire.
We weld a bracket for attaching a furniture gas lift to one of the shock absorbers. We weld the same bracket to the frame of the machine.We fix the gas shock absorber to the brackets.
Step 3. Making the Clamping Handle
From a sheet of metal we cut out a plate in the form of a rectangular trapezoid, slightly narrowing one of its sides from about the middle.
We cut off a piece for the handle from the pipe and weld it at an angle of 90 degrees to the smaller side of the plate.
We weld the plate to the left end of the profile pipe connecting the shock absorber rods.
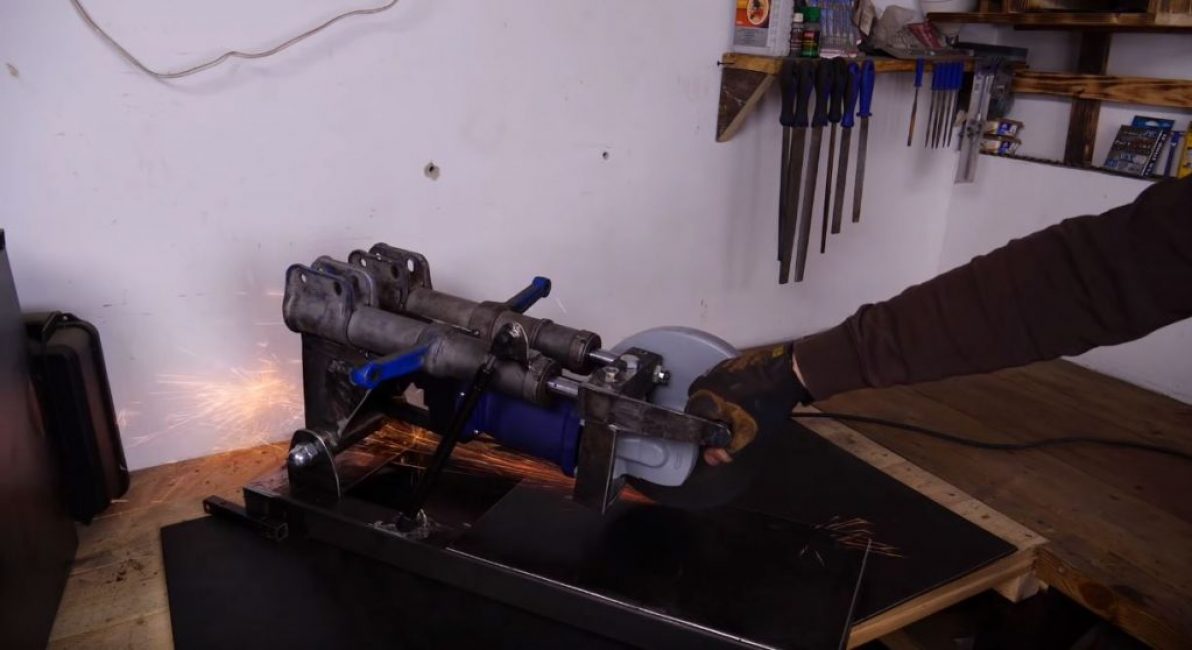
Step 4. Fasten the grinder to the machine
We cut out three pieces from a sheet of metal and weld a U-shaped mount.
We remove excess metal and grind the mount.
With the help of bolts we fasten the grinder to the frame. We pass the power wire into the prepared hole and connect it to a voltage source.
Pulling the handle and moving it back and forth, we cut a slot in the steel sheet on the frame. Our machine is ready to go.

Cutting machine from grinder
Do-it-yourself cutting machine from a grinder? | +Video


