
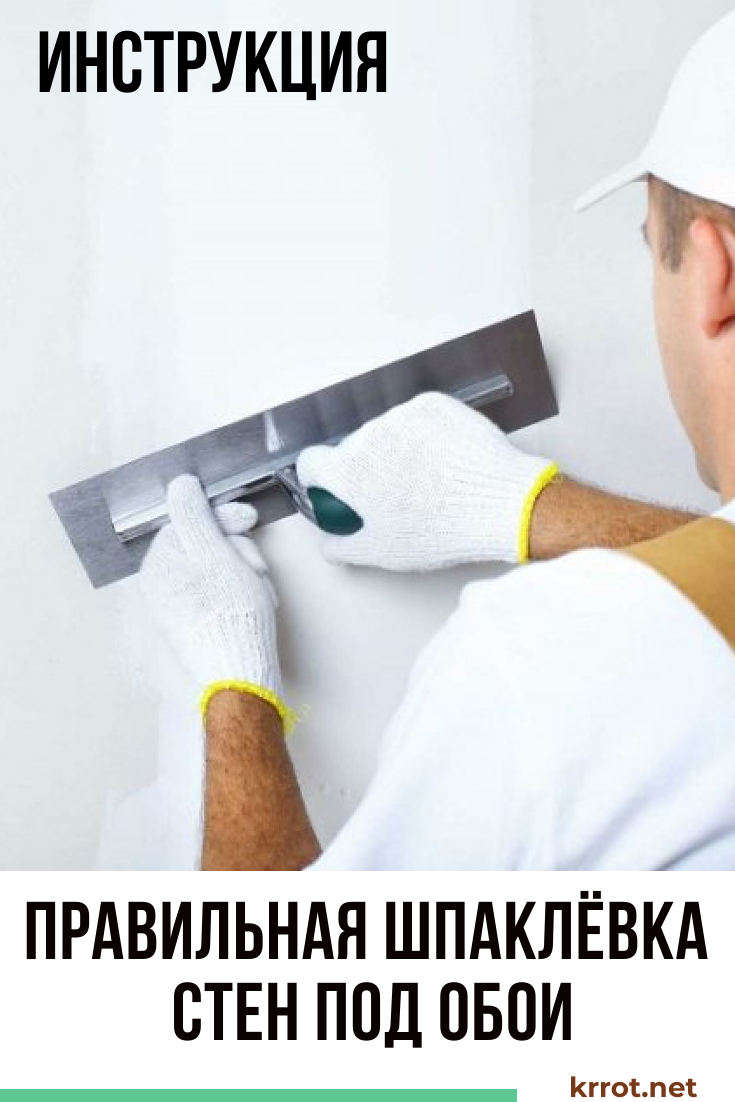
Leveling the walls is a key step in preparing the surface for decorative trim. However, this work is not difficult, which allows you to manage on your own and not involve a team of builders. You will find step-by-step instructions on how to properly putty walls for wallpaper, the nuances of choosing high-quality compositions and tools below.
Content:
 Read also: Making a greenhouse with your own hands from a profile pipe and polycarbonate: a complete description of the process, drawings with dimensions, watering and heating (Photo & Video)
The essence of the process
How to plaster walls with your own hands: instructions for beginners (Photo & Video) + Reviews
Putty allows you to achieve smooth walls and a flat surface
Putty (putty is an acceptable option) is the leveling of the surface with special building mixtures for decorative purposes.
It is considered the final stage of the rough preparation of concrete or brick walls for finishing (painting or wallpapering), but sometimes the final version of the work.
The undeniable advantages of putty include:
- process speed
- ease of implementation
- low price and low consumption of materials used
- possibility of layering on the surface
- an alternative to plaster in dry rooms
Leveling needs not only concrete, but also plasterboard walls
Alignment is needed not only for concrete, brick: putty is also needed for drywall. This step will allow you to remove the wallpaper in the future without a layer of cardboard, which will stick to the paper base without putty.
By the nature of the actions performed, leveling the plane for wallpaper is no different from putty for painting. The main thing that distinguishes the two processes is the final result. Ideal smoothness is needed for painting, and wallpaper can hide the roughness and mistakes of a novice builder.
 Read also: How to make a cellar in a private house or in the country with your own hands: diagrams, step by step guide, proper ventilation (55+ Photos & Videos) + Reviews
 Necessary materials
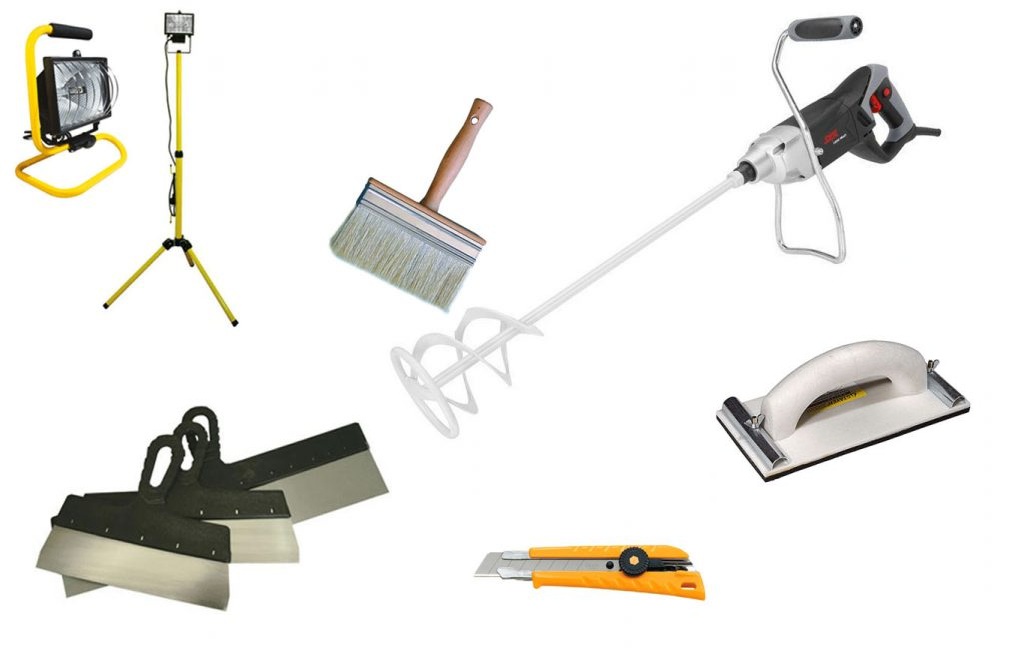
Tools for the job
For puttying work you will need the following tools:
- Spatulas. Their design is the same as that of plasterers, but the blades are thinner. It is better to use both straight and angular (profile) varieties
- Drill with mixer nozzle for mixing the composition
- Container for diluting dry mixes (a bucket or a capacious plastic basin is suitable)
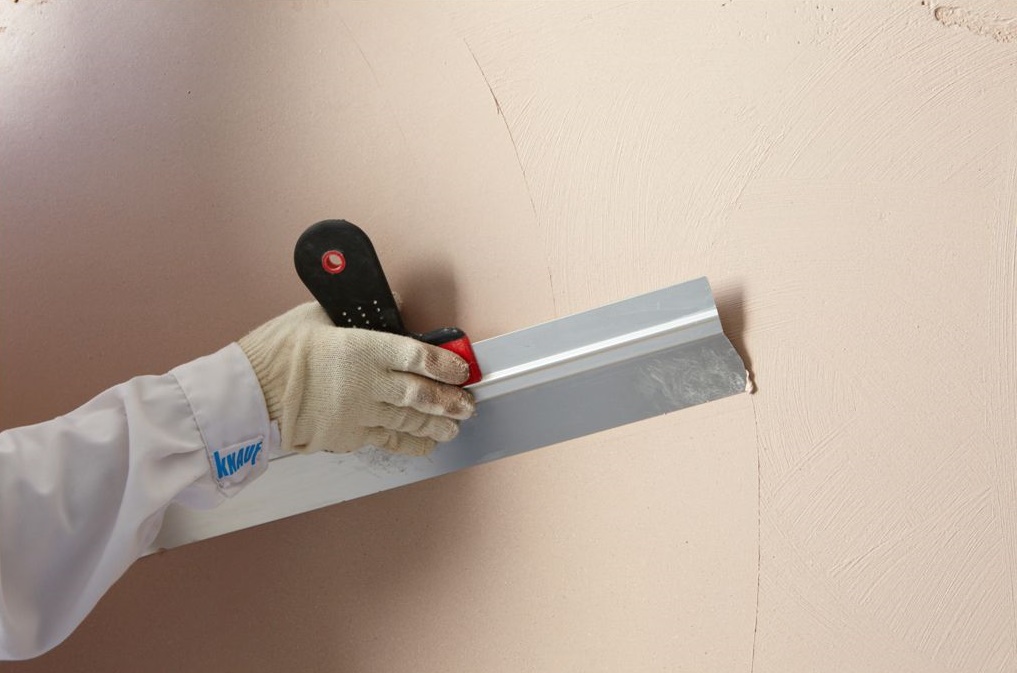
- Building rule. Required for significant curvature of the surface
- Level to control uniform application
- Grinding mesh or fine sandpaper for finishing the surface
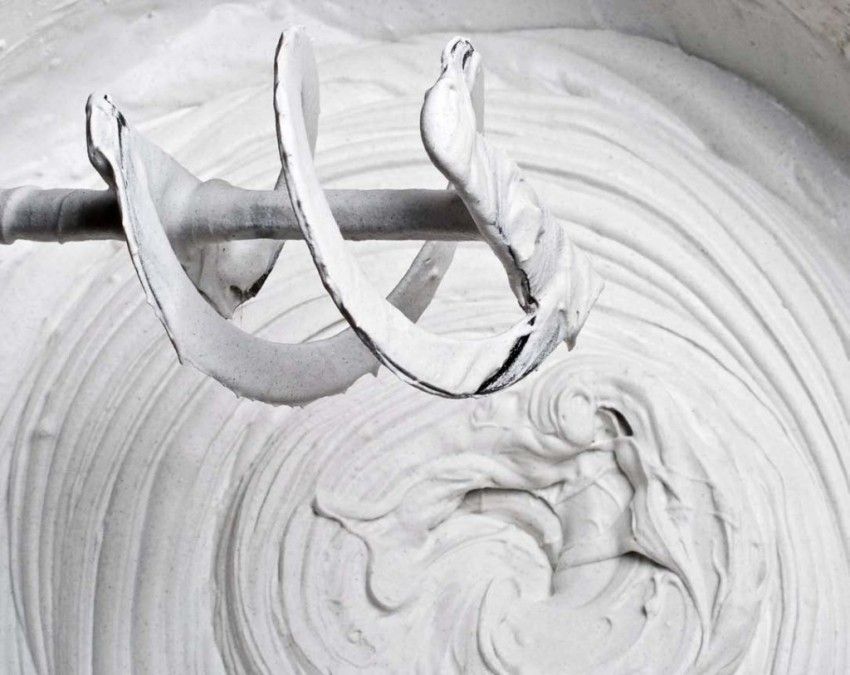
Mixer attachment for electric drill
In some cases, it is worth preparing:
- rollers and brushes for work in hard-to-reach places or additional priming of planes
- sickle mesh for gluing joints between sheets of drywall
- repair composition based on quick-drying polymers for the prompt elimination of identified chips and large defects
A wide and clean spatula is the main tool for leveling walls
![[Instructions] How to make beautiful and unusual wall shelves with your own hands: for flowers, books, TV, kitchen or garage (100+ Photo Ideas & Videos) + Reviews](https://iherb.bedbugus.biz/wp-content/uploads/2018/05/19-6-300x213.jpg) Read also: [Instructions] How to make beautiful and unusual wall shelves with your own hands: for flowers, books, TV, kitchen or garage (100+ Photo Ideas & Videos) + Reviews
Read also: [Instructions] How to make beautiful and unusual wall shelves with your own hands: for flowers, books, TV, kitchen or garage (100+ Photo Ideas & Videos) + Reviews
Types of putties
Ready mixtures have the desired viscosity, but are more expensive than dry ones.
Depending on the composition, putty mixtures are:
- Oil-glue. They are considered obsolete material, which is not recommended for use due to drying oil in the composition. The oily base soaks into porous concrete, and then appears on the wallpaper in sloppy spots.
- Gypsum cement. Dry mixes for use are diluted with water and kneaded. The coating is quite thick and is best suited for processing before wallpapering. It is applied everywhere: for internal works in dry and damp rooms. For distinction, it is marked with indices LR, KR, VH
- Water-dispersion. These putties also contain cement and gypsum, but they do not need to be diluted. Mixes are sold in plastic buckets immediately ready-made, already mixed with a polymer emulsion. These products are characterized by increased smoothness and strength.
- Acrylic. The highest quality and easy to use formulations. Their only drawback is the high price. They allow you to achieve a perfectly even coating, so they are rarely used for puttying under wallpaper
![[Instruction] Do-it-yourself laminate on a wooden floor: a complete description of the process. Laying schemes, what materials should be used (Photo & Video) + Reviews](https://iherb.bedbugus.biz/wp-content/uploads/2018/05/laminat-300x200.jpg) Read also: [Instruction] Do-it-yourself laminate on a wooden floor: a complete description of the process. Laying schemes, what materials should be used (Photo & Video) + Reviews
Read also: [Instruction] Do-it-yourself laminate on a wooden floor: a complete description of the process. Laying schemes, what materials should be used (Photo & Video) + Reviews Proven Blends
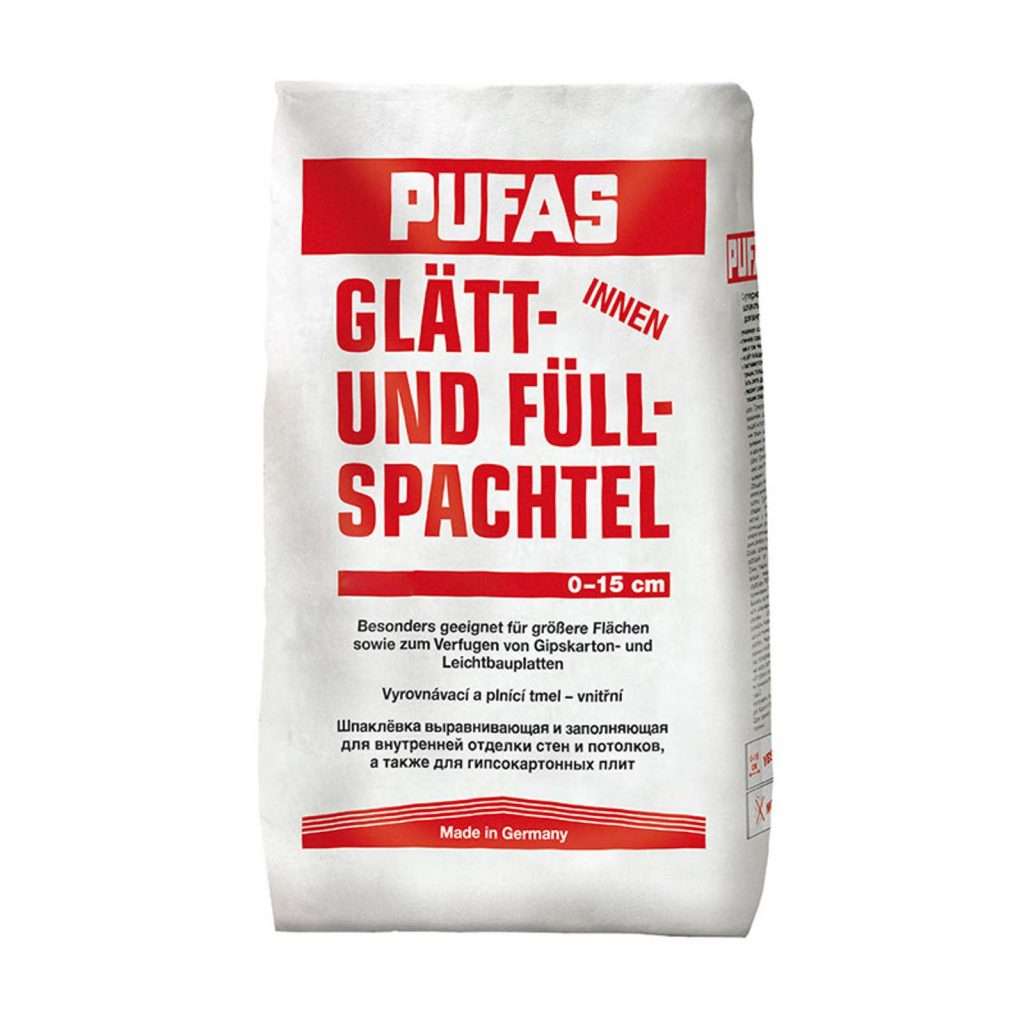
Pufas is one of the most popular all-purpose mixes.
According to the stages of the work performed, dry mixes are often divided into starting and finishing with varying degrees of particle size. However, it is more advisable to buy a universal composition that is easy to layer.
Better than others, according to experts and consumer reviews, such universal dry putties have proven themselves:
- Kreisel 662 - a fine-grained mixture that is optimally suited for leveling walls in city apartments. Sold in packages of 25 kg, but it shrinks a little, so both layers are advised to do 3 mm
- Veronit KR - environmentally friendly dry composition based on organic glue. Suitable even for children's rooms
- Volma Standard. The mixture is not afraid of moisture and is easy to use. Cheaper than other similar products
- Gypsum compound with methyl cellulose additive. Plastic, does not form sags, gives minimal shrinkage and is not subject to cracking
- Eunice Bleek. Suitable for residential areas. Easily levels even surfaces with flaws. Available in 25 kg bags
 Read also: Do-it-yourself furniture and other wood products: drawings of benches, tables, swings, birdhouses and other household items (85+ Photos & Videos)
Calculation of the amount of putty

The calculation of the amount of material is done taking into account the area of \u200b\u200bthe working room
The amount of dry leveling mixture for processing the premises is calculated according to the following parameters:
- floor space excluding door and window openings
- primer consumption (usually indicated by the manufacturer on the packaging)
- number of layers (minimum 3: 1 start and 2 finish)
- application thickness (calculated for each layer)
- margin (10-15% of the result)
So, to align the vertical planes of a standard room 5 by 6 meters, with ceilings 2.8 m high, two windows and a doorway, according to average estimates, you will need 5 bags of dry mix (25 kg each).
 Read also: Do-it-yourself drip irrigation device in a greenhouse: from a barrel, a plastic bottle, and even an automatic system. For tomatoes and other crops (Photo & Video) + Reviews
 Preparatory stage
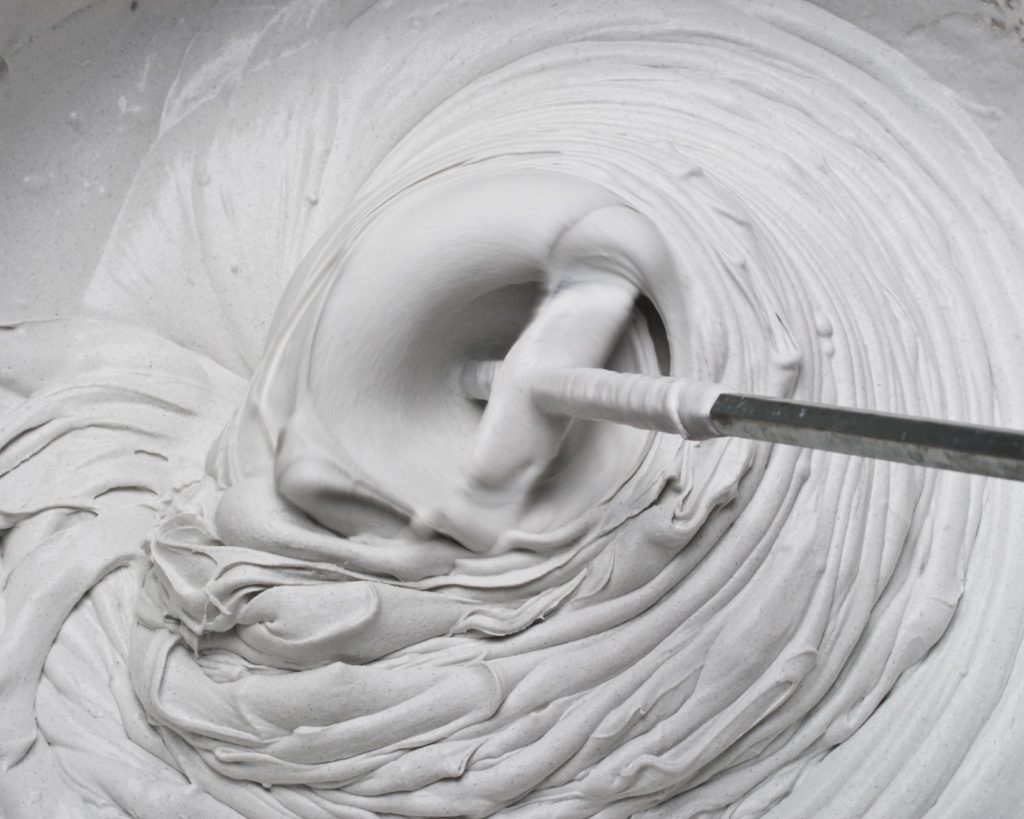
Properly diluted dry mix is uniform in consistency
When using the finished composition, the step for kneading the putty is skipped, and for dry mixes, proceed as follows:
- 2.5 liters of clean water is poured into a 7 liter container
- Gradually, in a thin stream, the mixture is poured into the water until a mound forms over the surface of the water.
- A mixer nozzle is put on the drill and the composition is quickly mixed to a homogeneous consistency without lumps. Mixing is recommended for at least 2-3 minutes.
- The composition is allowed to stand for 30-60 seconds and a second batch is made. After that, the putty is ready for application.
If during stirring the mixture turned out to be thick or liquid, it is not recommended to add either dry material or water. It is best to knead a new portion, taking into account the mistakes made earlier.
The preparatory stage also includes the processing of a construction tool: the spatula blade is wiped with a clean, lint-free material, the buckets are washed and wiped dry.
The walls to be processed are cleaned of the remnants of the previous finish: wallpaper, paint, plaster.
 Read also: Making a well in the country with your own hands: detailed instructions, plumbing from a well, original ideas for decorative design (75 Photos & Videos) + Reviews
 Step by step instructions for putty

Preparatory primer of walls before leveling
The alignment process with a special composition is divided into 2 stages:
- Rough finish or starting putty. This is the name of the first layer of the applied composition with a thickness of 0.3–0.5 cm. This step accounts for the maximum consumption of the putty mixture: all pits, cracks, chips are filled
- Finishing or finishing layer. Its thickness is no more than 10-20 mm and gives the final smoothness
Before rough application, it is worth carrying out one more stage, which can no longer be called preparatory. We are talking about priming the surface: this step is needed to eliminate chips, deep cracks, grooves.
For interior work in residential premises, acrylic and perchlorovinyl primer solutions are used. They do not have a specific smell and dry quickly (from 1 to 5 hours).
After processing the plane with a primer and its complete drying, the mixture is kneaded or the finished composition is taken and the putty is started.
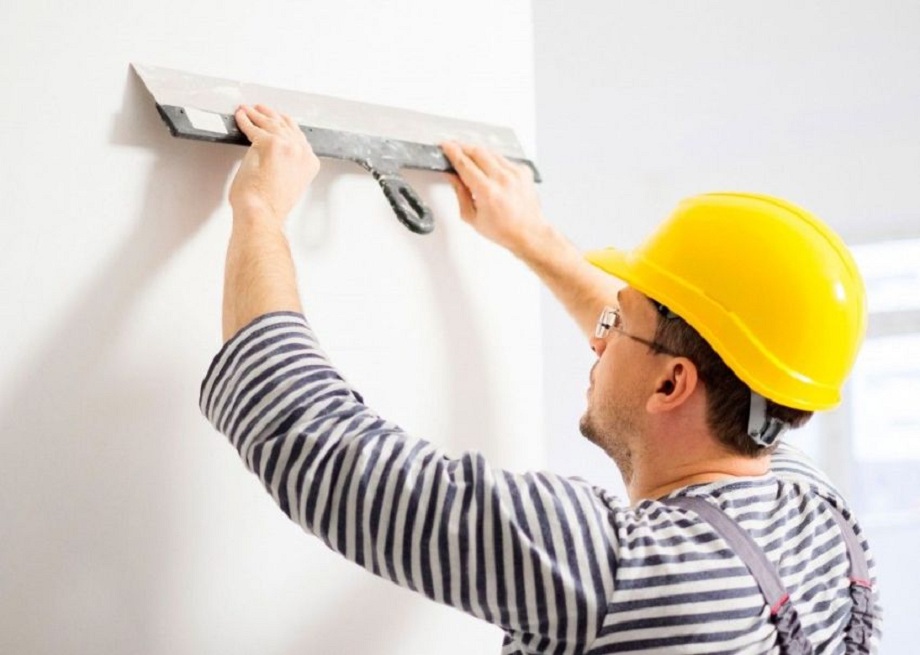
Rough application
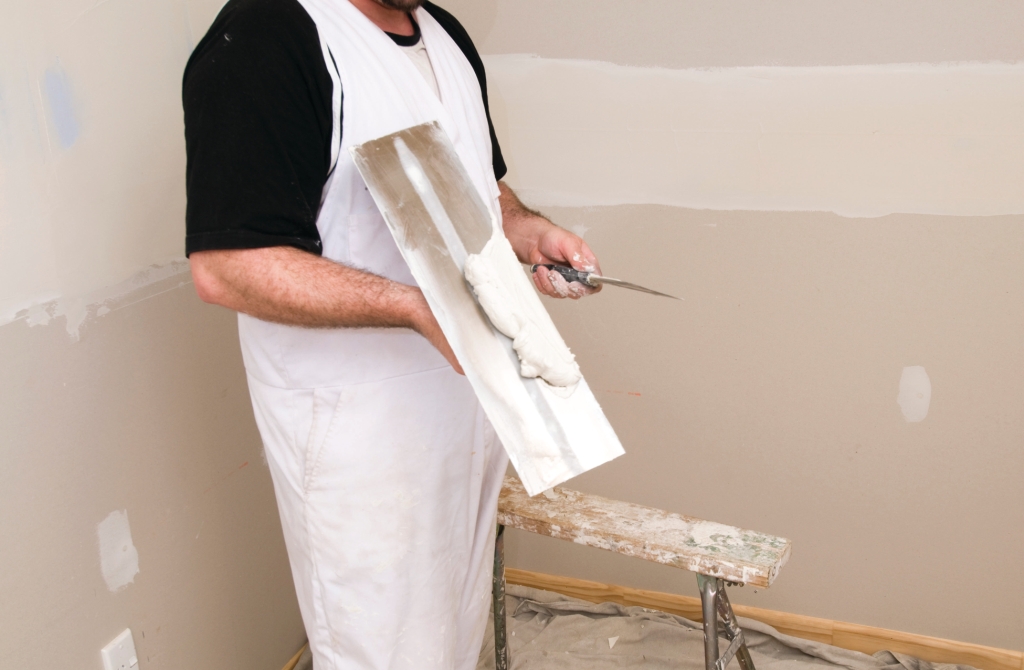
The composition is collected with a small spatula, and distributed along the wall with a wide
The first layer of leveling compound is applied as follows:
- Pick up a small amount of putty from a container on a small spatula
- The composition is transferred to the middle of the blade of a wide spatula
- The tool is gently applied to the wall at an angle of 45 degrees (from the corner of the room) and with confident smoothing movements from side to side, the composition 3 mm thick is evenly distributed over the surface
- Processing is carried out with an overlap: each next layer partially overlaps the previous one.
- They collect a new portion of the mixture and repeat the steps, moving to the opposite corner of the room until the entire vertical plane has been worked out
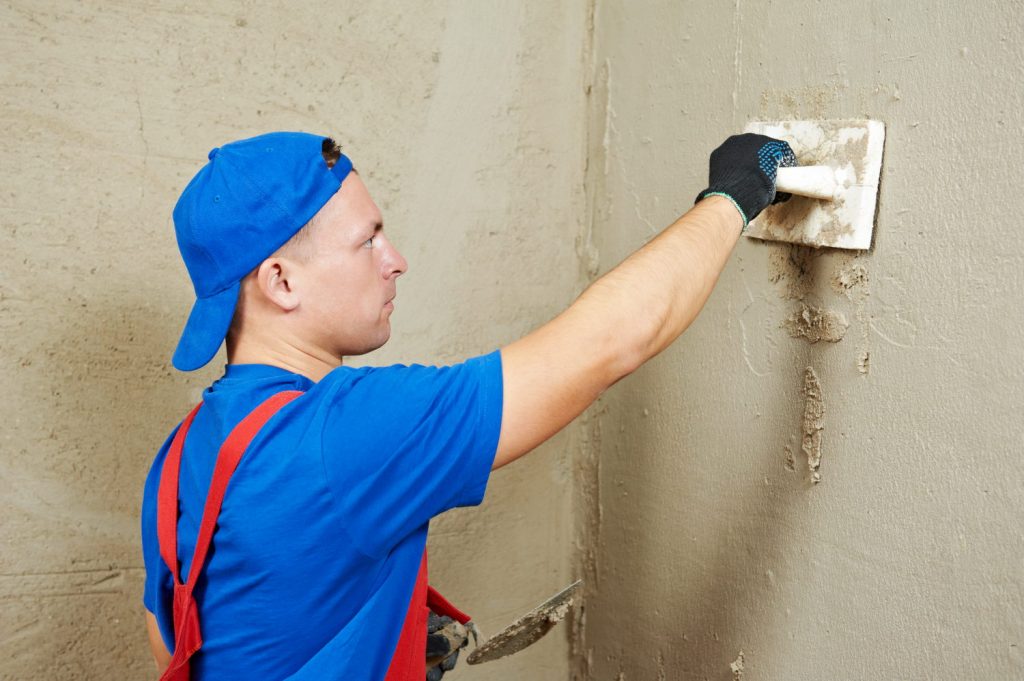
- The corners of the room are worked out with a profile spatula. Movements in this case are made up and down, and not to the sides.
- The result obtained is checked by the building rule, passing through a wet coating. So not only control the uniformity of application, but also remove excess solution
- While the surface is dry, the wall is rubbed: manually with a fine abrasive or with a professional grinder. Grouting is carried out in a circular motion counterclockwise
Finishing layer

The stage of grouting the finishing layer
The final layer is thinner (15-20 mm) and is applied in the same way as the starting one, but with some features:
- Before starting work, several multidirectional sources of artificial lighting are installed opposite the treated area.
- Layers are applied in the direction from the bottom up from the window (or corner of the room) to the door
- After applying the first finishing layer, the wall is allowed to dry. The surface is then refinished
- Grouting the finished base is done using a fine suede nozzle
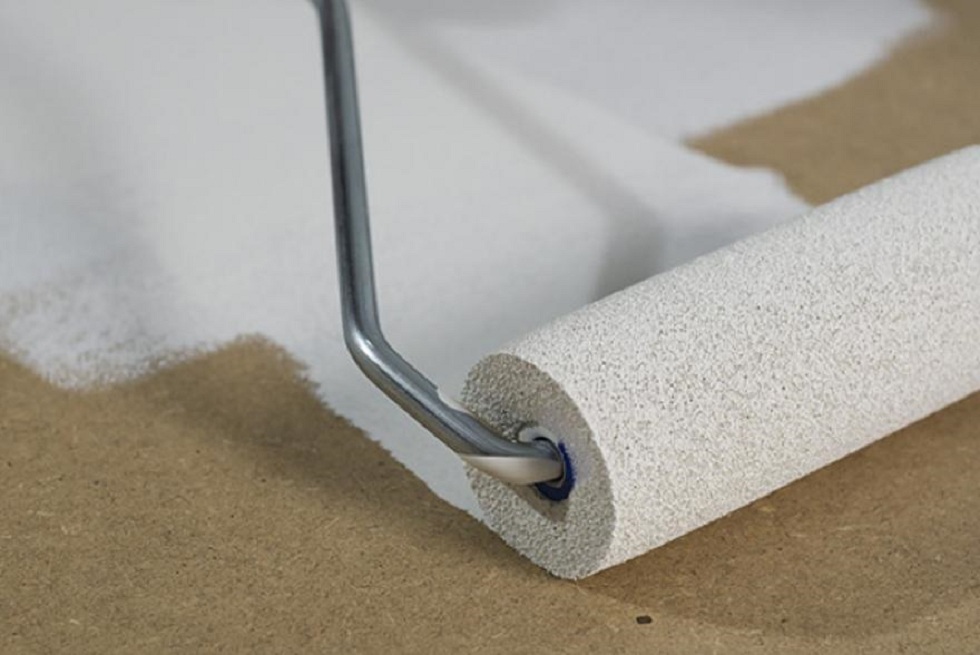
- The final stage is re-priming with two layers. After that, a perfectly flat wall is ready for gluing even the thinnest wallpaper.
 Read also: A septic tank for the home - a sewer pit without pumping out: a device, a phased do-it-yourself production of concrete rings and other options (15 Photos & Videos)
 Tips & Tricks
Grouting is done both at the start and at the finish of work, only the grain size of the sandpaper changes
In order for the result obtained after the independent performance of the putty to be of high quality, professionals advise to take into account the following nuances:
- Align surfaces for all types of wallpaper (non-woven, paper, vinyl), except liquid. The latter themselves are able to fill the defects of the foundation.
- When choosing a spatula, they are guided by the smooth edge of the blade and the rounding at its edges. Such a tool when working will give a thin uniform layer. It is recommended to keep the putty spatula clean, each time removing the remnants of the mixture from the blade, wiping dry
- For beginners, water-dispersion putties will be the best choice: they are easy to apply and have the right degree of viscosity. If you have at least initial building skills, it is recommended to stop at gypsum-cement mixtures
- For dilution of dry products with water, they are guided by indicators: 10 liters of water per 1 bag of dry material (25 kg). It is not recommended to knead the entire amount at once, because the composition will quickly dry out and become unusable.
- Do not try to apply putty layers thicker than 0.3-0.5 cm. The coating will not dry out and will start to crack
- Drying the putty will not speed up the heating of the room, nor the drafts
- If the room is prone to fungus, special antiseptic solutions are used at the priming stage.

Leveling the starting layer with a building rule
Puttying walls for wallpaper is an important and responsible process.. However, when using high-quality dry or ready-made leveling compounds, even with your own hands, you can do a quality job.
Despite the fact that wallpaper processing is not visible, unlike painting, many experts advise to practice several times in other rooms. The “set hand” will allow you to achieve a smooth and even application.
The correct application technique and the nuances of leveling the wall for wallpapering can be seen in the video -

Do-it-yourself wall putty under wallpaper VIDEO! final wall putty! wall putty
Proper wall putty for wallpaper: detailed instructions for a beginner for perfect alignment | Video
The subtleties when working with putty are told by the master in the manual -
Subtleties of work with putty. Various techniques. Tool. Mistakes. Mastery Secrets
Proper wall putty for wallpaper: detailed instructions for a beginner for perfect alignment | Video
The myth that it is impossible to properly level the walls on your own is debunked by the video -
Do-it-yourself wall puttying
Proper wall putty for wallpaper: detailed instructions for a beginner for perfect alignment | Video


