
 + Reviews")
Vacation in the country may well replace a week at sea, especially if it is clean, comfortable and beautiful. Do-it-yourself garden figures help to create a unique design and a bright exterior. If you put a little effort and connect your imagination, you can build extraordinary sculptures from the most affordable materials.
Content:
 Read also: Veranda attached to the house - expanding the living space: projects, tips on how to create your own hands (200 original photo ideas)
Introduction
Cute touches for giving
For many people, a garden is not just a useful area for growing berries and vegetables. This is a place where after a busy working day, the bustle of the city and everyday worries, the soul rests. Here you can recharge your batteries, relax properly, with a feeling of relaxation.
The place, which was created with love, will surely answer you with a warm and peaceful atmosphere. Friends and relatives will be happy to come here to sit by the fire in the evening, have a barbecue in nature. And even the morning weeding of the beds will not scare anyone.
Of course, ready-made statues can be bought at garden stores. But it is much more exciting to create your own, unique designs, showing creativity and artistic taste. And yet, the process brings all the participants together very well, all family members, even the smallest ones, can be involved in it.
 Read also: How to make flower pots with your own hands: outdoor, indoor, hanging | Step by Step Charts (120+ Original Photo Ideas & Videos)
 What figurines are
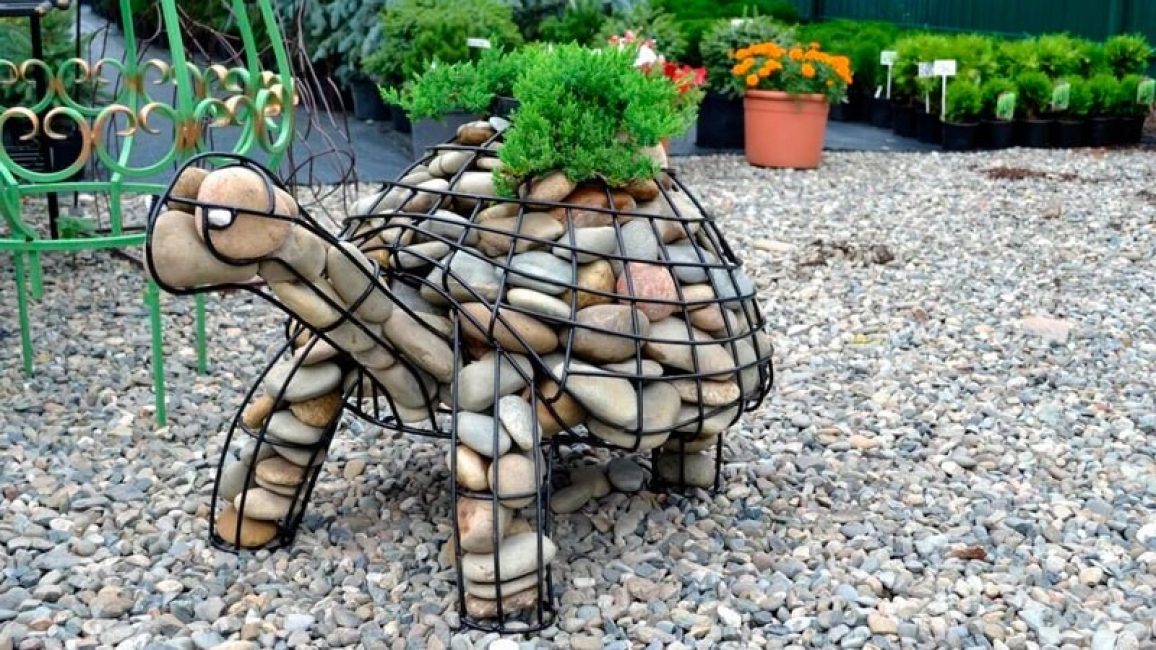
Phlegmatic Tortilla
You can come up with and implement any ideas. Someone wants to “plant” fancy flowers in their yard. Or make original flower beds and flower beds for living plants.
Others want to elegantly decorate garden paths, hang unusual swings, create a chic lantern or street washstand. In someone's dacha, magical gnomes and good fairies, forest animals or pets "live".
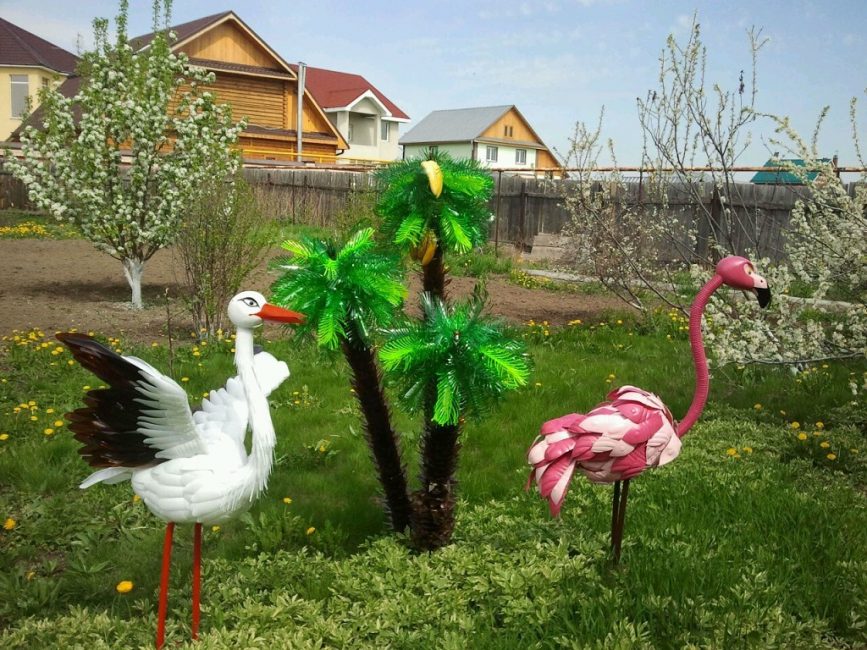
A country yard with a pond is inhabited by frogs, flamingos, fish, and its banks are skillfully decorated. In the corner you can start a funny clearing with porcini mushrooms, headed by an important fly agaric. Without limiting the imagination, they create entire fairy-tale towns with different heroes.
Abstract art lovers will love the options for casting their own unique statues. Working with polyurethane foam helps to build unusual and unique structures. Even from old iron bars, unnecessary wire and ordinary cobblestones, you can come up with chic things.
 Read also: How to make a patio in the country with your own hands: a variety of design options, decoration and arrangement (85+ Photo Ideas & Video)
Before you start creating
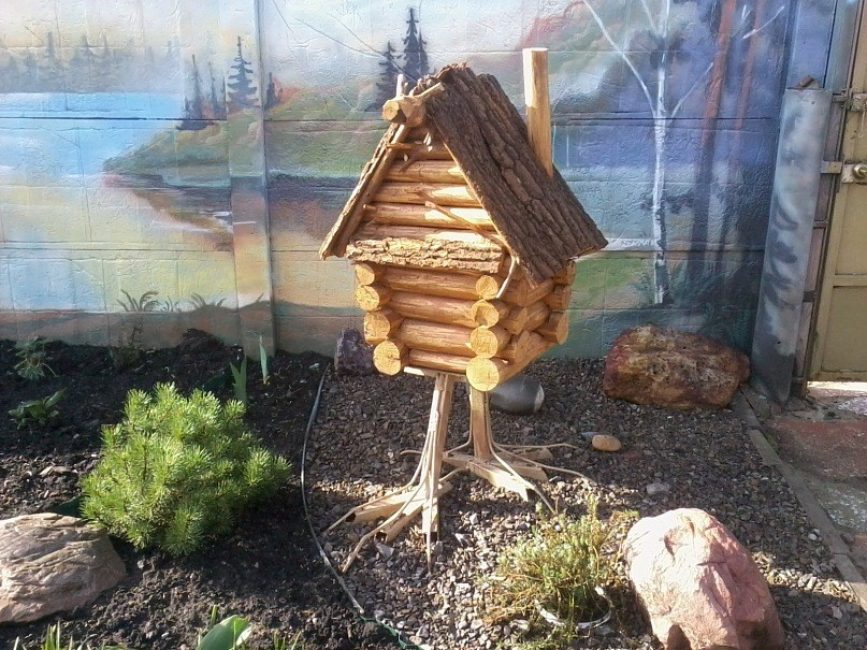
A hut on chicken legs
In any work, even creative, it is required to follow the general rules, to keep the concept. Garden decoration is no exception. Otherwise, you run the risk of creating a tasteless landscape of chaotic objects, the puzzles of which do not add up to a coherent picture.
So here are some helpful tips before you start:
- Pre-select the places where the figures will be installed. Under some of them it will be necessary to prepare the foundation. This should be taken into account so as not to interfere with the growth of horticultural crops.
- Take a look around your garden and determine what style it can be attributed to. It can be Japanese design or simple rustic country style. Or maybe there are romantic accents or elements of the hi-tech genre?
- It is necessary to clearly understand that cute colored hearts and balloons will not fit into the world of metal structures, and fairy-tale characters will feel strange in the exterior of the Japanese landscape
- Let the size of the figurines be combined with the size of the rest of the garden items. For example, among large trees, you can install a large mushroom. And next to the low bushes it is better to put small gnomes or lambs
- All structures must be compatible with each other. If you chose the theme of children's fairy tales, you should not add iron lizards made of nails and nuts, abstract geometric spheres made of cement, or wooden bicycles with flower pots here.
 Read also: How to make a children's house with your own hands: from wood and other materials. Dimensional drawings | (80 Photo Ideas & Videos)
 What are the sculptures made of?
Final step: painting
The most requested materials are:
- Old car tires
- Waste plastic bottles and eggplants
- Gypsum
- Cement
- Mounting foam
- Wooden blocks, logs, winding snags
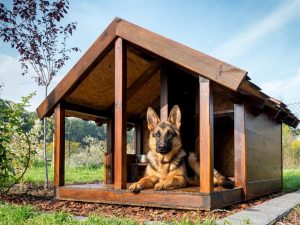 Read also: How to make a booth for a dog with your own hands: building a home in the yard and in the apartment. Drawings, dimensions and original ideas (55+ Photos & Videos) + Reviews
Master class on creating decor from plastic bottles
Country crafts made of plastic
Plastic bottles are a favorite material for amateur garden decorators. It has a lot of advantages:
- Durable, durable
- Easily processed, easy to paint
- Can be fixed, installed
- Affordable and cheap
And yet, it allows you to create amazing things: cool animals, luxurious birds, graceful flowers. Consider a few simple options.
Pink flamingo
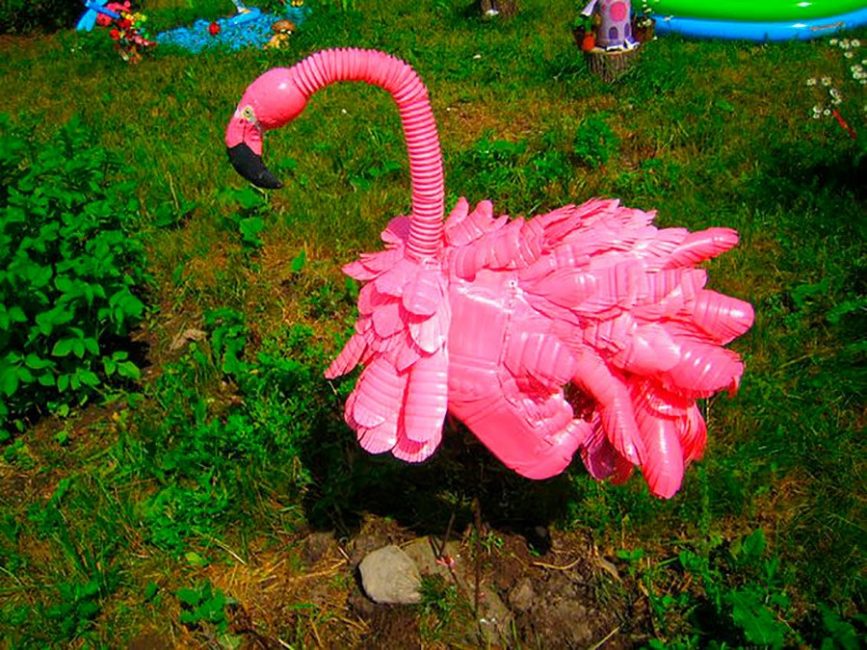
Pink flamingo
This bird looks graceful and unusually beautiful. Despite the apparent complexity, creating this miracle is not at all difficult. Flamingos will perfectly fit into the design of your garden, give it a sophisticated piquancy..
Prepare: 4 plastic eggplants, 1 liter bottle, hose, 1 cap, 3 metal pins, pink paint, brush, large scissors.
- Take a whole bottle with a lid and make a hole in it. This is the body of the bird, and the neck will come out of the hole. At the bottom, make holes for two metal rods that will play the role of legs
- Cut the rest of the bottles. Cut them into long, narrow feathers. Cut the edges of each feather around the entire perimeter into thin strips
- Make thin cuts in the upper body of the flamingo and insert feathers into them. The number of holes should match the number of feathers. Closer to the neck, insert shorter specimens, in the tail area, on the contrary, long ones.
- Insert a curved rod in place of the neck and put the hose on top. Attach the head to the end. It is made from a part with a neck from a cut liter bottle.
- Attach the rods to the bottom
On average, the height of the figure is 1.2-1.5 m. To make it stand steadily, you can pour a cement foundation. Finally, paint the bird with paint, and the leaves, body and head can be painted in advance.
Daisies
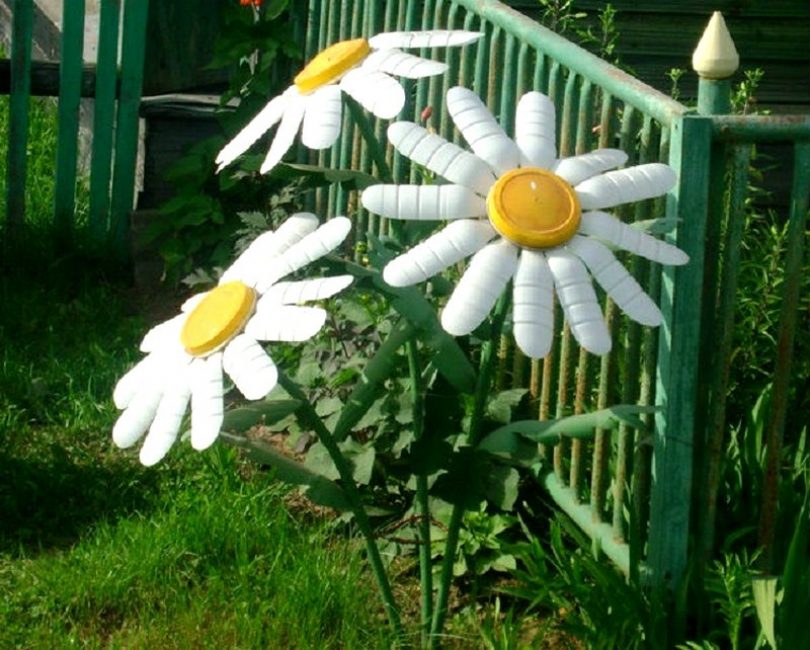
Wonderful and bright daisies
To make such wonderful chamomile, prepare metal pins and a hose for the stems, eggplants and paint. Cut even petals and leaves from the walls of the bottles. Use the bottoms as the core.
On the inside of each bottom, glue the petals with building glue. Push the structure onto the rods with a pre-installed hose. Attach leaves and color each flower.
bells
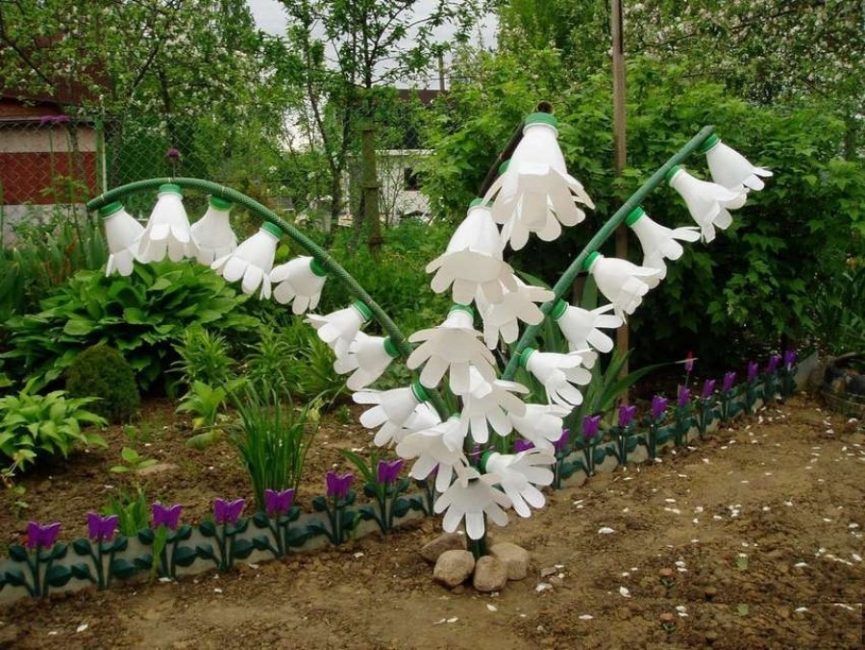
Delicate bells
Study the picture: it’s easy to repeat the construction on it even without step-by-step instructions. Metal tubes for the stems, bottles with caps, wire to secure the inflorescences and scissors for cutting will come in handy.
Finished bells (cut, bent and painted) are attached with wire to the stems, which are securely connected to each other in the lower third of the base and dug into the ground
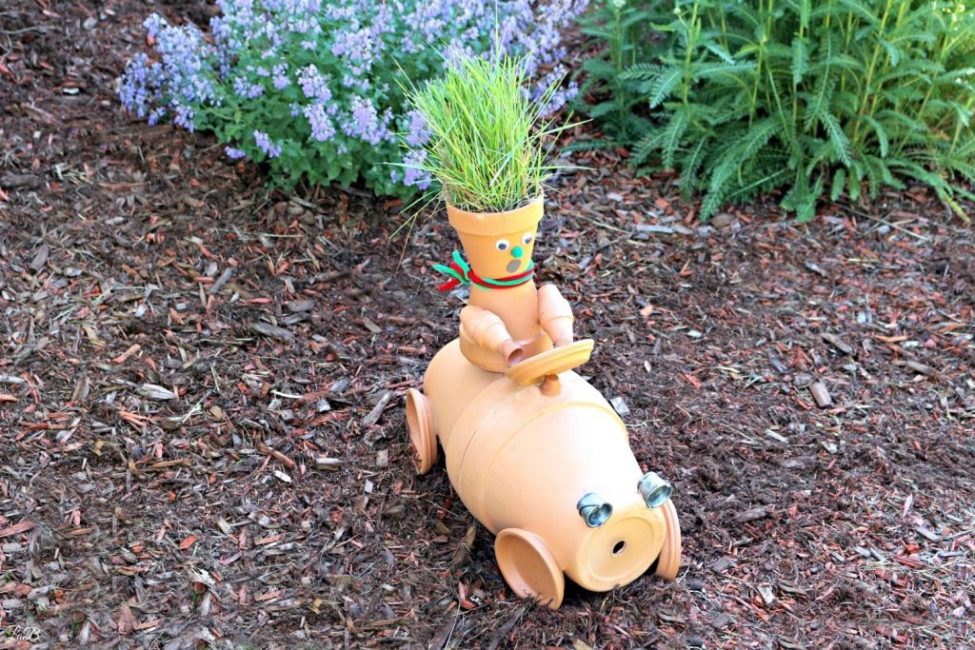
Piggy
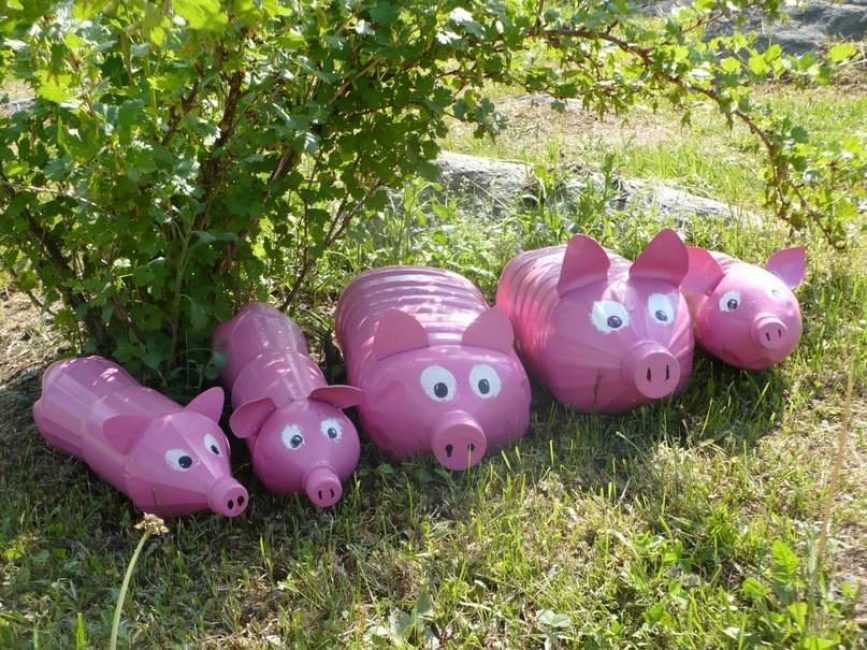
cool family
It's even easier to create pink piglets. Find bottles and eggplants of different sizes, fill them with sand. Cut one and cut out the ears that need to be inserted into the “head” area.
Next, just paint the pigs pink, including the lid. Draw the eyes. Make a neat patch with black lacquer for the nostrils.
 Read also: How to make and decorate beautiful beds in the country with your own hands: simple, tall, smart. For flowers and vegetables. Original Ideas (80+ Photos & Videos)
 Experimenting with wood
Wooden figurines
Wood, unfortunately, is not durable. It fades, so the colors of the figures will need to be updated from time to time. It also gets wet from moisture, so the statues should be covered during the rain and wrapped securely for the winter.
But such structures fit perfectly into the rustic style, look very cozy and pretty. The parts are interconnected with ordinary nails, so the structures are quite strong.
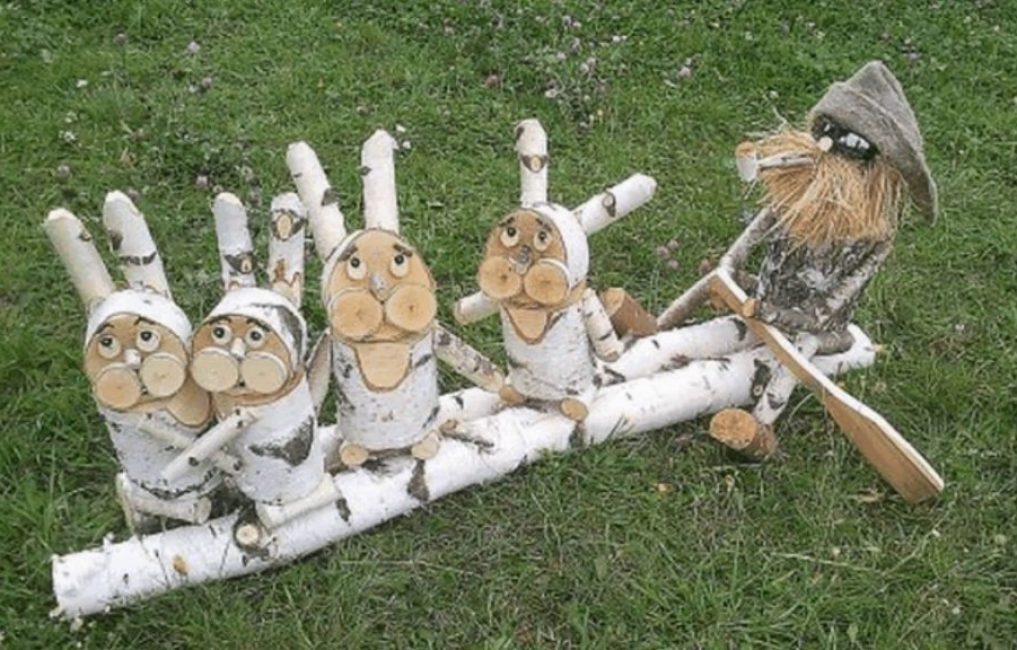
goat
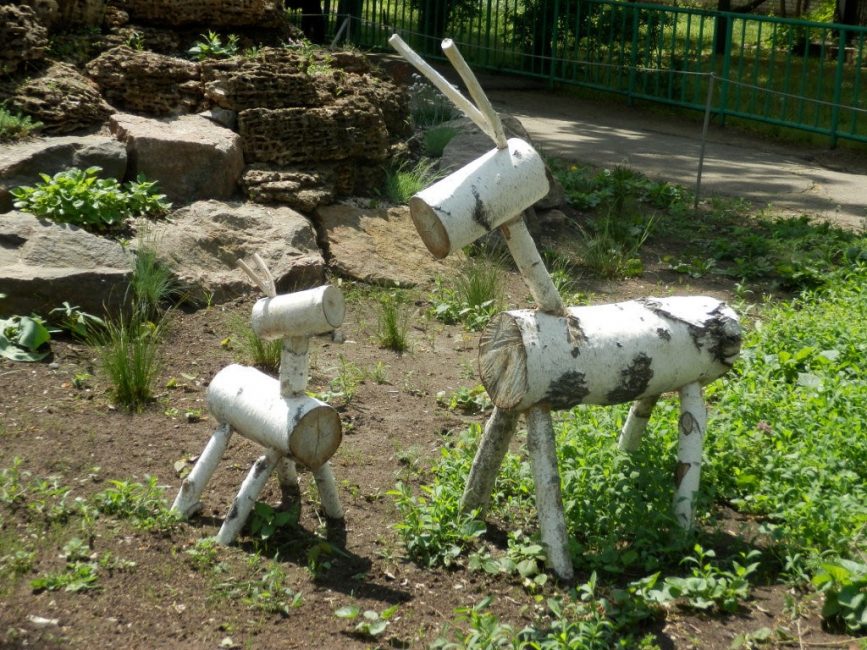
Goat from birch chocks
To make such a goat, find two birch logs. Make holes into which you will need to drive the neck and 4 legs. Prepare narrow sticks for these parts of the body.
Connect all the details and secure with nails and a hammer. Attach the horns. Optionally, you can draw eyes and a mouth on the "muzzle".
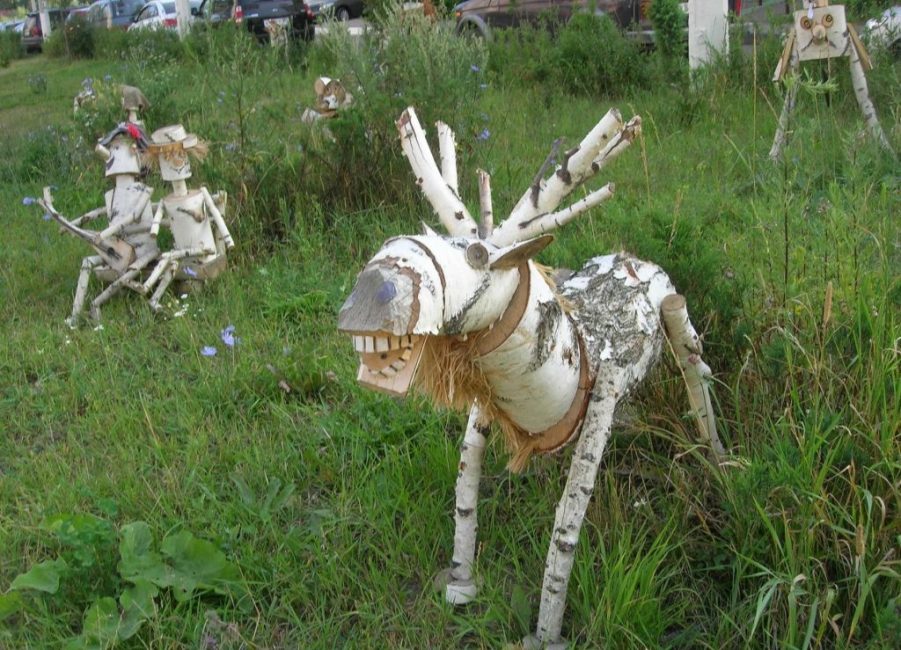
Other options
By analogy with the previous option, you can make different animals:
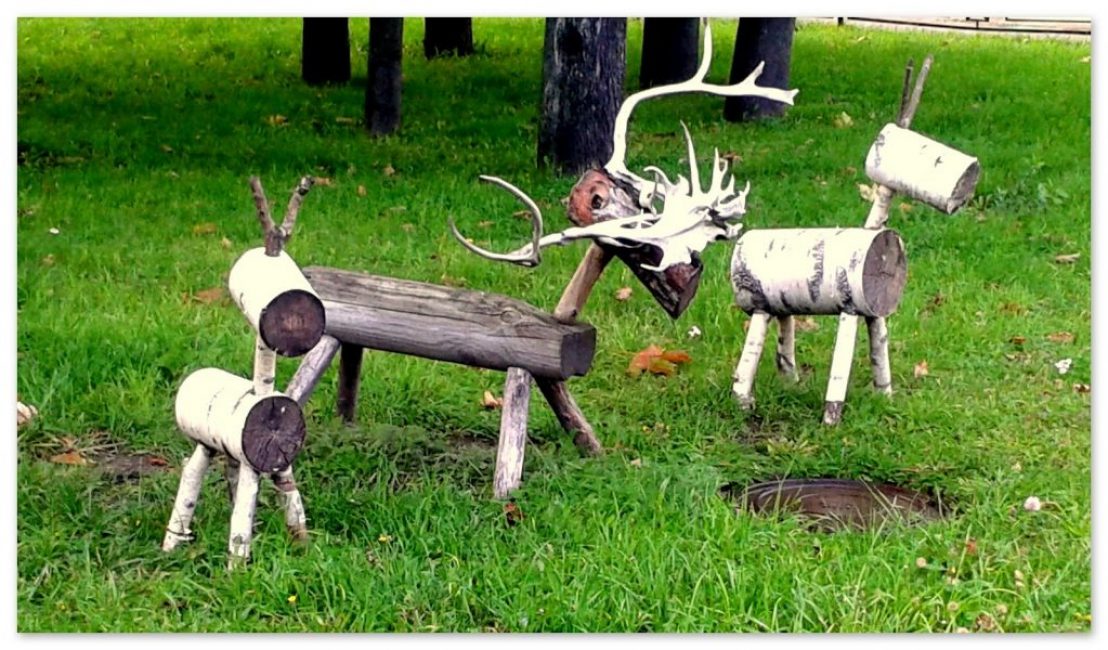
deer
Donkey and wooden men
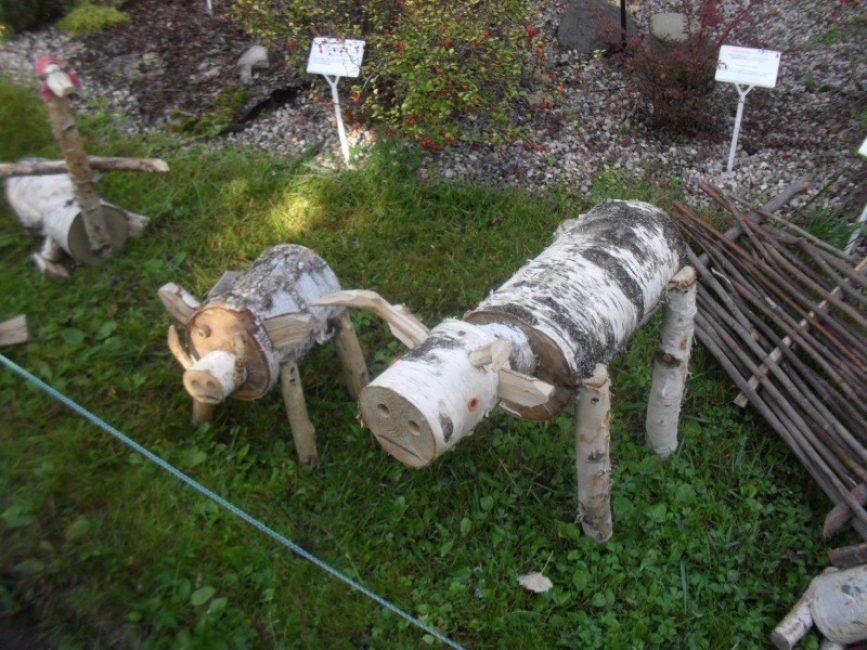
pigs
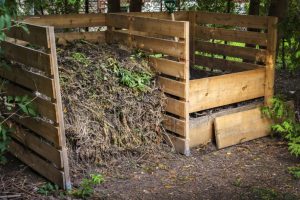 Read also: Making a compost box with your own hands: a description of the main technical points, recipes for making compost (50 Photos & Videos) + Reviews
 Gypsum creations
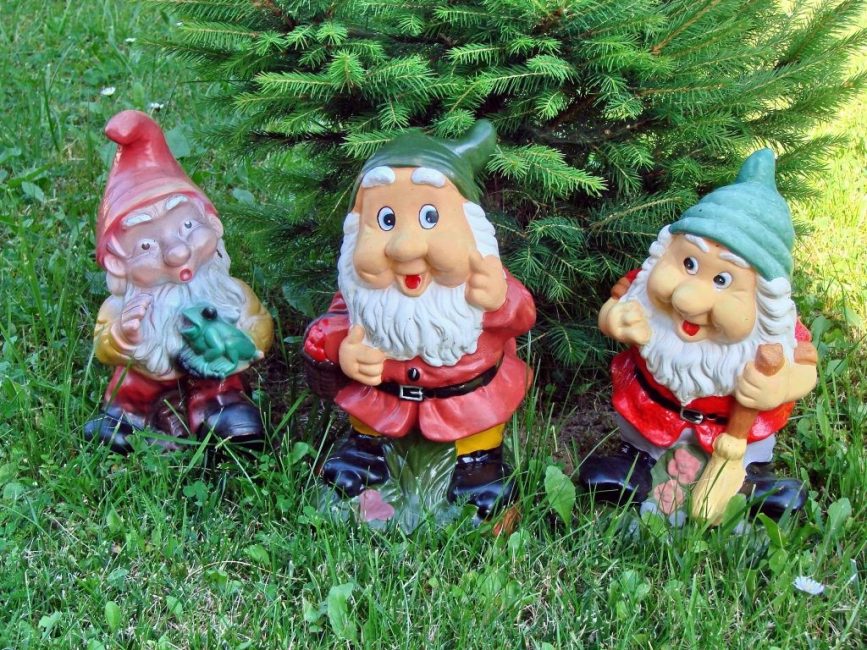
Gnomes guard the country Christmas tree
Gypsum is a very convenient material, it is strong, durable and water resistant. The colors are great on it. Working with such raw materials is a pleasure.
So, the first step is to go to the hardware store and buy the right form for pouring. Silicone is best. Let's analyze the step-by-step instructions using the example of a gypsum gnome, but you are free to sculpt any other character.
- If you plan to sculpt a tall statue, more than 1 m in height, you will need to make a metal frame. It’s better not to bother and create a low figurine up to 0.7 m. So it will become lighter in weight, it can be lifted, rearranged, put into the garage for the winter
- Dilute the composition with water exactly following the instructions on the package with gypsum. The mass is well mixed until a homogeneous mushy consistency. For the elasticity of the material, PVA glue is poured there. Approximately 10 g per 1 kg of dry gypsum
- Now fill half the volume of the mold with the prepared solution and let it set. Then fill the container to the top. Tap lightly on the sides to release air.
- The form is removed only after the gnome has completely dried. Give him at least two days
- The painting phase is coming. First, treat the entire surface with a primer. After that, you can apply colored paints, and after they dry, varnish for better preservation of colors.
 Read also: Do-it-yourself furniture and other wood products: drawings of benches, tables, swings, birdhouses and other household items (85+ Photos & Videos)
 Decorative flower pots (pots)
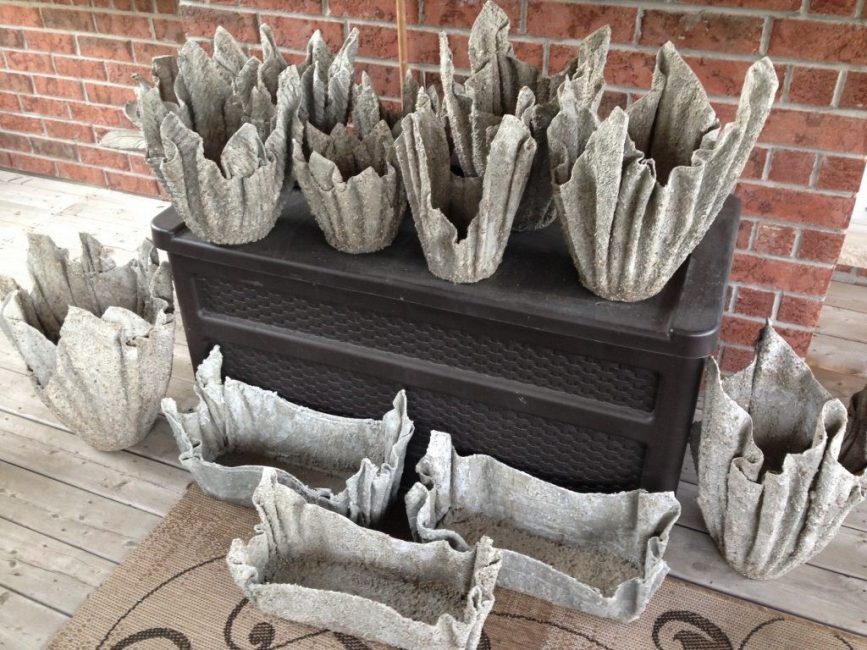
Unusual cement pots
In addition to heroes from fairy tales, animals or men, unusual flower beds, flower beds and pots.
- Prepare cement mortar. Take an empty waste bucket and a large rag. Rinse the fabric thoroughly in the cement and throw it on top of the bucket, evenly distribute the folds. When the structure dries, the bucket is removed. To do this, gently tap on it with a hammer. Before you will be an unusual vessel made of a frozen rag
- Old tires fit under the flower bed. If desired, they are simply decorated and flowers are planted inside. And yet, the inner circle can be cut into cloves and turned outwards - it will turn out beautifully and elegantly.
- Cut large plastic bottles, 20 liters, and paint in a bright color. Arrange them in an interesting ensemble, and plant inside the plant. Just do not forget to make holes in the bottom so that water does not stagnate after watering.
- Make a cement mold from the head of an unwanted baby doll. Coat it with the composition, leaving the top intact, and when the substance dries, remove the plastic. The stone head needs to be painted for aesthetics. Inside they fill up the earth and plant flowers
- Similarly, vessels are made from balloons.
 Read also: Do-it-yourself construction and arrangement of a summer kitchen in the country: projects, design, device, with barbecue and barbecue (60+ Photos & Videos) + Reviews
 Country ideas from cement
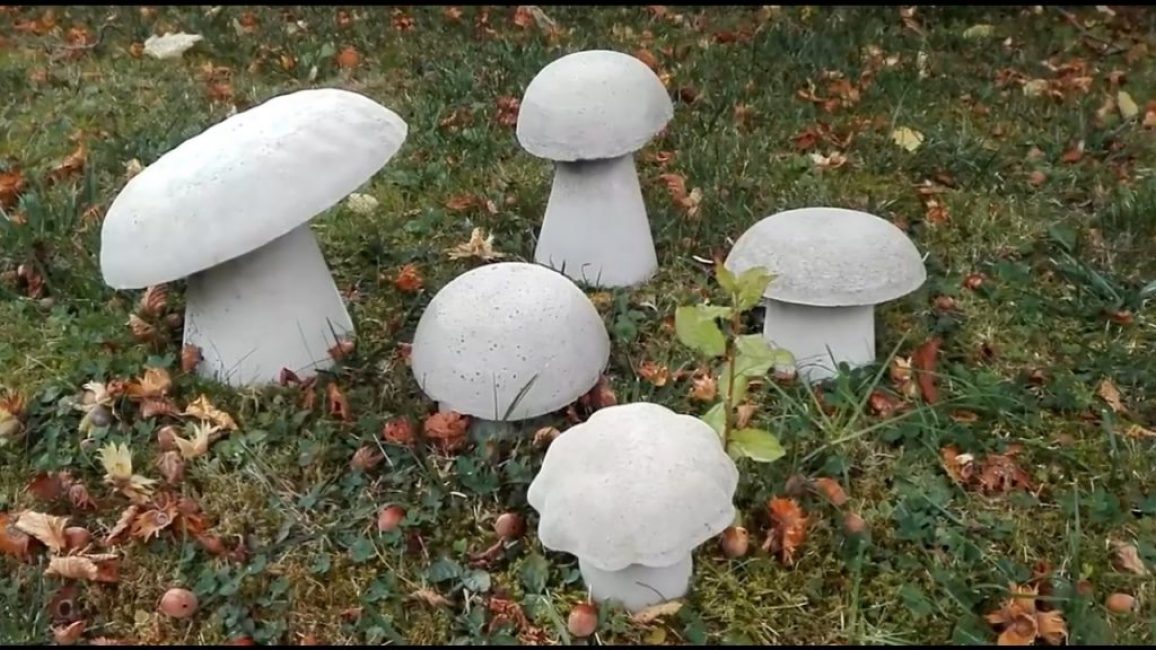
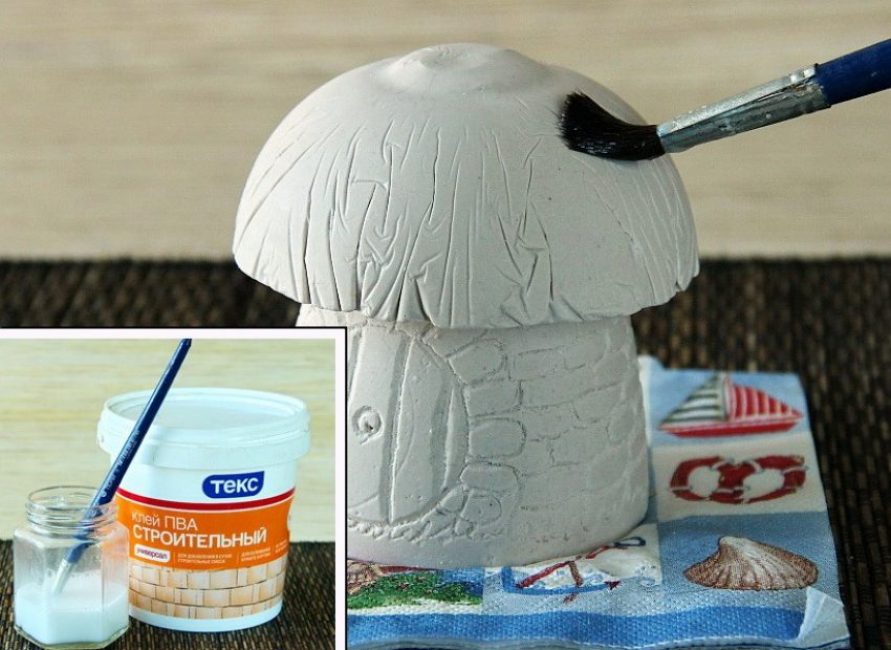
Cement garden mushrooms
Mix the cement mortar.
Openwork ball of ropes
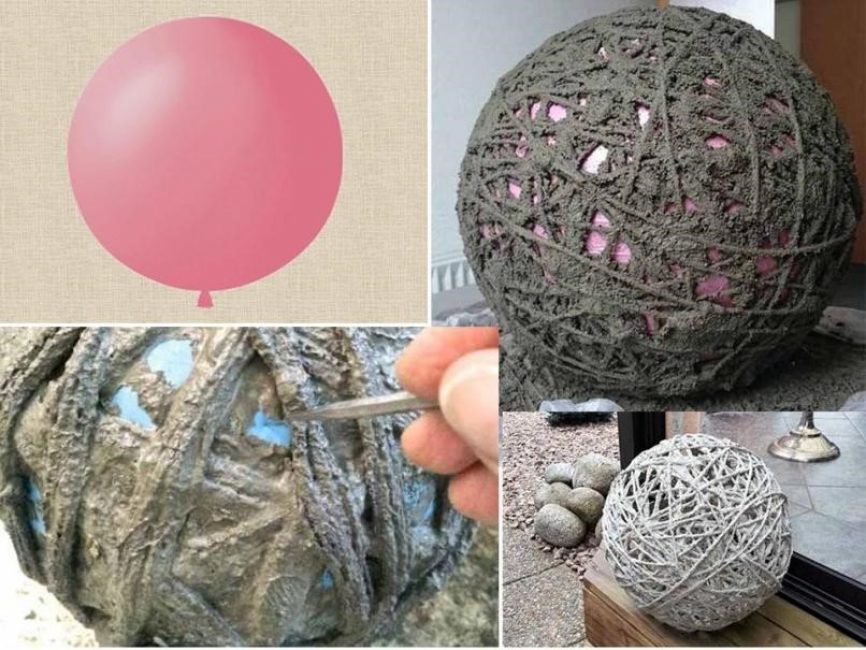
Woven rope sphere
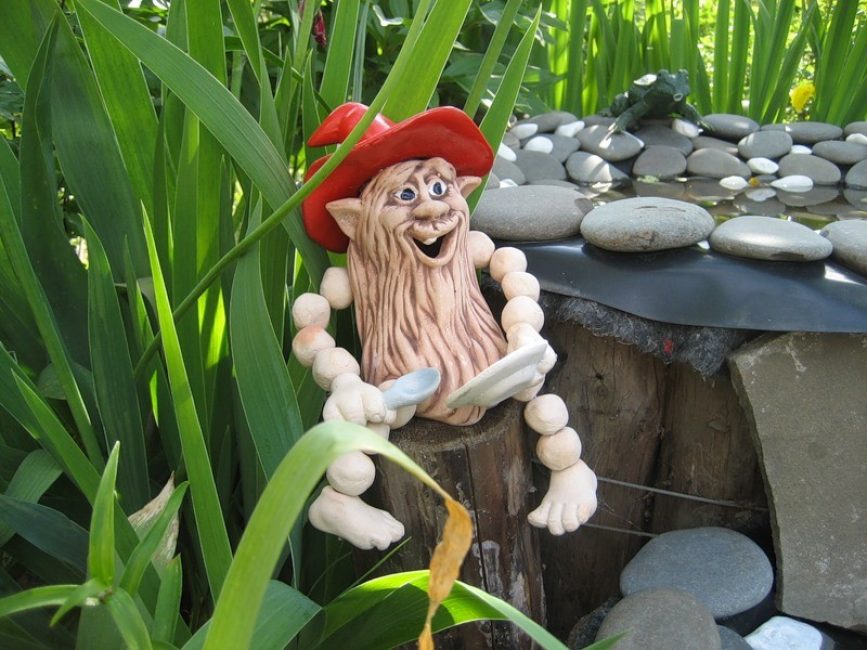
Gnomes

Gnomes from cement
Here we will tell you how to make a gnome without buying a special silicone mold.
What you need:
- Solution
- metal pin
- ropes
- Nylon stocking
Stages of work:
- Pour cement into the stocking and insert an iron rod there for stability.
- Highlight the nose area with your hands and twist the rope there. Should be a round ball.
- Make round legs, by analogy with how the nose was designed
- Under the nose, stick a piece of a thin rag folded in half, previously dipped in cement. It will be a beard
- Pull the stocking over the pin, fix and hang its end to the side to make a sharp hat with a tassel
- When the structure is completely dry, it is coated with a cement-gypsum mixture. So the paints will lie on the surface better and brighter
- Color the new country dweller
dragon eggs
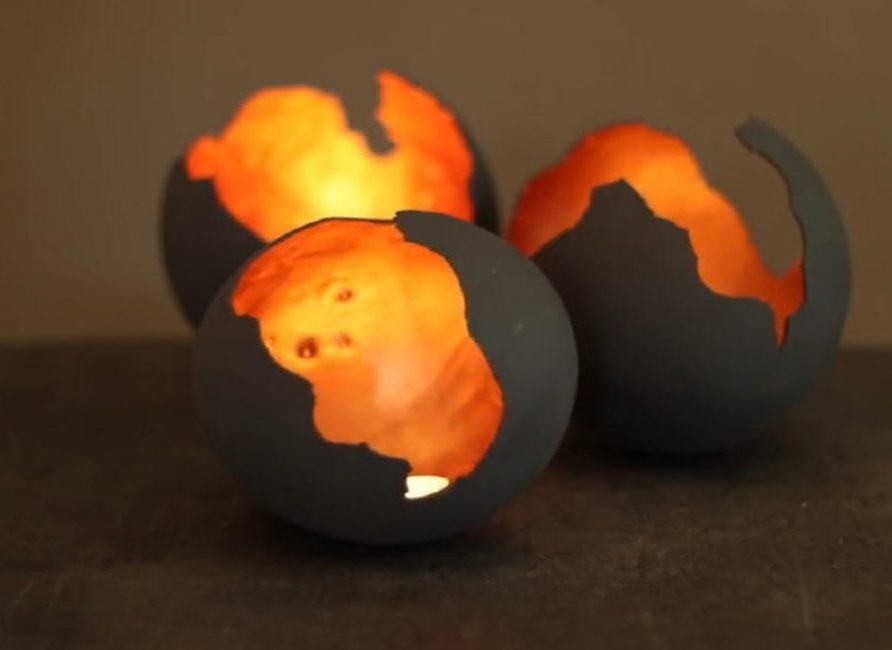
Mystical charm of dragon eggs
Add a little mysticism and mysterious paraphernalia to the design of the garden. How do you like the idea, laying real dragon eggs in the most often?
- Take ordinary balloons and smear them with cement mixed with plaster, approximately to the middle of the form
- Let the edges of future eggs be jagged
- Remove the bead when the shell is dry
- Now paint the inside of the egg with yellow paint with reflective or glare particles. This will give the impression that the shell exudes fiery light from the inside.
In the evenings, you can put lit candles inside.
Vegetation
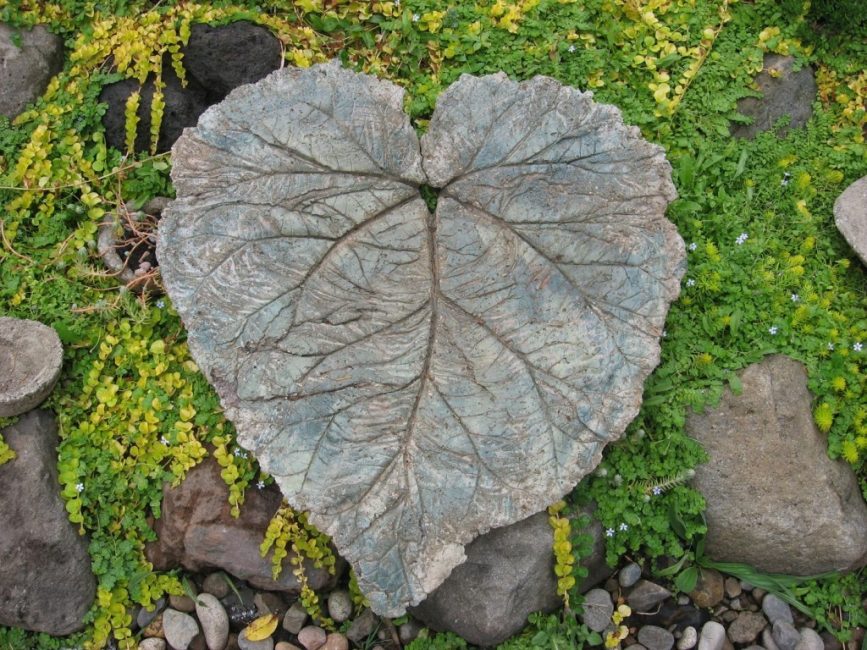
stone leaves
Look for large, thick leaves with a raised vein pattern. Plantain or burdock will do. Gently apply a thin layer of cement to them.Make sure that the mass exactly repeats the outline of the sheet.
When the substance dries, you will get pretty stone sheets, which can be intricately laid out near the pond, by the fire, arrange a gazebo. Use your imagination and create a whole composition from various cement crafts.
From toys
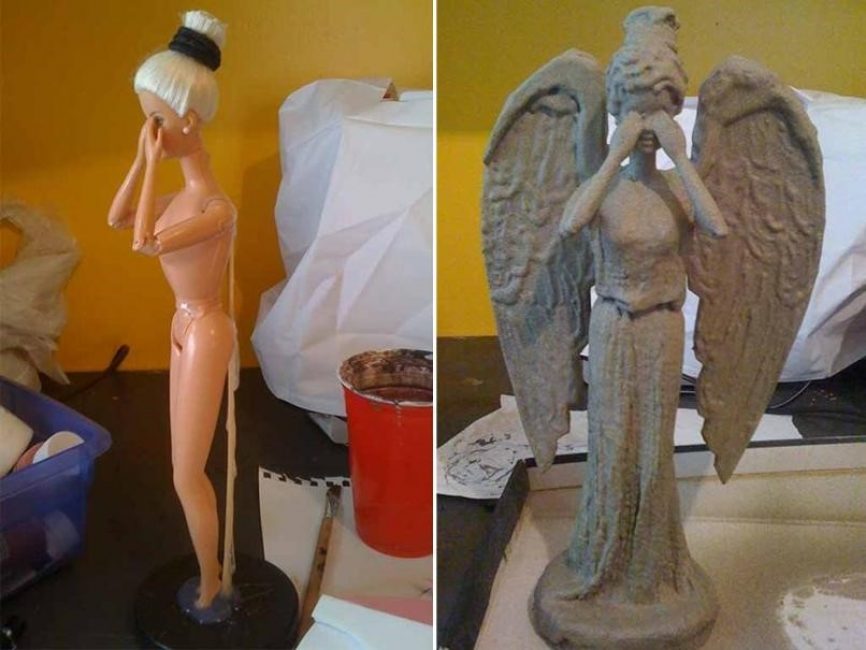
fairy fairy statue
Elegant garden statues can be made from ordinary toys. Take, for example, a Barbie doll, put it in an interesting pose, put on a fluffy dress, and dip it in a cement composition. Shake off excess, wait for drying and cover with white paint or lime in several layers.
If you want a garden fairy, first attach fairy wings from a plastic bottle to the toy. Place cement hares, cats, dogs next to it. Any animals that have taken a cement bath in the same way.
Working with old tires

Fence made of wheels from a car
Car tires are a versatile material. They make figures, country furniture, flower beds, borders, steps, swings. Rubber is cut, painted, bent and twisted.
Here are 5 cool ideas for using tires in a garden exterior:
- Bright border. Cut each tire in half and dig the cuts into the ground. Paint in joyful colors
- Picturesque fence. When there are a lot of tires, you can lay out a wall of them by placing them in a checkerboard pattern on top of each other. Pour the earth inside and plant grass - you get an amazing flowering fence
- Wall flower beds. Just hang the tire on the wall, fill in the soil and plant flowers
- Swing. First, the wheel is painted and a plank is nailed to the bottom to close the hole. Then it is hung from a tree on a chain or rope.
- Animals. Dig two small tires horizontally into the ground. One large one is vertically installed on them and another smaller one on top: the torso and head

Teddy bear from car tires
Separately, one wheel is cut and cut into strips, from which paws, ears, and a tail are formed. A muzzle is drawn on the top tire. The animal is decorated, supplemented, if necessary, with tails, horns, different paws.
Foam sculptures
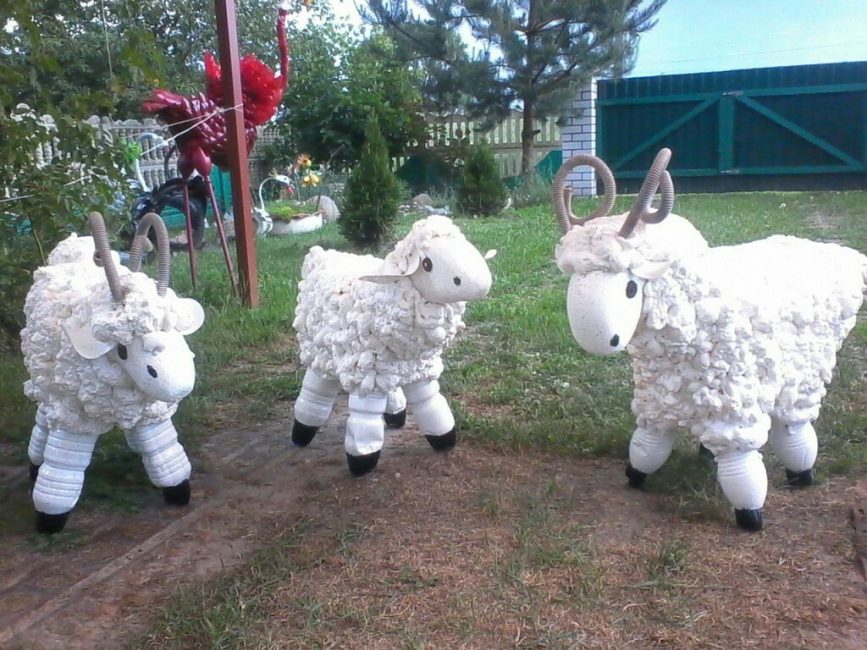
Curly sheep
When working with a can, follow the safety precautions, carefully read the instructions. Wear protective gloves, do not work near fire. This material is very popular in the independent decor of summer cottages.
First, it is practical, inexpensive and lightweight. Secondly, after drying, the foam is easy to cut, to give the figure the desired shape. Thirdly, she is not afraid of weather phenomena, does not get wet, does not freeze, does not deteriorate from the heat.
We will tell you step by step how to make a cute sheep:
- Make a base from plastic bottles: stick 4 legs from one and a half bottles into the eggplant body. Attach a tin can to the place of the head
- Shake the can and start spraying the foam. Make sure that the "wool" lies evenly. After the material dries, it will become clear where it needs to be added.
- Dry foam is cut with a clerical knife. Give the sheep a round shape. Sand it down with sandpaper for smoothness.
- Paint the animal with pale yellow paint, draw eyes, color the hooves
Character for a fairy tale atmosphere
As you can see, garden figurines are very easy to make with your own hands. Requires a minimum of skill and special skills. You practically do not spend money, while creating a unique and unique design of your site.
No design project, no complex installation, no huge list of materials is required. If desired, you can use any construction waste, cement residues, old bottles and unnecessary tires. Add some paint, a little fantasy, and spice it up with a pinch of enthusiasm.
Surprise your guests with your site and enjoy it yourself. Rid the courtyard of boredom and monotony, save it from the banal, albeit newfangled, landscape style. Let bizarre flowers grow here, fairy-tale characters start up and funny animals from the magical forest settle down.
DIY garden figurines
Watch the video, the author of which tells summer residents and gardeners fresh and original ideas for the creative design of a suburban area with their own hands:

VIDEO: DIY garden figures
We create garden figures with our own hands. Simple and interesting ideas from improvised materials (125+ Photos & Videos) + Reviews


I found a lot of new ideas for myself in the article, I especially liked the gnomes and cement doll sculptures. They look the most presentable. I would like to try and create something similar. But what should be the composition of the solution? What brand of cement can be used? Can sand be added to it? Can cement figurines be painted with acrylics? And it seems to me that cement products, so that they do not crack, must be ironed a couple of times (covered with cement milk).
Necessary
Very beautiful and original figurines! Thanks for the colorful pictures! Well, I would like even more pictures and more detailed descriptions. Thank you for everything that I saw very beautiful and positive!