
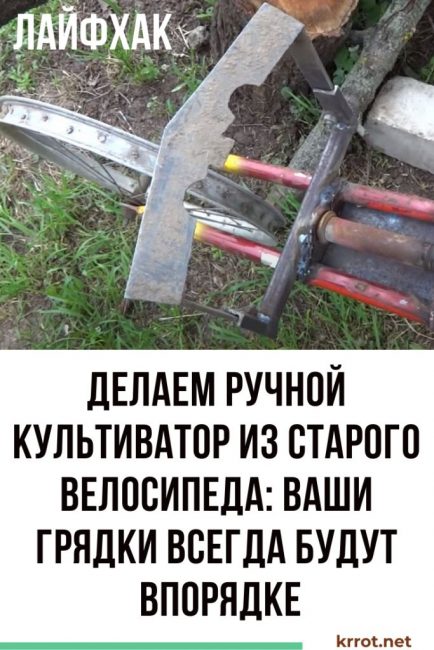
Warm and early spring contributes to the rapid planting of vegetables in household plots. Now is the time to think about weed control. Of course, you can do this with an ordinary chopper, but this is a very long and laborious process. In our article, we will tell you how to speed up weed control by making a manual cultivator with your own hands from improvised means. This tool will greatly simplify the weeding of vegetables on your site and save much-needed time in the country.
Content:
 Read also: Do-it-yourself fire bowl: do we breed? fire without harming nature
Materials for manufacturing
To make cultivator, you will need:
- front bicycle wheel with fork and handlebar;
- metal corner;
- a circular saw blade or any other hardened steel that fits the size;
- sheet metal;
- Bulgarian;
- welding machine;
- metal profile and round pipes;
- fittings;
- drill;
- bolts, nuts, washers.
Step 1. Making a cultivator knife
Cut out two rectangular blades from the circular saw blade.
We cut them to size and make a wedge on one side, for subsequent welding into a V-shaped knife. Choose the size of the knife according to the narrowest row spacing that is supposed to be weeded.
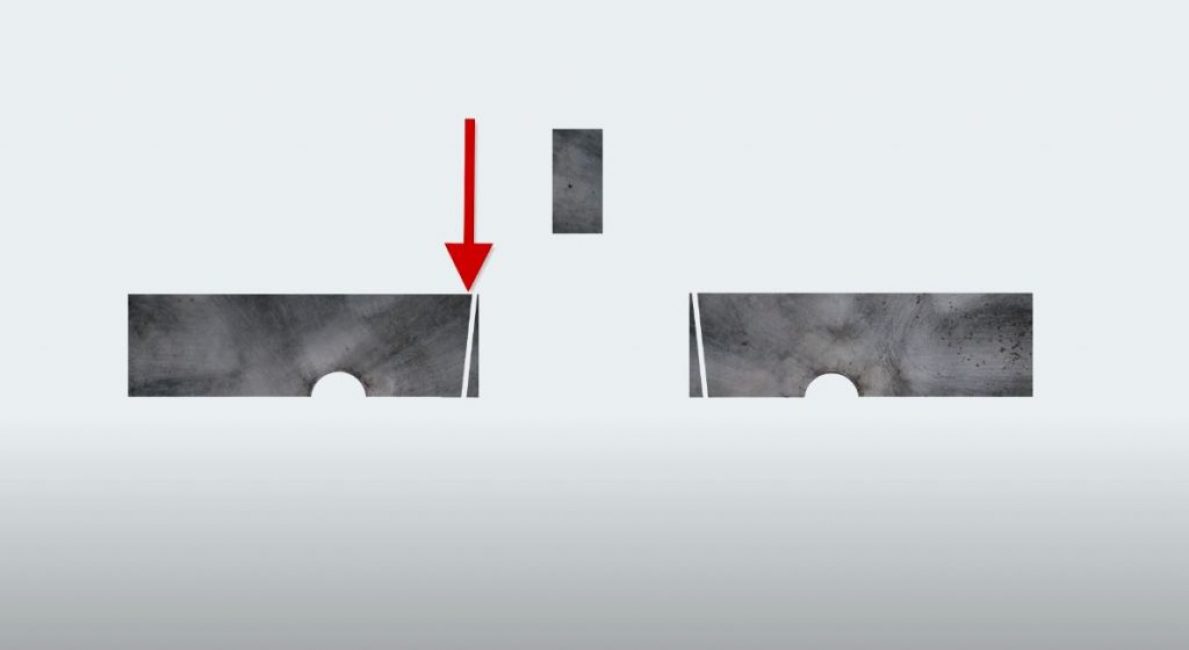
We weld the plates together, strengthening them on top with a plate previously cut off from the disk.
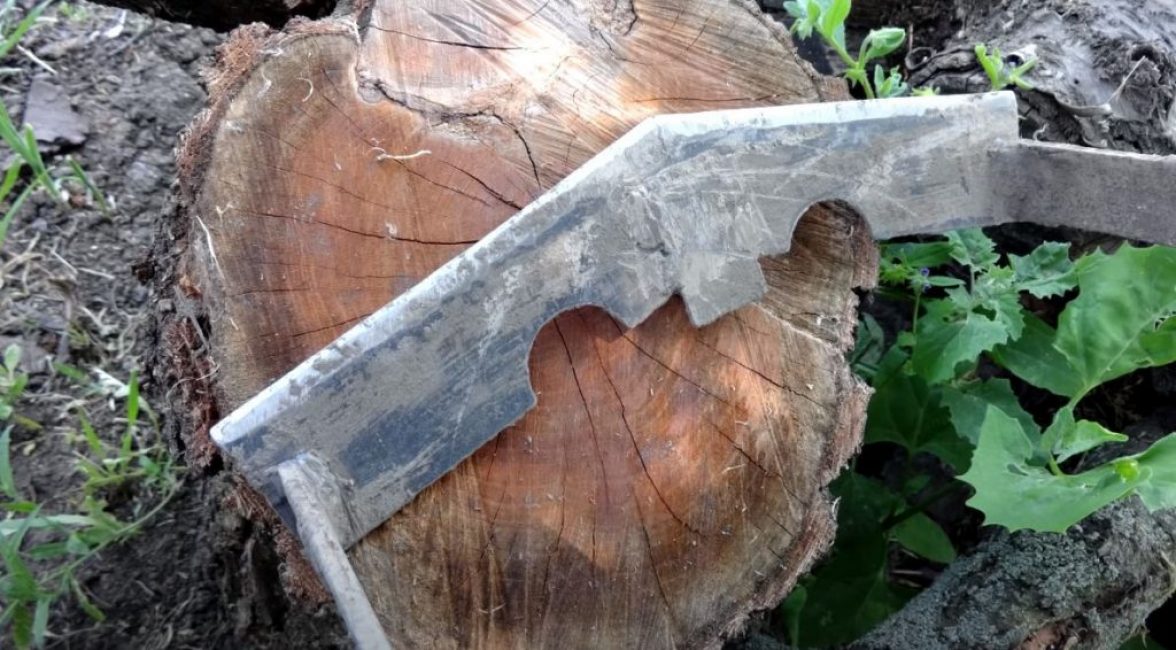
We sharpen the resulting knife. As a result, the knife looks like this.
Step 2. We collect the bipod of the cultivator
We cut out two plates from sheet steel with the expectation that the working depth of the cultivator is ≈200 mm.
The end of the plate, welded to the knife, is cut off a little at an angle so that the knife burrows into the ground.
We drill a mounting hole in the upper part of the plate.
From the profile pipe we cut off a piece along the width of the knife. We cut off two pieces from the corner and drill several symmetrical holes in them to be able to change the depth of the bipod knife.
We weld the U-shaped connection and bolt the cultivator knife to it.
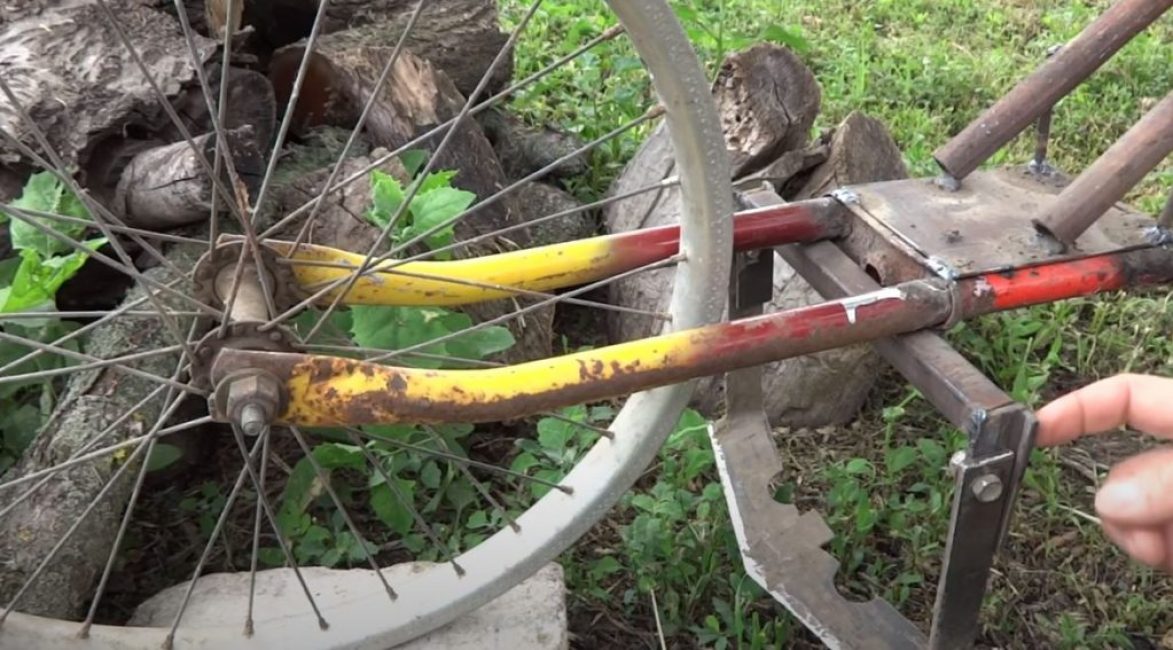
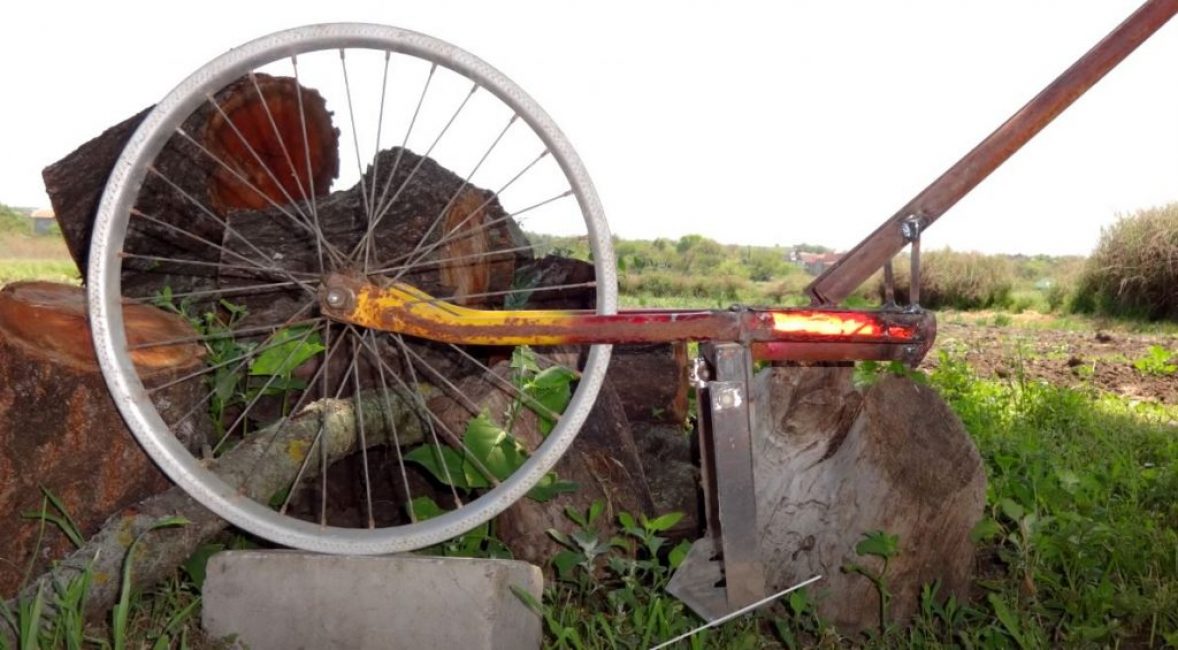
Step 3 Attaching the Bipod to the Wheelbase
We weld the bipod to the bicycle fork at a distance of ≈300 mm from the wheel axle.
Cut off the top of the fork.
We cut out a plate from sheet metal, along the width of the fork and weld it.
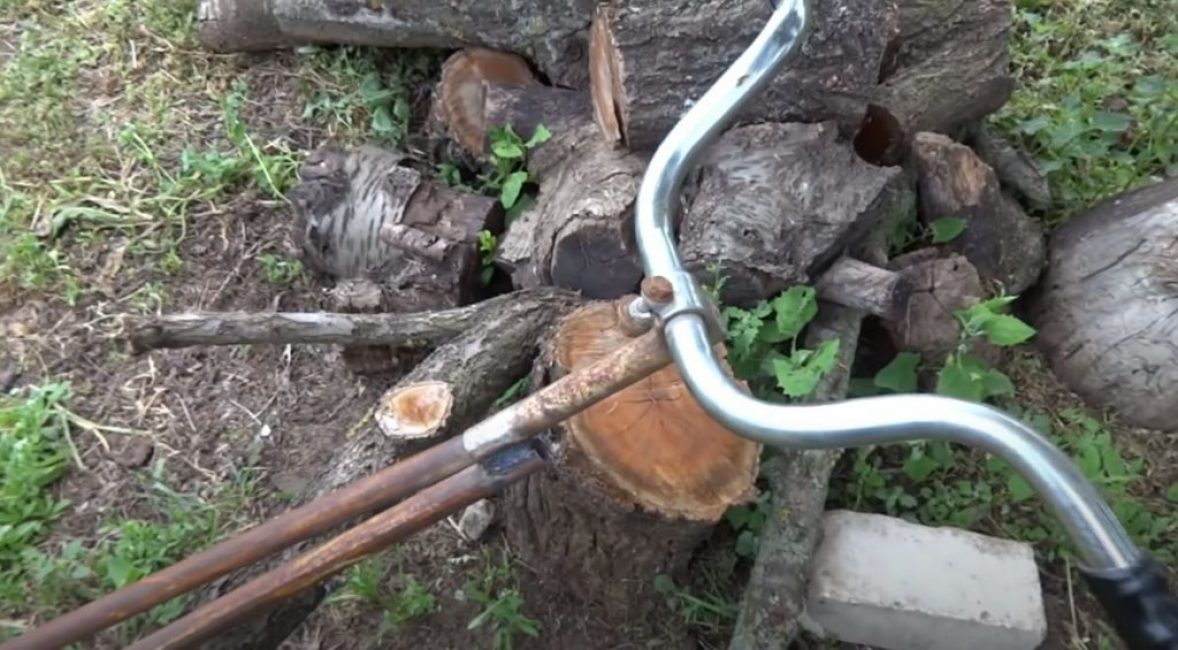
We weld two pipes to it on the spacers from the reinforcement to control the cultivator.
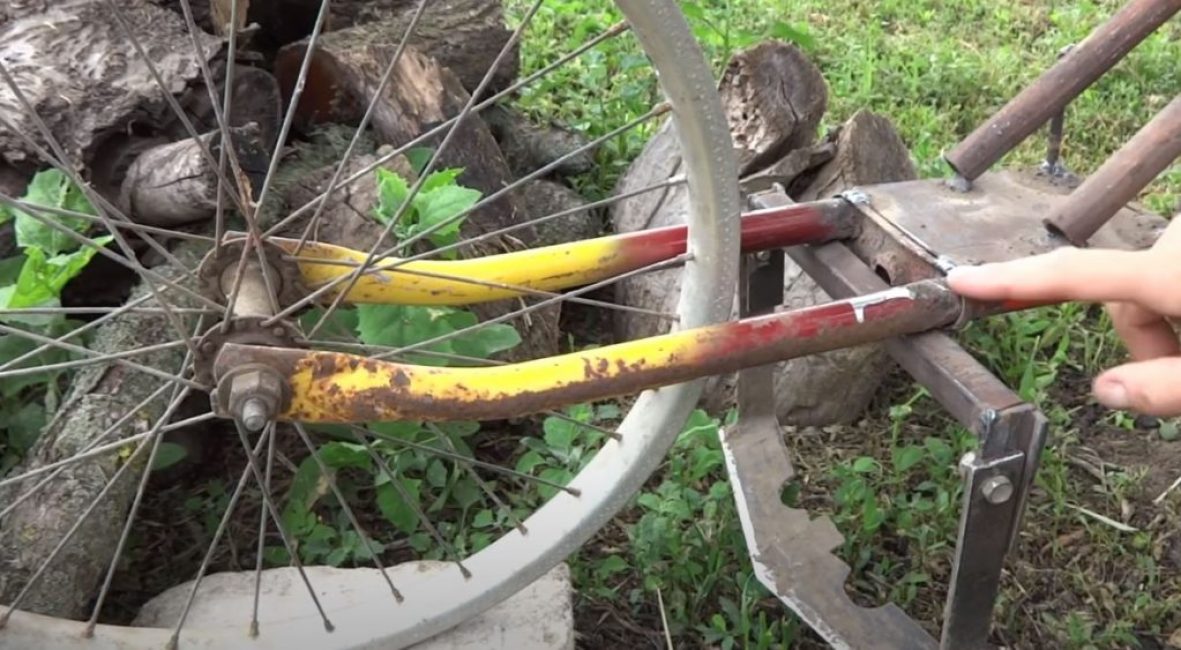
We reduce the second edges of the pipes and weld a bicycle handlebar to them.
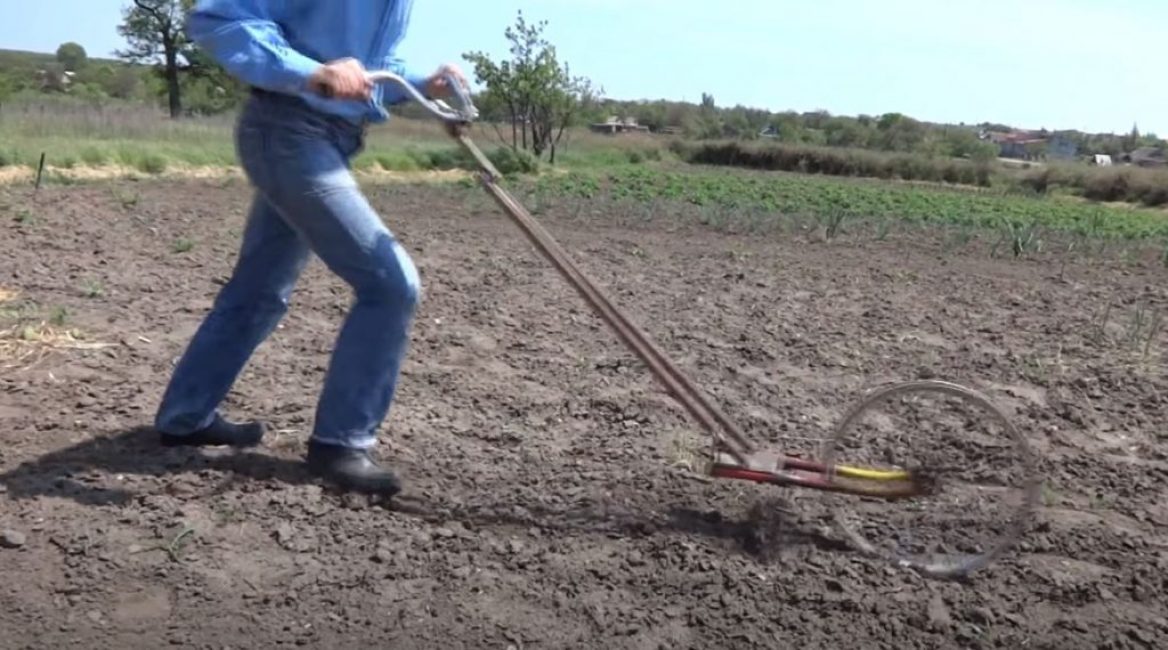
The cultivator is ready. They can easily weed both narrow aisles, for example, between onions and carrots, and wide ones (between potatoes and cabbage). Only in the second case it is necessary to pass the aisle twice. You can also work on the areas left for planting seedlings, passing the cultivator row by row.

DIY manual cultivator
Do-it-yourself manual cultivator: dimensional drawings | +Video


