
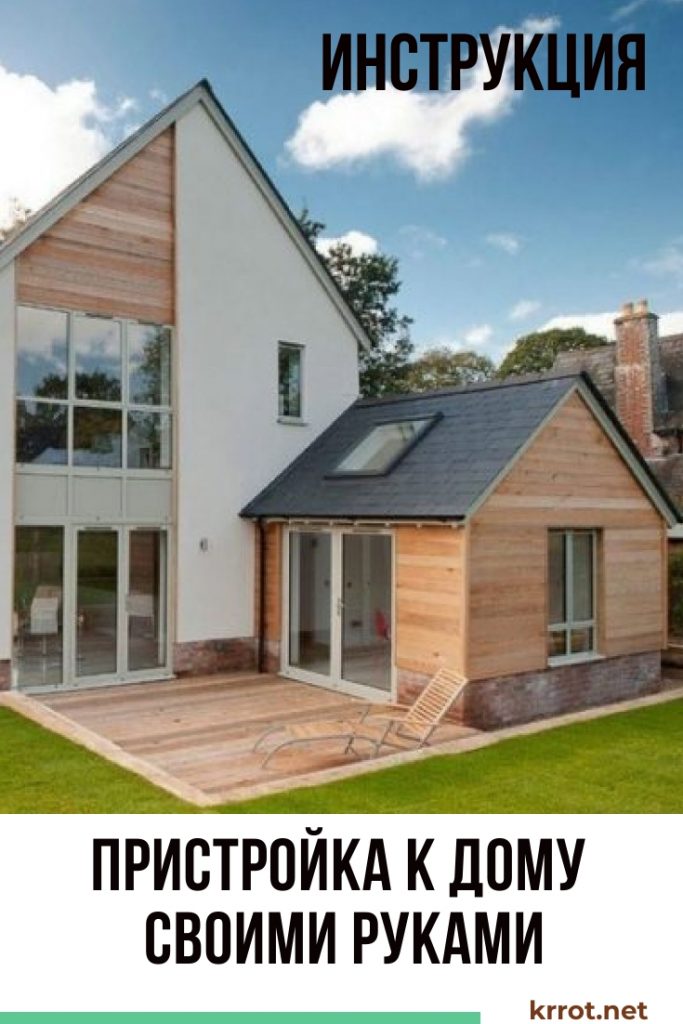
Sometimes it becomes necessary to modify your home. The goals are different - to expand kitchen, attach veranda, equip a technical room or an additional living room. Then the question arises for the owner of the house. What to do? A common option for expanding the area is an extension to the house with your own hands. It's cheaper than building a whole house. Allows you to avoid credit loans for years that not everyone can afford. All in all, it might not be very expensive. This refers only to the construction itself. A house that is overgrown with properly made outbuildings becomes more comfortable and beautiful.
Content:
 Read also: Projects of country houses for 6-10 acres: 120 photos, description and requirements | The most interesting ideas
Organizational moments
Even at the stage of considering the construction, you already need to be prepared for the fact that when the time comes to legalize a new structure, you will face difficulties. From the organizational and technical sides, this is all more difficult to consider. If the main building has already been designed and put into operation, then self-construction can lead to its accident rate.
The set up is not cheap. The type and design of the extension will be taken into account. New results for the operation of all housing will be required. But difficult does not mean impossible.
For registration you will need:
- Ground investigations at the construction site. Pleasure is not cheap. This is necessary to guarantee the reliability of the new structure, which in turn is important for the integrity of the old house.
- Checking existing housing
- Obtain building permits from neighbors
- extension project, designed by yourself or custom-made by specialists
- Approve the project from a licensed construction company, firefighters, SES, electricians, public utilities. Columns 1, 2, 4 by order in a construction company are solved faster, and at a price they are cheaper
- Obtain a building permit from the architects. Here you can also combine columns 1, 2, 4, 5 by ordering a “project by key” or “project with binding”
- Upon completion of construction acceptance of the building by the authorities that issued the permit
- Renew all contracts with public utilities for a new area
- Re-register a new area in the tax service, cadastre
If everything is done correctly, then the specialists of licensed firms often do not harm and quickly draw up all the documents.
 Read also: Terrace attached to the house: 150+ Best photo ideas | Do-it-yourself step-by-step arrangement
 Basic requirements for construction
The project of the future extension should be well planned from the beginning, so as not to lead to additional alterations later. It is necessary to think over all the points in advance. Each structure has its own conditions for construction.
For a living room, all structures must have good insulation. Otherwise, the heating will not make sense. It is also very important to prevent dampness in the room. Reliable waterproofing is a guarantee of normal operation of the premises, will make it reliable, durable. Natural light is also important.
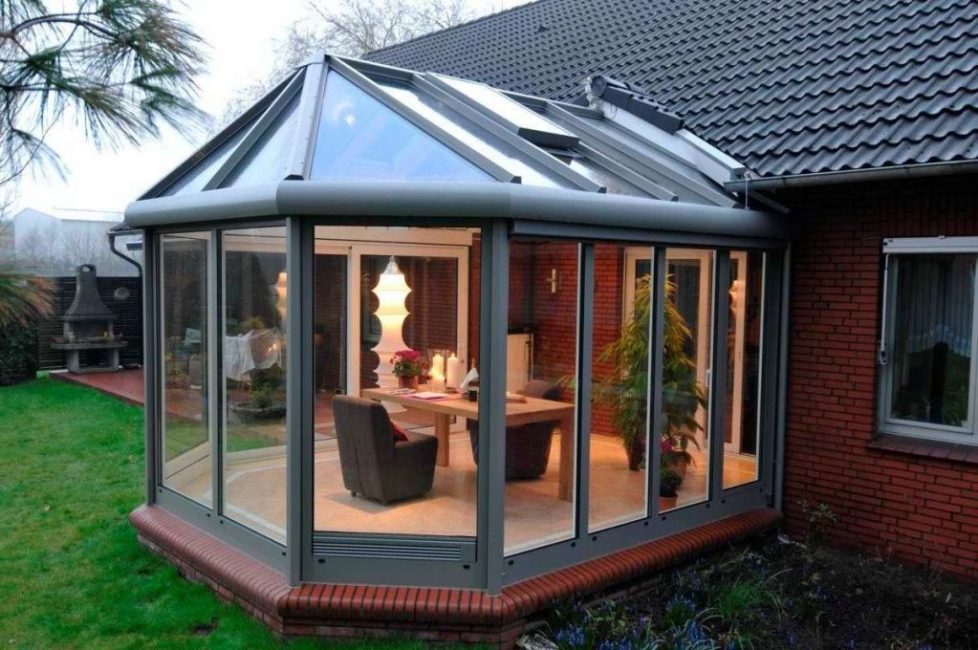
Glazed veranda
For cuisine and a bathroom, engineering communications are brought in advance. This is best done before filling. foundation. Particular attention should be paid to the insulation of the building and good waterproofing of the floor.
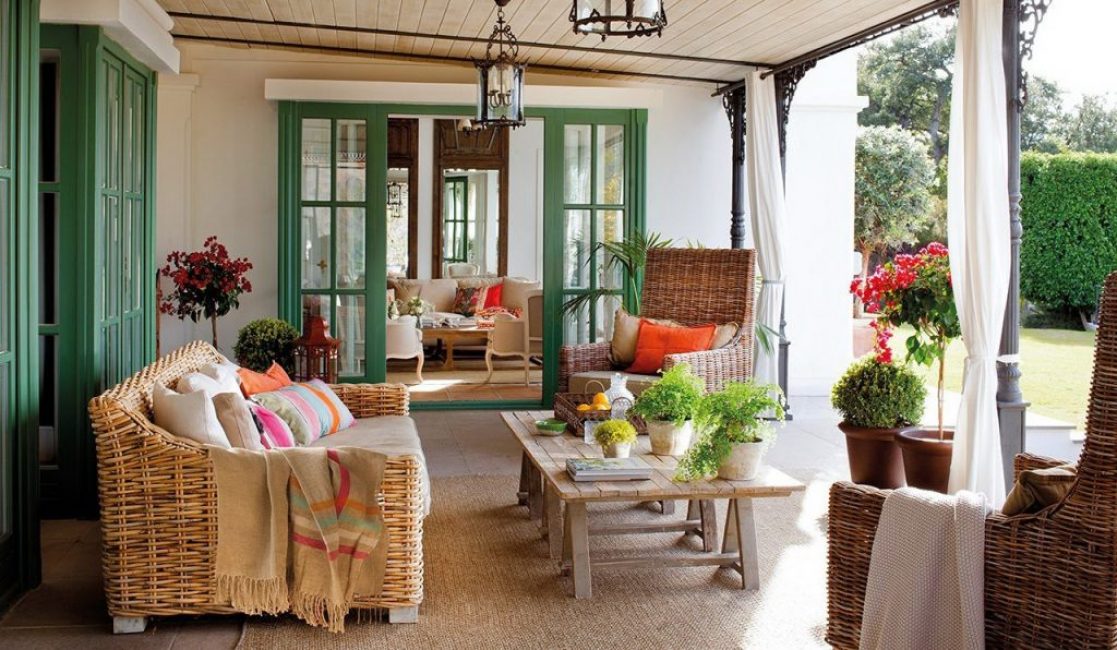
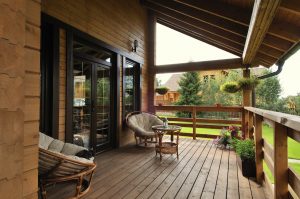
The main function of the veranda is to protect the entrance to the main building from bad weather. They rest here in summer. You don't need to warm up. Foundation waterproofing is very important. The structure can be in the form of a conventional flooring, with low walls and a roof raised on pillars. Walled verandas are also built, with a door and one or more windows.
 Read also: Veranda attached to the house - expanding the living space: projects, tips on how to create your own hands (200 original photo ideas)
Where to start?
With any construction, they begin with preparatory work. The site is thoroughly cleaned of debris and everything necessary for construction is prepared.
A drainage system is required under the building. To do this, the earth is compacted, and a slope is made at this place for water flow.
 Read also: Making a greenhouse with your own hands from a profile pipe and polycarbonate: a complete description of the process, drawings with dimensions, watering and heating (Photo & Video)
 Foundation
The base for the construction of the structure is tape and columnar. Each has its own qualities. To select the most suitable, you must first study each.
Strip foundation
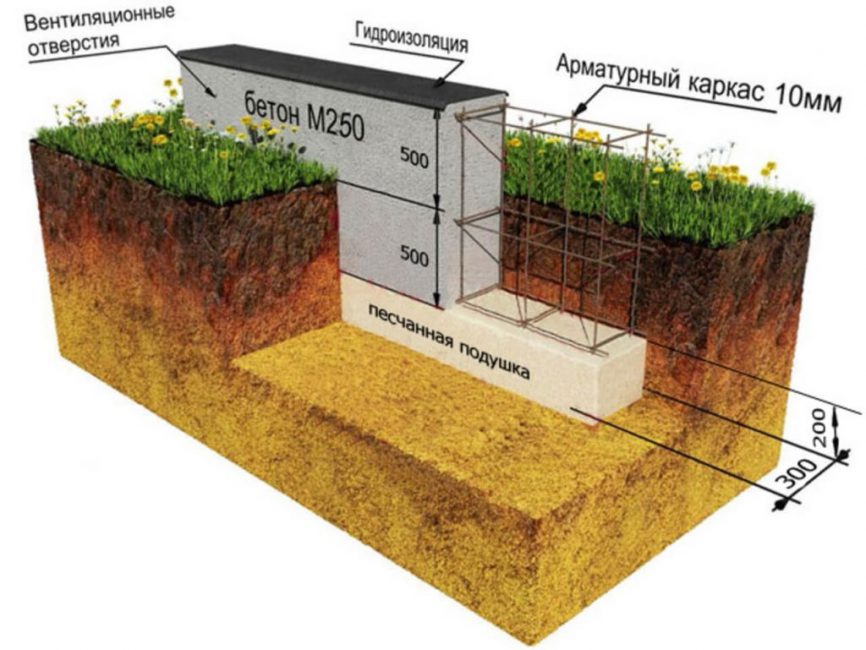
Sample diagram of a strip foundation device
This foundation is done in the following order:
- The rope is used to mark and trace the site for construction. It is stretched and fixed. According to this outline, a trench is dug to the depth of the base of the main building and 10-15 cm wider than the wall
- The bottom of the trench is covered with a 10-12 cm layer of sand. All this is carefully compacted. Next comes the crushed stone, which also needs to be compacted. Broken bricks are allowed
- The next step is to lay a waterproofing film along the trench. It goes 40-50 cm above the ground. It closes the foundation from the inside, and the formwork above the ground. Then the reinforcement is fixed. Its design in shape should be a repetition of the foundation to its full height.
- The concrete mortar should consist of cement with gravel. They fill 1/3 of the height of the trench. This layer must be completely dry. Next comes another layer of concrete. It will fill half of the remaining height
- Having installed the formwork, form the base. The waterproofing remains in the formwork, straightened along its walls and fixed from above. The film must not slide into the concrete. The formwork is completely filled with concrete. The solution must be pierced with a shovel so that there are no air cavities inside. The formwork is also lightly tapped so that the resulting vibration compacts the concrete solution well.
- Upon completion of the pour, the concrete is leveled and left to dry completely. Every day it is sprinkled with water. This makes it more durable. When it hardens, the formwork is removed
- It is recommended that the foundation be additionally covered with waterproofing compounds or materials in rolls. These are liquid rubber, tar, bituminous mastic and roofing material. Then they start building walls.
- The internal space of this foundation is equipped with various options. For example, using a concrete screed or flooring from floor beams and logs, with the installation of a wooden floor in the future
Column Foundation
Sample diagram of a columnar foundation device
This type of foundation is built of brick or concrete. Possibly both materials. This basis is used for the construction of verandas and living rooms, with further planning for the installation of boardwalk.
The foundation is carried out in the following order:
- First, the marking of the selected site for construction is also applied.
- Pillars should be placed 1.5 m apart. For them, pits are dug 50x50 cm in size and 50-60 cm deep. The dimensions of the pit at the top expand by approximately 10 cm on each side
- Further, the bottom of the pits is reinforced with sand and gravel. Waterproofing is being laid
- A layer of cement mortar is poured under the brick supports. It must completely freeze. After that, brickwork is done
- For concrete pillars, reinforcement and formwork are installed in the pit to the height of the future pillar. The waterproofing film is laid inside the formwork and fixed from above.
- The formwork is filled with concrete mortar in layers, each of which is allowed to dry.
- The top of the post is leveled and sprinkled every day with water until the concrete is completely dry.
- After that, the formwork is removed. With the help of warm bituminous mastic, the poles are pasted over with roofing material
- The void around the pillars is covered with earth with gravel. Every 10-15 cm it must be compacted
- Roofing material is laid on the pillars in several layers. This will be the waterproofing protection of the wooden bars. They will be mounted on top.
 Read also: How to make a beautiful and inexpensive fence in the country with your own hands: wood, metal and polycarbonate | (70+ Photos & Videos) + Reviews
Floor bases
Floors made of wood and concrete are laid on the strip foundation. The tree is also laid for a columnar foundation without lintels.
concrete base
Concrete base for floors
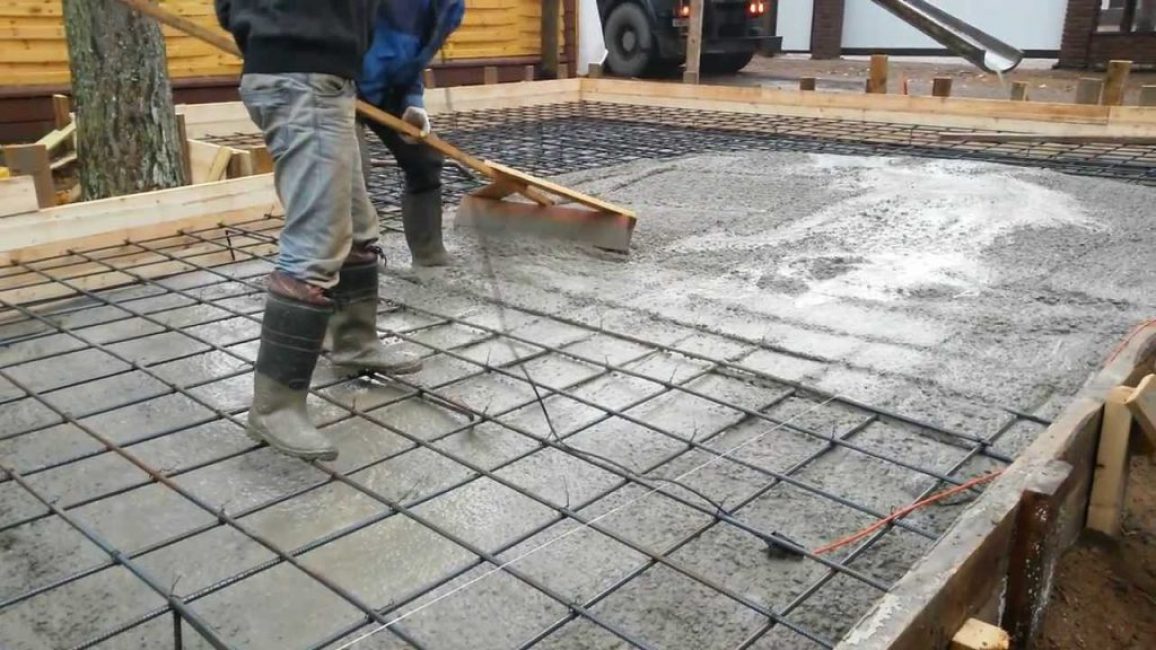
For the reliability and warmth of the floor screed on a strip foundation, work is carried out in stages according to a certain technology:
- At the beginning, the earth is removed from the foundation. It is loosened and removed. The depth of the pit should be approximately 25-35 cm
- The bottom is filled with 10 cm sand. It packs up well. Then crushed stone or expanded clay is laid in 15-20 cm. The second material makes the screed warm
- Everything is well leveled and the reinforcing grate is laid. A system of beacons is installed on it at a horizontal level. Some rooms require a sloped surface. For example, in a bathroom or on an outdoor terrace, water from the floor must flow freely to the drainage system.
- The next step is pouring cement and leveling. After a day, it is recommended to cover it with plastic wrap. This will make it more uniform, durable
- When the structure is ready, a floor covering or a wooden floor can be laid on a concrete base.
Wooden beam base
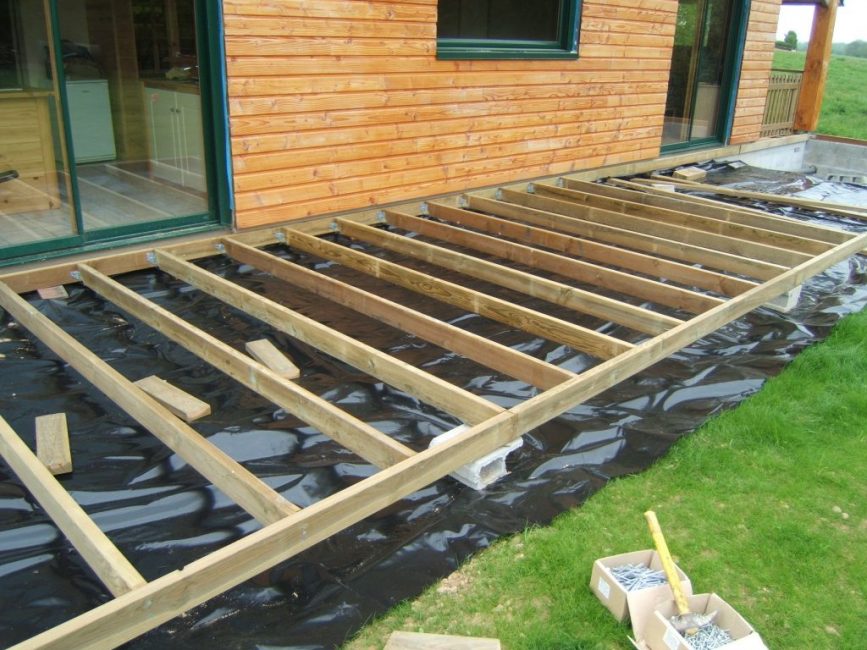
Base made of wooden logs
- To make the floors durable, choose high-quality crossbars.
- Wooden bars, 15x10 cm thick in cross section, are placed on the foundation, on a roofing felt substrate.
- They are attached to concrete using through joints or corners.
- The beams are also fastened to each other with powerful corners. All this will hold securely.
 Read also: How to make a children's house with your own hands: from wood and other materials. Dimensional drawings | (80 Photo Ideas & Videos)
 Wall materials
Any materials for the construction of an additional annex are used. The walls are built of brick, frame, foam blocks. The main thing is that all this has a good combination with the main house.
It will not be difficult to repeat the exterior decoration of the house. Wood, for example, goes well with all materials and looks good without additional processing.
Frame walls

An example of a frame structure
The construction of a frame structure is a good option:
- construction is fast, in a matter of months
- due to the ease of construction, no capital foundation is required
- you can do it yourself
- at an inexpensive price
The foundations of the house and self-building are made on the same level. Accession should not be capital, because. the extension will sag after a while. A deformation seam is made. Frame structures do not shrink vertically, which is very attractive.
The frame for the walls is made of timber and attached to pre-assembled coronal rungs. The bars can be attached separately. But it will be easier to assemble all the parts together with special fasteners, and then install them as an assembly.
To attach the frame to the main building, vertical markings are made. Here you need to be precise.After installation, to make the frame stronger, it is immediately upholstered.
The upper beam along the house is attached to the main wall with anchor bolts. Insulate the walls after installing the roof.
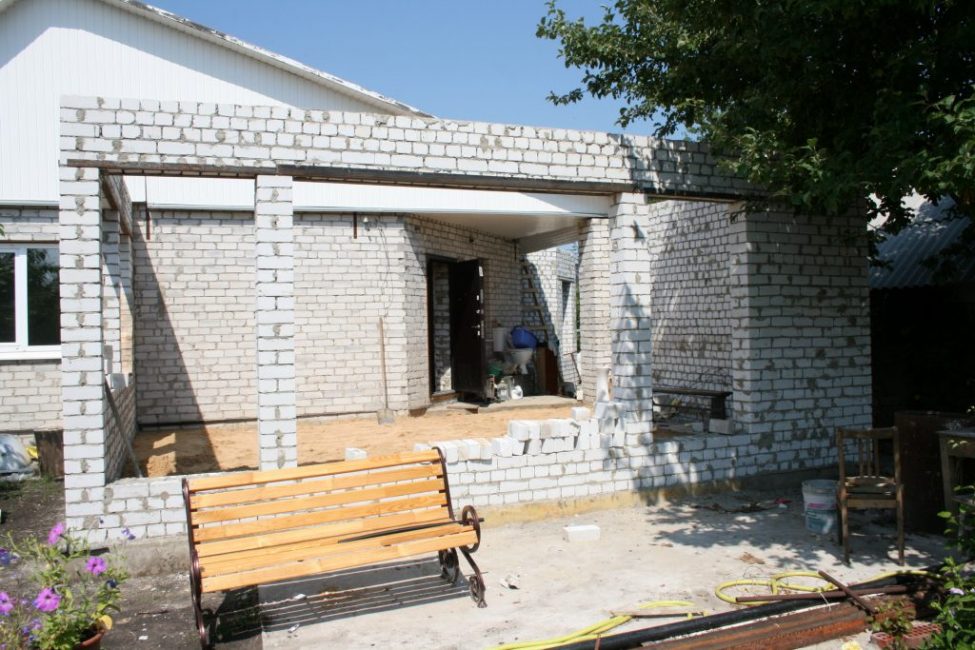
brick walls
Brick walls require a perfectly flat foundation surface. Everything is checked. If there are any irregularities, they must be corrected. Otherwise, this will lead to cracking between the bricks during shrinkage of self-building.
For the most part, brick structures are attached to the house from the same material. It is tied with a metal frame, which is placed in the prepared holes. They are made in the main wall at 2/3 of the depth. Repeat every 2-3 rows. The reinforcement should protrude from the wall by at least half a meter and end up in the seams of the masonry. It is important to take the rods are not thick. Otherwise, the seams in this place will be very wide. Or you will have to make a recess in the bricks under the reinforcement.
brick veranda
A brick extension is also attached to the tree with a frame. It is placed in through-drilled holes. Transverse stoppers are made on the reinforcement. They will keep them in the wall.
To follow the rows horizontally, you need to pull the cord along the future wall. A plumb line checks vertically.
The wall thickness will depend on the functionality of the attached structure. For a living room, a brick is laid in 1-2 layers. On the terrace or an outbuilding, a half-brick layer will suffice.
Upon completion, the brick walls are surrounded by concrete from above. To do this, set the form in which the reinforcement is placed. All this is concreted. When the mortar hardens, the form is removed and the roofing begins to be installed.
Laying brick walls is not easy, as it might seem. This requires experience. The best option would be to entrust the work to a professional. Or make walls from other material.
Walls made of foam blocks
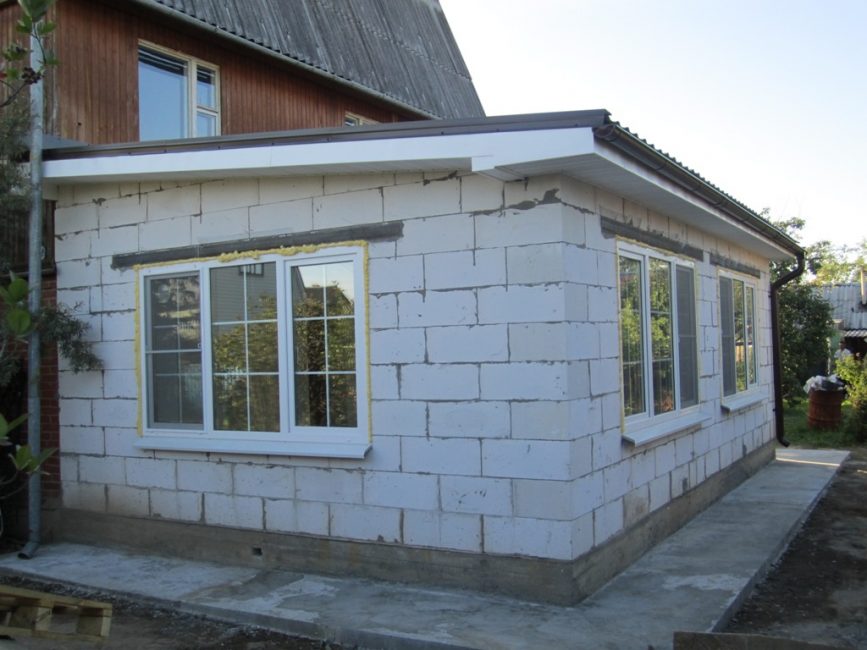
Extension from foam blocks
Foam concrete has its own distinctive qualities, among building materials:
- No special skills are required to work. Construction is possible on difficult ground
- Due to the fact that the blocks are large and light, assembly takes less time and effort compared to laying bricks or timber
- The material is durable, environmentally friendly, non-flammable and meets all fire safety standards. It also has low thermal conductivity and “breathes” well, which creates an optimal indoor climate.
- Inexpensive, easy to assemble and easy to drill
- An extension of foam blocks practically does not shrink and has a long service life.
- Additional protection is required, as the material soon loses thermal insulation due to its high hygroscopicity
- Not a very nice view. Therefore, external finishing is required.
Almost finished extension of concrete blocks
The construction of foam concrete obliges the implementation of a strict sequence of stages:
- It is necessary to start laying from the corner points
- From below, the blocks are moistened to increase the hitch. The initial row is covered with several layers of protection against capillary moisture
- The quality of the assembly is affected by the horizontality and verticality of the first row. Therefore, strict adherence to all rules is required. Horizontal irregularities are corrected with mortar
- An adhesive composition is used between masonry. Connections are obtained no more than 1 mm, which minimizes their space, in other words, "cold bridges"
- The composition is prepared, strictly following the rules. It is applied on top and on the sides of the blocks. Each brick is aligned horizontally and vertically
- Grinding grater levels the horizontalness of each row. The garbage that is formed must be carefully swept away
- Corners and every 5 rows are reinforced with rods that will bind the structure and prevent cracking. Why cuts are made with a circular saw 3 cm wide and 5 cm deep. Then recesses are knocked out with a hammer and a chisel. They need to be cleaned up.Welded rods are laid in the middle of the recesses and filled with adhesive.
Finished plastered outbuilding
For window and door openings, lintels with a width of not more than 1.75 m are installed. They are made using formwork - removable or fixed. For large openings, the strength of foam concrete is not designed. It is better then to choose a cinder block or silicate brick. This is a more secure base. The height of the jumper will depend on the thickness of the future floor.
For a removable form, metal structures of the desired size are first welded. On the sides of the opening, bars are nailed for support, a form is set on them. Shields are attached to the sides. Foam blocks are sawn into narrow blocks. They equip the form from the inside. The result will be a semblance of a trough.
The reinforcement frame is placed so that the side with a large number of rods is at the bottom. All this is fastened with struts. Then the blocks are moistened, filled with a solution of concrete along the perimeter of the walls and compacted. The poured concrete is leveled at the level of the blocks in the formwork and smoothed well.
For non-removable form, use U-shaped blocks. Setting the form itself is not required. Less time to work.
For laying such blocks you need:
- Install the block with the cut-out support on the sides of the opening. Next, check the horizontalness of the supports on the hose level. All irregularities are corrected with a grinding grater.
- The U-block is installed on the glue with the hole up. After that, a reinforcement structure is placed so that there are a large number of rods below. It is fastened with braces
- The block is moistened. Concrete layers are laid on top. They are carefully sealed with a trowel.
It is very important to install a reinforced belt on the building. This will make it resistant to various types of deformation, wind loads, and increase the carrying capacity. The reinforced belt is insanely heavy. They do it right on the walls.
 Read also: How to make a greenhouse with your own hands: for seedlings, cucumbers, tomatoes, peppers and other plants. From polycarbonate, window frames, plastic pipes (75 Photos & Videos) + Reviews
 Covering and roofing
When the walls are already erected, they begin to deal with the ceiling. For this, crossbars are used. They are installed on the walls 60-70 cm apart. They are fastened with special corners.
When installing the crossbars on a brick extension, they are embedded in a concrete belt. The sides of the crossbars are wrapped in roofing felt. Then all this is hemmed with boards or thick plywood. Insulation material is laid between the lining and the crossbars.

Covering and roofing
Roofs look different. Basically choose a single-sided view. It consists of rafters on which the roof is laid. There is nothing complicated in the installation. The main thing is not to make a mistake with the slope angle so that winter precipitation cannot remain on the roof. Otherwise, it will be damaged.
Next, put marks in the form of a horizontal straight line on the wall or front side of the roof. A bar is fixed along this line to support the support at the top. The base below will be the crossbars or the edge of the wall. In order to protect the walls from precipitation as much as possible, the rafters are released beyond the edges of the walls by 25-30 cm. They are also strengthened with the help of metal corners.
The problem of tilting the roof is more difficult to solve when it is attached from the side where the slope of the main building is arranged. There is nothing to attach the crossbar to. To do this, they remove a little roof from the roof of the housing, and a truss system is attached to its beams. Then combine the total coverage.
It is desirable to know initially what material will be on top. For a soft roof or flexible tiles, plywood or a lattice structure is placed on the rafters. Roofing iron, metal tiles, slate and other large canvases are placed overlapping each other on the rafters.
Definitely need waterproofing. It is covered with plywood or fixed to the rafters. Next comes the top coat.
To unite the roofs, at the junction, the upper row of the self-built roof is placed under the lower row of the slope of the house. If the roof of the upper part of the roof borders on the wall or front of the roof, the joint seam is necessarily covered with waterproofing. When the roof is ready, they set to work to insulate the structure inside.
 Read also: How to make a booth for a dog with your own hands: building a home in the yard and in the apartment. Drawings, dimensions and original ideas (55+ Photos & Videos) + Reviews
 Warming from the inside
Warming from the inside
For a room in which they are supposed to live, good thermal insulation is needed. The ceiling is sheathed and well insulated. After that, they begin to work on the floors.
On the installed crossbars on a columnar foundation, transverse logs are fixed from smaller bars. A draft is arranged on them floor. To do this, the boards are placed in a continuous flooring. This will keep the heat from escaping. Houses. After the draft floor is smeared with a thick solution of clay. It should dry well. Then a vapor barrier film is laid on it.
Insulating material is laid between the lags. It can be mineral wool, expanded clay or slag. Then they cover with another layer of vapor barrier, and plywood is laid. Then any floor material can be laid.
Concrete can be insulated in the following ways:
- Mineral wool is laid between the lags, which are fixed on a concrete base. All this is covered with boards or plywood.
- Through the "warm floor" system. It is installed on a finishing screed
- An infrared film is placed on a special reflective substrate, and then covered with a decorative coating
- Using dry screed and gypsum fiber boards
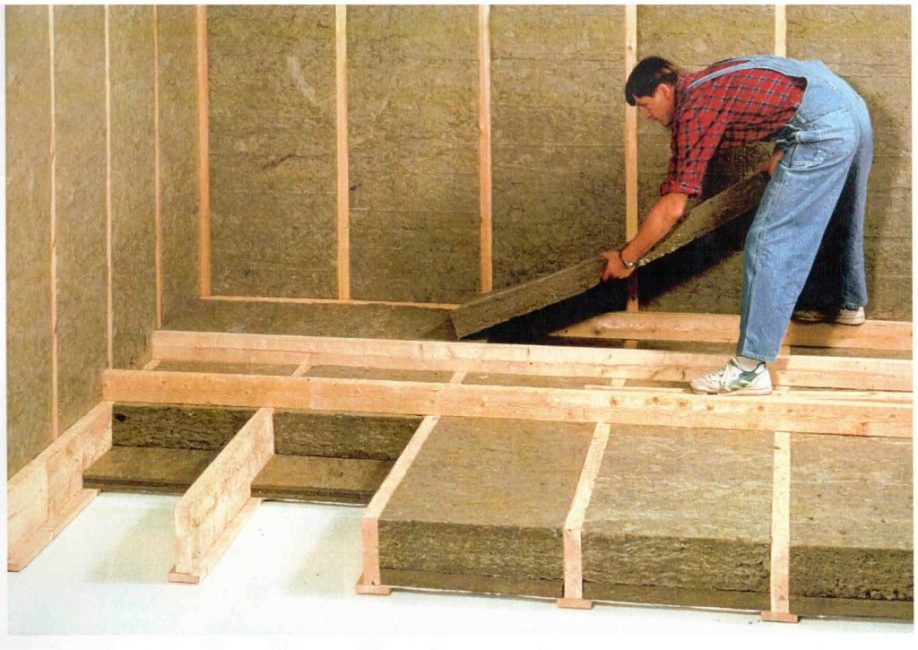
When everything is finished with the floors, the walls begin to be insulated. Mineral wool is the most common material. It is produced in mats, which makes the work easy and takes little time.
On frame walls, cotton wool is placed between the frame bars and covered with a vapor barrier film, which is attached to the bars with brackets. Further, the walls are covered with a variety of options. For example, natural wooden clapboard, plywood, drywall.
Expanded polystyrene is also used for room insulation. But the quality is worse.
Brick walls are usually insulated from the outside. The inside is covered with plaster or drywall. But, if there is a lot of space, you can also insulate with mineral wool, and close it with plasterboard slabs from above. Already then paste wallpaper or some other material.
If you carefully study all the stages of the construction of an additional structure and follow the developed technologies, everything will work out correctly and efficiently. If you are unsure of your abilities and feel a lack of skill and experience in construction, you can entrust the work to professionals.
Video: Construction of an extension to the house from A to Z

VIDEO: Construction of an extension to the house from A to Z
Extension to the house: a step-by-step description of the stages of construction with your own hands. List of suitable materials with their description (85+ Photos & Videos) + Reviews


An excellent guide to building an extension. With this approach, there will always be comfort and warmth in the house!
great article