
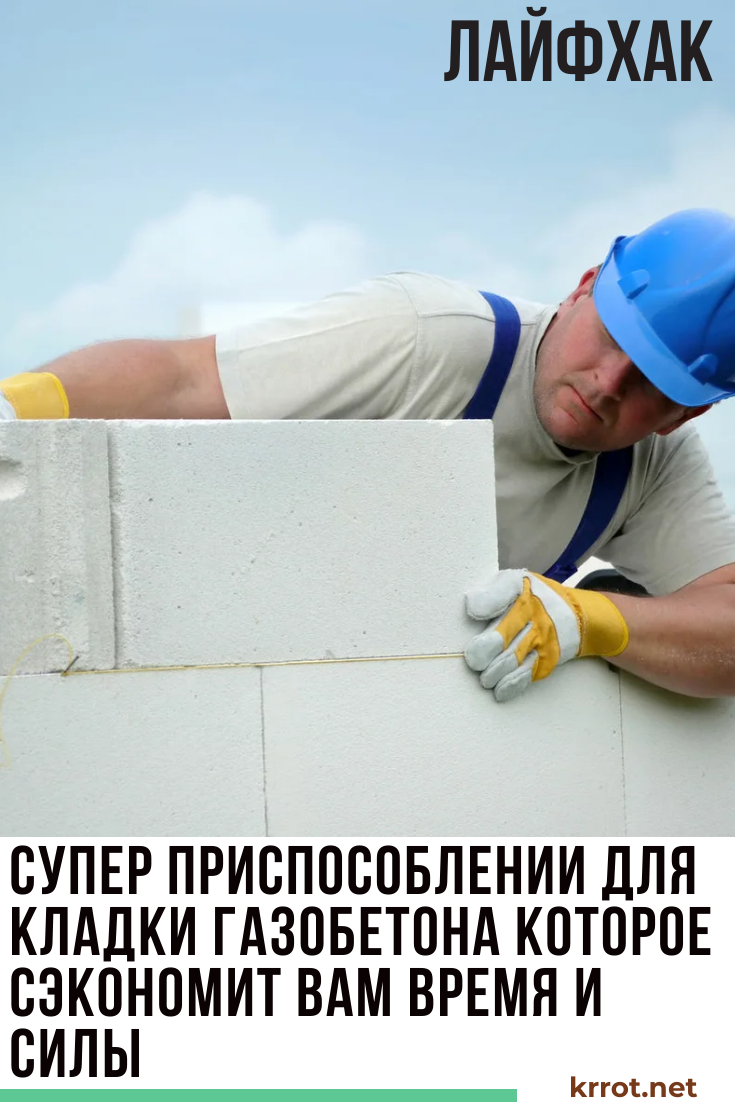
Work with gas silicate (gas blocks) compares favorably with the usual brickwork. Silicate blocks are much larger than bricks in size, and therefore the laying process is significantly accelerated, where the formation of an adhesive layer takes more time and effort.
This can and should be corrected. Therefore, we make a simple device for laying blocks that will save you time and effort.
 Read also: How to make flower pots with your own hands: outdoor, indoor, hanging | Step by Step Charts (120+ Original Photo Ideas & Videos)
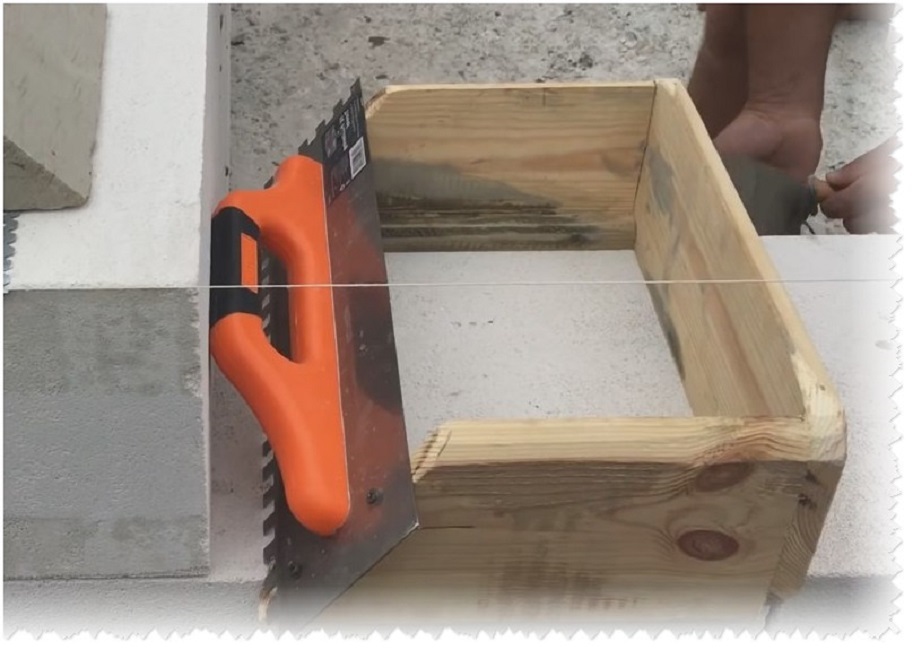
"Adaptation" for the formation of the adhesive layer
glue spreader
The essence of this product is very simple - the maximum acceleration of the application of the adhesive layer for laying blocks. For this you need:
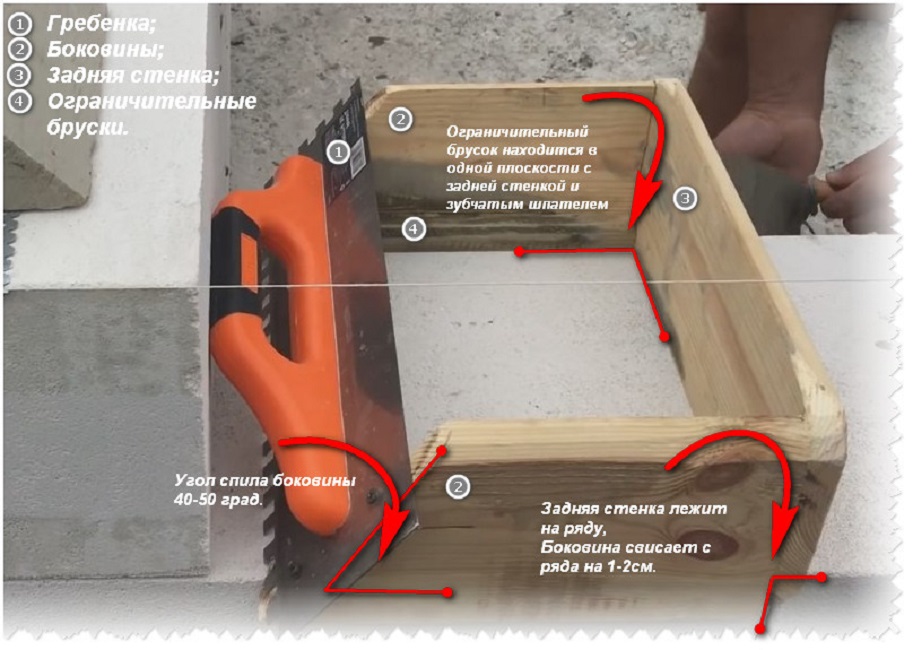
- Make a box on a skid. It should move easily along the row of the wall and will not move out of it. To do this, the side walls should hang from the row by 1-2 cm.
- I will adapt to equip with a spatula for uniform application of the solution - it is better to use a notched trowel. At the same time, it is fixed at an angle of 40-50 ° - this way it will be better to apply glue to the row
- Since the width of the adhesive layer is needed somewhat narrower than the block row - excess glue will not be squeezed out when installing the block - the device must be equipped with restrictive bars from the inside.
For manufacturing you will need:
- notched trowel
- Board 100-150 mm wide and about 1m long
- Bar 10-20 mm, length about 40-50 cm
- Fasteners: self-tapping screws
- Wood saw
- screwdriver
- Axe
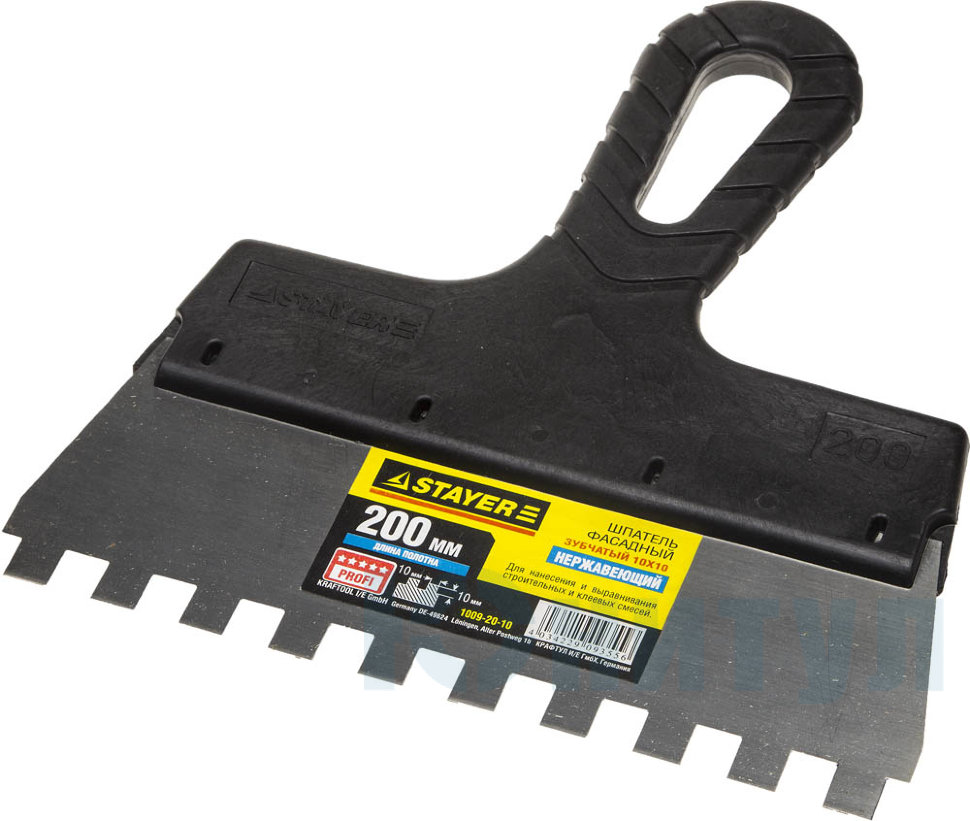
notched trowel
Stages of manufacturing devices for laying glue
Gas silicate masonry
- Preparation of blanks
To make the sidewalls of the fixture, you need to prepare two planks of the same length of 30 cm, on one side, the boards are sawn at an angle of 40-50 °.
You also need a back wall made of wood with a length corresponding to the width of the stacked blocks, plus 5 mm for the technological gap - so that the box does not get stuck in a row.
For limiters, two bars of 10-20 mm are cut off. Their length corresponds to the length of the side planks minus the thickness of the back wall. Do not forget on one side at an angle, the same as that of the sidewalls.
The design of the glue spreader
- Assembling the glue spreader
One restrictive bar is attached to the side walls along the self-tapping screws. To do this, the bar is applied to the side board so that it is from the end of the sidewall at a distance of the thickness of the back wall, and from below - at a distance of 1-2 cm.
Next, the back wall of the fixture is attached to the sidewalls so that it is between the side walls. The bottom of the board must correspond to the restrictive bars along their lower edge.
You should get a U-shaped design with legs sawn off at an angle. A notched trowel is attached to these legs at the same level as the back wall with restrictive bars.
Adhesives for laying glue are ready. To protect yourself from skidding during operation, the sharp edges of the fixture can be hewn with an ax and cleaned with sandpaper.
 Read also: How to make a booth for a dog with your own hands: building a home in the yard and in the apartment. Drawings, dimensions and original ideas (55+ Photos & Videos) + Reviews
 Instructions for use
Block laying tool
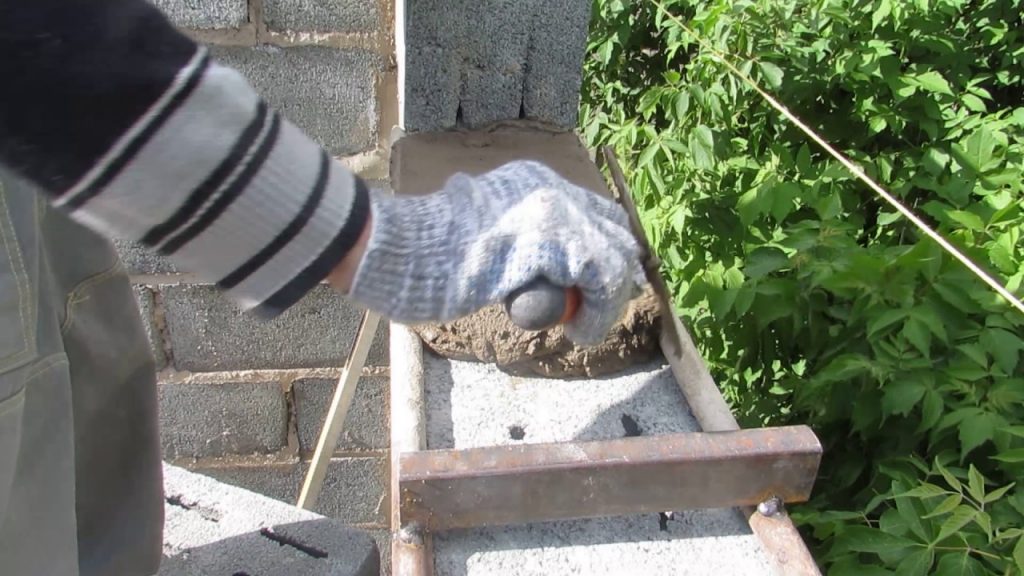
The order of work is elementary. To work, you need an adhesive solution, the consistency is normal. The glue spreader is placed on the end of a row of walls and gets to work.
Step number 1 - loading the fixture with an adhesive solution
Loading the glue spreader
Using a spatula, glue is loaded into the box. You don’t need to put a lot of mortar - it will be hard to work.
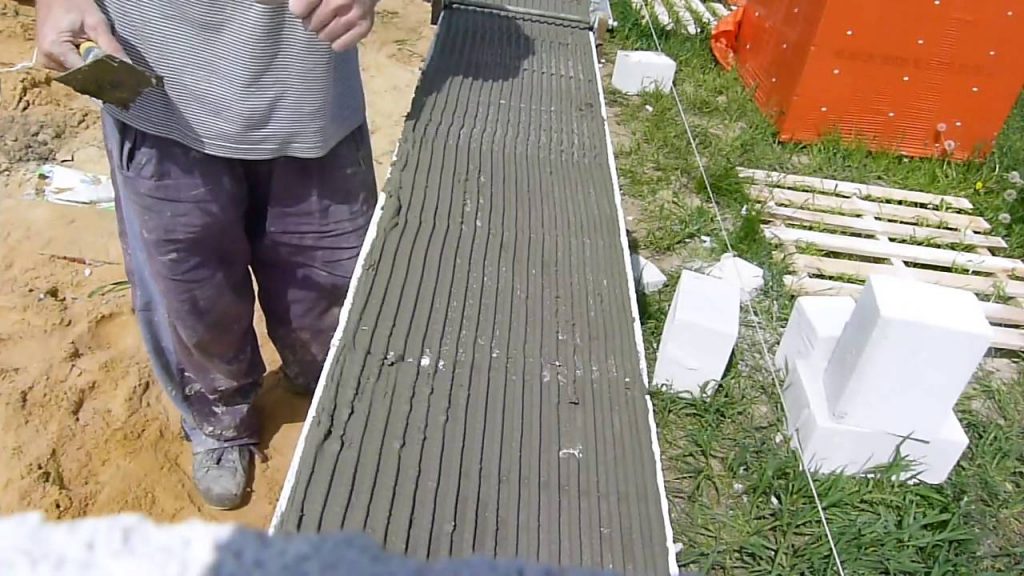
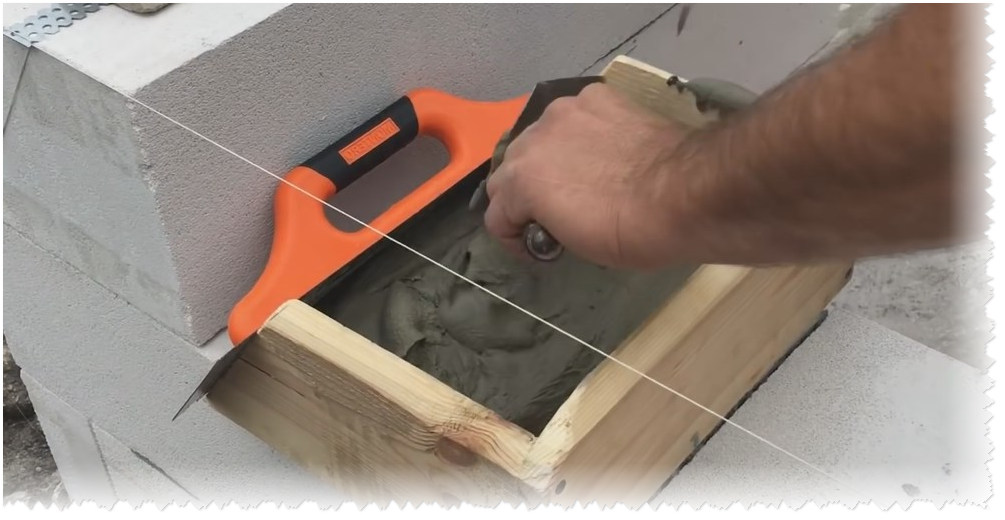
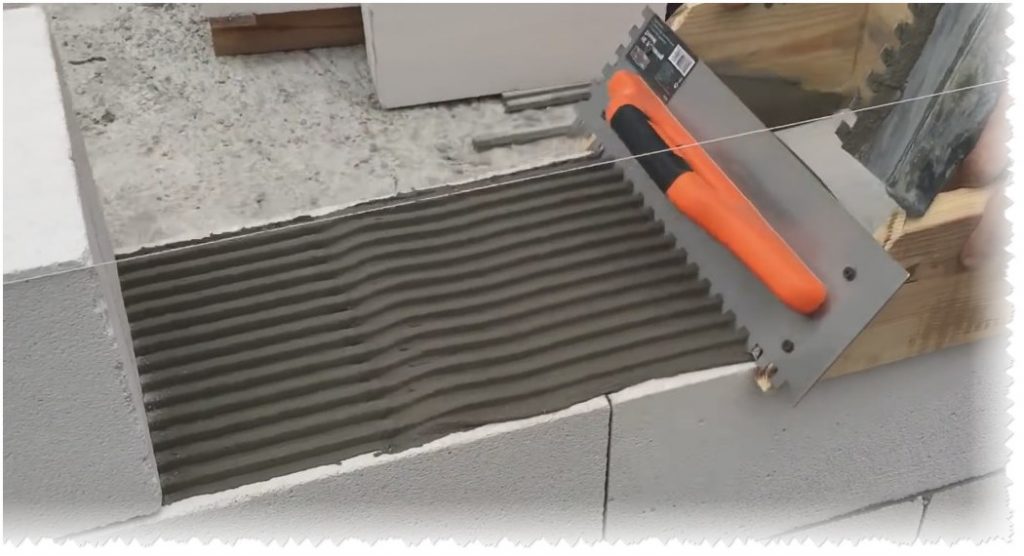
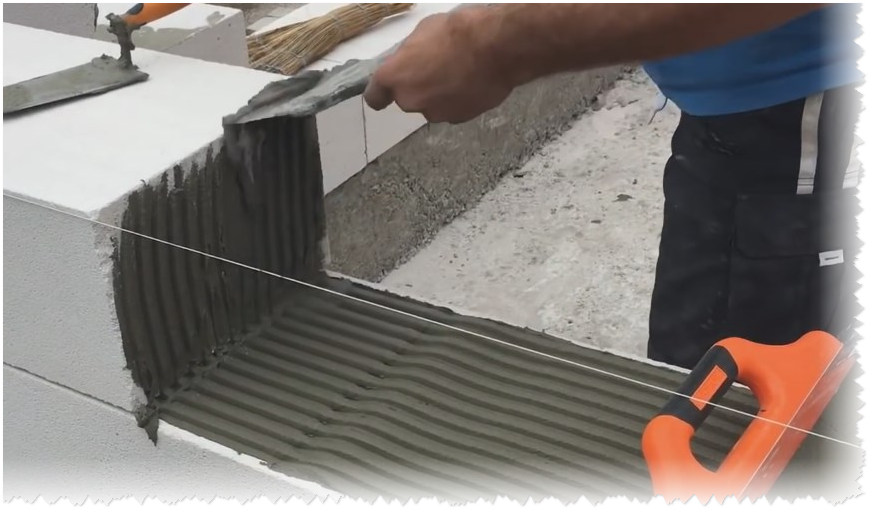
Step number 2 - form the adhesive layer

Applying a layer
We pull the adaptor away from the comb. If the glue spreader is “bitten”, then you need to move it back and forth a little, and it will go easier.
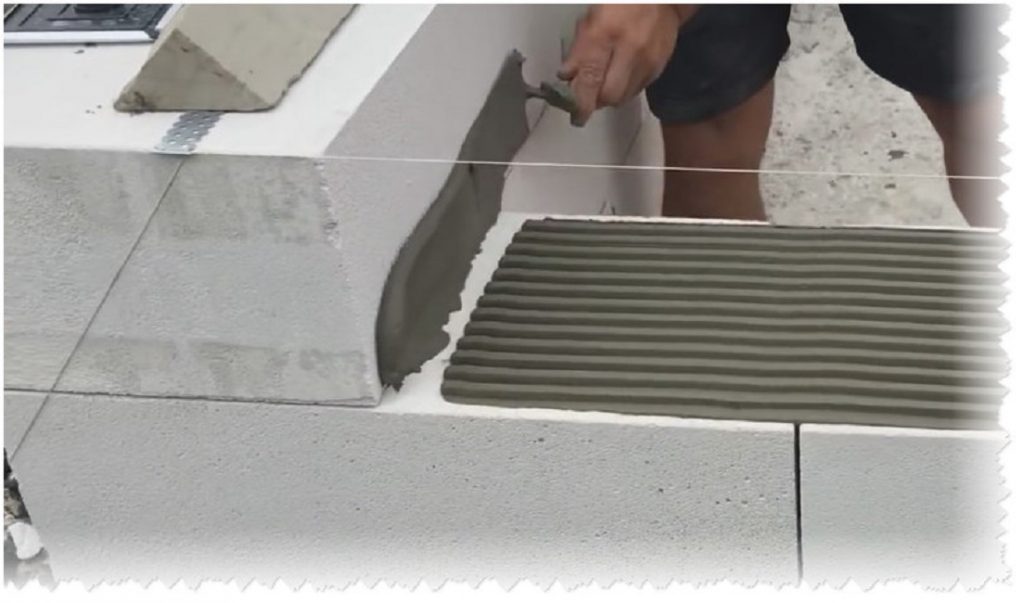
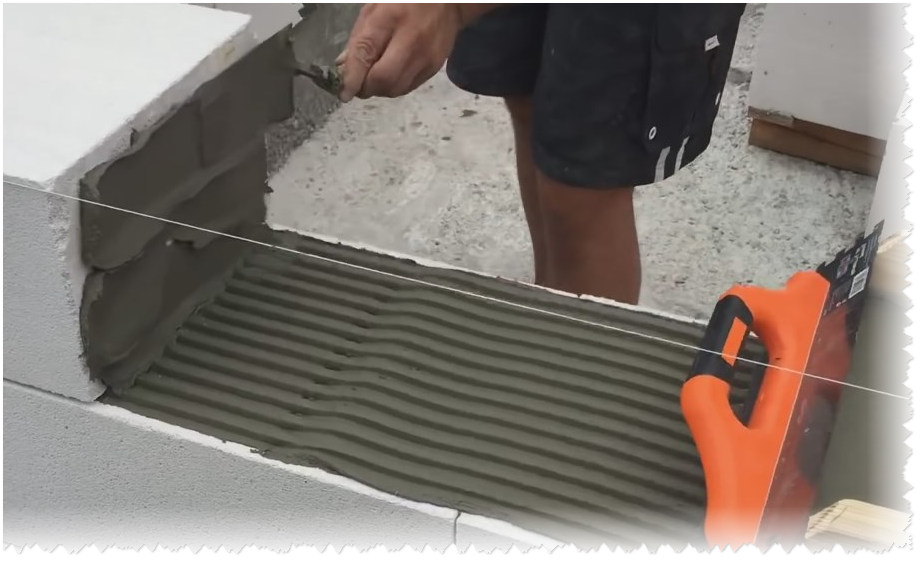
Apply glue to the end of the block
Do not forget about the glue treatment of the end of the previous block on the row. We apply glue.
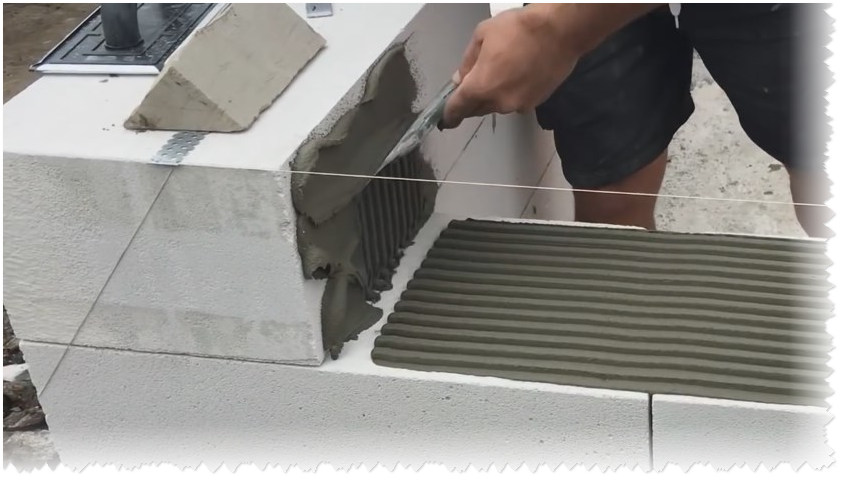
Forming the layer thickness
The excess must be removed with a notched trowel.
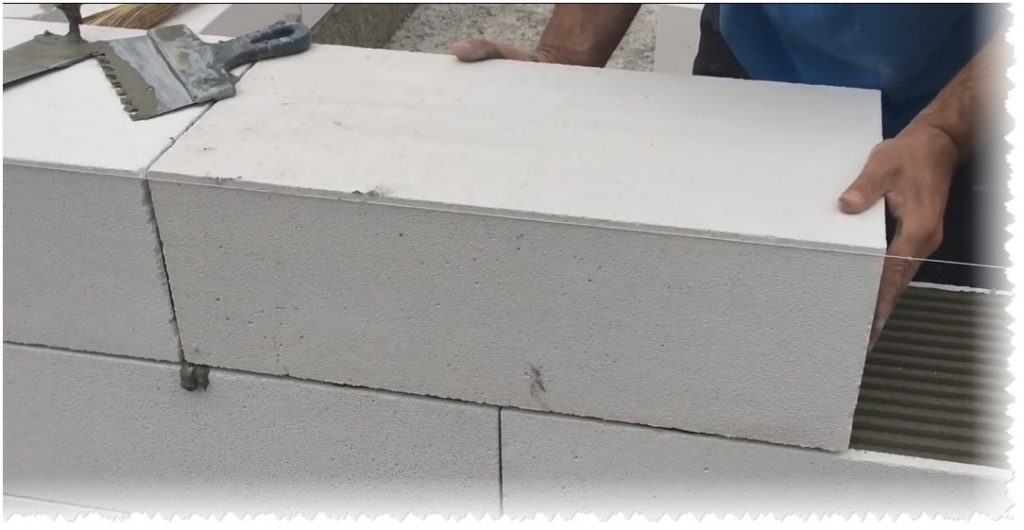
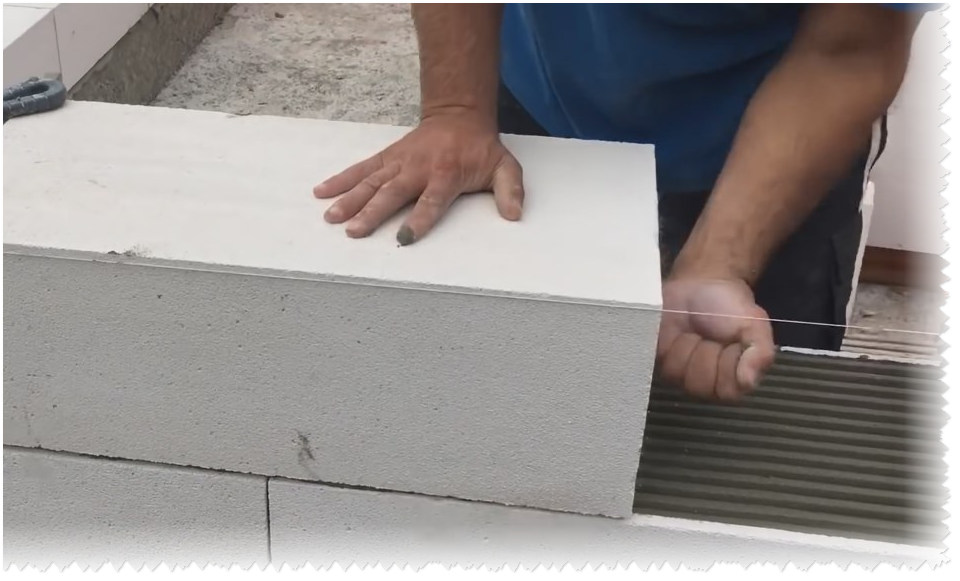
Step number 3 - install the block
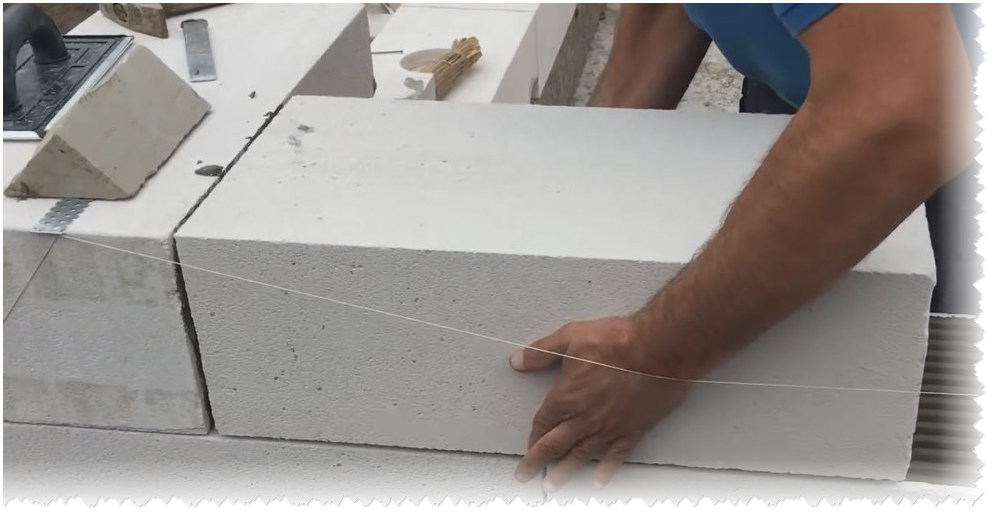
We put the block on the string
We install gas silicate in place. Align with string. The block assembly cycle is over.
Step number 4 - repeating the cycle
We act according to the cycle algorithm, shown in the steps in the photo below.
We apply glue
We process the end
We remove excess
We put a gas silicate block
Knock down if necessary
Step number 5 - quality control of laying, elimination of defects
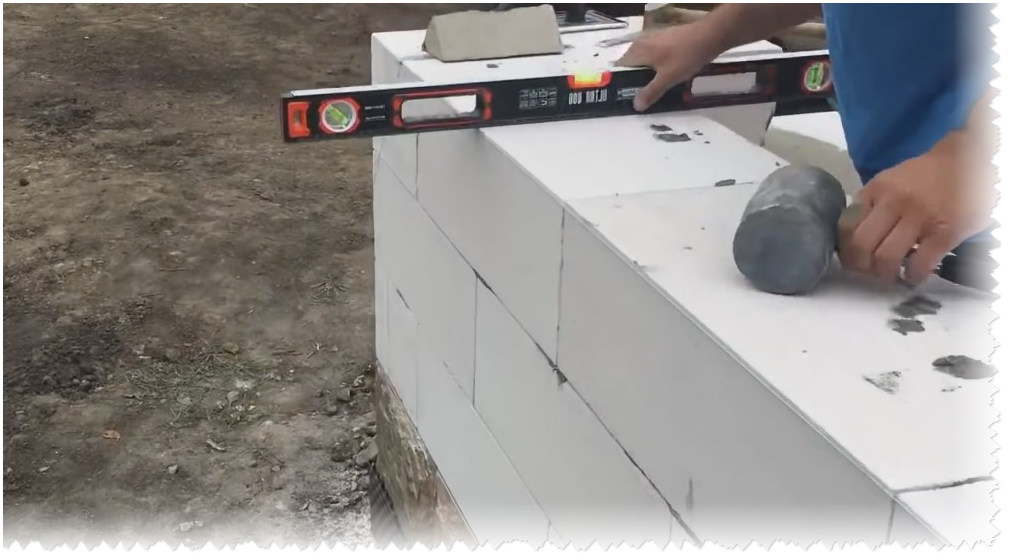
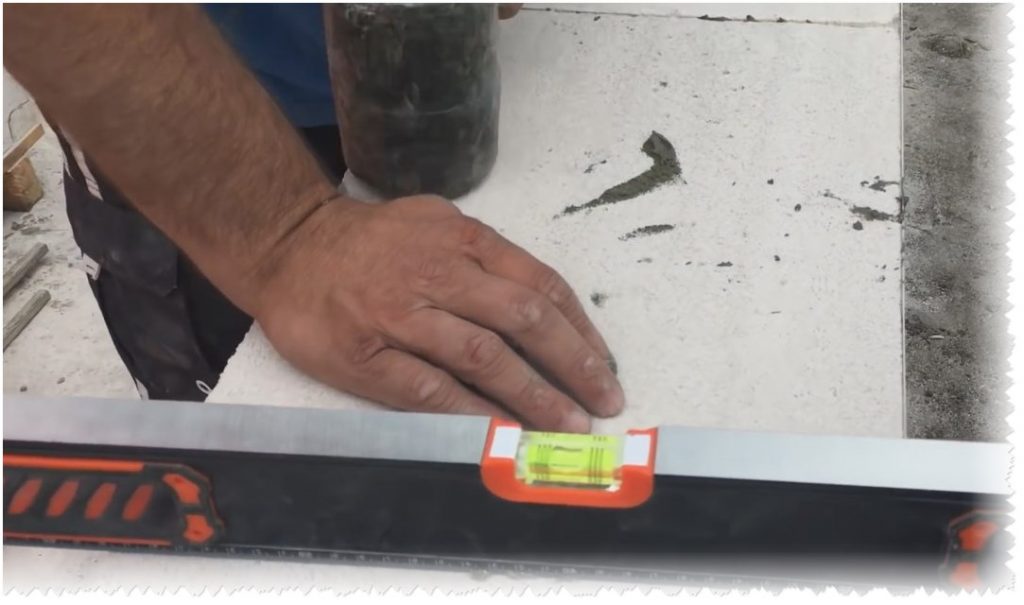
Level check
After laying several blocks (3-4), until the glue has risen, we check the quality of the installation.
Using a bubble level, we check the level of the laid out blocks in two planes.
We knock out the block with a mallet
We fix defects if necessary. We use a mallet.
![[Instructions] Do-it-yourself laminate on a wooden floor: a complete description of the process. Laying schemes, what materials should be used (Photo & Video) + Reviews](https://iherb.bedbugus.biz/wp-content/uploads/2018/05/laminat-300x200.jpg) Read also: [Instructions] Do-it-yourself laminate on a wooden floor: a complete description of the process. Laying schemes, what materials should be used (Photo & Video) + Reviews
Read also: [Instructions] Do-it-yourself laminate on a wooden floor: a complete description of the process. Laying schemes, what materials should be used (Photo & Video) + Reviews
Conclusion
The device for laying glue is really very convenient - the savings in time and effort are significant. Accelerating the construction process means reducing the overall timeframe, which means increasing profits.
VIDEO: Device for laying aerated concrete

Pinoblock masonry
Super device for laying aerated concrete that will save you time and effort


Is it really an interesting device? The only point is that it is only suitable for horizontal seams.