
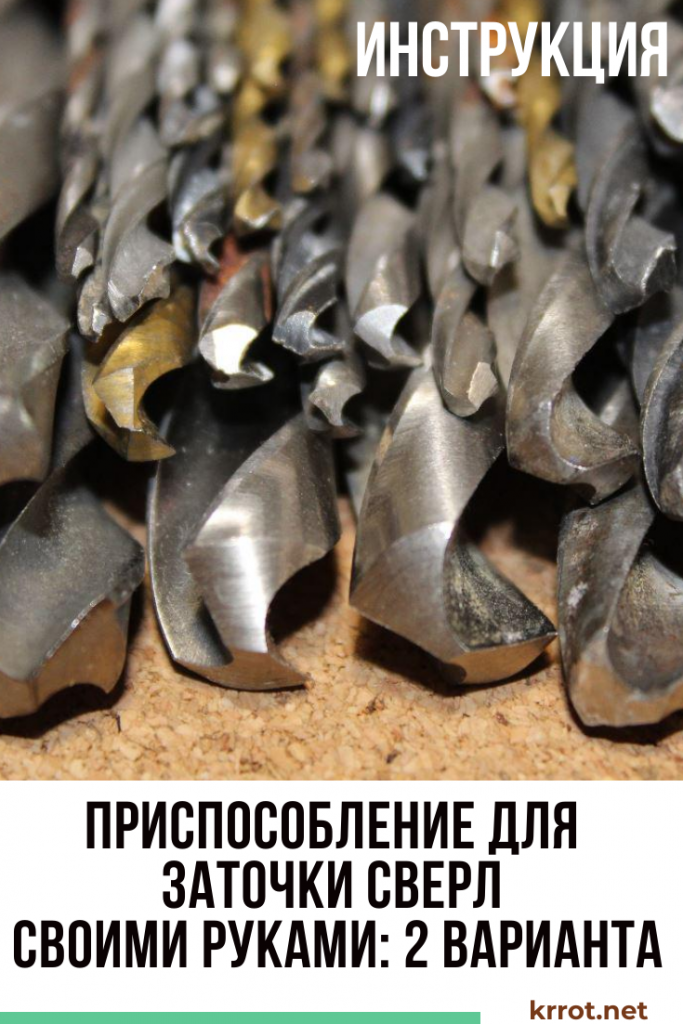
Sharpened drills are a must for any locksmith work. However, few people know how to sharpen them correctly - this is a whole science. What should a newbie do?
Make a device for sharpening drills with your own hands. Of course, sharpening will not be as high quality as manual sharpening, however, drills will cope with their functions.
To sharpen the drill, you need to accurately maintain the angle of inclination of its cutting part, which is about 120 degrees. This is the essence of the device - to fix the drill and observe this angle.
The sharpening tool can be made from metal or wooden. The difference lies in their durability.
 Read also: Landscaping your site with your own hands - (130+ Photo Ideas & Videos) + Reviews
Method number 1 - a fixture made of metal
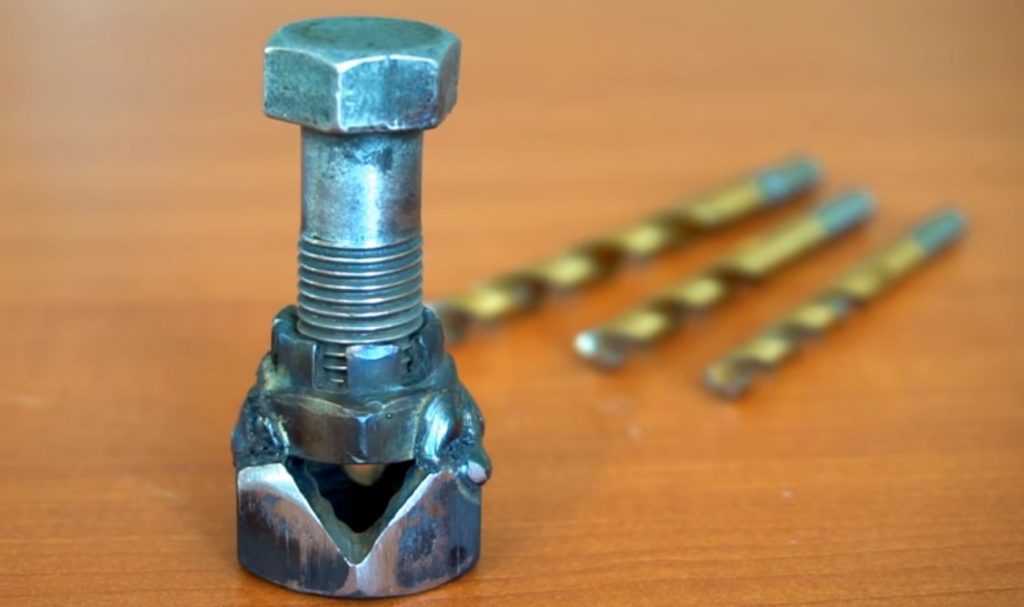
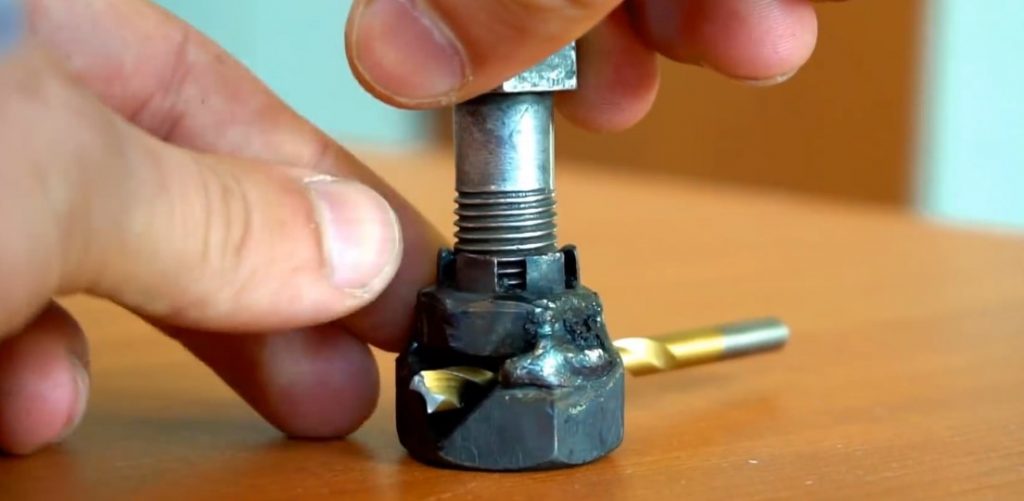
Two nut and bolt tool
Those who have basic knowledge and skills in metalwork can make a durable metal fixture.
For work you will need:
- two nuts
- bolt
- compasses
- vise
- welding machine
Step number 1 - marking the nut
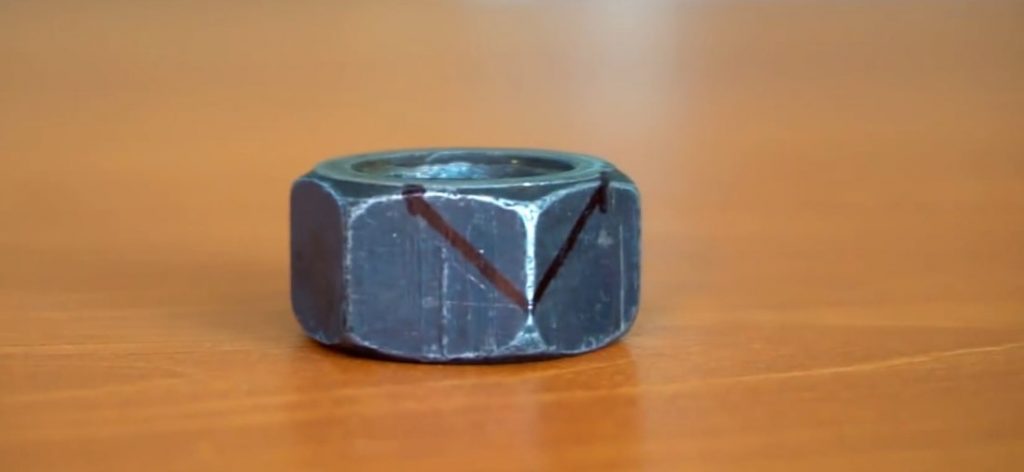
Nut marking
We make a landing nest for the drill. To do this, mark the nut with the help of a caliper, as shown in the photo above. We make markings on both sides of the nut.
Step number 2 - cut according to the markup
We cut according to the markup
We clamp the workpiece in a vice, and according to the marking we make a cut grinder.
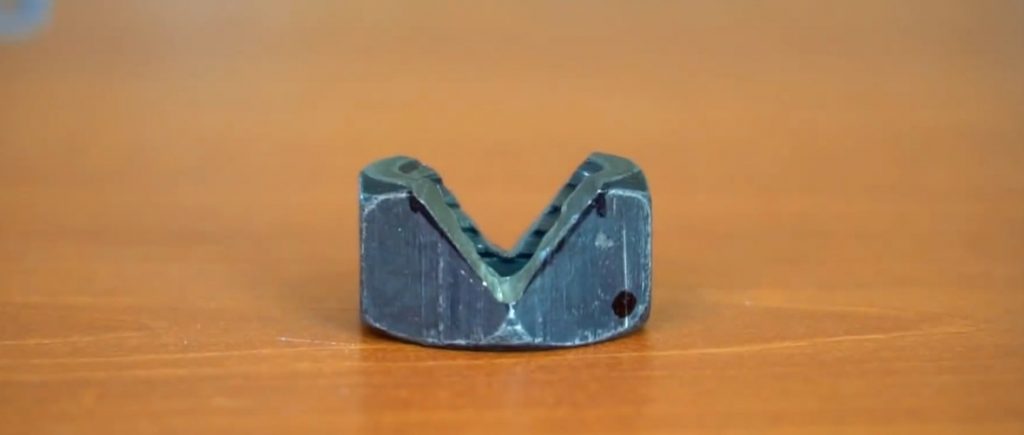
Drill Nut
In the end, it should turn out as shown in the photo above.
Step # 3 - preparing the second nut
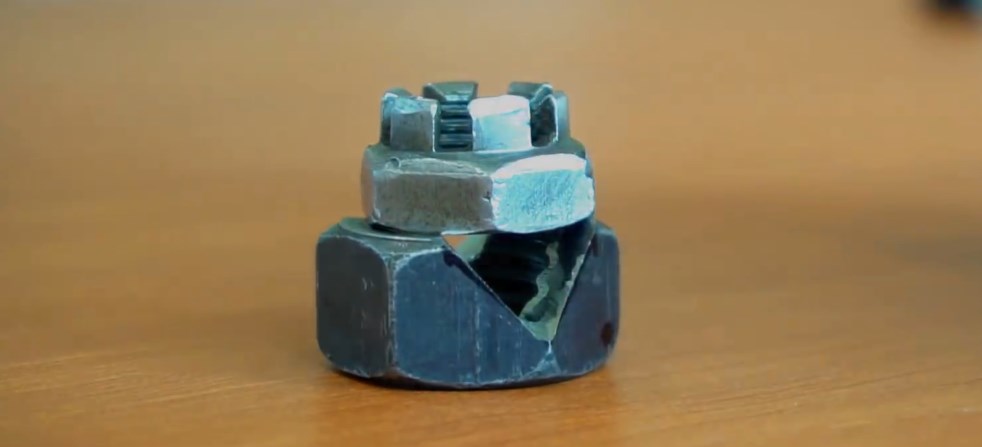
The second nut is one size smaller
We put a second nut of a smaller size on top.
Step 4 - weld the nuts
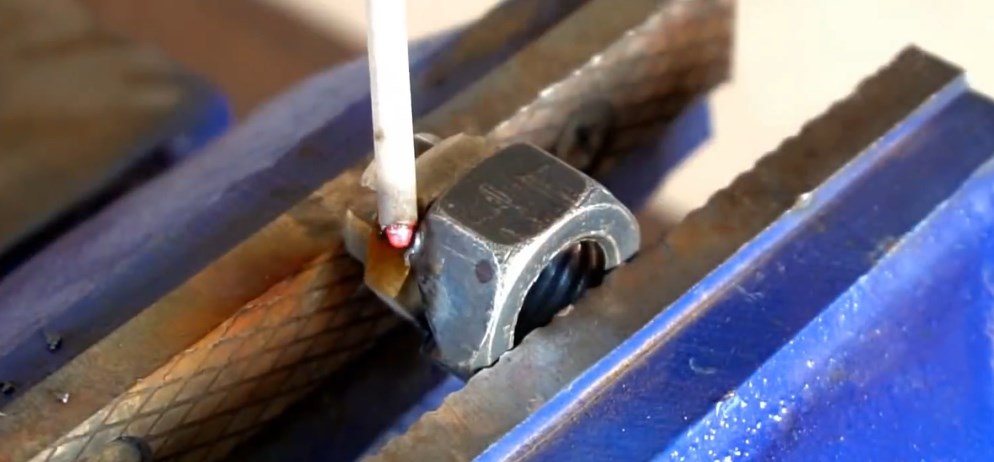
Weld nuts together
We fix both nuts in a vice, and grab them with electric welding. Two points will be enough.
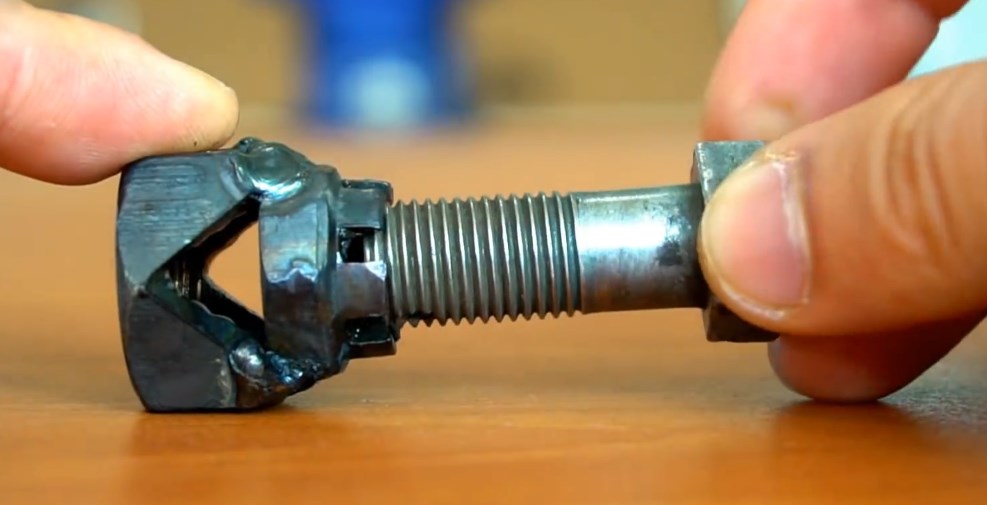
The device is ready to work
We screw the bolt into the whole nut. The device is ready for use.
Step number 5 - insert the drill
We insert a drill
We insert the drill into the fixture and fix it with a bolt soso that its tip protrudes slightly beyond the edges of the slotted nut.
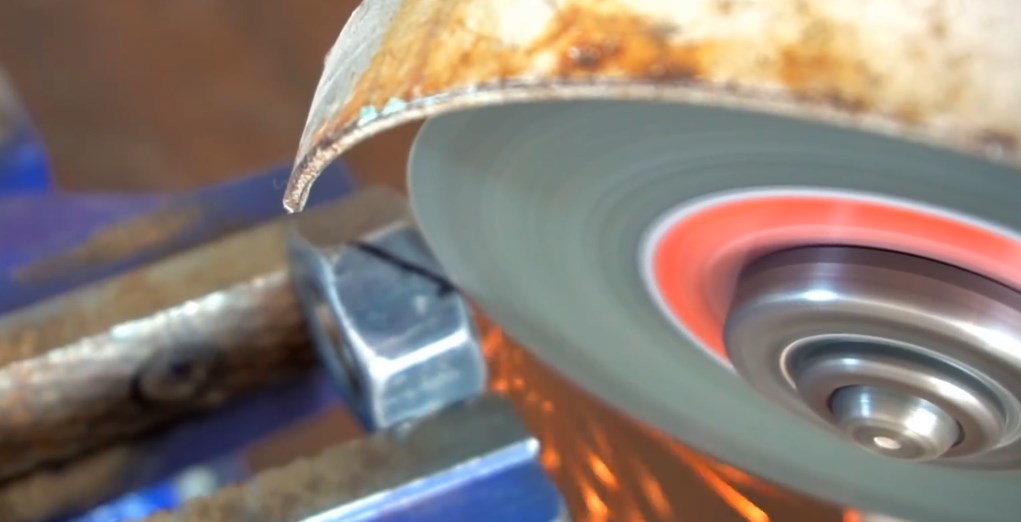
Step number 6 - sharpen the edges
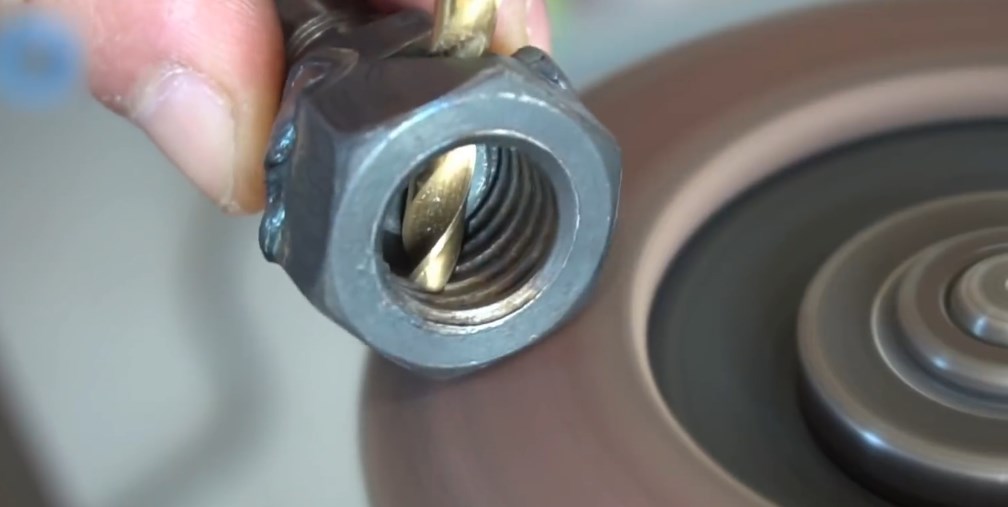
We sharpen according to the edges of the nut
We sharpen the drill on an emery or grinder. We try not to grind the edges of the nut.

Drill sharpening completed
The drill is sharpened. An angle of 120 degrees is maintained.
VIDEO: Metal fixture for sharpening drills

Wow!Awesome ideas With Drill Bits
Do-it-yourself drill sharpener: 2 options
 Read also: Perennial flowers (TOP 50 species): garden catalog for giving with photos and names | Video + Reviews
 Method number 2 - a fixture made of wood
Wooden block sharpener
This option is suitable for those who do not know how to use a welding machine or do not have access to it. The design principle is similar.
To make a wooden fixture you will need:
- wooden block about 2cm thick
- self-tapping screw or eurobolt
- drill
- protractor
Step-by-step instruction
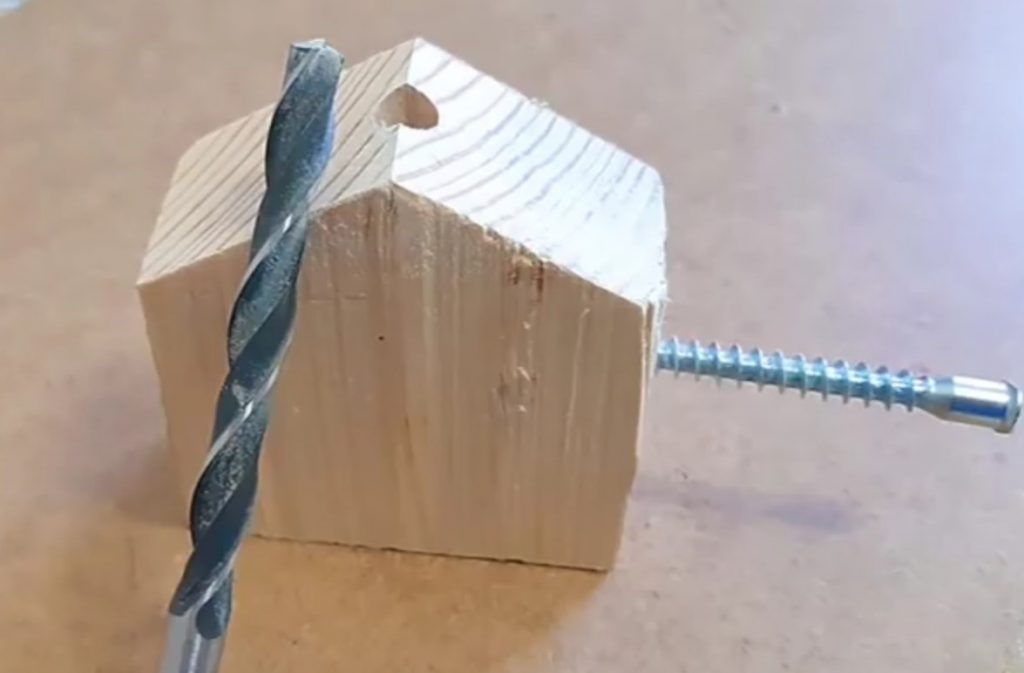
- The bar is centered, - from the end make markings along the diagonals
- According to the marking, the bar is drilled through with a suitable drill, - a groove for a sharpened drill
- On top of the bar, its angles are sawn off at 30 degrees - marking is done using a protractor. Zero value for marking - the axis of the drilled hole for the groove
- On the side of the bar, a hole is drilled for the fixing screw so that it connects to the groove for the drill
How to use?
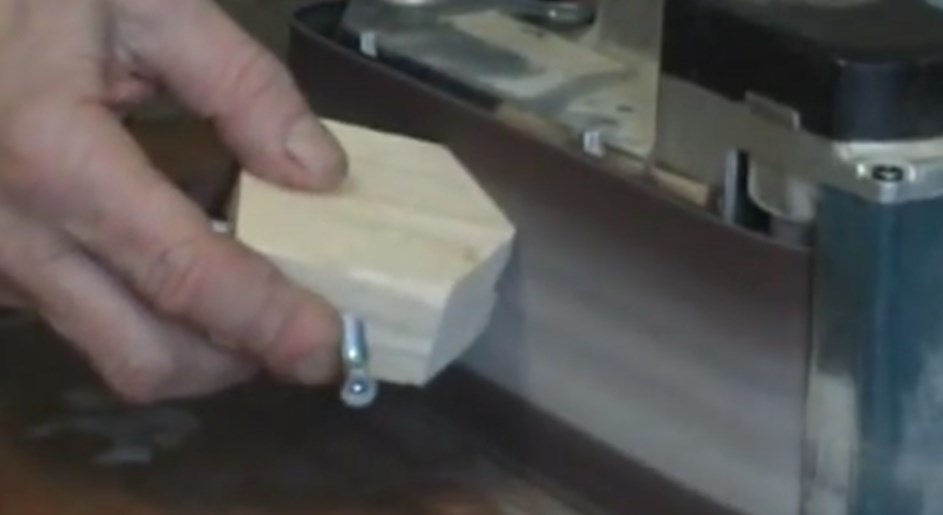
Sharpening on a belt grinder
A drill is inserted into the groove, which is fixed with a self-tapping screw, twisted on the side of the bar, - the tip of the drill should protrude slightly beyond the edge of the fixture.
Sharpen on a tape grinder or grinder. They try not to grind the tree much.
In conclusion, it should be noted that a wooden fixture is made for close drill diameters. For example, one fixture for drills with a diameter of 7.8.9 mm, the other for diameters of 4.5.6 mm.
VIDEO: Wood fixture for sharpening drills
How to sharpen a drill
Do-it-yourself drill sharpener: 2 options


In the first variant, the depth of cut of the nut should be different, and the drill with the sharpened side goes to the side where the cut is less
If you know metalworking and you know about the sharpening angles of the drills .. then it can be sharpened calmly without any devices.
If…
Simple, clear, thanks!