
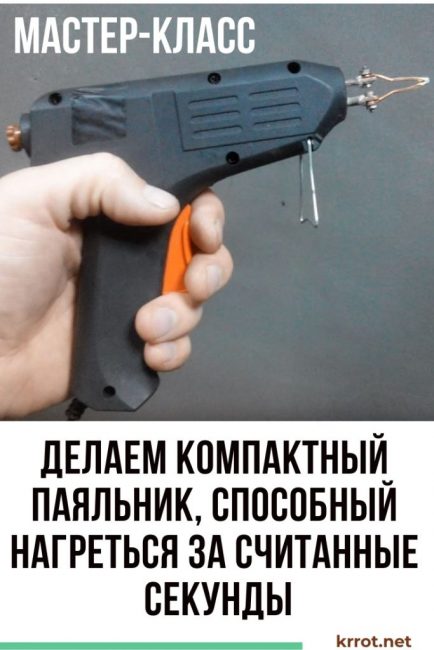
Each of us had to call home a consumer electronics repairman, or take it to the workshop ourselves. Watching the work of professionals, you always look with envy at their tools. Even a simple soldering iron heats up in a matter of seconds, unlike the usual one, which takes 5 or even 10 minutes to warm up to operating temperature. In our article, we will tell you how to make a super-fast soldering iron from a glue gun. It does not need to be constantly turned on, which saves energy consumption.
Content:
 Read also: Hunting belt for fruit trees from garden pests: description, types of belts, DIY making (Photo & Video) + Reviews
Materials for manufacturing
To make Psoldering iron from glue pandcentury,you will need:
- glue gun (possibly non-working);
- energy-saving lamps for 100 and 25 W;
- ferrite filter from any power cable;
- copper wire with a cross section of 2 mm;
- copper bus;
- two transistors MJE 13009;
- diode bridge;
- soldering iron;
- knife;
- screwdriver;
- epoxy resin;
- switch;
- saw or hacksaw blade;
- fuse socket;
- thermal paste
- screws and nuts.
Step 1: Preparing the Parts
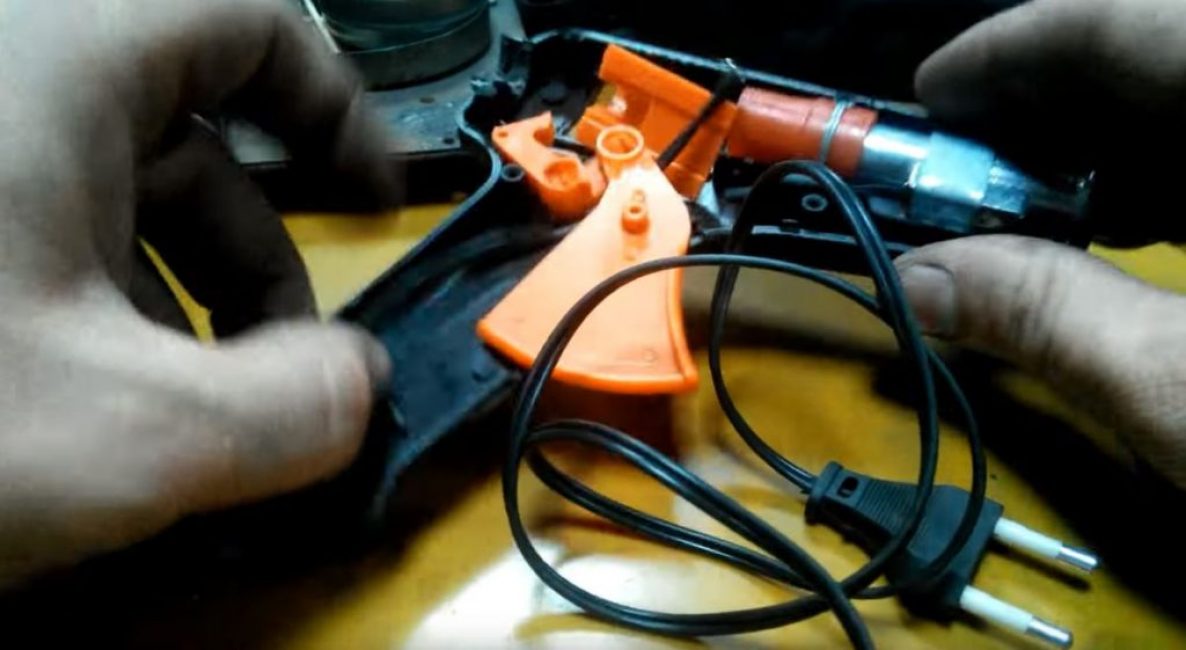
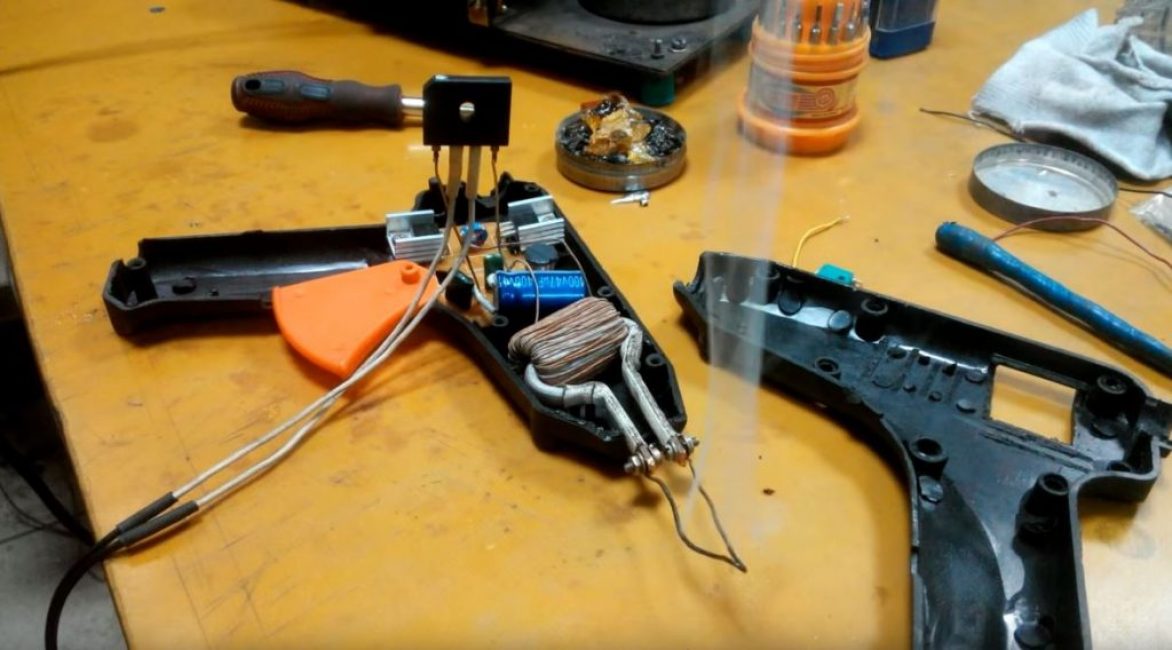
We unscrew the screws connecting the body of the glue gun and disassemble it.
We take out all the parts from the case.
Cut the winding of the ferrite filter with a knife and take out the ring.
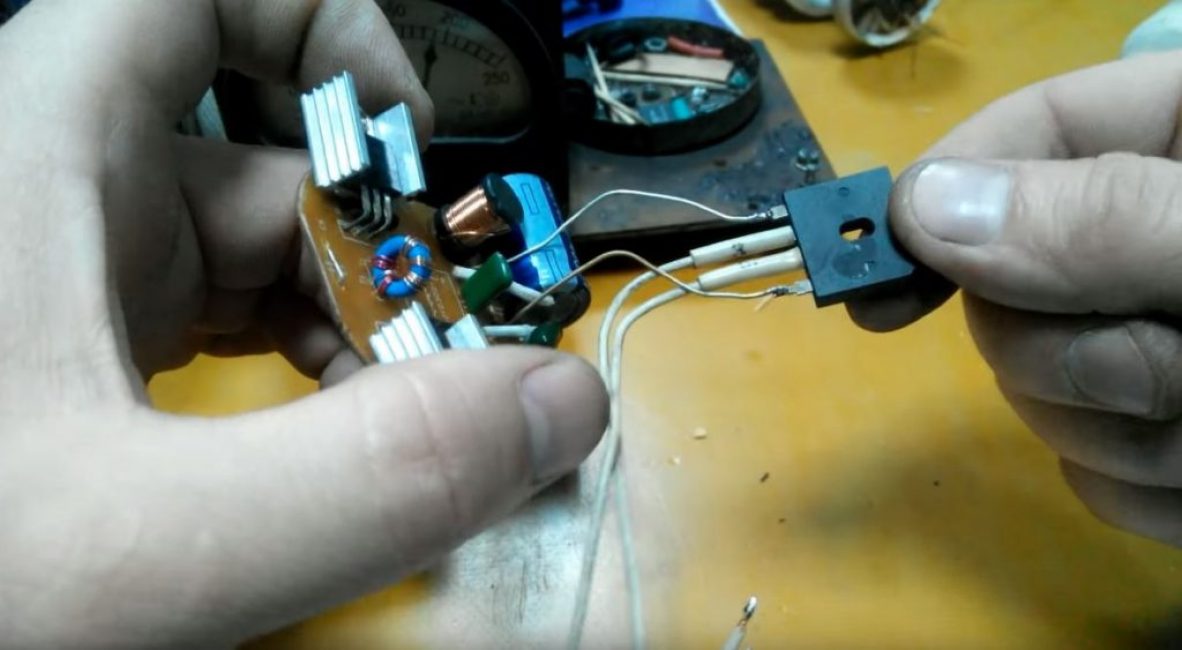
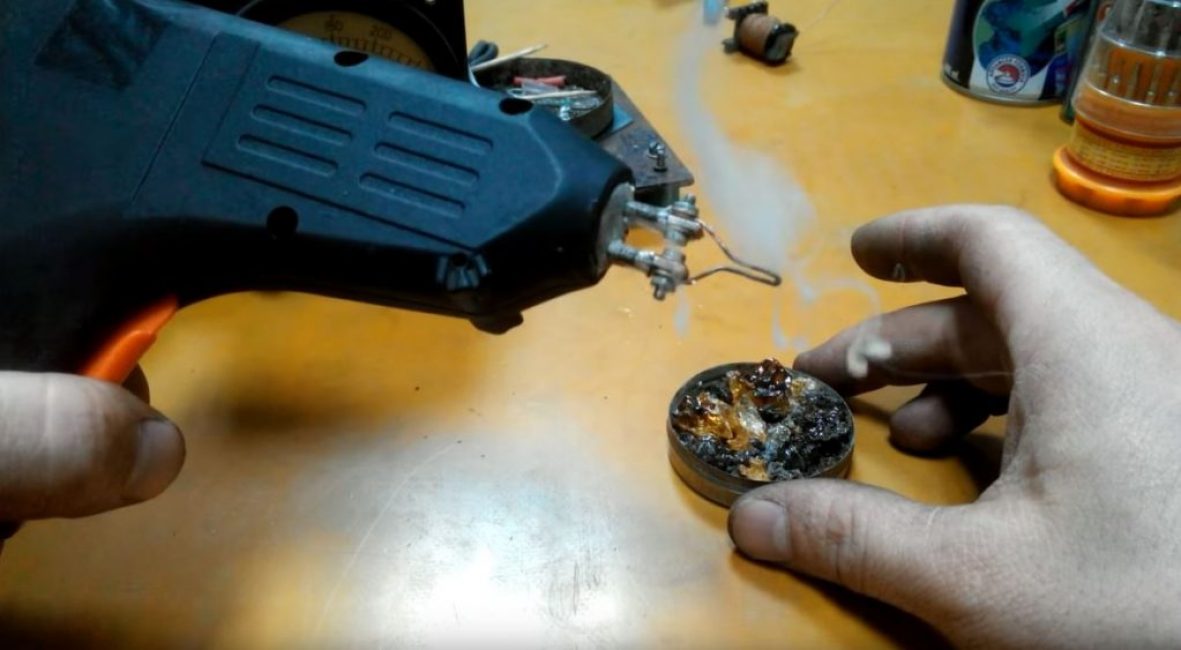
We disassemble an energy-saving lamp of higher power and take out the power driver (a circuit that maintains a constant output current of a certain value).

We remove the transformer from the board and carefully unwind its winding.
From the resulting wire, we wind the winding on the ferrite ring obtained in step 3.
We put the ring on an insulated copper bus, to the edges of which we fasten screws for attaching the soldering iron tip.

We also take out the driver from the smaller energy-saving lamp. Based on it, we will assemble a soldering iron circuit.
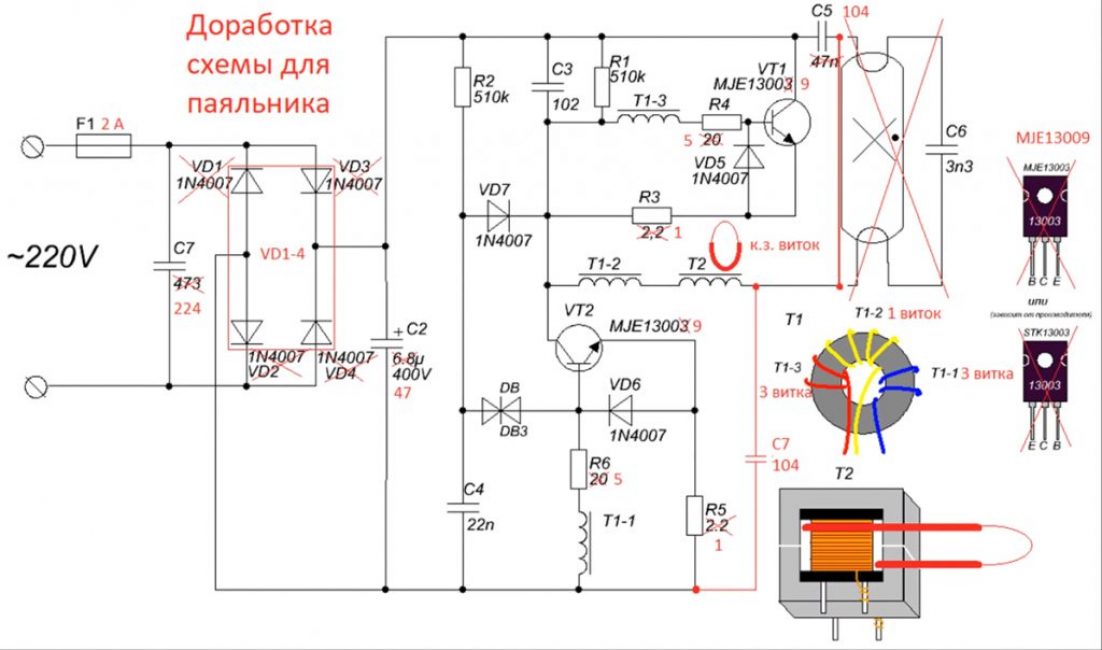
We replace the elements crossed out in the diagram with more powerful 100 W light bulbs from the driver.
We also change MJE 13003 transistors to MJE 13009 and diodes to a more powerful diode bridge. The pay looks like this.
Step 2. Assemble the soldering iron
Before proceeding with the final assembly, we check the performance of the soldering iron. To do this, we place the parts obtained in step 1 in the body of the glue gun. We make a sting from a copper wire with a cross section of 2 mm and apply power to the diode bridge.
After making sure that the gun works, proceed to the final assembly. We fill unnecessary voids and holes in the body with epoxy resin.
After it dries, we try on the switch and give the desired shape to the trigger.
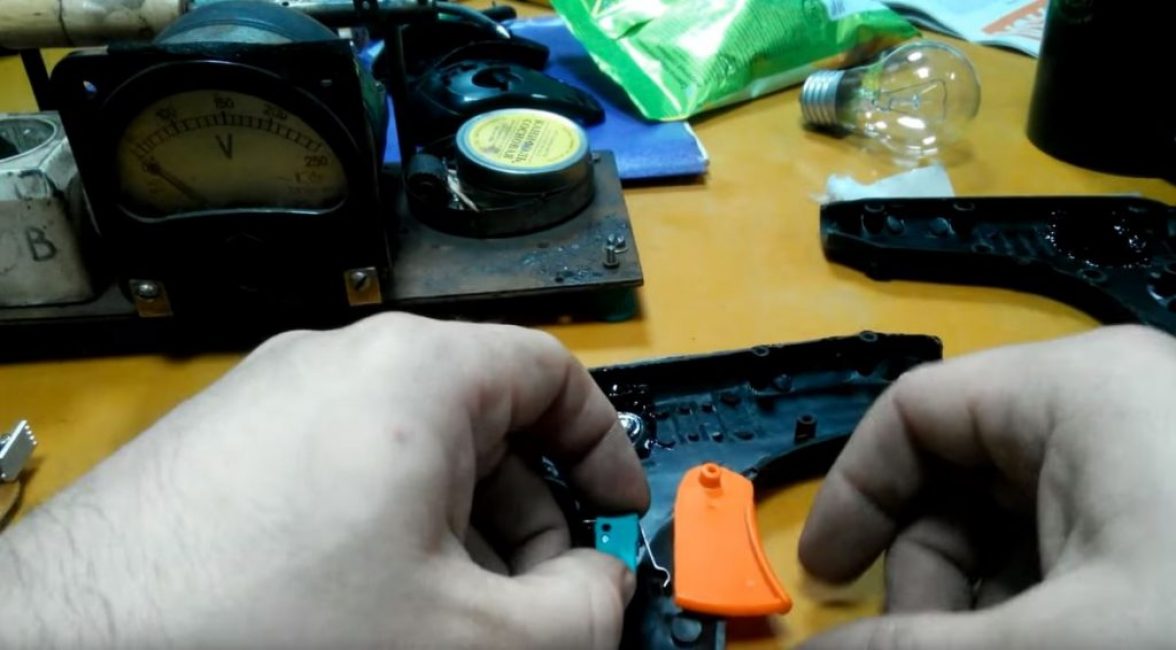
We fix their holders on the gun body with epoxy resin.
We insulate the coil of the pulse transformer and the copper bus using thermal paste.
Install a fuse socket in the glue supply hole.
We place all the parts in the case, connect the power through the switch and fuse and tightly lay the wires.
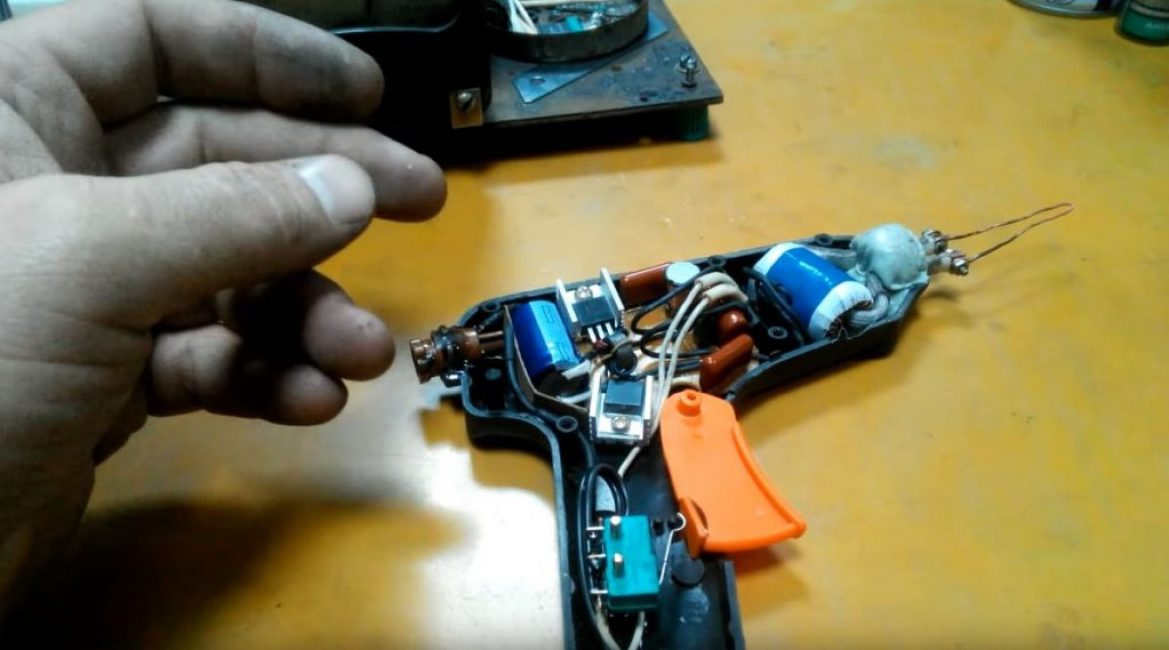
We connect the body with self-tapping screws. Our glue gun soldering iron is ready. It heats up really instantly.

Soldering glue gun
A soldering iron from a glue gun? | [Master Class]


