
In the possessions of any self-respecting gardener there is always one or two greenhouses for growing seedlings and thermophilic plants. If you have not had time to install such a structure on your site, it's time to start building. We will describe in detail how to make a greenhouse with your own hands.
Content:
 Read also: Projects of country houses for 6-10 acres: 120 photos, description and requirements | The most interesting ideas
Materials used
To create a frame, many types of materials or a combination of them are used:
- wooden beams, boards, slabs, etc.
- aluminum metal profile
- metal corner or pipes
- PVC pipes
You can glaze the greenhouse using window frames or polycarbonate. Polyethylene film or spunbond material (agrofibre) is used more often for making temporary shelters for plants and protecting seedlings from spring frosts.
You can also cover a stationary greenhouse with a film, but in this case it will have to be changed annually - winter winds will quickly render it unusable.
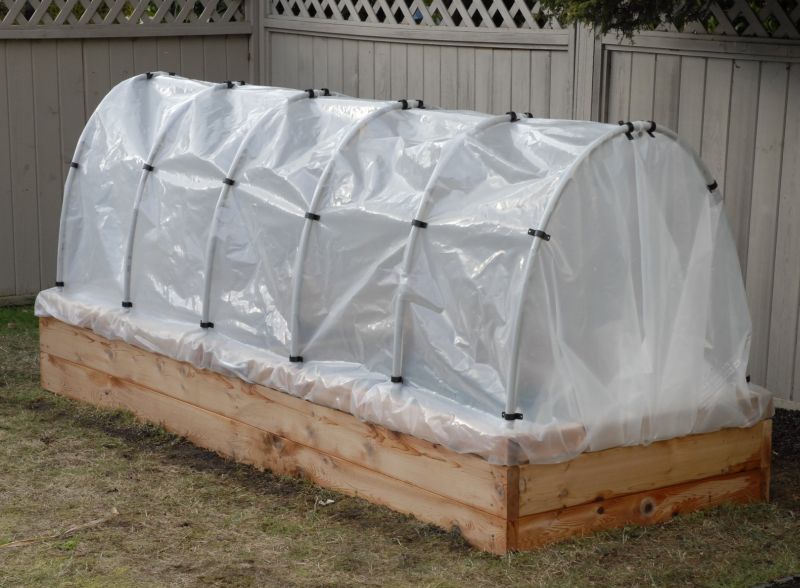
Small greenhouse for seedlings with arcs of PVC pipes
 Read also: Making a greenhouse with your own hands from a profile pipe and polycarbonate: a complete description of the process, drawings with dimensions, watering and heating (Photo & Video)
 The shape and size of the greenhouse
These parameters depend on the type of crops grown. For radishes, dill, strawberries and other undersized plants, low greenhouses are used. How to make a greenhouse for cucumbers and watermelons? Its optimal height is 1.8 m. To shelter cucumber seedlings, a structure up to half a meter high is enough.
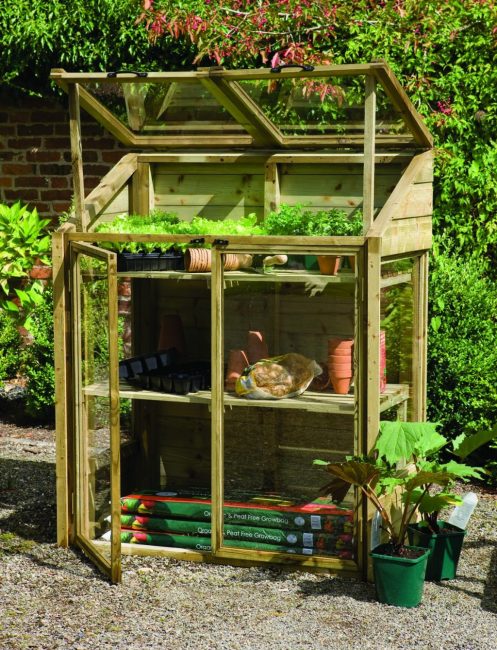
Three-tier mini-greenhouse
Tomatoes and peppers - tall crops, so greenhouses for them are made to the height of a person. For such buildings, full-fledged doors and a wide passage between the beds are equipped.
The width of such a greenhouse is 2-3 m. The length depends on the number of plants planted. A building longer than 6 m without a forced ventilation system should not be done, otherwise it will not be blown through in calm weather.
There are many designs of greenhouses:
Simple
Greenhouses-snowdrops
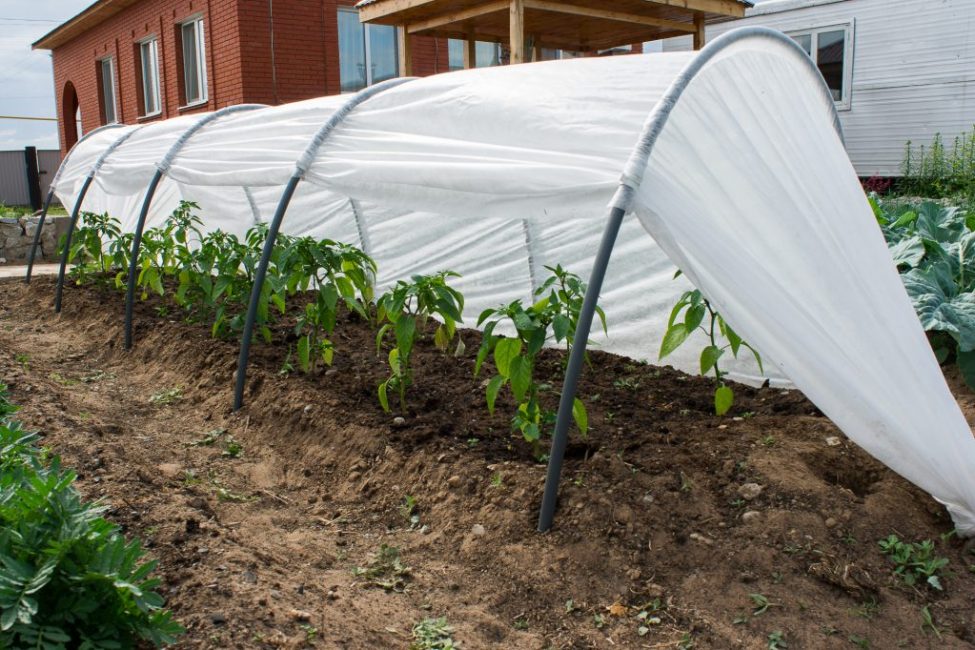
The simplest in the form of arcs dug into the ground; among the people they are called "snowdrops": they are used mainly as a spring shelter for seedlings; even a woman can make such a greenhouse herself.
triangular
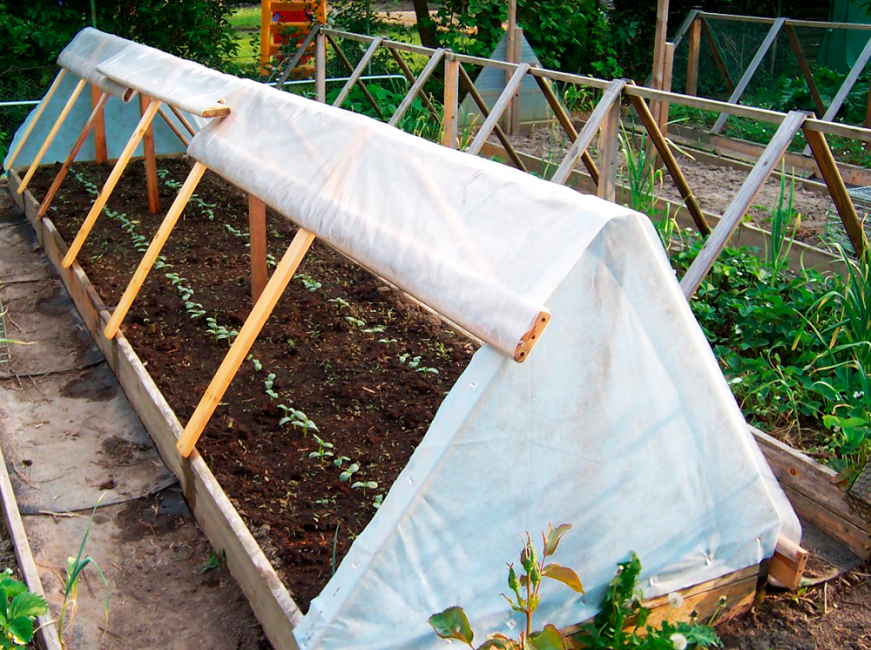
triangular greenhouse
Triangular, assembled from boards: the film or covering material on them is held stronger than on arcs; if desired, such a greenhouse can be easily moved to another place.
From window frames
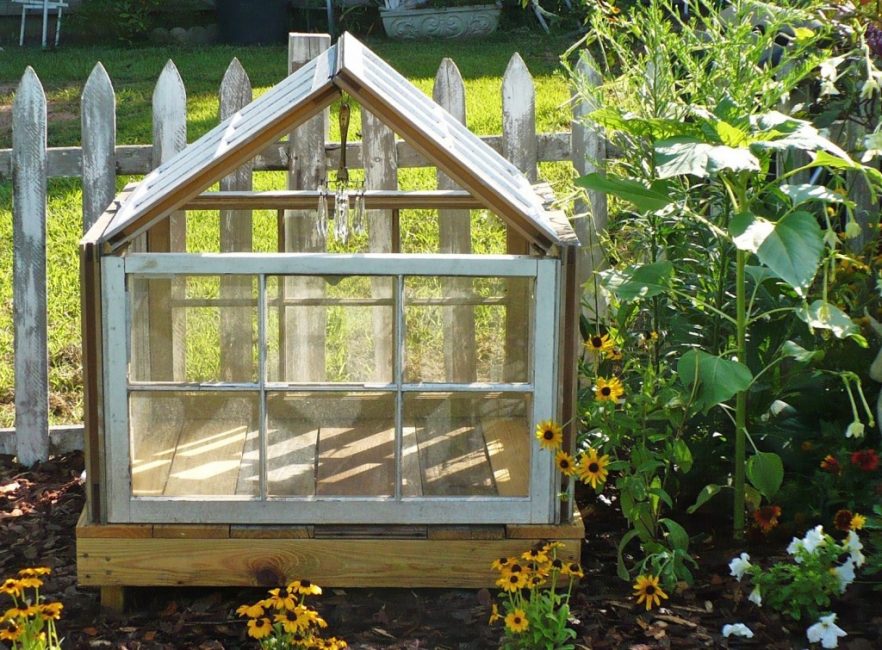
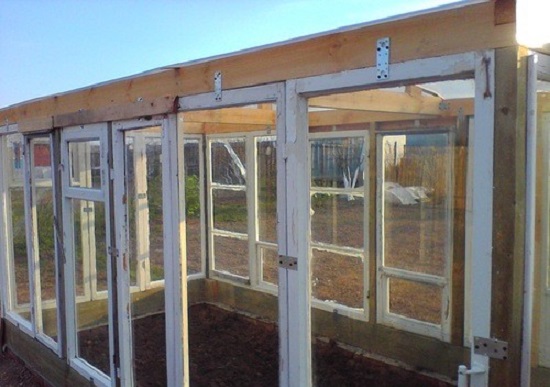
Greenhouse from window frames
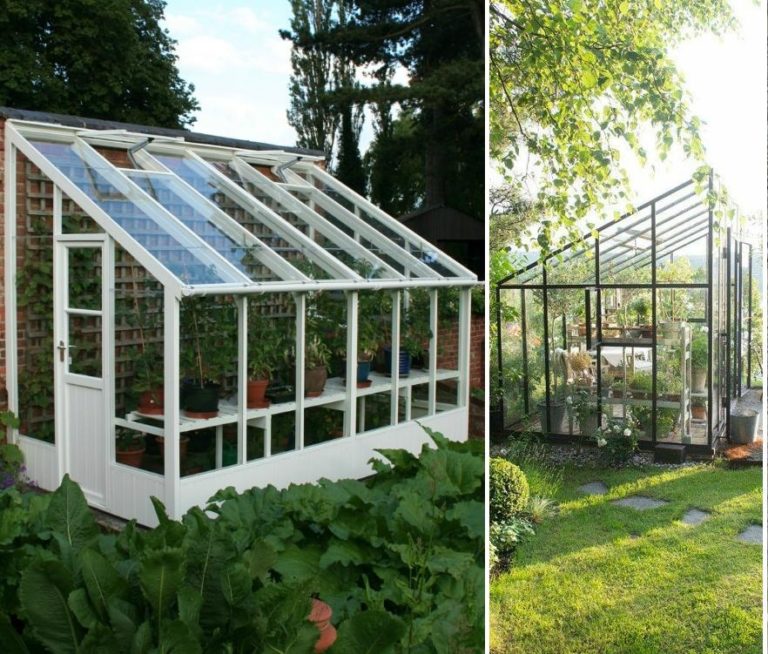
Assembled from window frames: a strong and reliable structure that can be used to grow many crops, including tall ones.
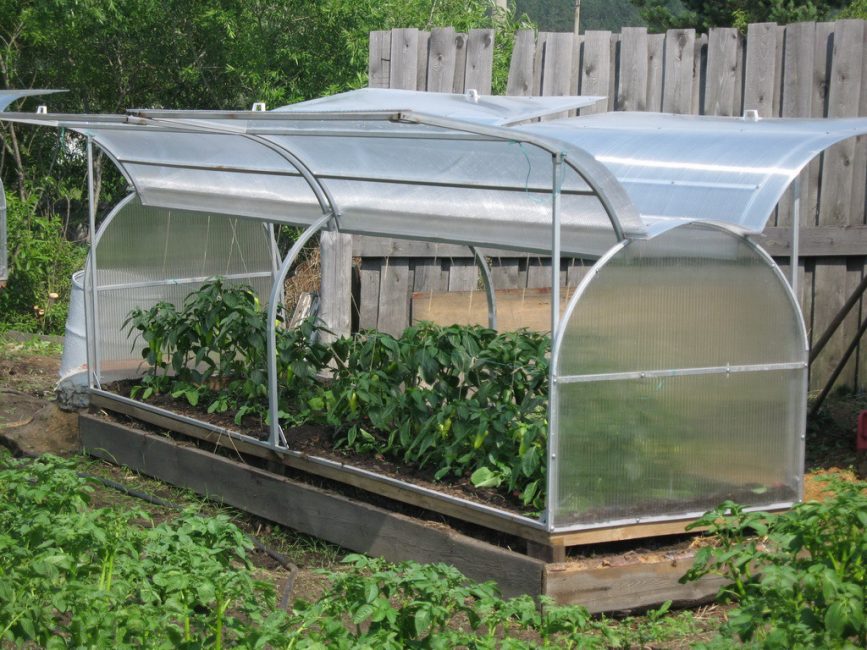
Folding
Butterfly greenhouse
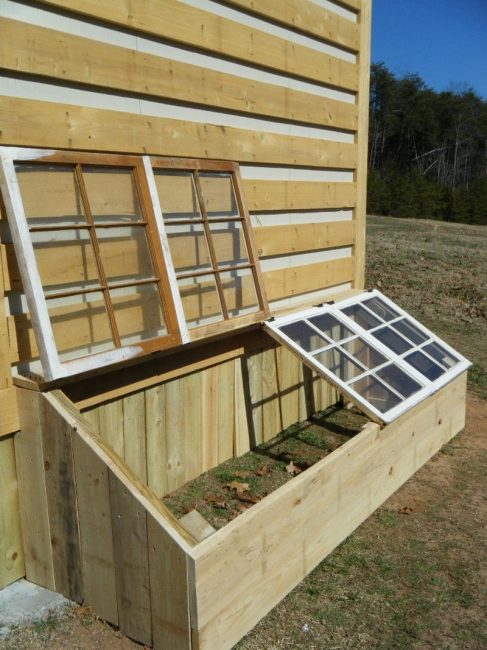
Folding greenhouses-butterflies of a rounded shape, the side windows of which rise from two sides; in this form, they really resemble the wings of a flying butterfly; how to make such a greenhouse for seedlings will be described below.
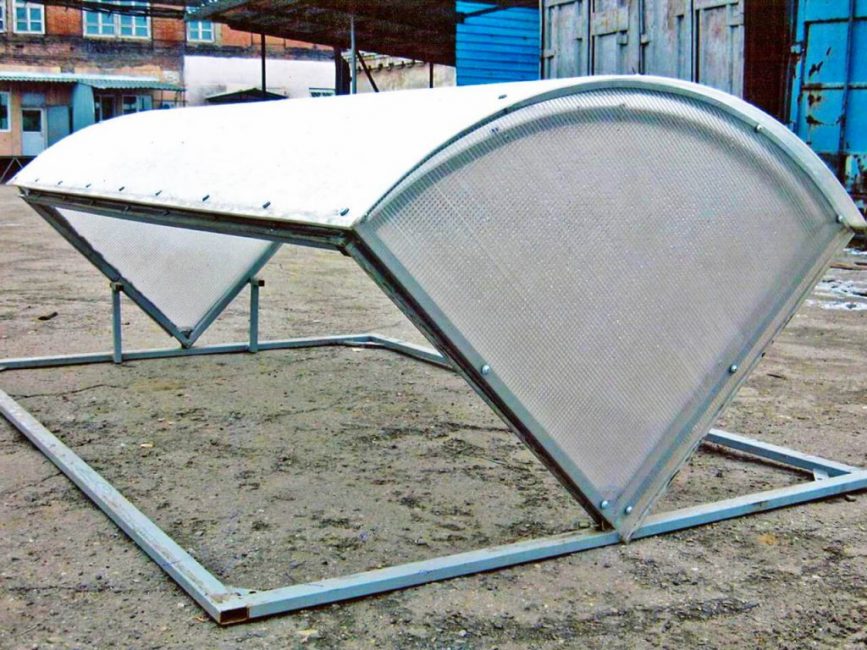
Hotbeds-bread boxes
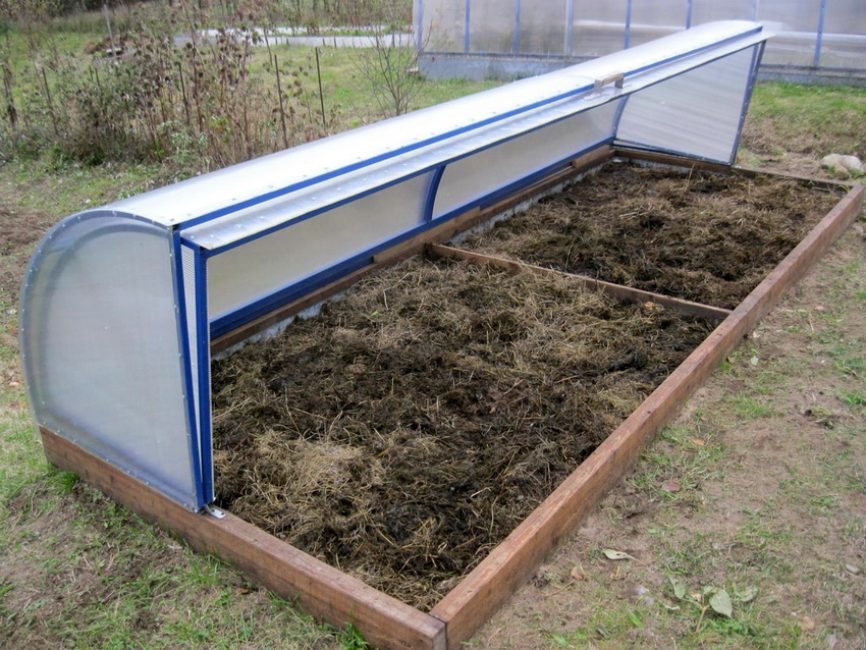
A greenhouse that looks like a bread box
Hotbeds-bread boxes (they are also called snails or shells): when closed, they resemble the previous version, however, the doors do not recline upwards, but rotate on hinges along the axis.
According to the shape of the roof, all greenhouses can be divided into:
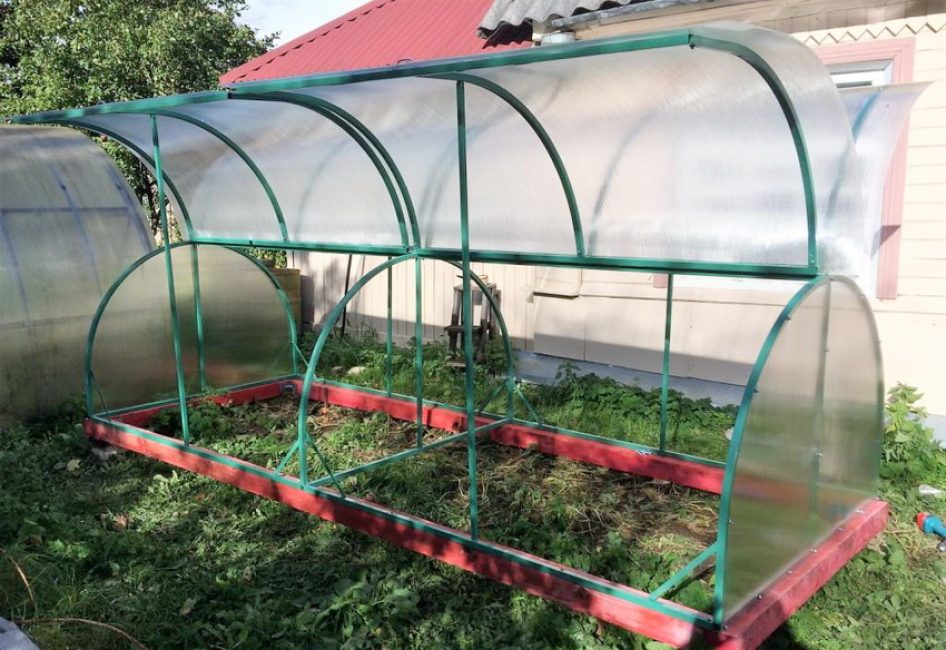
Arched

arched greenhouse
Arched: they are made mainly of polycarbonate, which is not a particular problem to bend; this form of structure allows the snow to easily slide down without lingering on the roof.
Shed
Shed construction
Shed: with a roof slope in one direction.
gable
Gable mini greenhouse
Gable: their roofs are formed by two inclined slopes.
A-shaped
A-shaped greenhouse recessed into the ground
A-shaped: a kind of gable; they do not have walls, they consist only of slopes, strongly elongated in height.
Drops
Drop-shaped roof
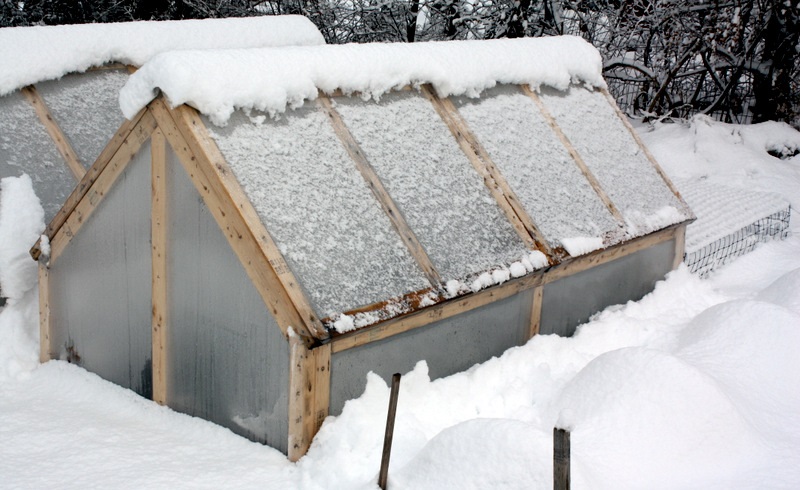
"Drops" (with lancet roof): a combined version of the arched and gable version; it is considered the best option for areas with snowy winters - snow does not linger on such a roof; such structures are less often damaged during strong winds.
wall
wall greenhouse
Wall greenhouses: allows you to significantly save materials during construction, they are built if the wall is well lit by the sun and is located on the south side.
 Read also: Peat tablets: how to use it correctly, a mini-greenhouse device for seedlings (20 Photos & Videos) + Reviews
Greenhouse from window frames
Throwing away window frames remaining after repair is a real crime for a gardener. After all, they can make a full-fledged greenhouse. Indeed, why spend money on a ready-made store building if you have excellent material at hand?
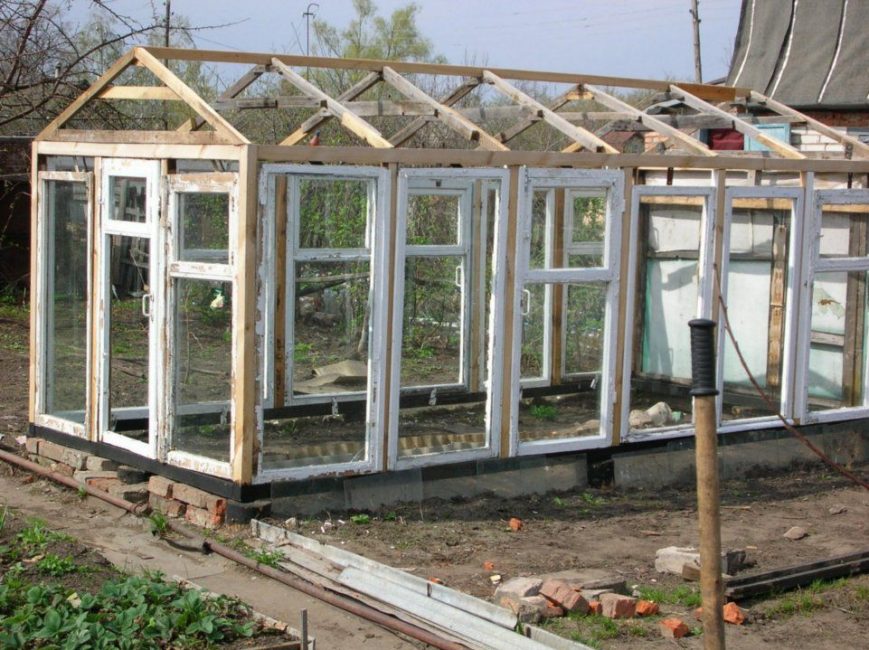
Old window frames are a popular material for greenhouses and greenhouses.
So, let's describe how to make a greenhouse out of window frames for tomatoes:
Is a foundation needed?
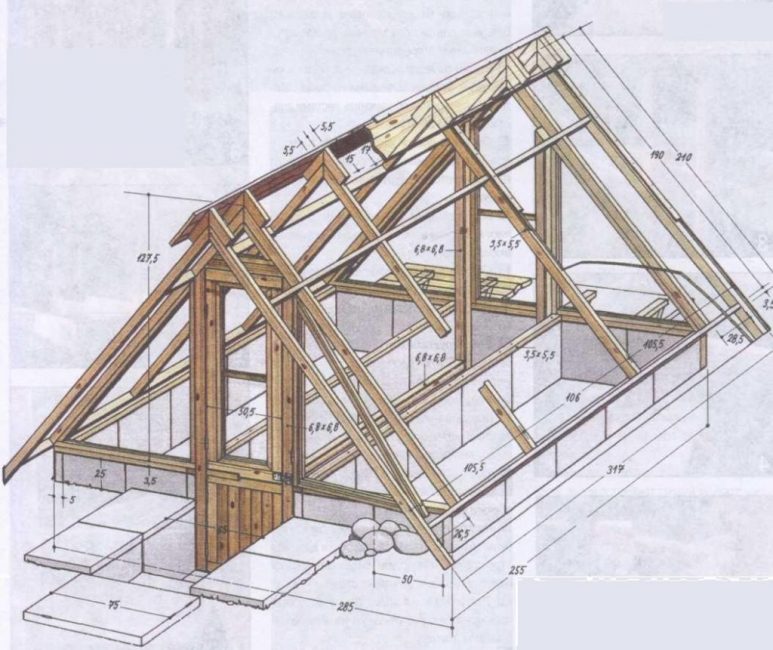
Weight greenhouses of window frames is significant, and without foundation in the process of subsidence of the soil, the structure can warp. Therefore, it is erected on a strip or brick foundation (you can use an old brick). It is also allowed to use foam blocks, columnar concrete foundation or metal piles.
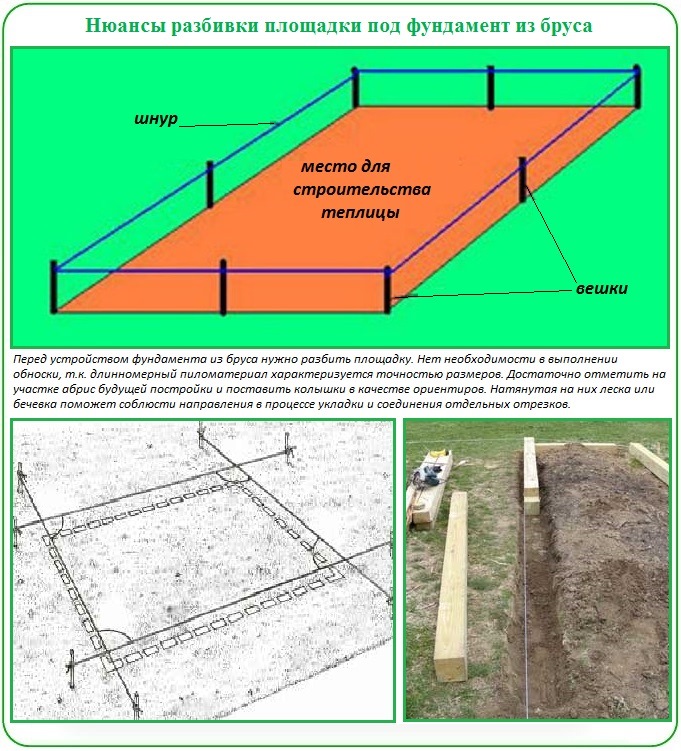
Laying the foundation from a bar
In some cases, instead of a foundation, a double row of thick wooden blocks is laid in the ground.. However, such a foundation is permissible only in the presence of dry sandy soils. But even in this case, it will last no more than 6-8 years.
It is desirable to use a coniferous tree - it does not rot so quickly. The beam is pre-treated with bituminous mastic and wrapped with roofing material. Two rows of beams are connected with anchor bolts or wooden dowels. You can simply hammer pieces of reinforcement into the tree.
Strip foundation
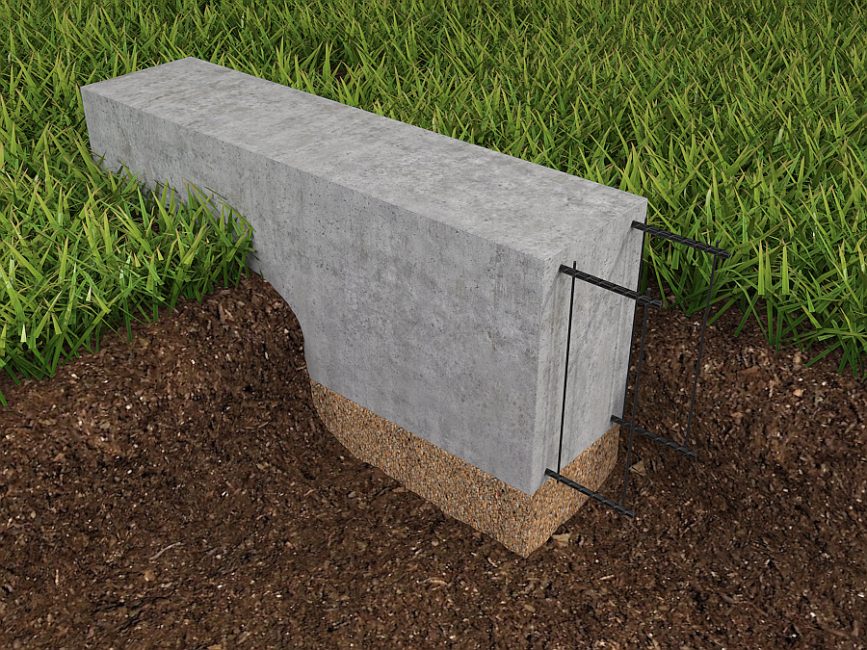
Strip foundation
Let us describe in detail the process of erecting a shallow strip foundation:
Frame assembly. Frame fixing
Fastening with pads
The frame must be strong enough to support the weight of the window frames:

Mini greenhouse from window frames
 Read also: How to make a beautiful and inexpensive fence in the country with your own hands: wood, metal and polycarbonate | (70+ Photos & Videos) + Reviews
 Polycarbonate greenhouse
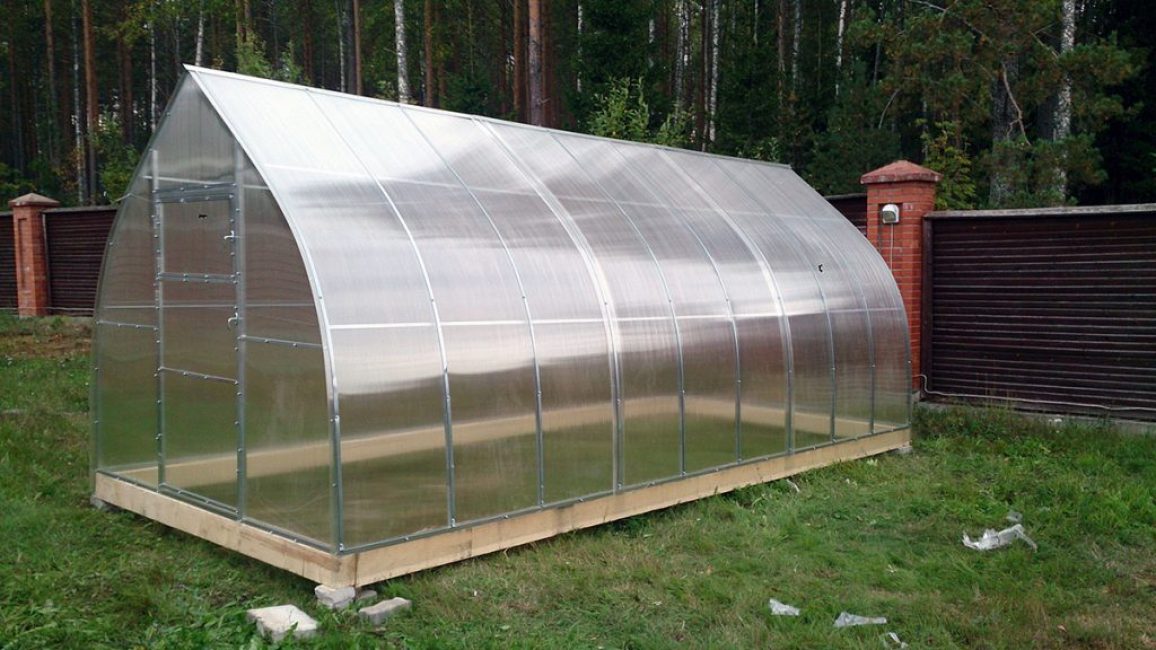
Perhaps the best greenhouse option for home use today. It has a minimal weight and does not require a powerful foundation - a deepening of 0.3-0.5 m into the ground is enough. We described the types of bases for the greenhouse a little higher.
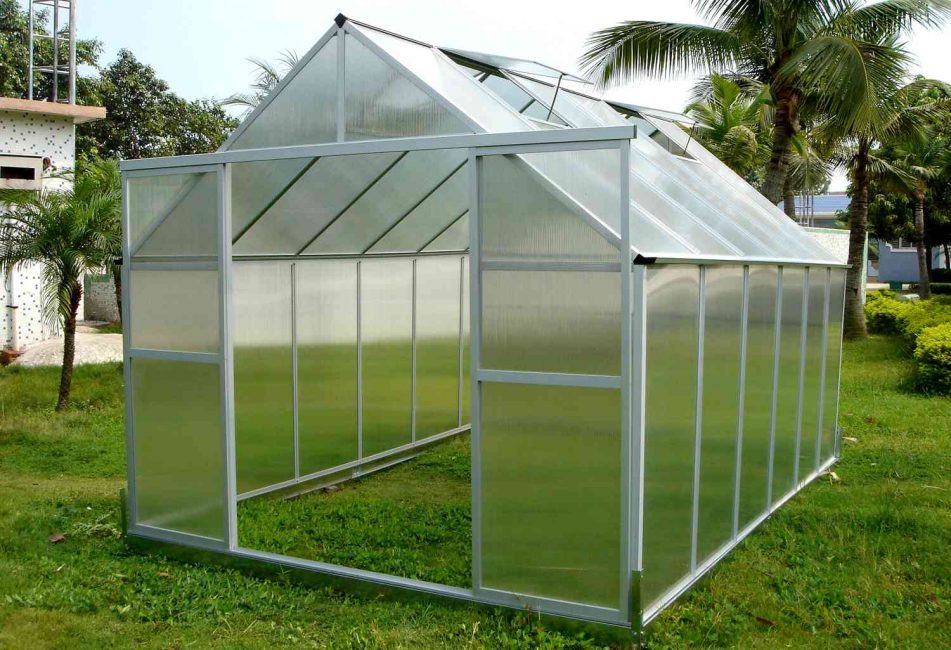
Ready-made polycarbonate greenhouse
Strong enough and easy to assemble, it is the most popular today. The special structure of polycarbonate sheets with an air gap makes them excellent heat insulators. Yes, and outwardly such a structure looks very aesthetically pleasing.
Frame assembly
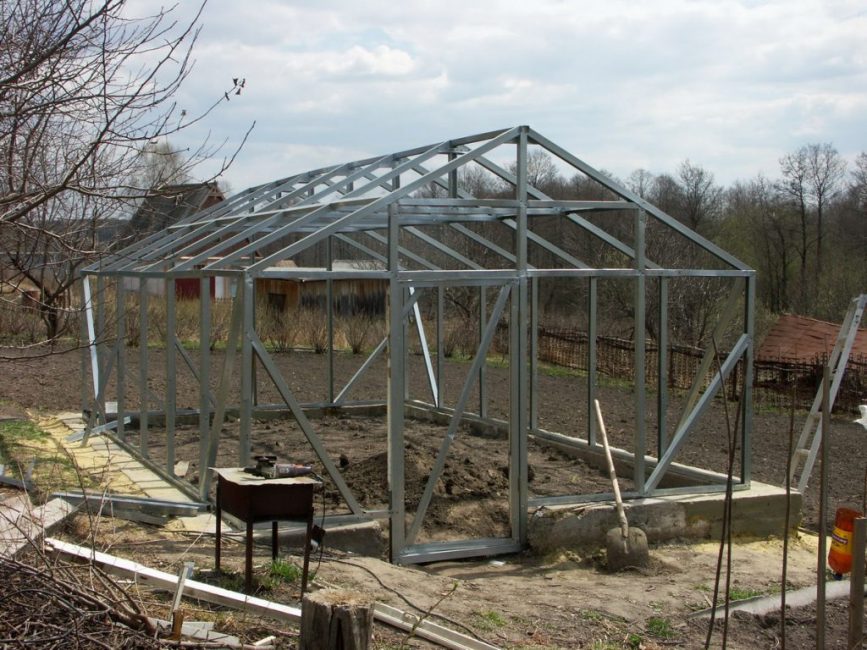
Finished frame
As a frame, a metal profile or wooden bars are used:
How to bend a pipe
Arched structures or streamlined drop-shaped greenhouses are more practical. Too much snow never accumulates on their roofs - it easily rolls down.

Pipe bending
Pipes of only a small section easily bend. With a profile height of 40 mm or more, it is problematic to bend them without preheating. This can only be done with a special profile bender.
In the absence of a device, you can do the following:
Polycarbonate mount
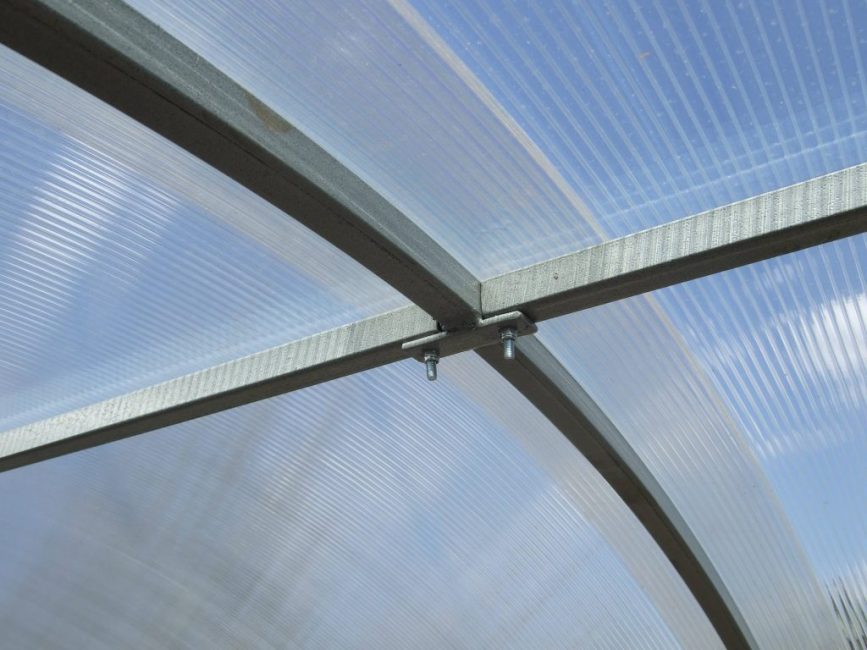
Lap joint
How to make a polycarbonate greenhouse?
In order for such a greenhouse to last longer, adhere to the following rules when assembling it:
- The protective layer on which the inscriptions are applied must be located on the outside of the greenhouse.
- To obtain the most durable structure, be sure (!) Pay attention to the location of the "honeycombs" of polycarbonate - they should only go vertically, in inclined structures - parallel to the slope.
- When creating arches, keep in mind that polycarbonate sheets bend only in one direction - in length, that is, along the line of stiffeners.
- The joints of the sheets should fall on the center of the frame rack, connect the sheets only in this way.
- Cut this type of plastic with a construction knife, jigsaw, grinder. You can also use a hacksaw or a circular saw.
- For strong connection of sheets among themselves special plastic profiles are used. Manufacturers do not recommend overlapping polycarbonate. In practice, in the manufacture do-it-yourself polycarbonate greenhouses cutting and fitting sheets perfectly does not always work. Some craftsmen generally manage to do without connecting profiles, placing overlapping polycarbonate. The most important thing is that the junction must necessarily fall on the center of the rack, and not sag in the air. Moreover, even with perfect installation under the pressure of snow, the sheet can be squeezed out of the profile. In the case of overlap, this does not happen.
- Powerful drill it is undesirable to use it for screwing in self-tapping screws - it will overtighten fasteners and often slip off during operation. It is better to work with a conventional screwdriver.Polycarbonate is drilled at low speed with little effort. Next, turn off the tool, insert the screws and continue to work.
- The distance between the screwed screws is 25-70 cm. It all depends on the type of frame and the expected snow and wind load.
- When assembling polycarbonate structures, riveting is sometimes used instead of self-tapping screws. However, it will be more difficult to dismantle the greenhouse or replace the damaged sheet in this case.
- When the temperature changes, the plastic is able to change dimensions. When butt-joining between sheets, a small space of a couple of millimeters in size is necessarily left - a technological gap. Otherwise, cracks will form at the junction. For the same reason, the size of the holes for the fasteners is made a little larger. To prevent the plastic from cracking, do not twist them all the way.
- To compensate for expansion and protect against cold bridges, it is recommended to use special thermal washers for polycarbonate (self-tapping screws are purchased separately). It is allowed to use EPDM roofing screws equipped with a gasket or standard for metal with a rubber thermal washer, in which the thread has a small pitch.
 Read also: How to make a children's house with your own hands: from wood and other materials. Dimensional drawings | (80 Photo Ideas & Videos)
Plastic pipe greenhouse
To create arched structures, PVC pipes are often used instead of metal profiles. After all, this plastic is quite durable - a single pipe can withstand a load of 500 kg. It is much easier to bend it into an arc than metal. Plus, users are attracted by the price of PVC products - assembling a greenhouse from it is quite inexpensive.
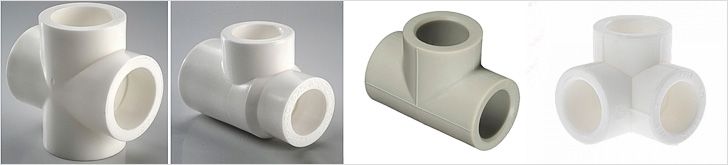
Tees and crosses for PVC pipes
A serious disadvantage of such products is lightness. A greenhouse with a frame made of polyvinyl pipes requires reliable fastening. Otherwise, with strong gusts of wind, the structure may collapse.
Materials and tools
How to make a greenhouse out of pipes?
- 2.5 mm PVC water pipes and connecting fittings - tees and crosses.
- To connect the frame to a wooden base, metal plates and galvanized self-tapping screws are used.
- We will cut the pipes with an ordinary hacksaw for wood or metal with fine teeth.
- It's great if you have a special welding machine for welding plastic pipes in your house or friends' house. But you can do without it - they can be glued together.
How to bend plastic pipes
For bending PVC products, they must be heated. To do this, use hot sand, salt or a building hair dryer. To begin with, you can practice on a small piece of pipe.
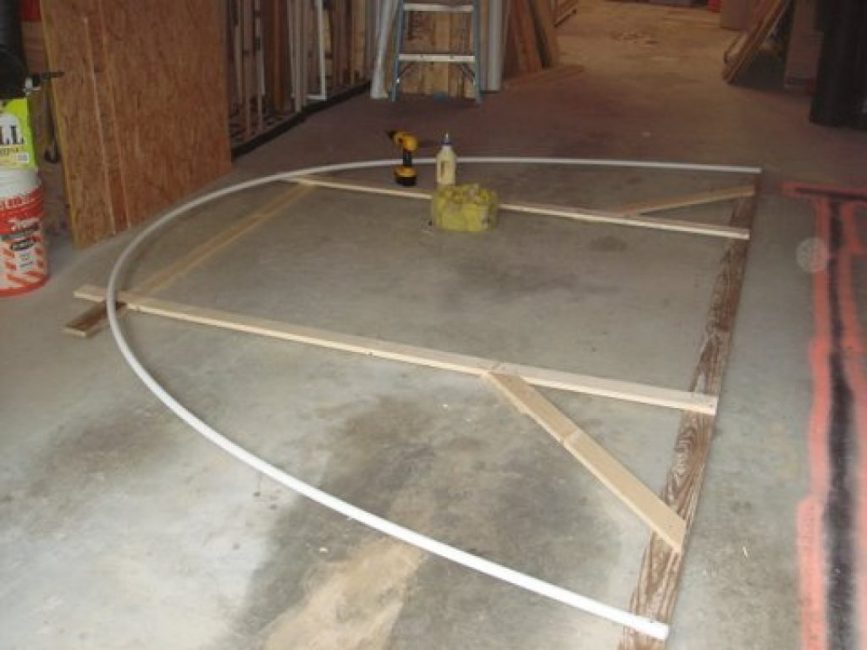
PVC pipe arc
We tell you how to make an arched greenhouse at home:
Assembling a small greenhouse from PVC pipes
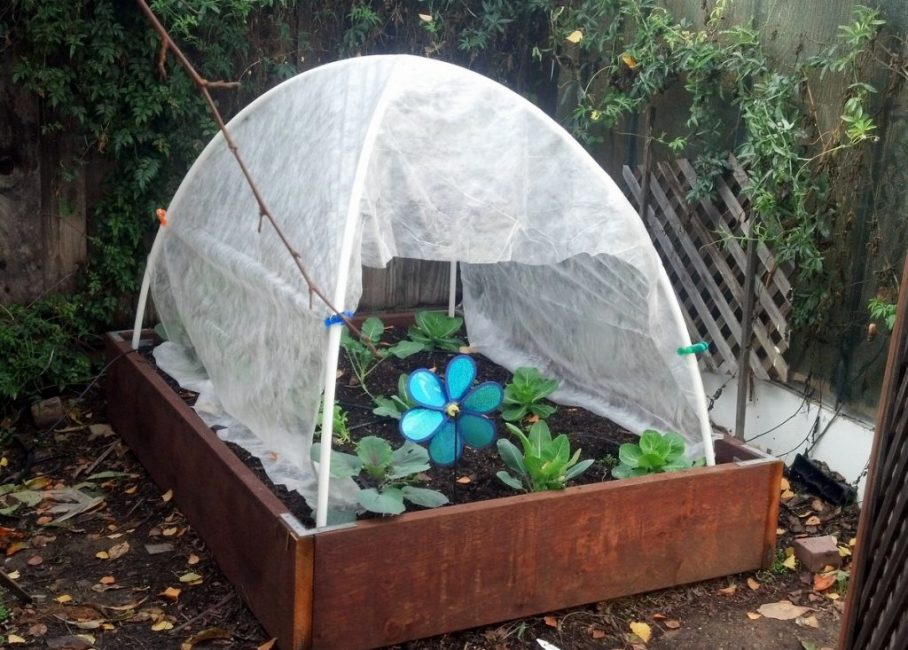
The simplest greenhouse made of plastic pipes
Let's describe step by step how to make a PVC greenhouse:
Pipe connections with crosses and tees

Assembly with corners and crosses
Fastening with corners and crosses is more durable. A similar method allows you to create not only small arched, but also more massive full-fledged structures:
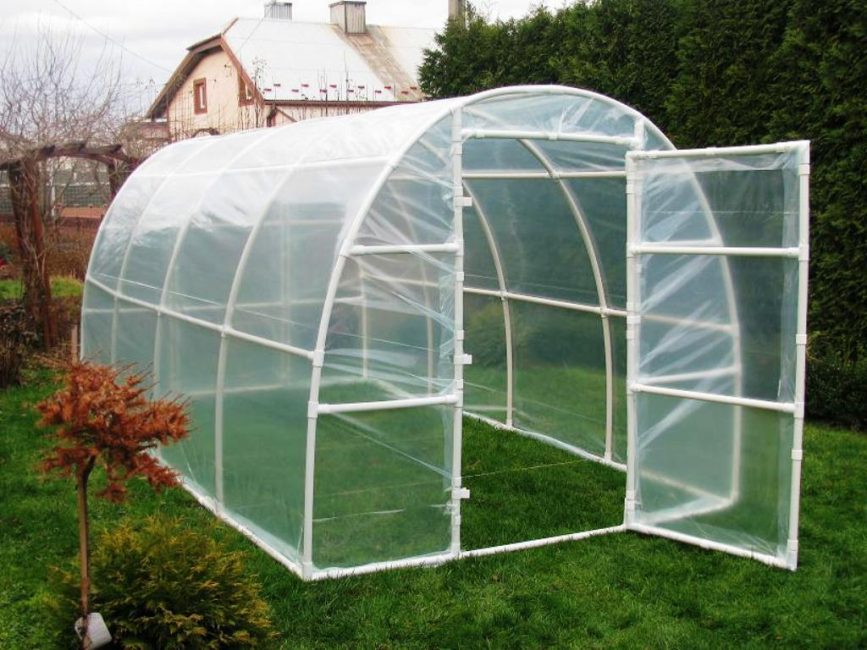
Assembled arched greenhouse from PVC pipes
![[Instruction] Do-it-yourself laminate on a wooden floor: a complete description of the process. Laying schemes, what materials should be used (Photo & Video) + Reviews](https://iherb.bedbugus.biz/wp-content/uploads/2018/05/laminat-300x200.jpg) Read also: [Instruction] Do-it-yourself laminate on a wooden floor: a complete description of the process. Laying schemes, what materials should be used (Photo & Video) + Reviews
Read also: [Instruction] Do-it-yourself laminate on a wooden floor: a complete description of the process. Laying schemes, what materials should be used (Photo & Video) + Reviews Butterfly greenhouse
How to make a greenhouse from pipes in the shape of a butterfly? The advantage of this design is perfect ventilation - in the summer, the greenhouse can be opened completely.
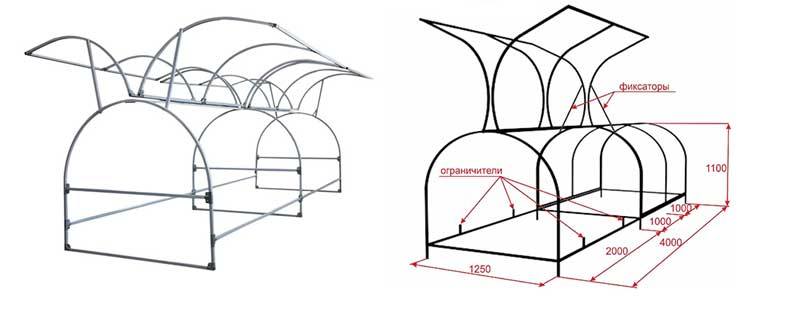
Butterfly greenhouse preparation
Butterfly greenhouse
 Read also: Do-it-yourself furniture and other wood products: drawings of benches, tables, swings, birdhouses and other household items (85+ Photos & Videos)
 Greenhouse bread box
Making a greenhouse-bread box is easy. The principle of its creation is similar to the previous one. The only difference is in the way the sashes are attached. If in the first case the hinges located on the upper horizontal lintel are used, then for the greenhouse-bread box, the hinged joints are at the very bottom, on the sides of the frame.
Since such a structure has a small height, it is possible to grow any kind of plant in it, except for climbing ones.
Greenhouse-bread box made of polycarbonate
Such a greenhouse can be easily moved to another place. A large greenhouse is best reinforced with horizontal guides. Make it better collapsible, so that if necessary, you can easily assemble and store for the winter.
To prevent such a structure from being pulled out of the ground by the wind, it is installed on wooden blocks. To protect seedlings from drafts around the perimeter of the greenhouse, they lay and compact the soil well.
 Read also: Do-it-yourself construction and arrangement of a summer kitchen in the country: projects, design, device, with barbecue and barbecue (60+ Photos & Videos) + Reviews
 Greenhouse on the balcony
There is still little work in the garden in early spring. Travel a long distance just to water daily seedlings, do not want too much. It is much more reasonable to make a mini-greenhouse on the balcony. It can also be used to grow a wide variety of flowers.
In warm weather, sow plants on balcony start in March-April. On insulated loggias, they can be grown all year round.
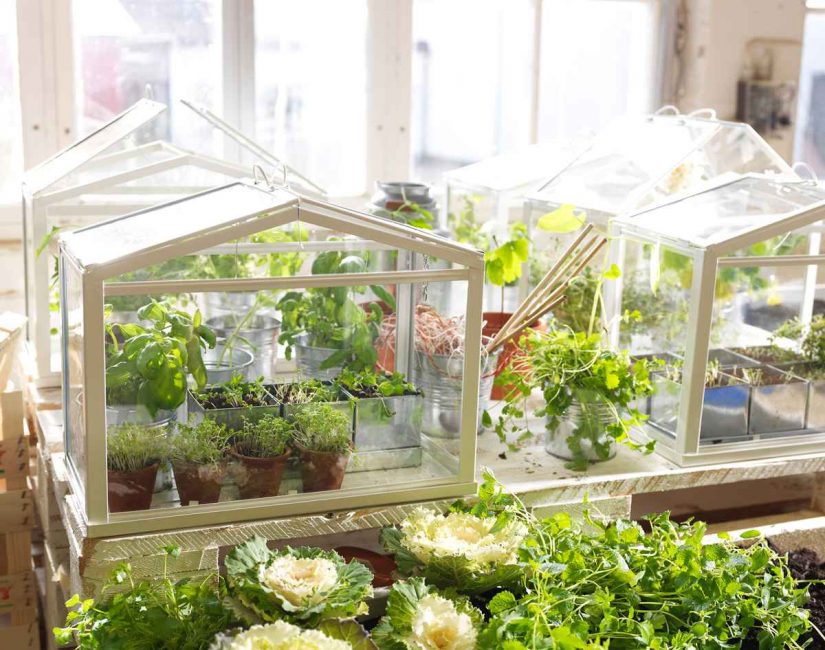
Mini greenhouses on the balcony
Any materials can be used for manufacturing. After all, the balcony is already protected from the winds, so capital structures are not needed here. We have described in detail the process of creating greenhouses from PVC pipes, metal profiles, wooden frames, polycarbonate.
When creating a greenhouse on a balcony, you can use any of the methods:

Greenhouse or garden bed (for the lazy) simply and quickly
How to make a greenhouse with your own hands: for seedlings, cucumbers, tomatoes, peppers and other plants. From polycarbonate, window frames, plastic pipes (75 Photos & Videos) + Reviews


Accessible, reasonable, without fake nonsense, which is now "in the open" in abundance. And most importantly, almost all the information that interests me is collected here))) Great site - I subscribe!