
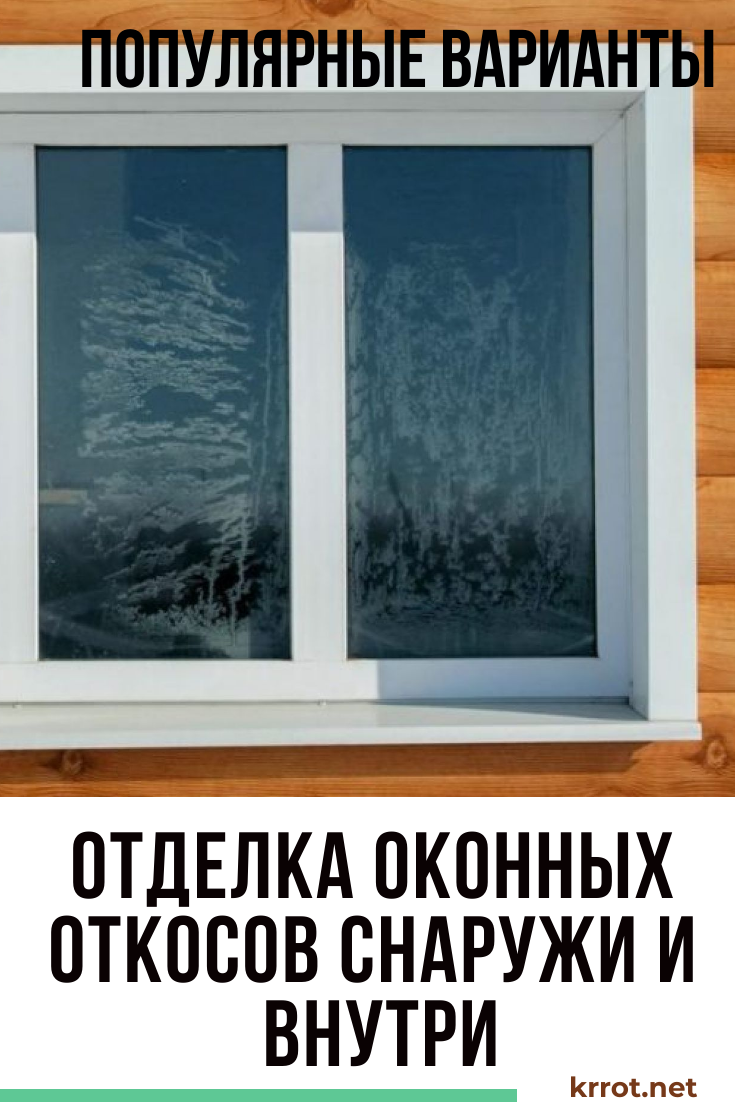
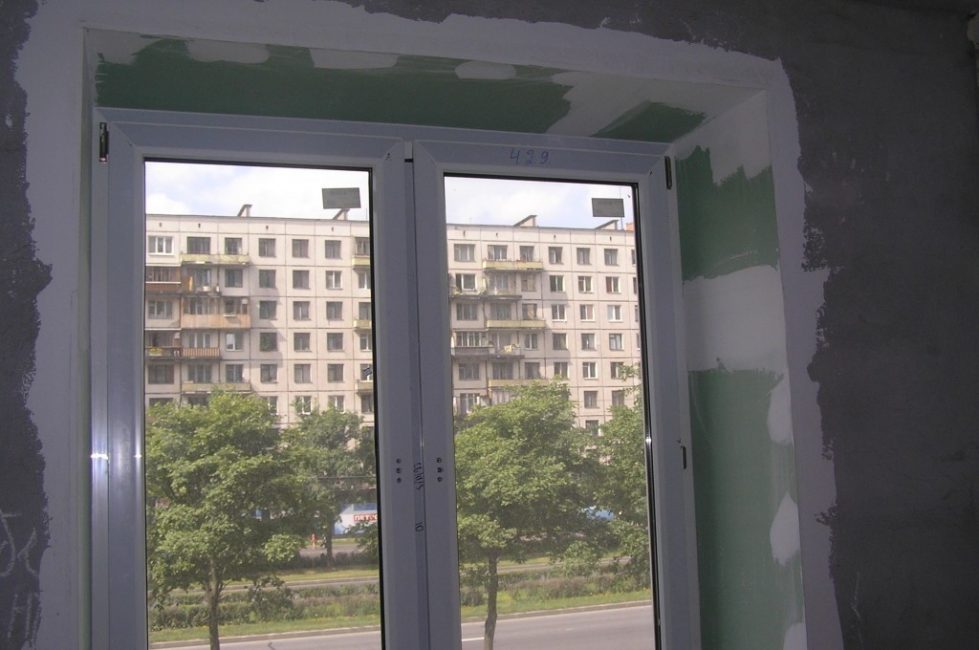
After installing the window block and filling the gap around the perimeter of the structure with mounting foam, you need to take care of finishing the slopes window from the outside and from the inside. Exterior finishing should not be postponed indefinitely for a number of reasons - without it window have an untidy appearance, and building foam is exposed to the damaging effects of ultraviolet radiation.
 Read also: Making a greenhouse with your own hands from a profile pipe and polycarbonate: a complete description of the process, drawings with dimensions, watering and heating (Photo & Video)
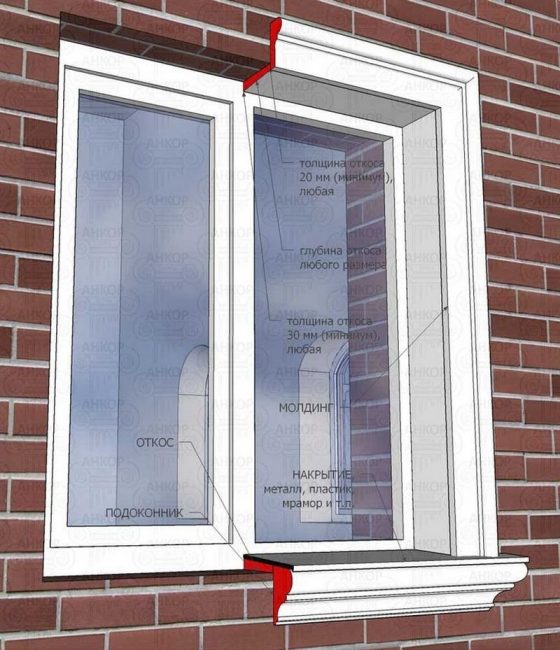
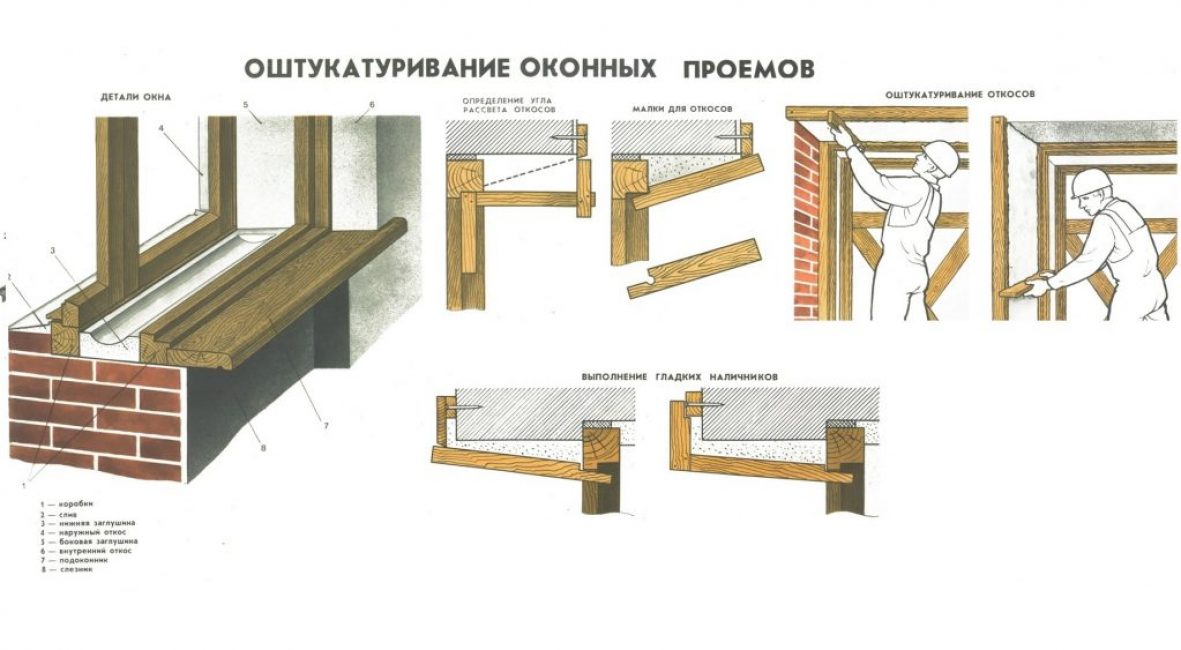
Functional purpose of external slopes
Polyurethane foam is able to quickly expand, filling the smallest cavities and firmly adhering to any surface. In a frozen state, it helps the fasteners to fix the window unit in the opening, serves as a good heat and sound insulator, a barrier against dust and moisture from the street. Building foam is not afraid of temperature changes, exposure to precipitation, but is destroyed under ultraviolet radiation.
If filled joints are left exposed to the sun, the polyurethane foam will degrade in a matter of months. Mounting foam under the influence of ultraviolet becomes brittle and crumbles, moisture penetrates into the material and accelerates the process of destruction. As a result, over time, the seams lose their tightness.
Sloped window
This results in freezing and wetting of the walls around the window, large heat losses, fogging of glass, mold growth in damp walls. The window unit can warp, and its mechanisms will fail faster due to increased loads.
Finishing the slopes, performed immediately after the installation of the translucent structure or after a short time, protects the seams filled with mounting foam from external influences. When arranging it, external slopes can be additionally insulate. High-quality finishing gives the windows a complete look, improves the appearance facade.
 Read also: How to make a patio in the country with your own hands: a variety of design options, decoration and arrangement (85+ Photo Ideas & Video)
 Materials and technologies
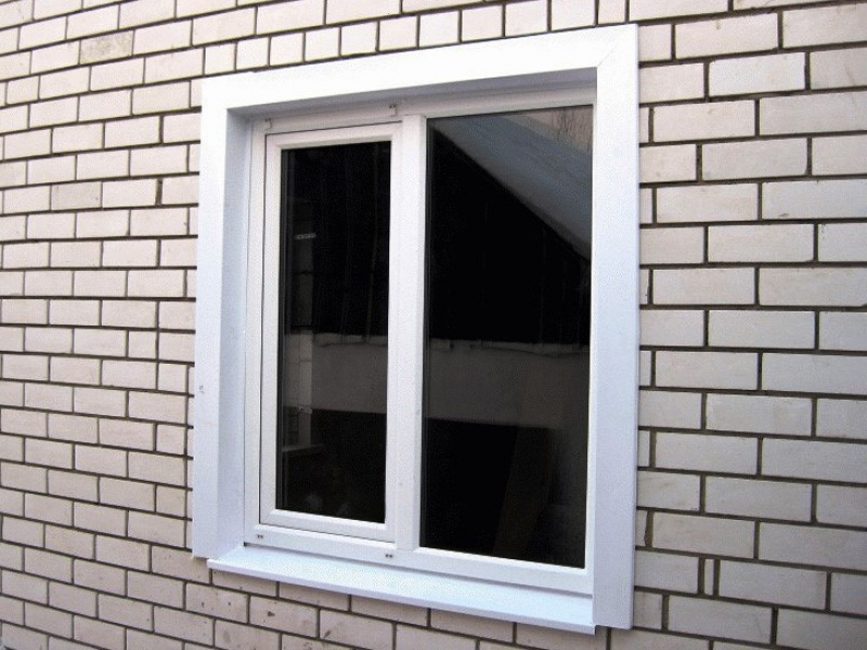
Plastic slopes
Used for window cladding:
- Facade plaster. The advantages of traditional plastering technology include the low cost of the material and the ability to finish window openings of any shape, including arched ones. The disadvantages include the complexity of installation, the duration of the work, the low thermal insulation properties of the finish, the need to periodically re-paint the surface. Violation of the technology of plastering works leads to delamination of the plaster layer from the base - in this case, the lining will have to be completely redone
- Drywall. Moisture-resistant GKL is easily cut and attached to a prepared surface, it is inexpensive. But the material, even painted with moisture-resistant paint for outdoor use, should not be exposed to direct water. This cladding option is suitable for windows overlooking a glazed balcony, terrace, or located under a wide roof overhang of a private house.
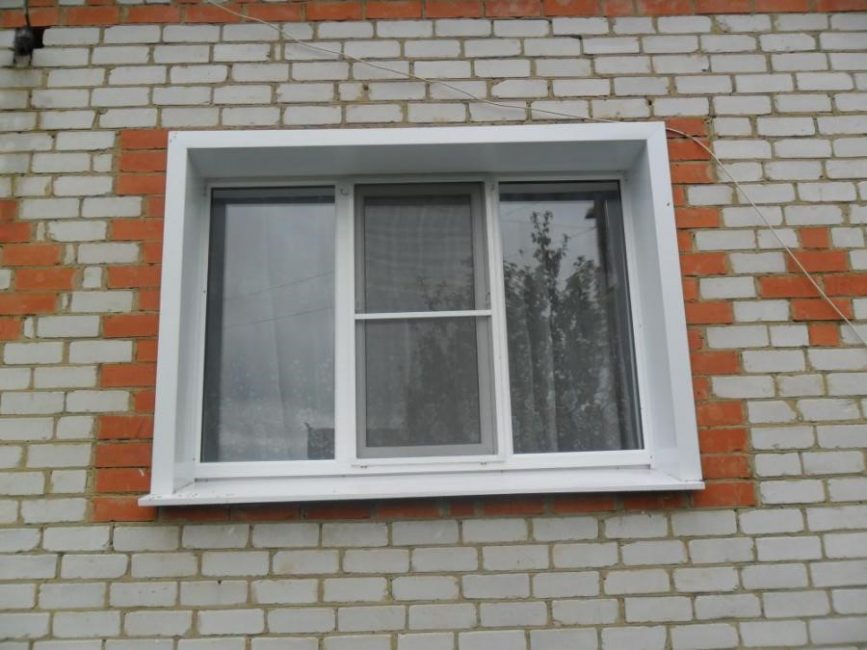
- PVC products. Slopes made of plastic are easy to install and are ideal for finishing metal-plastic windows.Manufacturers offer various decoration options, which allows you to choose the right color and texture of the material. Flexible PVC elements make it possible to decorate window openings of complex shapes, with rounded outlines. The material is easily cleaned of dirt, does not crack, does not deform, does not change color under the influence of temperature fluctuations, precipitation and UV rays. Lack of prefabricated PVC elements - high cost
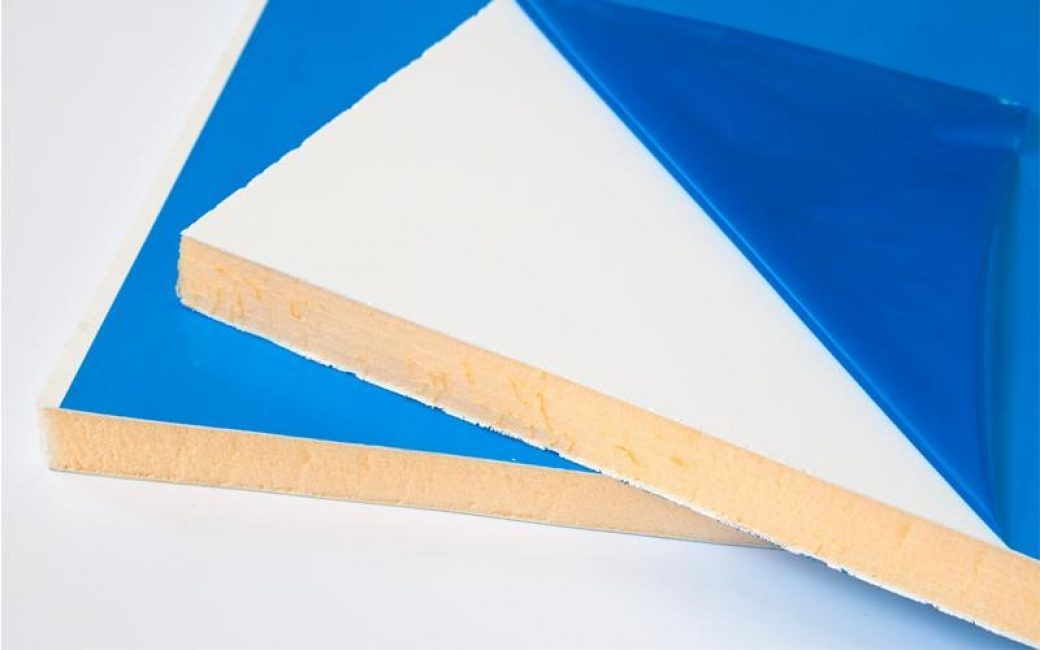
- Sandwich panels. This material consists of two sheets of plastic and a layer of foamed polymer heat insulator between them. The advantages of the material are the same as those of PVC slopes, but sandwich panels additionally insulate the open part of the window opening
- Metal. There is a wide range of slopes made of galvanized steel on the market, including those with a protective and decorative coating. Manufacturers of wooden windows with double-glazed windows can offer ready-made slope elements made of aluminum and decorated to look like wood, but this finishing option is expensive
- Tree. External slopes made of wood are suitable for decorating and protecting window openings in wooden houses. The most durable option is a thick larch board impregnated with an antiseptic and a water-repellent paint and varnish coating. Also, wooden cladding is mounted on window openings overlooking a glazed balcony, terrace
Plastering
Plastering
Necessary tools and materials:
- small (goniometer)
- plumb line
- hammer
- thin slats (wooden or metal)
- container for mortar
- trowel (trowel)
- construction grater
- brushes
- gypsum glue
- deep penetration primer for concrete, brick, building blocks
- polymer reinforcing mesh
- facade plaster
- outdoor paint
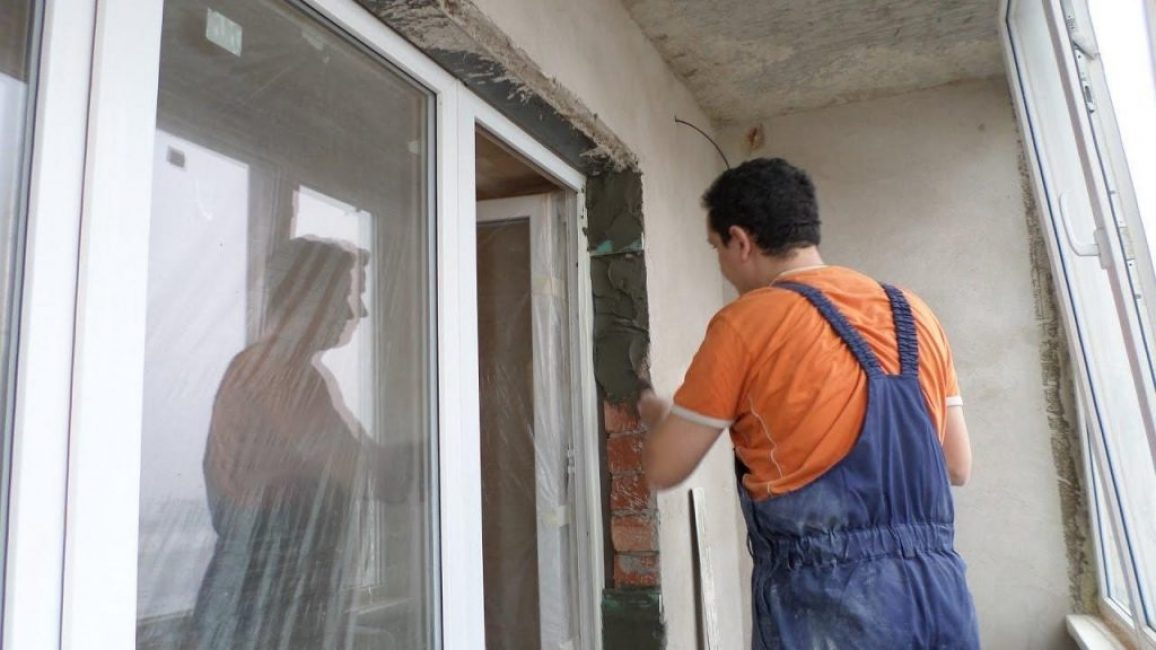
Before applying the plaster, it is necessary to prepare the surface. First of all, cut off the excess foam with a mounting knife. If the slopes are already plastered, they are tapped with a hammer. In the presence of voids, delaminations, the old plaster is completely knocked down.
Slope plaster
Surfaces are cleaned of dust, dirt, deep cracks are filled with putty for outdoor use and wait for it to dry. Then the slopes are primed, and 3-4 hours after drying, they begin to install beacons.
Thin slats are fixed at a distance of 5-6 cm from the window block on liquid nails or gypsum glue. Beacons should be located so that the plaster layer overlaps the edge of the block by 1-2 cm. The slope surface should not be perpendicular to the plane of the window, but at a slight angle - this improves illumination.
The plaster mortar is prepared according to the manufacturer's instructions. Then the first layer of plaster is applied over the beacons - it must be thick and form the required plane. Be sure to check the angles of inclination of the resulting slopes. For strength, you can use a reinforcing mesh - it is recessed into a layer of plaster.
After drying the base layer (it takes 24 hours), the surface is treated with a primer and dried. The leveling plaster layer should be thin. It is dried and treated with a construction grater. Then the surface is primed again - after drying, it is ready for painting with facade paint.
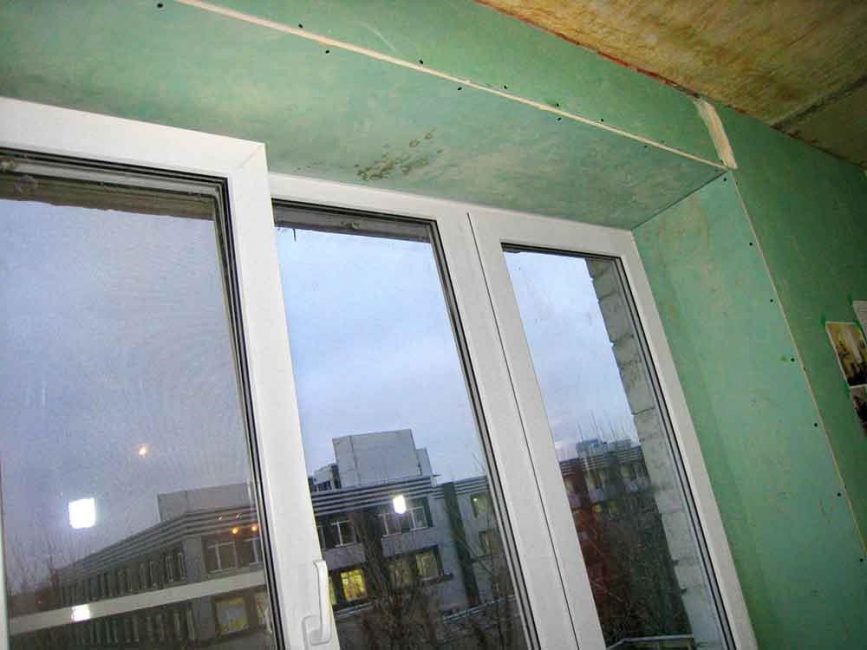
Drywall
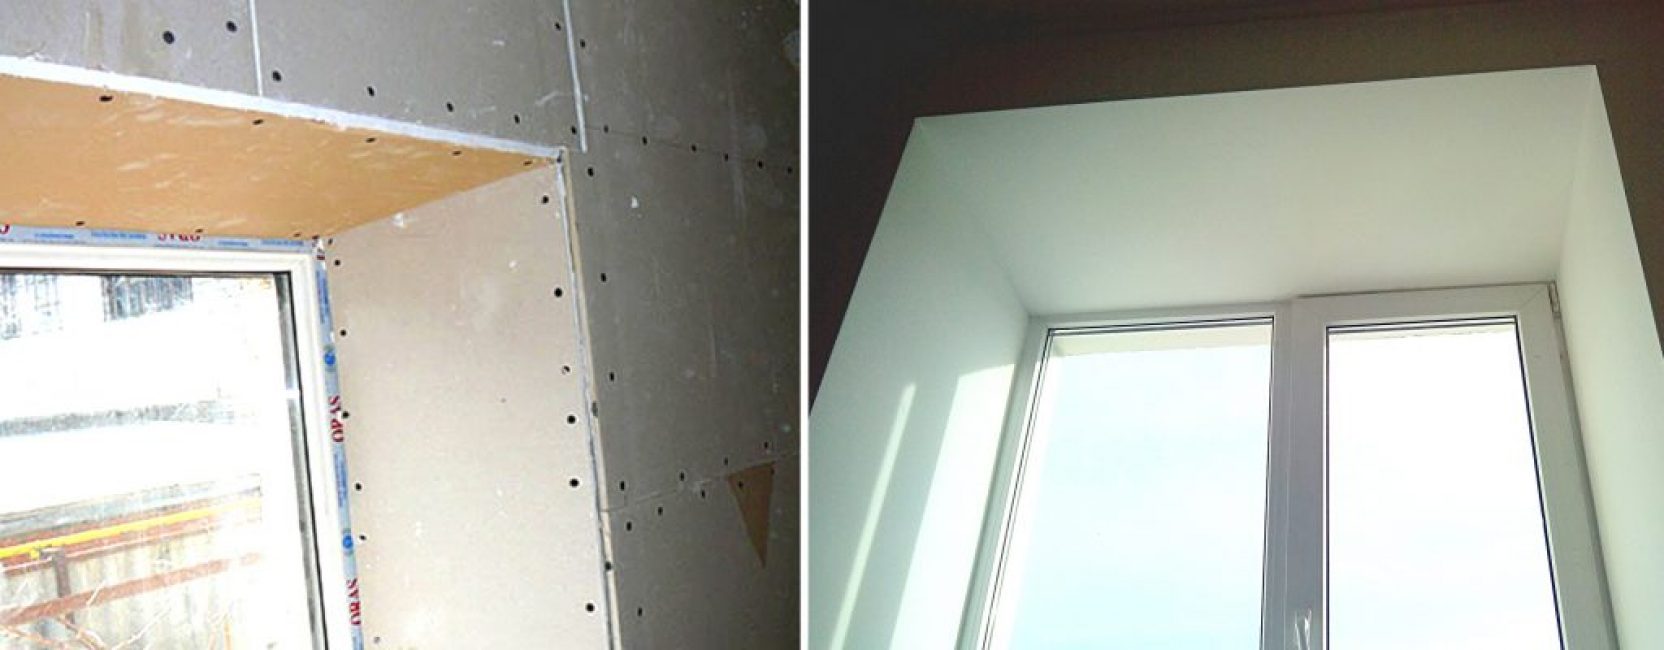
Drywall slope
Necessary tools and materials:
- moisture resistant GKL
- plastic beveled corner
- roulette
- building level
- assembly knife
- metal rail
- moisture resistant glue for plasterboard
- liquid Nails
- putty for outdoor use
- putty knife
- brush
- acrylic waterproof paint for outdoor work
Strips of the required width are cut from the GKL sheet for two side and upper slopes. To do this, make a deep cut with a sharp knife along the rail, break along the line, and then cut the cardboard on the back side.
Sheathing GKL window opening
The surface of the slopes is cleaned of dust and dirt, primed if it is planned to glue the material. A corner is attached to the window frame with liquid nails, a strip of plasterboard is glued to it.
Previously, a moisture-resistant adhesive composition is applied to the back of the drywall element with volumetric dots or a snake, closer to the outer edge. Then the drywall strip is pressed, fixing at the desired angle.
Second mounting option: a crate of laths is attached to the slopes with dowel-screws, on which drywall is mounted using self-tapping screws. Seams are recommended to be sealed with putty for outdoor use. Then the lining of the opening is primed and painted, a plastic corner is glued around the perimeter to protect the ends of the drywall from moisture.
PVC sheet
PVC finish
Necessary tools and materials:
- moisture resistant GKL
- plastic beveled corner
- roulette
- building level
- assembly knife
- metal rail
- moisture resistant glue for plasterboard
- liquid Nails
- putty for outdoor use
- putty knife
- brush
- acrylic waterproof paint for outdoor work
Rails are mounted along the border of the window opening, along the perimeter, with the help of dowel screws. With self-tapping screws, a starting U-shaped profile is attached to the window block, and an F-shaped profile is attached to the rails with brackets. In this case, the F-profile strip must go to the facade.
If necessary, thermal insulation material is glued to the slopes. Strips of plastic are inserted with their edges into the grooves of the profiles. In the corners, the joints should be carefully sealed with liquid plastic.
Sandwich panels
Sandwich panels
Necessary tools and materials:
- plastic sandwich panels with foamed thermal insulator
- U-shaped PVC profile
- PVC corner
- screwdriver + screws
- assembly knife
- liquid Nails
Having cleaned the surface of the outer part of the window opening from contamination, on the sides and in the upper part of the window block, a starting U-shaped profile is screwed with screws.
Planks are cut out of sheet material along the width of the slope and fastened to liquid nails, after inserting one edge into the starting profile. The top panel is fixed first, then the side panels. To protect the ends of the elements from the sandwich panel and give the window a complete look, the outer edge of the opening is closed with a plastic corner.
Metal
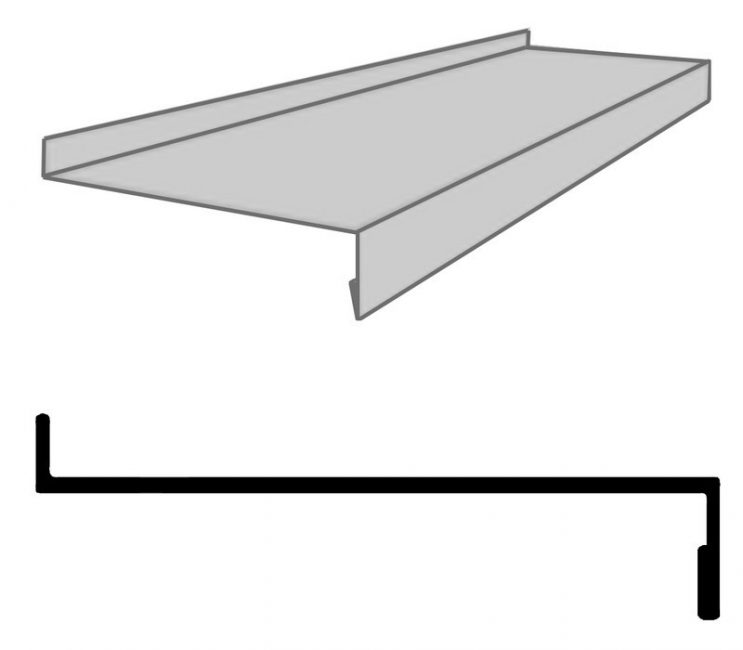
Standard profile strip
Necessary tools and materials:
- metal scissors
- tape measure + pencil
- goniometer
- sheet steel slope profiles
- screwdriver + self-tapping screws (painted to match the metal for cladding)
- assembly knife
- sealing noise-absorbing tape
- deep penetration primer
- brush
- silicone sealant
- foamed heat insulator + liquid nails (if necessary, insulate the structure)
At the preliminary stage, the opening surfaces are cleaned of dirt, excess foam is cut off with a knife. Then it is important to take measurements correctly in order to determine the length of the top and side trim elements, the angle of inclination of the drainage.
The drainage should have sidewalls bent upwards - they go onto the slopes. The angle of inclination of the drainage system is not less than 10°. To attach the drainage to the window frame, use self-tapping screws painted to match this element. Under the drainage system, it is required to lay a seal in advance so that rain and hail do not interfere with their noise.
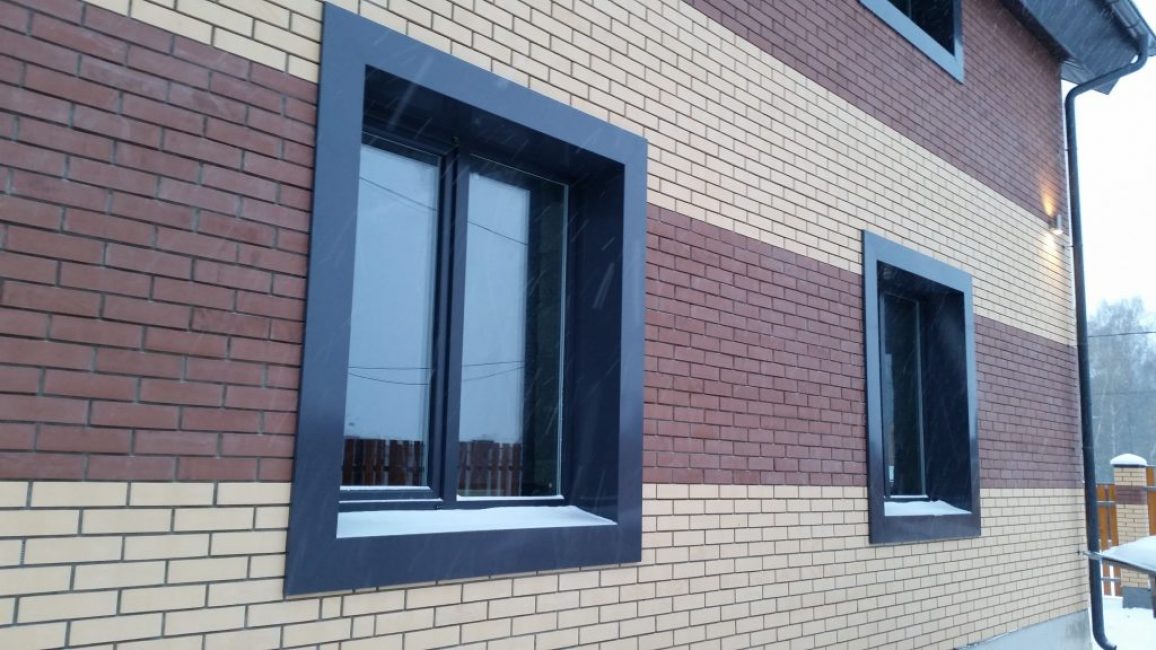
Metal lining of the opening
Then they are adjusted to the size of the planks - at the side, the lower part is cut in accordance with the angle of inclination of the drainage. The upper part of the plank facing the facade is cut at an angle of 45 °, the height of the protruding part must correspond to its width. The side elements are put on with a profile groove on the sides of the drainage system and attached to the frame with self-tapping screws.
The upper slope element is adjusted to size, the sides are cut out and bent along the edges with a width of about 1 cm. The part that will lie on the pediment should have protrusions on each side equal to its width. The upper element is mounted in such a way as to insert the sides into the grooves of the sidewalls, and the protruding parts on the gable - for the triangular protrusions of the side elements.
All junctions of metal elements to the wall are filled with sealant for outdoor use to prevent moisture from entering the structure.
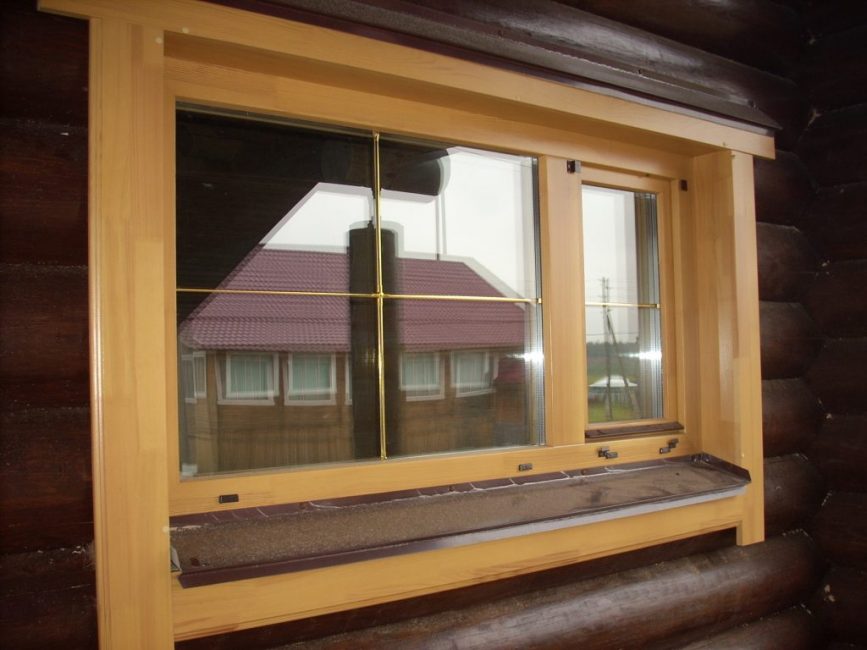
Tree
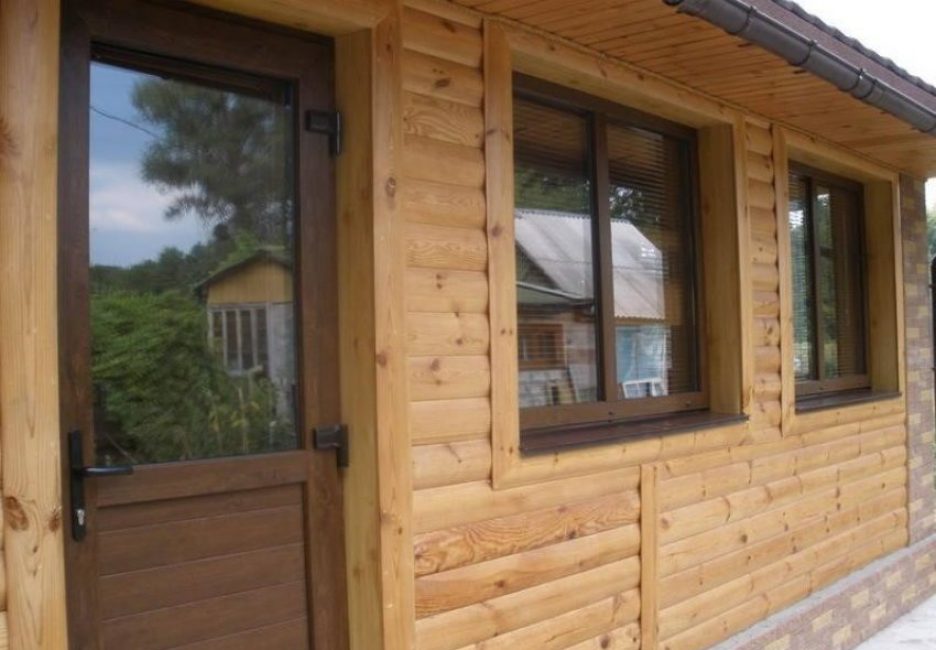
wood paneling
Necessary tools and materials:
- roulette
- building level
- thick boards from well-dried wood or lining
- trim strips
- antiseptic
- brush
- polyurethane foam
- wood stain + waterproof varnish for wood
- wood saw
- hammer + nails
- sealant
Vthe outer part of the wall opening is cleaned of dirt, excess mounting foam is removed, if the wall is wooden, it is additionally treated with an antiseptic. Measurements are carried out for each window separately, as precise fitting of the cladding elements is required. All prepared wooden planks are treated with an antiseptic.
The lower part of the sidewalls is cut at an angle corresponding to the angle of inclination of the drainage. The slopes are installed in the outer grooves of the frame and fastened together with self-tapping screws in the upper corners. It is important to achieve a fit of the elements, there should be no gaps at the junctions of the top and side strips.
wooden slopes
The gap between the structure and the opening is carefully filled with mounting foam, taking into account that it increases in volume by 3 times. A day later, after waiting for the foam to completely harden, it is possible to attach trim around the opening. They will close the gap between the finish and the wall, give the cladding a finished look.
The side trims join with the upper cuts at 45°. It is convenient to mount wooden planks on nails without hats or wooden studs and wood glue so that fasteners are not visible on the front side. The finished structure is covered with stain and varnish. The joints between the casing and the wall are filled with sealant.
 Read also: How to make a children's house with your own hands: from wood and other materials. Dimensional drawings | (80 Photo Ideas & Videos)
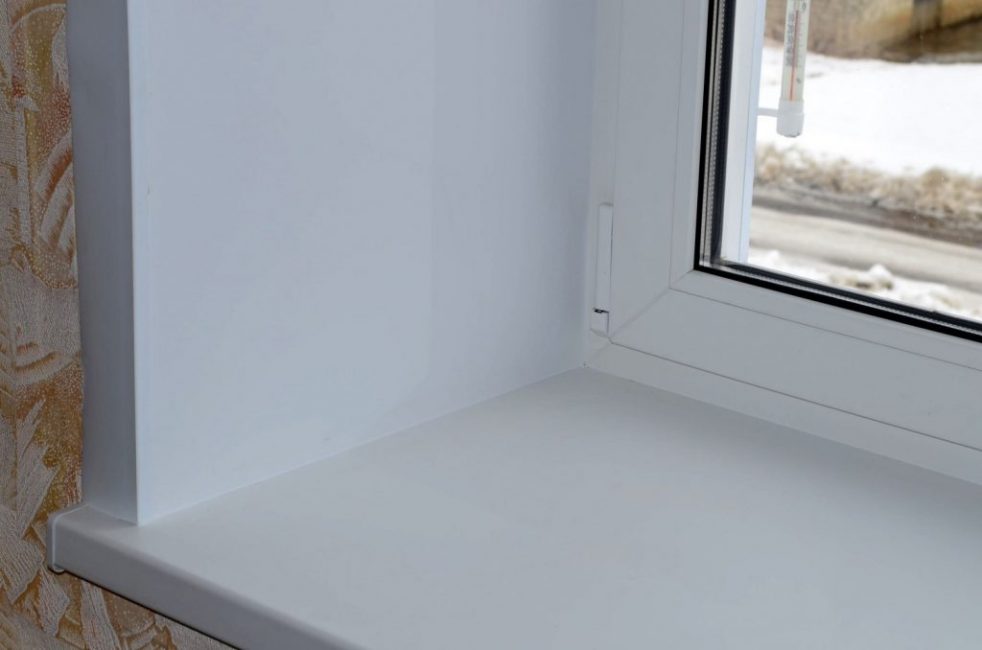
Internal slopes
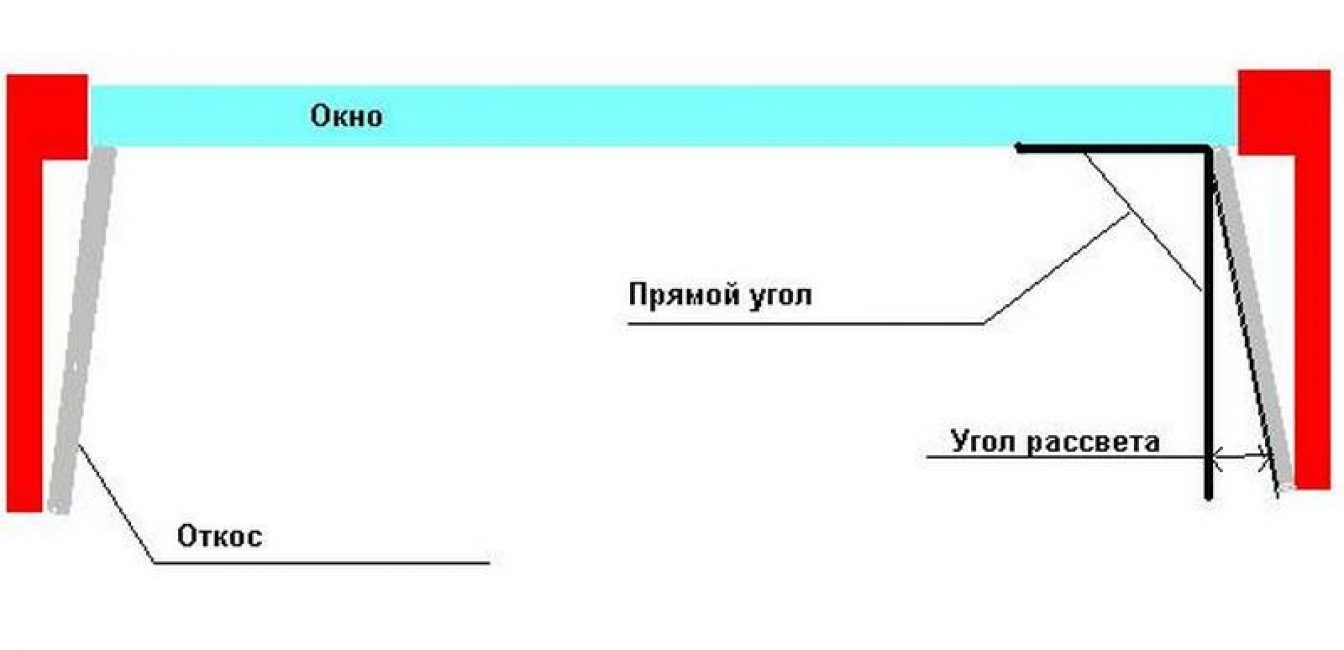
dawn angle
For finishing the internal slopes, the same materials are used as for the external ones, with the exception of metal strips. The technologies are generally similar, but there may be some nuances that we will consider in more detail.
Regardless of the material chosen, the finish is mounted in such a way that the slope plane is located at an angle of more than 90 ° relative to the window. "Dawn Angle" increases the area of dispersion of the light flux - the room will be brighter. First of all, this is true for windows in thick walls.
Decorative plaster
Decorative plaster slopes
The plaster layer when finishing the window opening from the side of the room can be made smooth or embossed using ordinary or textured plaster.
Plastering is carried out in several stages:
- slopes are cleaned and primed
- apply and level the base layer of plaster
- a perforated corner is mounted on the upper and side edges of the window opening and fixed by leveling the plaster mortar that has come through the perforation
- after drying, the base layer is primed
- apply a layer of textured plaster and use stencils, a spatula or other devices to form a decorative relief
- after drying, paint in the desired color with moisture-resistant paint for the interior
Plastic finish
Use of PVC panels with casing
This category includes sandwich panels for plastic windows and PVC sheets.
Installation work includes:
- fixing a rail 10x40 mm along the edge of the slopes (it is nailed to wooden walls, in other cases it is required to drill holes for dowels)
- cutting a groove 1 cm deep in the mounting foam on three sides of the window block (the window sill must already be installed) or fixing the starting PVC profile
- fitting plastic panels, taking into account the slope of the window sill and the angle of dawn (so that there are no gaps after installing the parts, they are adjusted by removing extra millimeters with a file)
- fixing the panels to the mounting foam (first the top panel, then the side panels)
- installation of decorative corners to decorate the edges of the opening (attached with liquid nails)
- removal of the protective film and sealing the joints of the panels with liquid plastic in color
Before installing the panels, holes are drilled along the outer edge of each element according to the diameter of the fixing studs. The back side is treated with sandpaper to improve adhesion to the mounting foam. The slopes are moistened so that the foam polymerizes better.
The top panel is inserted into the groove, foam is applied to it with short sprays, taking into account that it will increase in volume by 3 times. The panel is pressed with the outer edge to the rail and fixed with nails. If you drive them through the finished holes, the edge of the panel will not crack. The sides are attached in the same way.
If you use a PVC panel with a casing, no additional decoration of the edges of the opening is required. But in the future, when replacing wall decoration, it will be more difficult to accurately perform the joint of materials. A corner or a removable decorative profile can be dismantled and then reinstalled.
Plasterboard finish
Plasterboard on putty
To finish the internal slopes with moisture-resistant drywall, various technologies are used. In all cases, it is required to clean the slopes, cut grooves 1 cm deep in the mounting foam and fit the sheathing elements to size.
- Foam mounting. The slopes are moistened with water, the foam is applied to the wall and to the strip of plasterboard. They put the part in place, after a short time they remove it and install it again. Fix to the wall with pieces of masking tape. After polymerization of the foam, the adhesive tape is removed, the joints are puttied. The cleaned structure is painted, after which a protective PVC corner is glued along the edge
- Putty installation. Slopes should be primed and then leveled with a base layer of putty. After it dries, the surface is primed, a thin layer of putty is applied and the prepared GKL element is pressed against it. A day later, the joints are puttied, cleaned, primed and painted, a protective corner is installed
- Frame mounting. A crate is mounted from wooden slats or a metal profile. The details of the cladding made of GKL are fixed on it with self-tapping screws, sinking the heads. Joints and attachment points are puttied. Finishing work is standard. This option allows you to lay insulation between the elements of the crate
wood finish
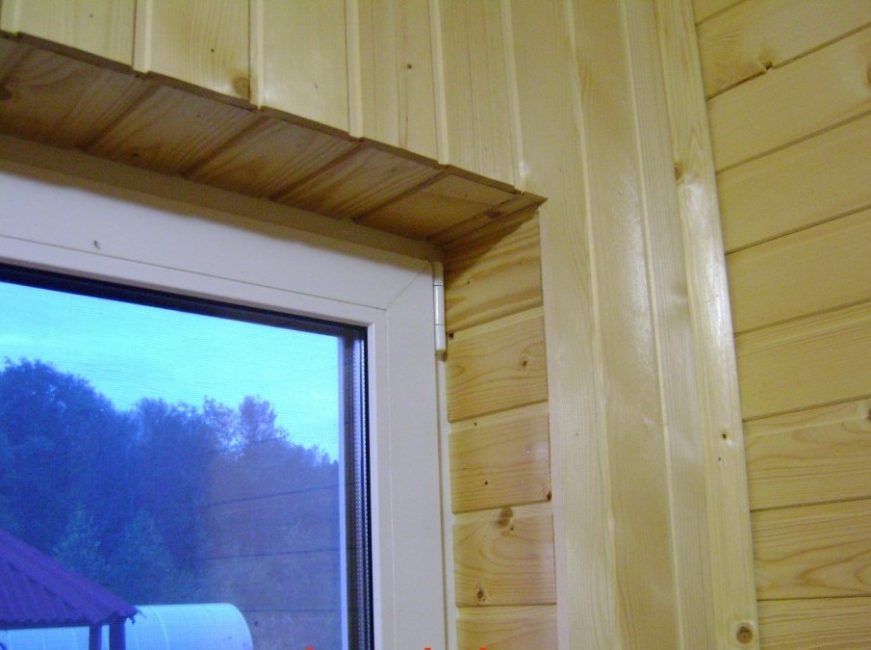
Clapboard lining
The internal slope from a solid board can be mounted using the same technology as the external one - on mounting foam. A variant with a frame made of wooden slats is also used.
The crate makes it possible to sheathe the window opening with clapboard, placing the elements horizontally.
In the course of work:
- fasten thin slats along the edge of the opening
- cut a groove in the mounting foam around the window unit
- cut to size lining
- the lower element is cut so that the bevel matches the angle of the window sill
- with an indent of 0.5 cm from the outer edge, two mounting holes for self-tapping screws are drilled in each element
- the lower element is leveled (its upper edge must be strictly horizontal) and fastened with a self-tapping screw through the lower hole
- put a groove on the upper element on the crest of the lower element, gently tap it with a hammer so that the connection is tight
- first screw the lower screw of the upper bar, and then the upper screw of the lower bar (this simplifies the assembly of the canvas from the lining)
- repeat the cycle until the opening is completely lined
- attach a decorative corner around the perimeter
- cover the structure with stain and protective varnish
Thermal insulation can be pre-installed on the slopes.If mineral wool is used, it is required to attach a waterproofing membrane to the base, and a vapor barrier on top of the mineral wool. Before installation, all wooden elements cut to size are treated with an antiseptic and fire retardant.
You can mount the finish of external and internal slopes on your own, if you have basic skills in working with a standard set of tools.

Video: Do-it-yourself installation of PVC slopes.
Popular options for finishing window slopes outside and inside: materials and technologies | (Photo & Video)
Video: Installation of metal slopes
Popular options for finishing window slopes outside and inside: materials and technologies | (Photo & Video)
Video: Slopes made of wood
Popular options for finishing window slopes outside and inside: materials and technologies | (Photo & Video)


Initially, after the windows were installed in the house - five years ago, I did not know at all that slopes needed to be made, and no one said about it. Winter was in our room - we had to come up with something on the go. I sealed it with dense foam and sheathed it with plastic - all that came to mind, since you definitely won’t work with a solution in winter - the putty will “die” instantly. and really saved. When it got warmer, I did it in the normal way, but the first option is also great - the main thing is to attach everything tightly.
111+ Exterior Slope Window Finishes