
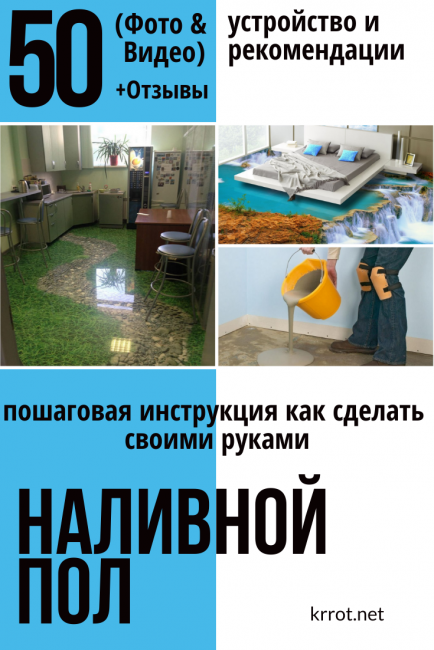
self-leveling floor
The self-leveling floor is of high quality and aesthetic appearance. Knowing the technology, you can fill it with your own hands, without the involvement of specialists. After reading the article, you will get acquainted with the main nuances.
Content:
 Read also: Veranda attached to the house - expanding the living space: projects, tips on how to create your own hands (200 original photo ideas)
Classification
self-leveling floor
The self-leveling floor is a floor screed, made from mixtures capable of self-leveling. It has a minimum thickness of 3.5 millimeters.
There are 2 types of bulk mixtures, differing in composition, which are also divided into subspecies:
A screed based on cement or gypsum, which is used as the basis for the main coating: laminate, parquet, linoleum and others.
This coating is divided into 3 types:
- Basic - used for initial alignment. It is able to remove irregularities up to 80 millimeters.
- The average - this layer is laid on the base. Levels unevenness up to 30 millimeters.
- Finishing - upper layer. He is responsible for the final leveling of the base. A decorative floor covering is laid directly on it.
This coating has a high degree of wear resistance.
There are 4 varieties:
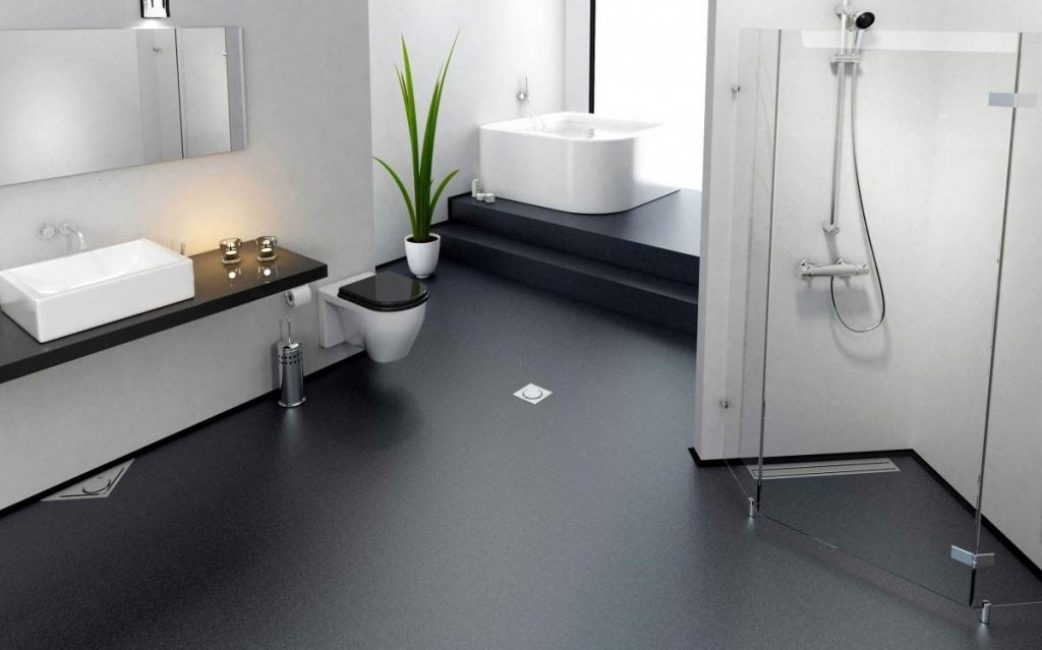
- Epoxy - used in rooms where sanitary and hygienic standards must be observed. Differs in moisture resistance, also it is not afraid of acids and alkali. Resistance to mechanical damage is average. Suitable for creating 3D designs.
- Epoxy urethane - This coating has high strength, while remaining elastic.
- Polyurethane – wear-resistant and elastic floor covering, withstands sudden changes in temperature. It is weakly resistant to chemicals.
- Methyl methacrylate – quickly hardens, in just 2 hours. Differs in good resistance to mechanical and chemical influences. The mixture can be worked at sub-zero temperatures.
The coating is also divided by decorative characteristics:
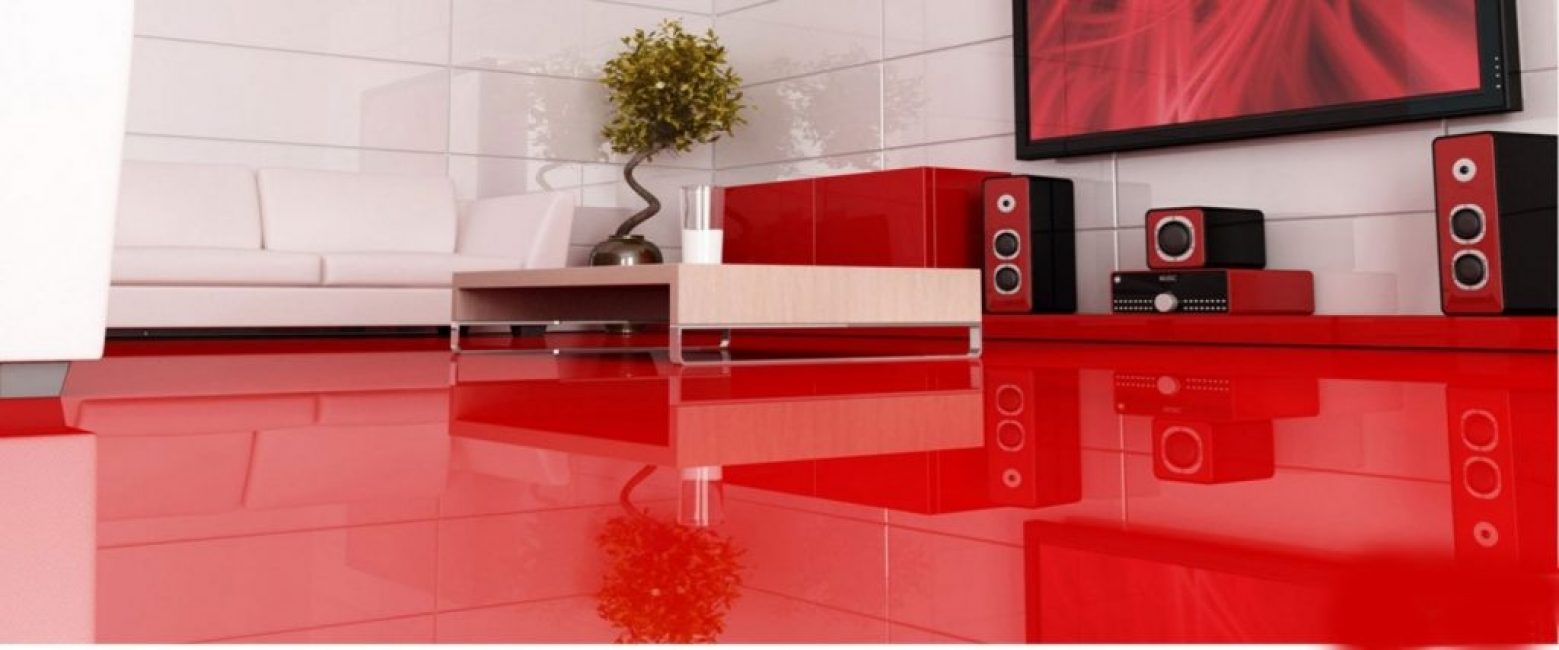
- Single color - ideal for residential areas. It can be either matte or glossy. The palette is chosen according to personal preferences.
- multicolored - suitable for installation in living rooms. You can combine a different number of shades. Such a floor implies the presence of a basic tone and a pattern on it.
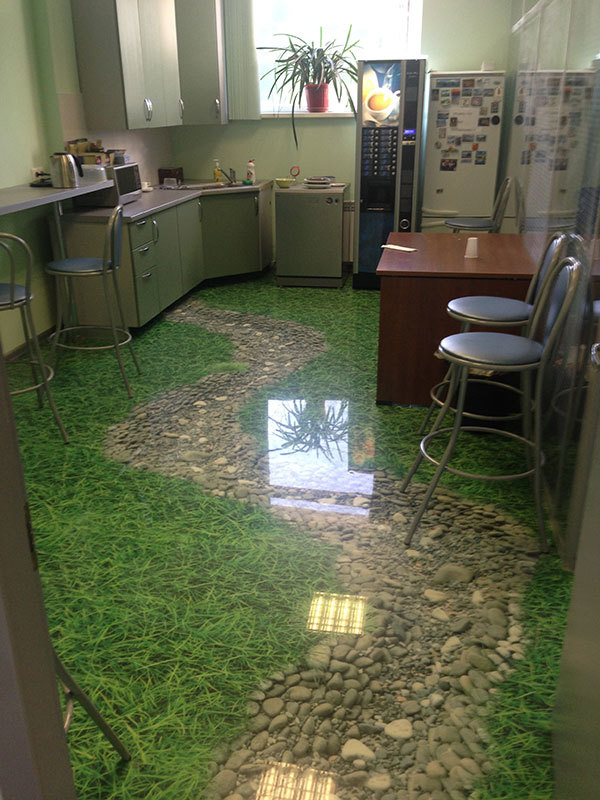
- 3D drawing - a fashionable innovation. Based on the three-dimensional drawing, the illusion of immersion and presence is created. It is created using a printed banner or directly applied with paints to the base.
Self-leveling floor has no seams
Self-leveling floor has a high service life, it varies from composition, from 20 to 40 years. This is an undeniable advantage over other types of coatings. However, linoleum or laminate is easier to remove and replace.
It has no seams, which guarantees its resistance to water. She won't fall under it. Thus, it is more reliable than the floor tiles laid in the bathroom or in the kitchen.
The coating is also resistant to temperature extremes and fire. With it, you can not be afraid of fire if it is exposed to direct sunlight.
 Read also: How to make flower pots with your own hands: outdoor, indoor, hanging | Step by Step Charts (120+ Original Photo Ideas & Videos)
 The composition of the self-leveling floor
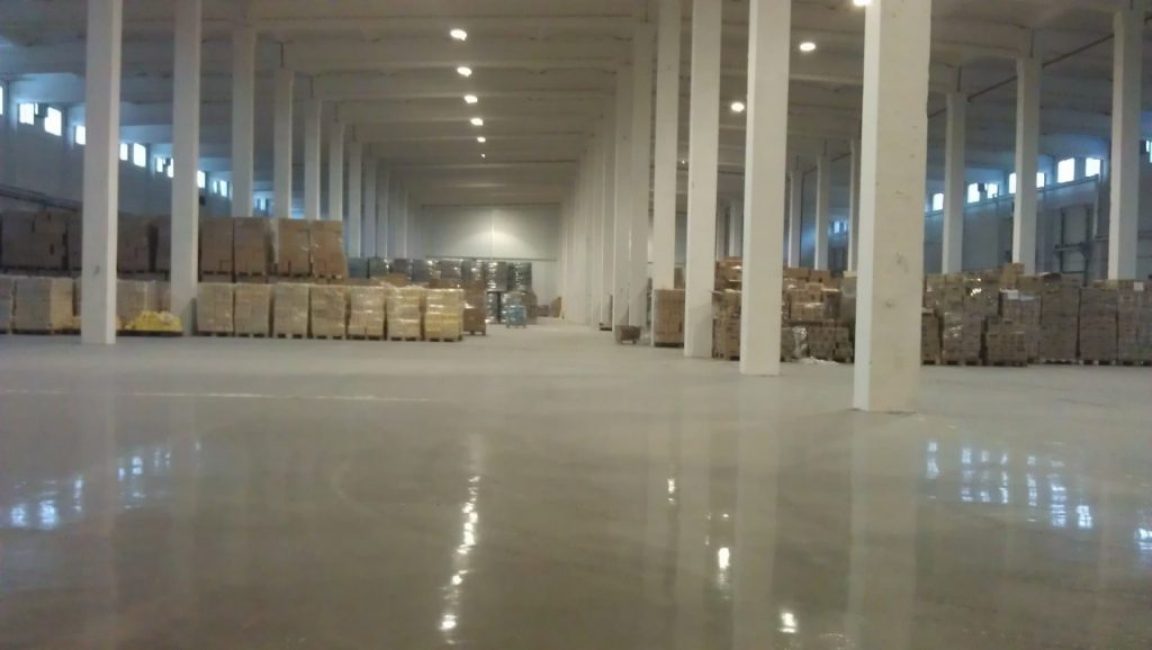
Warehouse with self-leveling floor
Different mixtures have their own composition. Their name speaks of the main component.
There are 4 main types of self-leveling floors:
They have high wear resistance, while they have an affordable price and a large selection of manufacturers.
The highest quality composition contains only 3 components: cement, sand and water. At the same time, they should not contain foreign impurities and chemical compounds.
For elasticity, they contain plasticizers. Moisture Retention Additives and Ingredients.
These mixtures are not decorative, they are used as a base leveling and base for flooring.
They do not like high humidity. But in dry rooms they are quite popular. Such a solution can be poured in a thick layer.
They differ from the composition of the cement screed only in the main component. This type is not recommended for use in high humidity areas: in the kitchen and in the bathroom.
Their installation is complex, requires certain skills. It is highly decorative. On their basis, artistic masterpieces are created.
The composition may contain fillers such as quartz, sand, hardeners. They are added to improve the quality and strength of the coating.
This combination improves the quality of the floor, unlike cement. This reduces the cost compared to pure polymer solutions.
 Read also: How to make a patio in the country with your own hands: a variety of design options, decoration and arrangement (85+ Photo Ideas & Video)
Tools for the job
Filling the self-leveling floor
Work is carried out in two ways: manual and mechanical.
Consider the equipment for manual filling:
- Synthetic roller - serves for applying a primer. The pile should be from 12 to 14 millimeters.
- Putty knife - used for applying the mixture in hard-to-reach places, for example, under batteries.
- Squeegee – will help to evenly distribute the coating material.
- Needle roller - removes air bubbles. Its moving part should be in close contact with the surface.
- Capacity - for mixing the mixture.
- Mixer or drill with attachment – for effective mixing of components.
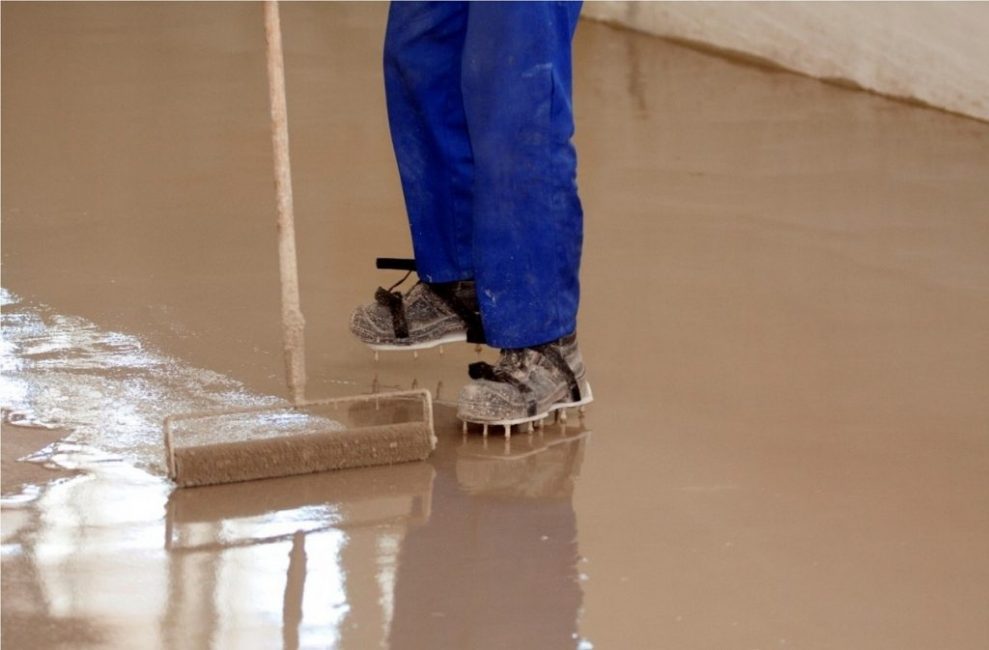
- Flat shoes - a special sole for shoes, covered with spikes. It will not leave traces on the still dry coating.
- Respirator - protect the body from caustic fumes that emit mixtures for self-leveling floors.
- Gloves – prevent contact between skin and material. The choice must be stopped on cotton.
- masking tape - glued around the perimeter at the bottom of the wall, protects the wall from adhesion to the material of the self-leveling coating.
- Film with adhesive tape – Protects freshly applied coating from dust. Stick to unfinished walls.
The list of tools is given directly for the installation of self-leveling floor. For preparatory work and rough finishing, other devices will be needed.
 Read also: How to make a children's house with your own hands: from wood and other materials. Dimensional drawings | (80 Photo Ideas & Videos)
 Preparing the floor for pouring
Foundation preparation
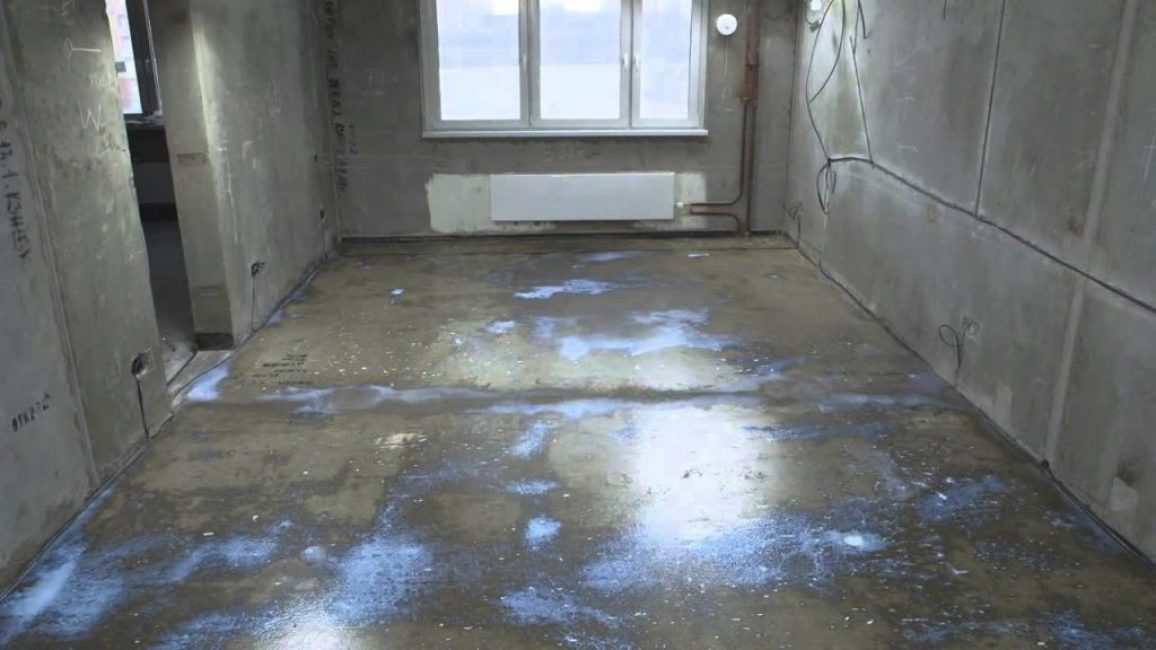
You can pour on a concrete or cement screed, on an old floor made of wood or tiles. The preparatory work in these cases will vary. Properly carried out, preparatory work will become the basis of a high-quality floor. They will provide a long service life.
Screed preparation
Screed installation
An important stage is the rough work on the installation of the screed. This is the basis of the future floor.
- If the screed is old, you need to check it for weak spots and oil stains. If problem areas are found, they must be dismantled. Restoration is carried out with cement mortar or a special mixture for screeds.
- This is done so that the material does not stick to the wall. Moreover, it will soften the possible deformation that can be transferred from the rough screed. Prevents cracking and helps maintain the integrity of the flooring.
- Ensure a stable temperature regime. Self-leveling floors, when dried, do not tolerate drafts and sudden changes in temperature.
- It is important to observe the humidity of the rough coating. It should not exceed 4%. If you lower it, there is no possibility, then the screed is treated with a special waterproofing agent in several layers.
- Next, a layer of primer is applied. It will fill all existing pores, this will prevent the formation of air cushions on the base coat.
Preparation of wood surfaces
Foundation preparation
The self-leveling floor is poured onto a flat, dry base. This condition is spelled out in the normative act SP 29.13330.2011.
The wooden surface should be inspected for the absence of various defects:
- Remains of old paint
- Grease stains
- Traces of decay
- moldy spots
- wobbly planks
- Skolov
- Lacquer coatings
- Blackness
There should also be no gaps between the floorboards.. When walking, they should not creak.
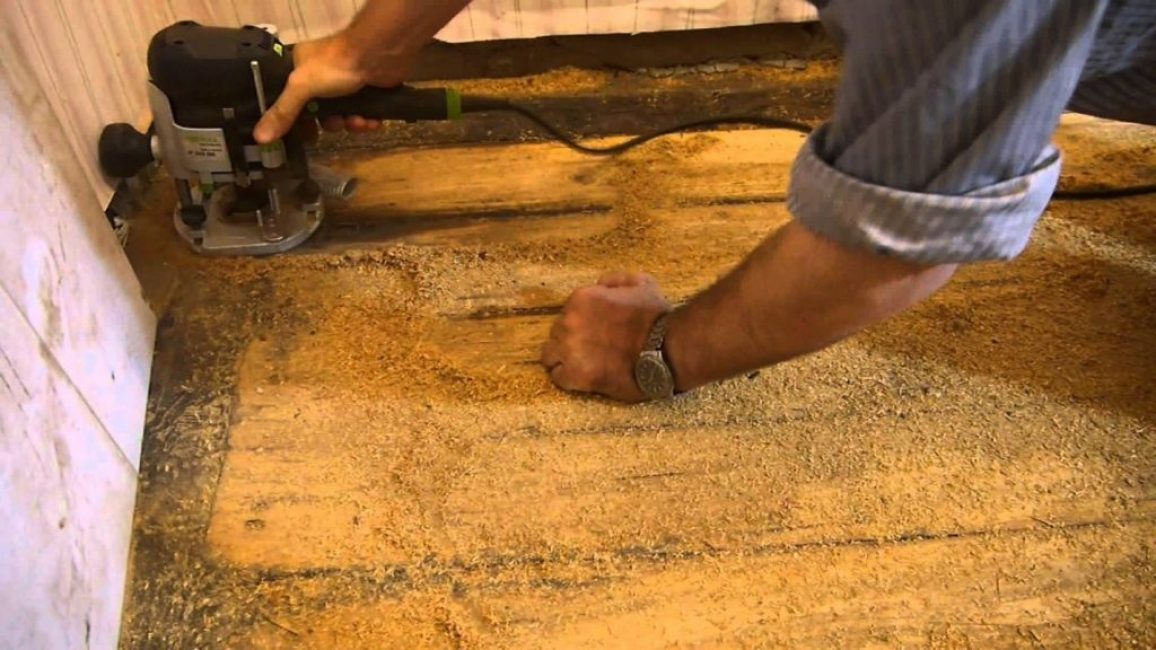
The paint is removed with washes or hand graters. After processing, the surface will be rough, this will ensure good adhesion to the waterproofing.
All chips and cracks must be repaired. You can use putty or a mixture of sawdust with PVA glue for this. Self-leveling floor masters recommend paying as much attention to this process as possible. If the seal is poor, the spiked roller will tear out parts of the material, which will create bumps on the floor covering.
self-leveling floor
If necessary, you need to carry out additional fastening of the floorboards. It is done with self-tapping screws. The minimum distance between them should be from 50 centimeters.
If the boards are heavily damaged, then it makes sense to cover them with chipboard or plywood. Their thickness should be from 14 millimeters and above. To eliminate a possible creak, chalk crumbs are poured between the sheets.
Old skirting boards need to be removed. Protruding carnations are sunk with a hammer into the wood.
The next stage of preparation will be the cleaning of construction dust. To do this, you need to vacuum and wipe the coating with a damp cloth. Pour the mixture onto a perfectly clean surface.
Further, the film is laid and fixed on the entire surface. It acts as a waterproofing. If the flooring is formed from pieces, then they should overlap by 10 centimeters.
Waterproofing prevents the wood from rotting under the finish coat. Moreover, it will not be able to draw moisture from the bulk layer. Because without enough fluid, the floor will lose some of its strength.
Masking tape is glued around the perimeter of the room along the bottom of the wall. It prevents the self-leveling floor from sticking to the wall and prevents cracking of the coating.
Tile surface preparation
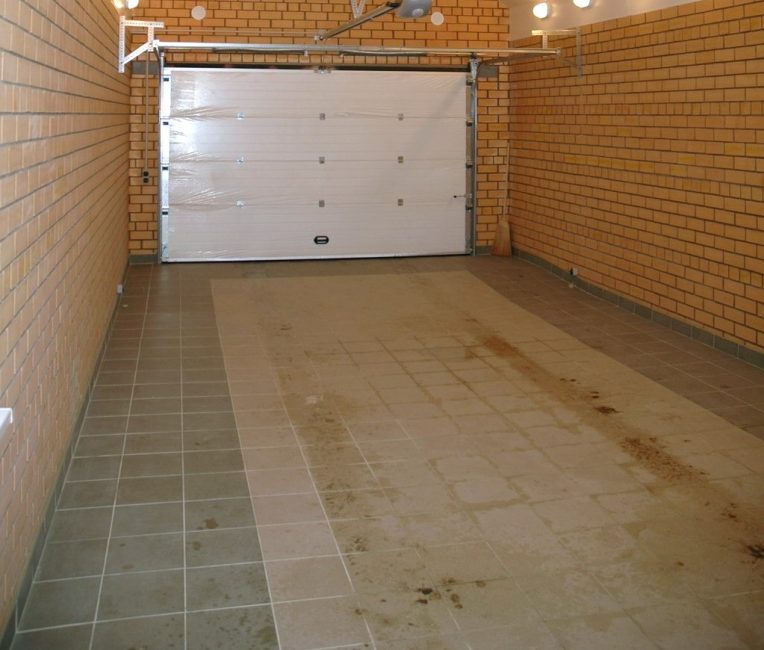
The basis of the old ceramic tiles
The basis for the self-leveling floor can serve as an old ceramic tile. It must be prepared before starting work.
- Check the reliability of each tile. All loose units must be removed. You do not need to glue them, the self-leveling mixture will fill the recess
- The floor needs to be washed well. It should be free of dust and dirt.All grease and oil stains are removed
- The clean floor must be treated with a degreaser
- Seams need to be treated with sealant to strengthen
- Next, a layer of primer is applied.
- After complete drying, you can start pouring the floor. It is better to start work in a day, or guided by the recommendations on the drying time, on the packaging of the mixture
 Read also: How to make a greenhouse with your own hands: for seedlings, cucumbers, tomatoes, peppers and other plants. From polycarbonate, window frames, plastic pipes (75 Photos & Videos) + Reviews
Solution preparation
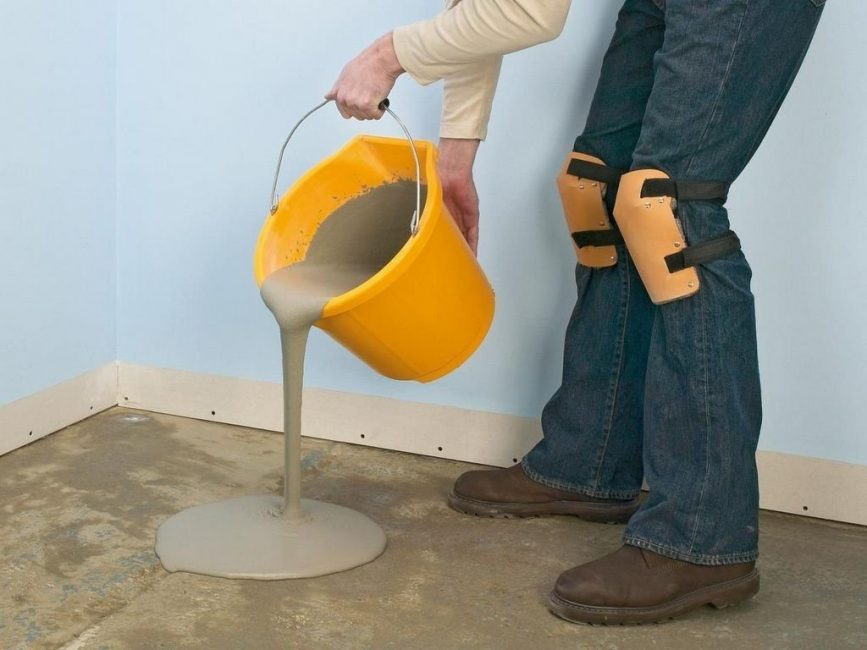
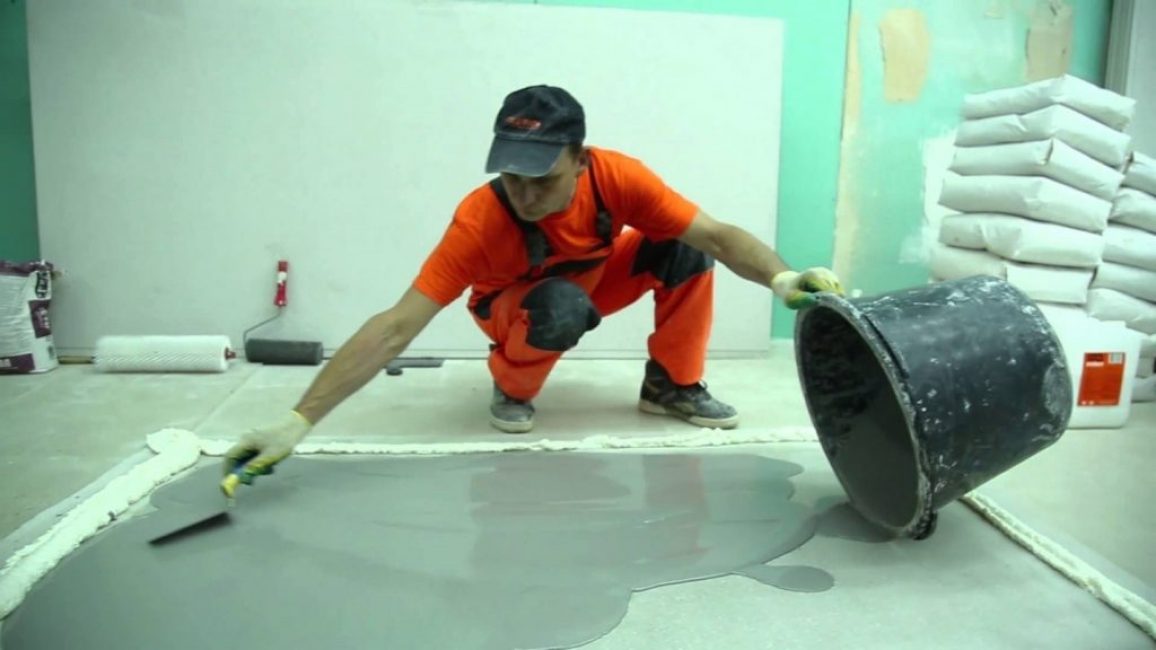
Filling the self-leveling floor
The self-leveling floor is made from dry mixes. It has the ability to harden when exposed to water and air.
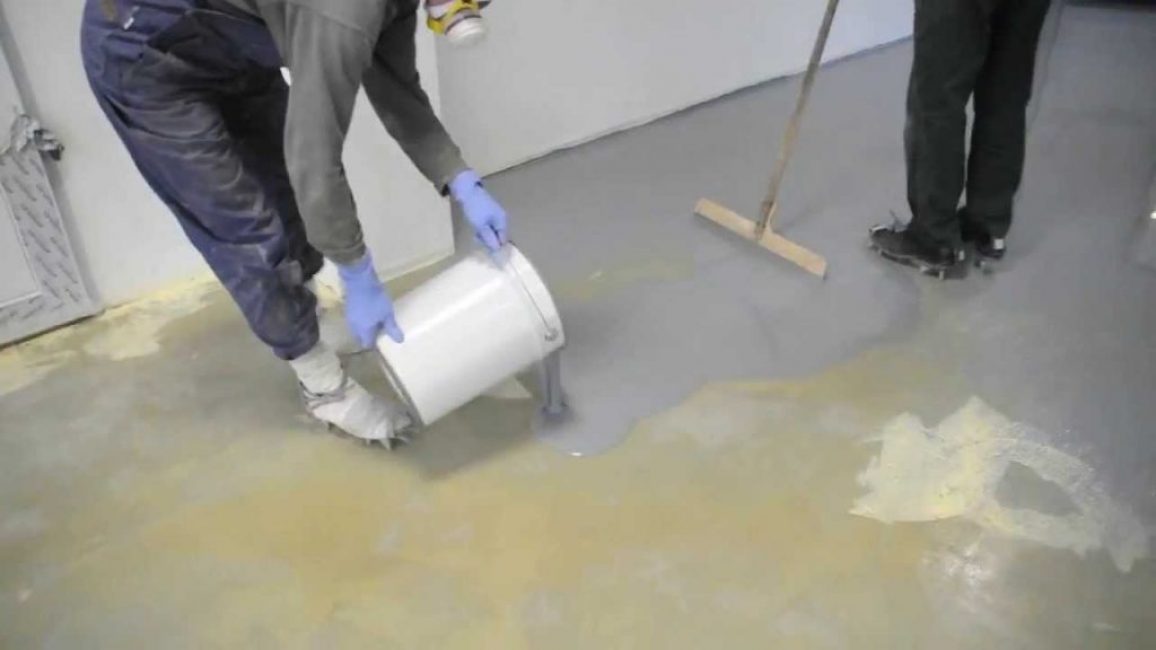
You need to knead in a container, you can use an old bucket. First, water is poured, then the dry component is gradually introduced. The mixture must be thoroughly mixed until a homogeneous consistency. It is better to do this with a drill with a special nozzle. Approximately 50 - 60 liters of water are needed for 25 kilograms of dry self-leveling floor.
After the ingredients are mixed, you need to check for viscosity:
- Take a lid, for example, from a jar of shampoo. The diameter should be about 5 centimeters, height 4.5 centimeters. Remove her bottom
- Place it on a flat, smooth surface
- The mixture is poured into the lid.
- She will start to spread. The consistency is normal if the diameter is from 16 to 18 centimeters. If the diameter is smaller, then water should be added, if more - the dry component.
 Read also: How to make a booth for a dog with your own hands: building a home in the yard and in the apartment. Drawings, dimensions and original ideas (55+ Photos & Videos) + Reviews
 Floor pouring procedure
Filling the self-leveling floor
It is necessary to pour the solution from the highest point on the surface. It is distributed along the plane with a roller with teeth. Bubbles that appear on the surface are removed with a spiked roller.
In rooms with a large area, the mixture is applied in stripes. Their width should be about 50 centimeters. You need to start work from the wall located opposite the front door.
Rolling with a roller should take place along the wall. This will reduce contamination of it by rebounding drops of solution. In a situation where this is not possible, when approaching the wall, it is necessary to reduce the intensity of rolling the roller.
The layer thickness should be from 1.5 to 5 millimeters.
After applying the layer, you need to wait for it to dry completely. The right time is indicated on the package. On average, the formation of the mixture occurs in 8-10 hours. After that, a second layer is applied. Each of them must be applied in one day. If you make half the room one day, and the second the next, it is difficult to avoid drops and overlaps.
12 hours after pouring the floor, the entire surface is varnished. The bulk coating will be ready for operation in 10 days.
Consumption of a dry self-leveling floor per 1 square meter is about 4 kilograms. This is with a layer thickness of 5 mm. Thus, for a room of 40 square meters, 160 kilograms of dry mix will be needed.
After completion of all work, the floor can be covered with a film. This will protect against dust ingress during the drying of the layers.
![[Instructions] How to make beautiful and unusual wall shelves with your own hands: for flowers, books, TV, kitchen or garage (100+ Photo Ideas & Videos) + Reviews](https://iherb.bedbugus.biz/wp-content/uploads/2018/05/19-6-300x213.jpg) Read also: [Instructions] How to make beautiful and unusual wall shelves with your own hands: for flowers, books, TV, kitchen or garage (100+ Photo Ideas & Videos) + Reviews
Read also: [Instructions] How to make beautiful and unusual wall shelves with your own hands: for flowers, books, TV, kitchen or garage (100+ Photo Ideas & Videos) + Reviews Self-leveling 3D floor
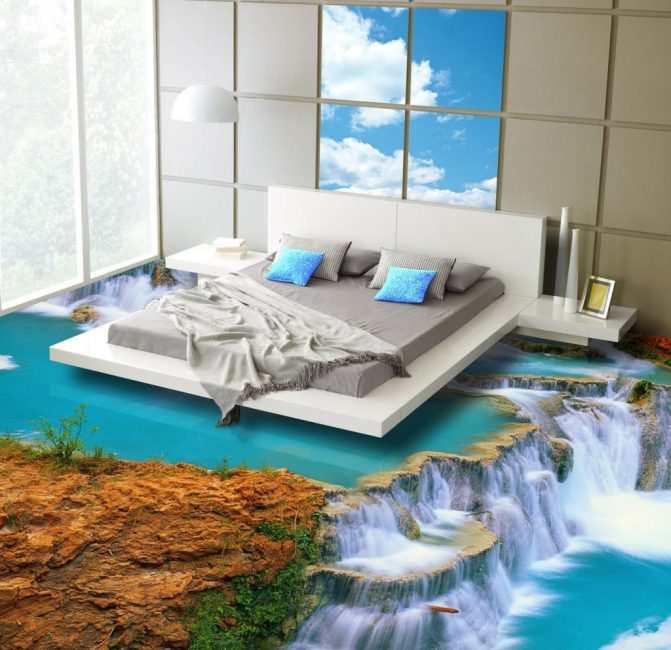
3D floor
The 3D floor consists of 3 layers:
- Base coat
- 3D drawing
- Finishing layer
The installation process begins in the same way as for a conventional self-leveling floor. The preparatory work is no different.
The base can be either a cement or gypsum screed or a polymer layer. When choosing, you need to consider the size of the picture. If you plan to place an image on the floor over the entire area of \u200b\u200bthe room, then you can use a draft base. If only a pattern, ornament or image is applied that occupies part of the floor covering, then the polymer-based layer will serve as the base coat.
The drawing is applied in 2 ways:
- Printed on a banner and pasted
- Drawn with paints on the base coat
When sticking a banner, its size should slightly exceed the area of the room. The surface on which it is applied must not have defects in the form of bubbles and roughness.
The final layer is applied over the image. For him, varnish is used. The thickness should not exceed 0.5 mm. You need to apply with a notched roller, and then go through it with a needle roller. To remove the formed air bubbles.
![[Instruction] Do-it-yourself laminate on a wooden floor: a complete description of the process. Laying schemes, what materials should be used (Photo & Video) + Reviews](https://iherb.bedbugus.biz/wp-content/uploads/2018/05/laminat-300x200.jpg) Read also: [Instruction] Do-it-yourself laminate on a wooden floor: a complete description of the process. Laying schemes, what materials should be used (Photo & Video) + Reviews
Read also: [Instruction] Do-it-yourself laminate on a wooden floor: a complete description of the process. Laying schemes, what materials should be used (Photo & Video) + Reviews Possible errors when filling
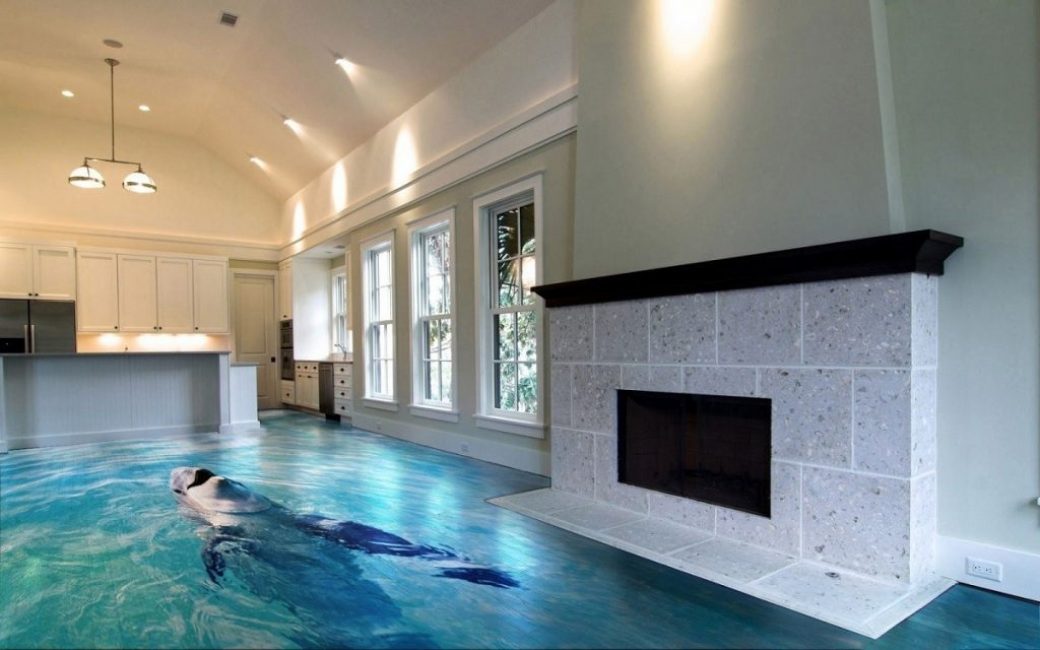
High quality pool floor
It is easy for a person without experience to make mistakes when pouring a self-leveling coating:
- Failure to comply with the parameters for the moisture content of the base, or ignoring its measurement. This oversight leads to the fact that the solution does not spread well, the distribution is uneven. After drying, the floor will have low wear resistance. It can peel off from the base, especially if it is concrete. Cracks appear on the surface
- The mixture is prepared by eye, without respecting the proportions - leads to the fact that the polymer coating becomes brittle. During operation, it wears out quickly, crumbles. It is also fraught with the appearance of spots, holes and delaminations.
- Ignoring the drying time of each layer will lead to fragility of use. The floor covering will quickly lose its decorative appearance.
- Rejection of some recommended tools. Especially the refusal to buy a scraper will lead to a disastrous result. The mixture is unable to spread perfectly evenly on its own. Without the help of a doctor blade, bulges and pits will appear on the surface.
In order for the self-leveling floor to serve for a long time, you must adhere to the recommendations of the manufacturer of the mixture for installation, and the operating rules.
- When choosing a mixture, you need to be guided by what rooms it is intended for. There is a division of solutions for installation in domestic and industrial premises
- The floor covering needs regular cleaning. In this case, detergents must be selected according to the recommendations. They should not contain fluorine and ammonia
- If any defects are found, it needs to be repaired.
- Felt should be placed under the legs of the furniture. It will help avoid dents.
- Furniture and other heavy objects must not be dragged along the self-leveling floor
Adhering to the above recommendations and tips, even a beginner will cope with pouring the self-leveling floor with his own hands. Such a coating can realize any fantasy. It will bring zest to the interior of the room and will be a great addition to the interior.
VIDEO: The easiest way to level the floor! Self-leveling floor in 20 minutes

The easiest way to level the floor! Self-leveling floor in 20 minutes.
Self-leveling floor: device, recommendations and step-by-step instructions on how to do it yourself (50 Photos & Videos) + Reviews
 Read also: Do-it-yourself furniture and other wood products: drawings of benches, tables, swings, birdhouses and other household items (85+ Photos & Videos)


Great article with comprehensive information, thanks to the author.