
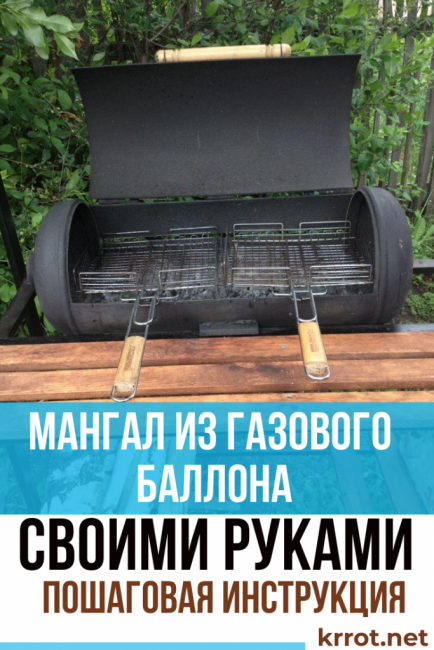
Do-it-yourself brazier from a gas cylinder
Anyone who has ever made a barbecue knows how important it is to have a good grill on hand. The quality of its manufacture depends on the convenience of its use, and, as a result, the quality of the prepared dish.
There is nothing worse when, during the preparation of a barbecue, you have to be distracted by restoring the correct working capacity of the barbecue; in some cases, even just to install the old barbecue evenly, you have to spend a lot of effort.
If such difficulties arise during the operation of the old barbecue, the easiest way to solve them is to create a new one. An original solution in homemade products of this kind is the use of ready-made structures, for example, used gas cylinders.
 Read also: Do-it-yourself brick brazier | Step-by-step instructions, a simple drawing (25+ Photos & Videos) + Reviews
Why gas cylinder
A gas cylinder is the fastest way to make a barbecue. In addition, it is a fairly simple, durable and affordable design. As practice shows, the balloon is the most popular basis for creating barbecues. You can find it very easily either at scrap collection points or in secondary markets by buying a cylinder from your hands.
In the latter case, it is best to use the system of electronic private announcements. The most popular platform in Russia is Avito
In almost all CIS countries there are analogues of Avito: in Ukraine it is the OLX service; in Belarus - the Kufar site, etc.
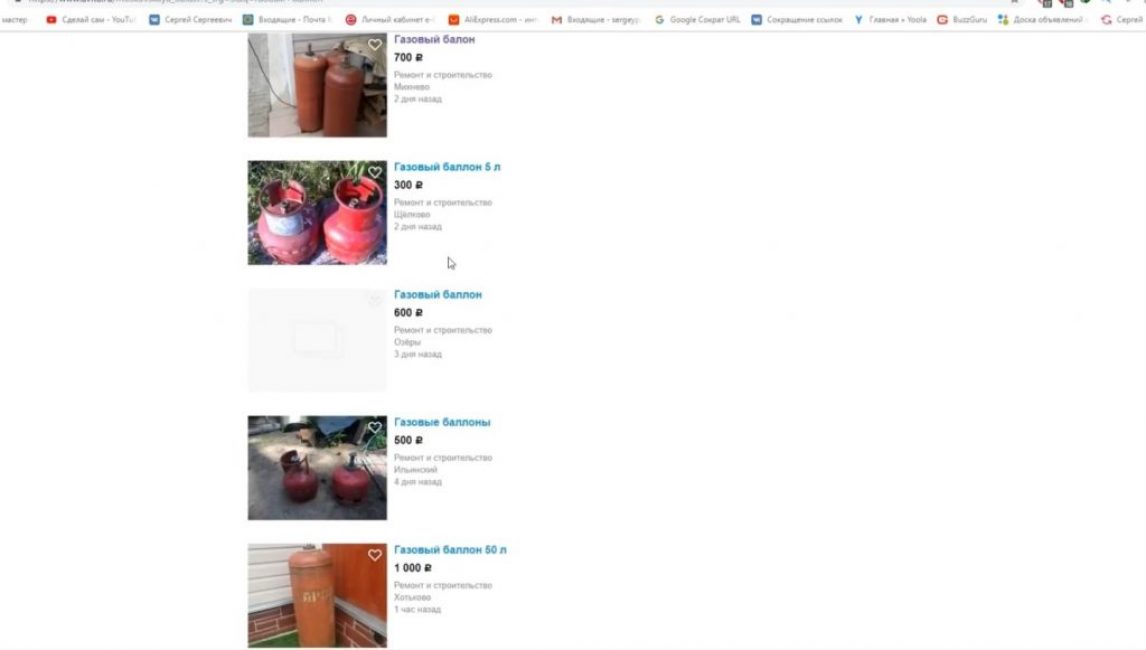
Offers on the secondary market of cylinders
The number of offers on the secondary market of cylinders is simply huge. And its price can range from 5 to 40 dollars, depending on the volume and external condition.
The convenience of buying on such sites lies in the fact that you can literally find the right product near your place of residence in just a few clicks.
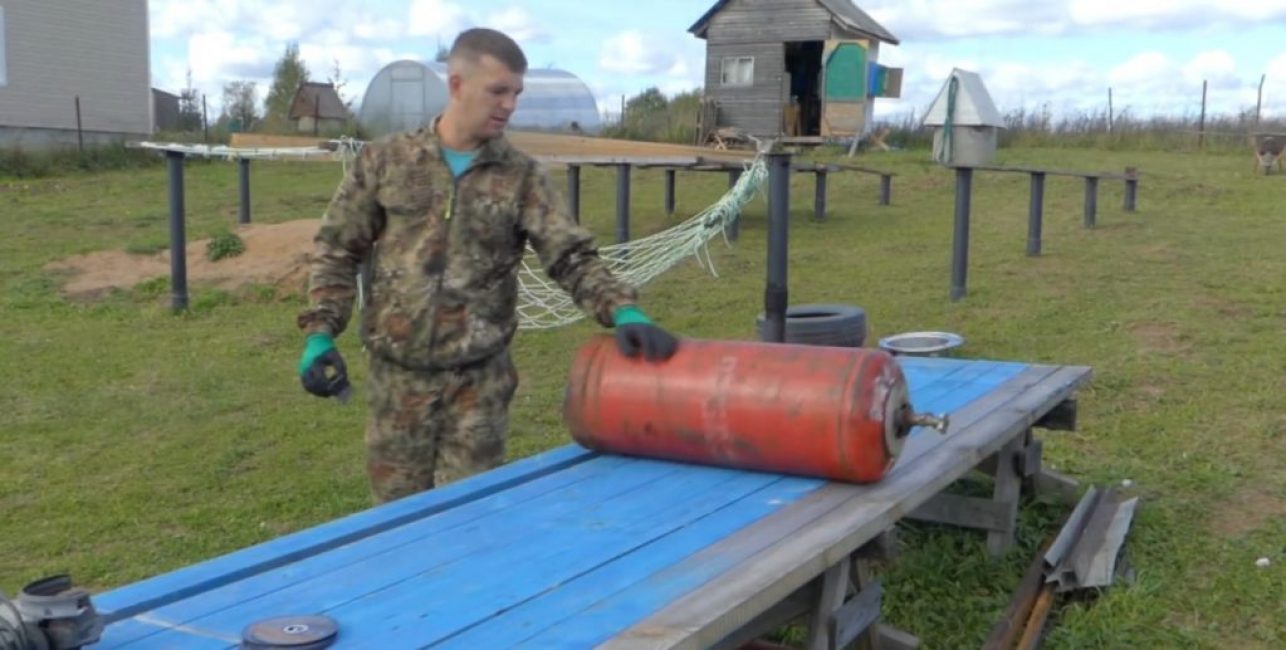
Action #1: Preliminary preparation
When the balloon is purchased, proceed to its pre-treatment. Using a cylinder can be potentially dangerous - suddenly there is gas left in it.
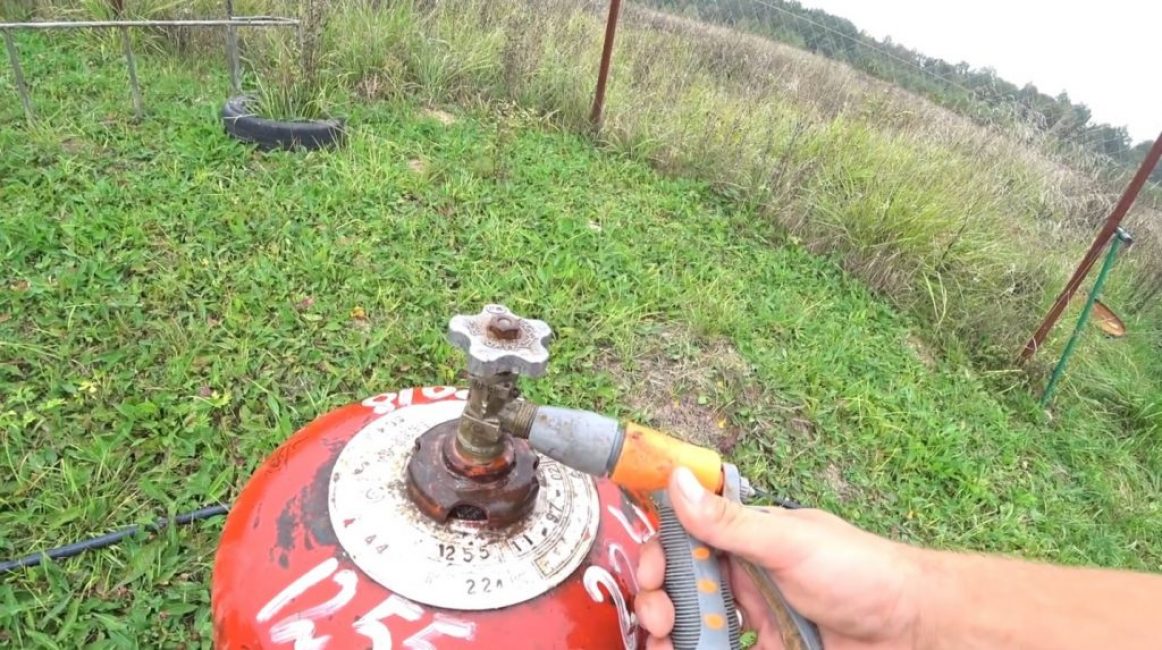
Filling the balloon with water
To exclude the possibility of any incidents, all remaining gas should be removed from the cylinder. This can be done with water, with which the balloon is completely filled. When the water fills almost the entire volume of the cylinder, you need to be prepared for the release of gas residues from it.
Removing gas from a cylinder
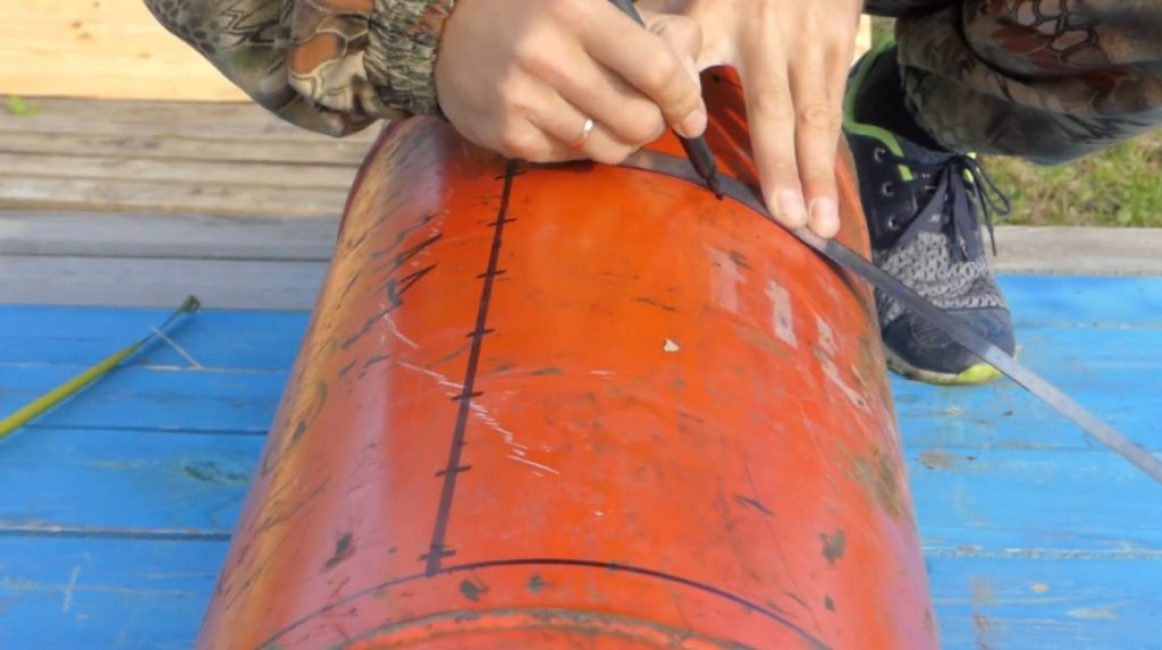
Action number 2: Marking the cylinder
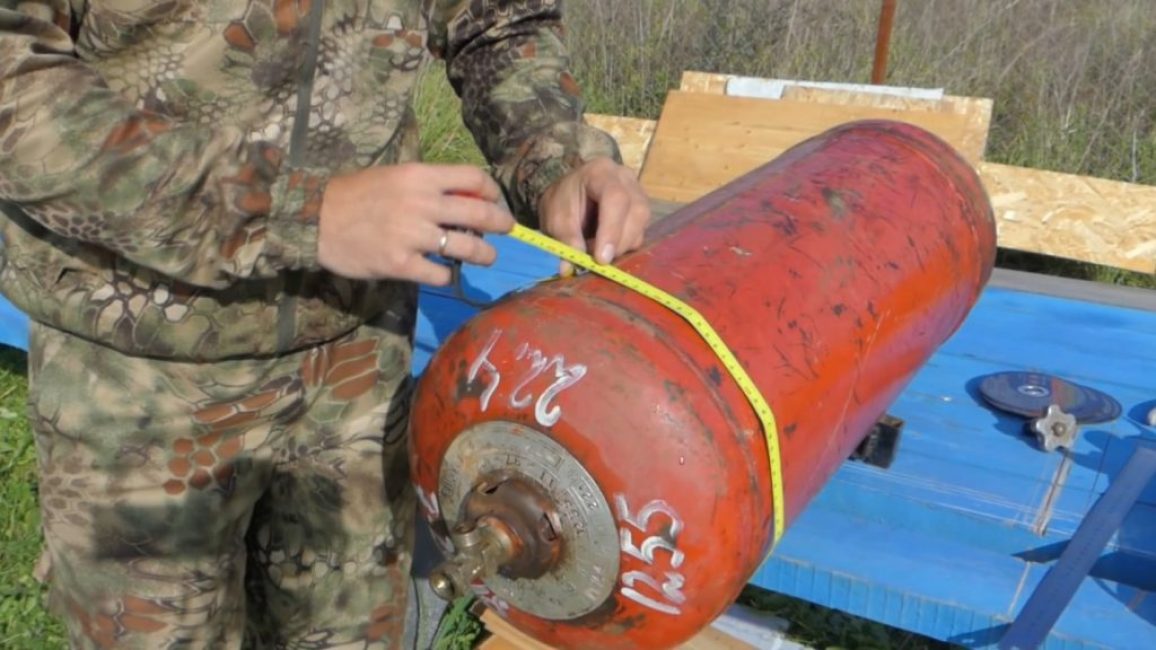
Balloon circumference measurement
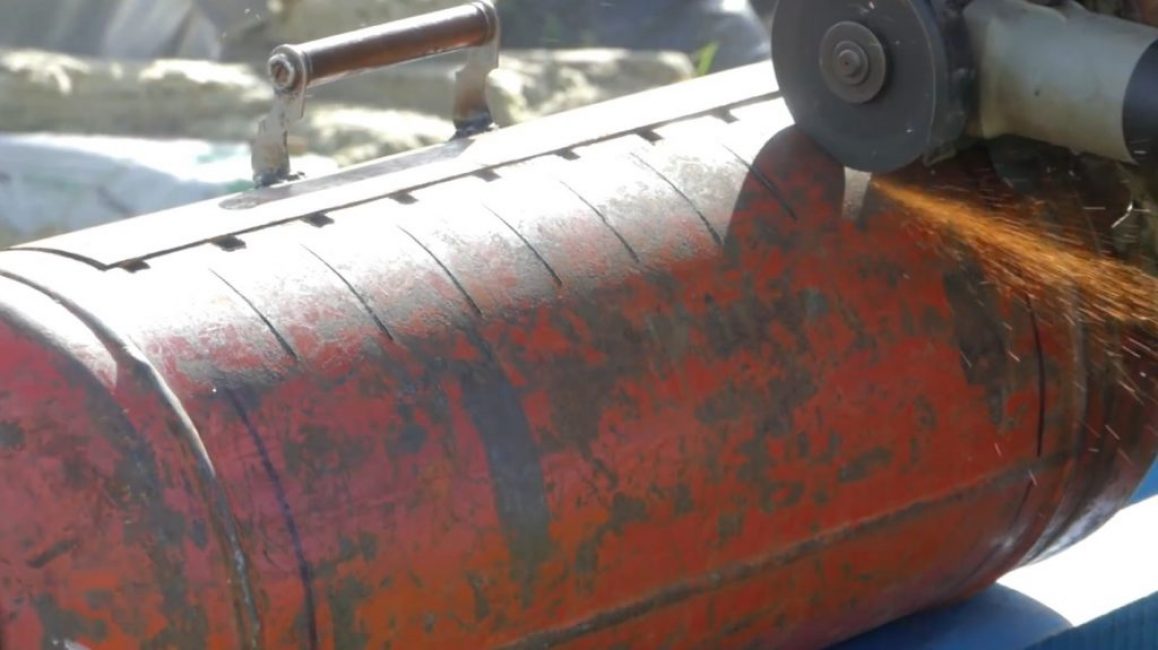
After that, the cylinder is located on the desktop and its marking is carried out. Marking is best done with a waterproof thick marker. Ordinary scratches will be poorly visible on the body of the cylinder.
The markup is done as follows:
The circumference of the balloon is measured
1 or 1.5 cm of the weld length is subtracted from the circumference
The remaining length is divided into 4 parts
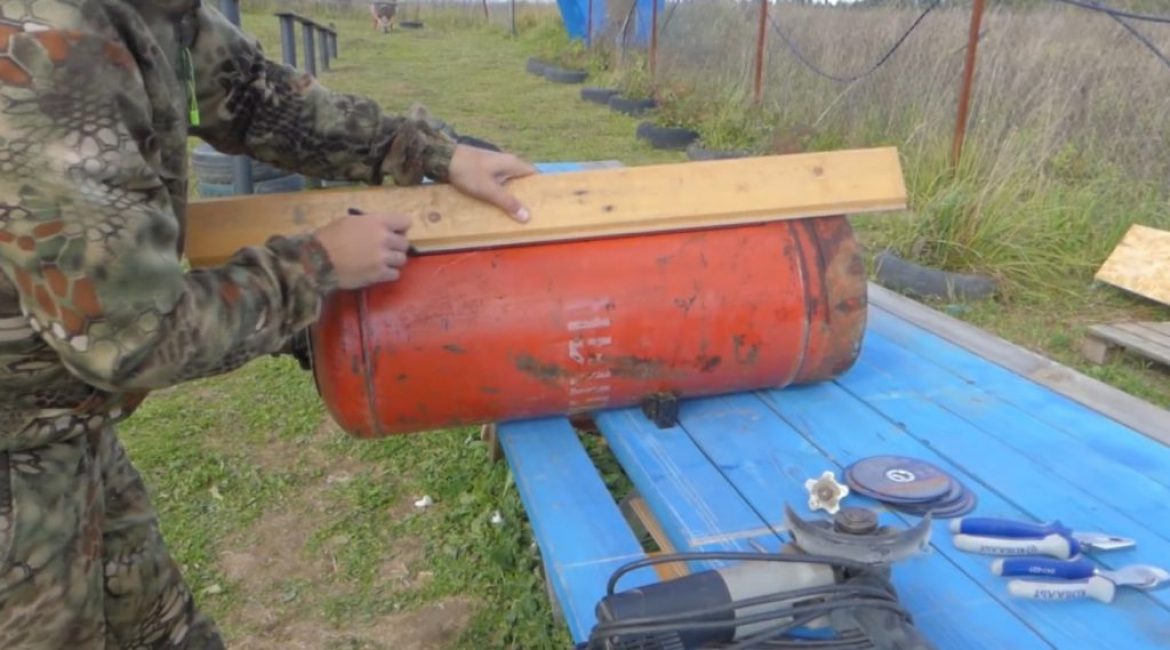
Drawing the middle line
The middle line is drawn. Additional lines are drawn on both sides of the center line at a distance of a quarter of the circumference, along which holes for skewers will be made. These will be located exactly opposite each other (diametrically opposite) holes for skewers
It is advisable to sign each of the lines so that later you do not get confused with them and correctly weld the hinges to the future door
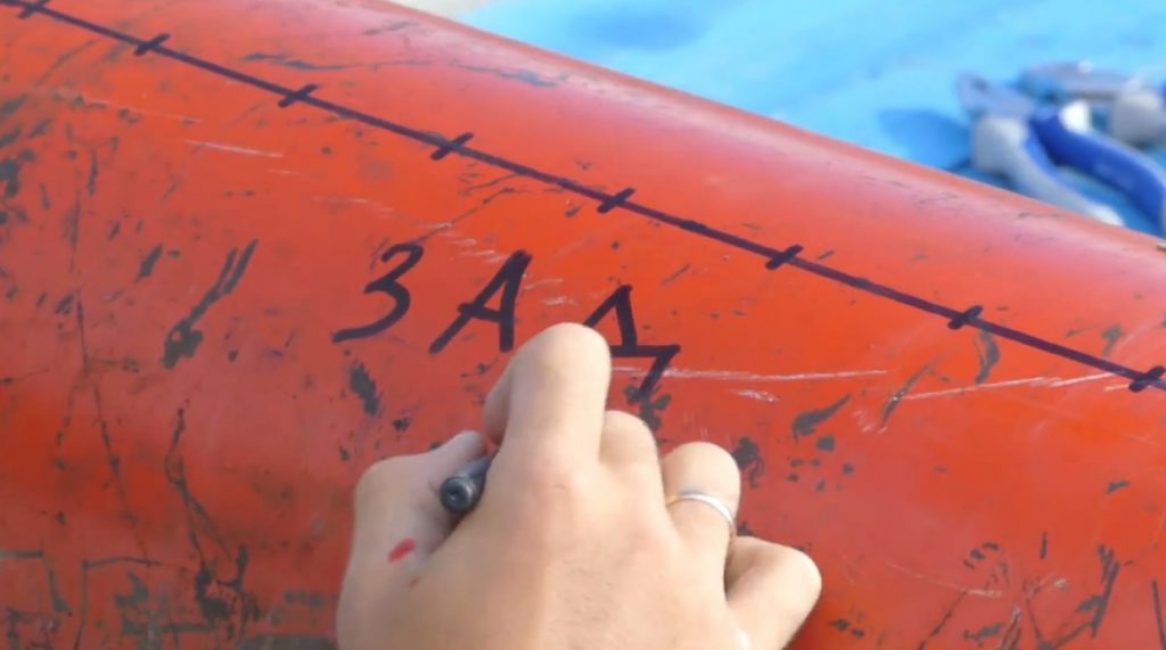
Line signature
About half the distance from it to the middle line should be retreated from the back line, on which the border of the lid should be marked
Cover border marking
Holes for skewers are marked. In this case, it is desirable to retreat from the edge of some distance and divide the remaining length into the number of skewers used
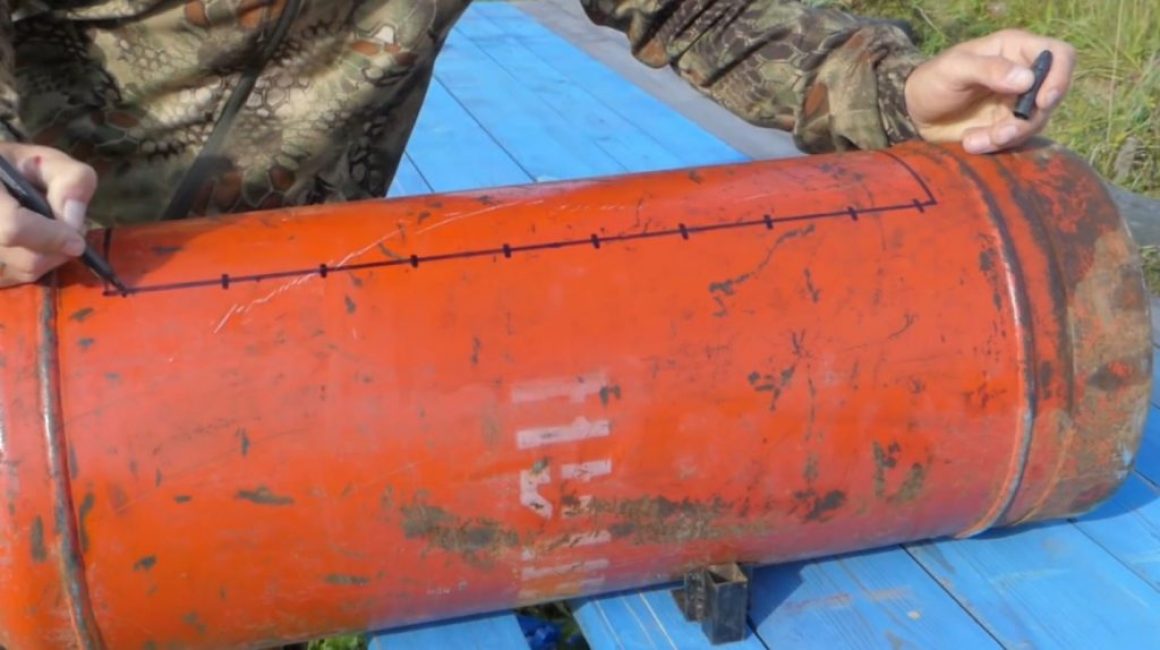
Marking holes for skewers
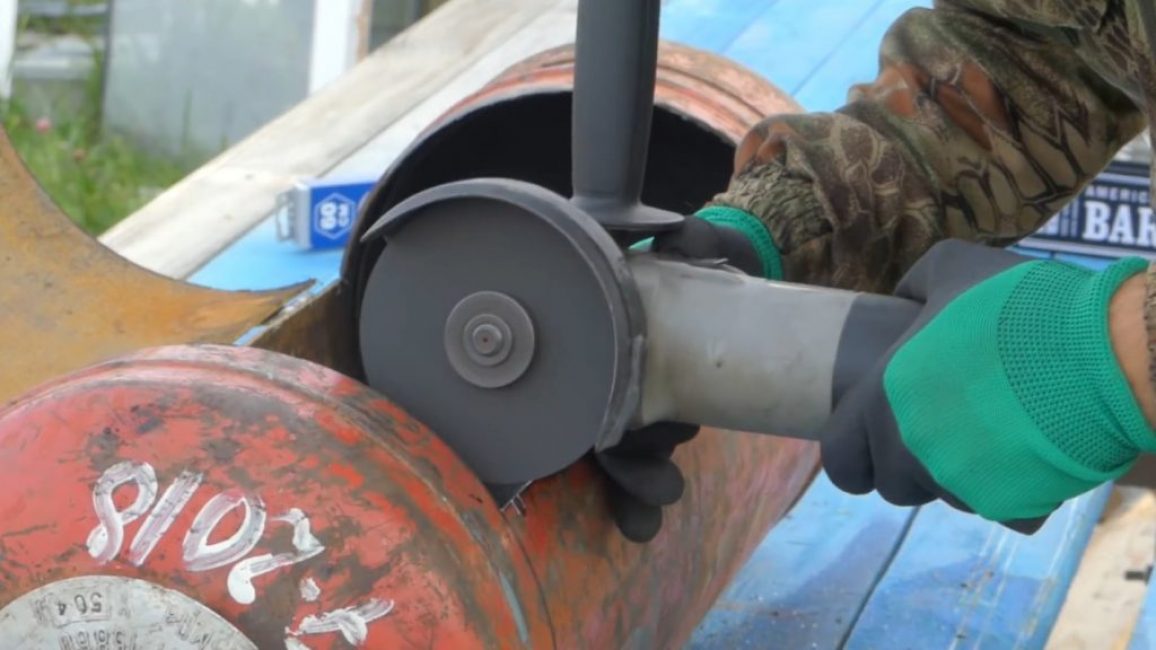
To cut the balloon with a grinder, it is advisable to prepare several discs for metal. They should be enough, since the material from which the balloon is made can bring many surprises. In particular, high-strength alloys, etc. can be used in its design.
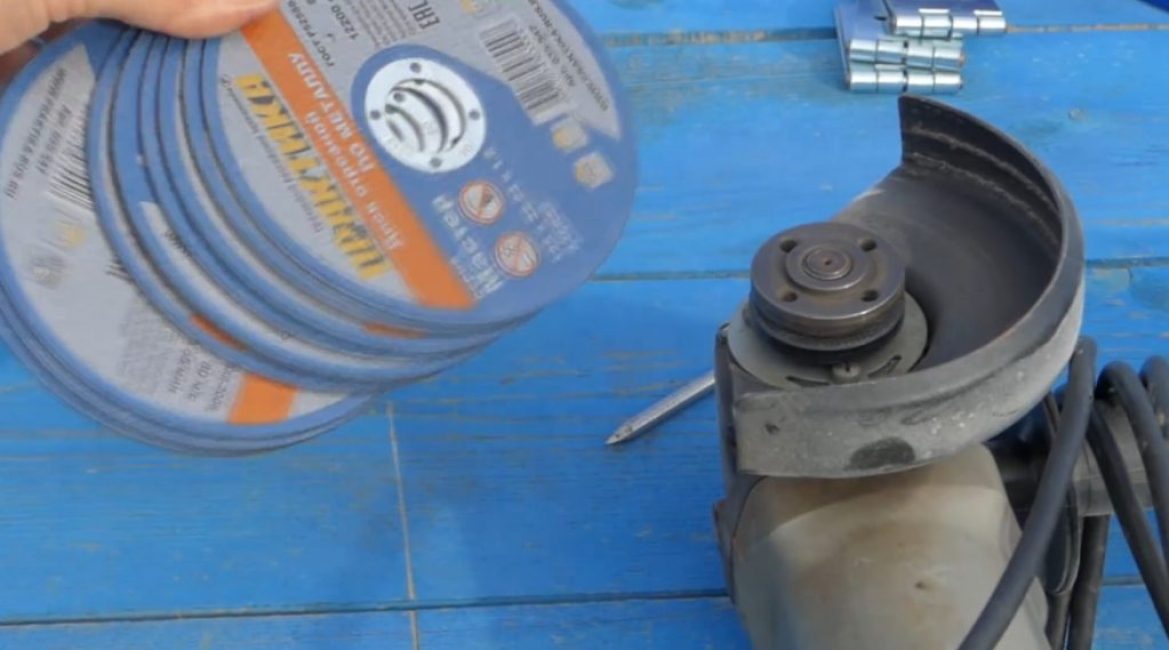
Discs for metal
Step 3: Making the lid and holes for the skewers
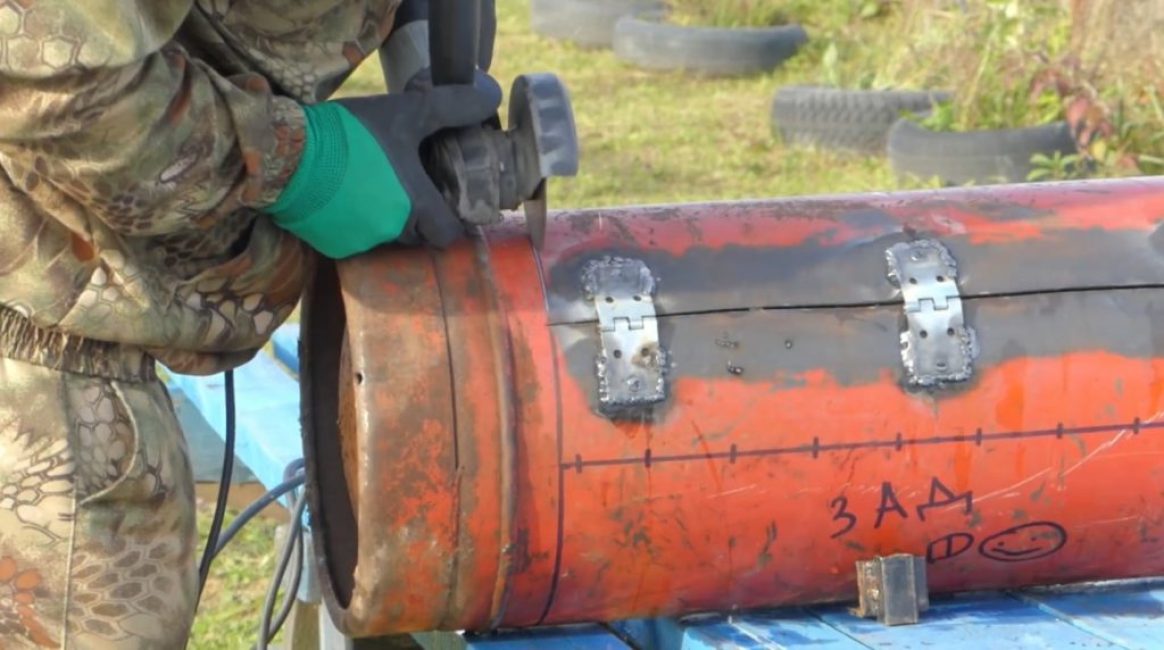
After that, a long cut is made along the back of the balloon along the back line of the lid. Once it is done, several loops are placed on it. Optimal - 2 or 3.
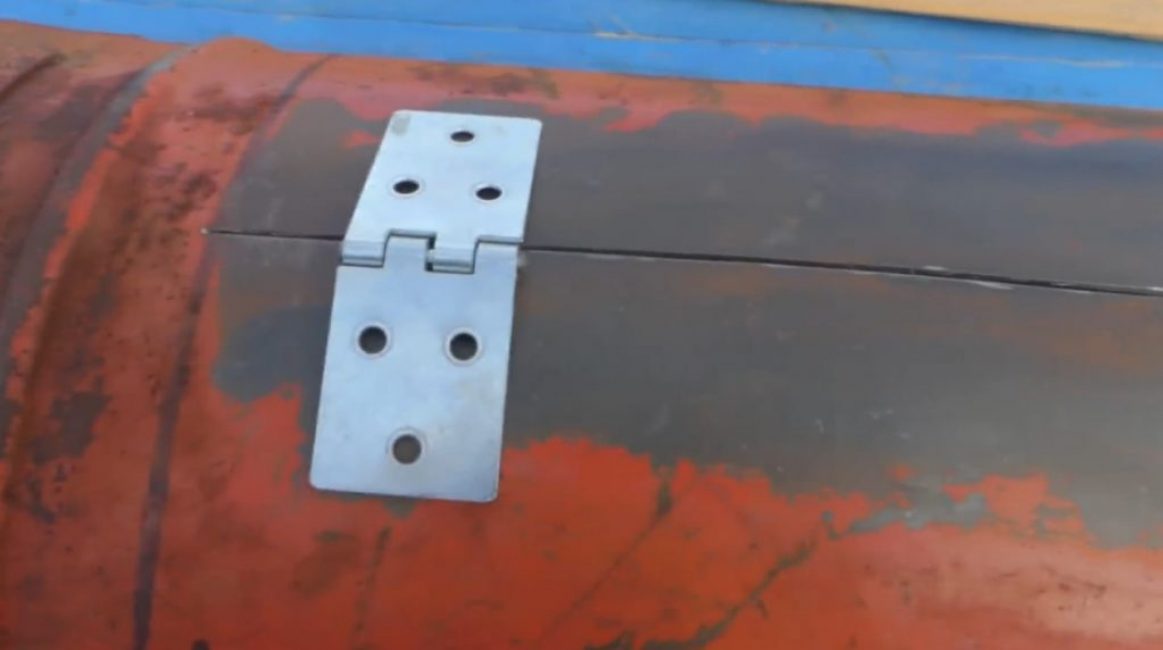
loops
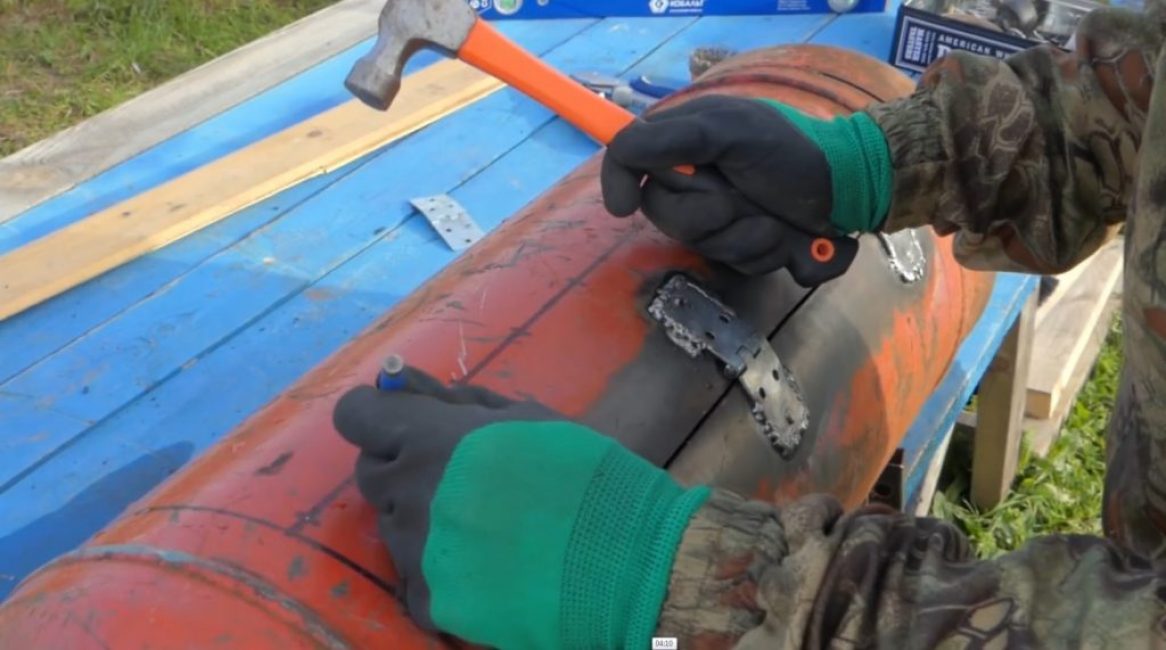
The next step is welding the loops. It must be done very high quality, walking around the perimeter of all the loops used in the design.
On the other hand, so that there is no mechanical deformation of the loops when welding, do not place the weld too close to the back line of the cover.
The optimal distance from the end of the seam to the middle of the loop will be 3-4 cm.

Welding loops
It is very important to weld the hinges before the rest of the cuts are made on the cylinder body. Otherwise, it will not be possible to place the cover in such a way that it fits well into the hole.
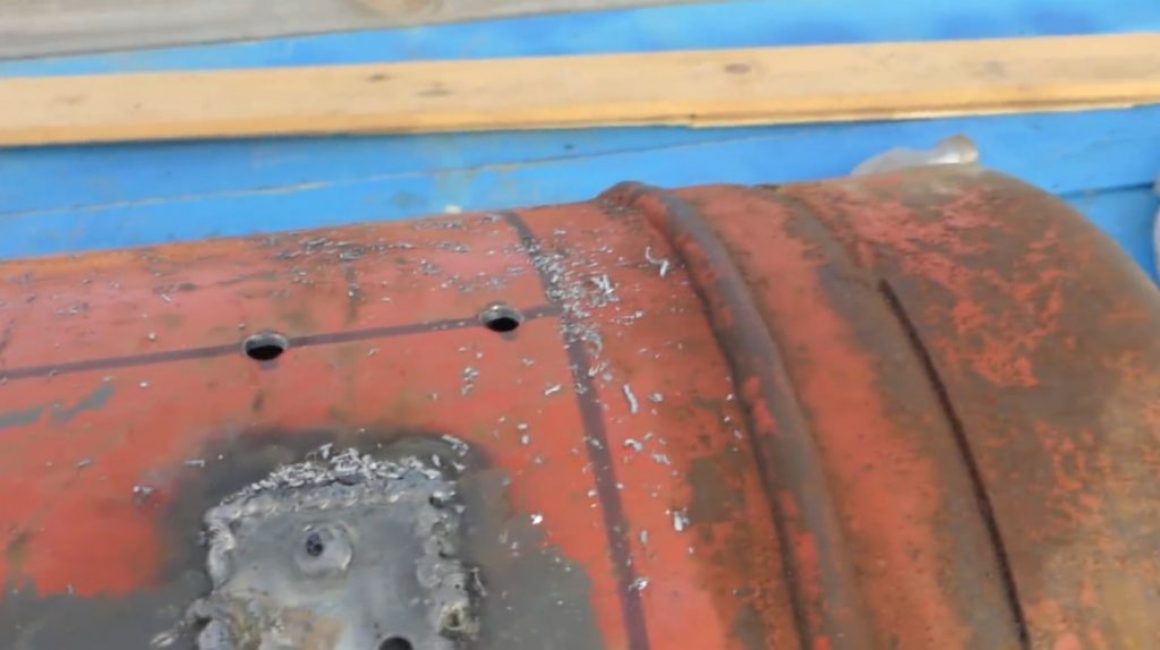
Section of the cylinder body
And only after all the loops are qualitatively welded to their places, it will be possible to proceed to further cutting out the cover. Cutting should not be done quickly so that all cut lines are smooth and aesthetic.
Next, you should lift the cover and check how well it fits into place. In this case, you should carefully examine the inside of the cylinder for various damage, as well as possible contents.
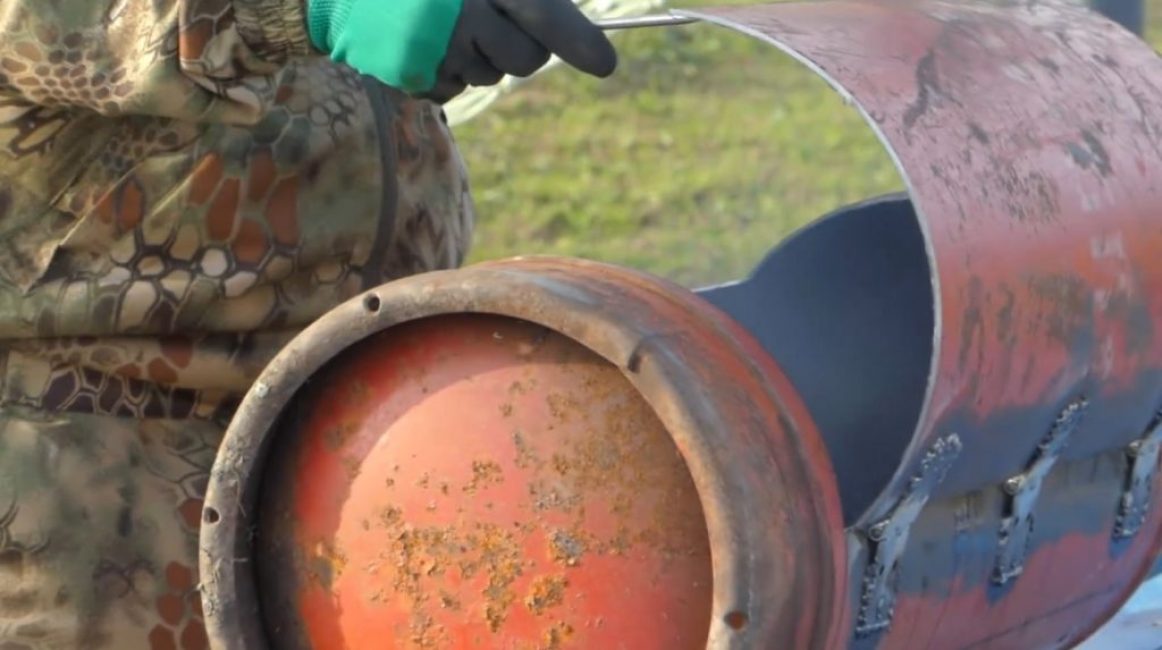
Checking the opening and closing of the cylinder cap
Usually, the smell from the cylinder is not very pleasant, however, this problem goes away after the first roasting of the future brazier. Also, do not eliminate various traces of corrosion, discoloration of the surface and other cosmetic defects - all this will go away after roasting.
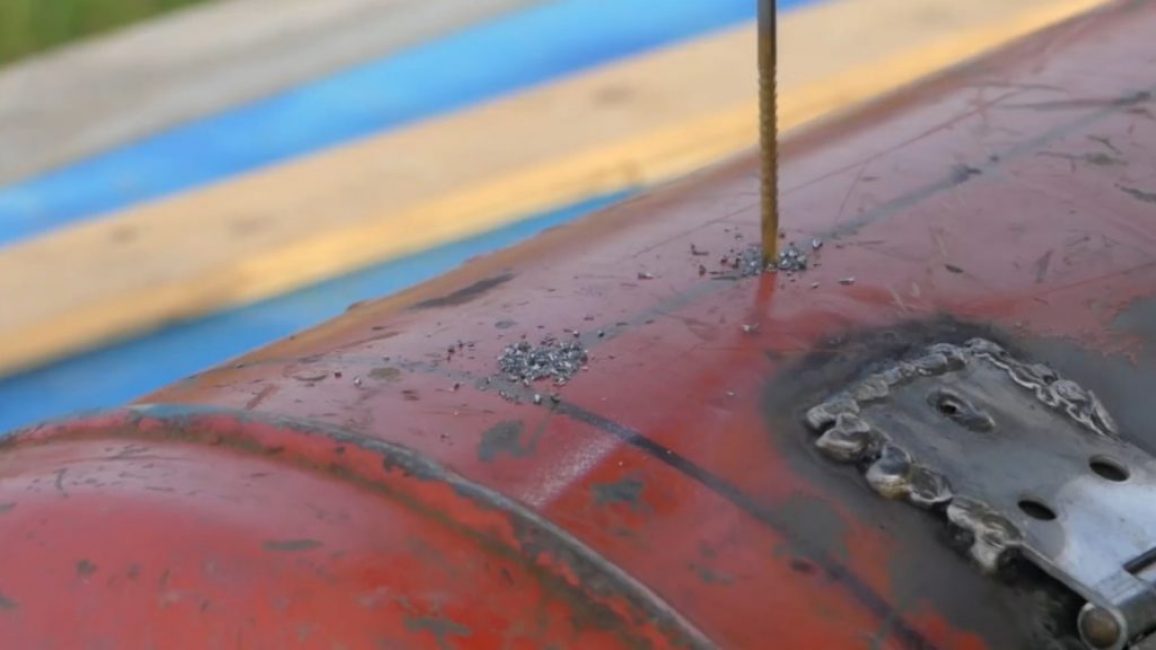
Next stage - making holes for skewers.
Everything is pretty standard here:
Using a core or countersink, it is necessary to punch all the holes for their further drilling.
Making holes for skewers
First, all holes must be drilled with a small diameter drill to set the direction. And then the holes are already drilled with a large drill.
Drilling holes for skewers
The body of the cylinder can be quite thick, so it's best to do just that. In addition, the round surface of the cylinder is not a flat sheet and it is rather problematic to drill it immediately with a large diameter drill.
After processing the rear holes for the skewers, they will take on the following form:
Holes for skewers
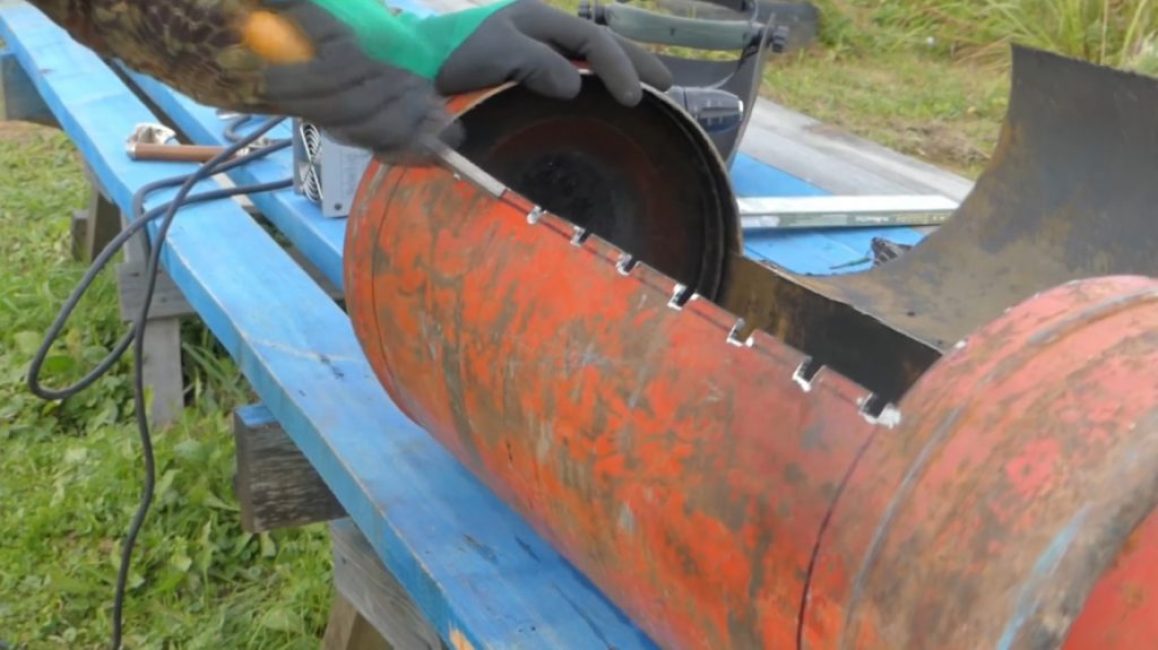
After that, they begin to prepare the "front" holes for the skewers.
To do this, with the help of a grinder, U-shaped holes are cut out from the opposite side. An alternative is to use triangular or even semi-circular holes. In the latter case, they would have to be made even before the cutting of the front edge of the cover.
U-hole cutout
After cutting the holes, they need to be slightly modified with a file of the appropriate section (square, triangular, round, etc.).
Finishing holes with a file
After the holes for the skewers are made at both ends of the brazier, they begin to work with the lid. The most important detail of the lid, on which the degree of convenience of working with the barbecue depends on 90%, is the handle for which the lid will open.
You can save on a cylinder, on the number of skewers, on drills and cutting wheels, but this detail should not be saved categorically.
The handle should not only be comfortable, beautiful and aesthetic, it should also perform safety functions:
- firstly, be located at a sufficient distance from the edge of the cover;
- secondly, to have heat-insulating properties.
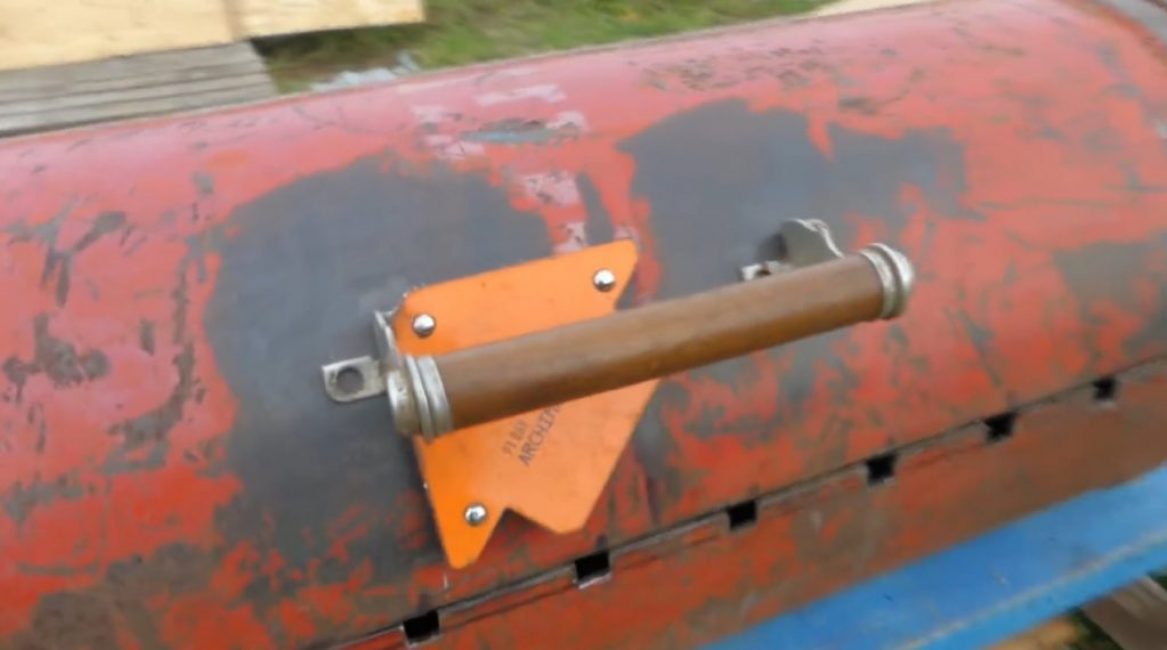
Barbecue handle
Therefore, the handle should not be completely iron, so that the user of the barbecue does not burn his hands. After selecting the handle, you can proceed to its installation.
First, it is cleaned with sandpaper or a special nozzle on the grinder, the place where the handle will be located. After that, the handle is welded to the lid using a welding machine.
Alternatively, you can attach the handle to the lid with bolts or screws - here it all depends on the desire of the master. In the latter case, the handle can be easily replaced.
Action #4: Circulate Oxygen
Creating side cuts
To blow oxygen in the brazier, it is necessary to make a sufficient number of holes on the sides. They should not be too wide so that coals do not fall out of the brazier during cooking, as this can cause a fire or burn.
In addition, openings that are too wide will provoke an open fire on the coals, which will lead to burning of the meat.
Therefore, the best option for such holes will be numerous side cuts, which can be easily done with a grinder and a cutting wheel.
It is recommended that the length of the cuts be made no more than 10 cm, and their number - equal to the number of skewers. The cuts are located from each other at the same distance; ideal - each cut is located exactly between the holes for the skewers.

Side cuts for oxygen access
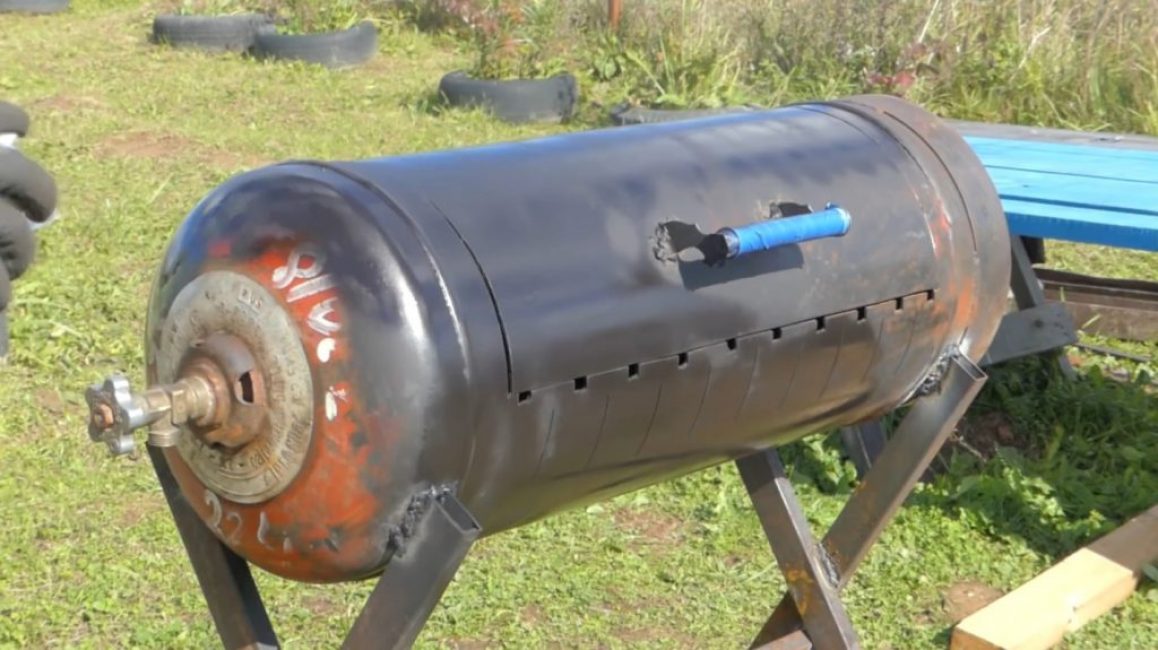
The same holes can be made on the opposite side. It is not recommended to make holes from the bottom of the brazier, because they will clog anyway and there will be no sense from them.
Next, you need to clean the cylinder from paint, dirt and corrosion. For this purpose, you can use, for example, a sandblast (of course, if you have a compressor and dry sand at hand).
In the event that none of this is available, it is enough to use a special nozzle on grinder.
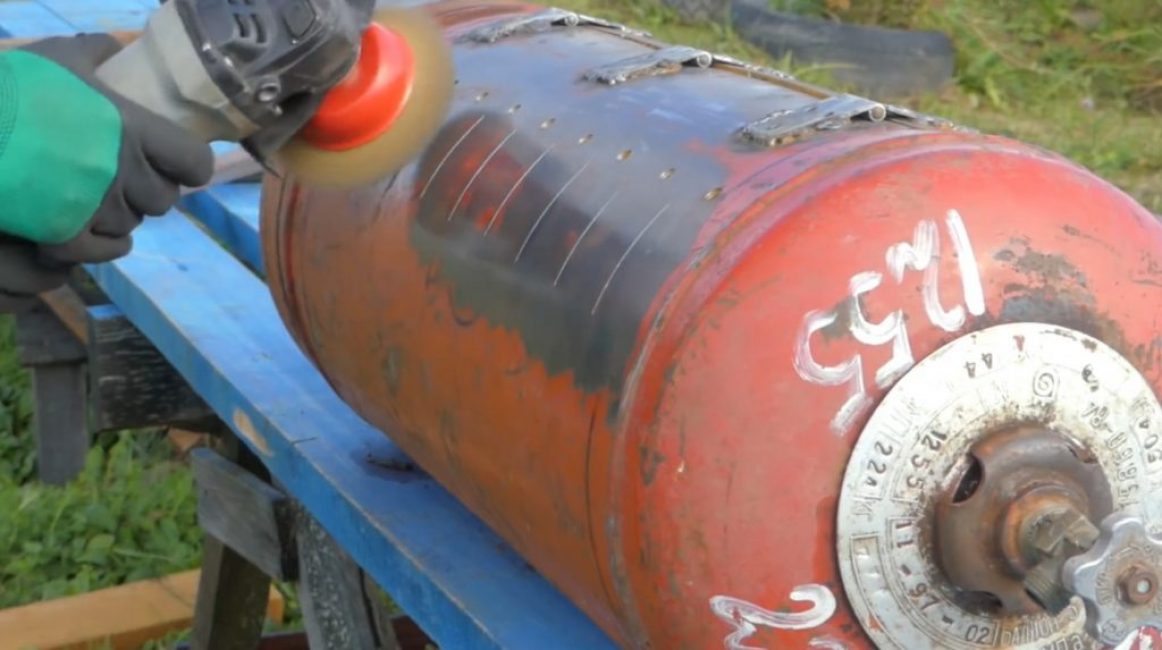
Cleaning the paint can
This process is quite tedious (it can take up to half an hour for a 40-50 l cylinder), but it is the most reliable and easiest to implement.
Moreover, the grinder, unlike the compressor, is in every home.
Action number 5: Making legs
The next stage is the manufacture of legs for the barbecue. In this case, you can use any materials at hand.
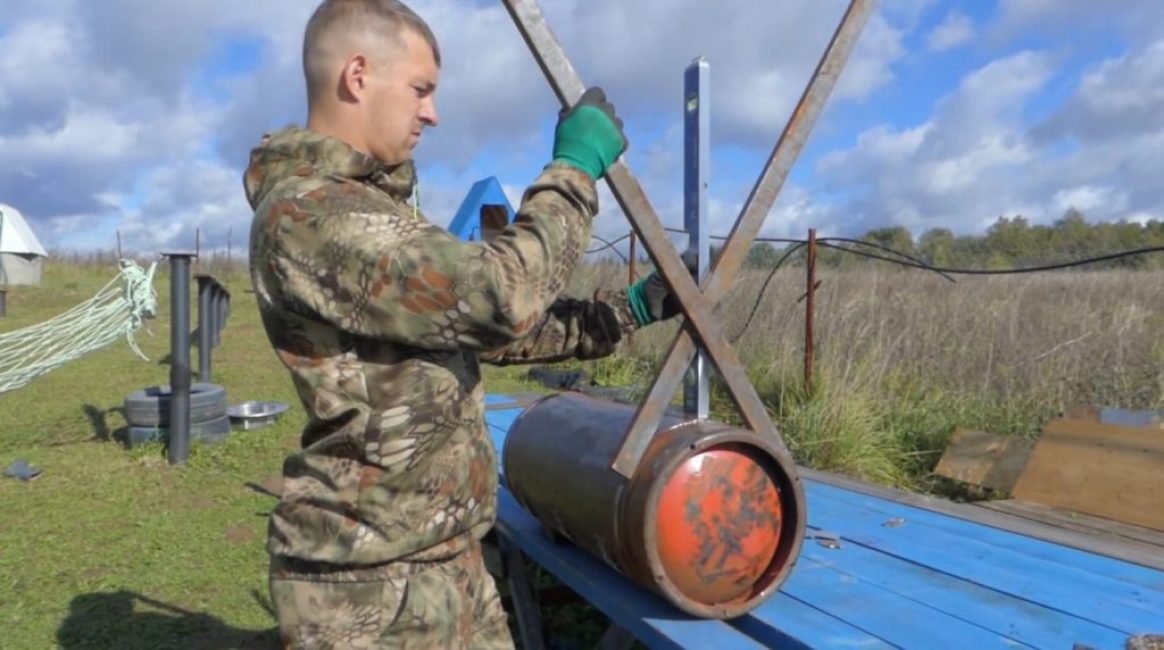
Leg manufacturing
The ideal option is a profile requirement with a section of 20 by 40 mm. The desired height and angle between the legs are selected based on the size of the material available, the diameter of the balloon and the method of attachment.
Best to use welding, since the other way of attaching the legs to a cylindrical cylinder is quite complicated and will take too much time.
Welding the legs to the cylinder
To ensure the correct location of the legs relative to the body of the brazier, a level and a magnetic corner are used.
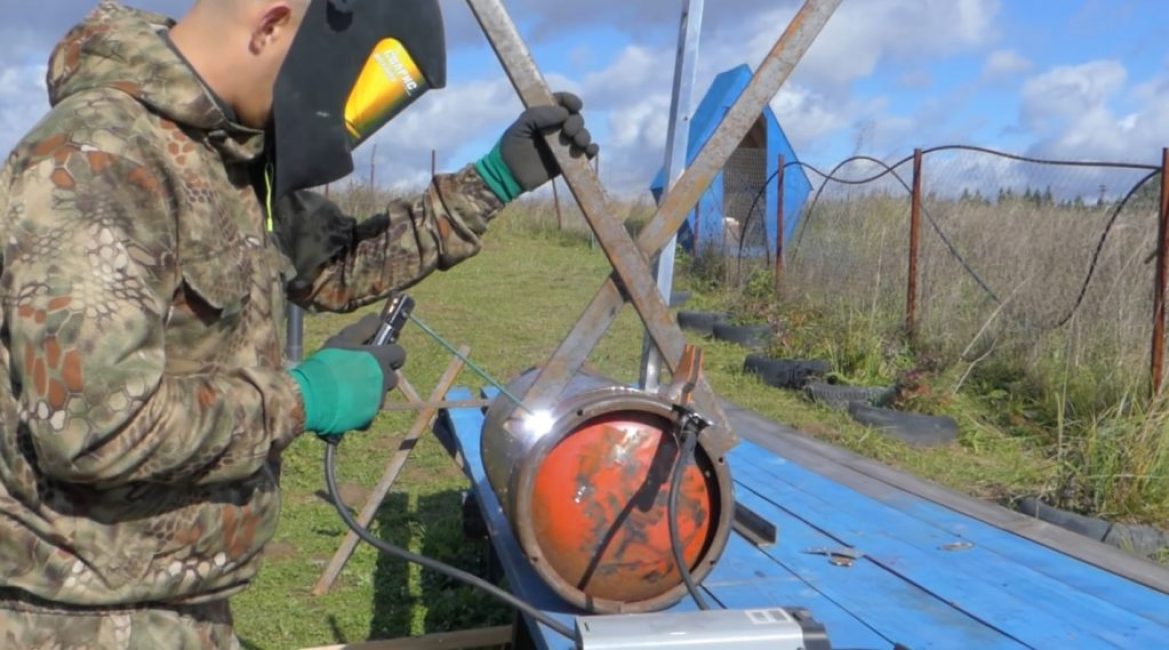
To increase the stability of the entire structure, a special transverse beam is used that connects the leg structures from opposite sides of the brazier.
Eё installation with the final finishing of the legs and alignment of the entire structure is also carried out using a level.
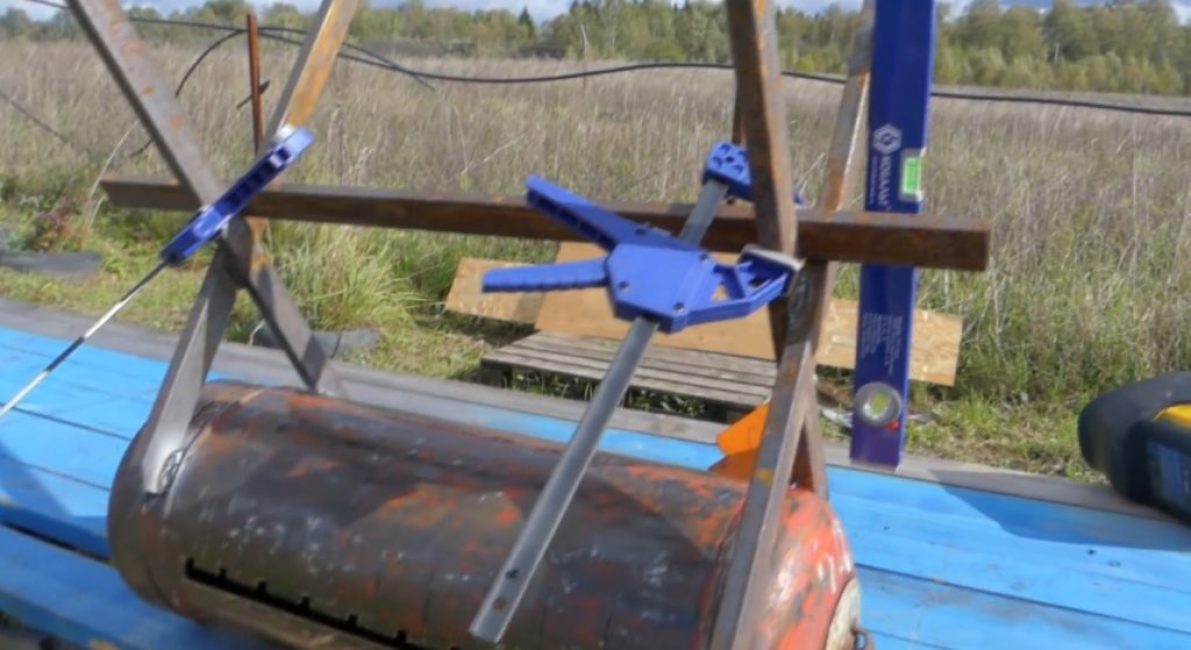
Installation of the cross beam
So that at the time of welding the structure does not “walk” from side to side, it is fixed with two clamps - each on its own leg.
After that, the entire structure is slightly “grabbed” by spot welding, the clamps are removed and the legs are carefully welded to the crossbar.
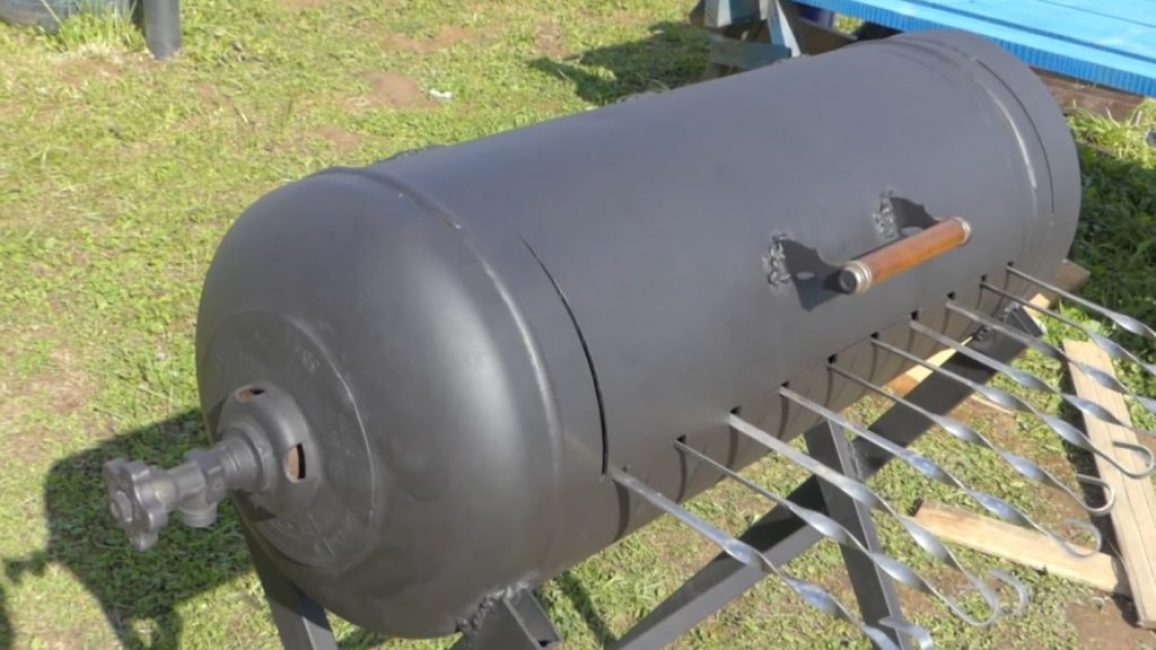
The cylinder valve can be cut off, but can be left. First, the overall style is preserved "Barbecue from a gas cylinder", secondly, the valve can also have a purely practical meaning - it is convenient to hold on to it, moving the structure, it can also be used as a hanger.
Action #6: Painting
Balloon painting
Similar paints are used for painting a wide variety of heating surfaces: stove doors, stove bodies, metal gas pipes, etc.
Before painting, the handle by which the lid is lifted must first be wrapped with electrical tape.
Finished brazier
The end result is a great grill. which is not only able to perform its functions, but also has a very presentable appearance.
 Read also: Gas cylinder in the country - for a stove, heater and other needs: terms of use (Photo & Video) + Reviews
 What else can be done
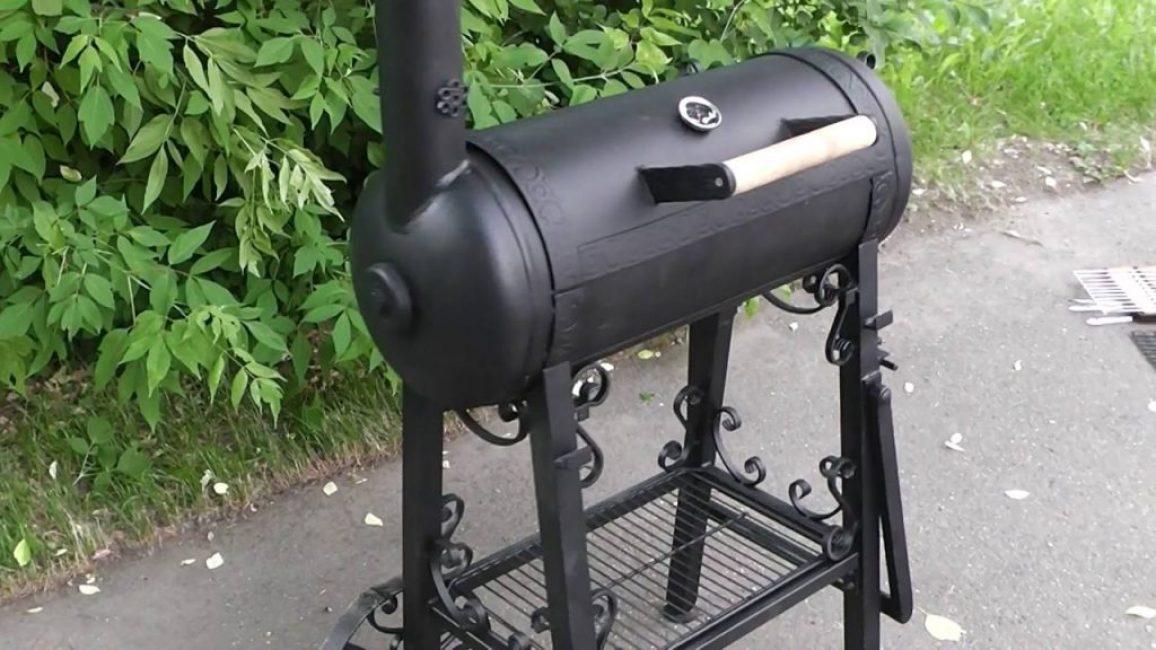
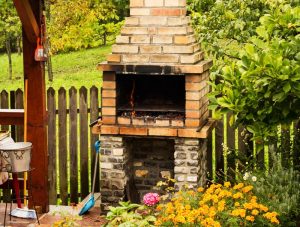
Another variation of the brazier from a gas cylinder
Further improvement of the design is possible in several directions:
Firstly, small folding shelves and tables can be easily attached to such a brazier.
Secondly, to ensure the regulation of the blowing of oxygen, increasing or decreasing the degree of heat of the coals, it is possible to make a design capable of changing the degree of opening of the lid with some kind of lock.
Thirdly, the design of the barbecue, you can still make it collapsible (at least make detachable legs), which will make it possible to move it in the trunk of a car and go out into nature with it.
There can be a lot of options for additional modifications, after all, the cylindrical body of the cylinder is an almost ideal option for the body of the brazier and many devices can be attached to it that increase the level of comfort.
VIDEO: Brazier from a balloon in 2 hours with your own hands! DIY idea!”

Do-it-yourself brazier from a balloon in 2 hours! DIY idea!
Brazier from a gas cylinder: step-by-step instructions for making your own hands | (50+ Photos & Videos)
 Read also: How to make flower pots with your own hands: outdoor, indoor, hanging | Step by Step Charts (120+ Original Photo Ideas & Videos)


Dear, is it necessary to prepare the surface and clean the paint on the cylinder before applying heat-resistant paint? It will burn under your paint. So much work, and a little laziness ruined everything.
Good afternoon, Dmitry! If you carefully read the article, then you will see a section where the cylinder is cleaned from old paint.