
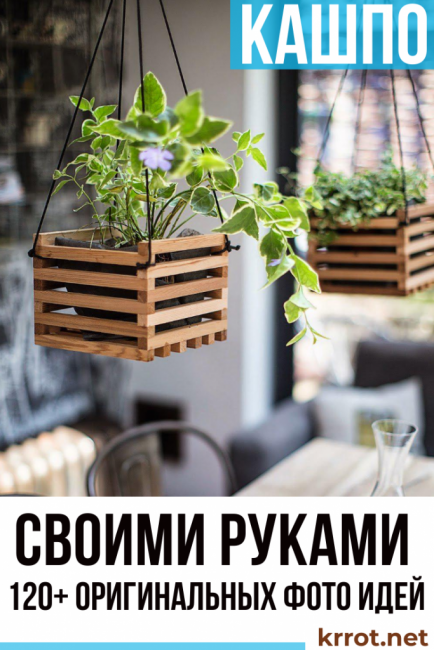
To grow plants and create extraordinary flower arrangements, different types of containers are required. Some of them can be found in the nearest store. But in most cases, their shape and design leaves much to be desired. Therefore, today we will master the technique of making flower pots with our own hands.
Content:
 Read also: Plastic bottles, what can be done from them? Useful DIY crafts: for home and garden (60+ Photo Ideas & Videos) + Reviews
What materials are best to use?
Floor, table, wall or unusual hanging planters can be made from many types of materials. The most important thing is that it is strong enough and lasts as long as possible.
Planter decor
- sand and cement with the addition of liquid glass
- alabaster
- cerensite: products from a solution prepared on the basis of calcium and aluminum salts are not only original, but also extremely durable
- tree: you can use both thin slats and massive wooden decks of a suitable size, in which the central part is removed
- vines: wicker planter-basket will perfectly fit into the decor of the room, finished in country style
- plastic: weaving can be imitated from plastic cut into thin strips or twisted plastic bags;
- heat-resistant clay
- papier mache
- felt
- yarn, braid, twine, strong synthetic threads: they are smeared with glue and wrapped around containers of a suitable size
For decor, they use burlap, original weaving cotton fabrics, twine, colored stones, nutshells, grain, tree bark, dried flowers, fur, paints and enamel, etc. A more massive planter for garden flowers is made from rubber wheels.
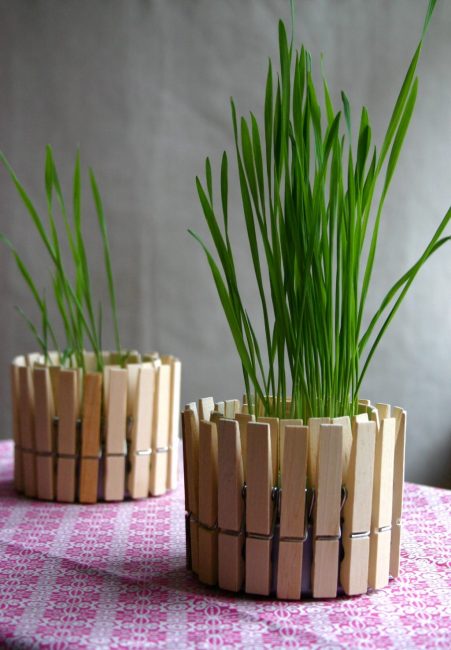
Original flower pot decor with wooden clothespins
Do not forget that the shape of the container should be combined with the outline of the plant. After all, even the most unusual flower in the wrong pots will look ridiculous.
 Read also: Interesting ideas for decorating your favorite dacha with your own hands | 150+ original photo tips for craftsmen
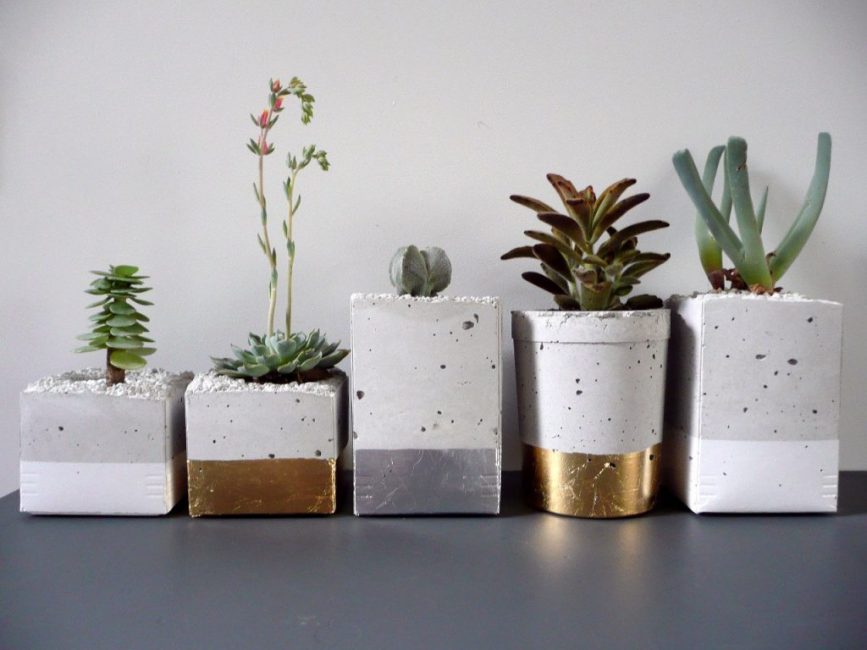
 Cement products of unusual shape
Yes, don't be surprised. From an ordinary cement-sand mortar, you can create a very original product. It can be left unfinished - in this case, only an unusual shape will be an ornament.
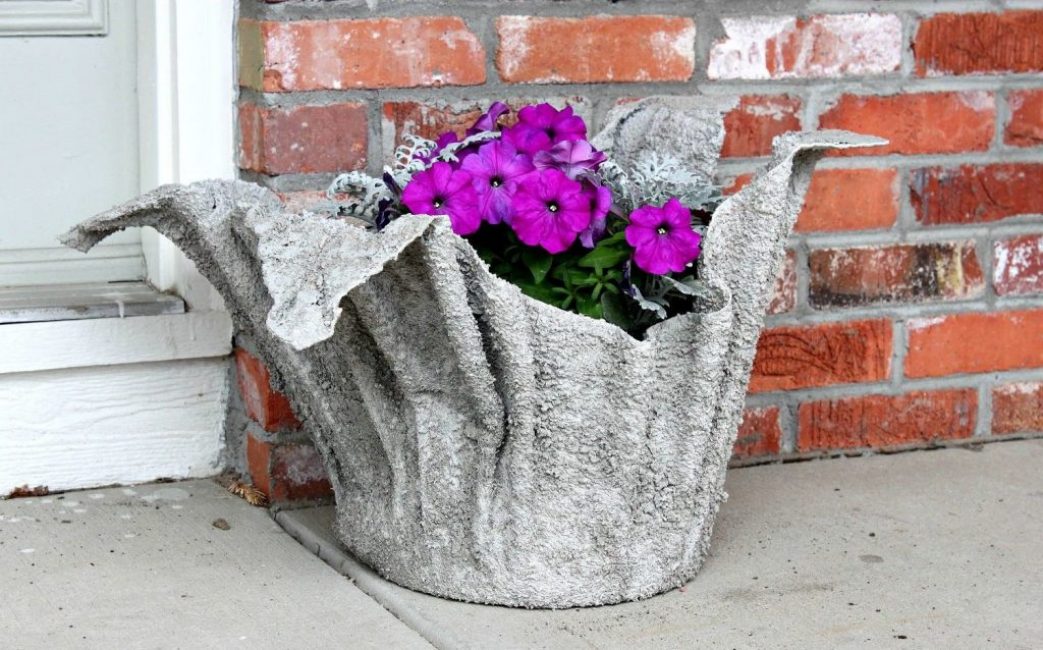
Making flower pots from cement and fabric is extremely simple
Paint and decorate the finished planter with shells, pebbles, rhinestones, broken glass, wood chips, buttons, feathers, fabric, lace, bright paper napkins soaked in varnish or glue, etc.
Main stages of work
Any plastic jars can be used as a form - a smaller container is inserted into a large one, and a solution is poured between them.
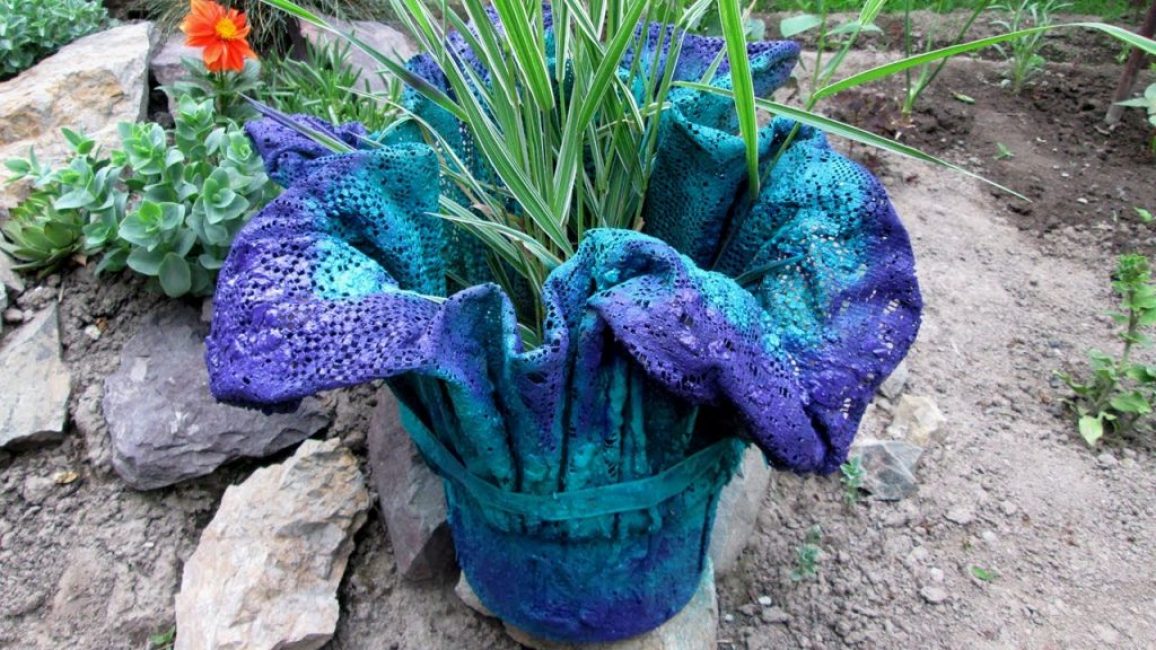
A more original design is obtained by using burlap or old waffle or terry towels. You can also use tulle - in this case, a characteristic pattern will be visible on the product.
The fabric is soaked in a solution, and then draped, laying out on a stand, for example, a bucket turned upside down or any other container.The cement should not be too liquid, otherwise it will simply drain off the fabric.
When using fabric, the product will turn out to be thin-walled, so it is better to add a little liquid glass or tile adhesive to the solution. The solution will turn out to be more plastic, and when it dries, microcracks do not form on the product.
The fabric soaked in the solution is laid out on pre-prepared forms.


Drying products. decoration
In order for the product to dry evenly, especially in the heat, it is better to cover it with a damp cloth. Drying time is 24-72 hours. Before this time, it is not recommended to touch the pots - the solution may crack.

Ready dried blanks
Detected defects (small cracks or bubbles) can be repaired with silicate glue. By adding color pigment to it, you can paint the product in the desired color. For painting, you can use special paint for concrete. There is even a special color for the solution, which is added immediately when kneading.
You can paint the product in any color you like. Cement planters look original, on which the texture of wood is drawn with a brush and paints.
Cement outdoor planters
The uneven edges of the product and minor imperfections in the form of burrs and cement sagging are cut off with a hacksaw. Small defects can be removed with sandpaper. Do not forget to also drill small holes in the bottom of the container for drainage. You can decorate a ready-made planter with pebbles, mosaics, shells, tree bark soaked in an adhesive composition. Most importantly, do not overload the product with decor so that the planted plant does not get lost against its background.
If you want to visually expand the room, it is better to choose for growing bushy plantsseated in squat low containers. To make the ceilings visually higher will help elongated flower pots with tall indoor flowers.
 Read also: Do-it-yourself playground in the country: play, sports | (100 Original Photo Ideas & Videos)
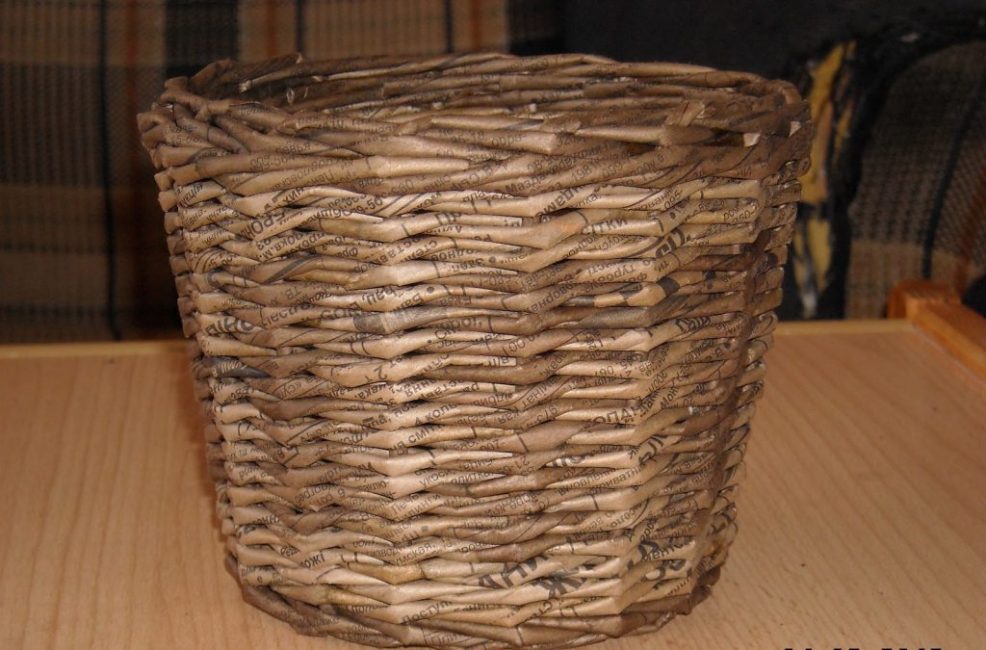
Wicker flowerpot-basket
In the classic version, vines or wicker are used for weaving.. But, if there are no branches at hand, you can use plastic cut into thin strips or even old newspapers and thin paper.
To protect against moisture, such products must be covered with glue or varnish.
Preparation of willow twigs
Weaving a planter from a thin and flexible vine turns out to be more decorative. But, since grapes are grown only in the south of Russia, we will use willow branches.
The optimal time to collect raw materials is early spring during bud break or July-August.. The branches must be selected of the same length, as straight as possible, long and flexible, up to 3 mm thick. They are cut at an angle of 45 ° with secateurs. To test the flexibility, the rods are bent at 90 ° - they should spring easily.
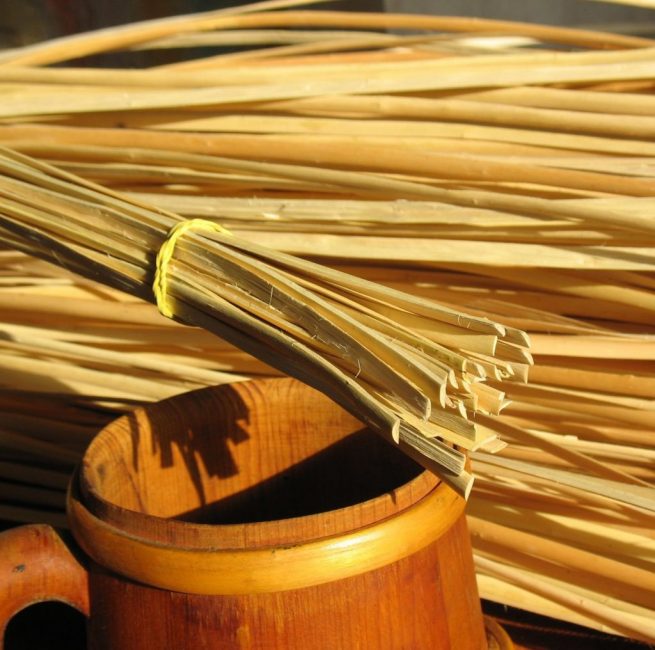
For weaving, both unpeeled rods and branches with completely removed bark are used.
In the latter case, it is better to collect raw materials in the spring - the bark separates better from such a rod. To remove it, use a special tool - a pinch. It is made from a thick branch with a split in the upper part. If the raw materials were collected in advance, before starting work, the branches are “revitalized” - they are soaked in hot water for 4-5 days.
Weaving methods
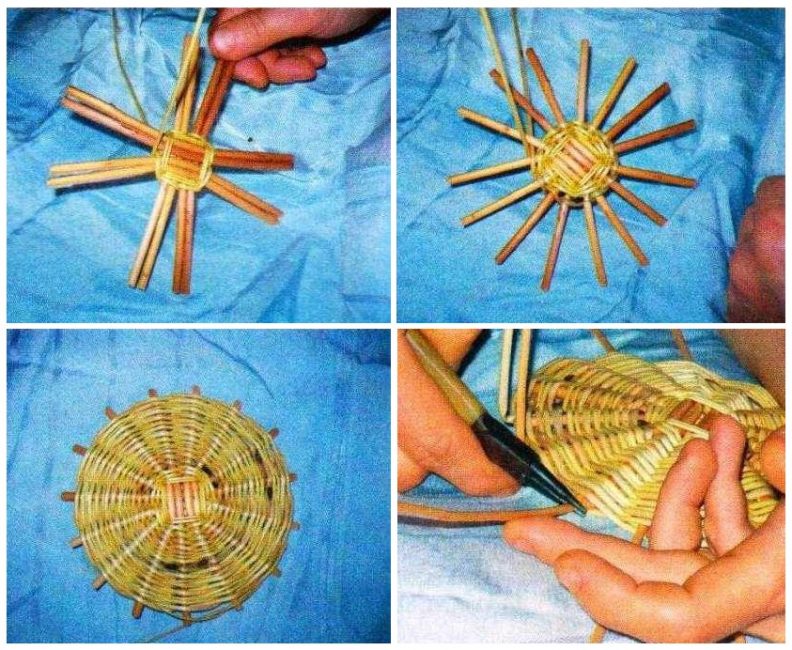
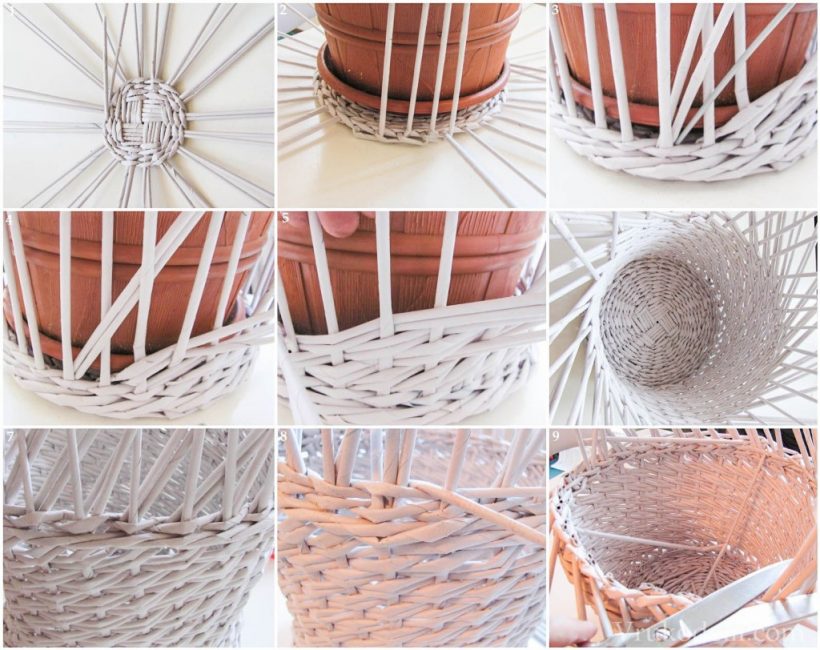
Weaving the bottom of the planter basket
For a small planter, you will need about 8 rods about 30 cm long:
 Read also: Landscaping your site with your own hands - (130+ Photo Ideas & Videos) + Reviews
 Newspaper weaving
How to make planters out of newspapers? The process of its creation is similar to the manufacture of planters from willow branches.. The only thing is that the paper must be properly prepared for work.
Preparation of blanks
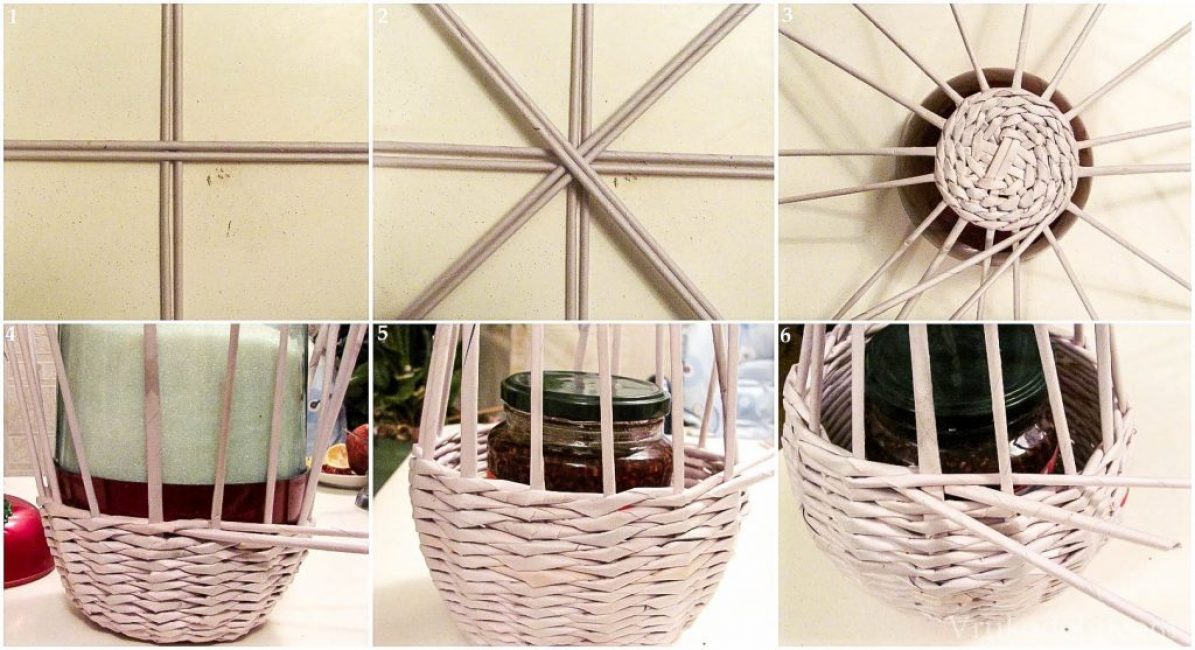
To obtain strong "twigs" the newspaper must be twisted.
For this:
Describe in detail how to weave a planter from plastic bottles, we will not. The scheme of work is completely similar to weaving from newspapers or willow twigs.
Finished paper pot
Newspaper weaving methods
A standard wicker planter consists of a bottom, which is made separately, and a side. Any container can be used as a form: from a bucket to a small jar.
There are many types of weaving. In difficult cases, several tubes are woven at once.
Paper weaving step by step
We will focus on the simplest:
Dark-colored pots always heat up more in the sun, so they can only be used for heat-loving plants.
 Read also: How to make a bird feeder with your own hands? 19 original ideas (180 Photos & Videos) + Reviews
Papier-mâché planter
If the collection of flowers is large, it is quite expensive to purchase flowerpots for each of them. When using improvised means, you can not only save a lot, but also get the most unusual decorative items. The original floor or hanging papier-mâché planter can complement the collection of flower pots.
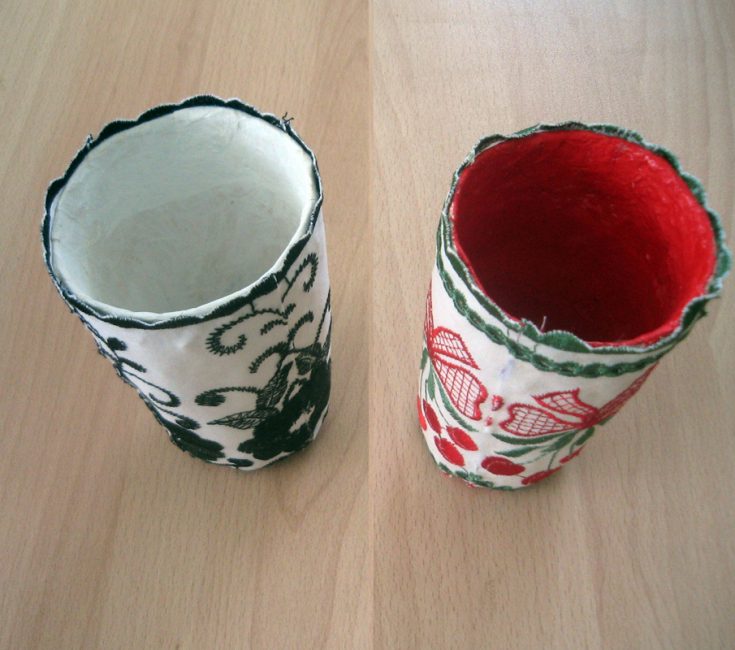
papier mache cups
Paper-glue mass is an excellent material, which is easy and simple to work with.
So, let's describe the process of creating papier-mâché planters:
Finished work from papier-mâché
Flower pots made of wood look very original. But, since such material will quickly begin to rot upon contact with moisture, it is better to make a larger container into which it will be possible to “hide” a plastic planter.
 Read also: Projects of country houses for 6-10 acres: 120 photos, description and requirements | The most interesting ideas
 Gypsum planters
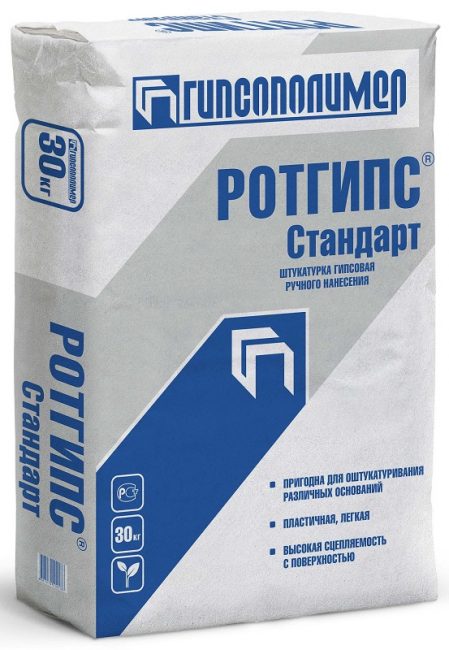
To work, you need 8-10 tablespoons of dry rotgypsum
The execution technique is similar to the technology of working with cement mortar.
Original flower pots made of gypsum
When making planters, do not forget about the drainage holes that are made in the bottom of the container. Otherwise, the water in it will stagnate, and the roots of the plant will quickly rot.
 Read also: Veranda attached to the house - expanding the living space: projects, tips on how to create your own hands (200 original photo ideas)
 Clay pot
There are never many flower pots, so we will do the next work from clay. For these purposes, it is necessary to purchase a special one that does not require firing. Such mixtures are sold in stores selling supplies for artists.
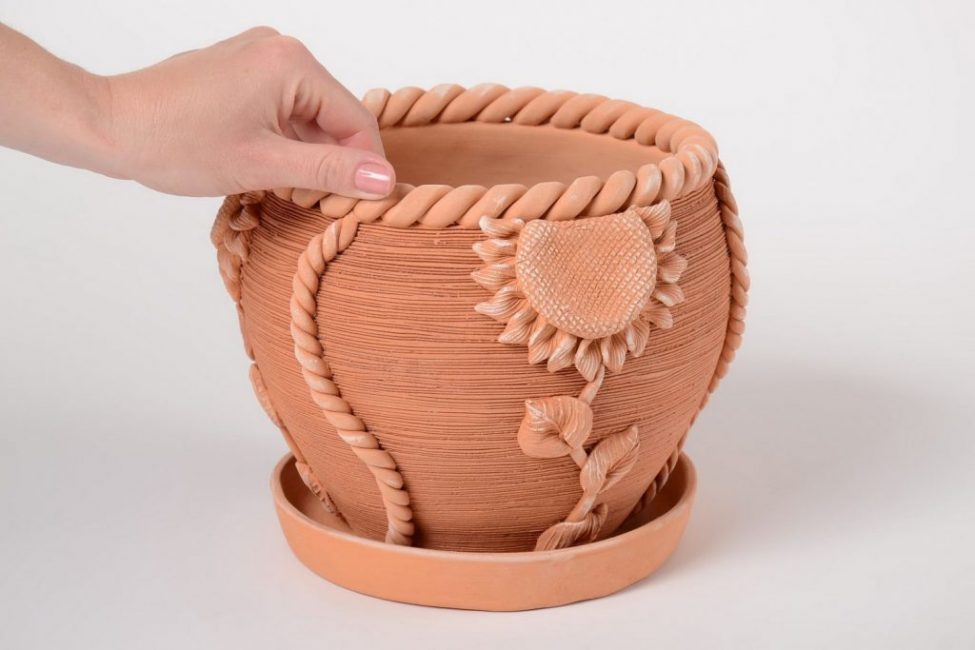
Clay decorative item
This type of clay hardens in air during the day without any firing.
It is beautifully painted and polished.
 Read also: Making a greenhouse with your own hands from a profile pipe and polycarbonate: a complete description of the process, drawings with dimensions, watering and heating (Photo & Video)
 Use of old items
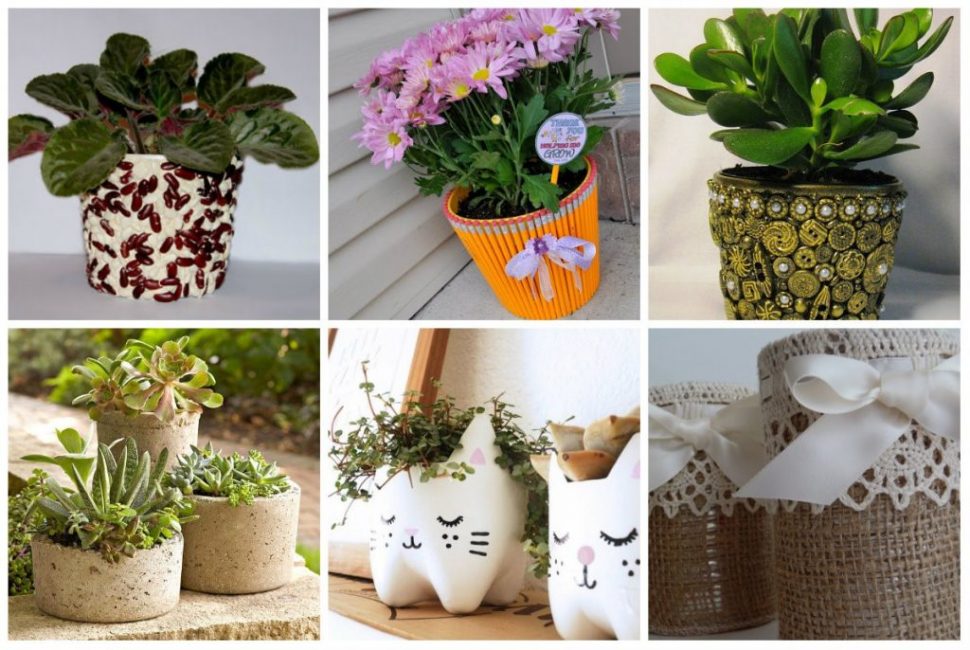
You can turn any objects that have served their age, sometimes the most unexpected ones, into a flower pot. For example, plant plants in an old salad bowl or teapot. If the product has a small crack, it does not matter - it can be deployed to the wall, making it invisible.
Pots made of transparent materials, for example, glasses or plastic bottles, look unusual. For decoration, light stones are poured onto the bottom, then earth. The top layer is decorated with a layer of dry sawdust.
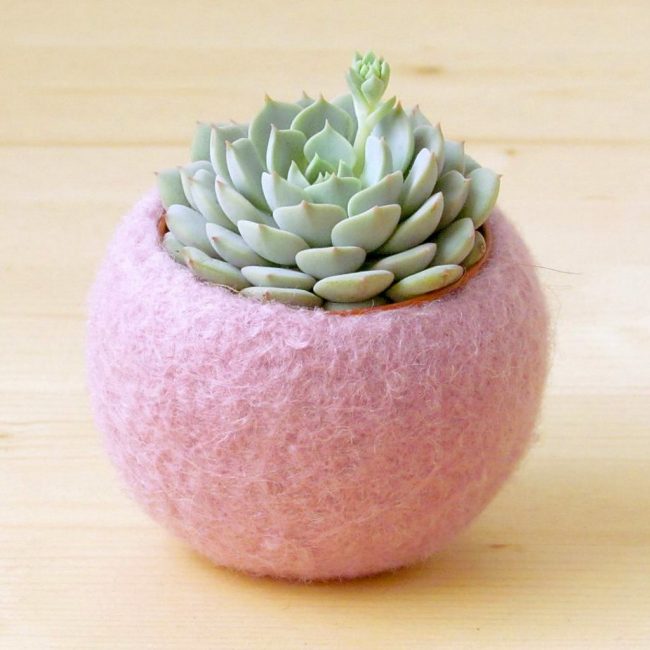
Felt planters
How do you like a flower pot made from an old cosmetic bag? Or street planters from bags (photo)? Agree, unusual. As well as products in the form of large shells, shoes, open suitcases and even jeans cut to the knee.
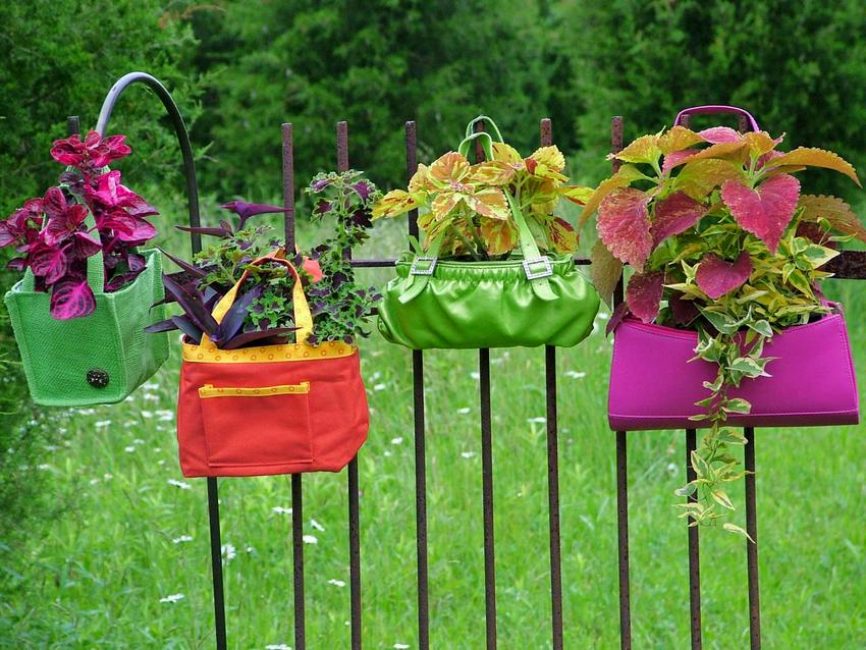
Planters from bags
You can even use a whole coffee table as a planter, placing all kinds of plants in its open drawers. Maybe your imagination will give you more creative ideas.
 Read also: Petunia: description of the 20 best varieties | Types: ampelous, vegetative, cascading, terry, small-flowered | (100+ Photos & Videos) + Reviews
 Planter decoration
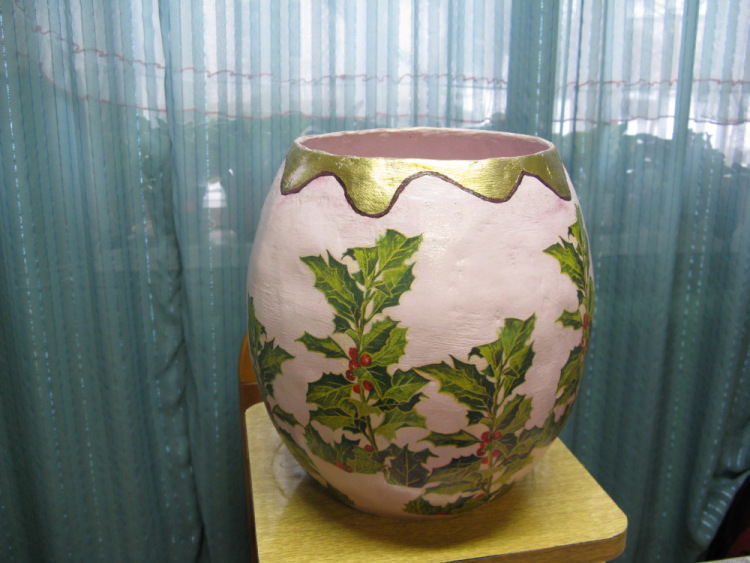
A planter with an original design does not have to be made from scratch. You can also use standard flower pots or containers that are suitable in size. They can be painted with paints, pasted over with paper napkins or cloth.
Flower pots are made from macrome. Craftswomen who know how to hold knitting needles or a crochet hook in their hands can prepare knitted “clothes” for a cache-pot. Lace, fabric, beads, buttons, coffee beans and cereals, etc. are also used for decoration.
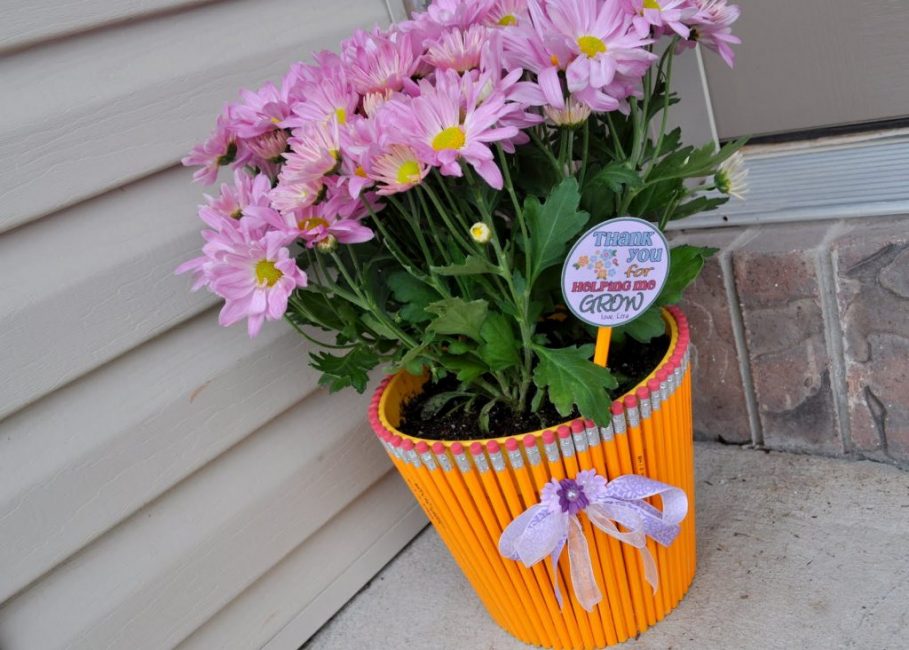
Original idea using pencils
When decorating with eggshells, it is preliminarily degreased in a solution of baking soda. After drying, the pieces are coated with glue and applied to the surface with a convex side.
If the distance between them turned out to be significant, small pieces are added to the gaps or uncovered areas are covered with crushed shells. Then the product is coated with PVA glue, and after drying, varnished.
 Read also: How to make a cellar in a private house or in the country with your own hands: diagrams, step by step guide, proper ventilation (55+ Photos & Videos) + Reviews
 Mosaic planter
Give a second life to an accidentally broken vase or tile by using it as a flower pot decor. In addition to fragments of any size, we need glue for ceramics and a special grout for joints.
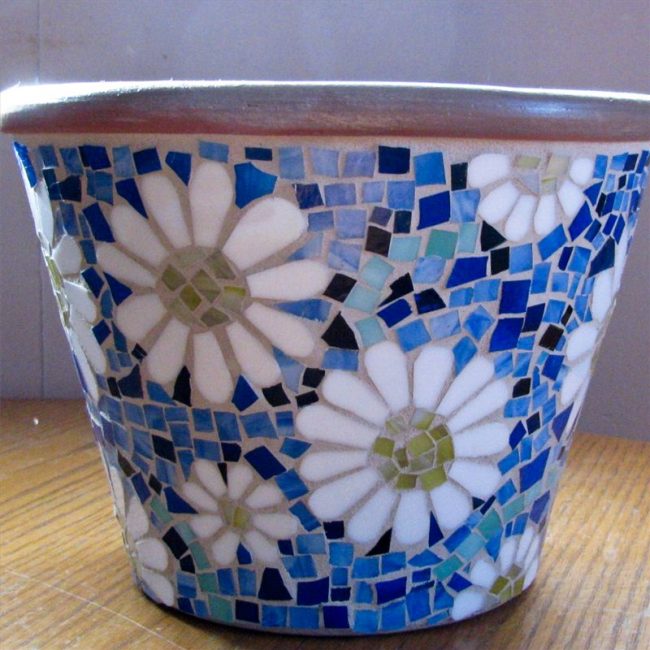
Flower pot decorated with mosaic
Using twine
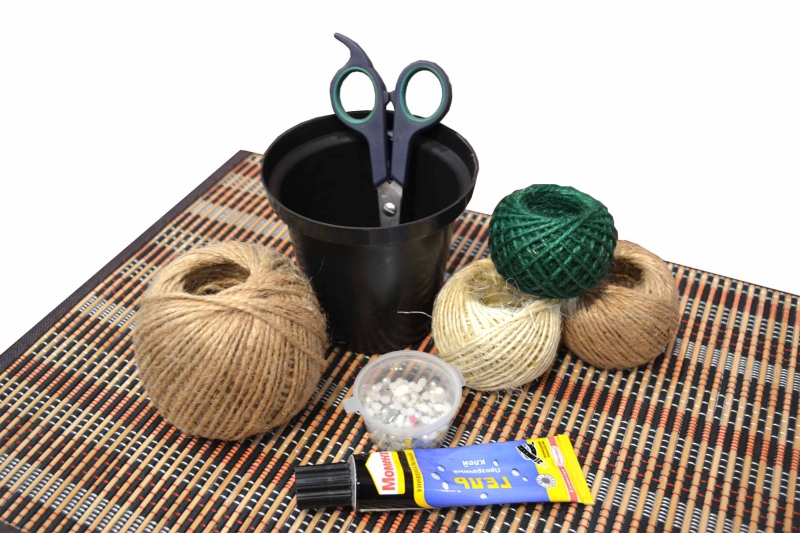
With the help of inexpensive jute twine, you can get an antique-styled product.
So, let's describe the process of creating flower pots from a rope for flowers:
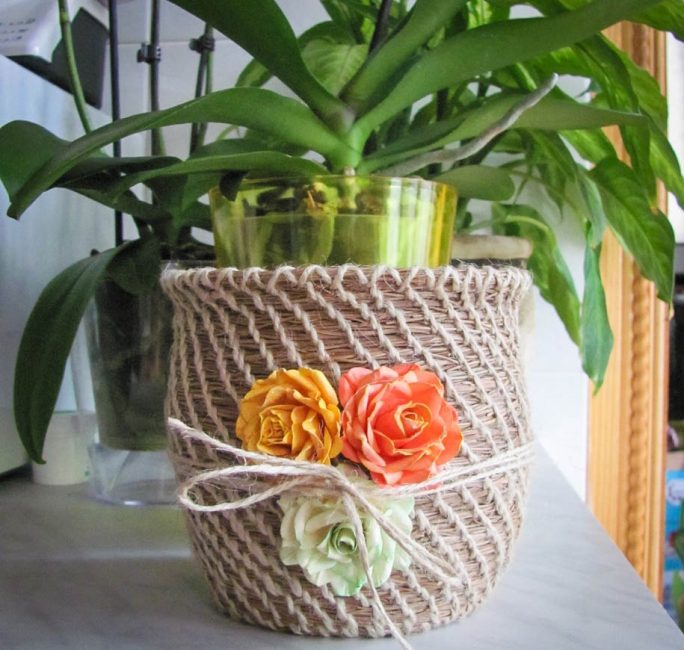
Jute twine decoration
Decorating with fabric or lace
You can use any original fabrics, border for curtains, tulle or lace. Since this material is inexpensive, you can arrange flower pots throughout the house in the same style and color scheme.
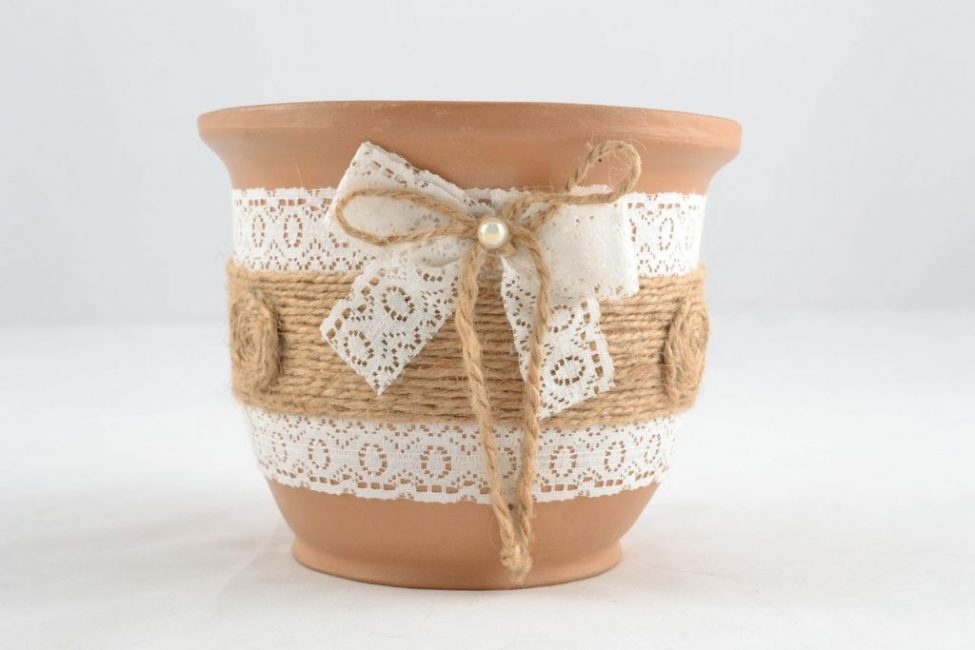
Lace and twine trim
There are many ideas for making pots. The author of this video suggests making unusual:

How to make a pot of gypsum with your own hands
How to make flower pots with your own hands: outdoor, indoor, hanging | Step by Step Charts (120+ Original Photo Ideas & Videos)


