With drip irrigation, a continuous supply of moisture to plants occurs. In order not to exceed the daily norm, water is supplied in scanty portions - drop by drop. To implement this irrigation principle, both simple and complex irrigation systems are used.
Their value varies widely. In expensive ones, water can be pumped with a pump; automation is used. In the simplest, classical ones, water reaches the irrigation site by gravity, due to the difference in the levels of the storage capacity and the planting site.
Content:
 Read also: Plastic bottles, what can be done from them? Useful DIY crafts: for home and garden (60+ Photo Ideas & Videos) + Reviews
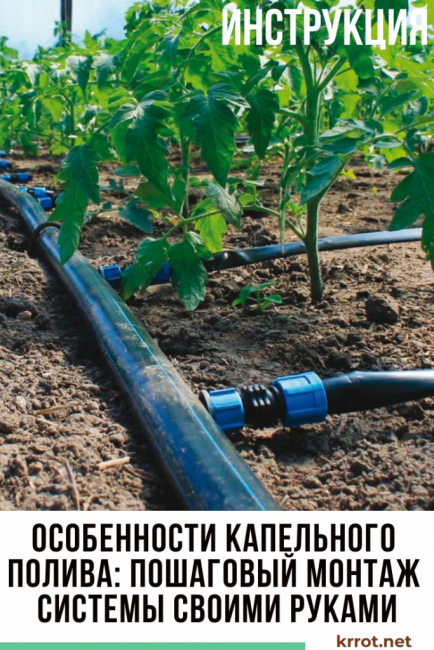
Features of drip irrigation
Drip irrigation is popular because it is a very economical method.
It reduces water consumption and reduces labor costs. In addition, the autonomy of people is increasing. The system does not require constant participation in the irrigation process. This means that the plants will not die without water if the gardener or gardener needs to leave. Anyone who installed this system can leave their site unattended for several days.
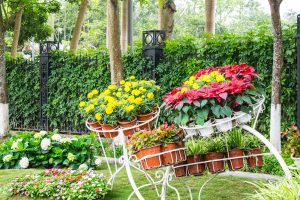
An important feature is that the drip irrigation system allows you to moisten the ground at any point in the site. Water can be delivered directly to the roots. Irrigation is carried out in this way greenhouse plants, and landings placed on the open ground. The method is great for watering the garden, hedges, bushes, fruit trees.
 Read also: Interesting ideas for decorating your favorite dacha with your own hands | 150+ original photo tips for craftsmen
 Irrigation system elements
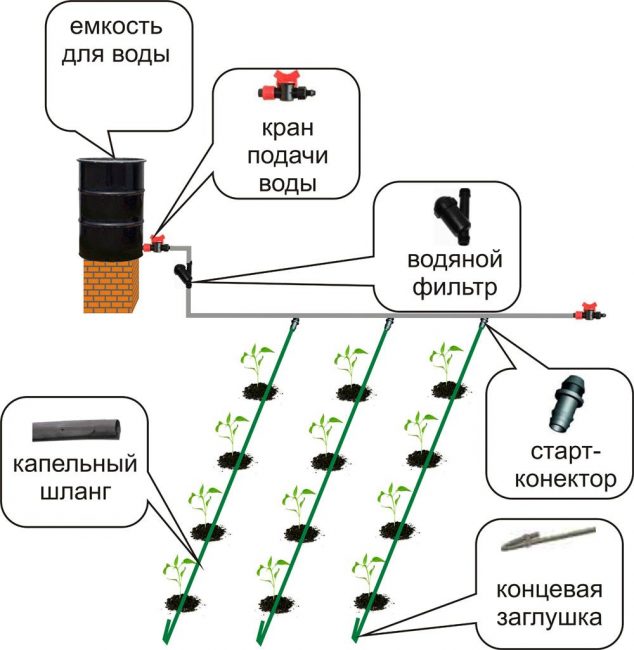
Irrigation system elements
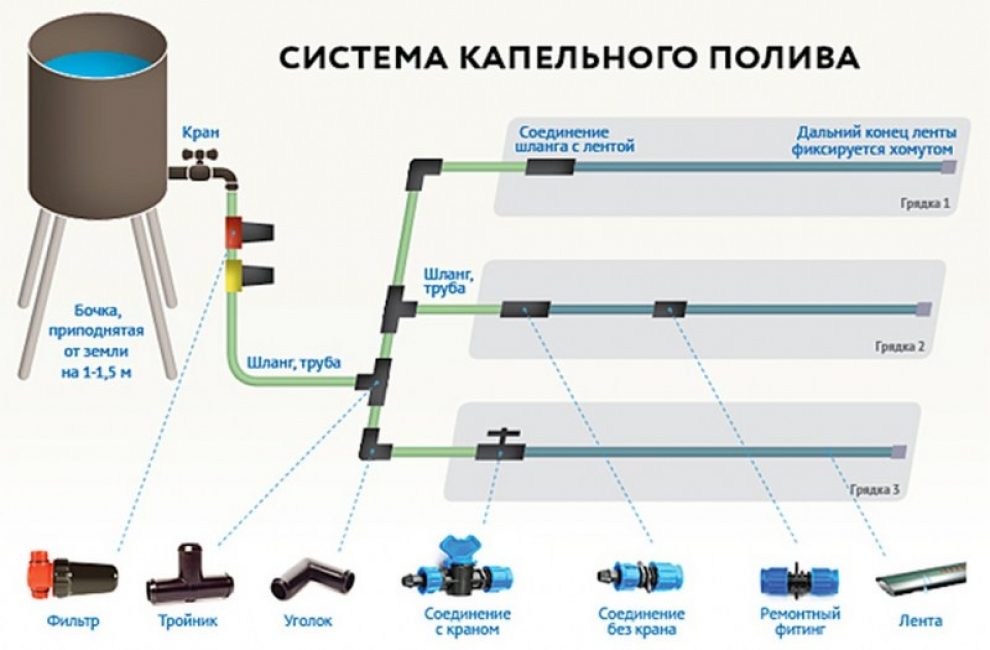
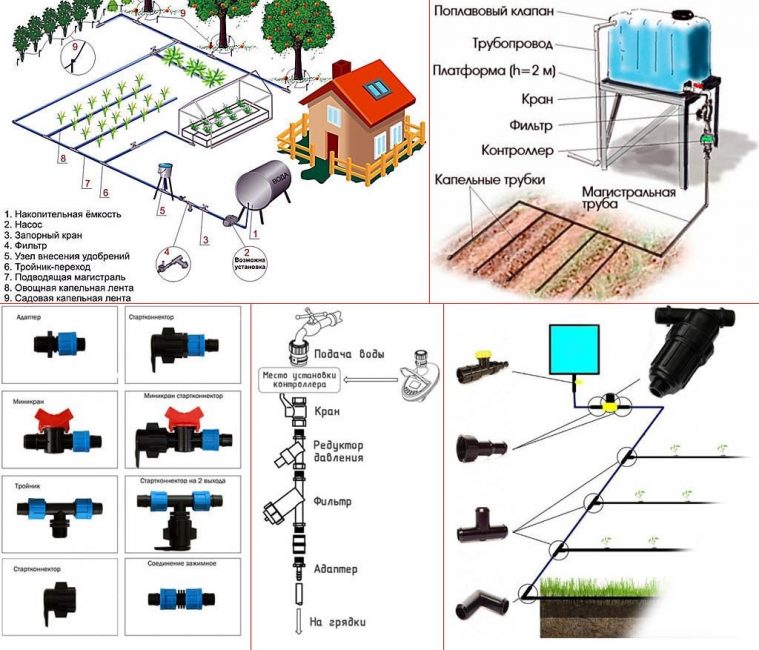
For drip irrigation to function reliably, you need a source of water supply. This function can be performed by a water supply system, a well, a well with a pump. Or a special storage tank (barrel) - this option is most common. The minimum allowable tank installation height is 1 meter.
For the smooth operation of the system, it is necessary that water freely enters each of the hoses. Therefore, it is necessary to introduce a special filter into the system. Without it, small holes in the drip tape will become clogged with small debris that has fallen into the water.
- Vortex
- Disk
- Mesh
drip irrigation system
Vortex and disc pumps are expensive, but they have high performance and excellent performance properties. They are used for watering large fields and gardens, where vegetables and fruits are grown on an industrial scale.
But for a small plot, a summer residence, their capacity is excessive, and the price is too high. Therefore, ordinary gardeners and gardeners use simpler mesh filters.
Other elements that can be used when creating an irrigation system:
Control valves
Additional filters
water meter
System for adding fertilizer to water
Irrigation control and management automation
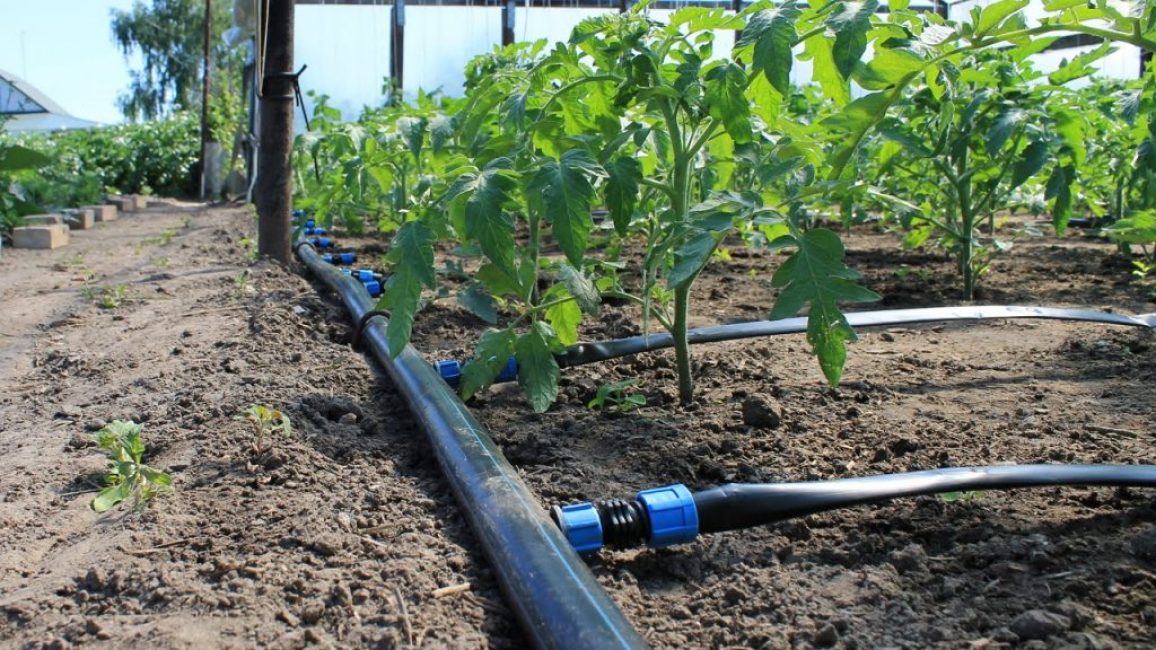
Hoses and pipes are used to transport water. "Main" pipes usually take plastic: from polypropylene, HDPE, PVC. They are able to withstand aggressive environmental influences and temperature extremes.
 Read also: Landscaping your site with your own hands - (130+ Photo Ideas & Videos) + Reviews
What is drip tape?
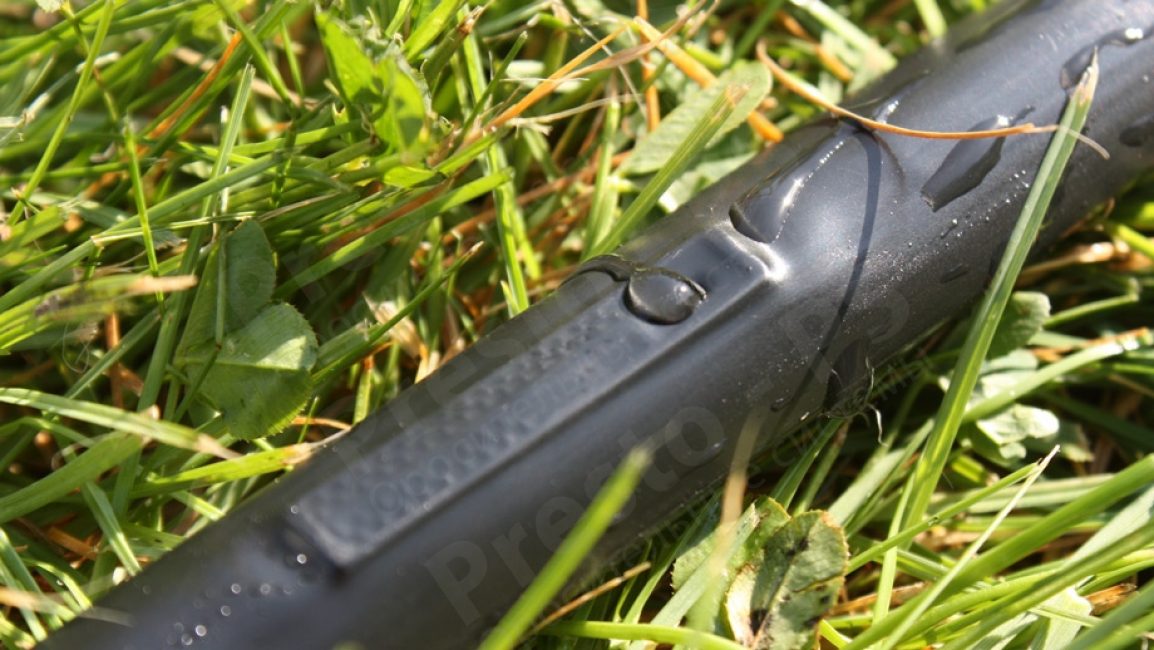
Drip tape is a plastic or rubber tube with thin walls. Holes are made in it, at an equal distance from each other. It is through them that water enters the soil from the system. Such a tube, otherwise a drip tape, can withstand a pressure of 1 bar. The product is delivered in bays, its length reaches 100 meters.
There are two types of tape on sale: emitter and slotted. The emitter ones are more sensitive to low pressure in the system, therefore they are not applicable in systems where water flows by gravity. For such cases, slotted tapes are used.
Drip Irrigation Tape
The principle of operation of drip tapes is based on the use of labyrinth channels and labyrinth systems (emitters). They provide an even distribution of water. But any piece of debris that gets into the tape can clog the channel or emitter and disrupt the entire system. Filters solve this problem.
When purchasing a tape, you need to pay attention to the thickness. It lies in the range from 0.125 to 0.375 mm. The specified size range is used most often. Thickness affects the mechanical strength of the product, which directly affects the service life. The most versatile is a tape with a thickness of 0.2 mm - it can be used in almost any conditions, and the cost is acceptable.
Another important parameter is the distance between the holes. It varies from 10 to 40 cm. For an emitter tape, it directly affects the cost - the shorter the distance, the more expensive the product. In this case, the choice must be made depending on the crop being grown. The most popular sizes are 20 and 30 cm.
 Read also: Perennial flowers (TOP 50 species): garden catalog for giving with photos and names | Video + Reviews
 Step by step installation of a drip irrigation system
Drip irrigation: correct installation
Training
Before proceeding with the purchase, and even more so with the installation of the system, it is required to make a preliminary calculation. You can do this on your own by researching the issue on the Internet. So entrust the specialists, providing them with all the necessary data. This is the size of the place for watering and information about the crops grown.
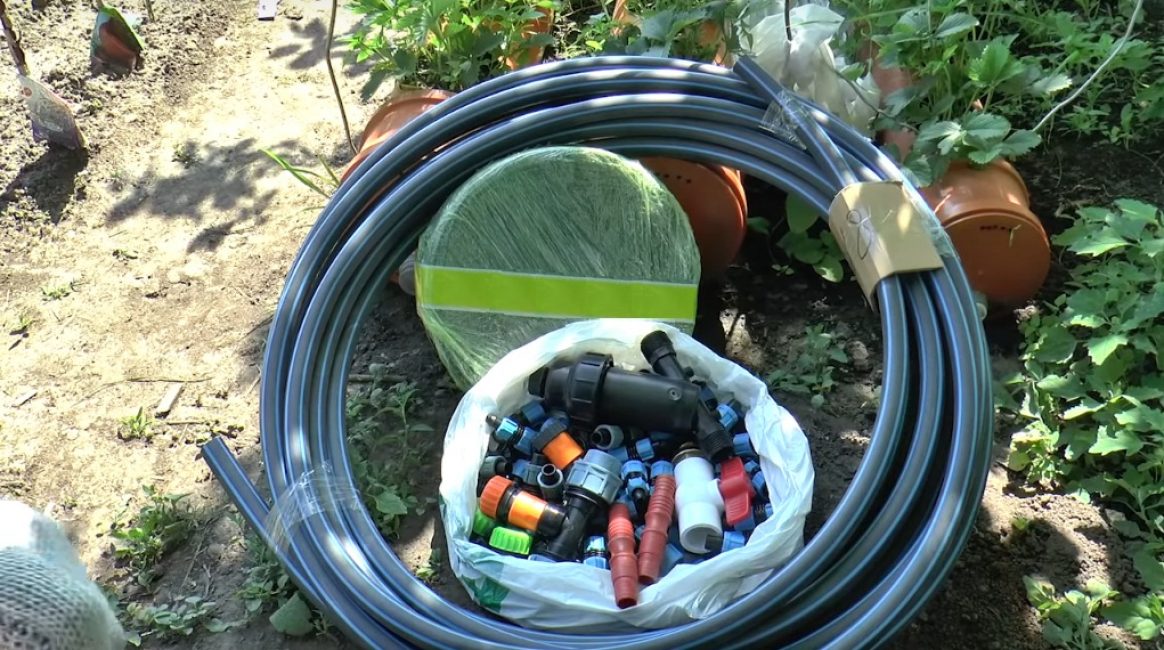
Purchased parts were used for installation:
- Filter;
- Threaded fitting;
- Flexible hose;
- adapters;
- Cranes;
- bushings;
- Pipes (flexible and drip irrigation)
A container (barrel) can also be purchased. It can be either plastic or metal. In the example, a barrel already existing on the site was used.
Irrigation system details
Next, you need to install the container. It needs to be securely fixed above the level of the beds, so that the water flows by gravity to the place of irrigation.
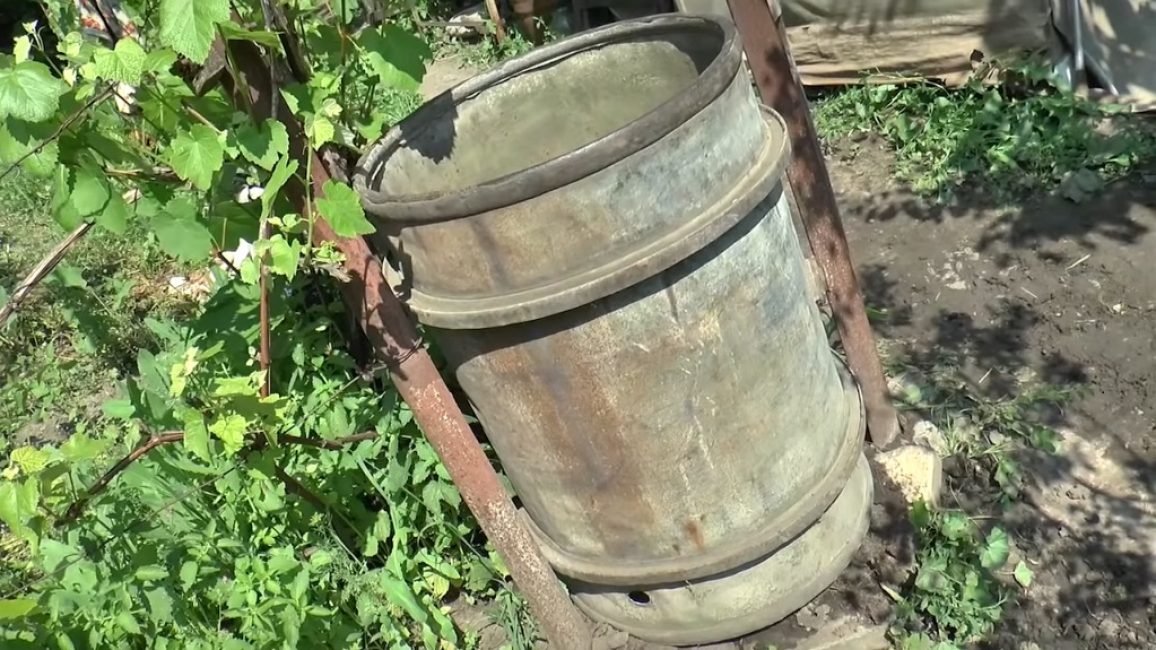
Tank installation
When the barrel is placed, a hole is drilled in it. A threaded fitting is inserted there. With a nut, the fitting tightly presses the rubber gaskets to the walls of the barrel. This achieves a high degree of tightness.
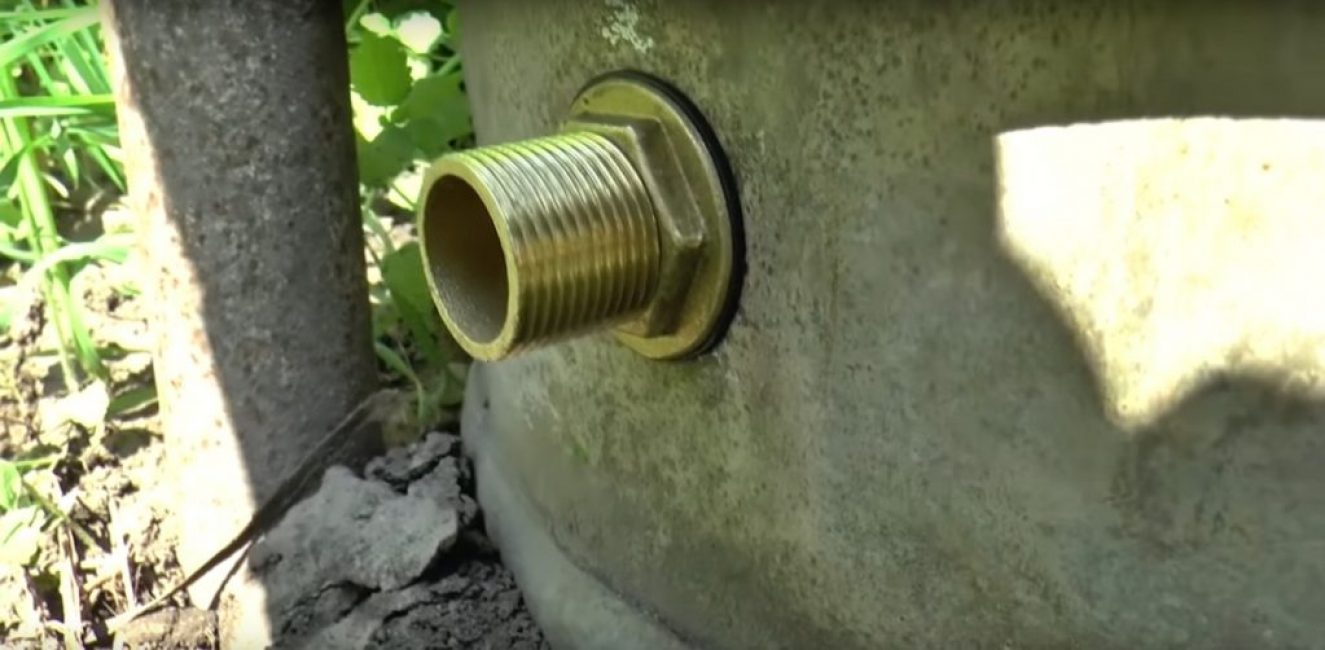
Threaded fitting
Water supply installation
The first to be installed on the fitting is a conventional ball valve.
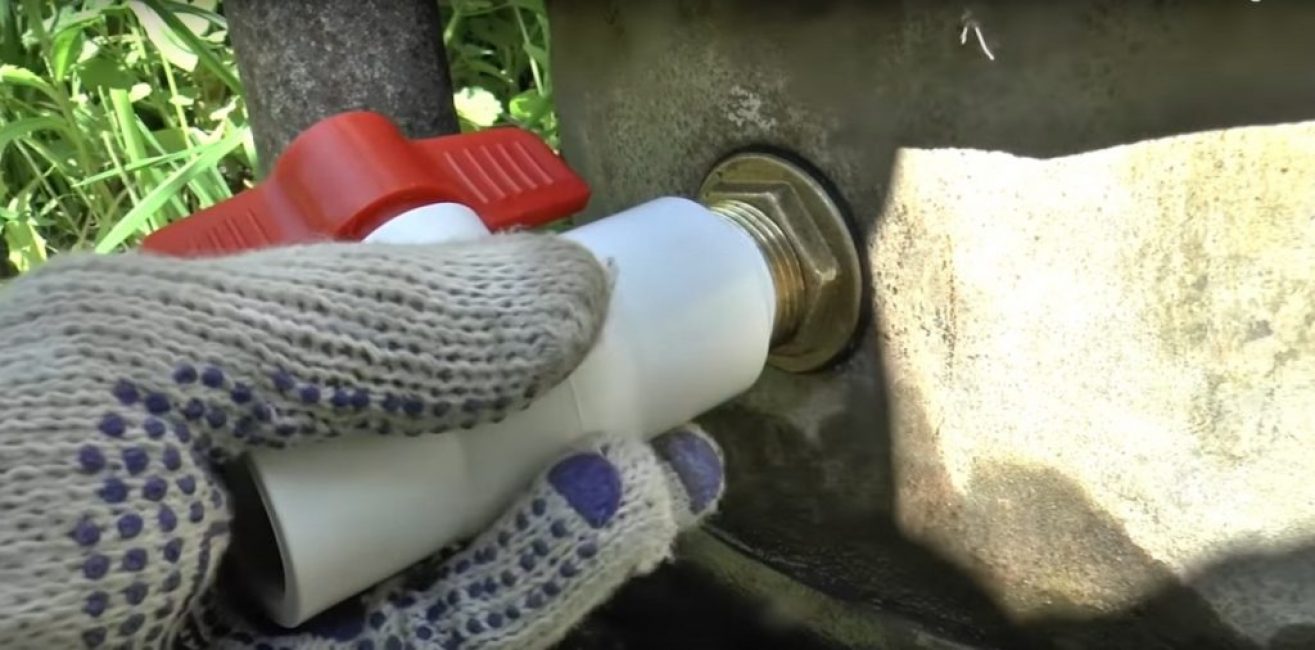
Ball valve installation
Then a special filter is attached. It is necessary to prevent dirt, solid particles from entering the water, which can clog the holes in the drip hose, thereby disrupting the system.
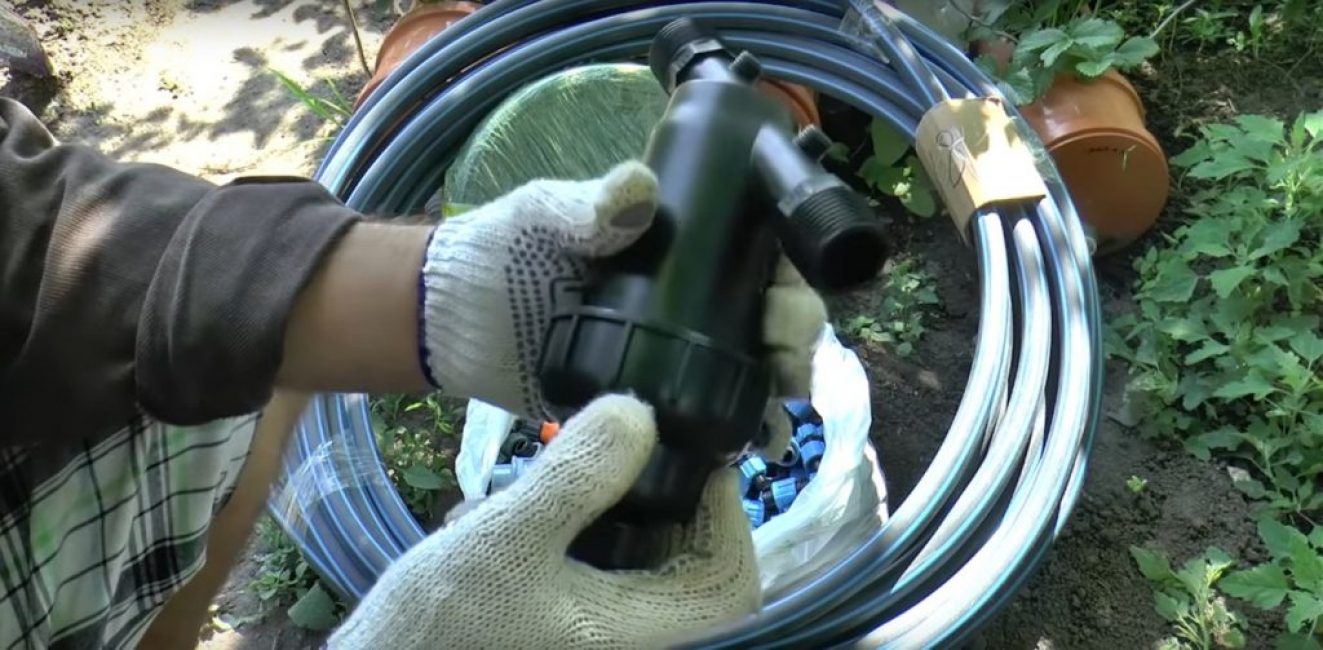
Special filter attachment
Next, a flexible hose is connected. It leads water from the installation site of the barrel to "main" a pipe that distributes water through drip tapes. For gasket "highways" suitable product made of PVC or HDPE.
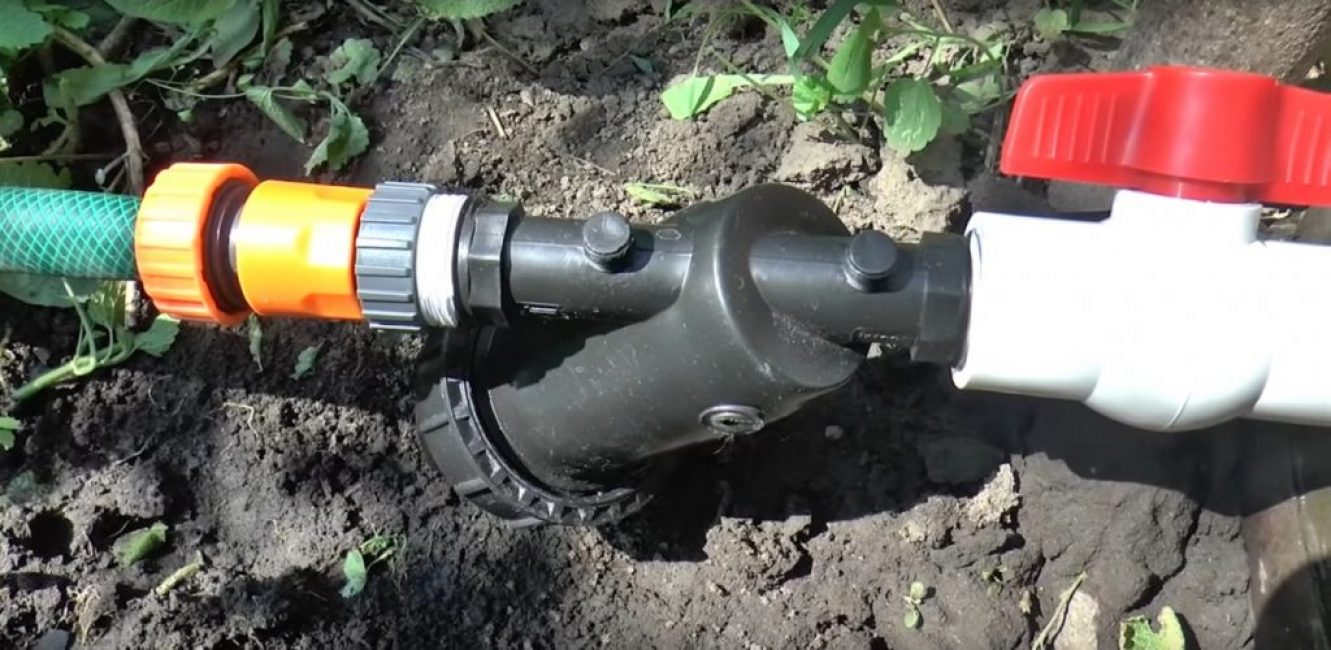
Flexible hose connection
A flexible hose can be attached to a rigid plastic pipe using a special adapter. It is also permissible to use a tee if wiring in two directions is planned.
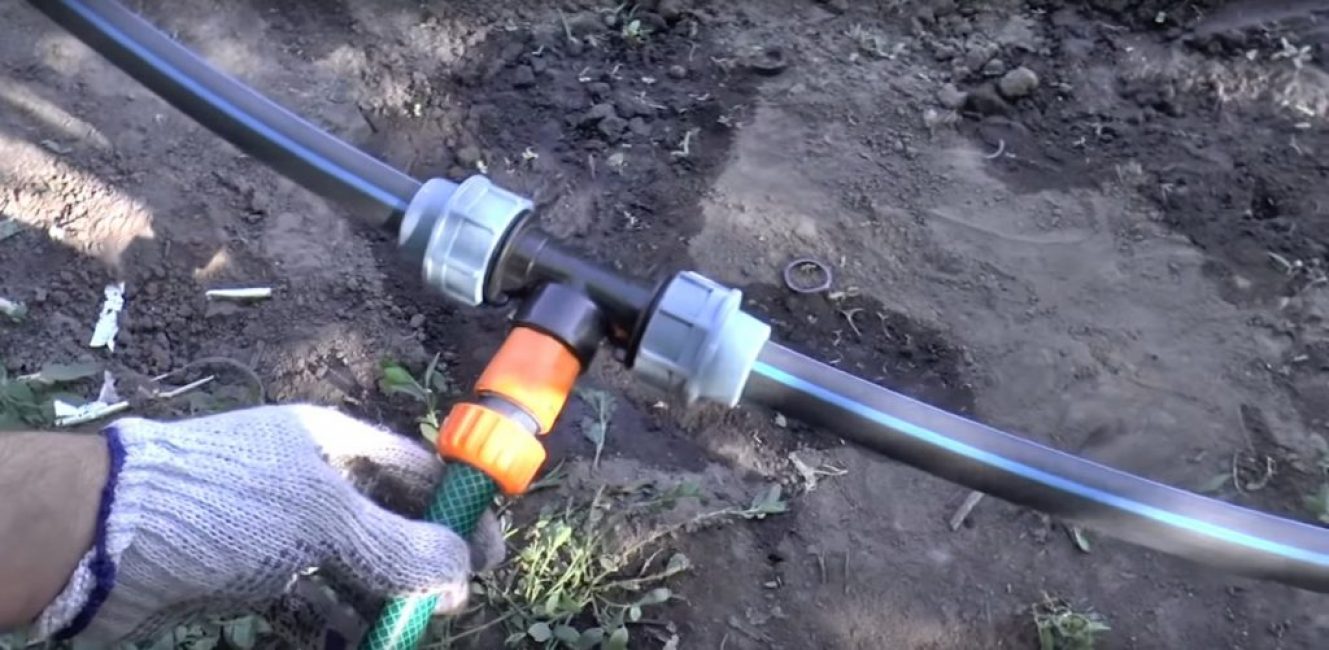
Flexible hose can be attached to rigid plastic pipe
Then "trunk" the pipe is laid along beds.
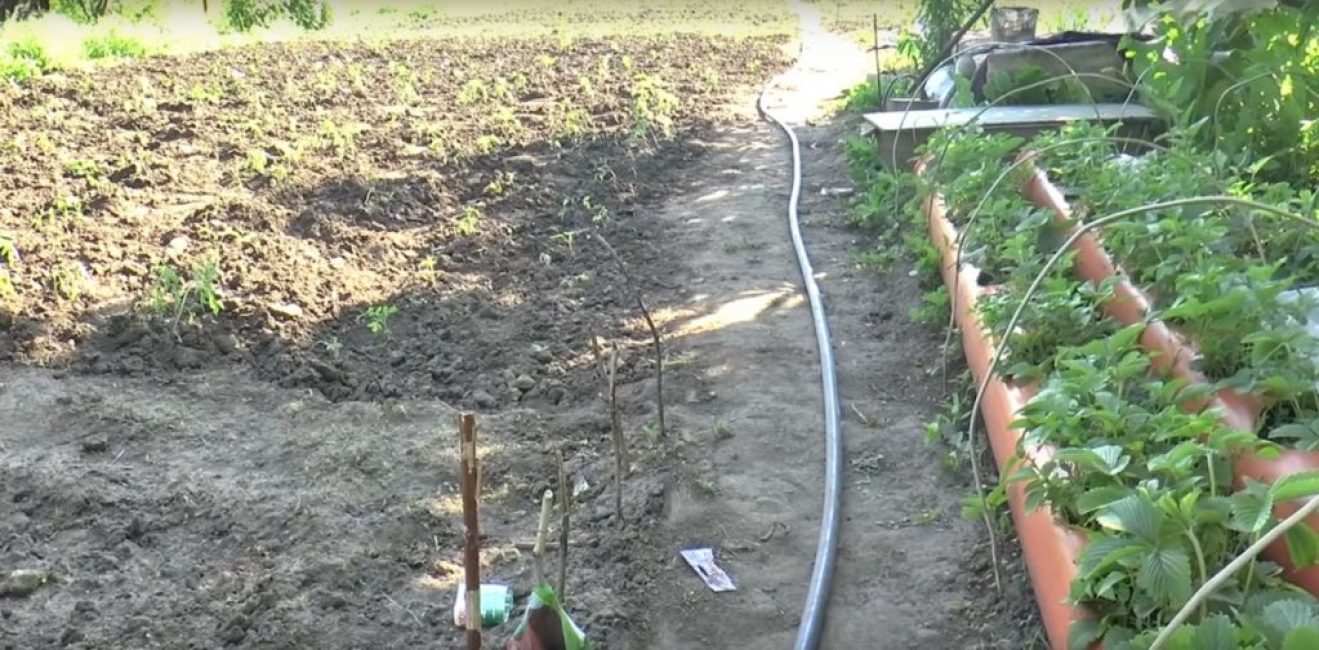
Laying the "main" pipe along the beds
Drip Tape Installation
Holes are drilled in a rigid pipe for installing fittings. The holes are placed opposite the plants in such a way that the next drip tape passes between the rows and can provide continuous watering.
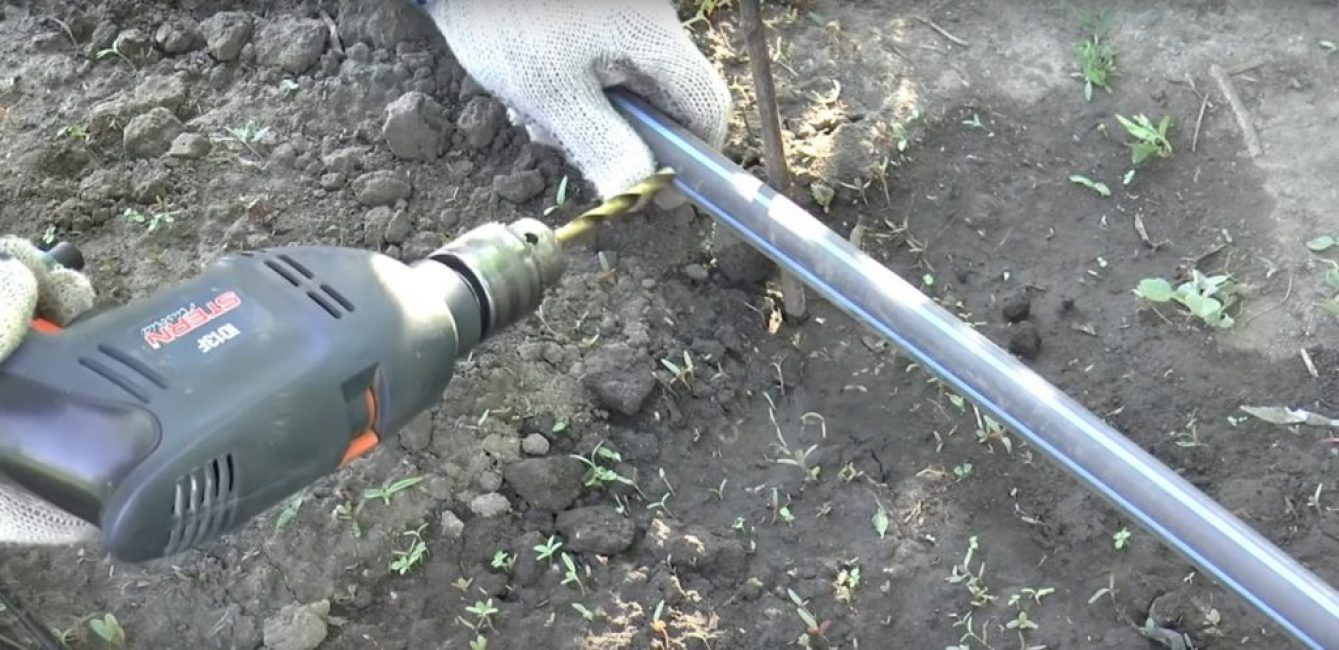
Holes for installing fittings
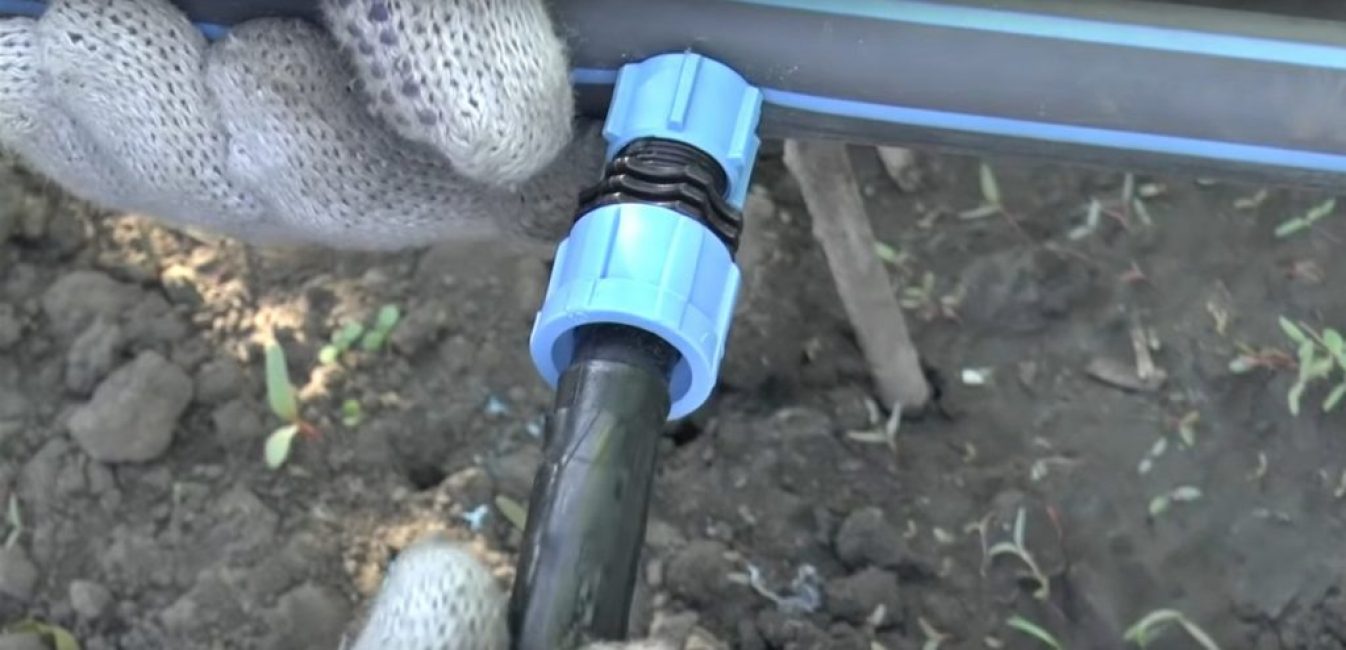
The thin end of the fitting is inserted into a rigid pipe until it clicks. Then the pipe must be pressed at the insertion point. This is done with a plastic nut on the fitting. Special tools for tightening are not needed - this operation is easy to carry out manually.
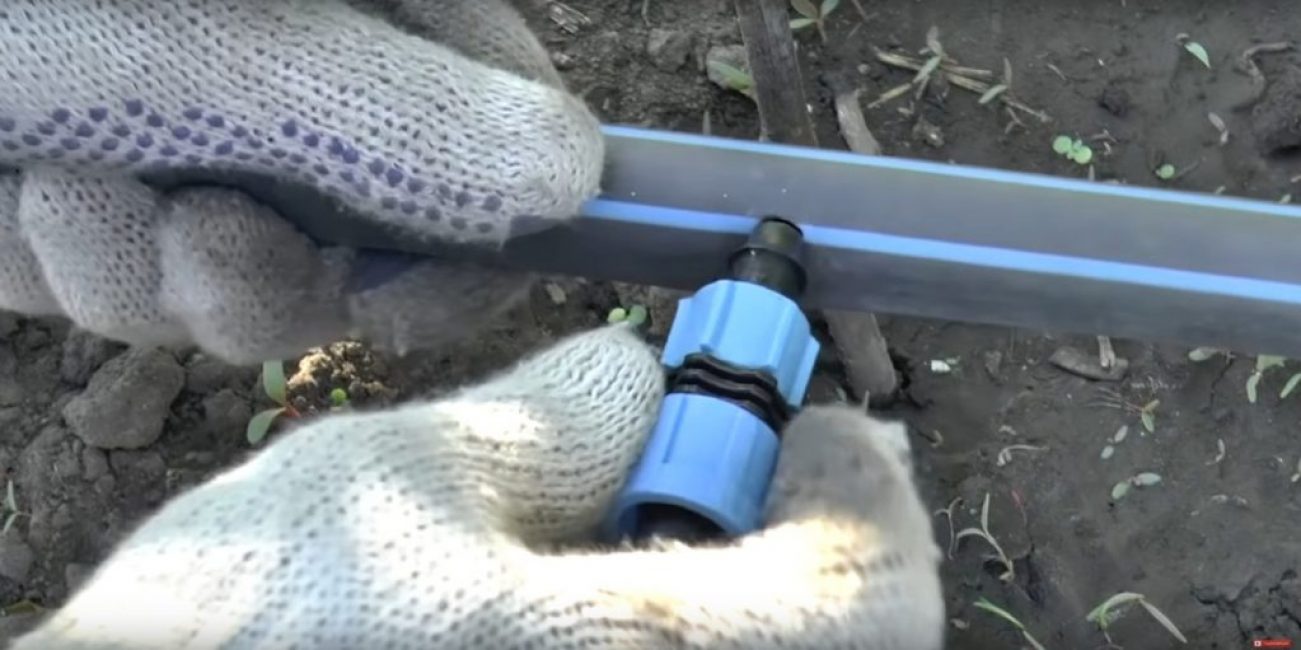
Fitting installation
Drip irrigation tapes are attached to the fittings. Their length should correspond to the width of the beds in order to provide water for all available plantings.
Attaching drip irrigation tapes
The flexible tube is mounted on the plastic and fixed on it by reverse rotation of the plastic nut. Then the tapes are stretched over the entire width of the beds.
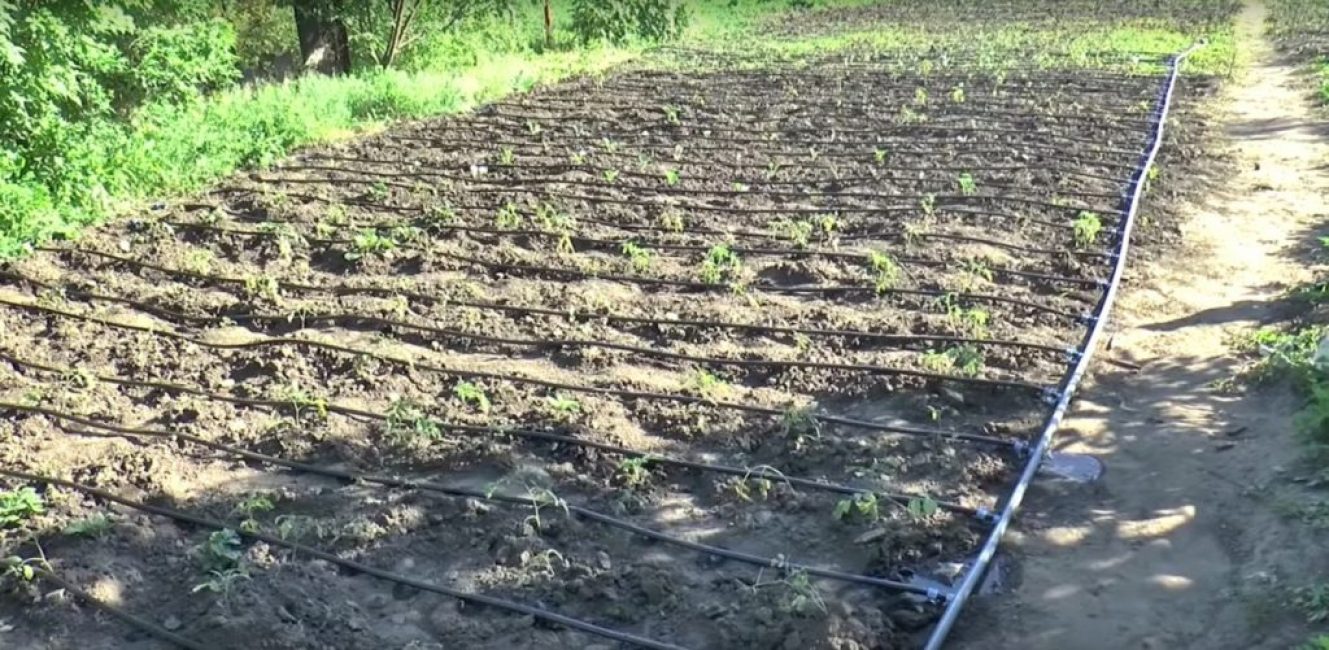
The system is ready to go
The system is ready to go. You can turn on the water and after a very short period of time the result will be visible - the soil near the watered plants will be moistened.
Such a drip irrigation system is assembled only from purchased materials. Components are not expensive, but if desired, individual elements can be replaced, made independently or improved.
 Read also: Lemon: description, care, growing from the stone at home, recipes for vitamin juice and lemonade (Photo & Video) + Reviews
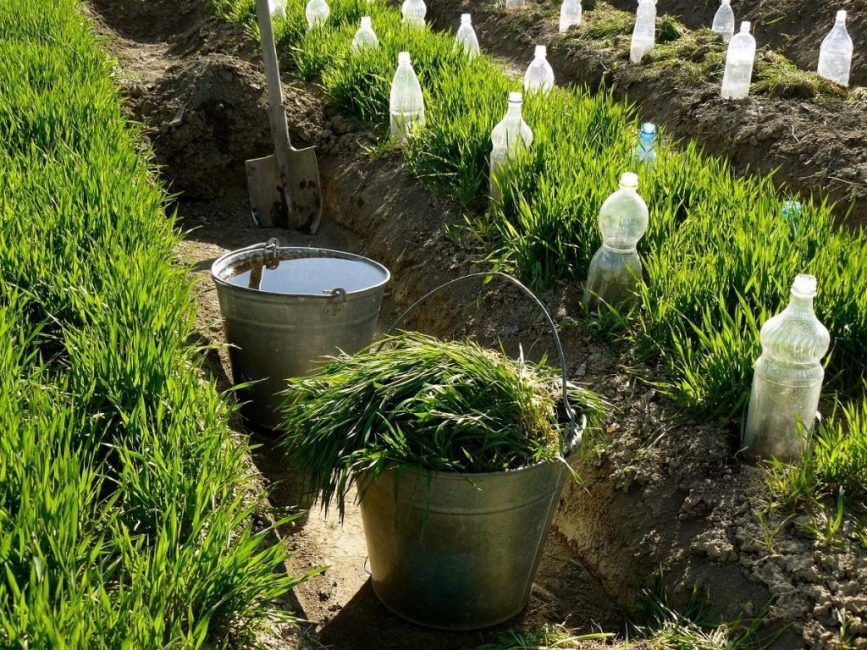
Plastic bottles - how to turn waste into a big crop?
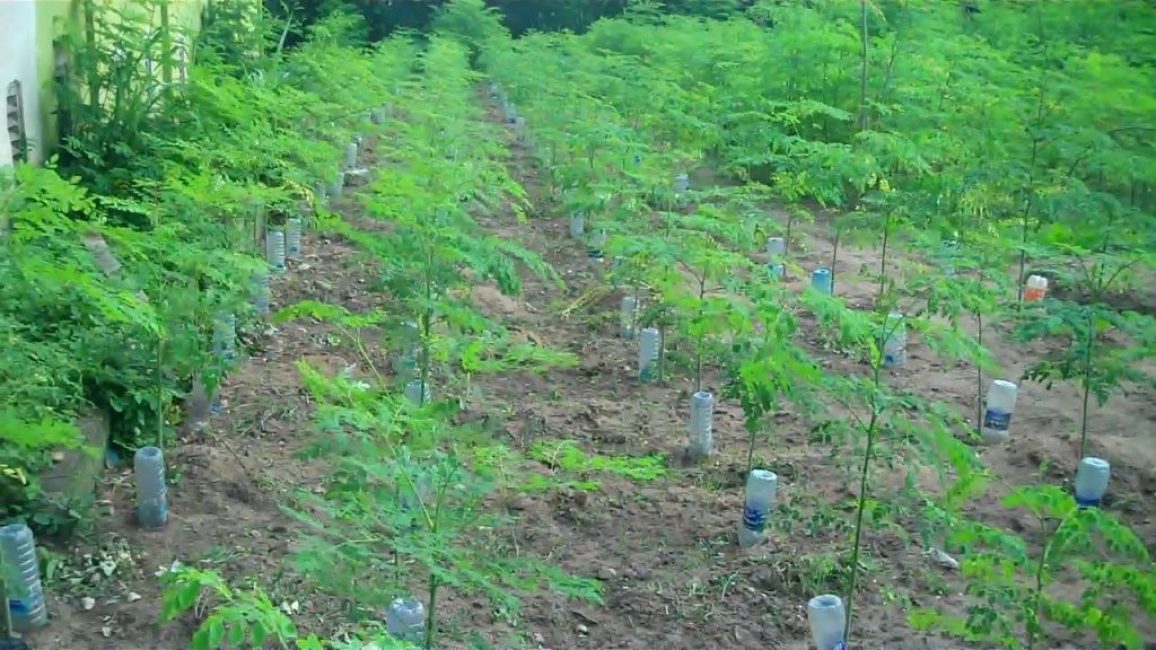
The simplest drip irrigation system
The simplest drip irrigation system that you can do yourself is from plastic bottles. Ease of manufacture and availability of materials does not affect the quality.
It will be a full-fledged design that has all the advantages of drip systems. With the help of bottles, it is possible to provide soil moisture for more than three days, depending on the volume of the bottle and the nature of the soil.
General information
Soil type is the main characteristic that affects the parameters of the system. When applying "bottle irrigation" on sandy structures, it is enough to make no more than two holes to get high-quality moisture.
Drip irrigation
The reason for this phenomenon is that the sand absorbs water well - it will quickly leave the container. In heavier soils, the number of holes is increased. By increasing the volume, you can increase the watering period, for example, a six-liter bottle is enough for about two weeks.
This method is best suited for small home gardens with relatively few plants. On an industrial scale, it is impractical to apply similar techniques. Due to the need to fill the container, the complexity of watering increases significantly.
Ways to organize the system
System Diagram
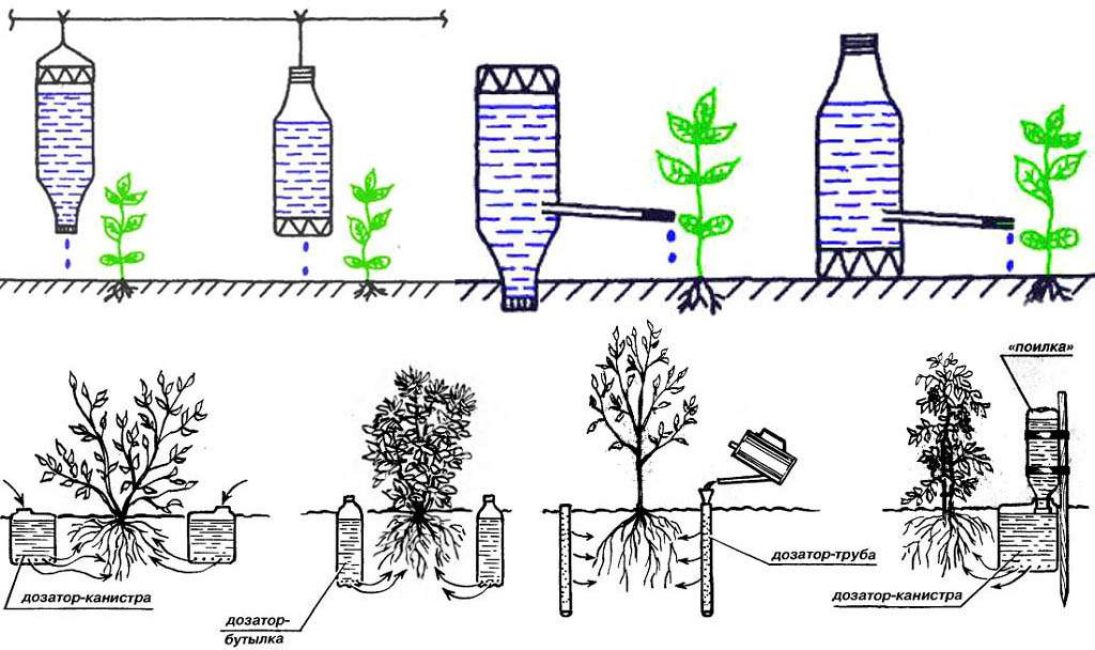
The two main approaches to low volume plastic container irrigation are subsurface irrigation and surface watering.
When subsoil watering, the bottle is dug upside down next to the plant. The depth of placement is 10-15 centimeters. Before that, holes are made over the entire surface, starting from the bottom, through which water will seep.
Before placing the container in the hole, it is wrapped with a cloth or gauze so that dirt and soil do not clog the holes and do not interfere with the movement of water.

drip irrigation system
You can place the bottle with the cap down. In this case, holes are punched at the top of the bottle. They do not reach the lid by two or three centimeters. The inverted bottle is placed in the hole, also wrapped with a cloth or gauze.
The bottom of the bottle that sticks out is cut off to gain access to the inside and add water as needed. Cover the bottle with a cut-off bottom so that debris does not get into the water.
You can simplify the manipulation of containers due to purchased nozzles. They are put on instead of a cover and allow water to seep into the soil.
These methods of organizing a drip irrigation system are very effective. At the same time, they are simple and allow you to reuse waste (plastic bottles) with benefit.
Thematic video: Drip irrigation. The best way from plastic bottles

Drip irrigation. The best way from plastic bottles
Drip irrigation: step-by-step installation of a do-it-yourself system from ready-made materials, plastic bottles (Photo & Video)
 Read also: Veranda attached to the house - expanding the living space: projects, tips on how to create your own hands (200 original photo ideas)
 Irrigation automation - necessary information
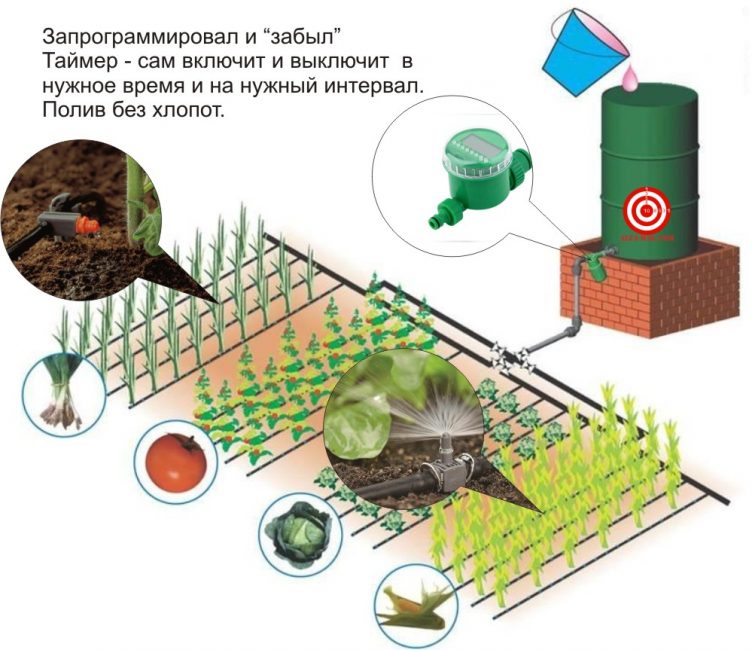
Automation with an electronic watering timer
Creating autonomous systems is a great way to simplify watering, reduce its labor intensity. And also protect yourself from trouble in cases where circumstances prevent you from watering a garden or vegetable garden on time, and the plants die because of this.
Modern electronics allows you to automate the water supply without much labor. To do this, it is enough to purchase a timer that will turn the pump on and off daily, at the same time.
This design will work perfectly without human intervention. And the owner does not have to spend time and effort daily on watering.
How to choose the right timers for drip irrigation
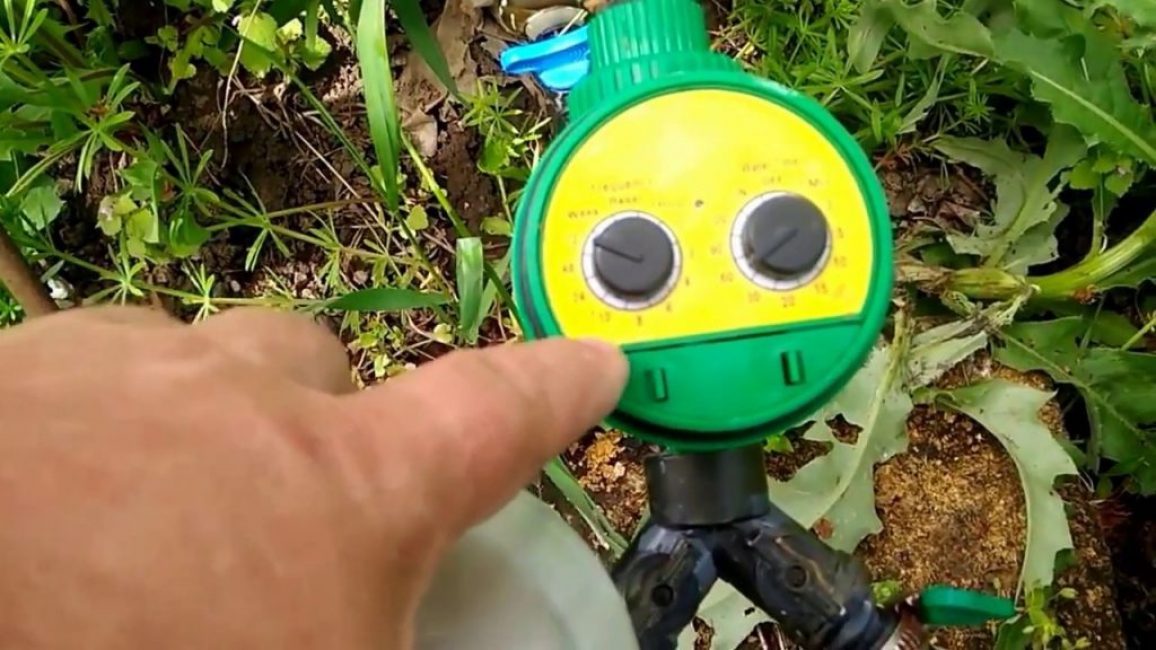
Automatic drip irrigation timer
The timer can be both electric and supply current to the pump, which in turn feeds the system with water. Or the timer can be water - it functions as a shut-off valve.
Lets out water according to the program. These devices, in turn, can be of electronic and mechanical type.
When choosing a timer, you should start from the number of crops that the irrigation system serves.. If these are one or two types of plants with the same watering regime, then you can take a simple, inexpensive mechanical timer or an electronic one, but with one program.
When different types of crops are irrigated, it makes sense to purchase a more expensive device that has up to 16 modes.
Thematic video: Do-it-yourself drip irrigation. Irrigation automation
Do-it-yourself drip irrigation. Irrigation automation
Drip irrigation: step-by-step installation of a do-it-yourself system from ready-made materials, plastic bottles (Photo & Video)
Thematic video: System installation
Do-it-yourself drip irrigation / Fast, reliable installation
Drip irrigation: step-by-step installation of a do-it-yourself system from ready-made materials, plastic bottles (Photo & Video)
The use of a drip system reduces labor costs, while improving the water supply to the garden, orchard. Therefore, drip irrigation is a great opportunity to save money while getting an excellent harvest.