
Tired of running around the yard with a watering can, dragging gallons of water every day? Organize drip irrigation in the greenhouse with your own hands. Such a system will not only help you save a lot of time and effort. A gradual drip of water will also be beneficial for plants.
Content:
- System Benefits
- Disadvantages of drip irrigation
- Operating principle
- Types of droppers
- Distance between droppers-nozzles
- Calculation of water volume and duration of watering
- Required Materials
- System assembly. Main stages of work
- Automated irrigation systems
- Subsurface irrigation
- Use of plastic bottles
- Drip irrigation of indoor plants
- Operating tips
 Read also: Projects of country houses for 6-10 acres: 120 photos, description and requirements | The most interesting ideas
System Benefits
The drip irrigation method was first used in Israel in the 1950s, in a similar way scientists tried to cope with water shortages. Later it was found that when it is supplied in small portions, not only water and labor resources are saved. Drip irrigation allows you to get earlier harvests.
During normal irrigation, water passes into the ground to a depth of 10 cm. Its gradual dripping allows the root system to be more saturated with moisture. Roots grow much faster, which means they extract more nutrients from the ground.
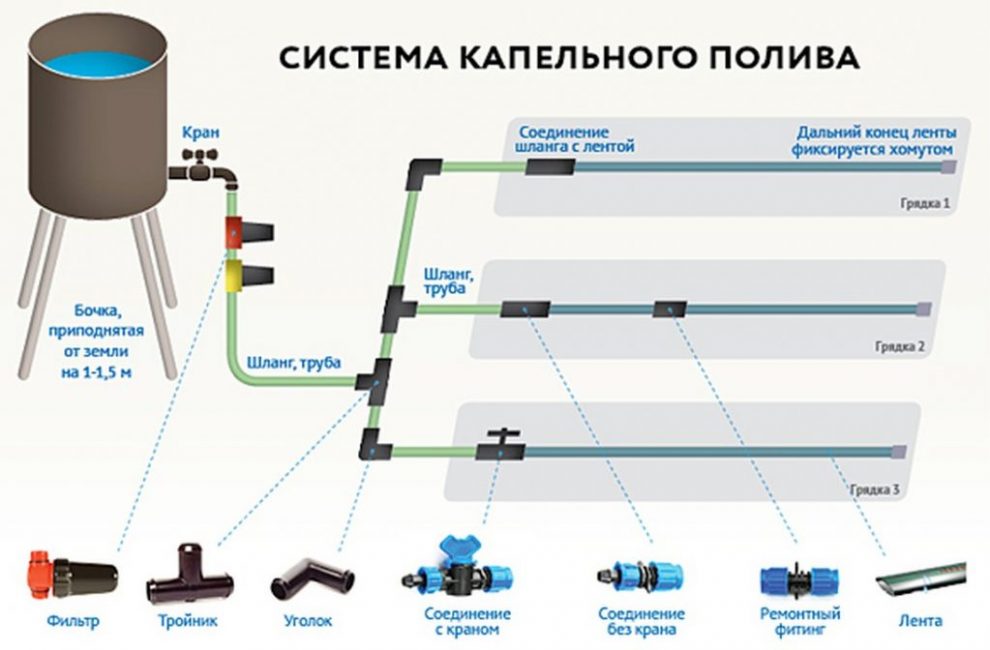
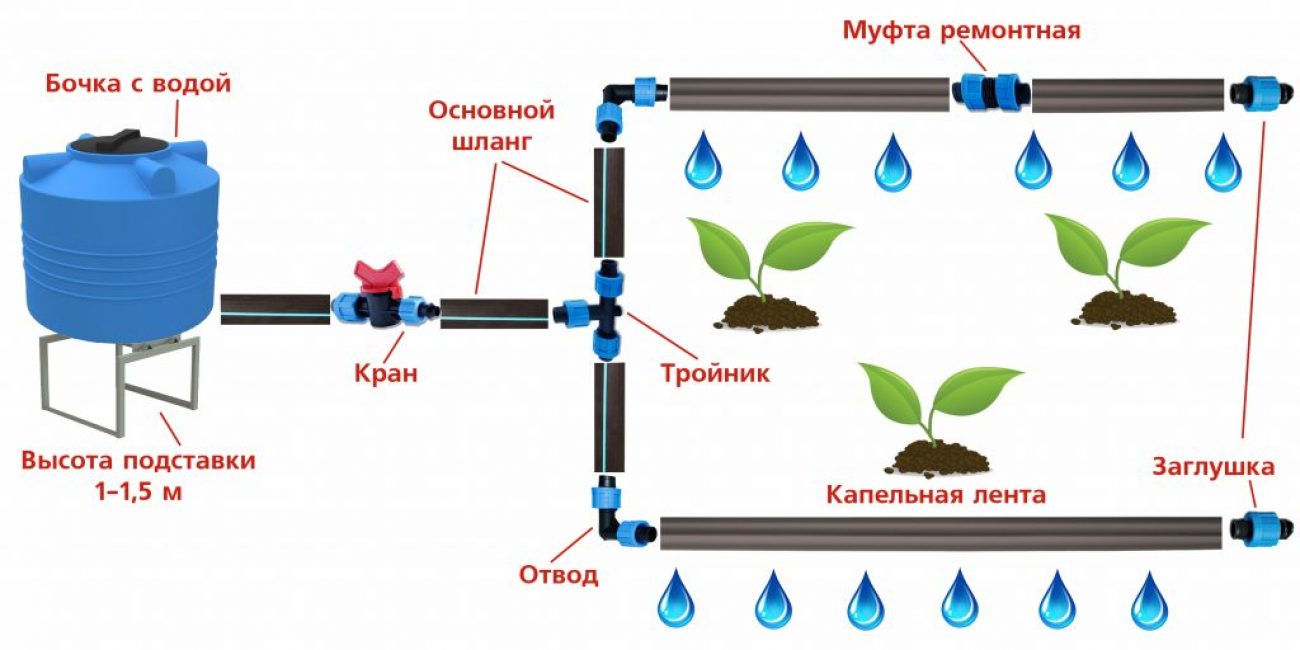
Scheme of installation of a drip irrigation system
Since the rest of the soil remains dry, the likelihood of waterlogging the soil is reduced. This has a positive effect on plant health - after all, most of such formidable diseases as powdery mildew, white, gray rot, black leg, bacterial spot develop precisely in conditions of waterlogging.
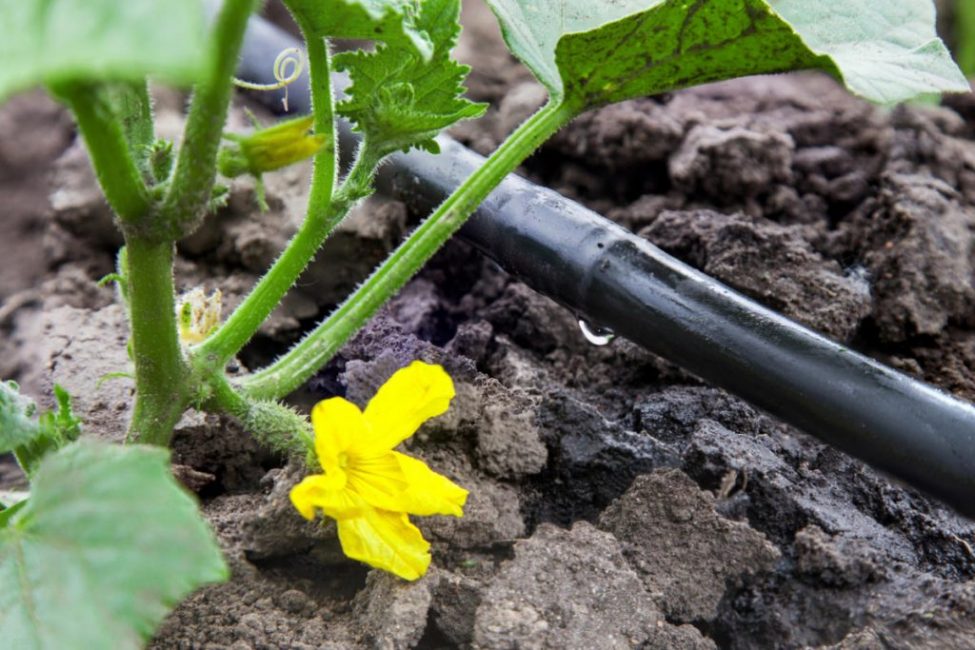
Since water is supplied under the root, the likelihood of plant burns, which usually occur when moisture gets on the leaves, is significantly reduced. This is due to the effect of the lens, which serve as small drops.
Plus, since only the root zone is irrigated, weeds that don't get enough moisture spread at a slower rate. Prevents a similar system and soil erosion.
Drip irrigation system for greenhouse is simple, but with its help it is possible to achieve an increase in plant yield by 30-40%. This method of irrigation allows you to accurately calculate the time and intensity of watering for each type of plant.
Initially, it was used only in greenhouse conditions. In the future, this method began to be used when growing plants in open ground.
 Read also: Growing seedlings at home: tomatoes, cucumbers, peppers, eggplants, cabbage, strawberries and even petunias. All the subtleties of this issue
 Disadvantages of drip irrigation
The main disadvantage of do-it-yourself drip irrigation systems for greenhouses is mandatory control. After all, with an incorrect calculation and an excess of moisture in the area, in addition to overspending water, you will simply destroy the plants. You will need to regularly check the filling of the barrel - it will need to be constantly topped up.
The simplest irrigation system
The disadvantages of drip irrigation include the need for periodic cleaning of holes - due to their small diameter, they often become clogged. However, this is not difficult to do - just flush or purge the system.
It is not recommended to increase the size of the holes, since the water will immediately pour out at the beginning of the hose, and simply will not reach the very last nozzle holes.
To protect the system from contamination at the inlet (that is, at the beginning of the hose located in the barrel), filter. You can even use an ordinary piece of foam rubber as it.
It will become much easier to clean the system - it will be enough to pull out and rinse the foam rubber. It is also necessary to protect the barrel itself from the ingress of debris and insects, as well as the receiver-distributor - they will need to be covered with lids.
 Read also: Veranda attached to the house - expanding the living space: projects, tips on how to create your own hands (200 original photo ideas)
Operating principle
Let's describe in detail the device of drip irrigation in home greenhouse. Water supply with this method is carried out using dropper dispensers (nozzles). Its simplest version is a hose with 3-8 mm holes made in it and a main spout plugged with a cork.
To ensure pressure, a tank filled with water with a hose lowered into it is raised to a certain height. Depending on the required pressure, it can be from 1 to 10 m. More complex systems are automated, but we will talk about this below.
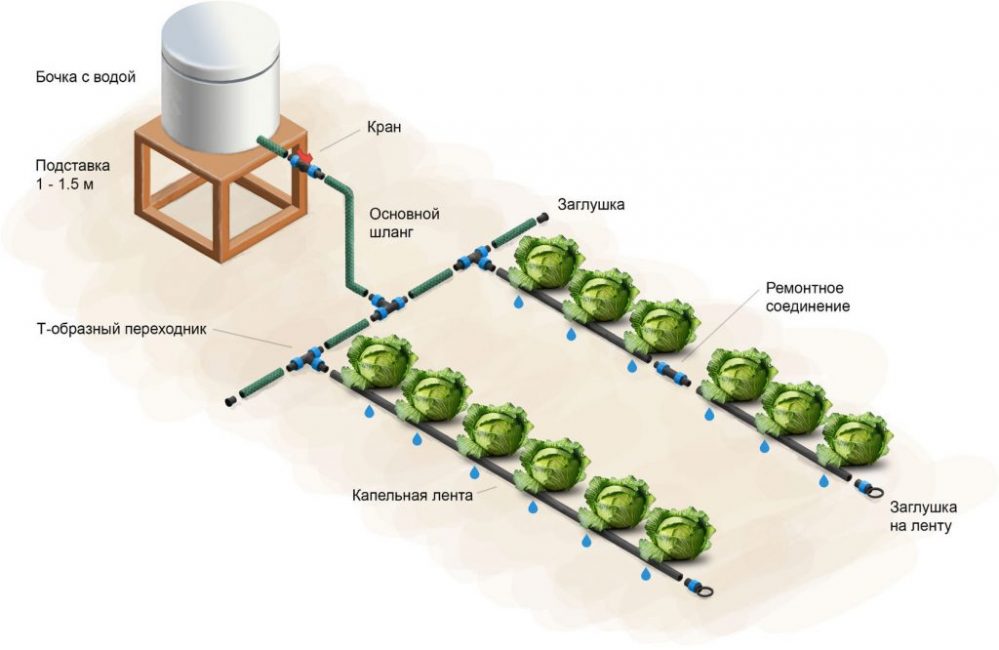
Drip irrigation scheme
Drip irrigation should be done only under the roots of plants. When water is supplied to the aisle, moisture for the roots will not be enough, and crops will develop worse. At the same time, the earth around will be compacted, loosening will be needed. Plus, the damp earth under the rays of the sun will overheat, which will adversely affect growth.
The source of water does not have to be a tap or a barrel. They can serve as a well, a well or a pond. To do this, you will need to connect a pump to the system.
But in any of the cases, the mandatory installation of a filter is required - otherwise the pipeline will quickly become clogged. When taking water from an open source (reservoir), you must first install filter coarse cleaning, and only then fine. In other cases, a single fine filter is sufficient.
But still, for watering a greenhouse or garden, it is better to heat the water in the sun before watering. For this, containers (barrels) of a suitable size are used. When it is raised to a certain height, water will flow into the system by gravity.
Pump needed only for water intake in the absence of a water supply system or its weak pressure.
 Read also: Making a greenhouse with your own hands from a profile pipe and polycarbonate: a complete description of the process, drawings with dimensions, watering and heating (Photo & Video)
 Types of droppers
Droppers are devices with small tubes at the end that cut into each of the holes in the hose or pipe to adjust the volume of water supplied.
Depending on the type of crops grown, the size of the plot and the material possibilities, you can choose one of the types of drip systems.
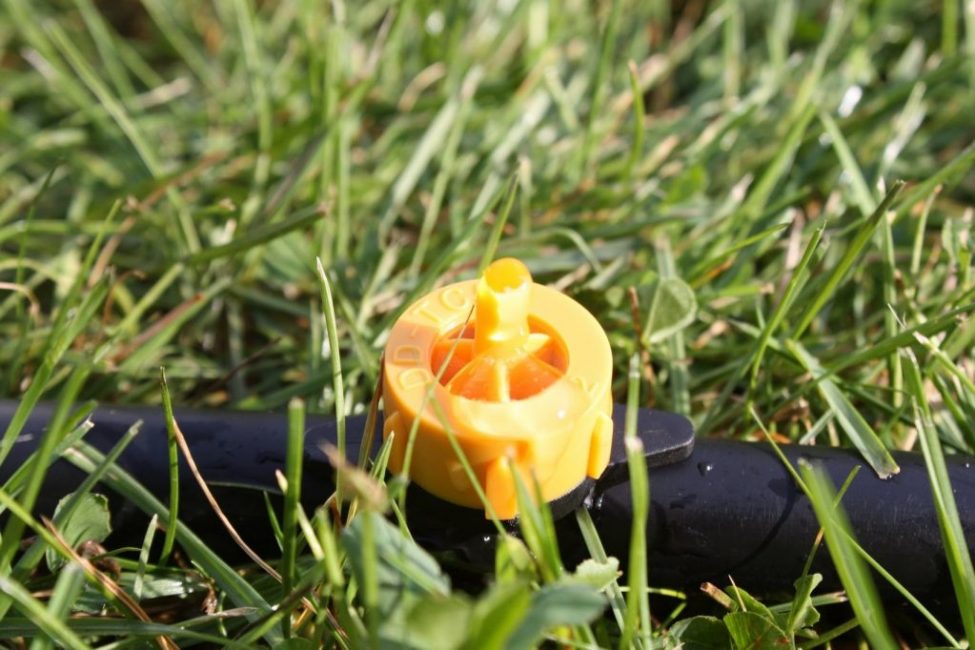
Compensated dripper
They are divided into:
- uncompensated and compensated: in the first case, the water supply to the end of the bed will be lower than at its beginning; compensated droppers, equipped with a membrane and a valve, are able to dispense water in a dosed manner even at different pressure forces; such devices are ideal for areas with height differences
- devices with a fixed volume of liquid supply (the manufacturer indicates it in the instructions): from 1 l / h
- with manual setting water flow
- equipped with an anti-drainage (compensated) system: do not allow to completely remove water from the system even when its supply is turned off; the pressure in them never drops to zero, so when you turn it on again, the time for air displacement is not required
- with dispensers like "spider": more expensive devices with drip irrigation for several plants at once
 Read also: How to make a beautiful and inexpensive fence in the country with your own hands: wood, metal and polycarbonate | (70+ Photos & Videos) + Reviews
Distance between droppers-nozzles
Do-it-yourself water supply in drip irrigation for a greenhouse must be carefully adjusted. With a low pressure, only those plants that are located at the beginning of the garden will be provided with water.
Excess water is also undesirable - landings will suffer.
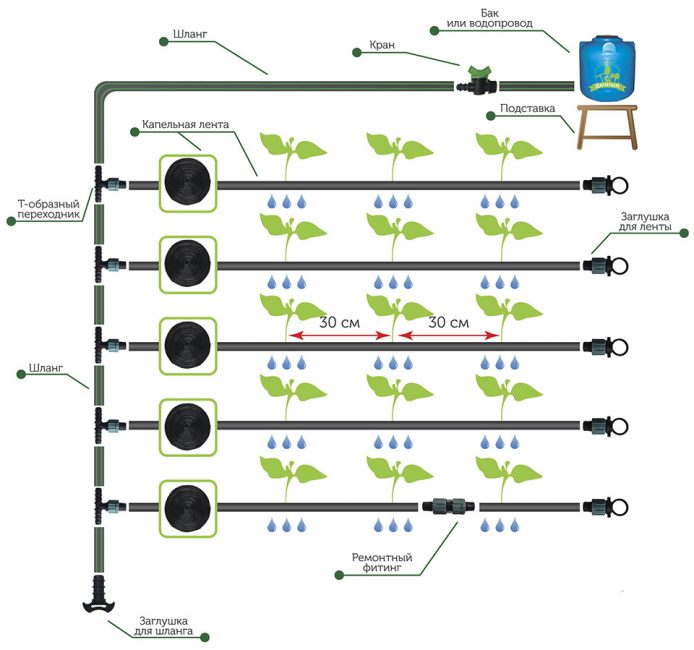
For most crops, the distance between the droppers is 30 cm
Types of droppers and dispensers and the distance between them should be selected depending on the type of irrigated plants.
After all, there are no universal devices for irrigation:
- dispensers-"spiders" with a large distance between the dispensers; they are best used for irrigation of perennial greenhouse plants; do not use for open ground and watering seedlings, in this case a smaller distance between droppers is required; conduits for "spiders" are made only suspended
- for watering most crops, the distance between dispensers should be 30 cm
- droppers with a step of 20 cm are used for watering root crops - carrots, onions, etc.
- for melons and gourds, the distance between droppers is 1 m
 Read also: How to make flower pots with your own hands: outdoor, indoor, hanging | Step by Step Charts (120+ Original Photo Ideas & Videos)
 Calculation of water volume and duration of watering
To make homemade drip irrigation, you should first draw up a plan indicating the length beds and the arrangement of plants on it. Next, a drip irrigation scheme is drawn, which indicates the location of each of the pipelines and a container for collecting water (barrels).
A detailed system plan is needed not only to determine the total length of the pipes, but the number of droppers, as well as adapters, tees and other details.
Next, you need to calculate the volume of water consumed, that is, the size of the required container (barrel). For example, for laying a pipeline 10 m long with a distance between droppers (nozzles) of 30 cm, 34 pieces will be needed. If each of them "gives out" 5 l / h, then 34 droppers will pass through themselves 170 l per hour.
If the length of the system is longer, then too much capacity will be needed. Therefore, it is better to split the drip system into two or use a constant source of water.
Drip irrigation can be used for any type of planting. Only the scale and type of equipment change. In addition to greenhouse plants, it can be used to water vegetables and fruits in the open field, as well as flowers, trees and bushes.
Water consumption during drip irrigation for such moisture-loving plants as cucumbers is 2 liters per bush, that is, several times less than the usual norm. Drip irrigation tomatoes in a greenhouse with already formed fruits, it is produced 1 time in 4 days.
Each plant will need 1.5 liters of water. cabbage and potatoes you need 2.5 liters per day.
Thus, when water is supplied from a dropper 3 l / h for irrigation cucumbers it will take a little less than an hour, tomatoes about 30 minutes, cabbage and early potatoes about an hour.
 Read also: How to make a tapestry with your own hands? Original ideas and drawings (110+ Photos & Videos) + Reviews
 Required Materials
To equip a permanent irrigation system that will be operated from year to year, it is better to purchase not hoses, but more durable PVC pipes. Since moisture should enter the system slowly, the diameter of the tubes is selected to be minimal - up to 10-16 mm.
It is better not to use transparent pipes or tapes - algae will grow inside them. Metal pipes will not last long - rust will quickly clog the dropper nozzles.

drip tape
Manufacturers also offer ready-made irrigation systems in the form of polyethylene drip tapes with built-in drippers. With the help of them it is easier to dose watering - micropores inside resemble a labyrinth in which the direction of water flow is controlled.
The wall thickness of the tapes can vary from 0.127 to 0.381 mm. However, such systems serve no more than one season. In the spring, you will need to purchase new tapes.
- a pump that comes with a filter (such systems are called masterblocks) for supplying water at a certain pressure (up to 1.5 bar)
- droppers (we described their device and types above)
- racks for strengthening droppers-dispensers at the roots of plants
- cocks (switches) for adjusting the flow force and shutting off the system in separate modules
- fum-tape or tow for sealing joints
- plastic connectors
- adapters
- tees
- plugs: they are located at the ends of pipelines
When taking water from a well, you will also need a filter. You can buy a regular mesh or disk. To install automated stations, you will also need a control unit (timer) and a battery.
 Read also: How to make a children's house with your own hands: from wood and other materials. Dimensional drawings | (80 Photo Ideas & Videos)
 System assembly. Main stages of work
Assembly diagram
Doing drip irrigation in a greenhouse with your own hands is not difficult:
 Read also: How to make a greenhouse with your own hands: for seedlings, cucumbers, tomatoes, peppers and other plants. From polycarbonate, window frames, plastic pipes (75 Photos & Videos) + Reviews
 Automated irrigation systems
When installing the controller (timer), the system is fully automated. That is, it will not be controlled by a person by turning the crane, but by special equipment. At a given time, it will turn on and off the water.
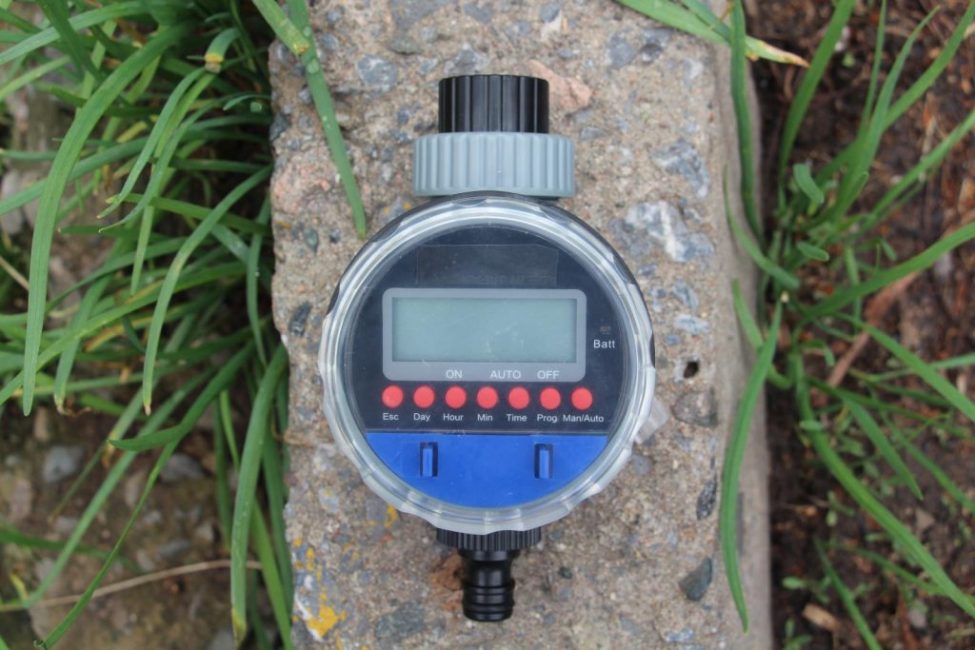
Automatic watering timer
At large enterprises, systems with a high degree of automation are installed - such devices are able to control soil moisture, ambient temperature and even its humidity.
For an automatic watering device in private ownership or in a country house, it is enough to purchase a simple device that allows you to set up watering at a given period of time. That is, at a certain time, the tap will open and water will be supplied to the system. After its expiration, watering stops.
Installing such equipment is easy. The timer, equipped with fittings on both sides, is inserted into any place in the pipeline. It can also be connected to a pump to control the intake of water.
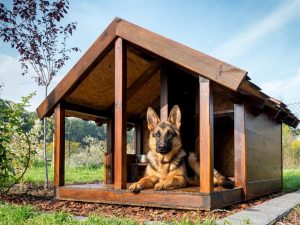 Read also: How to make a booth for a dog with your own hands: building a home in the yard and in the apartment. Drawings, dimensions and original ideas (55+ Photos & Videos) + Reviews
 Subsurface irrigation
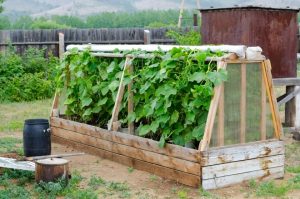
This type of irrigation differs from conventional drip irrigation only in the depth of the water supply. A similar method has been known since ancient times - pottery pipes were used for this. Today it is used both on large farmlands and small summer cottages.
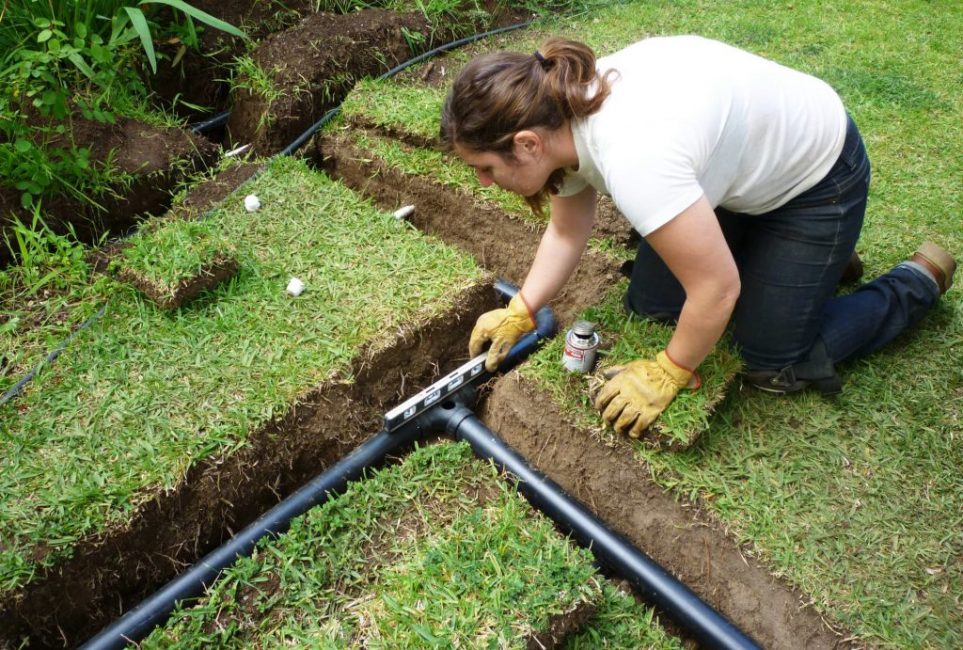
Installation of an underground irrigation system
Water is supplied to the roots of the plant through tubes equipped with holes. Since the top layer is practically not moistened, a crust does not form on it, and the soil does not require constant loosening.
Another advantage of the method is the minimization of the loss of moisture used in the evaporation process. Subsoil irrigation allows you to maintain a more favorable air and thermal microclimate on beds.
Use of plastic bottles
For watering small areas, you can make a simple device consisting of a plastic bottle with a small piece of tube inserted into it, hanging upside down. As it is more convenient to use an empty rod from a ballpoint pen.
In addition to the main hole for the tube, you will need a second one through which air will escape. If the tube is too wide, another, thinner tube or piece of insulation from the wire, called a jet, is inserted into the main tube to reduce the rate of water supply.
You can do it even easier. In a plastic bottle, pierce 8-12 holes in the bottom. Their number depends on the type of soil. On light sandy holes, a minimum number is made.
Moisture seeps into the clay soil more slowly, so the number of holes is increased. However, their size must be minimal, otherwise the water will pour out of the bottles very quickly. It is better to do this with a regular needle.
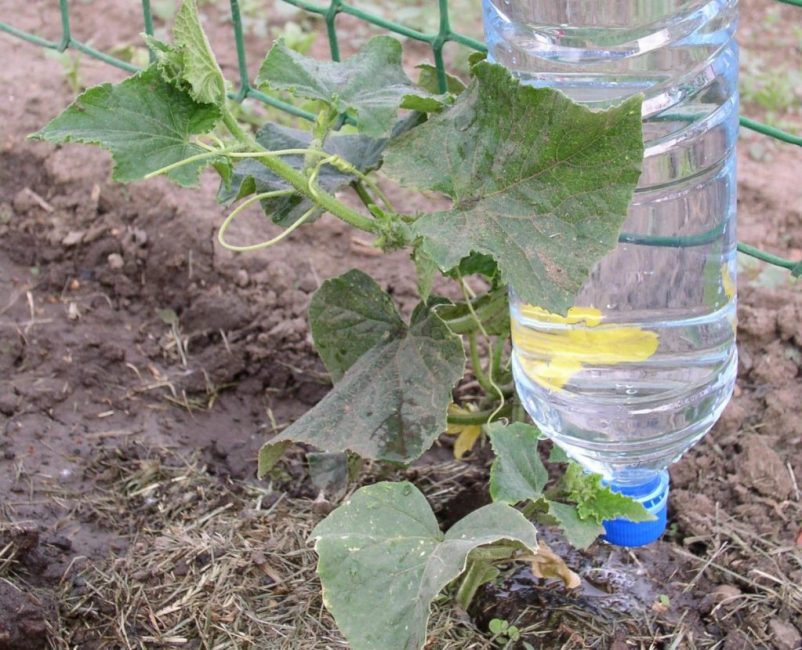
The bottle is filled with water, closed with a lid and buried in the ground, leaving the neck unfilled. As the container empties, you will add water through it. Since it can shrink as the water flows out of the bottle, it is better to make a small hole in the cap as well.
With a bottle buried in the ground, the plants will be supplied with water using underground irrigation. The top layer of soil will not be wetted, so the usual crust on it, which needs to be constantly loosened, will not form.
When dripping tomatoes in a greenhouse using this method, one liter bottle is enough for 5 days. A similar volume will be enough to water one bush. A 5 liter container will provide them with water for 10 days.
Clay soil can quickly clog small holes. To prevent this, use regular nylon stockings. They are pulled over corks or parts of bottles with holes made in them.
Another method of protection against clogging of holes is often used - drainage. Before burying the bottle in the ground, to do this, throw some hay or a piece of burlap on the bottom of the pit.
Of course, it will be difficult to use such systems for irrigating a large number of plants. But in some cases, for summer residents who rarely appear on the site, this can be a lifesaver.
Drip irrigation of indoor plants
Such a device will come in handy during your vacation. There are many ready-made drip irrigation systems on sale in the form of flasks that look like enemas, capillary trays, wicks, smart pots, etc.
Manufacturers also offer to use hydrogel for long trips from home - a polymer that can retain moisture, and then give it to plants for a certain time.
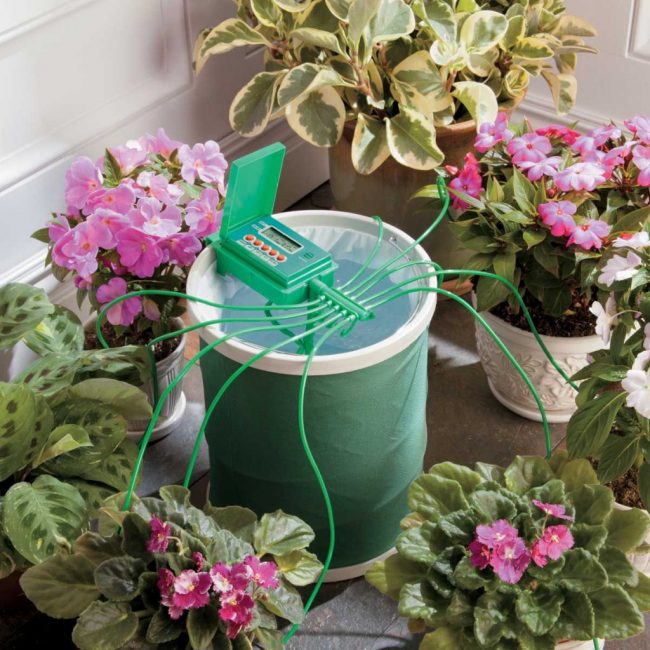
Automatic watering can for indoor plants
If you decide to make drip irrigation for indoor plants, before you go on vacation, be sure to check the performance of the system. If water is poured out of it too quickly, during the first couple of days, in the remaining time the plants will become without water and simply die.
To assemble a drip irrigation system, you will need a large plastic bottle and an old medical dropper or one or more thin food grade silicone tubes. They can be found in medical supply stores.
In hardware stores selling moonshine stills, you can buy tubes of a slightly larger diameter. The outlet end of such tubes can be closed with a plug, and several holes for irrigation can be made in the tube itself.
Assembling a wick irrigation system is even easier. To do this, a large container of water is placed next to the flower pot. One end of the wick is lowered into the container, the other is buried in the ground.
Please note that this method can only be used with loose soil. Water will not seep into dense earth. You should not use wick watering for tall plants with large roots - there will not be enough moisture for them.
Operating tips
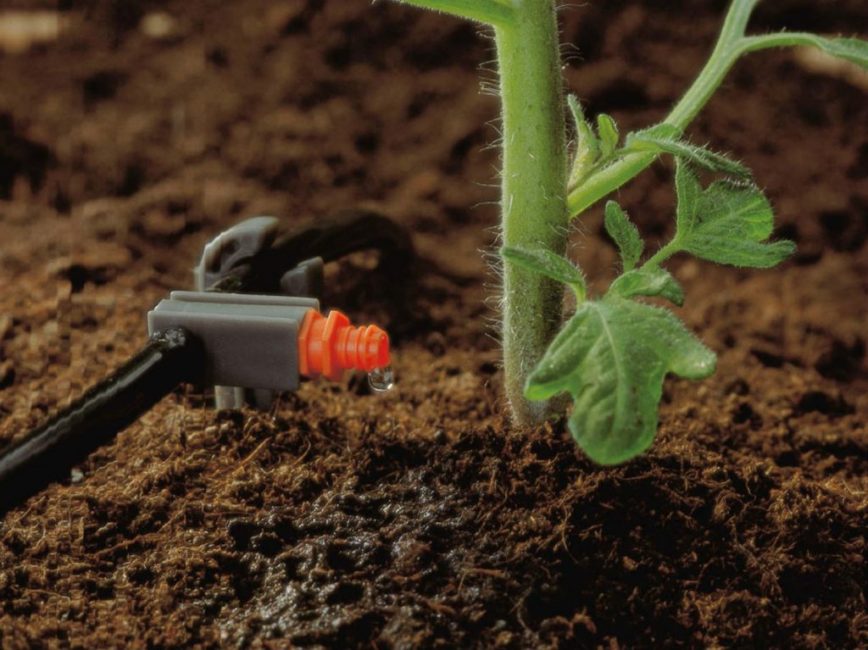
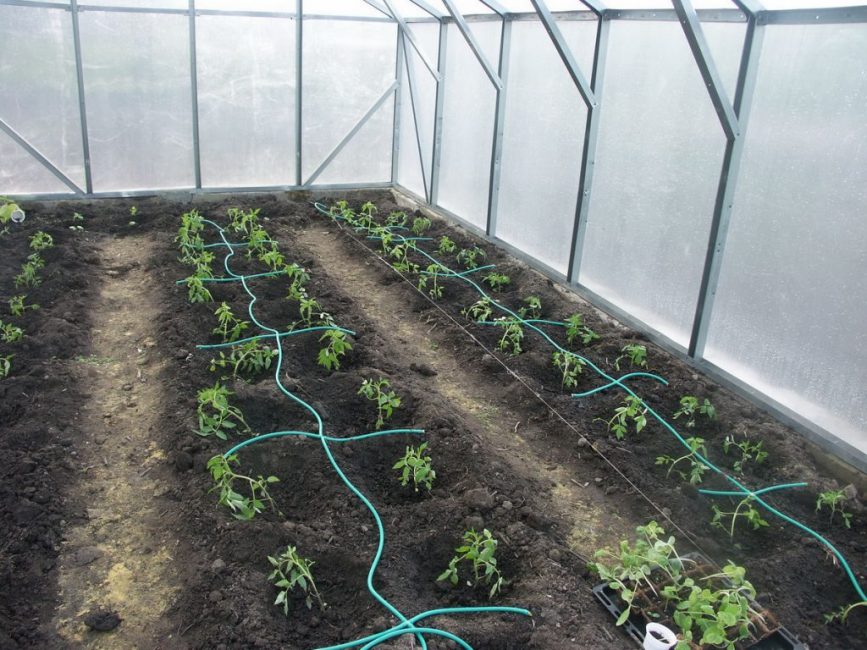
Drip irrigation of tomatoes
Despite the simplicity of design, the drip irrigation system requires constant maintenance.
To extend its life, observe the following rules:

Simple watering in a greenhouse for 525 rubles with your own hands
Do-it-yourself drip irrigation device in a greenhouse: from a barrel, a plastic bottle, and even an automatic system. For tomatoes and other crops (Photo & Video) + Reviews


