
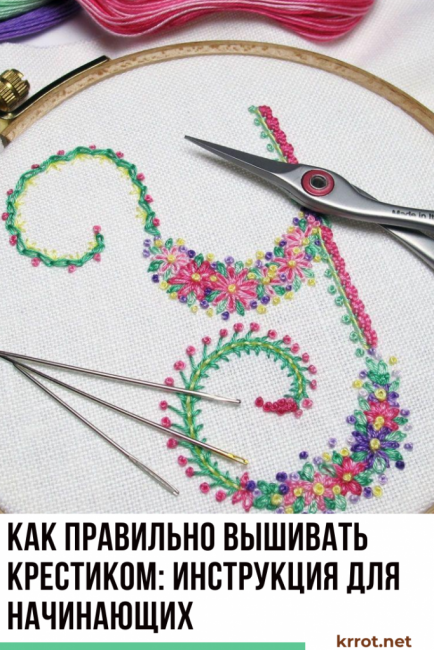
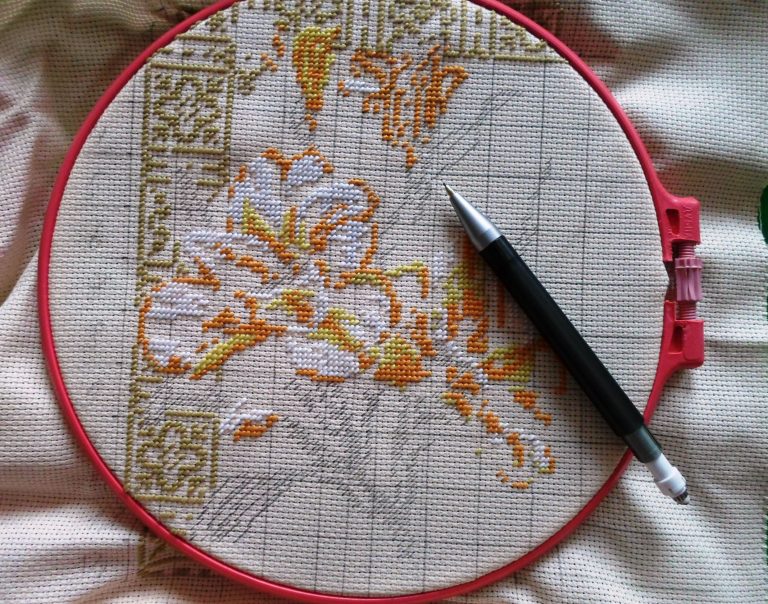
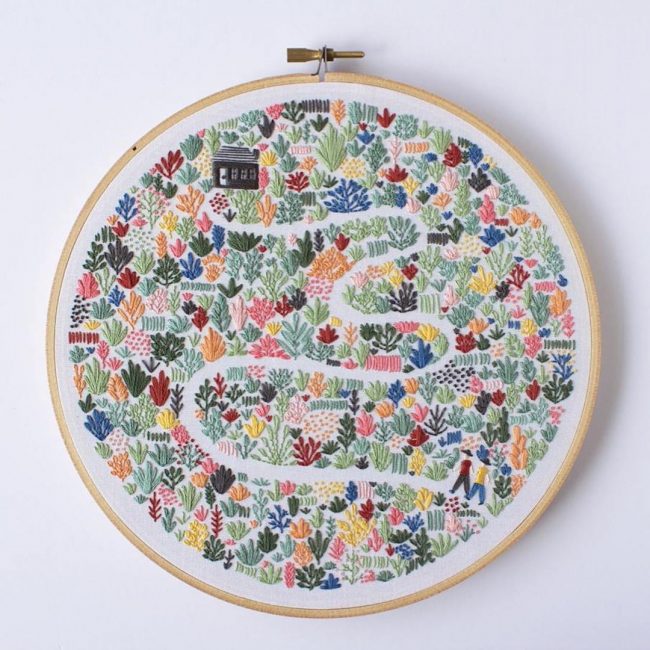
Today we will tell you how to cross stitch, this is an introductory lesson for beginners, how to select materials and tools, where to find patterns and ideas, and also share the secrets of experienced embroiderers. Cross stitch is back in trend today. Dresses or blouses, bed linen, towels, curtains, tablecloths and even brooches are decorated with such products.
Content:
- Stitch types
- Embroidery methods
- Reading diagrams
- Required Materials
- Memo for beginners
- Cross-stitch. Main stages
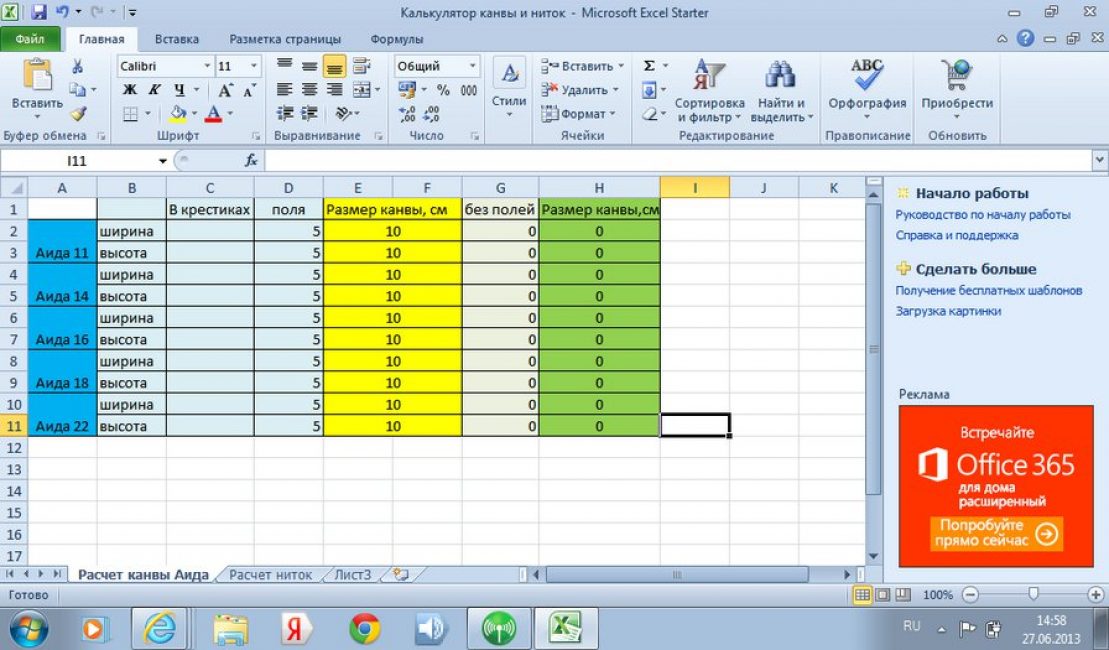
- How to calculate canvas size?
- How to calculate thread consumption?
- Smooth color transitions
- Working moments
- Embroidery without canvas
- How to make a diagram from a photo
- Insert embroidery into a frame
![[Instruction] How to pinch tomatoes in a greenhouse and open field: a step-by-step explanation of the correctness of the procedure (Photo & Video) + Reviews](https://iherb.bedbugus.biz/wp-content/uploads/2019/05/kak-pravilno-pasynkovat-pomidory-300x199.jpg) Read also: [Instruction] How to pinch tomatoes in a greenhouse and open field: a step-by-step explanation of the correctness of the procedure (Photo & Video) + Reviews
Read also: [Instruction] How to pinch tomatoes in a greenhouse and open field: a step-by-step explanation of the correctness of the procedure (Photo & Video) + Reviews
Stitch types
Despite the fact that on the finished product all the crosses seem to be exactly the same, there are several varieties of them:
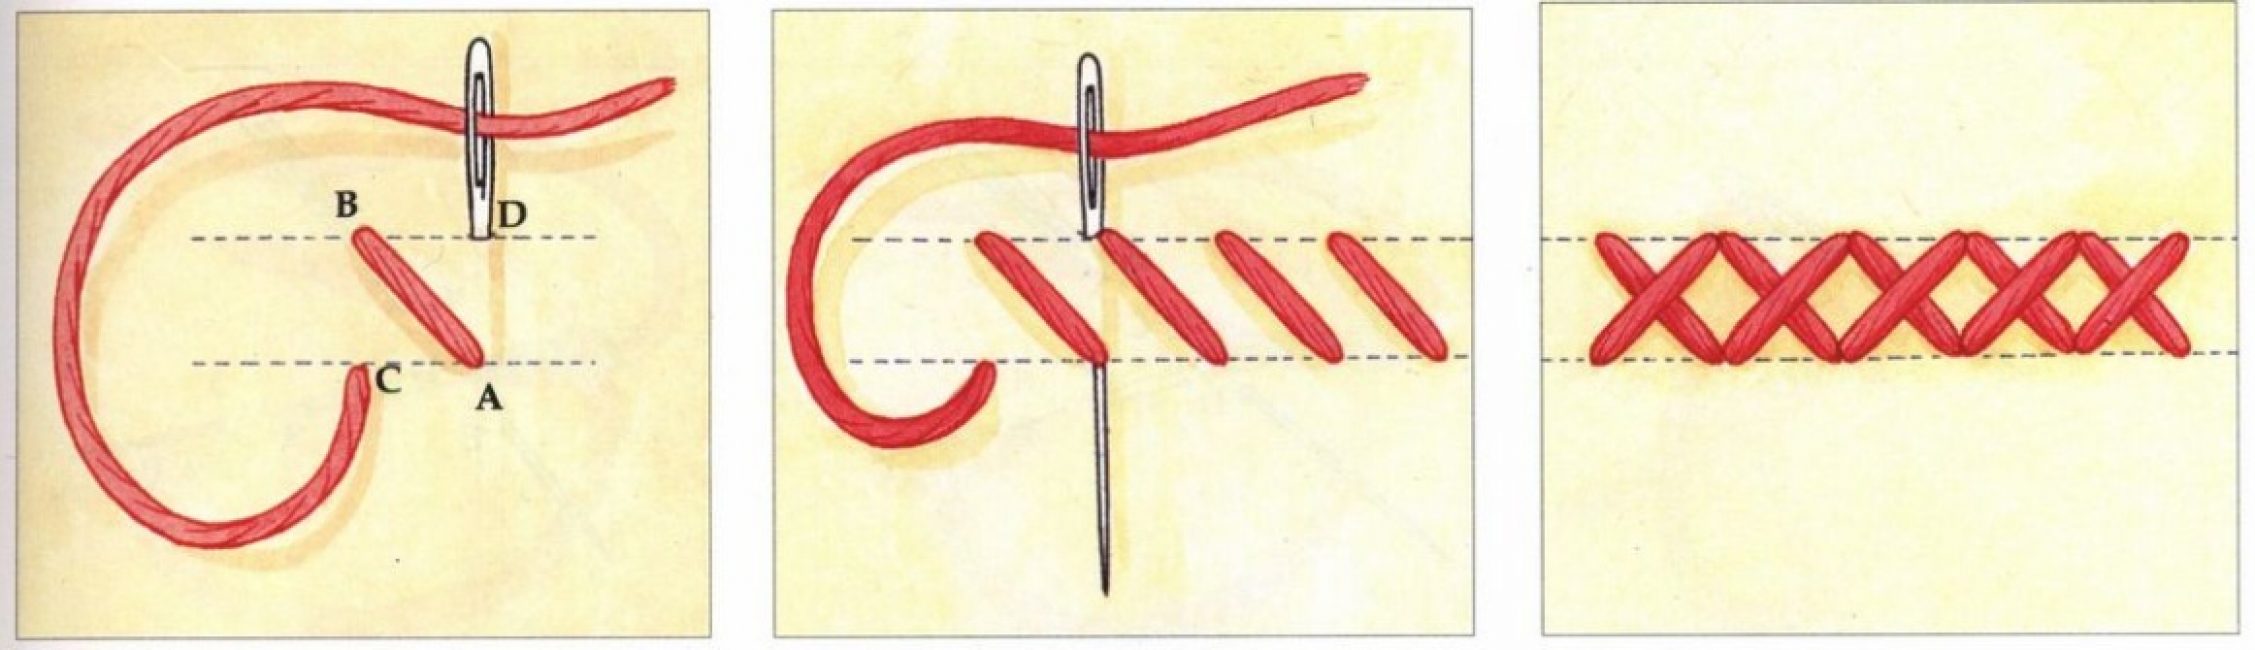
classic cross
Split stitches

Making a tapestry stitch
Bulgarian cross
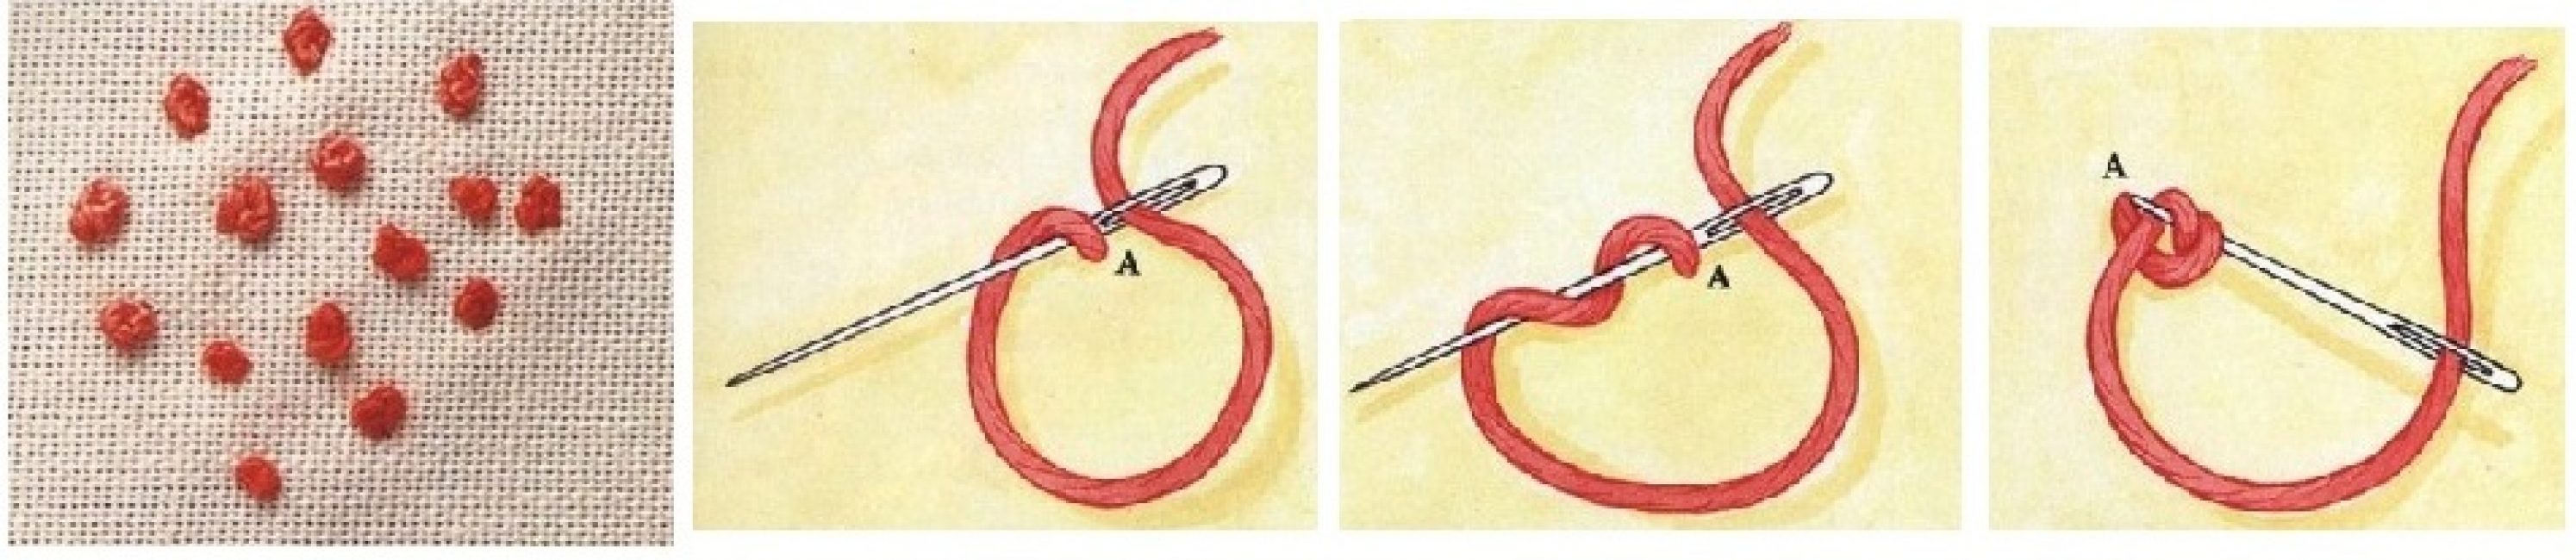
Making a French knot
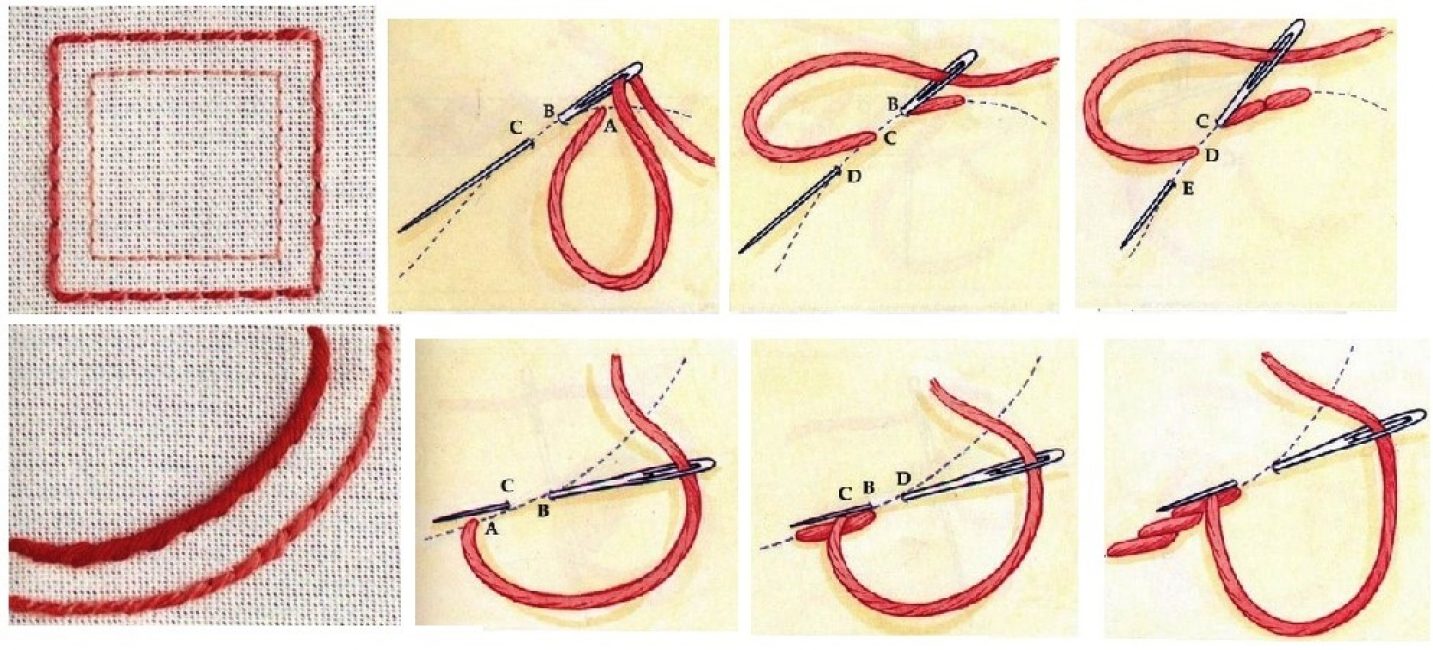
The order of the stalk seam
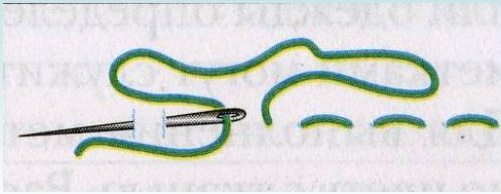
Seam "forward needle"
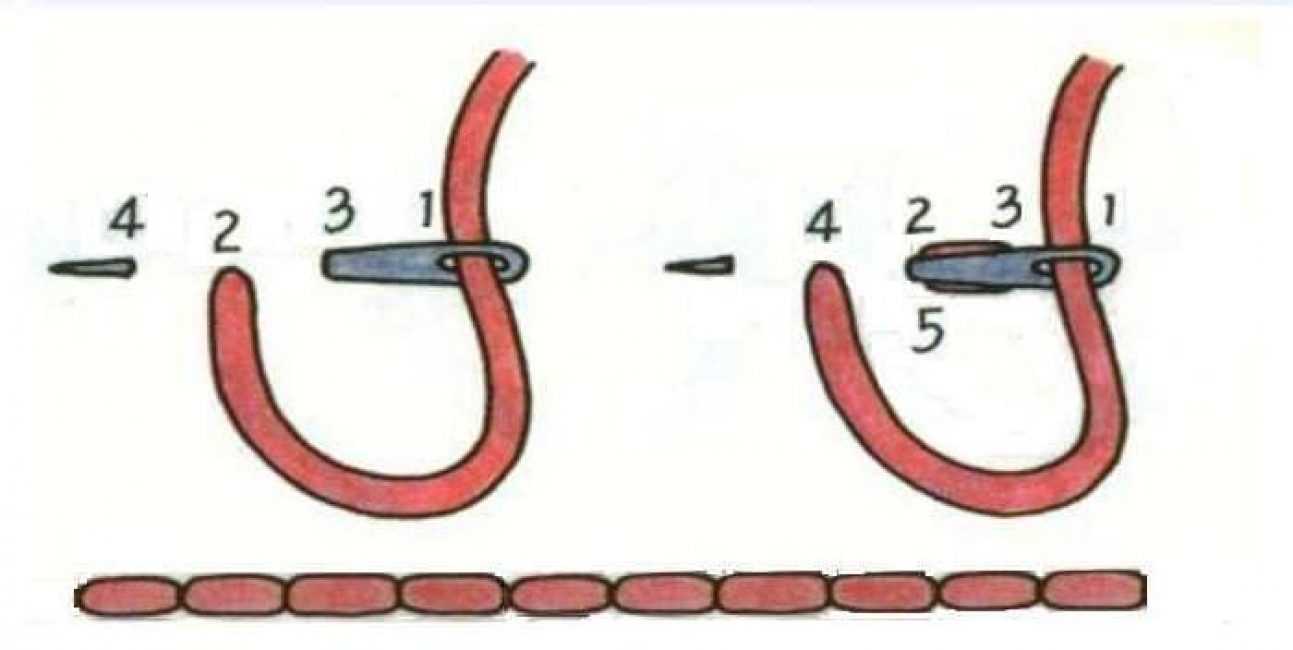
Finishing seam "back to the needle"
 Read also: Autumn pruning of fruit trees for beginner gardeners: terms and step-by-step description in pictures | (Photo & Video)
 Embroidery methods
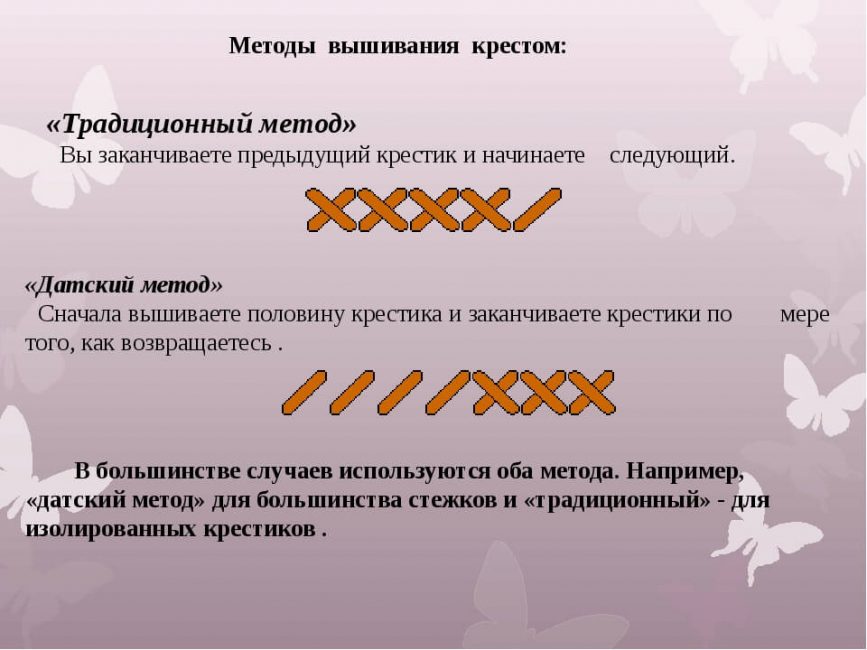
There are only two such methods. The first of them, called traditional, involves embroidering each cross in order - that is, both cross stitches are immediately made in it. With the Danish method, you first prepare one row of slant stitches without using a cross stitch. Then come back and start filling the same row with the second stitches.
Sewing sequence
Most embroiderers use both methods. The traditional one is used if you want to make single crosses.The Danish method is used when filling large areas with one color.
![[VIDEO] Peonies for beginners](https://iherb.bedbugus.biz/wp-content/uploads/2019/07/hqdefault-146-300x225.jpg) Read also: [VIDEO] Peonies for beginners
Read also: [VIDEO] Peonies for beginners
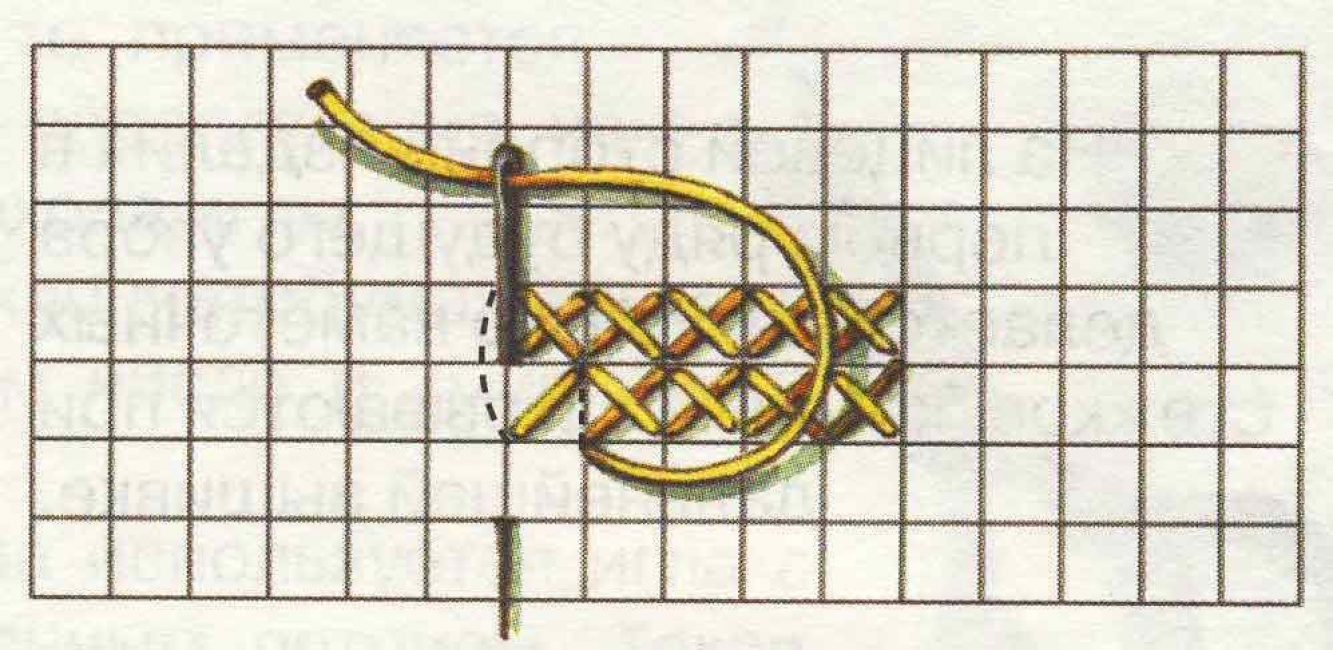
Reading diagrams
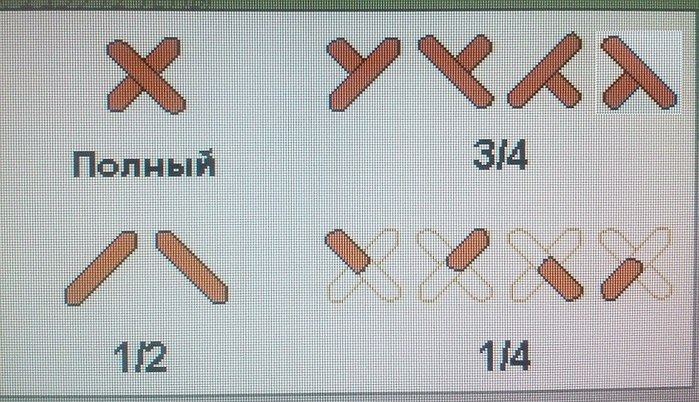
Usually, detailed instructions are attached to the set, which describe in detail the procedure for working and decipher the designations. Since the icons on the diagrams of different manufacturers may not match, you will need to carefully study the specific drawing and its symbols.
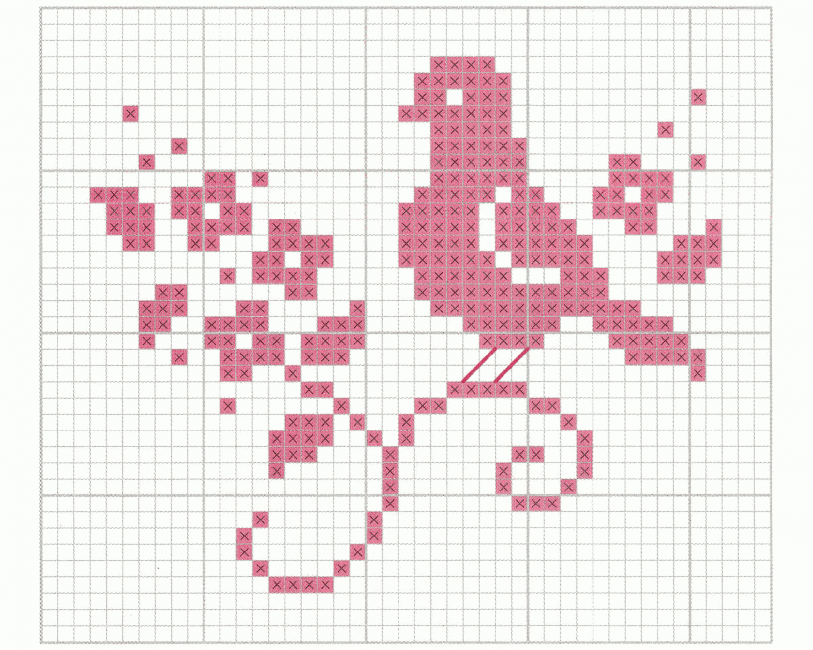
Cross stitch pattern
Each square in the diagram is painted with its own color. The center from which work begins is marked with an arrow. The numbers most often mean the thickness, that is, the number of threads. Mixed colors (blends) on the crosses are indicated by two numbers, for example, 318 + 416.
The number of addition of threads is also indicated, for example, 1 and 2 mean that you should embroider in two, 3 - in one thread. In the event that, in addition to the classic cross, other types of stitches are used, their designation is deciphered.
![[VIDEO] Clematis for Beginners](https://iherb.bedbugus.biz/wp-content/uploads/2019/07/hqdefault-151-300x225.jpg) Read also: [VIDEO] Clematis for Beginners
Read also: [VIDEO] Clematis for Beginners Required Materials
A beginner embroiderer will need:
- canvas: special fabric made of cotton or linen in the form of a mesh; sometimes for convenience it is starched; the holes between the cells in such a grid are clearly visible, which is convenient when choosing the size of the cross, the start and end points of the seam
- plastic or wooden hoops in the form of a pair of hoops with a diameter of 10-30 cm, nested one inside the other: a device for stretching the canvas; stitches on a well-stretched fabric are neat and even
- a needle with a large eye and a not too sharp end (they are called tapestry); it is believed that a needle that is too sharp can split the threads of the canvas or already finished embroidery; but experienced embroiderers often use ordinary thin needles with a large eye, believing that crosses are obtained with them more evenly; for a thin weave of canvas, you will need the thinnest needle No. 12-28, for embroidery on a dense thick fabric, you need to take a thick needle up to No. 12
- colored threads of different thicknesses: in embroidery it is used mainly floss (cotton or linen yarn without knots and seals, in 12 additions); you can buy other types of threads of suitable quality
- thimble: it will come in handy when working with a dense canvas
- embroidery scheme indicating the number of cells - cross-stitches
- washable or disappearing canvas markers: for the convenience of following the scheme, the future drawing is divided into squares of 10x10 cells; you can also use a simple graphite pencil for marking - it is easily washed off
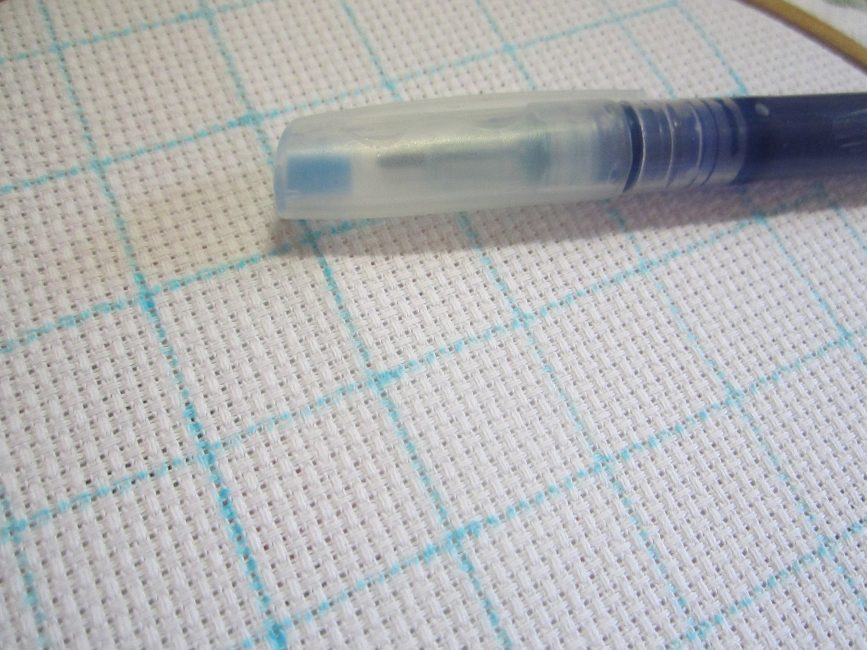
Canvas marker
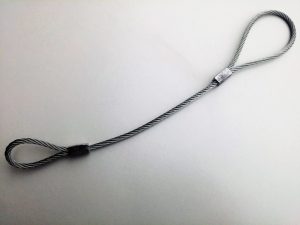 Read also: How beautifully and securely to braid the cable into a loop: a step-by-step schematic instruction
Memo for beginners
Of course, knowledge of all the intricacies of the work comes only with experience.
It is advisable to start work from the center of the canvas
But there are several rules that even a beginner embroiderer should know:
- Try to create perfectly even, parallel stitches from the very first day of training. The seams should look neat both from the front and the wrong side. From the side of the face there should be crosses, from the inside - straight vertical lines.
- All stitches must go in the same direction.
- Work begins with a colored area of the largest size.
- Do not cut the thread longer than 65-70 cm. Otherwise, it will constantly get tangled and you will have to cut it off. It is more convenient to measure on the arm - it should go from the beginning of the palm to the elbow. Metal threads are made even shorter - they get tangled even more.
- For beginners, it is more convenient to use canvas No. 14, the cells of which are clearly visible. The optimal size of the canvas at first is 20-25 cm.
- The canvas must first be washed and steamed with an iron - perhaps the fabric will shrink. Its edges are treated with glue.
- When purchasing threads from an unknown, unverified company, be sure to first lather a small piece - if it has faded, you should not use them.
- Do not forget to draw embroidery, especially complex ones with a small pattern. In this case, the probability of error will be significantly reduced.
- Always start work from the center of the canvas, folding the canvas twice (horizontally and vertically) in half. In this case, even with an error in the calculations, the finished work will be located exactly in the center of the canvas. Excess fabric can be trimmed.
- If you want to skip several cells, you need to pull out the needle from the wrong side and stretch it to the desired cell.
- Whatever type of stitches are used, the top ones are always located in one direction.
- When doing large jobs, gradually fold them inward and baste so that the edges of the fabric do not fray.
- In the process of long-term work, sebum and dust remain on the fabric, so the products must be washed after work. It is better to do this with a colorless shampoo with the addition of a small amount of vinegar. Plus, water will help to finally straighten the fabric, threads and eliminate bends and deformations.
- Steam the work from the reverse side, using a sufficient amount of steam. In order not to smooth out the crosses, but, on the contrary, to make them more voluminous, you need to do this on a soft terry towel.
 Read also: How to prune grapes: in autumn and before shelter for the winter | Instructions for beginner gardeners, schemes | (Photo & Video)
 Cross-stitch. Main stages
The sequence of execution of a simple cross
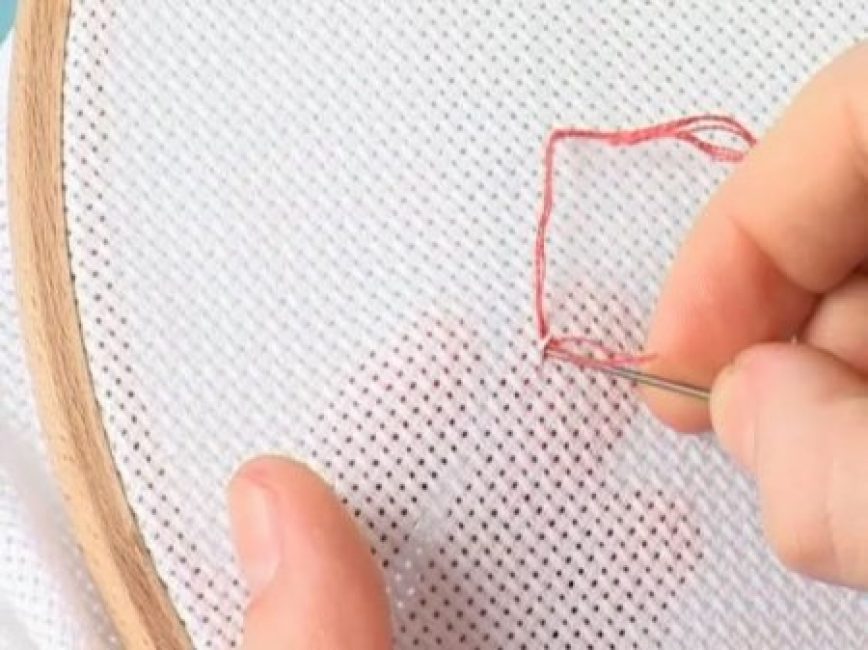
To begin with, let's try to embroider a small piece of fabric with a classic full cross. Please note that the needle must always be in a vertical position (parallel to the threads of the fabric). Its point can be directed, depending on the direction of the stitch, up or down:
- we pass the first row, performing parallel oblique stitches; no need to tighten them too much.
- the tip should be pointing down
- sew the second row of stitches, moving in the opposite direction, the point of the needle is pointing up
- fill in this way the area of the required size
- we begin to close the completed rows with intersecting stitches - when they close a whole row at once, the threads intersect in one direction, and the embroidery looks neat
- to avoid knots, in the last row we fix the thread by bringing the needle to the front side and passing it several times under the last stitches
- the finished work is ironed from the inside with a steam iron
 Read also: DIY Florarium: step by step instructions for beginners | TOP 100 Creation Ideas (Photo & Video)
 How to calculate canvas size?
In ready-made sets, everything is simple - a precisely matched scheme is applied to the canvas with a given number of cells. But even when using your own schemes, it is not difficult to calculate the size of the canvas.
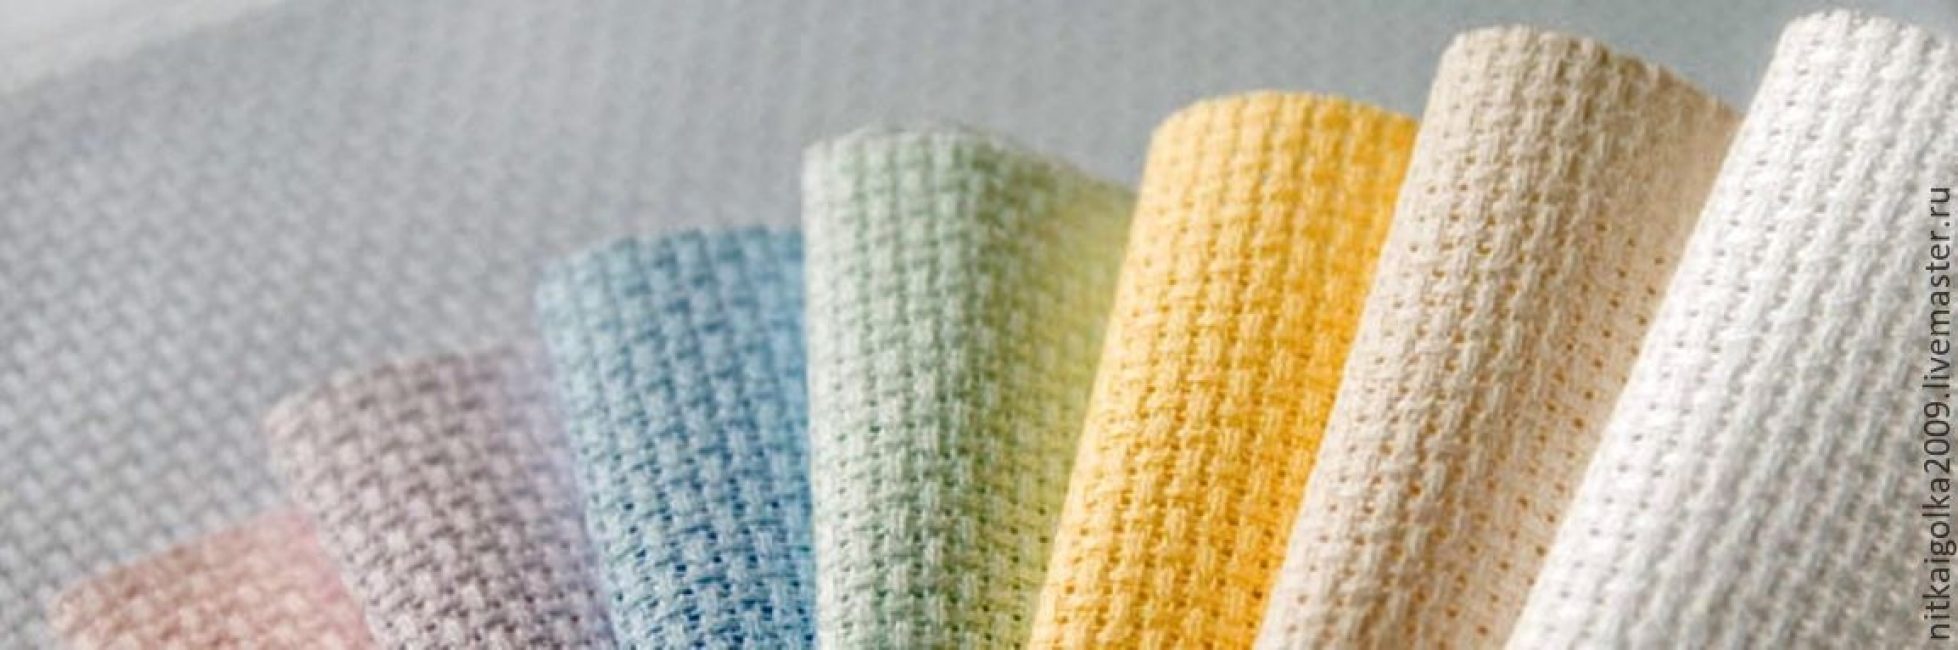
color canvas samples
Since each diagram indicates the number of crosses in length and width, we can only determine how many of them will fit on a fabric of a certain size. Canvas #18 is the classic canvas used by most embroiderers and is the one we will be using as an example.
Embroider a row of crosses so that their length is 1 cm. Count their number. You will get the number 7. Let's say there are 240x280 crosses on the selected pattern. This means that the canvas size should be (240 : 7 = 34.3 cm) horizontally and (280 : 7 = 40.0 cm) vertically.
Do you want the finished embroidery to be larger or smaller? In this case, change the canvas by choosing its number.
Canvas selection
 Read also: Do-it-yourself bas-relief: a master class for beginners - a sculptural masterpiece on the wall | (100 Photos & Videos)
 How to calculate thread consumption?
Mouline threads are quite expensive threads, so it is unprofitable to buy them with a margin. Of course, it is impossible to determine with an accuracy of up to a centimeter how many of them will be needed for a particular embroidery. After all, the thickness, tension and number of broaches on each scheme are different. But it is necessary to know at least their approximate number required for work.
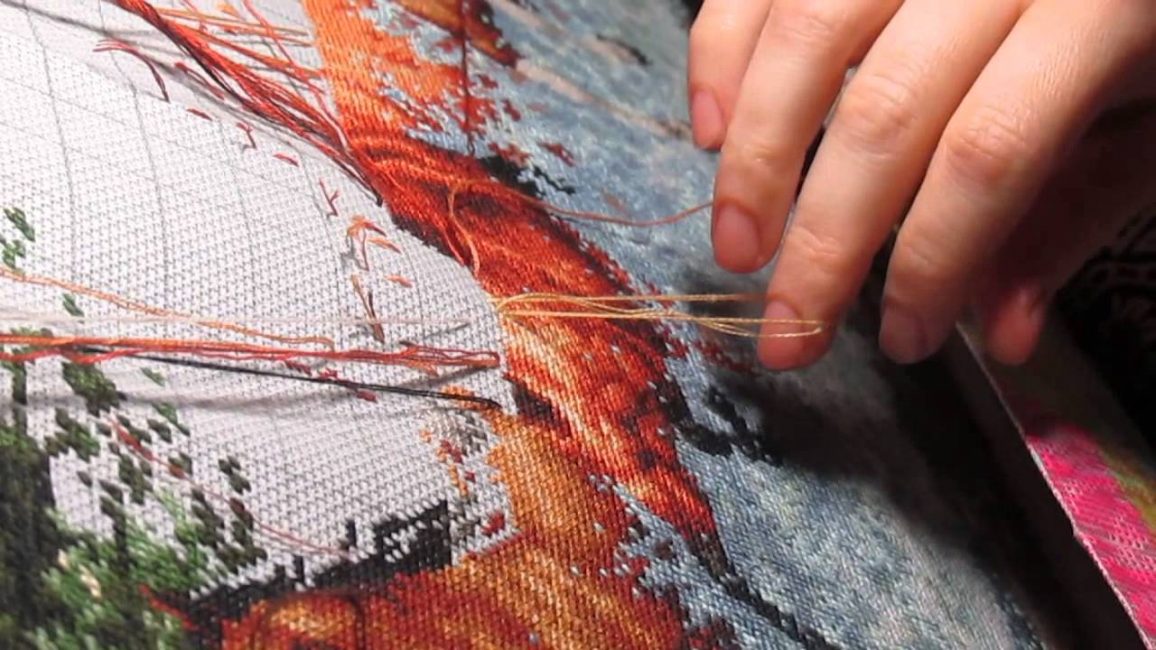
Complex work requires a more detailed calculation of consumables
To count, cut a thread 1 m long. Let's say you will embroider in 2 threads. Pull them out of the segment, embroider a square out of them and measure its height and width. The floss label always indicates the length of the threads. Calculate how many centimeters you can embroider with 1 pack of floss.
Do not forget to take into account the number of additions of the thread. That is, if you used 2 threads for embroidery, and the floss thread consists of 6 threads, then with one skein you can embroider an area 3 times larger.
Thread Calculator
For calculations, you can also use programs - thread calculators and canvas. Free versions of them are often posted online.
 Read also: Do-it-yourself Christmas toys for the Christmas tree: beautiful, original, with soul! Master classes and step by step instructions | (75+ Photo Ideas & Videos)
 Smooth color transitions
If the threads were not purchased in a set, but were bought separately, they must be sorted by shade. This takes into account the thickness. Indeed, in the finished work, the difference will be very noticeable. To make it easier to see the threads, lay them out on a canvas.
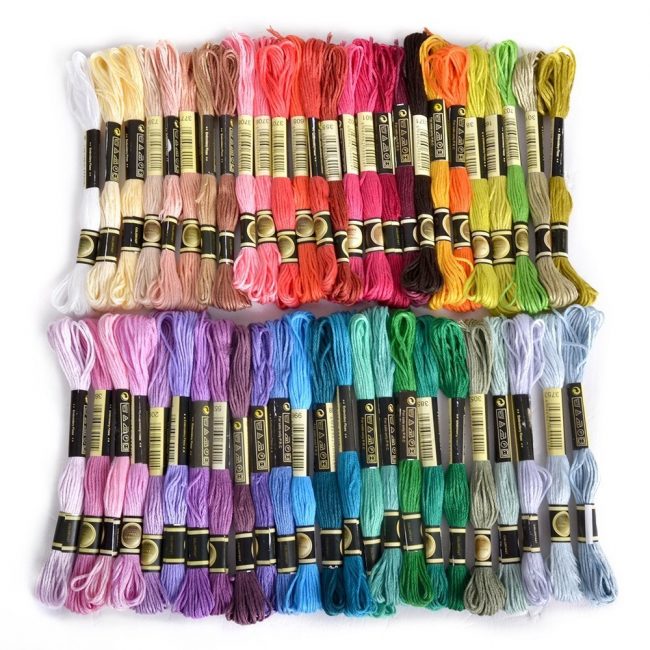
An abundance of colored threads for embroidery
You can try to embroider several crosses in different colors. If you failed to acquire transitional colors, and neighboring cells turned out to be contrasting, it does not matter. Use blends - mixing threads.
Take two strands and put them together. The result is an intermediate shade. When embroidering in three threads, the shade to be obtained is taken into account. That is, two threads should determine the main color, and the third should give them a shade.
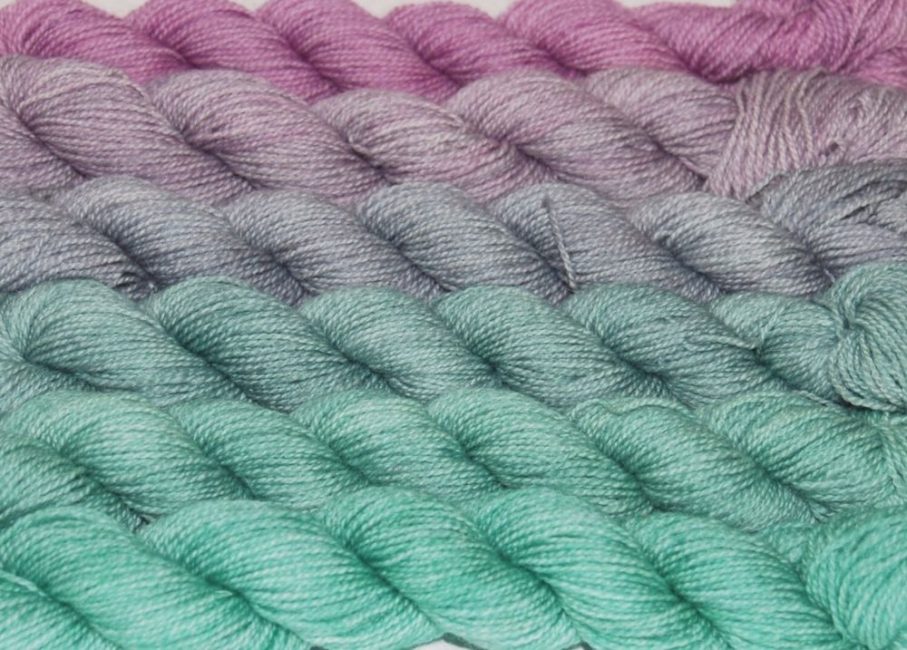
Smooth color transitions
 Read also: Gardenia home: care after purchase, the secrets of growing and propagating for beginner gardeners, types and varieties | (50+ Photos & Videos)
 Working moments
The finished work should look perfect. Any mistakes are not allowed. If they do occur, they should be corrected immediately. The exception is the wrong choice of the type of crosses - most often such seams are not striking, and it is not required to rip and redo the stitches.
In order for the work to look neat, there should be no errors in it.
It is also necessary to dissolve the work and start it again if the color of the threads is unsuccessfully selected. Correction also requires an unsuccessful choice of the direction of the stitches.
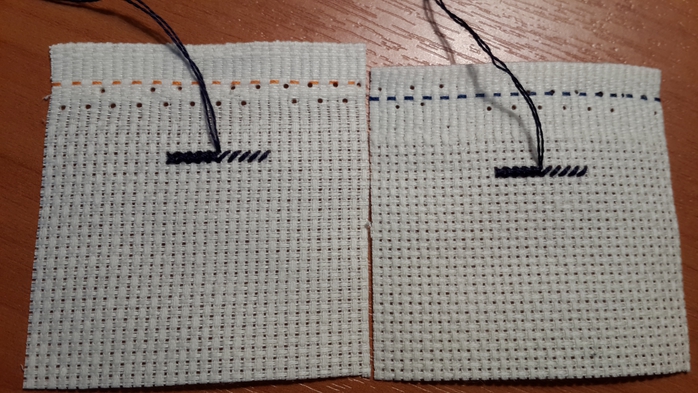
If the size of the canvas is chosen incorrectly, an additional piece of fabric is cut off and applied so that it overlaps the main canvas by 5 crosses. Then both pieces are fastened with a “back to the needle” seam. In the future, embroidery will close this joint.
Embroidery without canvas

Embroidery can make your wardrobe stand out from the rest
Once upon a time, craftswomen, indeed, embroidered on ordinary fabrics (linen, cotton) without using canvas. However, for beginners it is better to use a special canvas - canvas. Indeed, it is problematic to accurately count the required number of threads to create an even cross on ordinary fabric. If the first work turns out to be sloppy, interest in further embroidery will disappear.
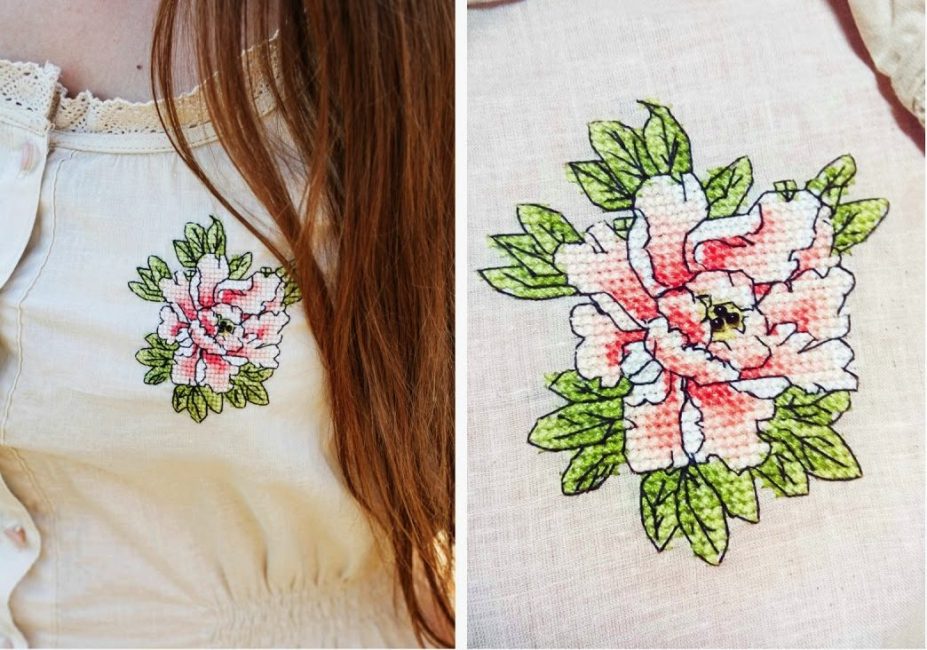
Embroidery on a blouse
When creating patterns on finished products - sheets, towels, tablecloths, clothes - it is better to use a soluble or laid on canvas, the threads of which are removed. In the future, as you master the process, you can use ordinary fabric for work.
How to make a diagram from a photo
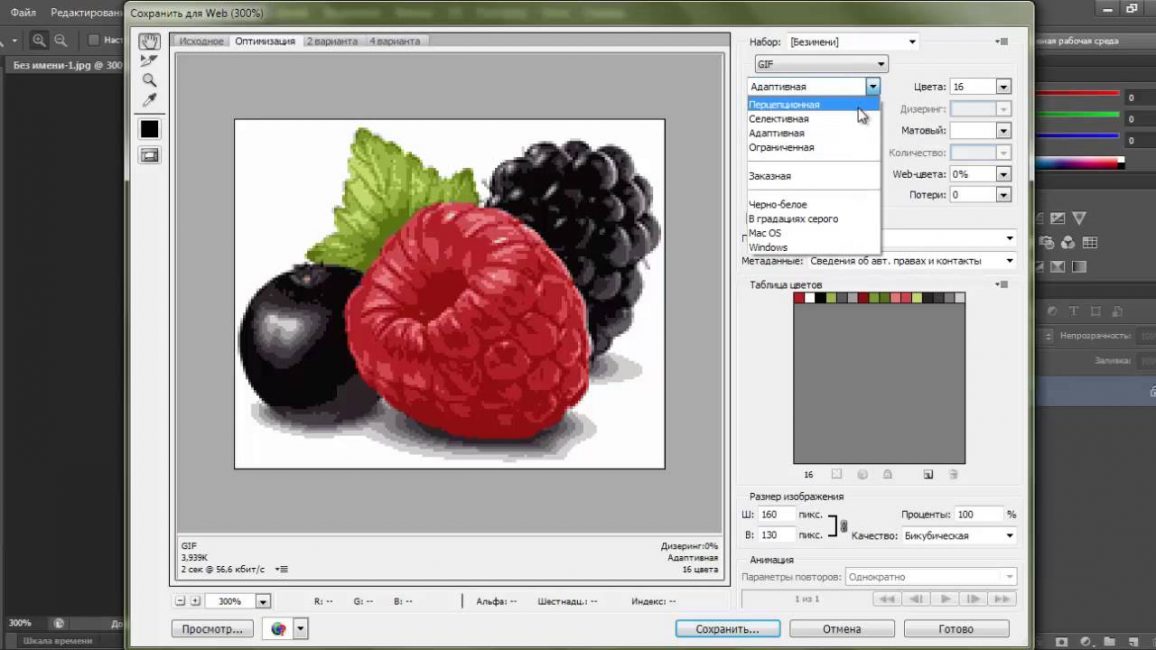
Creating a diagram from a photo in Photoshop
There are a lot of ready-made free schemes on the network. But one day you will want to create your own original work. After all, independent production of circuits is an exciting job in itself. There are three main ways to compose them from a photo.
They are made with:
- Special programs: you can download any of them on the Web, for example, the free EmbroBox; its advantage is the ability to select shades of threads, determine their length, as well as calculate the size of the future picture; after completing the scheme, you will know exactly how much material you will need;
- Photoshop: if you own this program, it will not be difficult for you to draw up even a complex scheme; to do this, it is enough to reduce the resolution of the photo (using Menu - Save for Web), and then, if necessary, correct the colors in certain areas;
- Millimeter paper and pencils of the desired color
The latter method is more laborious, but no less interesting. You will need to enlarge or reduce the photo to the desired size (you can do this at any photo salon), and then overlay translucent graph paper on it.
At first, it is better to choose pictures with a minimum amount of details, colors and shades. If the pattern is not clearly visible, it can be applied to the window pane. To get a sketch, you need to paint over each of the sections with a different color. In order for their contours to be clearly visible, they are additionally outlined with a simple pencil.
Insert embroidery into a frame
Embroidery in a round frame
The frame can be purchased ready-made or made from improvised means - wood, thick cardboard, or even ceiling skirting boards. Lacquered frames made from an ordinary box of chocolates look very interesting.
But still, to protect against dust and fading, it is advisable to use frames with glass. As a backdrop (such a substrate is called a passport), it is better to use plywood, chipboard or thick cardboard.
In the latter case, you can attach the canvas with double-sided tape. For greater effect, it is better to put a piece of synthetic winterizer under the cardboard - the embroidery will look more voluminous. The center points are first fastened with pins so that the fabric is taut and the cardboard sheet does not warp. Then the cardboard is turned over, and the wrapped edges of the canvas are attached with double-sided tape.

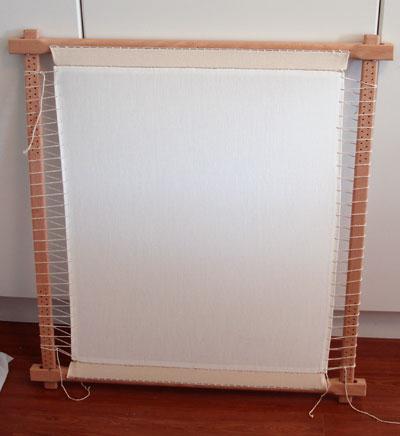
Stretching canvas on a wooden frame
The method of fastening to a sheet of plywood or chipboard is more complicated. Stretching the canvas with buttons is undesirable - over time, the embroidery will sag. Holes are prepared along the perimeter of the sheet at a distance of 1 cm from each other with an awl. Then, embroidery is sewn to the substrate with a “forward needle” seam.
The corners are attached first. We check whether the work is exactly in the center and whether it is stretched tight enough. Then we proceed to attach the sides. After the fabric is securely fixed, the frame is assembled - glass is placed on it, and the structure itself is strengthened with metal clips.
Securing the fabric with threads
Another way to attach to sheets of plywood or chipboard is to nail the fabric on the sides of the sheet with small carnations. The corners of the canvas are pre-folded and neatly hemmed.
VIDEO: We suggest you use the video tutorial on reading embroidery patterns

We suggest you use the video tutorial on reading embroidery patterns
For beginner embroiderers, symbols on diagrams are always a problem.


