
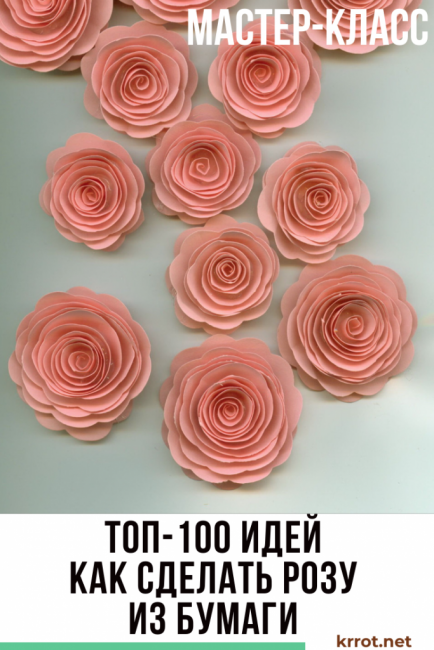
Paper roses are an ideal decor option that is easy to make a reality with your own hands.
Among the many techniques on how to make a rose out of paper, for starters, you can choose the simplest ones, and as you accumulate skills, move on to more complex ones. With very little effort, you can thus make your home interior original and unique.
Beginning "florists" will help our article-instruction.
Content:
 Read also: Projects of country houses for 6-10 acres: 120 photos, description and requirements | The most interesting ideas
What can be decorated with paper flowers?
Decorating with paper flowers
Paper roses, even if they are a budget element of decor, but quite spectacular, and most importantly, exclusive. These are versatile products that are suitable for transforming any interior.
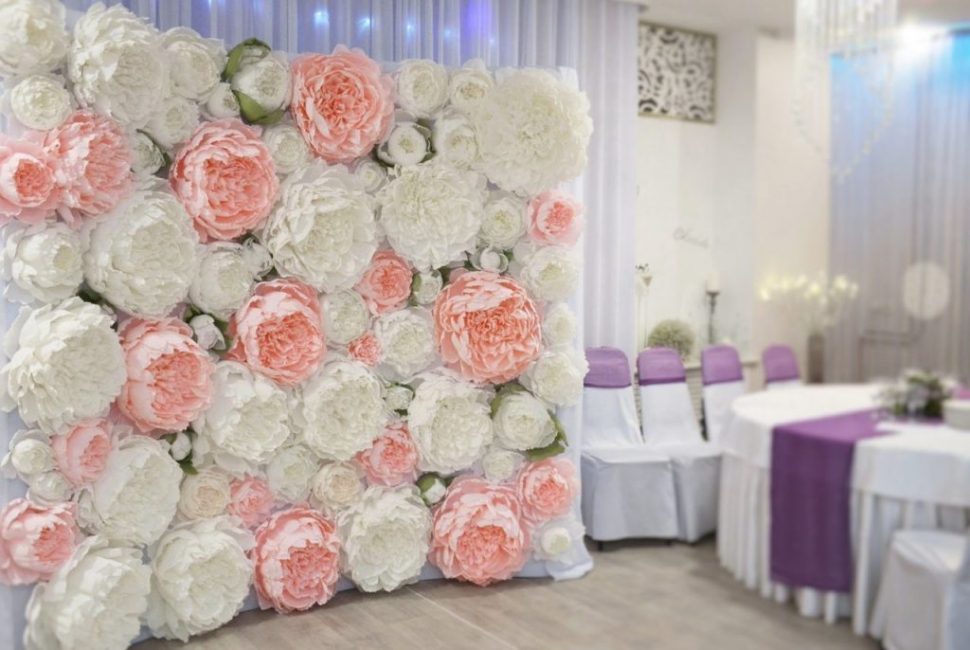
If you turn on fantasy, then you can endlessly list options where rose decoration would be appropriate. It can be compositions in the form of bouquets, placed in ordinary vases or decorated according to your own idea, decorating candlesticks, flower wreaths, a beautiful decoration for gift wrapping, an unusual flower wall panel, birthday cards and other crafts.
In a private house, you can decorate stair railings or mirrors with paper flower garlands. And the festive table will acquire some zest if you place handmade roses on it.
An easy option for beginners
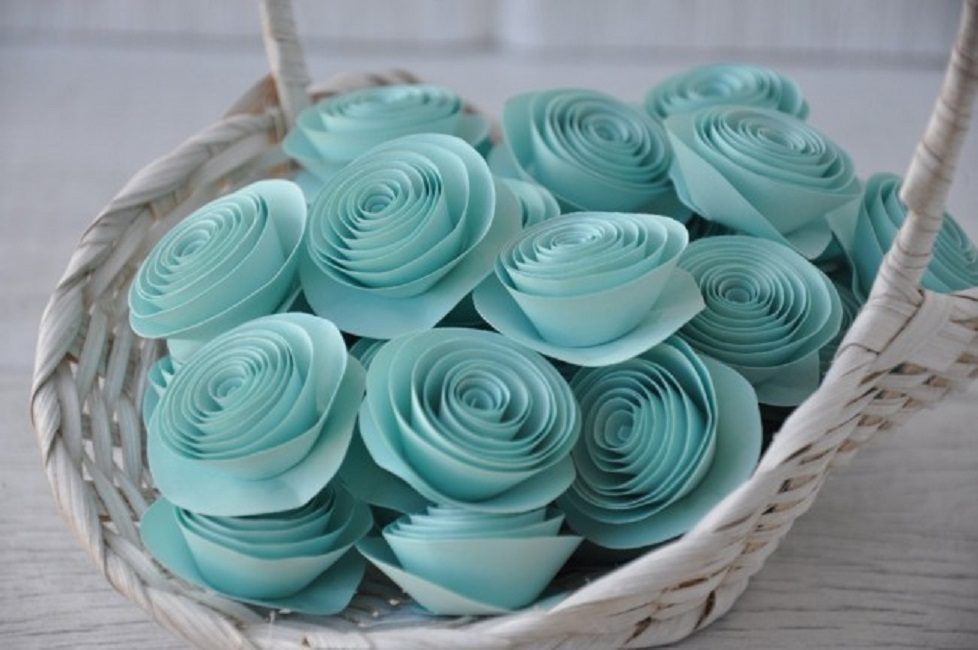
paper roses
This example of making a paper rose is easy to make, but in the course of work you will get real pleasure. The resulting roses can be used both for decoration and as a gift. Everyone will love this present.
We will make such roses according to a curly pattern. What will be required:
- sheet of paper and the denser the better
- paper glue
- scissors
- pencil
- spectacular vase
Step by step instructions for action:
- On a paper sheet, draw a spiral circle (each chooses the diameter at its discretion)
- Now cut the circle along the lines so that the result is a strip in the form of a spiral. The number of blanks will depend on the size of the future bouquet
- Then we will twist the blanks, starting from the outer edge. Only twisting should be as tight as possible
- To prevent the bud from unwinding, fix the inner end with glue. Gently spread the petals with your fingers
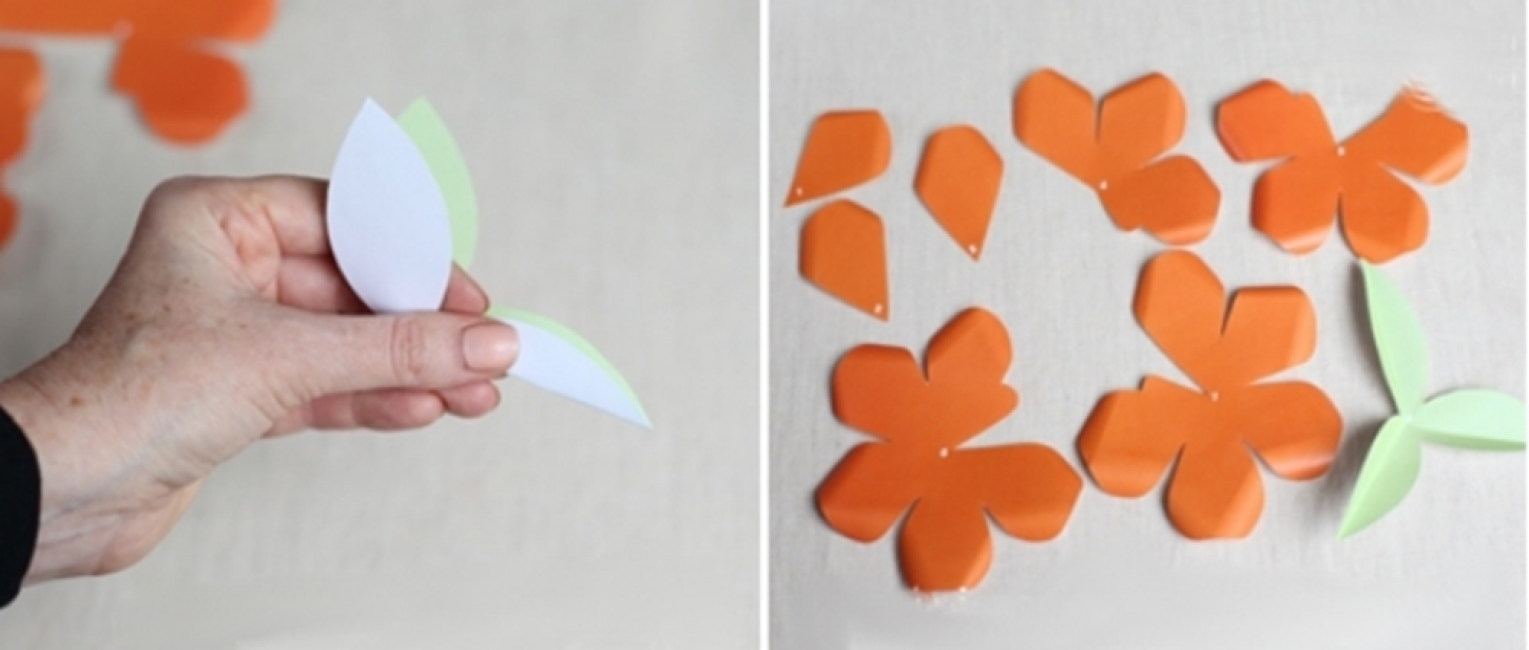
- When the rose is ready, proceed to cutting out the leaves. Draw them on paper first. Glue the resulting leaves to the bottom of the rose
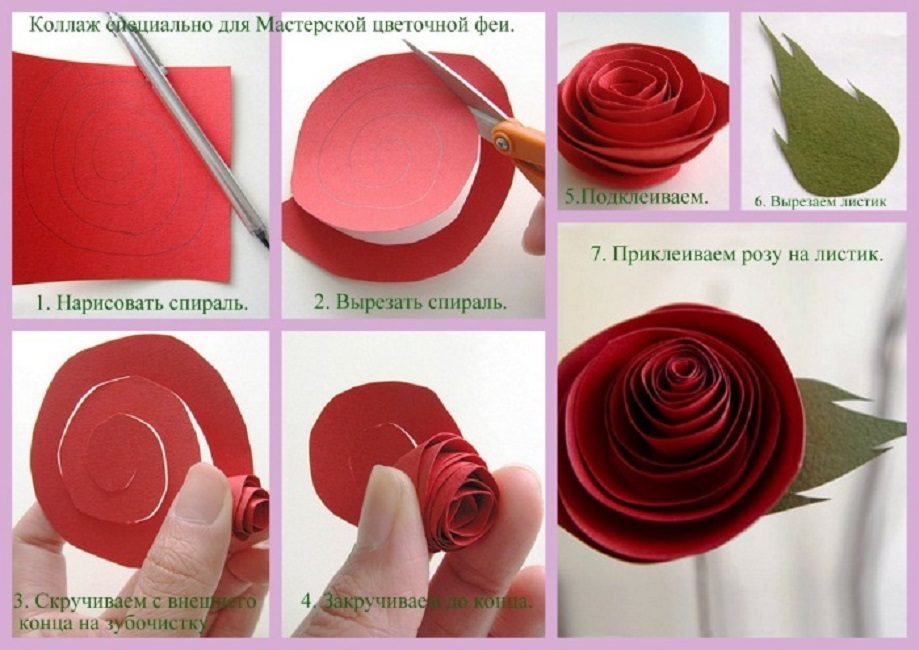
How to make a spiral rose
It remains to plant a rose with leaves on a dry branch and put in a vase. You can add as many such decorated branches as you like.
Similar flowers are obtained from cardboard or music paper.
 Read also: Rose: description of 16 varieties, features and care - such a different queen of flowers (150 Photos & Videos) + Reviews
 How to make a compact paper rose
Rose Making Guide
Through simple manipulations, it is possible to make some kind of weaving in the form of a flower. During the work will be involved:
- colored paper
- wooden sticks
- scissors
- PVA glue or glue gun
Adhering to the elementary scheme, you can literally make a compact lush rosette in just 5 minutes. And a bouquet of them will take no more than half an hour.
They operate as follows:
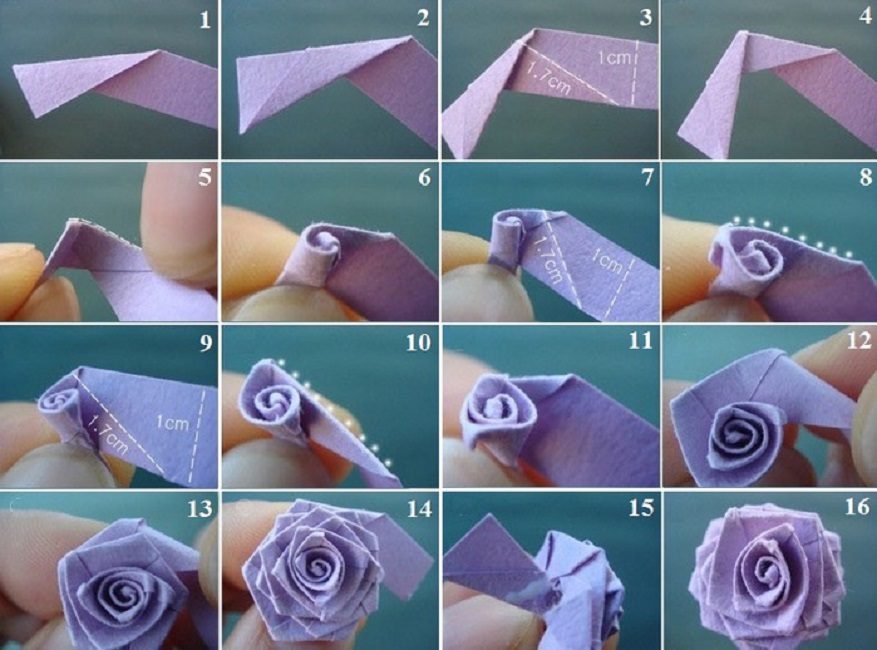
- Cut a sheet of paper into narrow strips, about 1 cm wide
- Take one strip and bend it from one edge, as in Figure 1. It does not require special accuracy - it is folded by eye
- Then twist the workpiece along the axis, without affecting the free parts of the cut. Having reached the untouched area, they bend in the opposite direction from the last bend and continue to turn
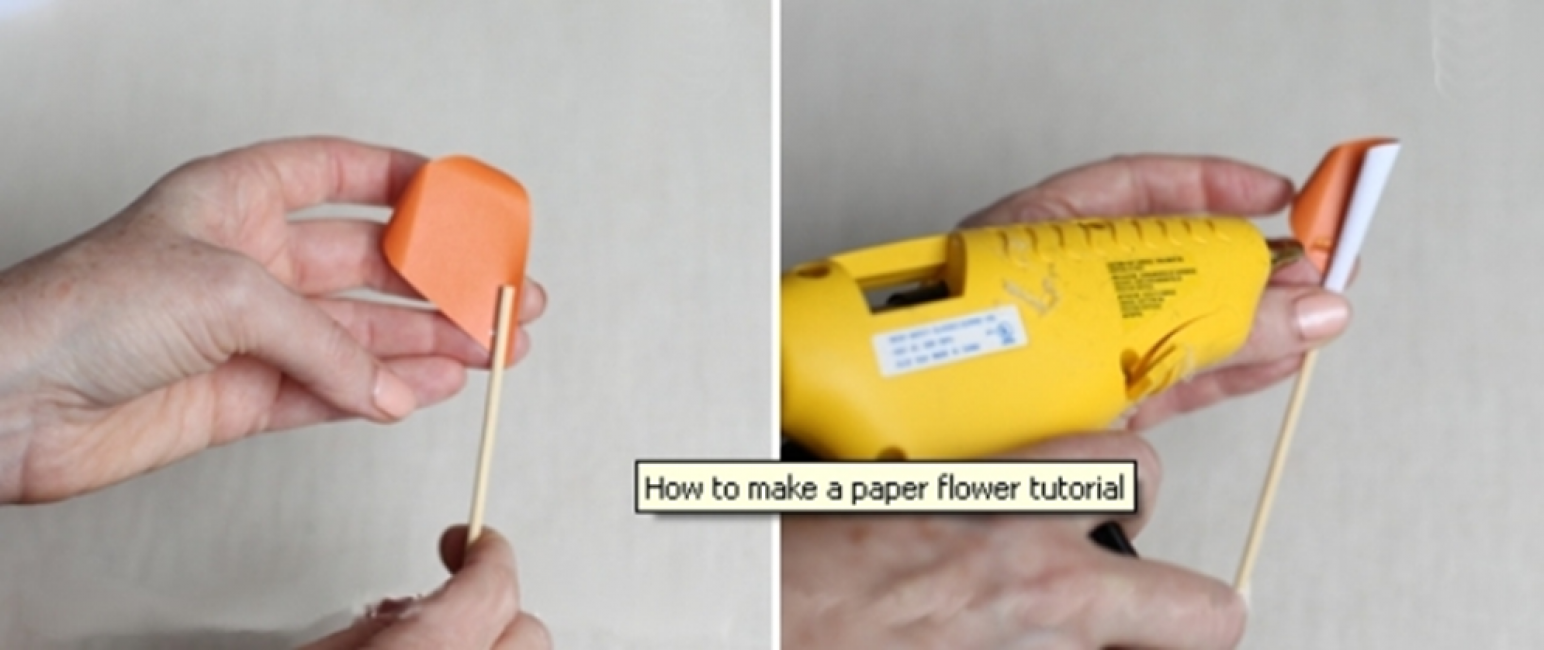
- In this manner, they move to the end. In the final, glue the remaining tail to the base of the bud
- Put the finished rose on a skewer-pedicel, which you first wrap with green paper. Wire can be analogous

Compact paper rose
Proceeding in the same way further, a beautiful bouquet of roses comes out.
This is how you can make beauty without any special tricks. It remains to repeat these manipulations with the remaining paper strips in order to quickly fold a whole bouquet of paper roses with your own hands. Similar flowers can be made from corrugated paper.
 Read also: How to make flower pots with your own hands: outdoor, indoor, hanging | Step by Step Charts (120+ Original Photo Ideas & Videos)
Corrugated paper roses
Sequencing
Corrugated paper roses are as realistic as possible. Such material is often used by decorators, since the corrugation is flexible and easily takes the desired shape, with its subsequent preservation.
First prepare everything you need:
- corrugated paper web
- glue
- stationery scissors
- wire
Instruction:
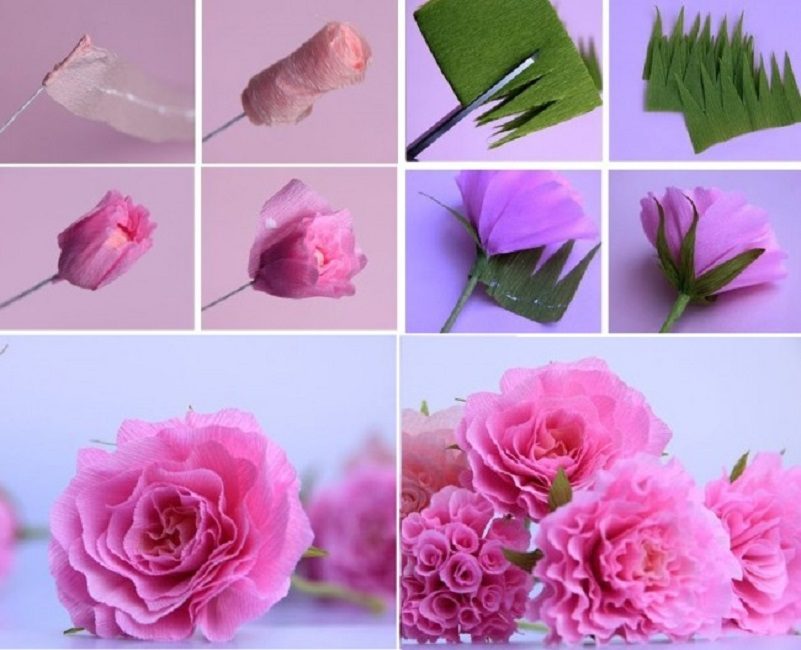
- As in the previous case, strips of corrugated (cigarette) paper are cut. The width is chosen individually, depending on the desired height of the bud
- Take one strip and wind it tightly around the edge of the wire. For fixing, each curl must be lubricated with glue. This creates the base of the flower.
- Now cut out the frilled petals of any size and glue them on top of the base. Apply glue only to the lower part of the petal (just squeeze out one drop)
- Cut the leaves from the green corrugation and glue them to the bottom of the finished bud
The sequence of actions can be seen in the photo above.
 Read also: Growing roses from seeds: stock rose (mallow), Chinese, stone, angel wings, polyanthus and other popular types and varieties (35+ Photos & Videos) + Reviews
 Making a paper rose

paper rose
In the process, we need thick white paper, glue (adhesive tape) and scissors. Now let's get straight to work:
Fold a sheet of A4 office paper along the center line (orientation - along) and fold in half again.

Sheet of office paper
Then unfold it and cut along the folds into 4 strips.
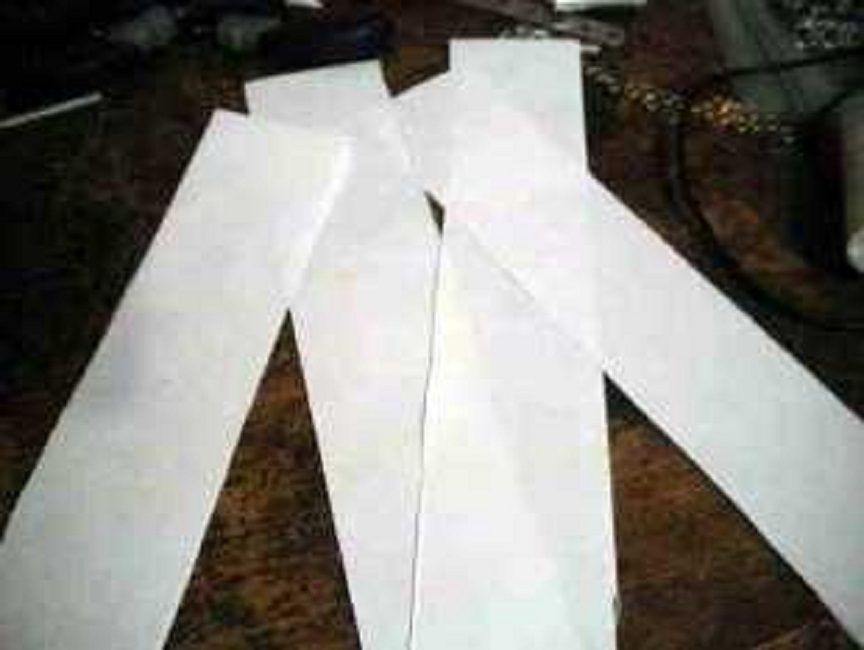
4 paper strips
Using glue or duct tape, fasten these blanks together so that one long strip comes out.
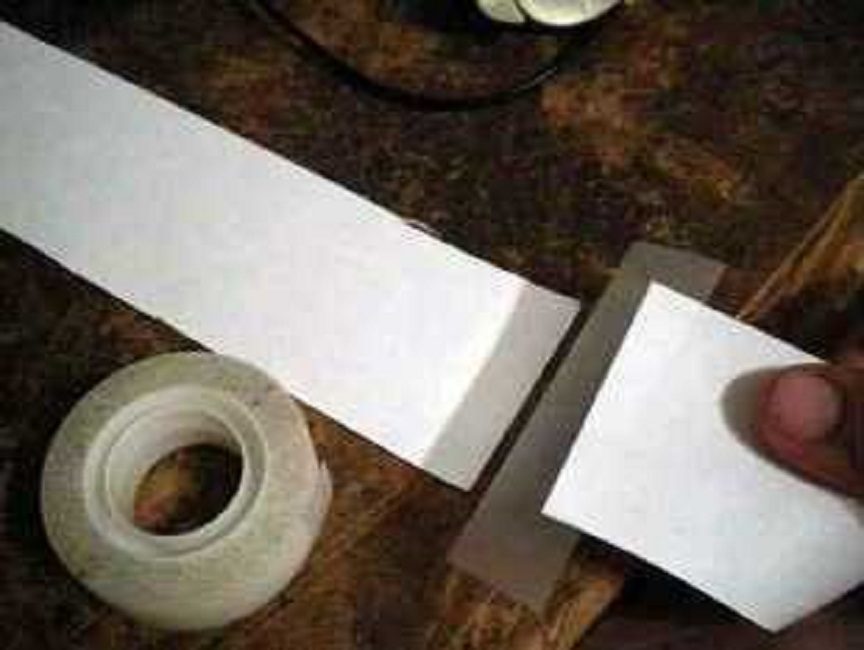
long strip of paper
The resulting strip must be rolled up so that the rod comes out.
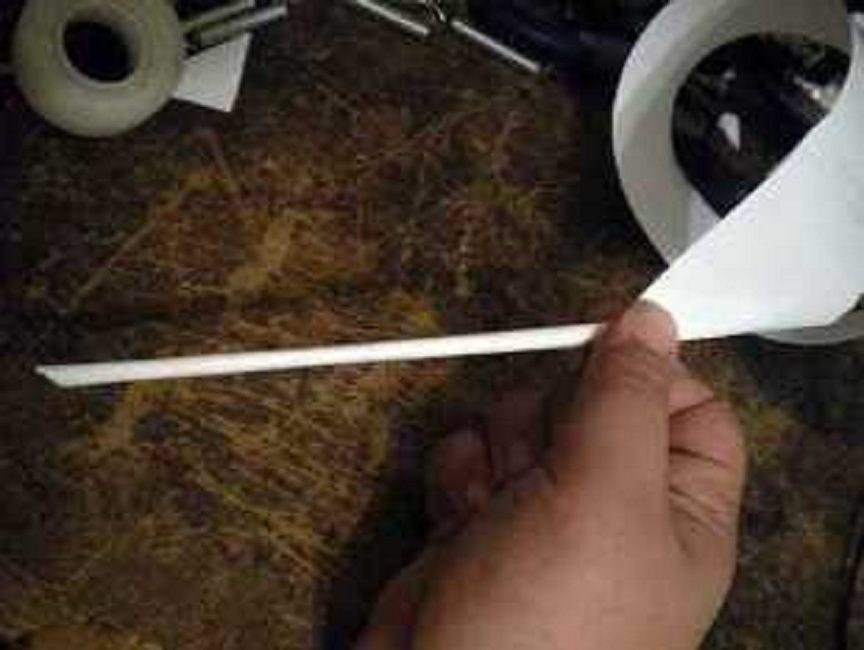
Rose rod
Start folding the remaining paper in half and at the same time wind it around the center. Continue rolling until a rosette forms.
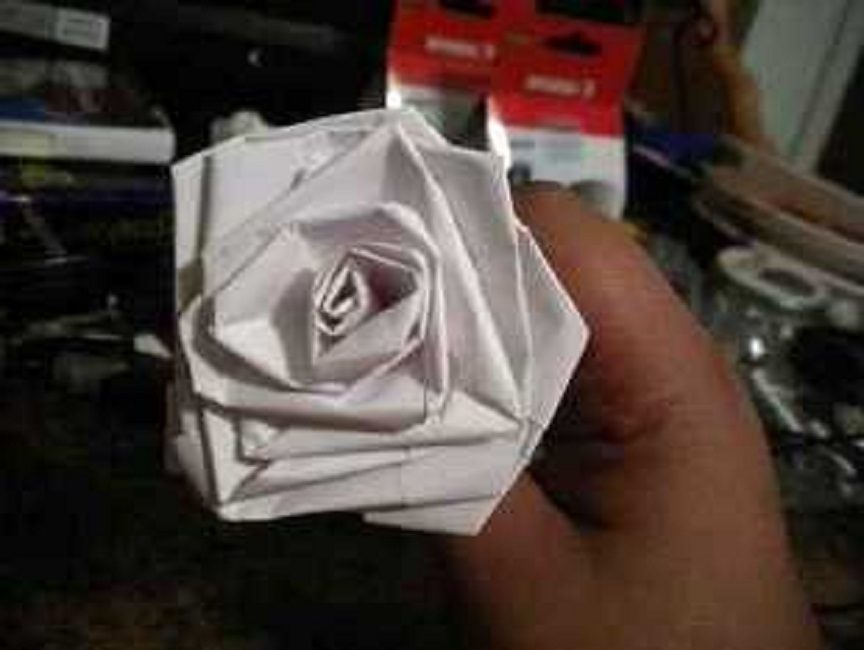
rosette
 Read also: How to make a patio in the country with your own hands: a variety of design options, decoration and arrangement (85+ Photo Ideas & Video)
How to make a crepe rose
Template preparation
The following will come in handy:
- red and green crepe paper
- wire or wooden skewers
- pencil
- scissors
- PVA glue
The algorithm for making roses from crepe paper:
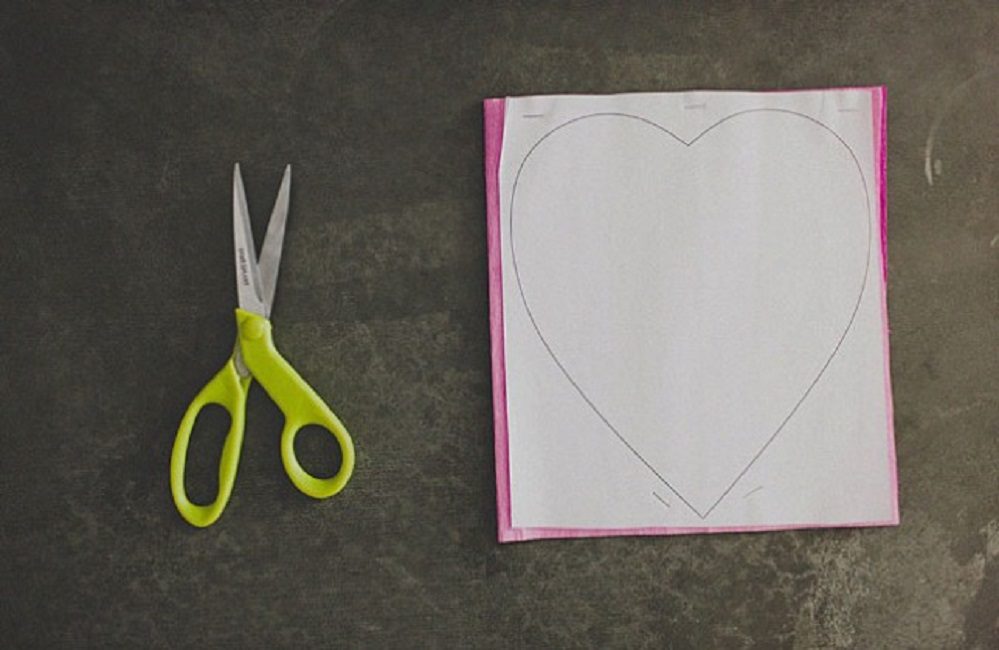
Draw a heart on a white sheet and cut it out. This will serve as a template. Its size will depend on what height the bud wants to get. In the considered version, the heart will be 15 cm high.
Make the required details according to the template.

Sample
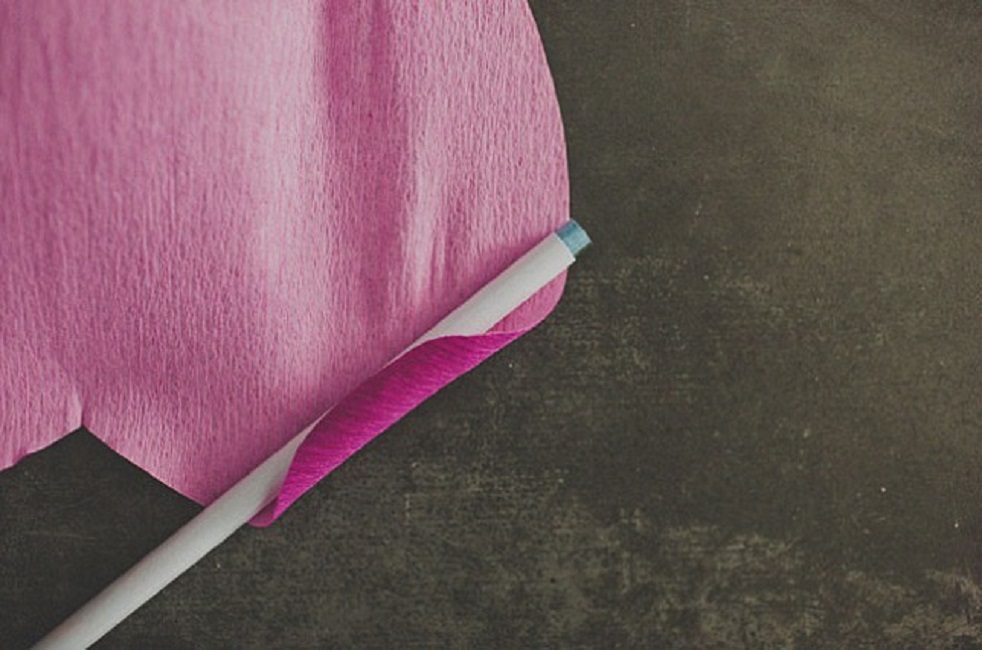
Making a stem is easy. To do this, wrap the wire or sticks with green floral tape or colored paper using glue to fix it.
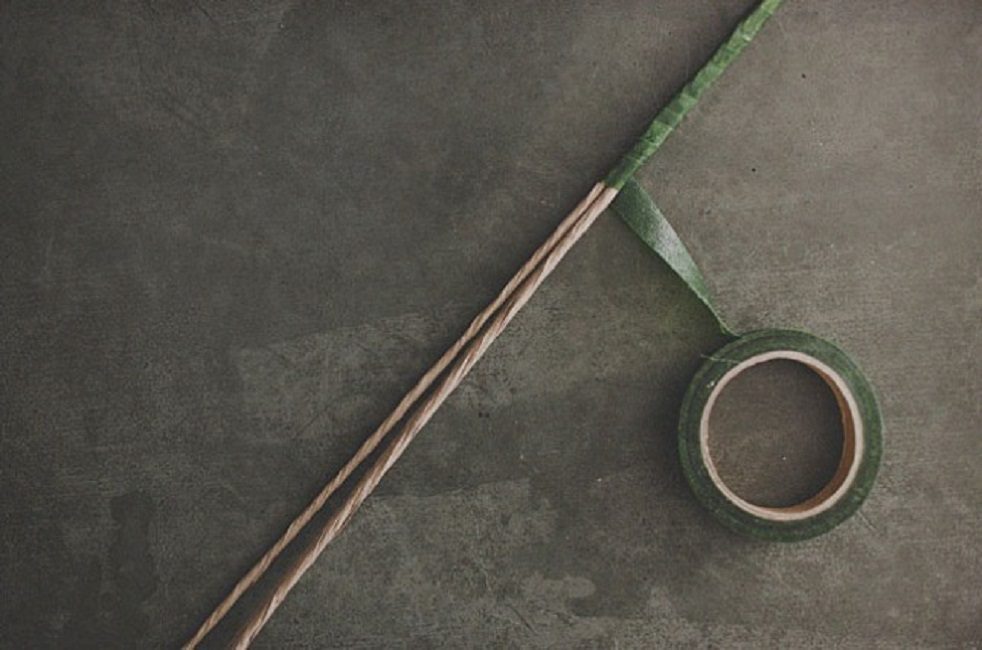
Stem making
Stretch the petals (hearts) made earlier in width.

Rose petals
Then screw first one of the upper edges onto the handle, then the other. This is how exquisite wavy petals are obtained.
Exquisite wavy petals
Now, in turn, attach each petal to the stem with adhesive tape.

Attaching the petals to the stem
The result is a magnificent "cap" of a rose.

Lush "hat" roses
After that, proceed to the manufacture of foliage. To do this, wrap the wire with green crepe paper and attach the leaves cut out in advance to it.
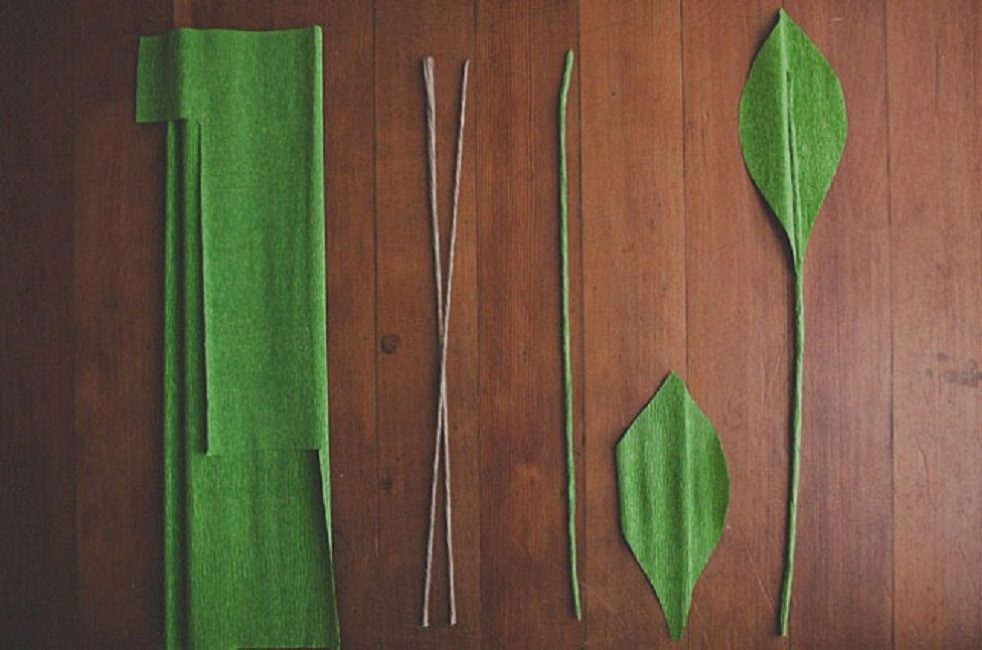
leaf preparation
The next step is to attach the calyx to the base of the flower. Cut it out of the same green paper in the form of a carved strip.

Attachment to the base of the calyx flower
It should be fixed to the stem with glue or adhesive tape.

Fixing the calyx
 Read also: How to make a children's house with your own hands: from wood and other materials. Dimensional drawings | (80 Photo Ideas & Videos)
 Spectacular paper roses
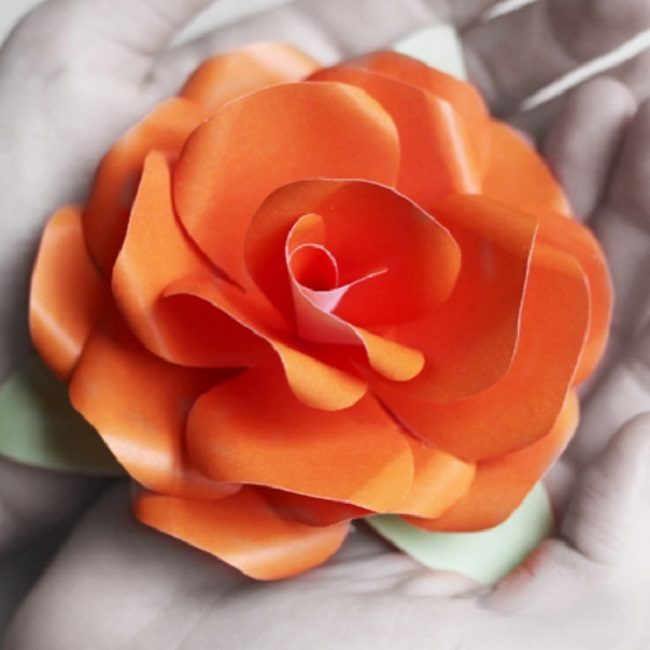
Crepe paper rose
To make such a beautiful rose, you must first download a template from the Internet. So you need a printer to print.
Rose manufacturing scheme:
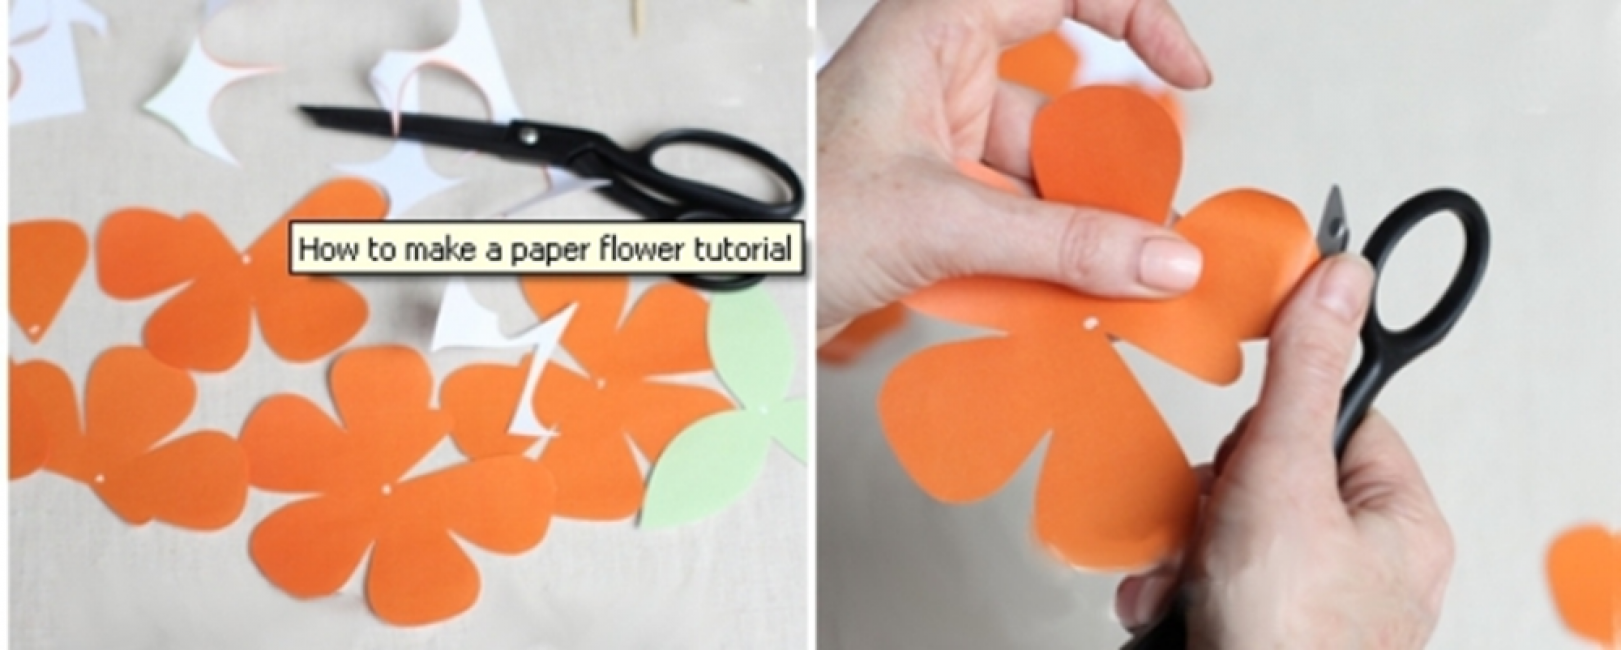
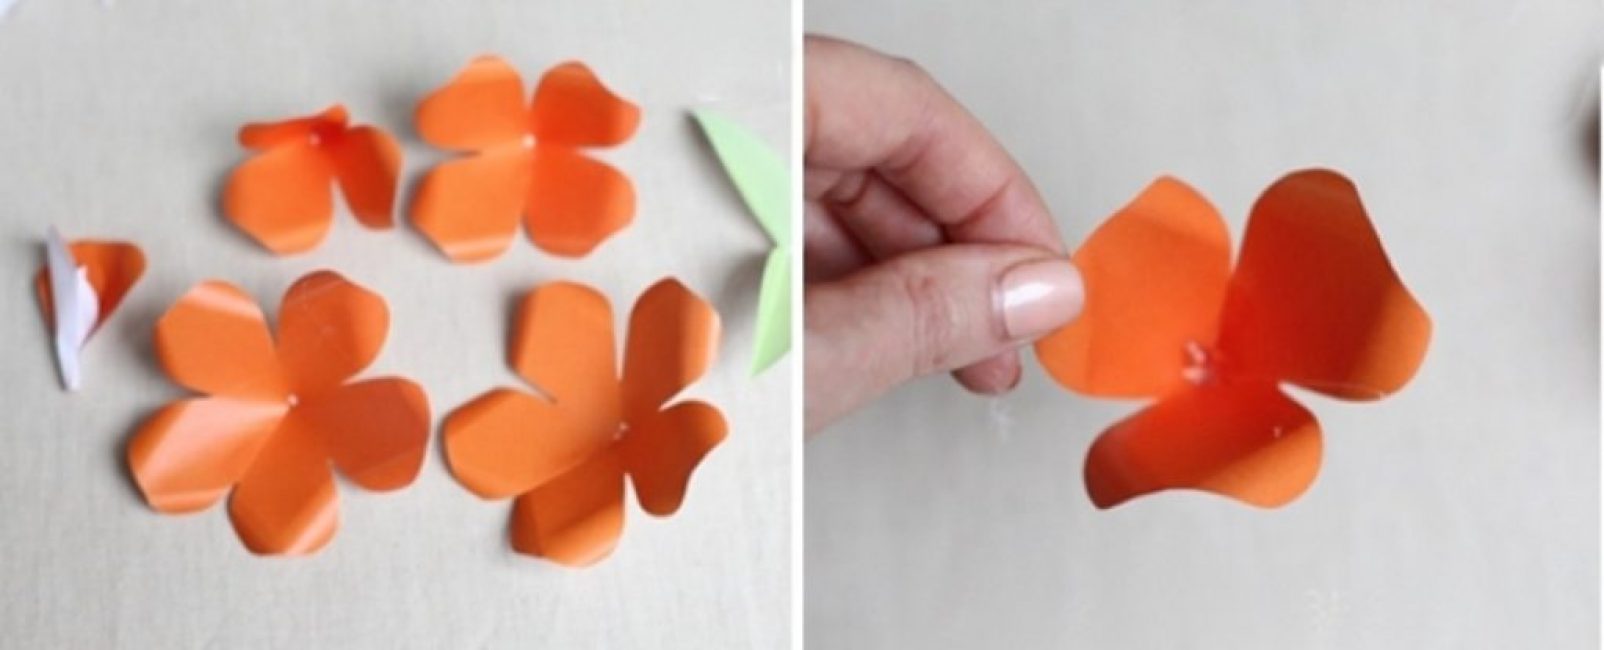
Make stencils first. To do this, print them from the Internet. They cut a lot of petals and leaves. All of them are numbered to make it easier to collect the flower.

stencils
Using scissor blades, twist the edges of the petals.
Twisting the petals
The three green sheets included in the kit are folded along halfway.
green leaves
Petals numbered 1, 2 and 3 begin to be wound onto a wooden skewer. It is necessary to glue them with hot glue from a gun.
Attaching the petals to the skewer
Petals under No. 4, 5, 6 and 7 are glued together in the form of cones (see photo).
cone shaped petals
Now fasten each part sequentially to each other to make a bud. Collect the rest of the flowers in the same way.
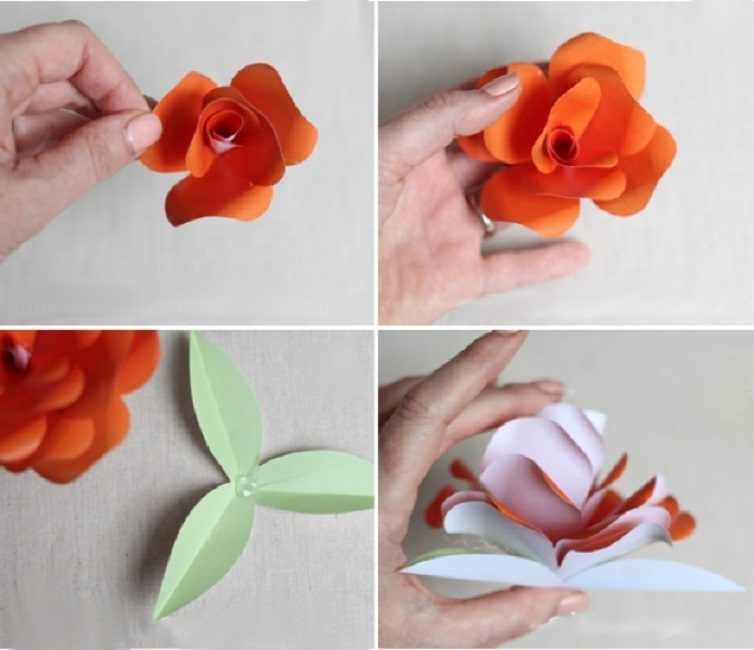
Ready bud
Attach such beautiful roses to the branches and insert into an ordinary flower pot. The result is a stunning pot of roses.
 Read also: How to save rose seedlings before planting? Description, classification, reproduction, pest control measures (75+ Photos & Videos) + Reviews
 Flower from coffee filters
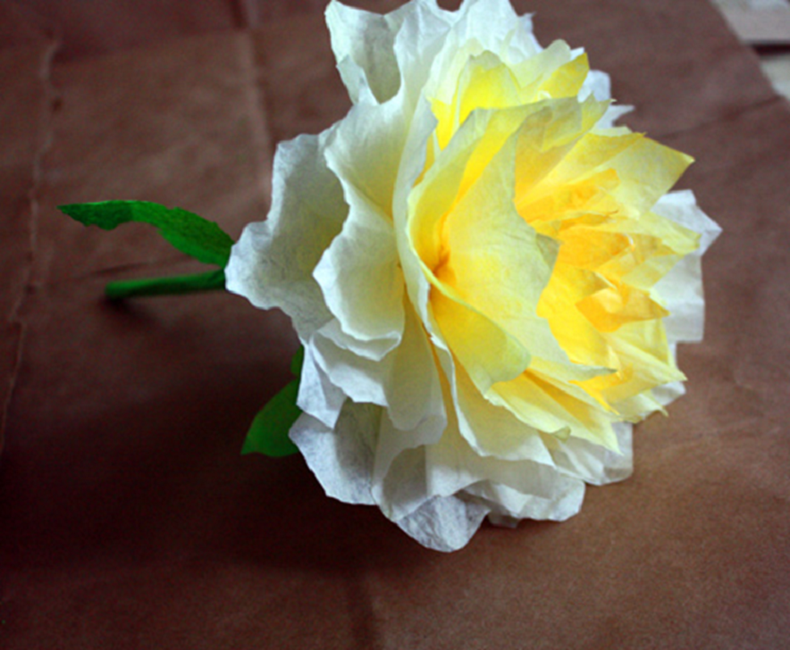
Flower from coffee filters
With such roses something is decorated or used as crafts for gifts to relatives and friends. For 10 flowers you will need:
- 60 coffee filters
- watercolor paint (2 different colors will come in handy, for example, yellow and orange)
- deep bowls of water
- 9 cocktail tubes
- green electrical tape
Operation instruction:
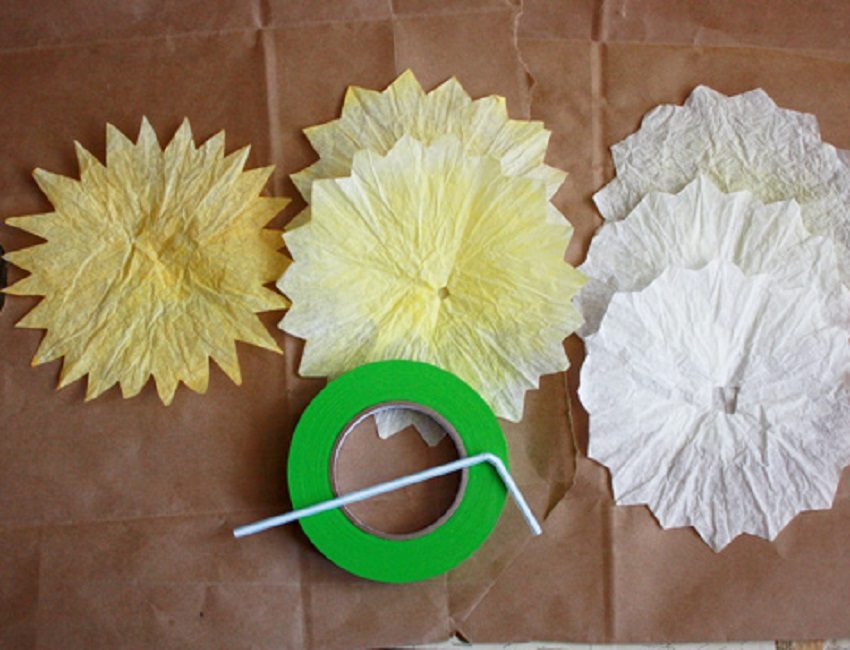
Divide the filters into 3 groups for coloring in different shades: 10, 20 and 30 pieces
Dilute the paint in water. In the first cup, make a pale yellow shade, in the second - medium intensity, in the third - more saturated
Immerse the filters in the paint and hold them there for about half an hour so that they are well painted over. Then take them out and dry them.
Lay out the blanks by shades

Round triangles
Fold the circles in the form of triangles and make cuts on top to end up with voluminous roses. Make a hole in the center of each filter
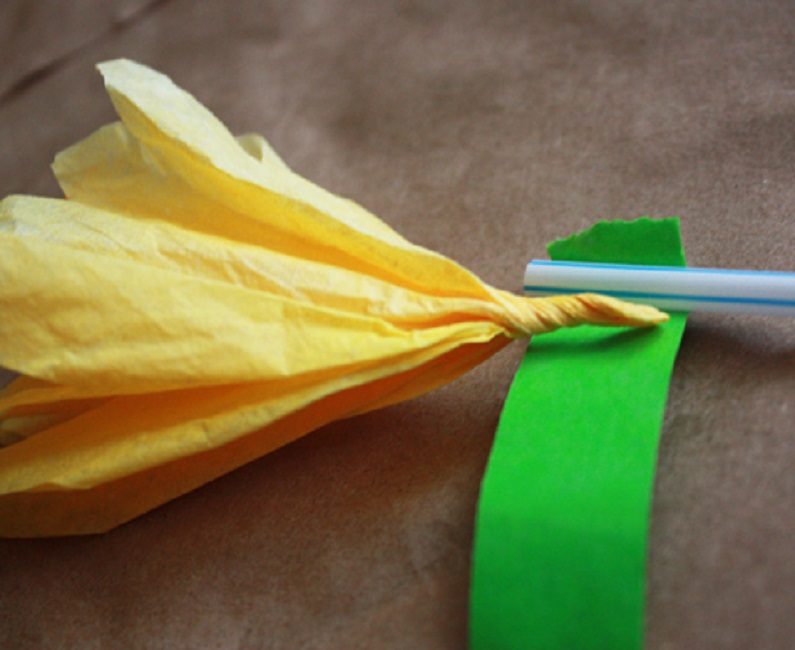
Collect the bud, which will consist of six parts of different shades (1:2:3). Prepare the tubing and electrical tape immediately
From electrical tape cut 4 strips 5 cm long
Tape strips
Twist one filter and tie it to the tube
Attaching the filter to the tube
Put the rest of the rounded blanks on the tube from below, lift and fix. This is done with every filter.
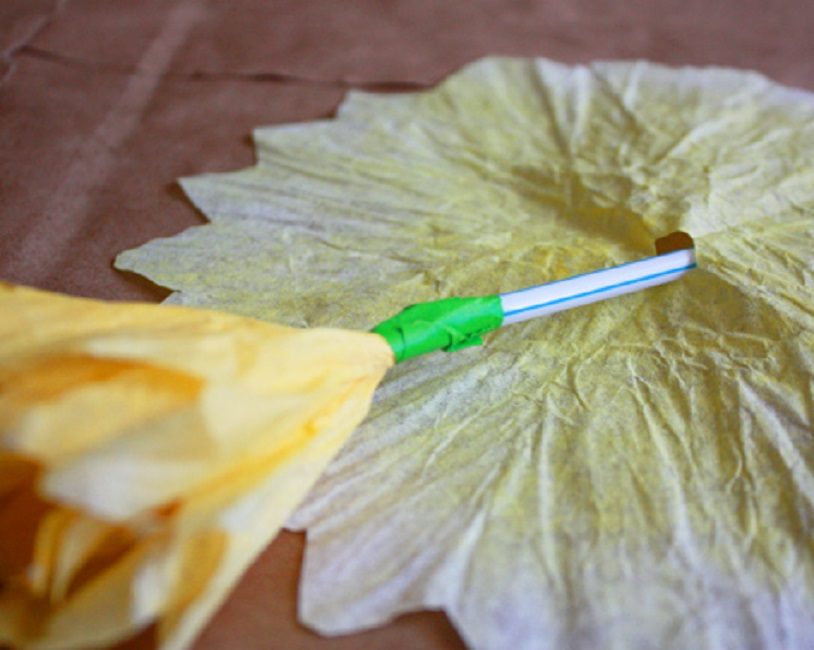
Fastening the rest of the workpieces
To get a natural stem, wrap the tube with electrical tape along the entire length. Leaves can be cut out of coffee filters and attached.
 Read also: Do-it-yourself furniture and other wood products: drawings of benches, tables, swings, birdhouses and other household items (85+ Photos & Videos)
 Delicious bouquet of roses
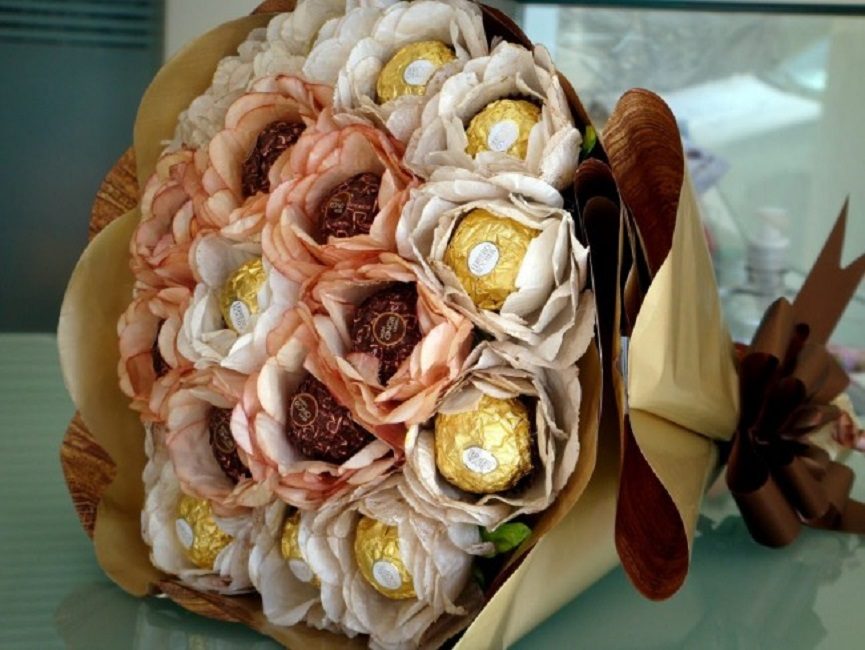
Bouquet of sweets and roses
Gently pink roses with sweets hidden inside will delight even an adult woman, not to mention a girl. To please your chosen one with such an unusual gift, you will need to make a little effort.
Necessary materials:
- corrugated paper roll
- scissors
- small round candies
- special wire
- strong threads
- floral tape
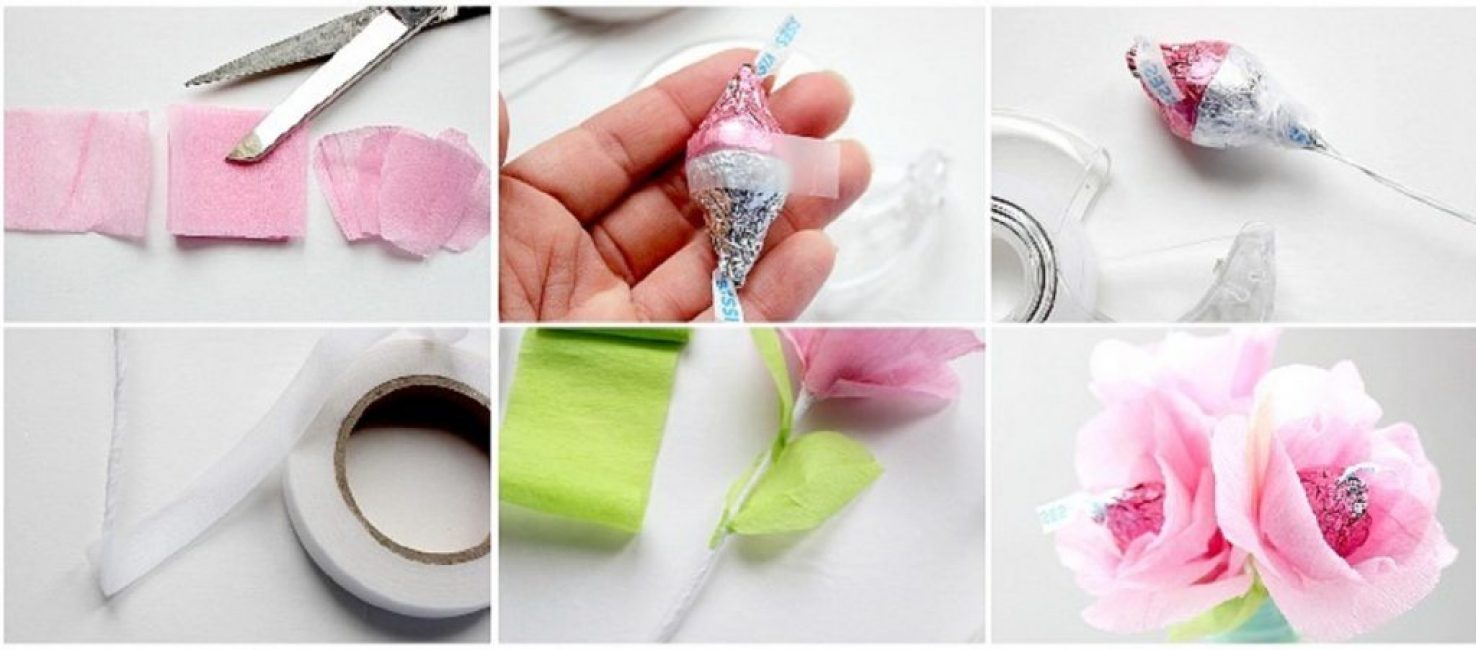
The process of making candy roses
Further sequence of actions:
- Cut out 5 rectangles 6x7 cm from paper and the same size 4x7 cm. From the resulting blanks, cut the petals with rounded edges and a smooth bottom
- Stretch each detail across the width (from the center to the edges) to give them the maximum similarity with natural rose petals.
- Cut out the sepals from the green corrugation. Stretch them in the same way, and twist the top edge with a toothpick
- Attach the candy to the wire with a thread. Now overlap all the petals around it and fix them at the base, wrapping them with a thread
- The sepals must be glued to the bottom of the buds or attached with a special tape
 Read also: We build a house for a cat with our own hands. Interesting ideas and step-by-step instructions: from plywood, cardboard boxes, fabric. Dimensional Drawings (120+ Photos & Videos)
 Roses from banknotes
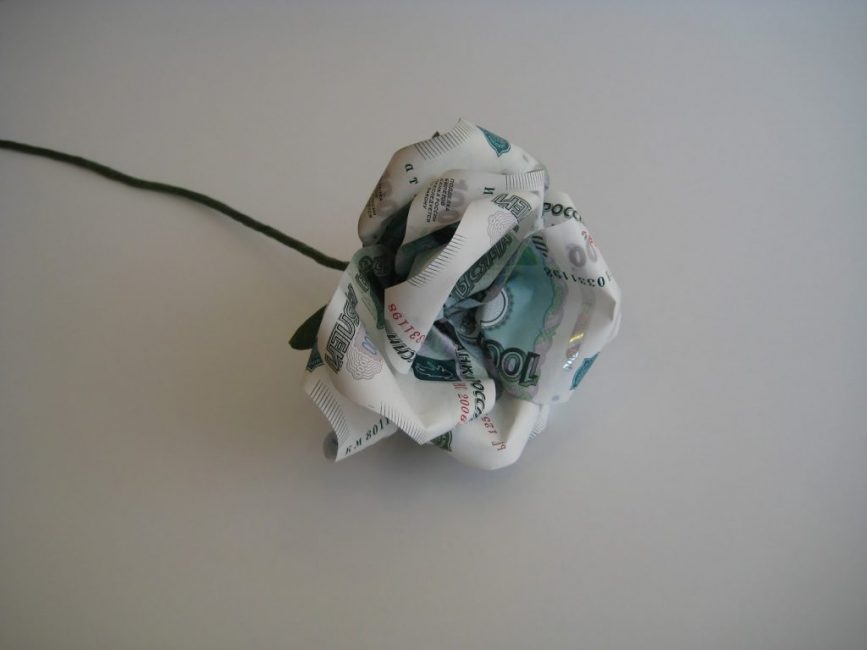
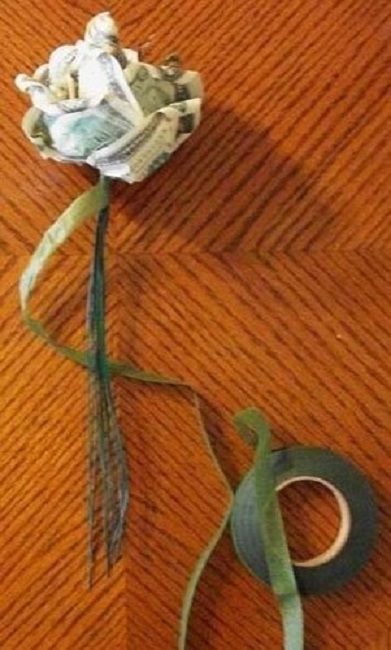
Rose from money
An excellent gift, symbolizing wealth and success in business, is roses from banknotes. To do this, you need to buy fake banknotes or print them on a printer from the Internet.
Instruction:
Bend the bill in half at a slight angle so that the top part is slightly wider than the bottom. Twist the upper corner on the right with a pen or pencil. Turn the workpiece over and repeat the manipulations.

Bill bending
Using a toothpick, twist the corners of future petals.

future petals
A wire is placed on one banknote in the middle (in a line along the bend), the ends are lowered down and connected to each other. Do not forget to spread the petals afterwards.
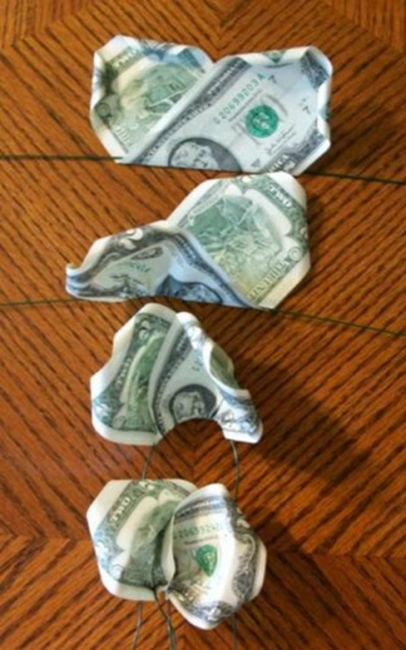
Wire attachment
Pull the wire through the other leaves in the same way.
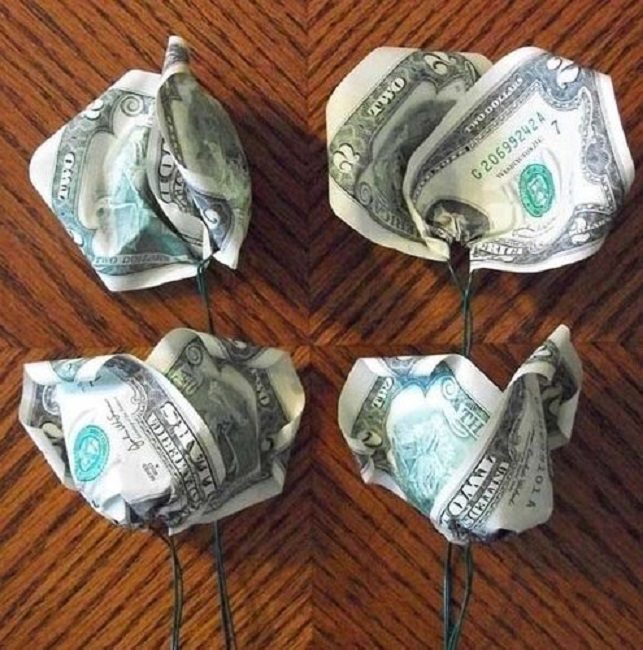
Pulling wire through other petals
Connect all the blanks together and twist the wires into one piece to make a trunk. Wrap it with green duct tape. You can attach leaves to it.
Finished result
 Read also: We make vertical beds with our own hands: the best ideas of 2018. For vegetables, berries, herbs and flowers (65+ Photos & Videos) + Reviews
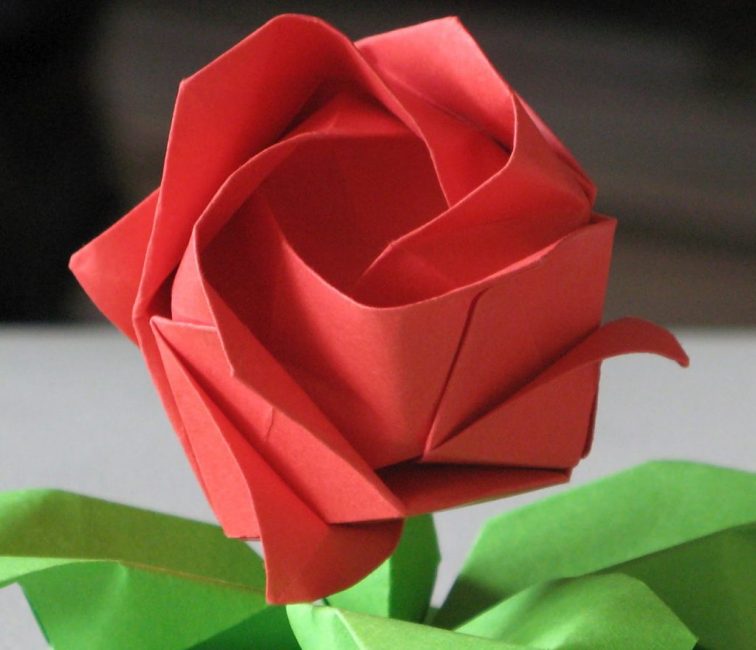
 Rose Kawasaki
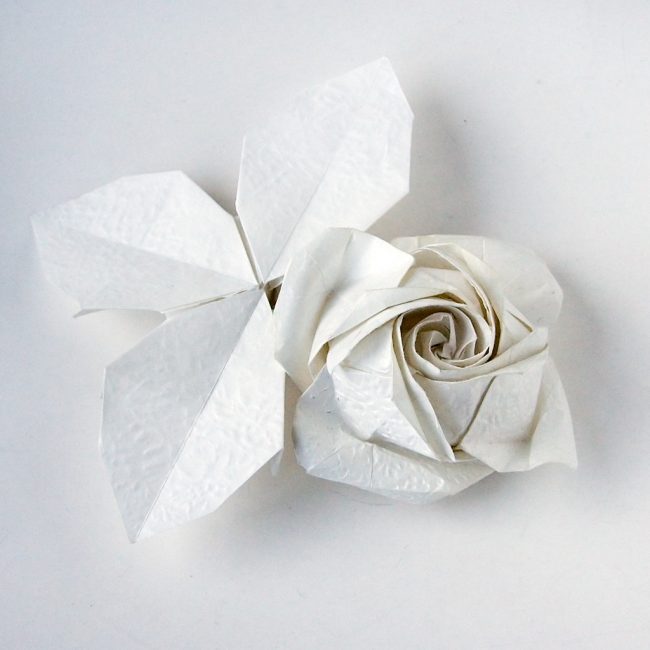
Rose Kawasaki
The hardest thing to make is a Kawasaki rose. This is only available to those who already easily cope with various techniques for making paper roses. It will be problematic to learn the technology of creating a bud from an ordinary square of paper.
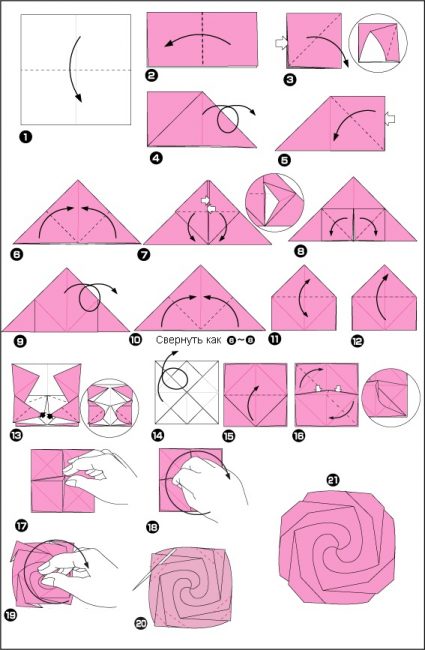
Fold a rose from a paper blank in the shape of a square, based on the video clip and drawing.

Scheme for making Kawasaki roses
Sequence of steps:
- You will need to prepare 2 sheets of paper (red and green) with sides of about 20 cm
- We take a red sheet (for a bud) and bend it diagonally. Then we unbend and outline the second diagonal and bend in the same way
- Open and fold the square in half on one side and the other
- Bend each side of the square to the center line
- We bend the small corners, then lift the sheet and create something like a dome, where the upper corner is cut off. Then we give the workpiece the desired shape
- We form the middle of the flower - we bend the upper ledges towards us and bend the lower edges back (in this case, you need to lift the scroll)
- To prevent the bundle from falling apart, hold it with your fingers or fix it with tape. Flip it upside down
- We wrap the corners of the petals along the axis inward. After that, it is necessary to open each bend, turning it inward
- Randomly protruding outer petals need to be arranged together and tucked into the pocket of the petal next door
- Squeezing the bud with your hand and slightly compacting it, straighten it out with a pencil, which we insert into the hole at the base
For clarity, it is proposed to additionally go through the video lesson below.
VIDEO: Rose Kawasaki I How to Make Origami

Rose Kawasaki I How to Make Origami
How to make a rose from plain and corrugated paper: step by step tutorials | (110+ Photos & Videos)
Origami
origami rose
This is a classic technology that involves folding various shapes from a square sheet of watercolor paper without the use of glue and scissors. In this way, you can quickly make a rose. Napkins can be used instead of plain paper, but they are more difficult to work with due to the fact that bends are not clearly visible on them.
Step by step master class:
- Consistently bend the square first across, then unfold and do the same diagonally
- Now fold the sheet into a two-layer triangle
- Bend the corners of the top layer to the top relative to the center line
- Bend the top corners so that they are pointing down
- The formed folds should be carefully straightened - first on one side, then on the other
- Square them up
- Turn the workpiece over and repeat the steps already done on this side
- Next, bend the top and create the desired folds.
- Move to the bottom of the bud. Starting to reveal it
- To the folds located on the left and right, successively give the shape of a triangle
- Turn the piece over again. Prior to this, set the bent triangle in a vertical plane
- Twist the petals along the axis, moving in one direction
Step by step process of making an origami rose
It remains only to twist the petals a little with a toothpick and the rose is ready.
Even giant roses can be made in similar ways. To do this, you need colored Whatman paper or corrugated paper. Such large roses are often used in the design of wedding ceremonies and other significant celebrations held on the street or in a spacious room.
Video instruction, how to make an origami rose below.
Origami paper rose Mother's Day Gift
How to make a rose from plain and corrugated paper: step by step tutorials | (110+ Photos & Videos)


