
A soldering iron is a simple and effective device that serves to connect parts. It is used not only in everyday life, but also in industry. But what if it was not in the pantry, and you urgently need to connect small metal parts? There is a way out, you can make this device yourself.
Content:
 Read also: TOP 12 Best garden shears: choosing a tool for cutting grass, bushes and hedges | Rating 2019 + Reviews
Materials for manufacturing
To make a soldering iron you will need:
- power step-down transformer of small power;
- heat shrink;
- wire 2 mm thick;
- thick plywood;
- PVC pipe;
- switch;
- stationery knife;
- pliers;
- screwdriver;
- soldering iron;
- saw;
- hacksaw blade for metal;
- minimill;
- insulated wires;
- plug into a 220 V socket.
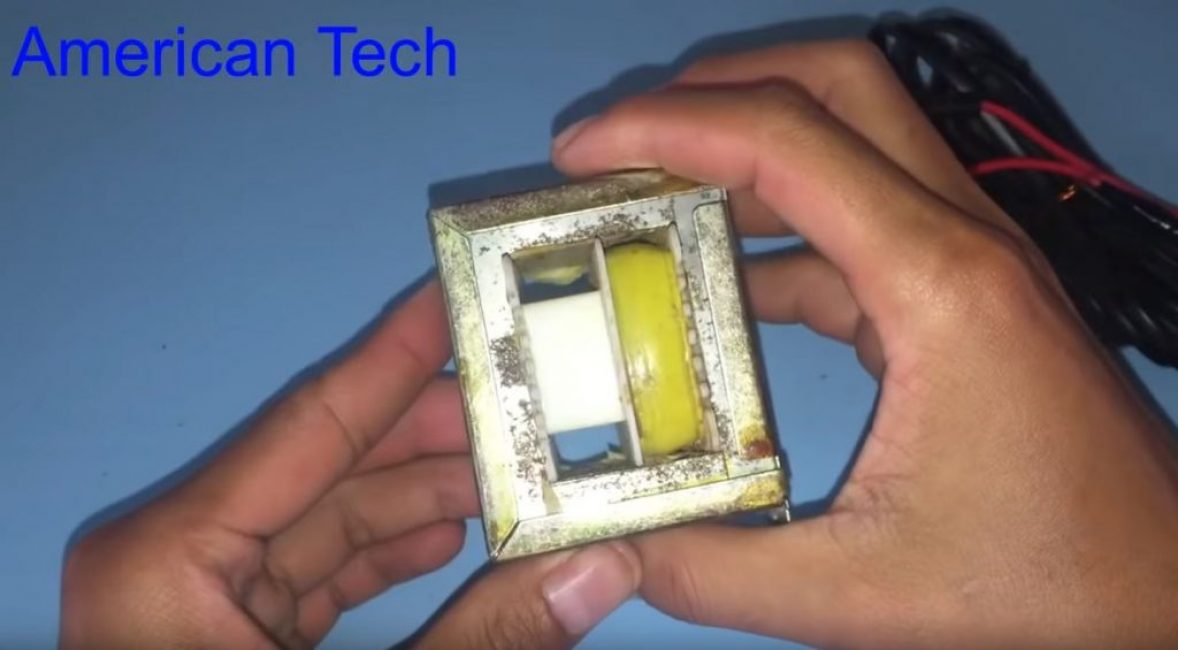
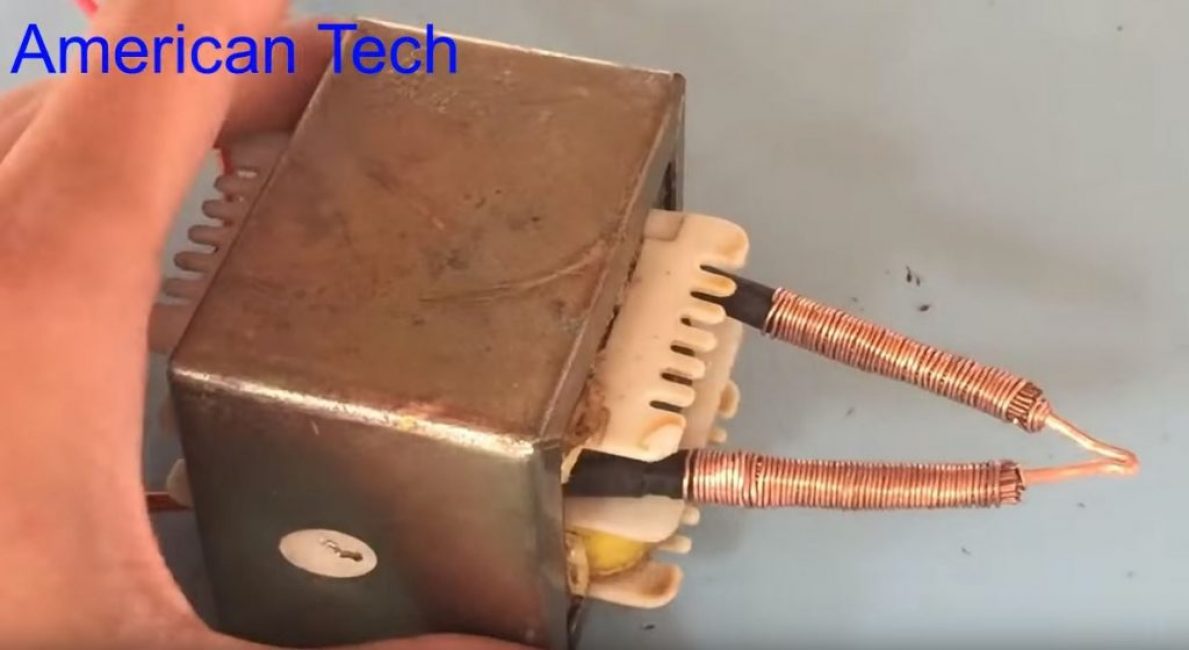
Step 1. Unwind the transformer winding
We remove the insulation from the top of the transformer with a clerical knife.
Carefully unwind the wire of the secondary winding (upper part of the transformer), turn by turn. We do not throw away the wire, we will use it in the future.
Now one of the sections is empty.
Step 2. Making a new secondary winding
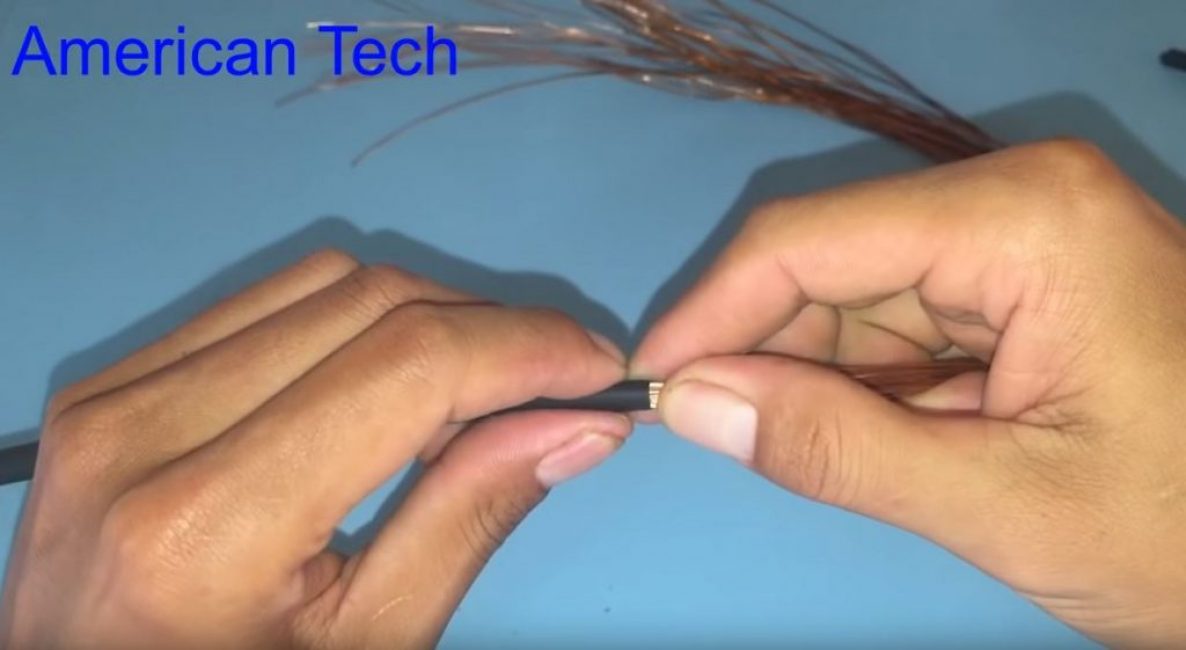
We proceed to work with unwound wire. We divide it into segments about 40 cm long.
We fold the resulting segments into a bundle. We clean each wire on both sides by 2-3 cm with a clerical knife.
We draw the entire bundle of wire into the heat shrink.
We thread the heat shrink into the secondary section and make 2 turns.
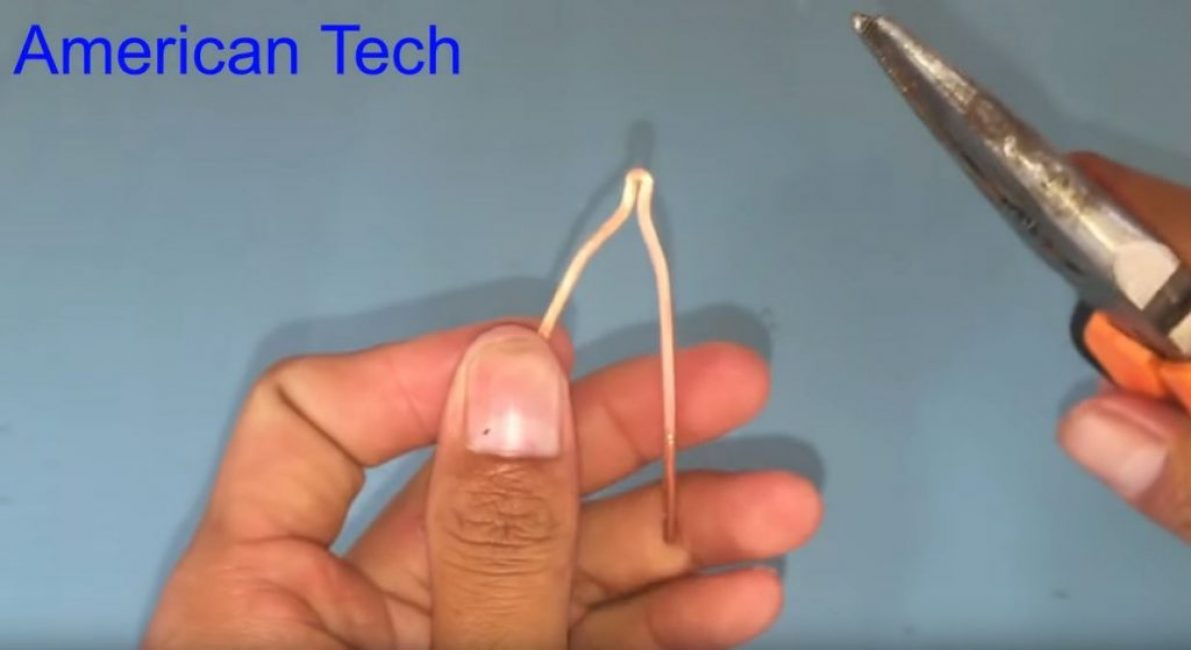
Step 3. Making a soldering iron tip
To create a sting, we will use a wire 2 mm thick.
We clean and bend the wire in half. At the place of the fold with pliers, we form a soldering iron tip.
We insert the ends of the sting into the middle of the terminals of the secondary winding.
We fix them by wrapping the leads with wire.
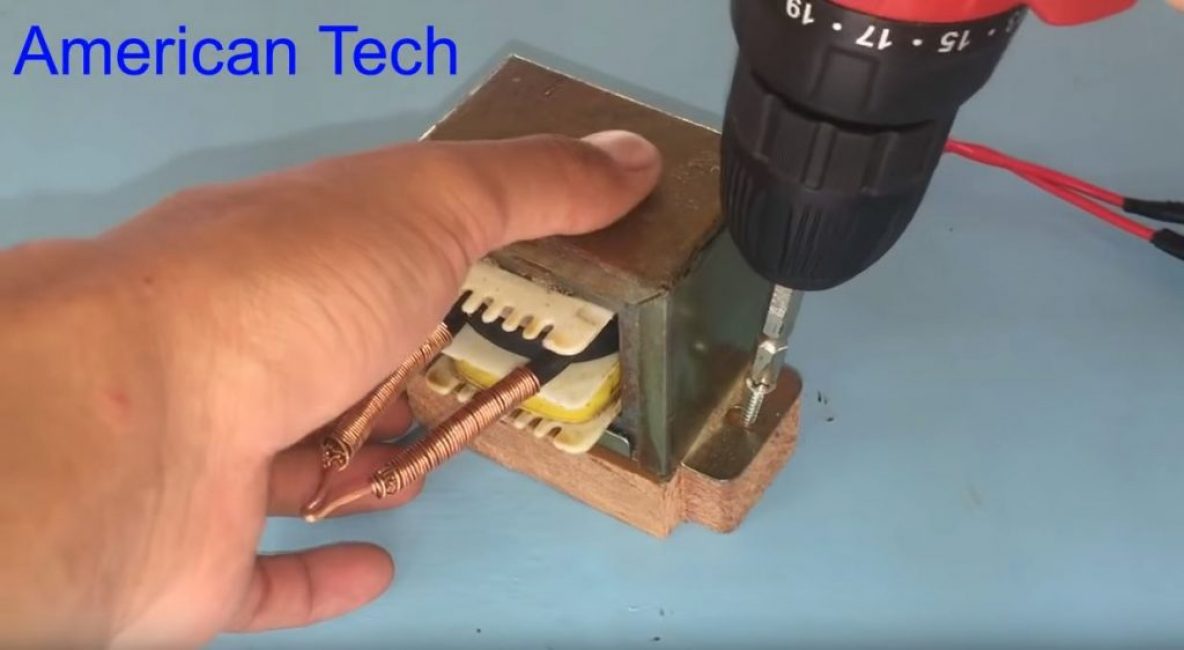
Step 4. Assemble the soldering iron
In order to make the basis for the soldering iron, we cut out a rectangle with cut corners from plywood, corresponding to the base of the transformer. In the center, we drill a hole according to the diameter of the polyethylene pipe intended for the handle.
We outline and drill two holes in the base with a thin drill. We fasten the transformer to it with self-tapping screws.
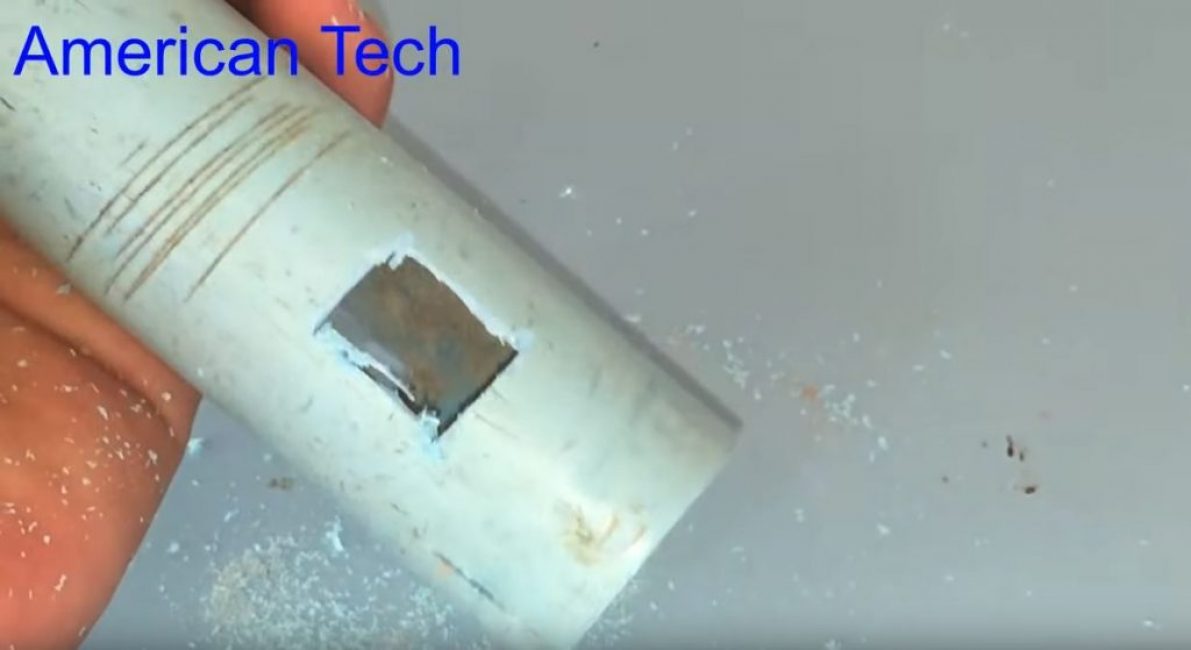
In the PVC pipe with a hacksaw blade, we cut a longitudinal slot and a hole for the wires.
Using a mini-mill, cut out a rectangular hole for the switch.
We solder insulated wires to the switch, assembling the power supply circuit to the primary winding of the transformer.
We insert the switch into the handle, and the handle into the base of the soldering iron.
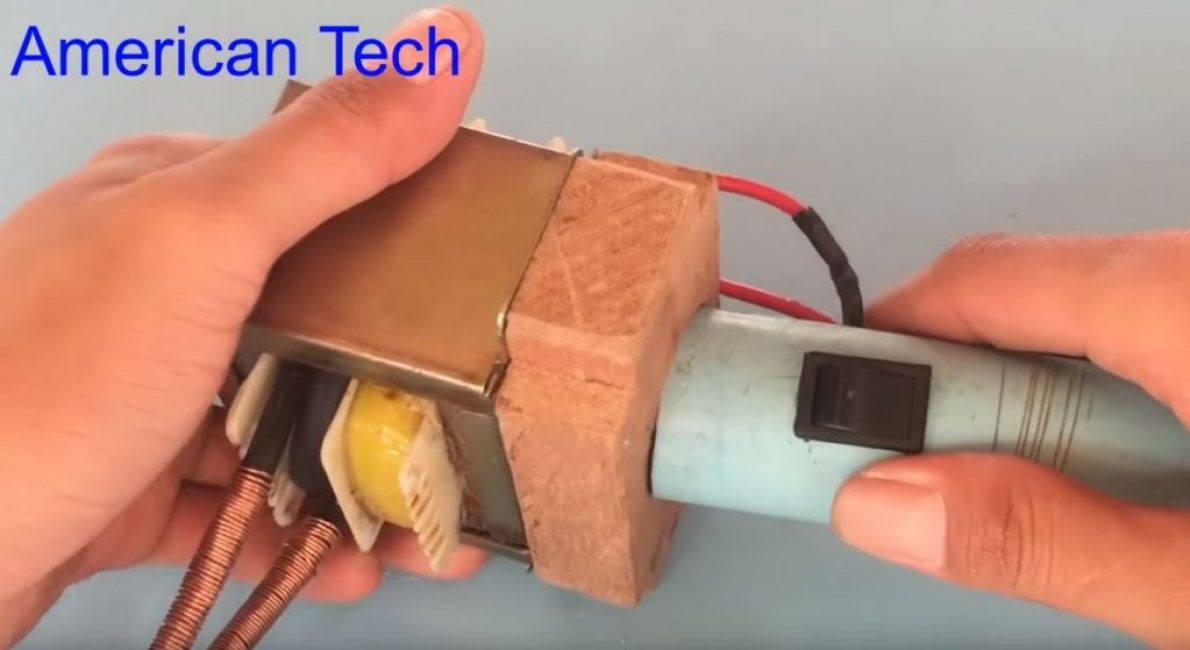
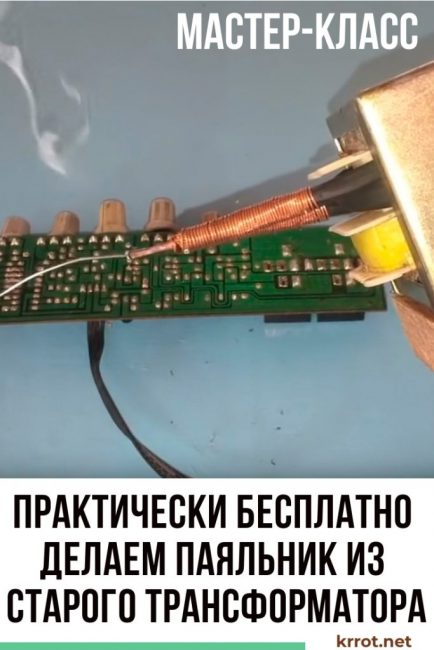
We connect the plug and connect the soldering iron to the network. By pressing the switch, we solder.

With this soldering iron, you can also clean holes in used printed circuit boards.

How to make a soldering iron with your own hands
How to make a soldering iron with your own hands? | The second life of an old transformer - a new tool for a penny


