
On the summer cottage you need a room where the working equipment will be stored. Such a change house is built in 1-2 weeks. The room will help to hide from the rain, the sun. You can spend the night inside if the country house is not yet completed. You can buy a small change house or make it yourself. There is nothing complicated, the main thing is to follow the instructions, follow certain rules.
Content:
 Read also: We make vertical beds with our own hands: the best ideas of 2018. For vegetables, berries, herbs and flowers (65+ Photos & Videos) + Reviews
Change house option
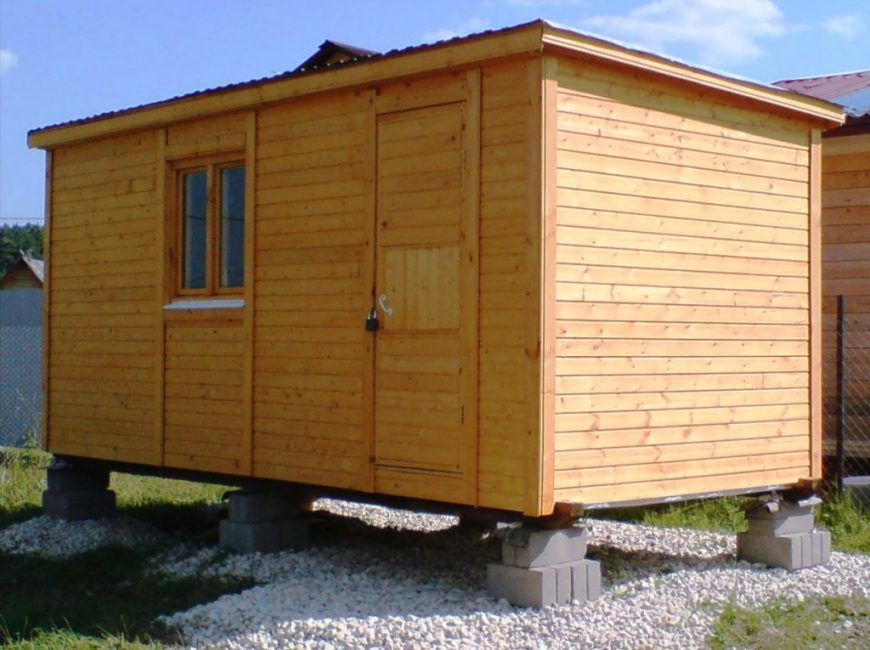
change house
The change house can be used as a utility room, an economy version of the dwelling before the construction of the main house. It is useful for storing inventory items: lawn mowers, trimmer, fishing rods.
If let down sewerage, insulate, can be used as a shower cabin, a small bath. It is worthwhile to determine in advance what is planned to be stored in the extension. Choose the size and type according to your needs.
Shield
Change house switchboard
A budget option. Usually the frame is made of timber, lining of lining. The interior space is covered with MDF or chipboard. Insulate with glass wool or foam. You can cover the subfloor with an unedged board. Finishing - inexpensive plate material. The roof is single or gable. A budget option roofing - from iron of small thickness.
To prevent the roof from deforming, make several stiffeners. You can do without a heater if you do not plan to use it in the cold season.
frame
Frame change house
The quality is higher than that of the shield. Materials cost more. To reduce the cost of construction, you can make a minimum number of windows or do without them. Remove barriers. During the construction, a bar with a section of approximately 10x10 cm is used. It does not deform. The interior space is covered with clapboard.
To make the room inside dry, use a heater - mineral wool and a layer of vapor barrier - glassine. The ceiling and floor are made double for strength and additional insulation.
Beam and log
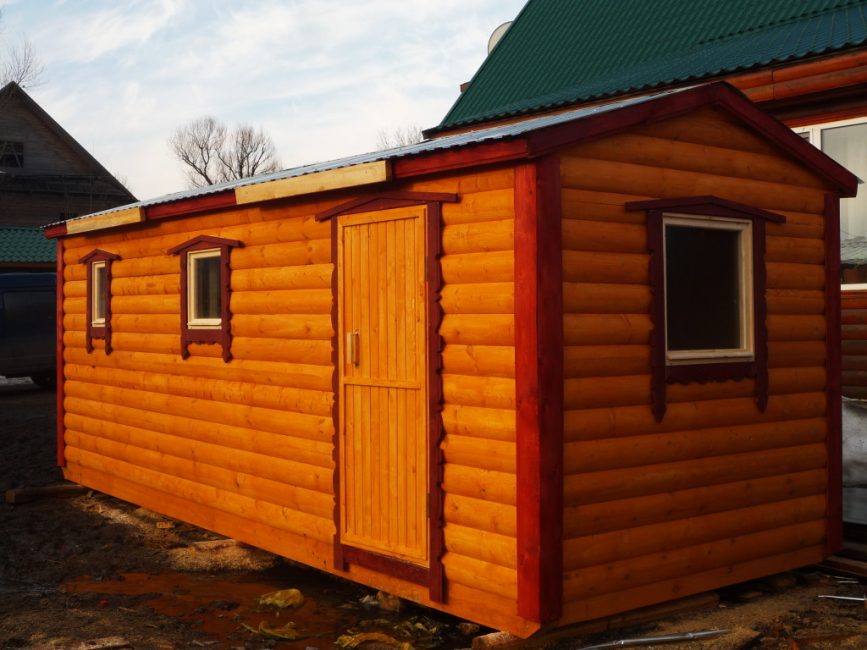
Timber change house
It costs more than the previous options. It makes sense to build if the premises are planned to be used at any time of the year. Can be used as bathsif you install the oven, water heater, build partitions.
For construction, it is recommended to use a beam of at least 100x150 mm. Thoroughly putty. Line the interior with clapboard.
Container
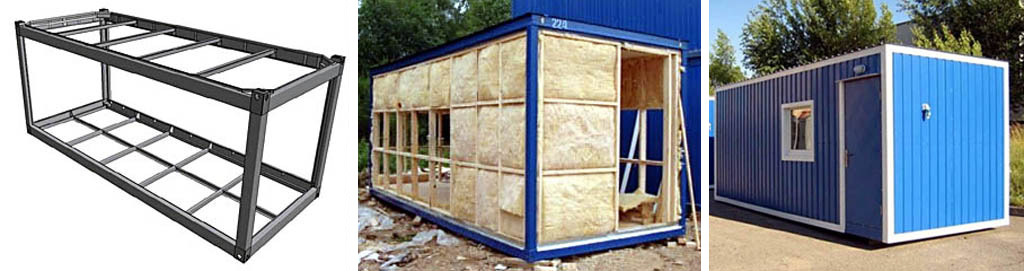
Change house-container
Building for temporary use. During construction, you will need to use a welding machine. Frame from a metal channel. Walls made of sandwich panels. The design is difficult to combine with the design of the site.
Made from metal channel. Acts as a framework. The remaining space is filled with sandwich panels.
 Read also: Self-leveling floor: device, recommendations and step-by-step instructions on how to do it yourself (50 Photos & Videos) + Reviews
 Making a change house

Change house drawing
The shield and frame utility rooms are built according to approximately the same algorithm. The load is taken by a rigid frame. It is not expensive, the work is not too laborious.
There are 2 building options:
- from the cell. In the picture on the left. The floor is laid after the construction of the main part
- from the base. Shown on the right. The floor is done first. The rest of it fits on it.There is more work here, but it is easier to build, no special skills are required. This option will be discussed below.
It will not be possible to make an extension in a few days. If done qualitatively, it will take about 3-4 weeks to build. During operation, all wooden parts should be impregnated with an antiseptic and a water-repellent mixture. You can use used engine oil, which will replace both substances.
It is not workpieces that should be impregnated, but already cut and prepared parts. The draft floor, logs, boards of the lower strapping should be impregnated with bituminous mastic.
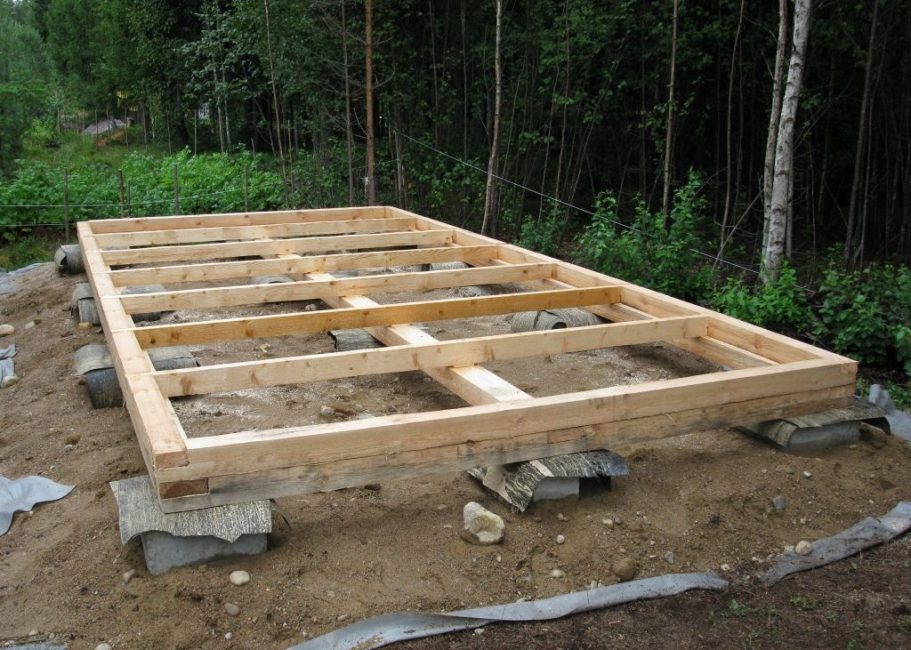
Foundation construction
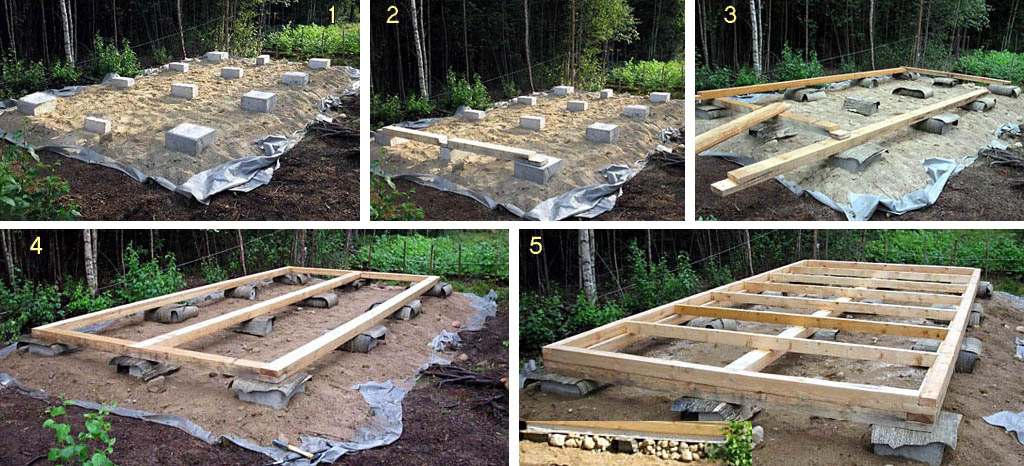
Foundation construction
The building will not be large, therefore, you can build a foundation using a simplified technology, as in the figure below. The ground should be approximately flat, without "humps".
Building a foundation:
- Lay a columnar non-buried foundation (1 position)
- Assemble a frame from a beam (2–4 position). Choose dry wood, with a section of 100x150 mm or 100x120 mm. The bearing capacity will be sufficient for normal operation
- Fix the lower frame of the frame with the floor lags (5th position)
It makes no sense to build a full-fledged foundation. Get expensive and long. To build, dig a hole that extends half a meter beyond the building. Remove the top layer of earth by about a shovel bayonet, about 30 cm.
To prevent the backfill from expanding, lay a layer of geotextile. Pour a layer of sand to the ground level. Tamp several times. Install the poles as shown below. The distance between them is about 1.5 m. Calculate to get an integer number of spans.
Foundation creation
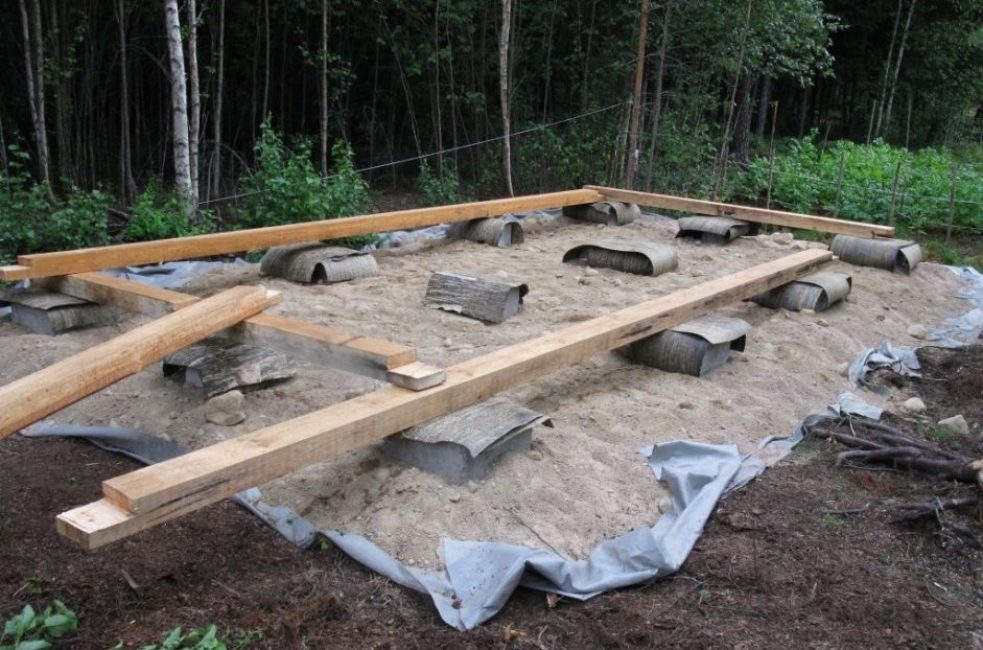
To create a base, you should take a level, align the concrete blocks on which you will have to lay a beam. Everything must be on the same plane.
Lay the beam on a concrete base, observing the level.
Laying bars
Under the wood lies 2 layers of roofing material. Fasten together with end brackets. It can be sheet metal. Attach to blocks.
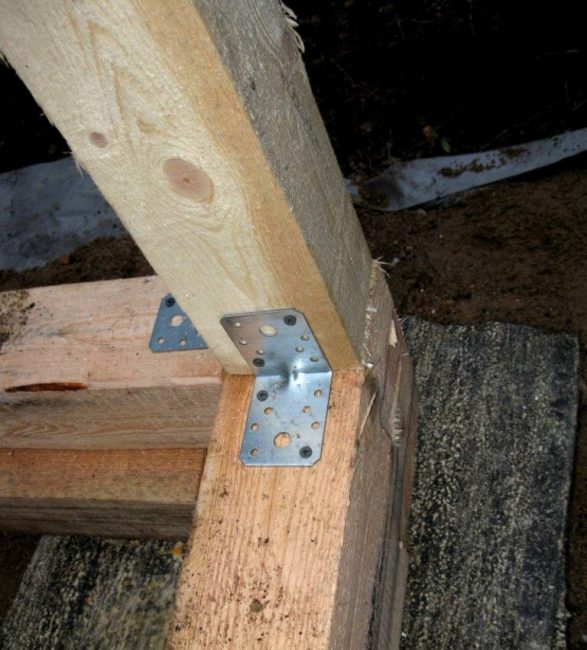
end bracket
Fasten with anchor bolts. Key top. It's easy if you use a puncher and a box head.
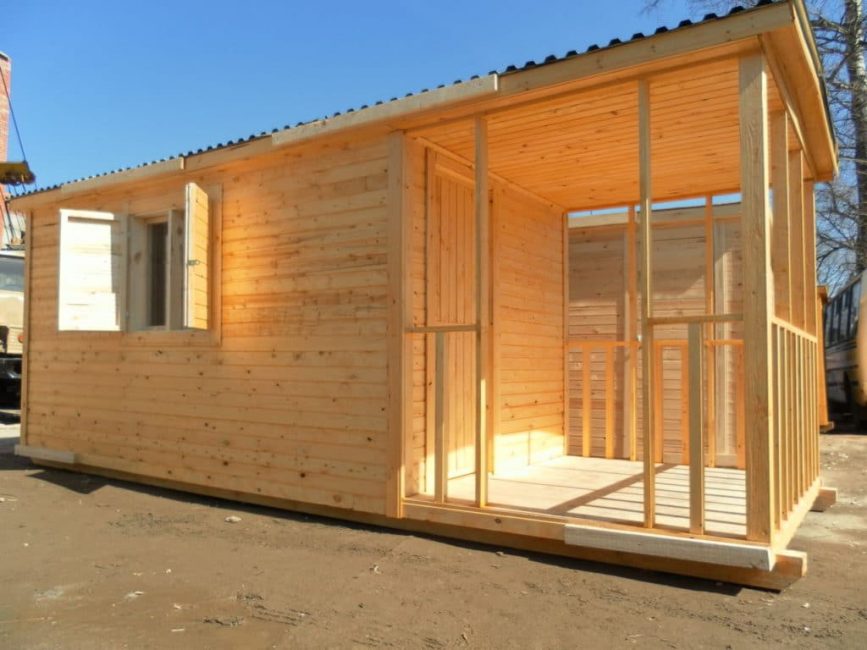
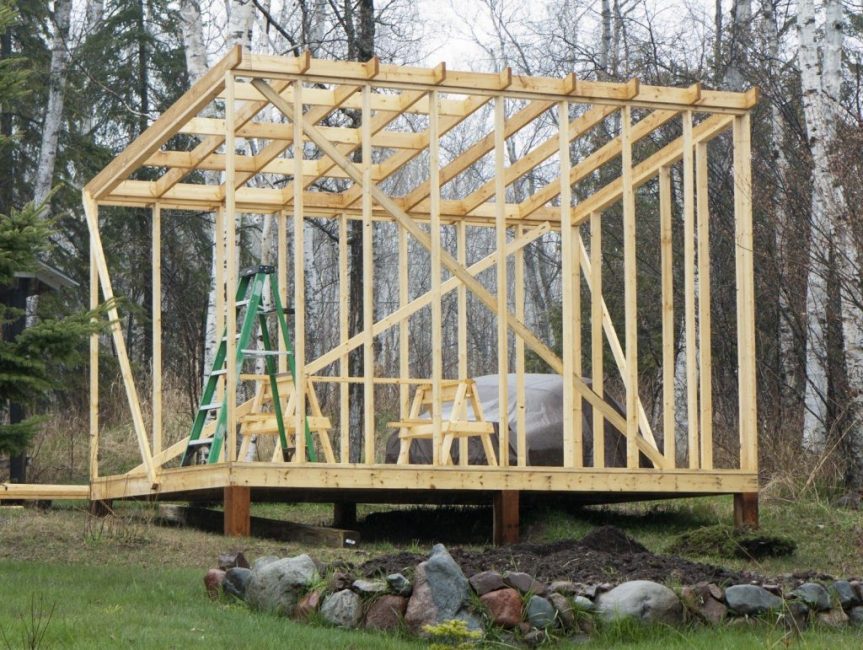
Frame installation
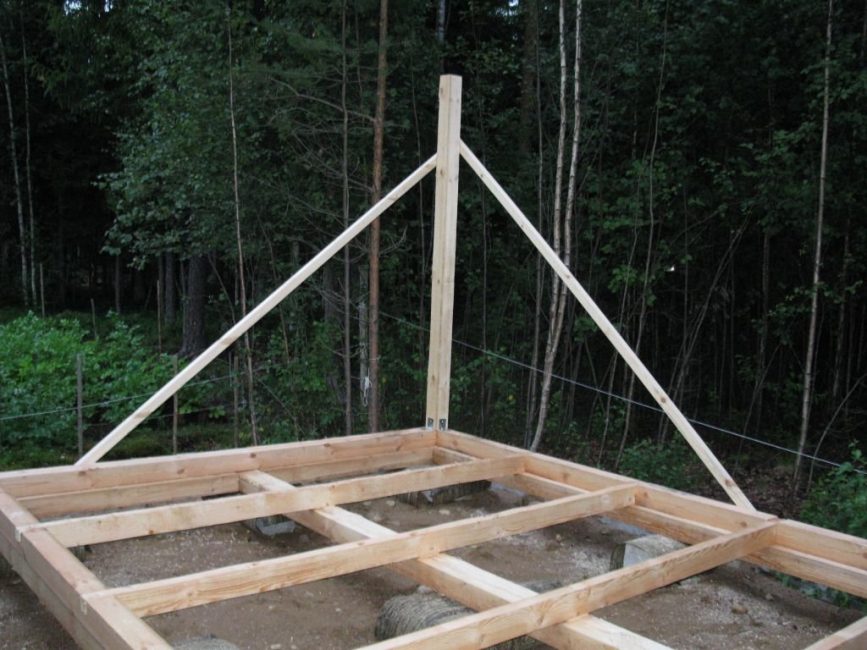
Frame installation
Work begins with the corners of the structure. You should take a bar 50x100 mm or 60x100 mm. Fasten the elements with temporary ties. Then align the racks, bring them along the same plane with vertical racks around the perimeter. Install metal plates to add rigidity.
Check the levels of the racks and tie them with horizontal beams. It will turn out a solid wooden structure, which can no longer be broken if you press on any of the sides.
The next step is to install the roof. For convenience, you need to build one row of vertical racks of greater height. It should be on the front. The back side should be lower level. The difference in height is about 50 cm.
frame
Connect the racks with floor beams. On the upper part of the structure, tie a beam.
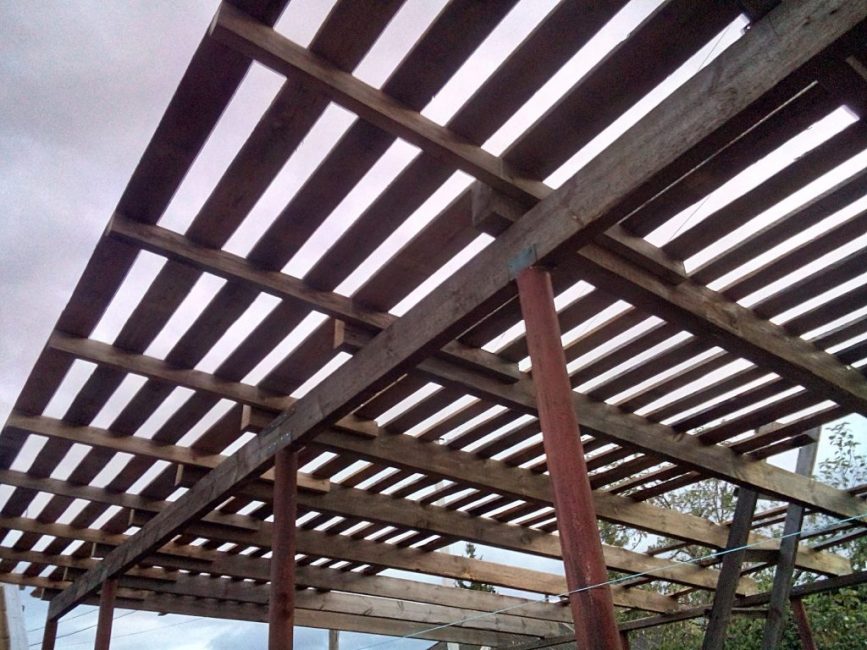
Roof installation
Rafter installation
There is already a base for easy installation of the roof. Rafters should be laid on it. Choose the strongest and straightest timber. If there are significant flaws, it will be difficult to lay the roof.
Lay the rafters at the same distance. 60 cm is enough. The connection with the lower floor beams must be strong. Parts located on the roof must protrude beyond the perimeter of the structure. Get a visor on the front side.A canopy will be erected on the back to drain rainwater.
Fix the rafters in any convenient way: nails, screws, bolts and nuts. use method "castle" – with the help of corner metal plates for fastening.
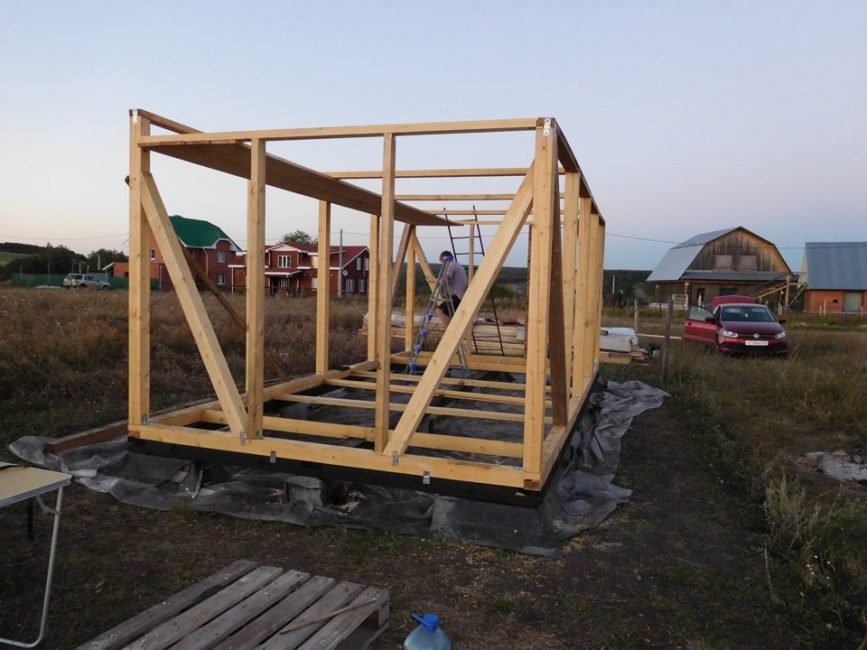
At this stage, you should mark the places for windows and doors. Along the perimeter of the frame, install additional racks that will reinforce the openings. They will help to put the necessary details without difficulties.
crate
For laying roofing material on top of the room, it is necessary to perform a crate. From the very beginning, the work was carried out according to the level. It is enough to take even wood, nail it perpendicular to the rafters. The distance between the shalevka is about 10 cm. Fasten with any details: nails and a hammer, self-tapping screws and a screwdriver.
When the wooden crate is laid and fixed, the roofing material should be laid. You can choose any: slate, iron sheets, tiles, etc. One of the options is roofing material and ondulin. It will be practical and not very expensive.

Laying roofing material
floor laying
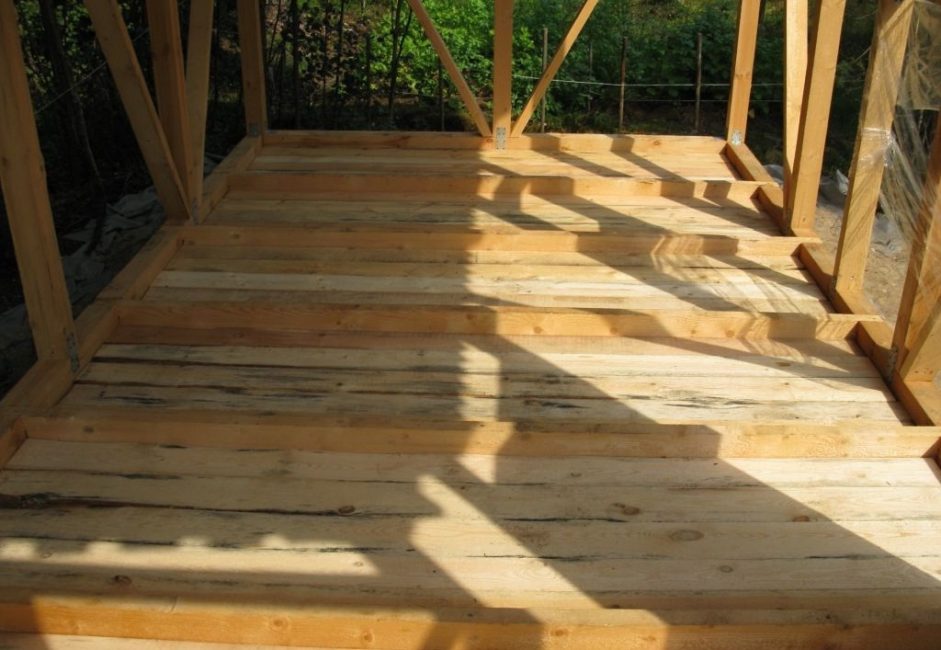
Laying the black subfloor
You can lay a rough wooden floor, finish it and finish it. Or add decorative flooring that will make the room more pleasant.
The draft floor can be laid on the base of the timber. Another option is if a threshold is provided in advance. It is necessary to take the first beam with a section of 100x150 mm in advance, lay it on the floor. The next beam is perpendicular, with a section of 100x100 mm.
Both options are acceptable. In the second case, the floor level will turn out lower due to the deepening for the draft log.
A layer of waterproofing is laid on top of the boards. You can take plastic wrap, or other material of higher quality. It is fixed, as a standard, with the help of staples and a stapler.
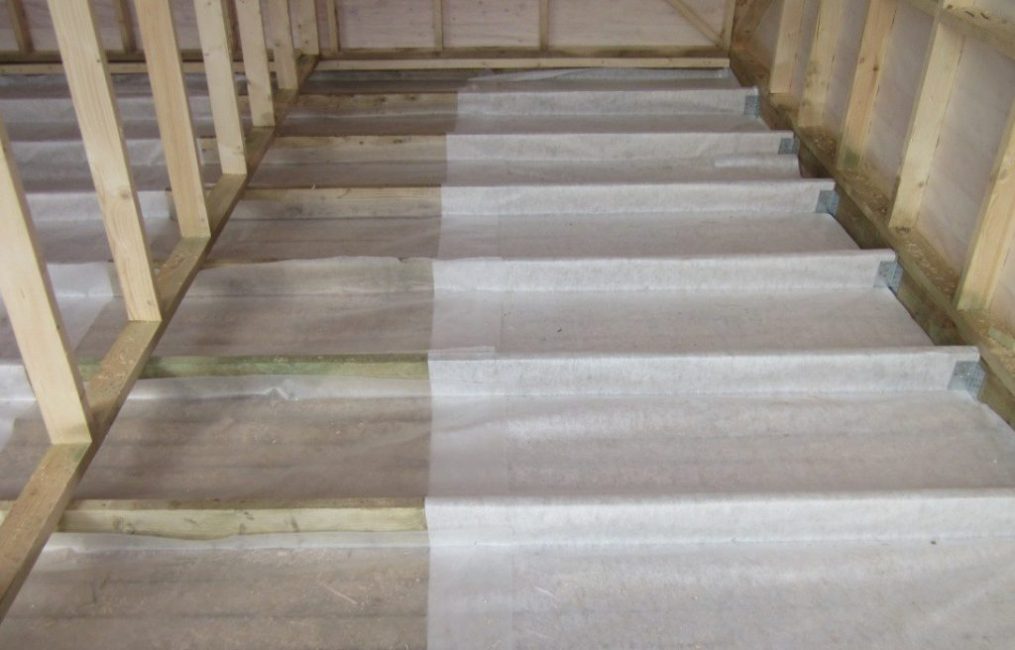
Laying waterproofing over the floor
After fixing, isolated cavities will be obtained. They contain insulating material. Suitable mineral or glass wool. You can cut the rolls on the spot. When working with glass wool, use protective equipment: overalls, gloves, closed shoes.
If the size of the insulation sheet is larger than the cavity, it must be cut, not trampled. It is necessary to achieve the size of the pieces, approximately the same as the cavities.
The heater does not need to be fixed. A waterproofing layer is laid on top and fixed to the brackets.
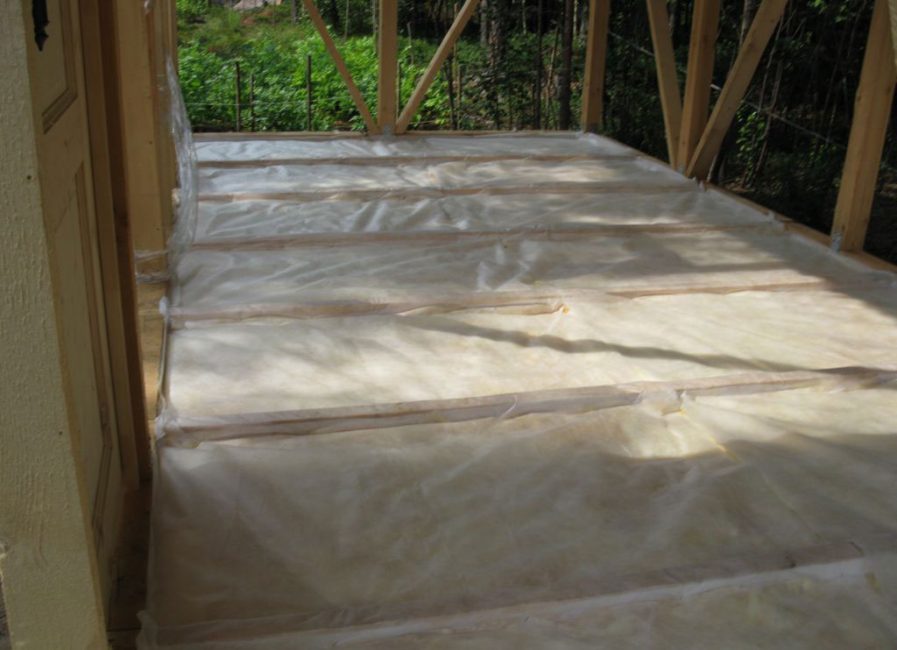
Fixing the waterproofing layer
The next step is to install the floor. To do this, pick up a dry, durable tree, which is subsequently painted and varnished for beauty.
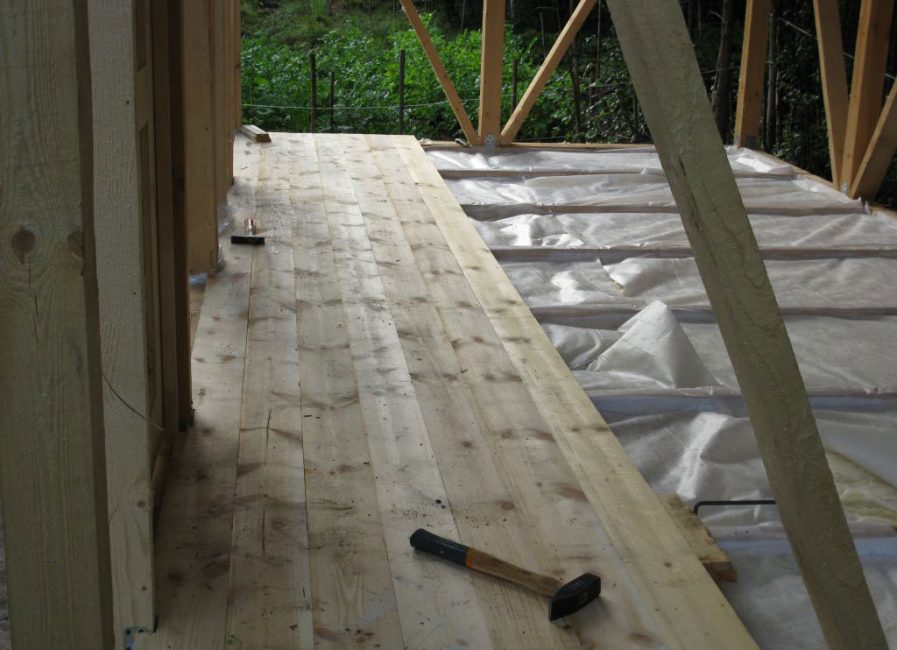
floor laying
At this stage, the installation of the floor ends.
Warming

Change house insulation
After the exterior finish, you can find a significant minus inside - a draft. It can be eliminated by internal or external insulation and sealing. Treat all joints with mounting foam, putty large holes. You can use mineral wool or other insulation.
Stages of work: creating a frame, laying material, waterproofing and cladding with decorative material. The cavities into which thermal insulation is inserted should be approximately equal to the pieces of the selected thermal insulation. You can not fix it, it will be pressed with a finishing compound.
Perform the same actions on the ceiling so that cold does not penetrate through the pores.
outer skin
Upholstery with insulation
Walls should be covered with insulation to protect the room from moisture and wind. If the room needs to be warm, a layer of heat-insulating material is needed. The film should be fastened with an overlap of 20 cm. Fasten with staples to the wood. To increase the tightness, stretch all joints with tape.
After upholstery with insulation, the change house should be sheathed. Any exterior finish materials are available: siding, wood, composite panel, plastic.
 Read also: How to install a water-heated floor with your own hands: step-by-step installation instructions for all types of coatings (20+ Photos & Videos) + Reviews
Conclusion
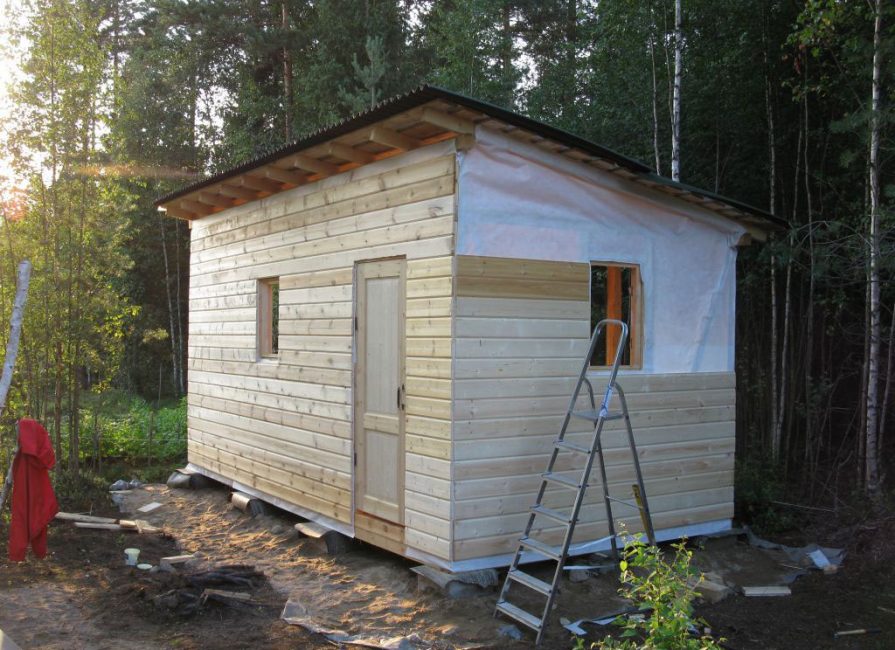
Ready change house
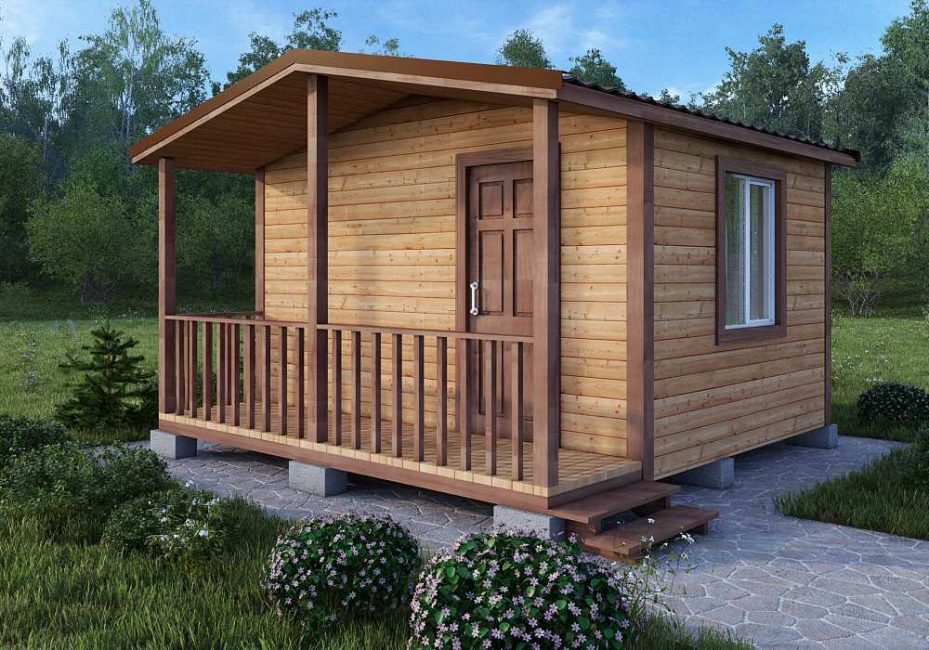
Additionally, you can strengthen the windows with shutters so that during strong winds the glass does not break. An example of the design in the figure below. Folding ones are easier to make than swing ones. All you need is one large sash and fasteners attached to it.
The result is a multifunctional room, without which it is difficult to do at their summer cottage. Depending on what is planned to be stored in a change house, they choose the option of insulation, inner lining.
Anyone who knows how to hold a hammer in their hands can build such a room.

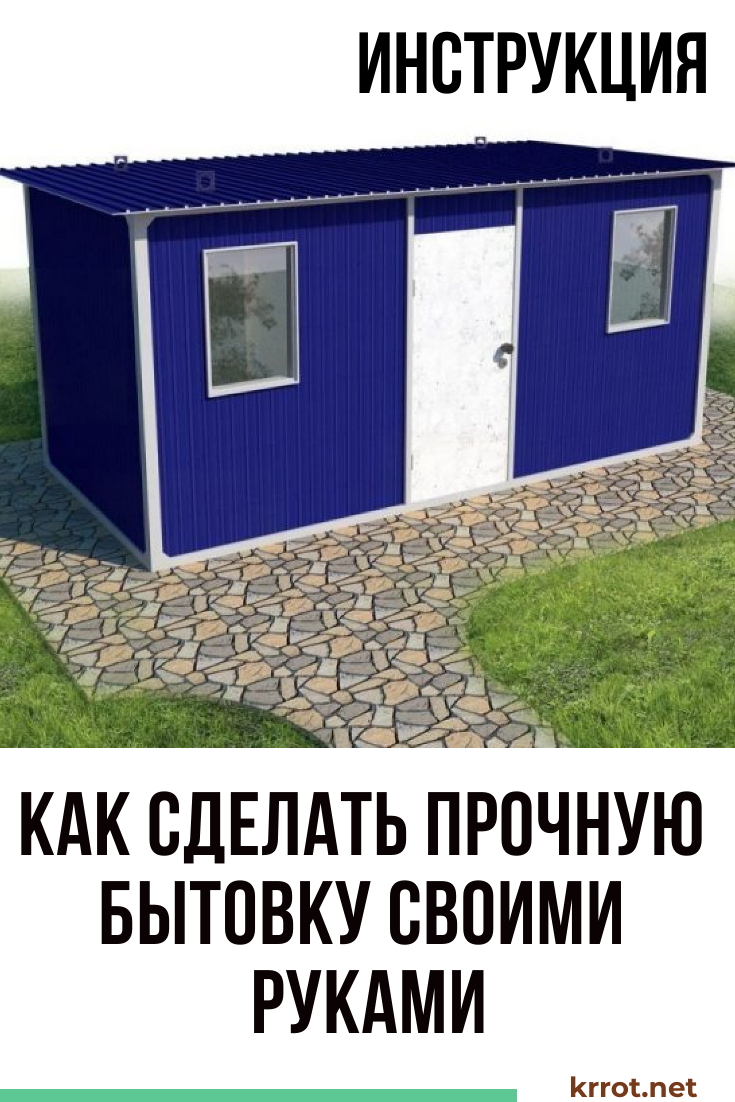
Do-it-yourself change house 6x3m
How to make a durable change house with your own hands: simple step-by-step recommendations | (50+ Photos & Videos)


