

Profiled rolled metal is perhaps the most commonly used roofing material in recent years. This is due not only to its high strength and wear resistance, but also to its relatively low price. If you have never encountered it before and do not know how to fix the corrugated board on the roof, carefully study this article.
Content:
 Read also: Potatoes: description of 73 best varieties (Photo & Video) + Feedback from gardeners
What type of decking to choose?
The strength and reliability of this type of material depends on several parameters:
- steel thickness: Naturally, the higher this indicator, the better; too thin steel will bend at the slightest gust of wind; the most versatile material is considered to be 0.3-0.5 mm thick; but it is better to use a more durable profiled sheet 0.45-0.5 mm
- corrugation shape and height: maximum rigidity is guaranteed by a wave in the form of a trapezoid; for roofs with a slope angle of 45 ° or more, its optimal height is at least 20 mm; for flat roofs this parameter should be higher
- zinc coating thickness: it should be 140, and even better 275 g per square meter; a coating of lesser thickness will quickly become unusable, because zinc is able to weather over time
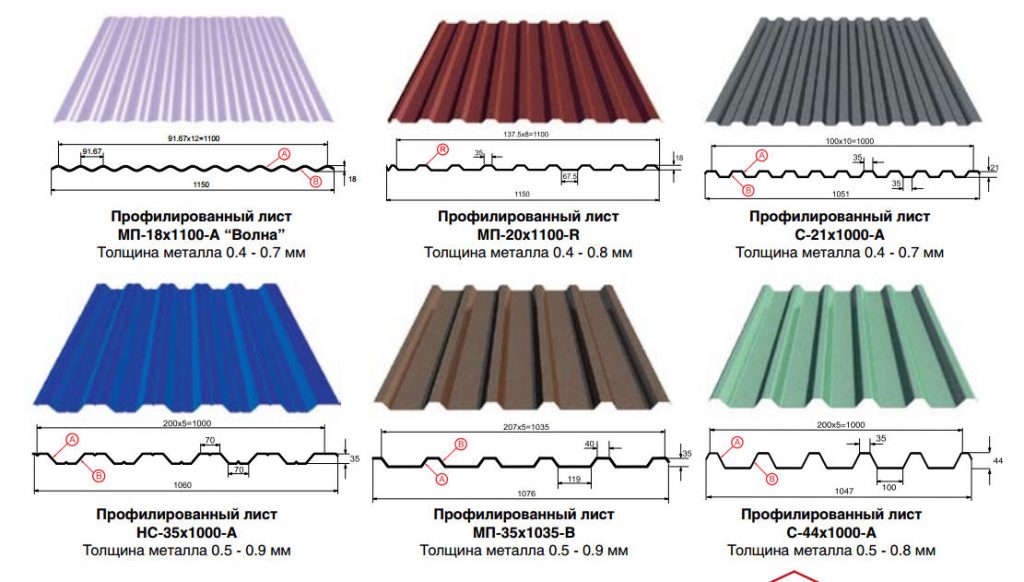
Assortment of corrugated board
The most commonly used material for roofing is C20 or H20. The number 20 means the height of the profile in millimeters. Marking "H" is used for the carrier (roofing material). It has a wave in the form of a trapezoid of sufficient height, equipped with stiffeners. You can use universal (NS) and even wall profiled sheet, marked with the letter "C". It is only necessary to choose a material with a wave height of 20 mm. A roof assembled from the KP20 profile will be more reliable. The letter "P" in the marking indicates the presence of a groove for collecting condensate, which protects the roof even from small leaks.
The increased height of the corrugation will provide the material with increased rigidity. This material costs a little more. But the final price of the roof will be equal. After all, the consumption of profiled rolled metal C10 or P10 will be higher, since it will need to be laid with an overlap of 2 corrugations. For KP20, an overlap of 1 wave will be enough.
The bearing (roofing) material, marked with the letter "H", has a higher wave in the form of a trapezoid. Such stiffeners provide better resistance to snow and wind loads. But when using a more massive wall with a corrugation height of more than 45 mm, it will be necessary to strengthen the truss system, otherwise it may collapse.
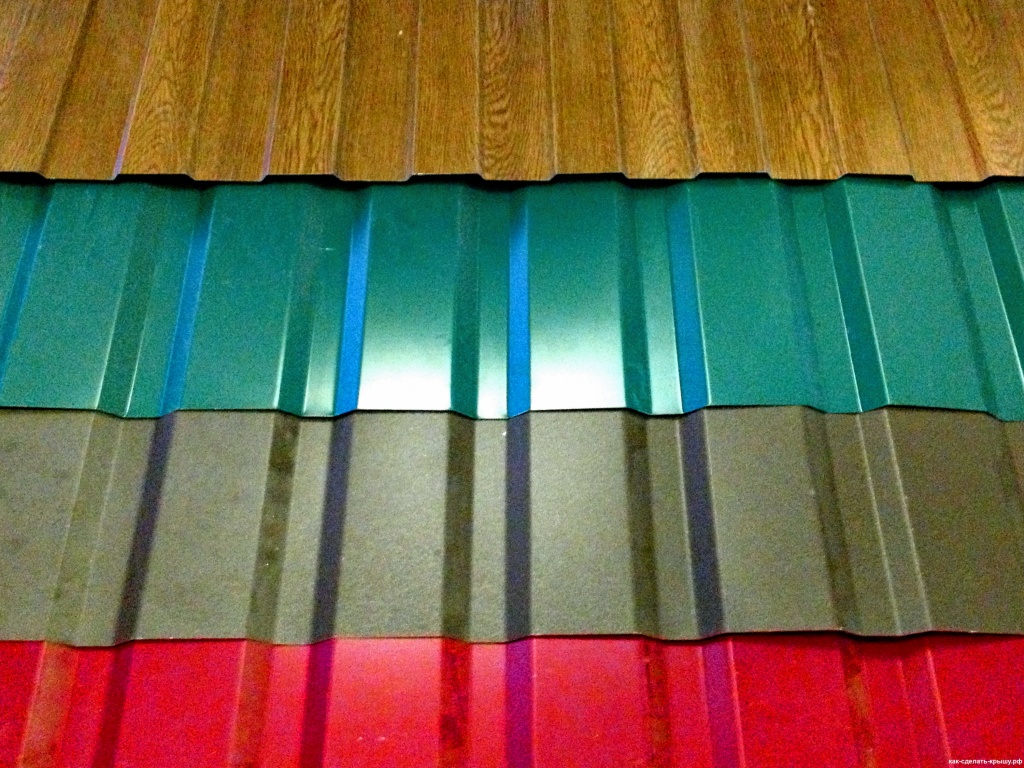
Color variety of corrugated board coating
A material coated only with a layer of zinc will cost less. Decking with colored polymer protection looks more original. But the main function of such a coating is not only decorative - it is designed to additionally protect steel from premature corrosion. It will be better if it is matte - such coatings do not burn out so quickly. Polyurethane spraying is considered the most reliable and durable. Polyester-coated corrugated board will cost less.
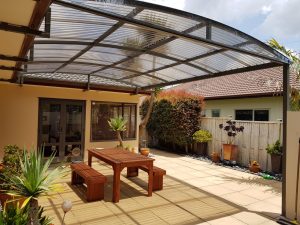 Read also: Canopy in the courtyard of a private house made of polycarbonate and other materials (250 PHOTO IDEAS) - Beautiful view, convenience and practicality
 Required amount of material
First you need to determine the total area of \u200b\u200bthe roof. The calculations here are simple - you need to find the area of \u200b\u200beach triangle (or rectangle, if the roof is gable), and then add up the resulting numbers.
We determine the required number of rows of corrugated board horizontally. To do this, it is enough to divide the length of the roof slope by the width of the sheet. The calculation is carried out without taking into account the overlap (it is 80-85 mm). Don't forget to round the total up. To calculate the number of sheets vertically, divide the height of the roof by the length of the sheet. In this case, it is necessary to add to the height of the roof the length of the cornice overhangs of 200-300 mm.
It remains to multiply the number of rows vertically and horizontally. Please note that we have received the number of sheets that will be needed to cover only one slope. If the roof is gable, naturally, the number must be doubled. For a four-slope, respectively, increase it by 4 times.
To determine the amount of material that will be cut, for clarity, it is better to draw a sheet layout diagram on paper. For complex roofs, it is advisable to use online calculators - it will make calculations more accurately.
Accessories
In addition to the corrugated board itself, you will also need to purchase fasteners (self-tapping screws) and additional elements for fastening on skates, valleys, in the area of \u200b\u200bthe chimney, and walls. You will also need corners, end and cornice strips. We will describe each of them in more detail below. When calculating the required number of additional elements, it must be taken into account that they, like the profiled sheet, are mounted with an overlap.
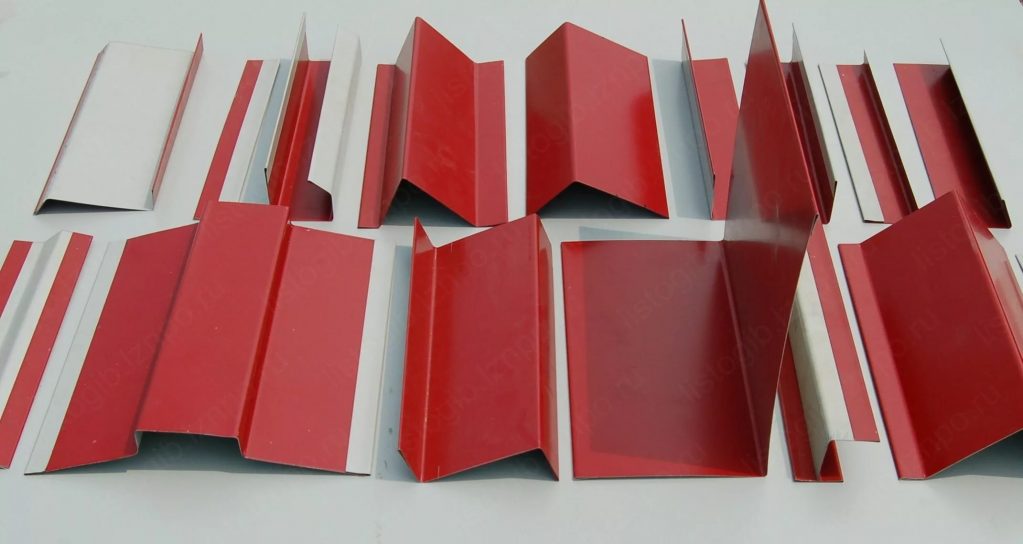
Additional elements for corrugated board
What kind of self-tapping screws to fasten the corrugated board to the roof? It is screwed to the crate with 20 mm white metal self-tapping hardware with a diameter of 4.8 mm. For a square meter of corrugated board, you will need 6-9 pieces of self-tapping screws. Such fasteners are equipped with reinforced metal drills, which facilitate their screwing in without prior perforation of the corrugated board. Outwardly, they resemble a drill. More practical are hardware with a hexagonal head and a rubber (neoprene) gasket.
 Read also: Interesting ideas for decorating your favorite dacha with your own hands | 150+ original photo tips for craftsmen
Lathing type
After installing the rafter system, laying waterproofing and battens, they begin to fasten the profiled sheets. To install the crate, you will need to purchase a timber with a width of 100-150 mm. With a small rafter pitch of 60-80 cm, a 25-mm beam is enough. If the distance between them is more than a meter, a thick beam of 50x50 cm is used for the crate.
If the rafters are spaced 80-100 cm apart, it is enough to purchase a 32 mm beam. For fastening the waterproofing, a 4-5 cm countertray is used.
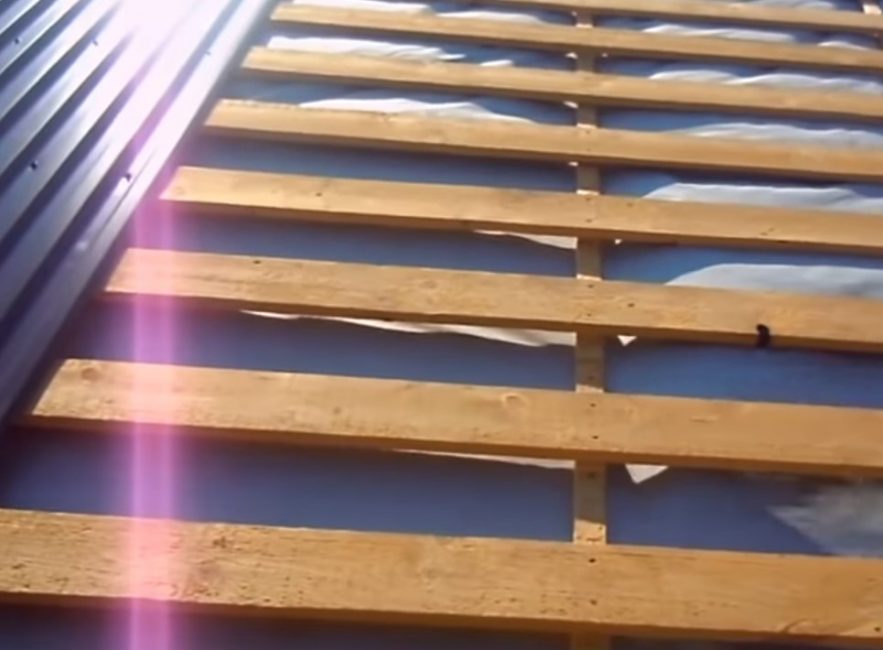
Lathing step
When choosing the pitch of the battens, they are guided by the thickness of the metal, the height of the corrugation and the angle of the roof. Sheets with a small corrugation height of up to 10 mm are laid only on a continuous crate. Such material is mainly used for roofing sheds and other utility rooms.A solid crate will also be needed when laying the material on a roof that has a slight slope of up to 15 °.
C21 or MP-20R corrugated board with a thickness of 0.5-0.7 mm is mounted on a crate with a step of 30 cm. If the angle of inclination of the roof is more than 15 °, a distance between the bars of 60 cm is sufficient. For NS-15 corrugated board, this indicator is equal to 50 and 100 cm, respectively, depending on the angle of inclination.
 Read also: Landscaping your site with your own hands - (130+ Photo Ideas & Videos) + Reviews
 Cutting of corrugated board
To begin with, most manufacturers strongly discourage the use of a grinder for these purposes. After all, when using abrasive discs, due to the strong heating of the metal being cut, the protective polymer layer of the corrugated board can melt. Accidentally falling sparks can also damage it.
The use of the grinder in practice is still possible. But only when using special discs of small thickness (1.0-1.6 mm) designed for cutting metal. The teeth in them are made of hard alloys. It is better to choose a larger circle diameter. Otherwise, when cutting sheets with a large corrugation height, its lower corners will have to be cut.
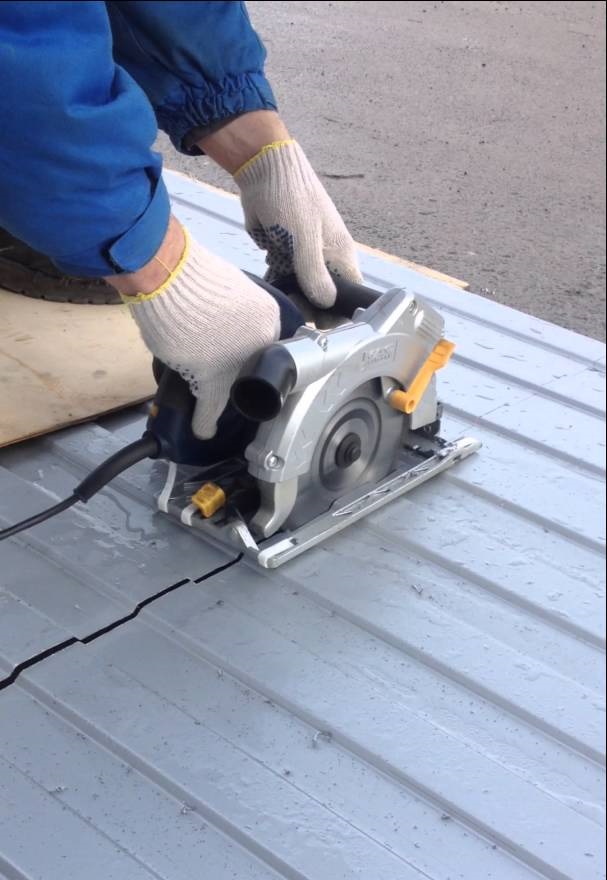
Hand circular saw
Another way to cut is to use a hacksaw. Cuts when using it are neat, even, without jagged. But a large number of sheets with a hacksaw cannot be processed. Yes, you can only cut in a straight line. Metal shears are used mainly for cutting across the corrugation.
A good tool for cutting corrugated board with a wave height of up to 25 mm is an electric jigsaw with fine teeth. It is necessary to work at the highest speed, making reciprocating movements. The tool is tilted along the sheet.
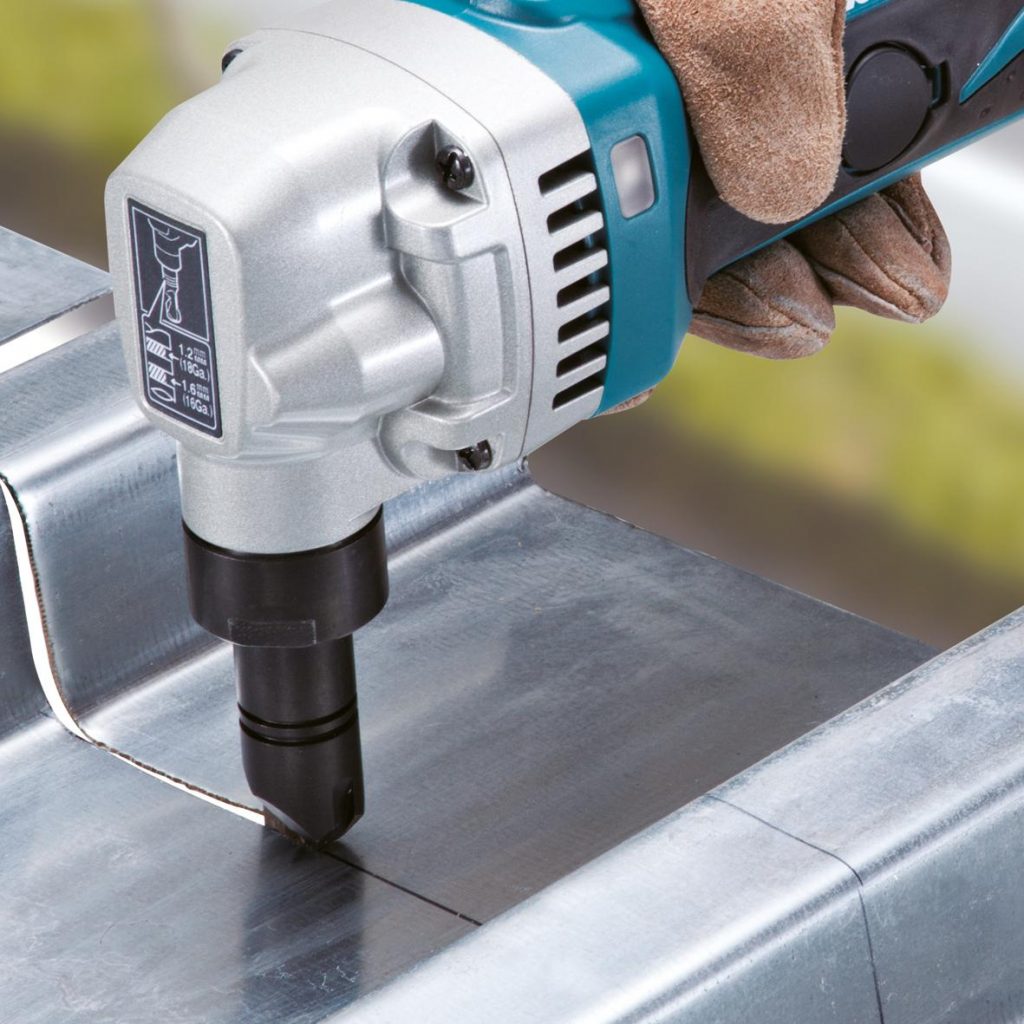
Using nibblers for metal
Sufficiently even cuts in a straight line are obtained using a circular saw with a special disk, equipped with victorious solders. It can do a lot of work in a short amount of time. To protect against overheating, the tool is set at low speed.
 Read also: Projects of country houses for 6-10 acres: 120 photos, description and requirements | The most interesting ideas
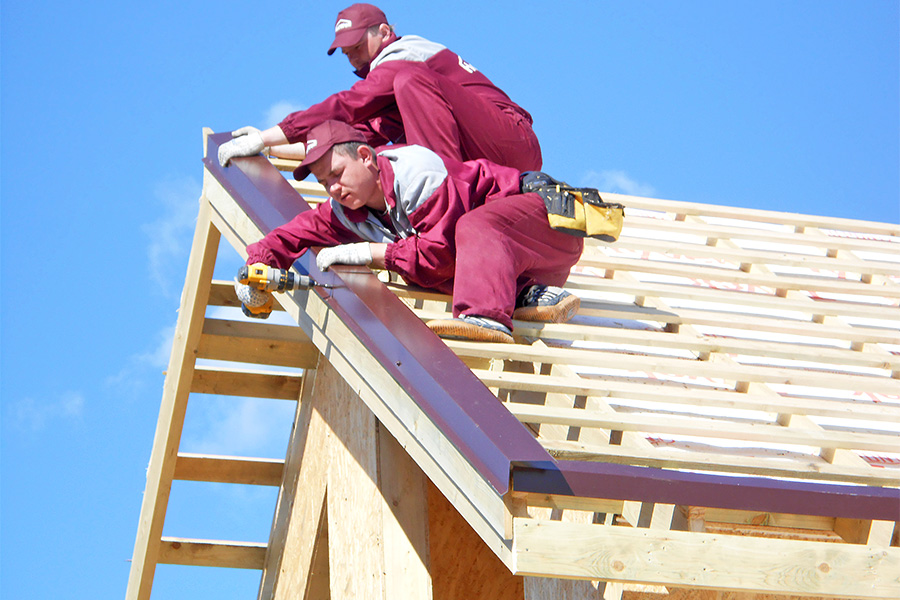
Installation of profiled sheets
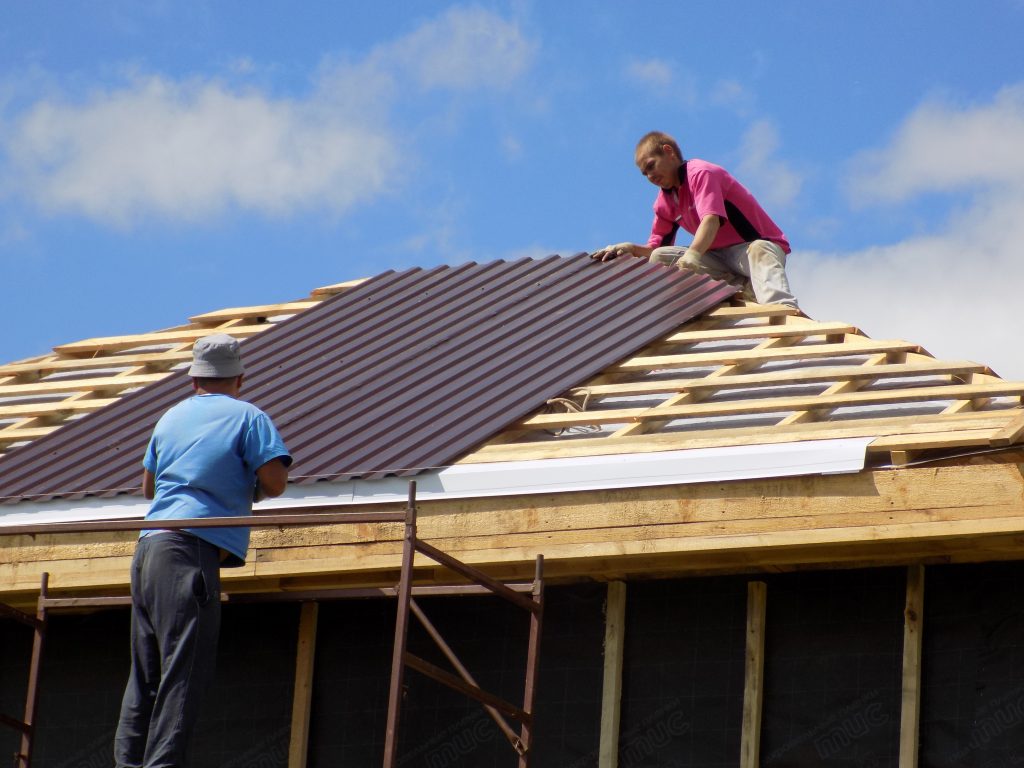
Installation of profiled sheets
Let's describe how to properly fix the corrugated board to the roof:
- The cornice strip with an overlap of 1 cm is always mounted first. It is fixed under a layer of waterproofing. First, end boards are installed, the top of which is located on top of the crate. A bar will be attached to it
- To protect the roof from moisture, it is better to use a roof seal that repeats the shape of the corrugations. In its absence, double-sided tape is attached to the roofing strip. In the future, they lay all the longitudinal and transverse joints of the metal profile
- Like any type of roofing material, the profiled sheet is laid only with an overlap. The standard overlap size is 0.5 waves. The overlap for gentle slopes up to 14 ° should be large and be 1.5 waves
- It is more convenient to raise the corrugated board to the roof with the help of a pair of logs or a ladder installed “upside down”. You can also make a special ladder so that it rests on the wall, and not on the edge of the roof. To do this, two bars are nailed to its sides. To ensure the stability of the stairs, they are fastened together with another board.
- To avoid warping of the sheets and the appearance of microcracks in the coating when lifting, they are taken from 2 sides and bent into a groove
- Lay sheets start from any side of the roof from below in such a way that the lower (concave down) wave falls on the edge of the roof. If the material has a capillary groove, it is directed upwards
- The allowance for the visor of the sheets should be 10 cm. To align the edge at the bottom of the eaves, it is better to pull the rope
 Read also: Terrace attached to the house: 150+ Best photo ideas | Do-it-yourself step-by-step arrangement
 Screwing in hardware
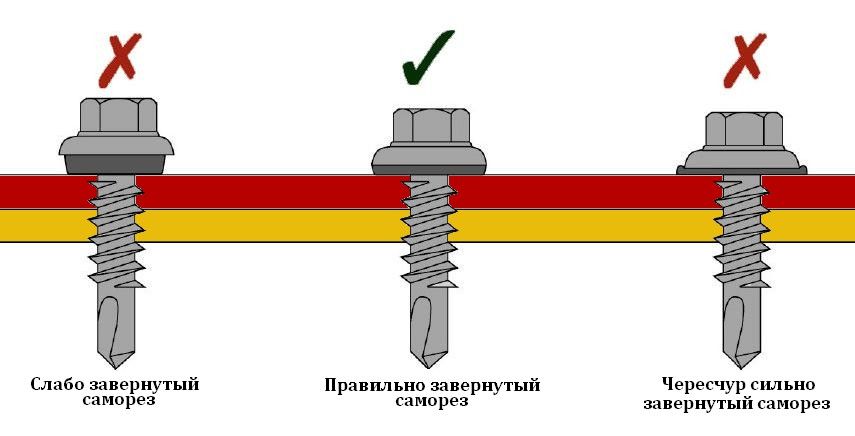
The correct force for screwing in self-tapping screws
Let us consider in detail how to fix the corrugated board on the roof with self-tapping screws:
- Unlike slate, which is attached to the upper wave, self-tapping screws are screwed into the metal profile only to the lower ridge. Otherwise, deflections are formed on the material, which are clearly visible from afar. Plus, under the weight of snow, the self-tapping screw will not tear out of the tree
- At first, the screws are not completely screwed in, but only “baited”. They are finally pulled together only after the alignment of the sheets.
- The distance between the fasteners depends on the type of profiled sheets and the planned wind load. On average, 10 pieces per sq. m. The general rule is that sheets located on the edge are fixed with a large number of self-tapping screws. On the bottom and top of the roof they are placed more often - through a wave
- On the rest of the sheet, proceed as follows. In places of overlap, 2 self-tapping screws are installed. The overlap of each next sheet is fixed on the side and along the bottom edge. In the rest of the section, the screws are placed through the wave in a checkerboard pattern
- In areas with difficult weather conditions (winds, hurricanes), professional sheets are fixed along the bottom and top of the roof more often, in each wave. On the rest of the sheet, the number of self-tapping screws also increases.
- The ridge bar is screwed every 30 cm
- How to fix gutters to the roof under corrugated board? If a dripper is provided in the roofing system (a corner strip passing along the overhang of the roof), it is fixed even before the batten is installed on top of the waterproofing
- Self-tapping screws must be located strictly at 90 ° to the surface. Their length is selected in such a way that they enter the wooden block of the crate by 3-4 cm. Depending on the type of corrugated board, it can be 4.8-6.3 mm
- It is not necessary to tighten the fasteners tightly. There should be about a millimeter between it and the profiled sheet. Otherwise, during the thermal expansion of the material during temperature changes, cracks will appear in it. Plus, a tightly screwed self-tapping screw will pinch the rubber gasket. Due to the stress effect, cracks will quickly appear in it, through which water will begin to penetrate into the cracks.
- If the self-tapping screw goes too easily, it means that it has fallen into a crack in the crate. It should not be taken out. Otherwise, water will seep into the hole made. You just need to screw next to another
 Read also: Making a greenhouse with your own hands from a profile pipe and polycarbonate: a complete description of the process, drawings with dimensions, watering and heating (Photo & Video)
 Installation of additional elements
Installation of the wind bar
It remains only to figure out how to fix the additional elements of the roofing corrugated board on the roof:
- In order not to walk on the profiled sheets once again, the strips at the junction of the slopes begin to be fixed already when the profiled sheet is already laid on one of them. When laying the second slope, the sheets will simply be slipped under the bar, and then fastened
- It is allowed to fasten the strip after the installation of adjacent slopes.The advantage of this method is the control of the ventilation gap on the ridge and the ease of installation of barrier elements to protect against insects and birds. But the likelihood of damage to the surface of the sheets during repeated walking increases.
- Unlike sheets, planks are fastened in such a way that the hardware falls into the crest of the wave of the sheet lying under the plank. Skate elements are screwed in the same way
- In the area of \u200b\u200bthe ridge, it is better to lay a porous sealant for corrugated board that repeats the shape of the waves. It is able to breathe, that is, to pass vapor, while it protects the under-roof space from moisture, wind and dust.
- On the gables, do not forget to install wind pads - they will protect the roof from the damaging effects of the wind. They are fixed in increments of 20 cm.
 Read also: TOP-6 Recipes for making pork jamon at home: a step-by-step description of how to make a meat delicacy originally from Spain (Photo & Video) + Reviews
 Helpful Hints
Many people confuse the methods of fastening slate and metal profiles. Indeed, the slate is attached to the upper ridge. This is done so that moisture, flowing down the wave, does not get through the hole into the under-roof space. Self-tapping screws are protected by a rubber gasket, and there is no such danger.
The fastening of corrugated board should be more durable - after all, unlike heavy slate, metal sheets have a fairly high windage.

Lifting sheets along the lags
Plus, if you try to screw the corrugated board into the upper wave, deflections are formed in the metal, which are clearly visible externally. Therefore, the answer to the question in which wave to fix the corrugated board on the roof is unambiguous - to the bottom.
- Sheets are laid on either side of the roof from its lower edge. So that the overlap seams are not conspicuous, it is better to start from its far end, gradually moving towards the entrance to the building. A similar method is used, for example, when sticking wallpaper. They are glued from the window precisely because the joint of the seam is not conspicuous at the entrance
- When joining sheets, pay attention to the direction of the prevailing winds. Joints against the wind are highly undesirable. Otherwise, moisture will get into the seams.
- Novice builders often complain that when laying corrugated board, gaps form in places of overlap. But this happens due to the usual inattention. After all, the width of the waves and shelves always alternates. That is, a wider shelf should be only at the bottom. When the sheets are joined, a narrower shelf should be placed on top of it. Only if this condition is met, the sheets will lie back to back, without gaps. Please note that the width of the shelves is different at the edges of the sheet. If you need a wider or, conversely, narrower shelf, simply turn the sheet 180°
- How to properly fix the corrugated board on the roof with self-tapping screws? Many users do not pay due attention to the angle of inclination of the fastener. But if it is screwed in not at a right angle, but with a slight slope, the gasket will not adhere tightly to the surface, and moisture will penetrate inside.
- Roof measurements should be taken twice. After all, the length of the rafters on different slopes is unlikely to match up to a millimeter. Measurements can only be considered accurate if both results differ by no more than 2 cm. Otherwise, you will purchase more (or less) material than required
- Avoid too many cuts. In such places, due to damage to the coating, the risk of rust increases. To minimize the number of cuts, select the length of the sheets to be a multiple (including overlaps) of the roof height
- It makes no sense to save by purchasing corrugated board with a small corrugation height. After all, it will need to be mounted with a large overlap (in 2 waves). High-wave material is applied to adjacent sheets with an overlap of 1 wave
- Under the weight of a person, metal will always bend. Although visually it may not be noticeable.Therefore, to obtain a perfect joint, without gaps, when fastening adjacent sheets, be sure to tighten the adjacent edges to each other manually. For the same reason, installation should be carried out gradually, from sheet to sheet. If you connect them randomly, then gaps will necessarily form at the joints of the missing sheets. It is undesirable to step on the bottom layer of material during the installation process.
- To avoid gaps in the overlap, it is necessary to start the installation of the roof from the edge, which has a shorter length.
- Installation of corrugated board during strong winds is prohibited. Due to the high windage, the plate, “inflated” by the wind, can easily fall off the roof, dragging a person along with it.
For detailed instructions on how to fix the corrugated board on the roof, see the video:

VIDEO: Instructions for installing corrugated roofing
How to fix corrugated board on the roof correctly: do-it-yourself step-by-step chicken breeding of fasteners, cutting, mounting on self-tapping screws, tips (Photo & Video) + Reviews


Useful article! During construction, as a rule, insulation is necessary. To do this, I highly recommend Airgel thermal insulation of walls from the outside and from the inside, because such a material is soft and resistant to external influences, not only mechanical, but also weather, installation is easy and fast, has a low thermal conductivity and high hydrophobicity.
Tell me, is it possible to put a profile on the old roof of the garage, and after a year or two raise the garage and reuse the same sheets?
Hello, Alexander. Yes, you can reuse corrugated board. Unless, of course, your roof shape changes dramatically.