
For the construction of this type of building, it is not at all necessary to use expensive building materials. When building a garage with your own hands, cinder or foam blocks are most often used. In our article, we will describe the stages of planning the construction of a garage.
Content:
 Read also: Foundation: types, device, step-by-step instructions for laying a strip foundation with your own hands | Photo & Video +Reviews
Depth and type of foundation
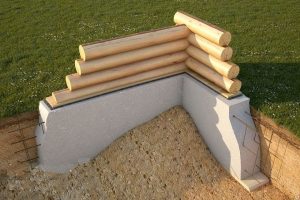
When choosing it, the weight of the structure and the type of soil must be taken into account. When erecting walls from cinder blocks, it is sufficient to equip a shallowly buried tape or columnar base. It can be poured from concrete or built from the same blocks.
But, if hollow structures are used for the construction of walls, then for the arrangement foundation need solid cinder blocks. The foundation of them is able to withstand a structure weighing up to 100 tons.
trench preparation
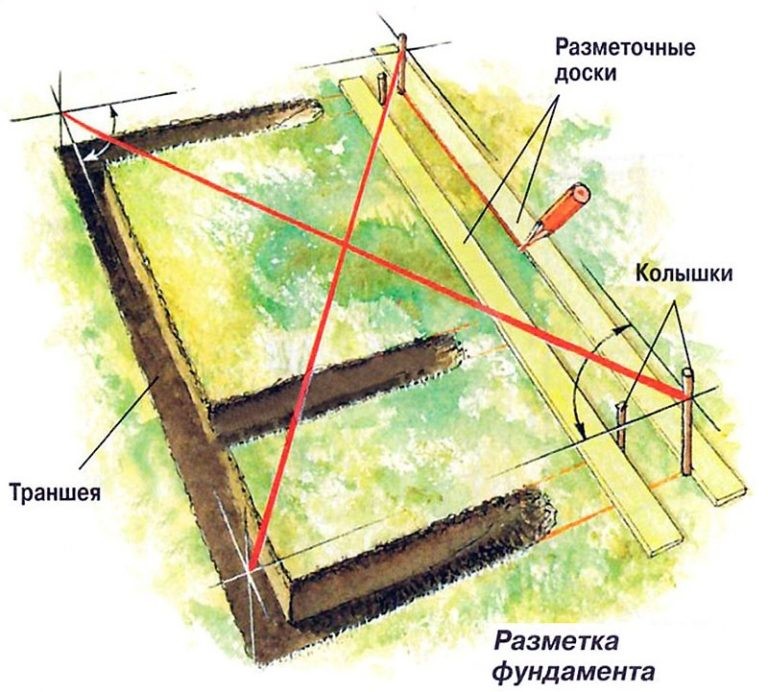
Marking the foundation for the garage
Before starting work, it is necessary to determine the width and length of the structure. There are a lot of drawings and photos of a self-built garage on the net. For a passenger car of standard sizes, it will be enough to erect a building measuring 3x6 m. In width, it is necessary to leave a margin of 70 cm for ease of passage and arrangement of shelving. If it is planned to attach a workshop to the garage, then the length or width will increase accordingly. The acceptable height of such a structure is 2.3 m.
When choosing a place for a garage, be sure to check the communications plan so as not to damage the water and gas pipes. To mark the future trench, metal rods or strong wooden stakes with pointed ends are used. They are placed in the corners and sides of the future foundation every 1.5-2 m. A strong cord is pulled tightly between them. To get a perfect rectangle, it should also be stretched from the corners - the diagonals should turn out to be equal in size and have the same intersection angles.
The trench is dug by hand - when using the technique, the soil will crumble. After its excavation to a depth of 70-80 cm (on clay soils by 150 cm), the earth should be carefully compacted. For problem-free soils, this is not much needed. On weak soils, this procedure is mandatory. With good compaction of sandy soil, sandy loam or loam, the drawdown can be up to 0.5 m.
Laying blocks for the foundation
Therefore, the arrangement of the garage should begin with the choice of the type of foundation. The construction of a cinder block foundation is permissible only on dry sandy soils, sandy loams or loams. When building on wet ground, the building will need a foundation that goes underground below its freezing point.
Cinder blocks are laid on a pillow of sand and gravel 40 cm thick. First, the trench must be waterproofed. To do this, use roofing material or fiberglass.
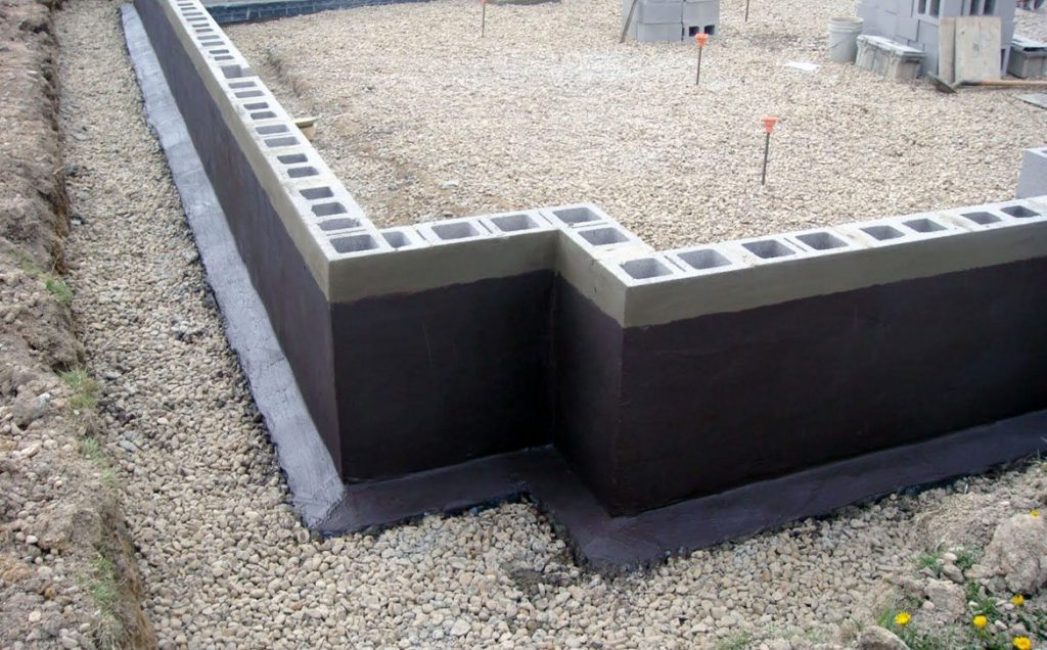
To obtain a more massive sole 40 cm wide, the first row of blocks is laid out with a “poke”, that is across the wall. The remaining rows are arranged in the usual way, with a “spoon”, that is, along. In this case, the thickness of the foundation walls will be 20 cm.
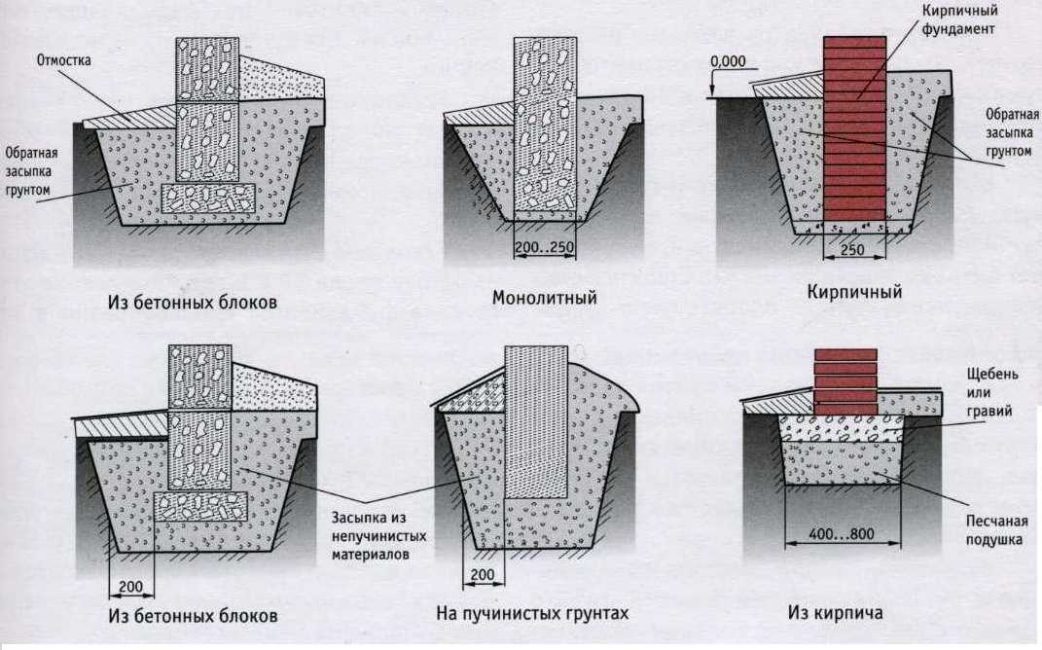
Types of strip foundation
Laying is done in a checkerboard pattern so that each of the blocks of the next row falls on the seam of the row of the previous one. To obtain a reliable design, the verticality and horizontality of the rows are verified by the building level. The height of the foundation must be calculated so that it rises above the surface by 0.7 m.
The laid out base must be strengthened with a plaster mesh. It is attached to a cement mortar 2 cm thick. To protect the base from moisture, it is covered with liquid bitumen. A double layer of roofing material or other rolled waterproofing is attached on top of it. After the foundation is completely ready, the space between it and the ground is covered with earth and compacted tightly.
 Read also: Shelves in the garage: order first. General design issues, simple options, step-by-step instructions for making your own hands (75+ Photos & Videos) + Reviews
 Gate installation
They are mounted before the construction of the building begins. For the manufacture of the frame of the gate, a metal corner is used. An I-beam is laid on top so that it goes into the walls by 20 cm.
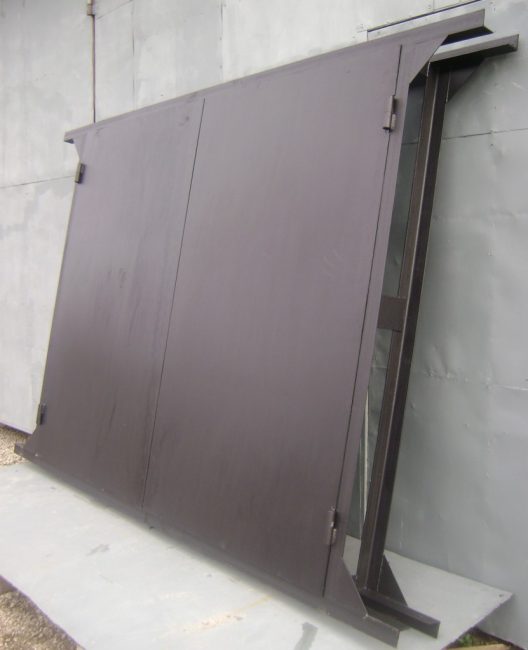
Ready-made swing, metal gates
For a strong fastening of the gate frame, it is necessary to weld metal 12 mm bars 40 cm long to it, which will later be laid in the seams of the walls. To do this, you need to accurately calculate at what distance you need to attach the bars.
After leveling the structure and checking the horizontal and vertical position, it is embedded in cement and temporarily fixed with wooden braces. Before installing the gate, be sure to check if there are any obstacles to opening in the form of buildings or trees.
 Read also: Dog bed: a description of the key points, step-by-step instructions for making your own hands (140+ Photos & Videos) + Reviews
Calculation of the required number of blocks
First you need to know the perimeter of the walls. We will need to add the length and width of the building and multiply their sum by 2. For a garage of standard sizes 3x6 m, the perimeter will be (3 + 6) x 2 = 18 m.
Now you need to determine the area of \u200b\u200bthe walls. Let's say their height is 2.3 m. We multiply the perimeter of the walls by the height of the building. The area will be equal to 18 x 2.3 \u003d 41.4 square meters. m.
The standard size of a cinder block is 0.19 x 0.39 m. We multiply these numbers. Its lateral area will be 0.0741 sq. m. Now it remains to find out the number of blocks required for laying the walls of a garage measuring 3x6 m. The perimeter is 41.4 square meters. m divided by the area of one block of 0.0741 sq. m. We get 558.7 pieces. We round the number up to 559. It is necessary to take cinder blocks with a margin of 5-10% for cutting and marriage. We add 56 more blocks to the resulting number 559. We get 615 pieces. Please note that this calculation is carried out without taking into account solid blocks going to the construction of the foundation. For him, the calculation should be done separately.
You can also use online calculators to calculate the required number of cinder blocks. For example, this one:
 Read also: Barn: a device with and without a foundation, step-by-step instructions on how to build your own hands (50+ Photos & Videos) + Reviews
 Walling
A building made of high-quality cinder blocks can last 50 years or more. You can lay out walls from them quite quickly.But, since such blocks are quite heavy, you will need an assistant in your work.
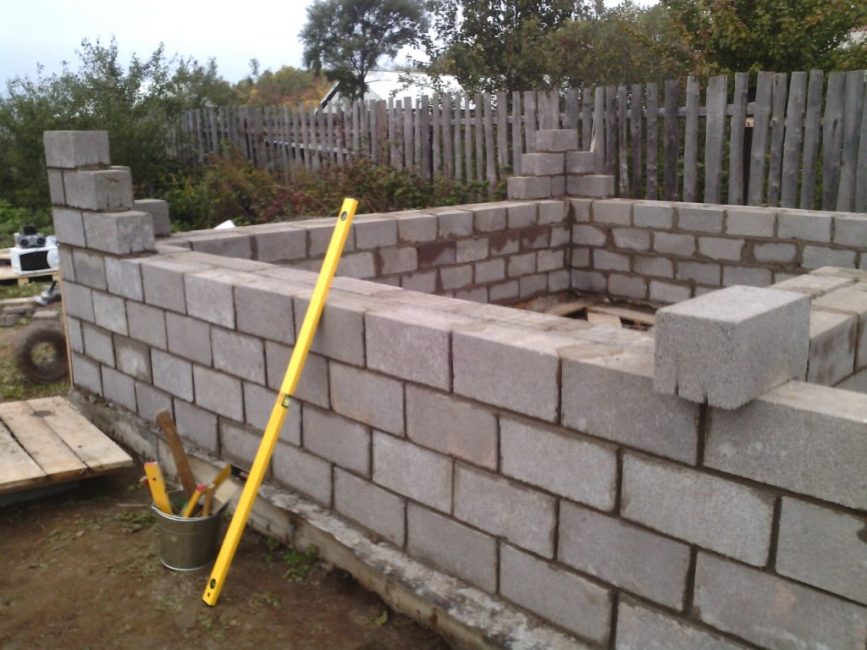
Construction of the walls of the garage from cinder blocks
- Before purchasing blocks, be sure to check their quality. To do this, install a pair of randomly selected products on top of each other. There shouldn't be a gap between them.
- Products from fine-grained slag are more expensive, but they also last much longer. However, their thermal insulation properties will be lower
- To fasten cinder blocks, it is better to take not a standard cement mortar, but a special adhesive mixture. The seams in this case will be thinner and stronger. When using a cement mortar, the proportions for mixing are standard: 3 to 1 (sand, cement). Frost resistance and strength of the solution can be enhanced by adding plasticizers to it.
- When using cement mortar, the thickness of the joints is 1.5 cm. When laying on glue, this parameter must be specified in the instructions.
- Dilute the solution gradually after all, after setting, it will no longer be possible to use it. It should be enough for 1-1.5 hours of work. Keep in mind that for 4 blocks it will take you about a bucket of mortar
- For the walls of an unheated garage, half-stone masonry is enoughwhen the blocks are laid along, and not across the wall
- Block laying should begin from the corners with checking the verticality and horizontality of the rows with a building level. To do this, a string is stretched between the two extreme blocks, which will serve as a guide.
- Hollow blocks have only holes down
- To get a checkerboard laying, the next row starts with a half of the block. In this case, the next row will move, and the cinder blocks of the first row will close the seams of the blocks of the previous row. In order not to engage in cutting, you can purchase ready-made corner cinder blocks
- To strengthen the structure, it is better to use reinforcement (metal mesh). It is laid in the seams between the rows. The first row is reinforced necessarily. Then the grid is laid in every 4th row. Window and door openings must also be reinforced. The grid is laid in the last 2 rows
 Read also: Extension to the house: a step-by-step description of the stages of construction with your own hands. List of suitable materials with their description (85+ Photos & Videos) + Reviews
garage floor
The cost of cinder blocks for building walls is only 1/3 of the cost. Material investments will also be needed for arranging the roof, foundation, gates, decoration, etc. But still, a block building will cost less than any other material.
To cover the roof, I-beams are used, which are laid across the building every 80 cm. Their length should be 25 cm more than the total width of the garage. In places where they rest on the walls, cinder blocks must be replaced with more durable ones. concrete blocks.
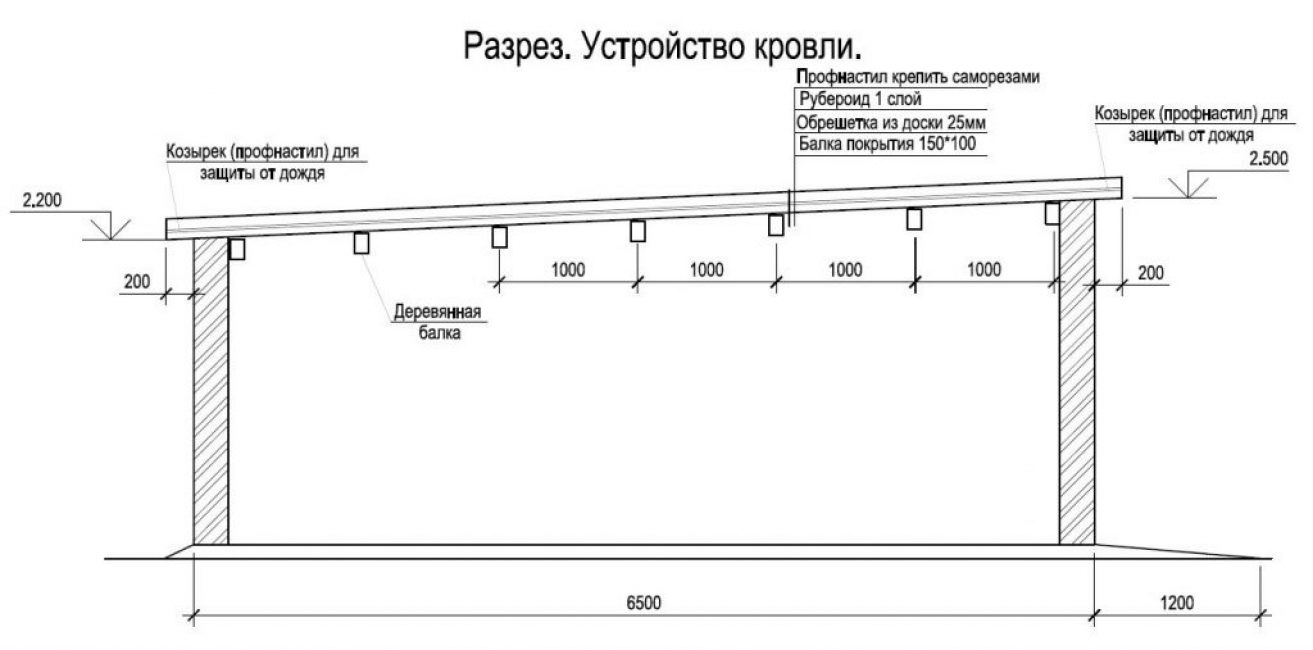
Garage roof installation
Thick, durable boards are attached to the bottom of the beams. Their thickness should be 4-5 cm. They are waterproofed with roofing material with a small 10-centimeter run on the walls.
To protect the foundation from rain and melting snow, 4 cm long visors should be attached to the edges of the roof. You can insulate the roof with slag, which is poured on top of the roofing material, foam plastic or mineral wool. They are protected from moisture with a layer of 30 mm cement screed. In the future, it is treated with bitumen, and then covered with roofing material with an overlap of sheets of 10-15 cm. They also need to close the visors.
For the roof of the garage, you can use any material: from slate, metal profiles to tiles. It is necessary that it protrudes 20 cm beyond the walls. Then, during rain or snowmelt, moisture will not flow down the walls.
 Read also: DIY Christmas toys for the Christmas tree: beautiful, original, with soul! Master classes and step by step instructions | (75+ Photo Ideas & Videos)
 viewing hole
viewing hole
Its arrangement is possible only when the groundwater rises below the level of 2.5 m. If they rise a little higher, drainage can be arranged in the area of \u200b\u200bthe pit. However, this will require additional labor and capital investments. With a high groundwater approach to the surface level, it is better to refuse to build a viewing hole - it will simply be flooded.
Standard sizes
Inspection hole dimensions
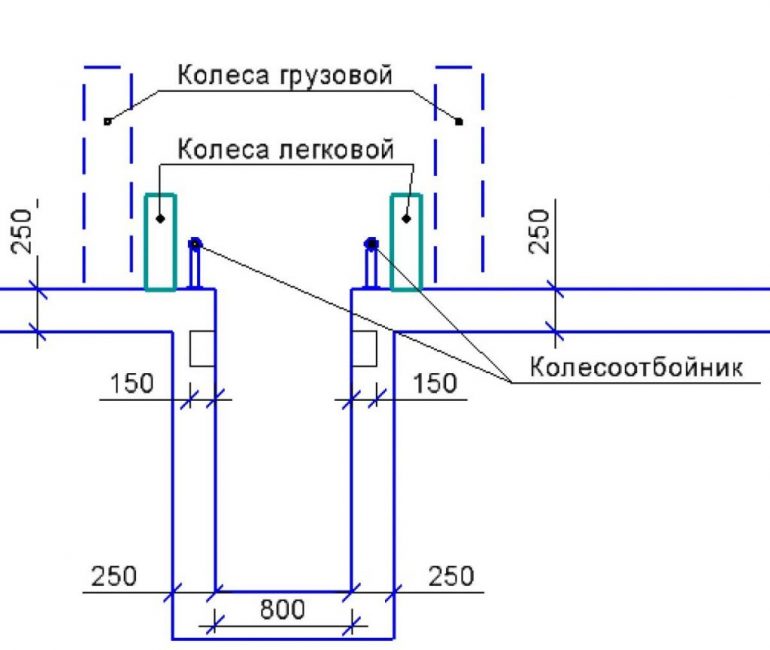
For a comfortable inspection and repair of a passenger car, the dimensions of the pit should be as follows:
- length: to determine this parameter, 1 m¸ is added to the length of the vehicle, for example, (4.5 + 1) = 5.5 m
- width, 200 mm less than the standard gauge of the car (the distance between the wheels), in this case the car can easily drive into the pit without the risk of falling down; You can check this information in the technical documentation.
- depth: so that an adult can stand in it, straightening up, this parameter should be 1.85-2.0 m
The pit for the viewing hole needs to be done a little moreso that there is room for concreting or laying brick walls. It is also necessary to take into account the thickness of the hydro- and heat-insulating layers. If necessary, niches for placing tools can be provided in the walls of the pit.
Finishing the walls of the pit with concrete
To protect against moisture, crushed stone is poured into the bottom of the prepared pit, and then sand. From above, such a pillow is covered with a layer of wet clay and compacted. Further, reinforcement is laid on the bottom, and it is concreted or laid out with bricks. In order for the concrete to set well, the pit must be left for a week to dry.
After the specified time has elapsed, waterproofing is laid on the bottom, then a layer of foam (heat insulator), and it is again filled with a layer of concrete mortar of small thickness. Enough 15-20 mm.

The concrete walls of the pit are reinforced with reinforcement
It is also desirable to pre-coat the walls with clay, which is a natural waterproofing agent. A thick film or roofing material is attached on top. You can replace it with bitumen, liquid rubber or plastic plates. Next, a heat insulator is attached.
The thickness of the walls when pouring concrete is 15 cm. When installing the formwork, reinforcement in the form of a metal mesh or bars is placed in it.
The concrete solution is poured in stages of 0.3-0.4 m, followed by drying for several hours. At each stage of pouring, it is well bayoneted to remove voids.
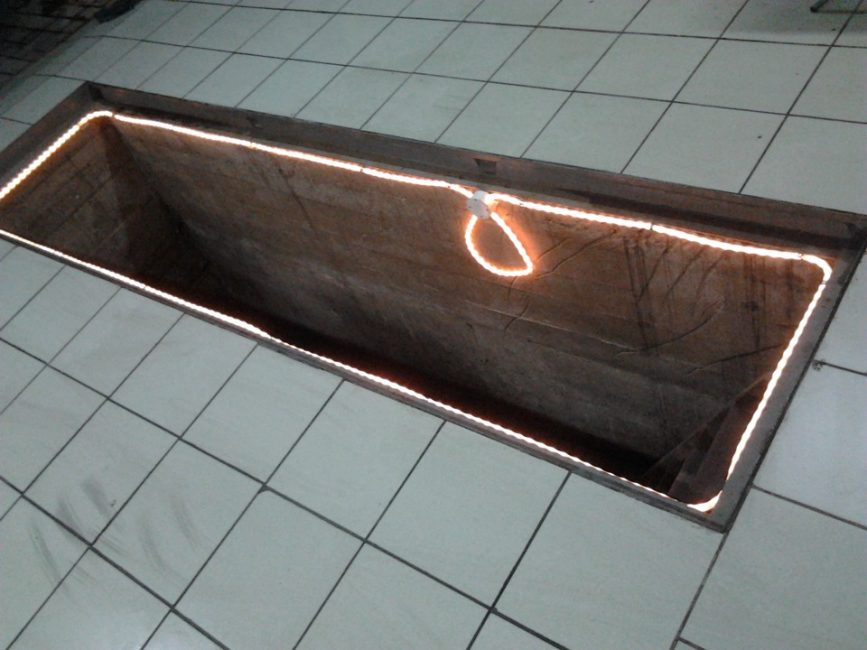
When laying lighting, the wires should be hidden in the corrugation. It is attached to the reinforcing mesh using plastic ties before pouring concrete. It is necessary to provide for natural or forced ventilation of the inspection pit.
You can protect the walls from shedding with the help of a metal corner, laid around the perimeter at the top. It is advisable to make a durable metal or wooden cover to eliminate the possibility of falling.
To descend into the pit, steps are equipped in it. Although you can use an ordinary ladder for these purposes.
 Read also: What can be built on a summer cottage? | TOP-9 Common country houses | (75 Photos & Videos) +Reviews
 Pouring floors
Before pouring, the surface must be covered with a crushed stone pillow. The floors are leveled along the upper boundary of the foundation or slightly higher. The thickness of the concrete layer should be 10-20 cm.
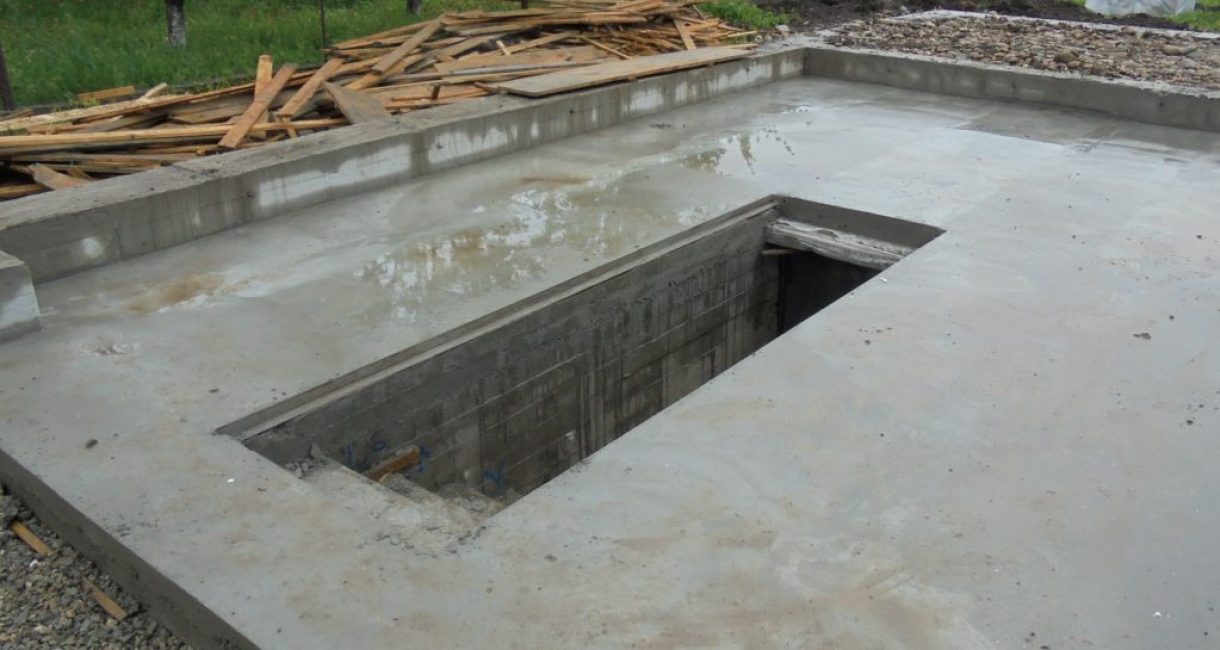
Finished base of the garage with a viewing hole
To make the floors even, when arranging a garage with your own hands, you first need to prepare beacons - metal or wooden slats installed on thick mortar slaps. The distance between the slats should be slightly more than the length of the rule - a tool in the form of a long ruler used to level the mortar.
The horizontal alignment of the beacons is done using the building level.If necessary, a solution is reported under them or, on the contrary, it is pressed into the surface more strongly. After leveling the concrete, it must be covered with a film and left to dry for a week.
 Read also: Projects of country houses for 6-10 acres: 120 photos, description and requirements | The most interesting ideas
 wall decoration
Porous cinder blocks are able to reliably retain heat in the building. But at the same time it is also a disadvantage. Since porous cinder blocks quickly absorb water, the walls of it require additional finishing. They can be plastered or protected with a ventilated façade. Otherwise, when freezing wet walls, the material will begin to collapse.
Wall decoration must be done immediately after construction is completed. The best time for this is summer.
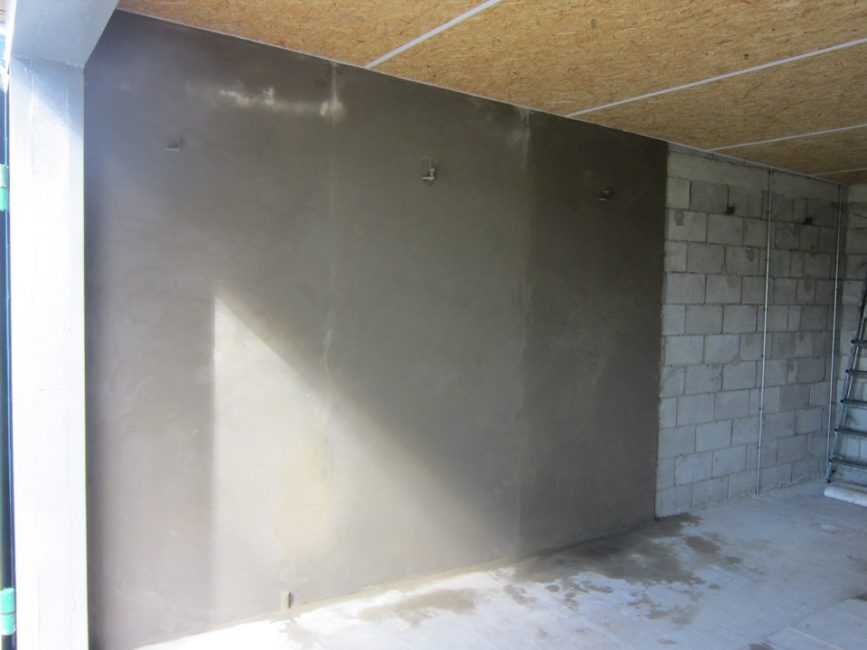
Plastering garage walls from the inside
Since the plaster mortar will not adhere well to cinder blocks, a reinforcing mesh is used for finishing:
- it is attached with small nails
- it is better to pre-prime the walls, this will better strengthen the surface and increase its adhesion to the mortar
- beacons made of wooden or metal slats are placed to align the walls
- the plaster mortar is spread with a spatula, and then leveled with a building rule along the lighthouses
- the last step is to grout the surface with a metal float
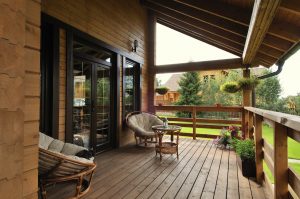 Read also: Terrace attached to the house: 150+ Best photo ideas | Do-it-yourself step-by-step arrangement
 Arrangement of ventilation
If you do not want the details of your car to quickly become rusty, be sure to make sure you ventilate your garage. It is also required to remove exhaust gases that adversely affect human health.
For a small room, natural ventilation is sufficient. To do this, holes are prepared in opposite walls: inlet for fresh air and exhaust. The first is placed at a minimum height from the surface - 10-15 cm from the floor. The second exhaust hole is placed almost close to the ceiling, at a distance of 10-15 cm from it. The exhaust pipe is brought out above the roof to a height of 0.5 m.
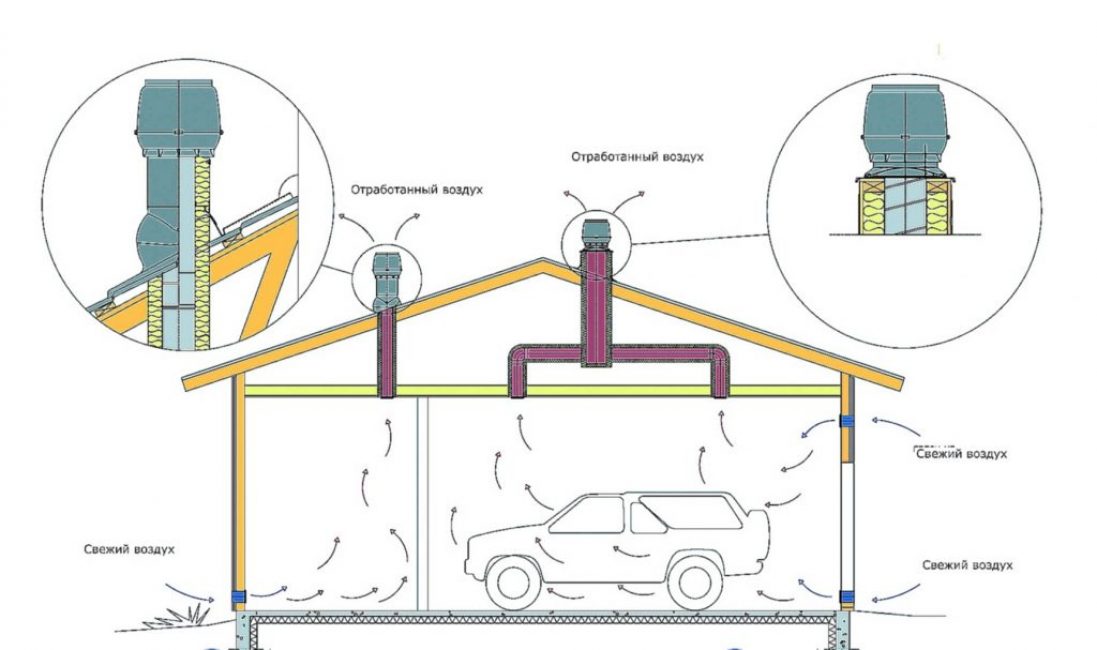
Garage ventilation
When arranging ventilation in the garage, it must be taken into account that for a room of 15 sq. m diameter of the hood should be 225 mm. With an increase in the area of \u200b\u200bthe room for each square meter, this parameter must be increased by 15 mm. If a pair of holes is prepared for the hood, then the diameter is halved accordingly.
The cross section of the hood must necessarily be equal to or less than the cross section of the supply ventilation. Otherwise, the thrust may be overturned. For the same reason, if you cover the supply air duct, be sure to reduce the draft in the hood as well.
 Read also: Veranda attached to the house - expanding the living space: projects, tips on how to create your own hands (200 original photo ideas)
 Shelf installation
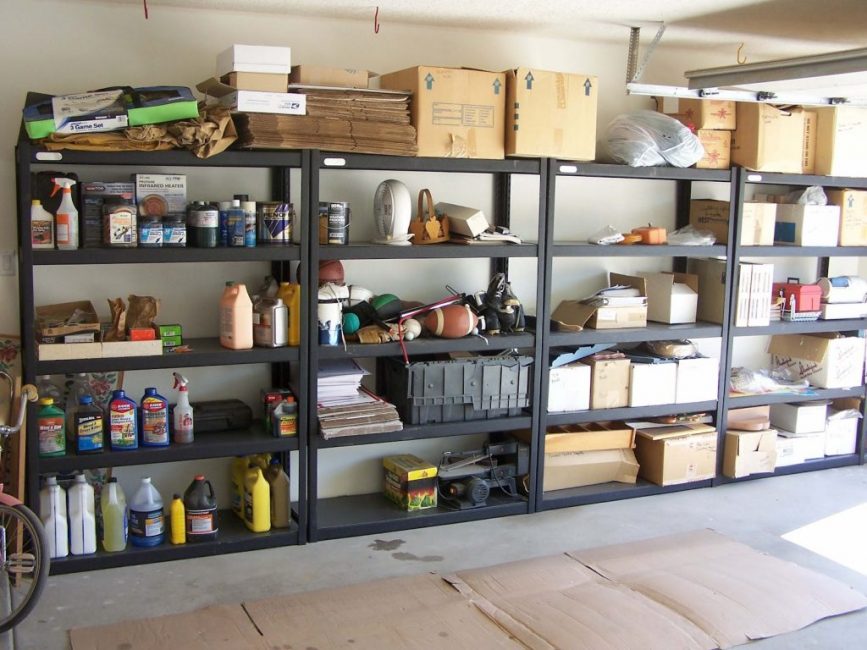
It is difficult for a real motorist to do without tool storage places. To equip the shelves in the garage, you can use any option for their location. They can be suspended, angular, have different lengths and widths. Shelves can be placed along one, two or even three walls.

Hanging shelves in the garage
If containers with liquids will be installed on the shelves, it is better to provide small sides along the bottom. Be sure to think about where you will store massive things. Such shelves should be additionally reinforced. Otherwise, over time, they will sag, and then completely collapse. It is better to hang winter and summer tires closer to the ceiling so that it takes up a minimum of free space.
Prefabricated racks
This video tells in detail about each of the stages of building a garage from foam blocks, as well as the main subtleties and secrets of its construction.

Garage for Friendship from Cinder Block in 2 Days
Building a garage with your own hands: details about each of the stages. Description, step-by-step instructions, drawings of the roof, inspection pit, interior arrangement (75 Photos & Videos) + Reviews


