
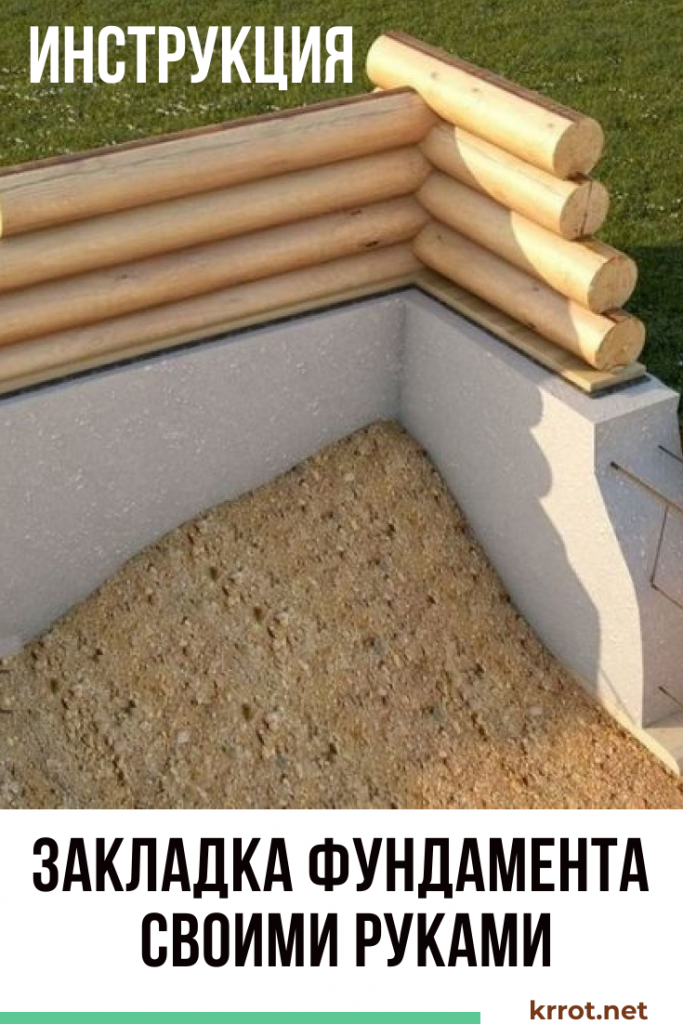
The foundation of the building is the most important part of it. The slightest mistake in the construction of such structures can end in failure. It is necessary not only to correctly calculate its depth, quantity and cross section of reinforcement, but also to ensure reliable and high-quality drainage, hydro and thermal insulation. We will describe the process of making a strip foundation with our own hands and step-by-step instructions for its construction in detail.
 Read also: Perennial flowers (TOP 50 species): garden catalog for giving with photos and names | Video + Reviews
What kind of foundation to choose?
The choice of the type of foundation depends on the mass of the building, the type of soil and the depth of its freezing.
Terrace attached to the house: 150+ Best photo ideas of 2018
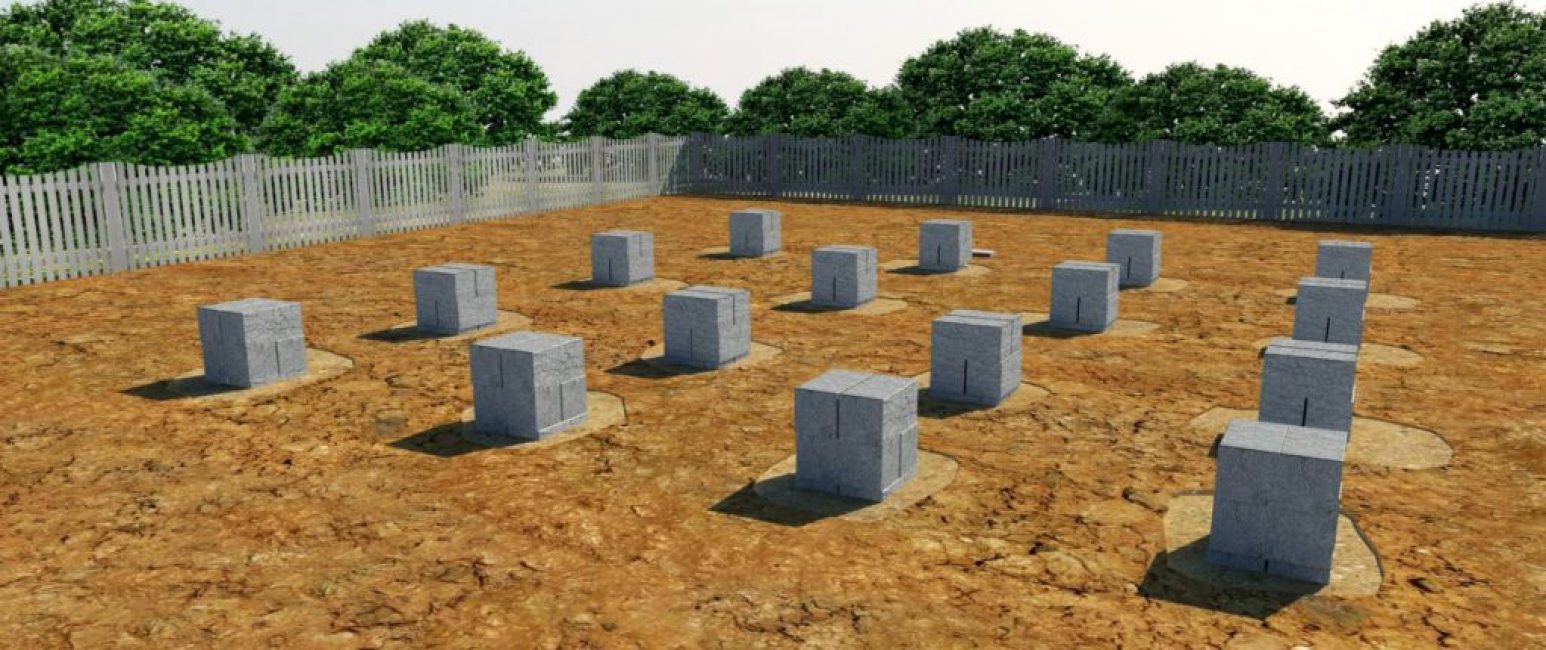
Column supports
According to the type of construction, all bases are divided into:
- tape: the most common, are made in the form of a closed circuit, due to which the load on the ground from the structure is transferred evenly; it is laid not only under the walls, but also the partitions of the building; such foundations, in turn, are divided into shallow and deep-buried
- pile: the building is installed on vertical rods (piles) with a depth of 3-20 m; are used in difficult terrain, large depths of soil freezing and in swampy areas; the disadvantages include the need to use special equipment for driving piles into the ground and the lack of basements; with horizontal movements of the soil are unacceptable
- pile-grillage: with load-bearing horizontal beams (grillage) connecting the piles in the upper part; to protect against frost heaving, it is never buried in the ground
- columnar: on poles with an extension in the form of a "sole"; construction on soils with deep freezing is allowed; supports connected by jumpers (rand beams) are placed every 3 m
- slab: a rather expensive structure in the form of a monolithic slab 20-30 cm thick, lying on the surface of the soil, which simultaneously serves as the floor of the building
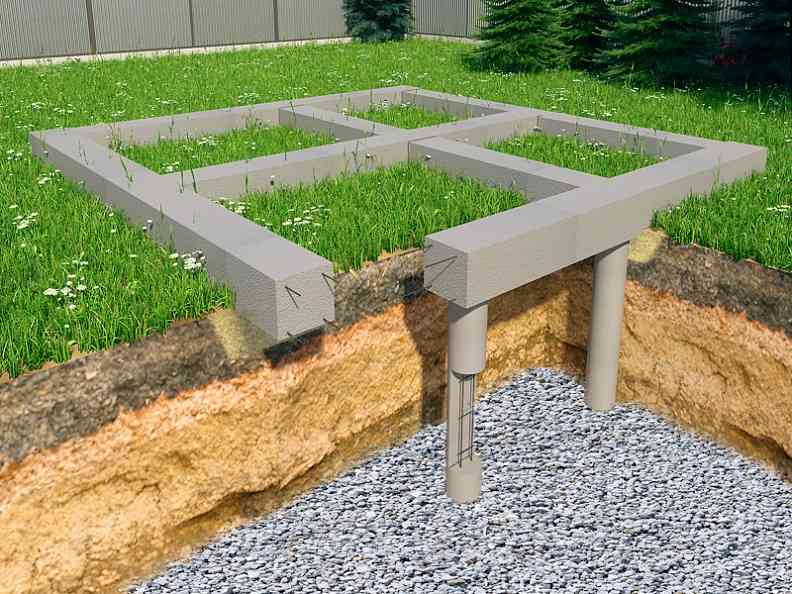
Pile-grillage foundation
Heavy buildings and high-rise buildings are usually built using strip foundation. Pillar foundations more economically advantageous, and it is allowed to erect light frame or wooden houses, but only if the soil is not peaty and not heaving clay.
Pile structures can be used even with a significant mass of the structure. But they are used mainly on land plots with weak sandy or peaty soil, as well as in the regions of the Far North with a large depth of soil freezing. To avoid movement, piles are not installed in pits, but are driven or screwed into the ground.
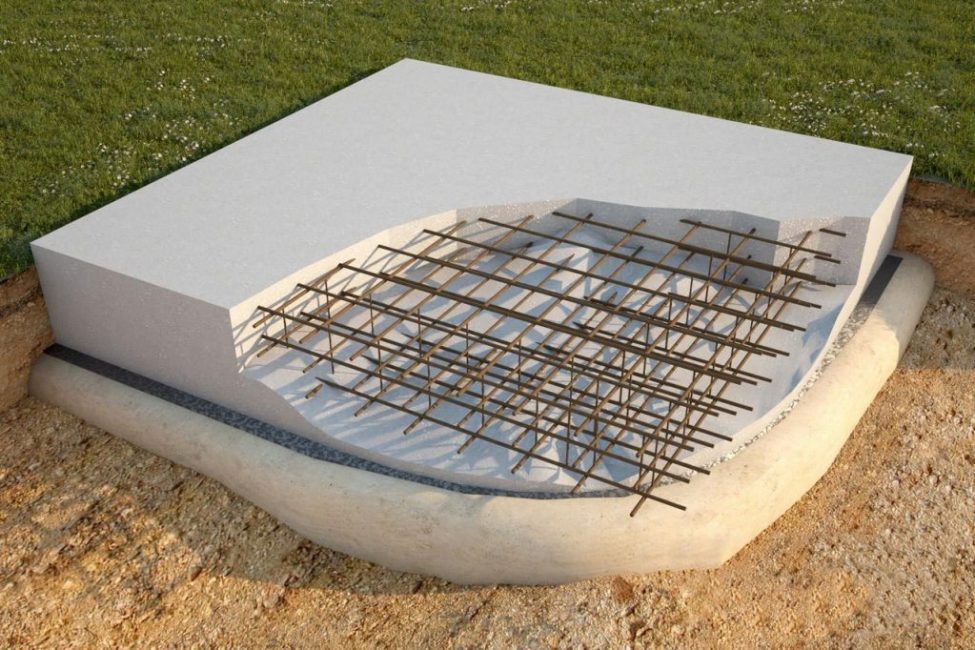
slab base
Slab shallow foundations it is more reasonable to use in problem areas with high soil mobility. Such a "floating" base is able to withstand even significant soil displacements without damage to the building.

VIDEO: Choosing a foundation for a house
Foundation: types, device, step-by-step instructions for laying a strip foundation with your own hands | Photo & Video +Reviews
 Read also: Projects of country houses for 6-10 acres: 120 photos, description and requirements | The most interesting ideas
 Strip foundation
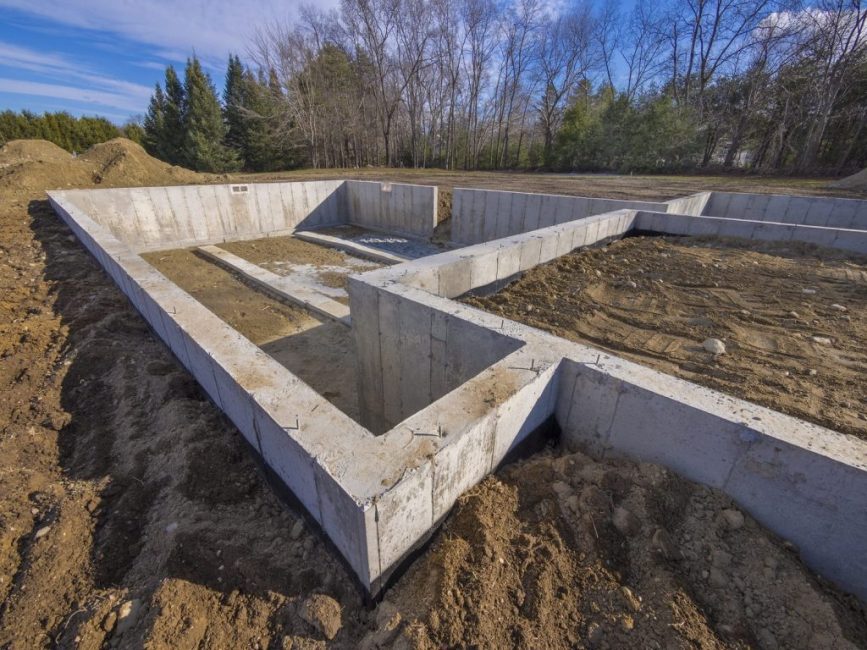
Strip foundation
Although the cost of such a support is quite high and averages 25-30% of the price of the entire object, due to its high strength and reliability, this option is most often used. Below is a detailed step-by-step instruction for the manufacture of a strip foundation.
Depth
Tape bases have two varieties:
- shallow-depth with laying in the ground at 50-70 cm; used only for light buildings
- deep buried up to 2 m: should go into the ground 20-30 cm below the level of soil freezing
Finding out how deep the soil freezes in your area is easy. There are special cards for this. However, teach that this meaning is normative. In practice, it is necessary to take into account the type of soil and the average monthly temperature of the region of residence. Teach also that wet marshy soil always freezes stronger than sandy. Dense soil freezes more than loose soil.

Depth of soil freezing by regions of Russia
In the Moscow region, the standard freezing depth is 140 cm. When laying the foundation, another 10% is added to these figures. For unheated rooms, an additional 10% must be added. If there is a basement, the base falls 40 cm below its floor. It is also necessary to take into account the height of the drainage layer and the sand cushion.
Ideally, only geologists can answer the question of what the depth of laying the foundation should be. Neither tables nor maps can show the presence of dangerous quicksand, the level of groundwater, various violations of the soil composition, etc.
trench width
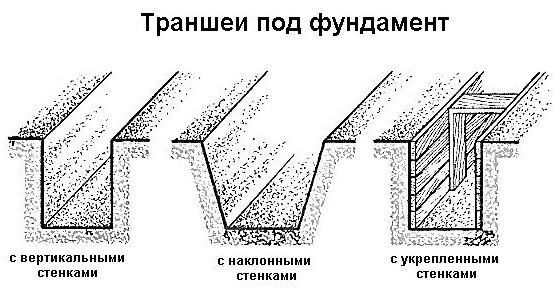
Types of trenches for the foundation
The width of the structure is calculated based on the width of the walls plus 10 cm. 40-60 cm are added to this value for the possibility of people passing during the installation and pouring of the formwork. On average, the width of the trench is 0.7-0.8 m. When arranging the drainage system, this parameter is increased by another 20-30 cm.
So that there is no difference in heights, they begin to dig a trench from the highest angle. It is desirable to do this manually - when digging with an excavator, it will not work to get perfectly even walls without shedding the soil.
The crumbling soil is completely removed - after all, even compacted, it is inferior in density to the soil that has been compacted for years. Part of the land should not be taken away - with the help of it, backfilling will be carried out.
If the earth crumbles heavily, they dig a trench at a slight angle. You can additionally strengthen it with plywood or plank boards with spacers. If there is a basement, a pit is immediately prepared for it.
Territory marking
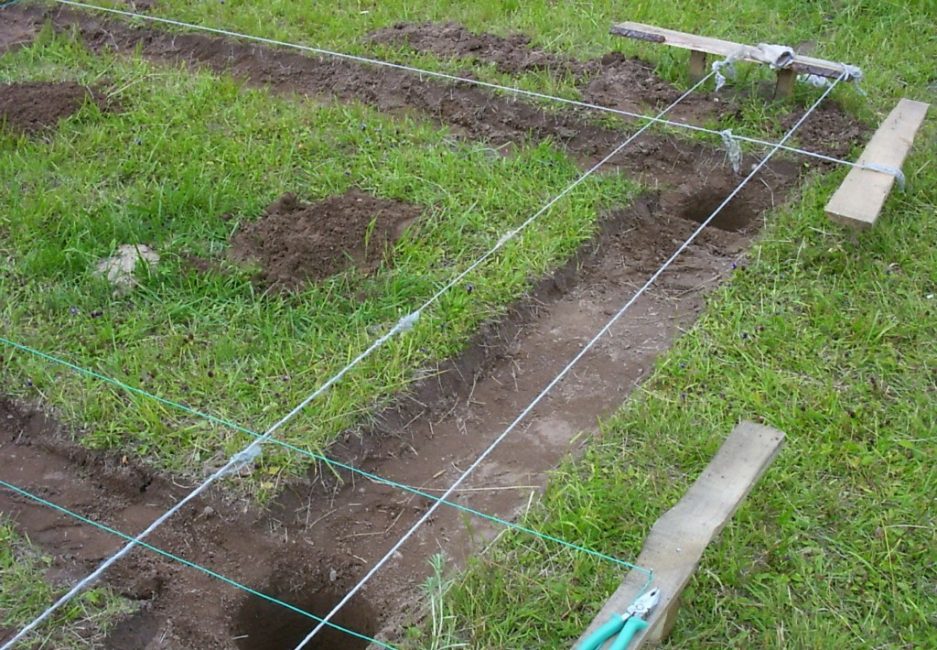
Territory marking
Before starting work, the plant layer of soil (sod) is completely removed to a depth of 20-30 cm. On chernozem soil, the construction of a foundation is unacceptable. The layer of loose soil must be completely removed.
When marking, the width of the walls is added to the design dimensions of the building. It starts from the corners where pegs or reinforcement bars are hammered. A string or fishing line is tightly stretched between them. The horizontal and vertical sides must be verified with a building level. The corners must be strictly straight. It is also necessary to double-check the diagonal dimensions.
Pillow of sand and gravel
Before building the foundation for the house, you should take care of arranging the pillow. Materials such as sand, crushed stone and gravel almost do not absorb moisture, therefore they are less susceptible to frost heaving. The use of pillows based on them allows you to protect the site from uneven shrinkage of the soil. The pillow allows you to more evenly redistribute the load from the mass of the building over the entire area. The soil underneath will settle more evenly.
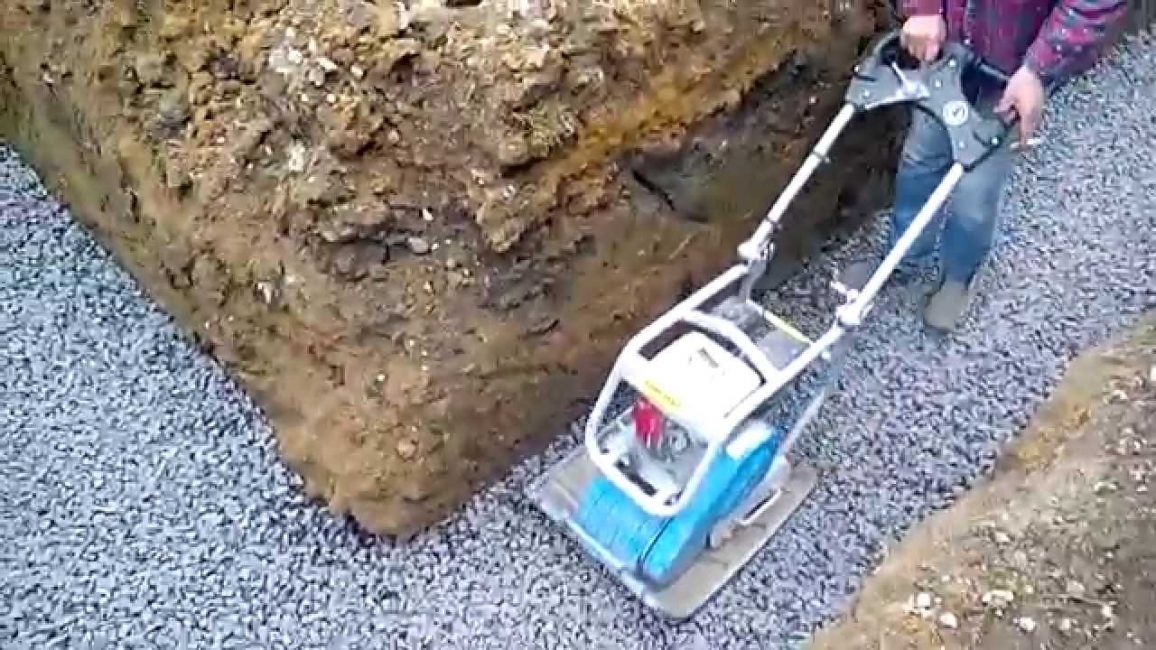
rubble laying
The layer of such a pillow should be 20 cm. So that it does not silt, a layer of film or roofing material is laid before it is backfilled. The same layer of waterproofing is required to be laid after filling with crushed stone and sand.
Sand must be spilled with water, and then tamped with a vibrotamper or with a special device in the form of a wooden block with a vertical handle.
"Correct" formwork
Fixing the formwork with stacks
The most common foundation problems are:
- formwork break
- her bursting
- concrete mortar leaks
To avoid such mistakes, do not rely on chance and use junk lumber. For the manufacture of formwork for the foundation, a flat board 25 mm thick without significant defects, 2 grades is required. In the future, after parsing the formwork, it can be used to equip the crate.
Too large shields will be inconvenient to use - they are made 3-4 m long and assembled with nails. For transverse racks, a rail or the same board is used. To avoid leakage of the mortar, there should be no space between the boards.
After lowering into the trench and leveling, the shields are fixed with pegs driven into the ground. In the future, they can not be removed - they remain in the concrete. From the outside, the formwork is additionally reinforced with props. The distance between them is at least 1 m.
All shields are interconnected with wooden slats. To protect the formwork from swelling, the boards are tied with wire, which is screwed to the vertical crossbars. During the demolition of the formwork, it is cut off and left in the concrete.
Roofing felt is often used as a waterproofing layer. It is fastened with slate nails.
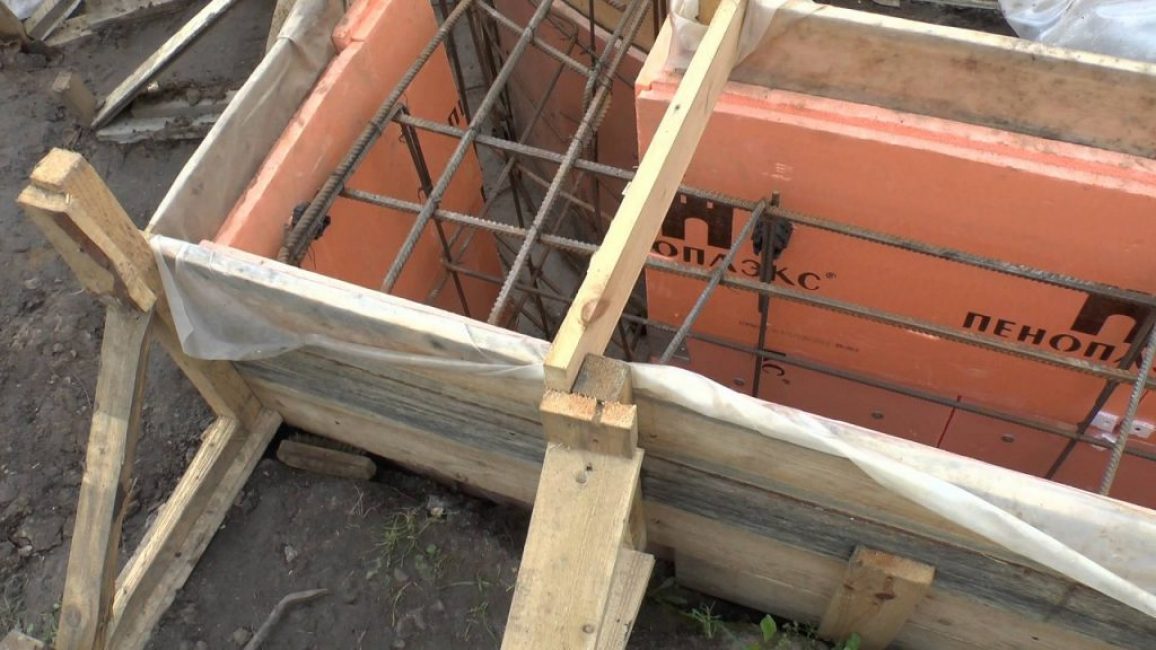
Reinforcement installation
In the strip foundation, the reinforcement should be set in the form of a rectangle. There is a logical explanation for this. Two forces act on the support of the structure at once: heaving forces from below and the mass of the structure itself from above. There is practically no load on the middle of the tape. To compensate for these two loads, two belts are prepared: upper and lower.
When deepening the foundation to a depth of 1 m, this is enough.Three belts are prepared for a deeply buried base: the third is required for reinforcement with a high height of the reinforcing cage.
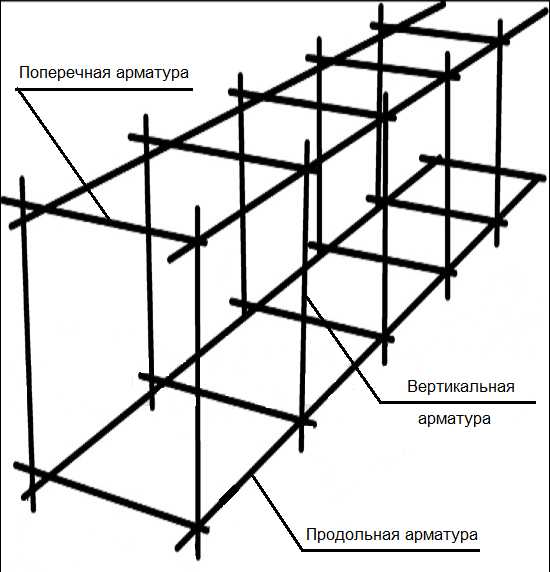
Reinforcement scheme
Smooth bars are allowed only when creating jumpers. For the main frame, reinforcement with a ribbed surface with a diameter of 8-16 mm is used, capable of withstanding tensile loads. The ribbed surface can also provide better adhesion to concrete. Reinforcement steel grades for foundation SGS, 25G2S, 32G2Rps.
To protect the metal from corrosion, the reinforcement should be located only in the thickness of the concrete. Therefore, it is necessary to retreat 5 cm along the edges and bottom of the formwork. According to SNiP, the reinforcement spacing is 30-35 cm.
Corners and walls, which bear the load from neighboring walls, are the weakest point. In order to avoid the appearance of cracks, the bars in these places are bent at an angle of 90 degrees with an overlap of 60-70 cm. If the length of the bar is not enough, they are connected with L-shaped clamps.
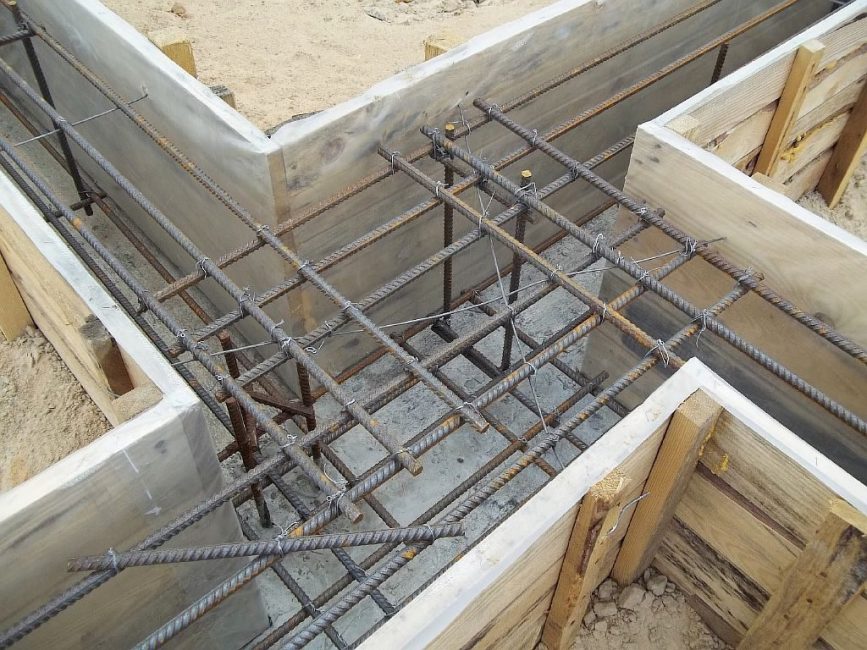
Rebar laying
Therefore, it is necessary to fasten the reinforcement with the help of knitting. To do this, use a special wire. Knitting is done manually, and with a large amount of work with a gun. To work with wire, it is more convenient to use a special hook.
Checking the quality of cement
Before giving detailed instructions for building a foundation, let's talk about the quality of cement. When pouring the foundation for a house, saving on cement is definitely not worth it. According to GOST, it must be at least grades M200-300. But it is better to play it safe and use cement M400-500. This is especially important in the construction of heavy or multi-storey buildings. Indeed, in practice, today's cement is often produced not of the best quality.
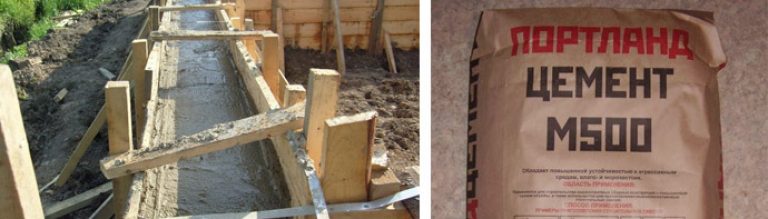
Cement for strip foundation
High-quality concrete has a dark gray color. It should be fresh and not caked - when squeezed in a fist, it should easily spill out between the fingers. Since this material is able to quickly absorb moisture, if purchased in advance, store it in a dry place, covered with plastic wrap, for no more than 1-2 weeks.
It is difficult to focus on the manufacturer - after all, each region produces its own cement. Therefore, it is better to do a test batch of the solution.
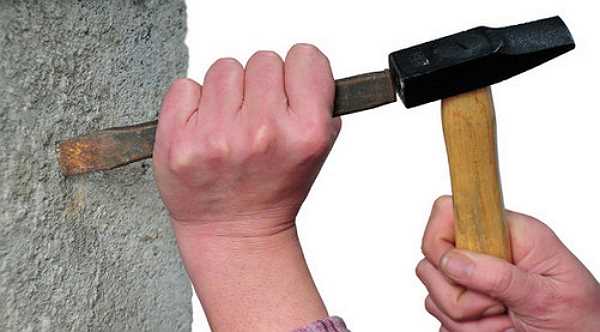
After it hardens, it is necessary to install a chisel on the concrete surface and hit it with a hammer. You should be left with only a small scratch mark. Breaking off small pieces means that, even if the manufacturer assured you otherwise, the brand of such cement is no more than M200. Holes in concrete after impact appear when pouring cement M100.
Checking the quality of concrete
The inside of the dried concrete should be darker than on the surface. After a month, hammering a nail into high-quality concrete should be difficult. In the conditions of Siberia and the North, it is important to pay attention to the frost resistance of the material. Such concrete is marked ML.
We prepare a concrete solution
The right foundation should be made from a quality solution. Eits proportions are directly dependent on the brand of cement. So, when using cement grades M400, the ratio by volume will be 1.0: 1.2: 2.7 (cement, sand, crushed stone are taken for mixing).
Concrete mixer
| Concrete brand | Proportions by volume cement / sand / crushed stone | Proportions by weight of cement / sand / crushed stone | Approximate volume of concrete from 50 kg of cement (1 bag), m3 |
|---|---|---|---|
| M100 | 1,0/4,1/6,1 | 1,0/4,6/7,0 | 0,231 |
| M150 | 1,0/3,2/5,0 | 1,0/3,5/5,7 | 0,189 |
| M200 | 1,0/2,5/4,2 | 1,0/2,8/4,8 | 0,160 |
| M250 | 1,0/1,9/3,4 | 1,0/2,1/3,9 | 0,128 |
| M300 | 1,0/1,7/3,2 | 1,0/1,9/3,7 | 0,122 |
| M400 | 1,0/1,1/2,4 | 1,0/1,2/2,7 | 0,092 |
Sand is used dry, without impurities of clay and debris. To remove large particles, sand must be sifted through a sieve. Crushed stone will need a fine fraction with a particle size of 5-20 mm. The use of river gravel instead, which has low strength, is undesirable. Plus, its grains have a too smooth surface and do not adhere well to concrete.
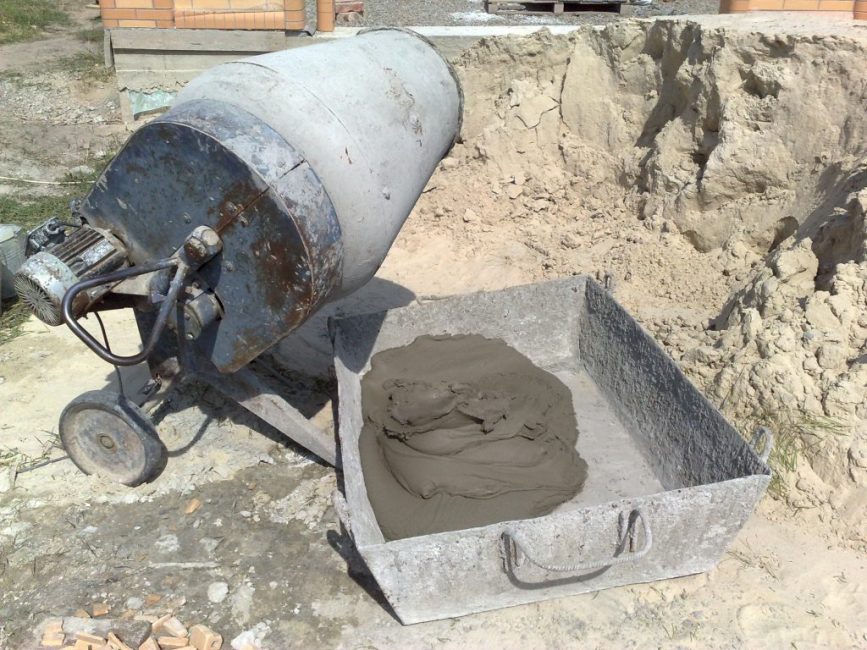
First you need to thoroughly mix the dry mixture together, and only then add water to it. If kneading is done by hand, then this must be done in small portions, otherwise, in case of non-mixing, lumps form in the solution. The resulting solution should be thick enough and not drain from the trowel.
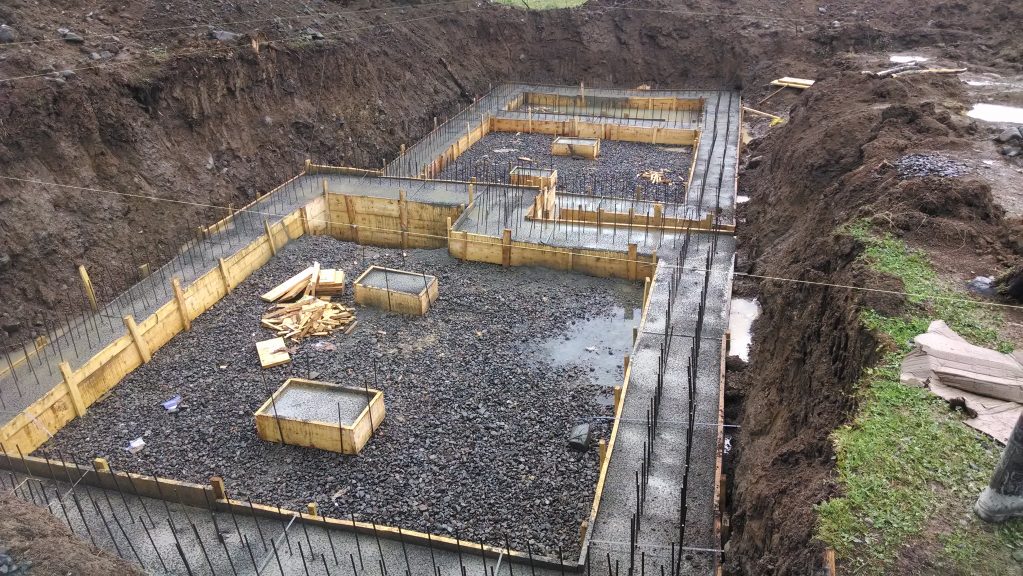
Foundation pouring
The strip foundation is made in the form of a continuous concrete sheet passing along the perimeter of the walls and internal partitions. When erecting light buildings, the construction of brick bases is allowed.
Pouring solution
The foundation is poured in small portions, in layers of 20-30 cm, and each of them must be additionally mixed with a shovel, or a special vibrator for concrete is used to remove possible voids that reduce the strength of concrete. To extrude them, it is better to additionally tap the formwork. However, this should not be done after the solution has set.
At the end of the work, the finished foundation is covered with a film so that it dries evenly and does not crack.
Foundation insulation
Via insulation it is possible not only to reduce heat losses and provide a microclimate in the premises, but also to significantly increase the service life of the foundation itself. For this, inexpensive materials that are difficult to rot are used: styrofoam, expanded polystyrene.
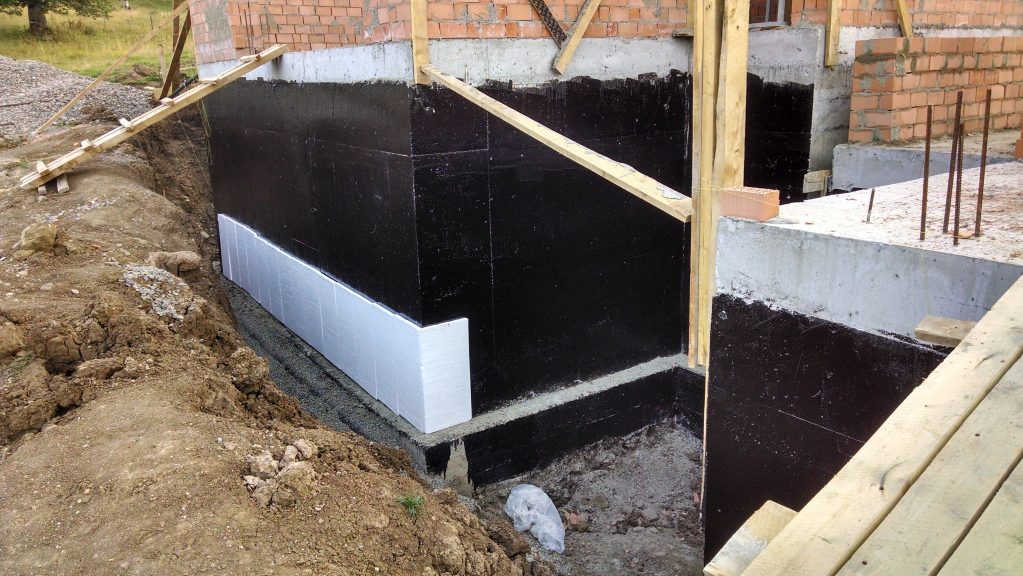
Foundation insulation
Work on the insulation of the foundation can be started immediately after the removal of the formwork. First, it must be checked for defects and, if necessary, cut down excess concrete. To avoid the appearance of air pockets, large irregularities are sealed with plaster.
Styrofoam or expanded polystyrene plates are pre-coated with special glue. They must be pressed firmly to the surface and slightly moved so that the glue is evenly distributed. The seams between the plates are additionally sealed with mounting foam. After the glue has dried, the trench between the foundation and the soil is covered with sand or sifted soil.
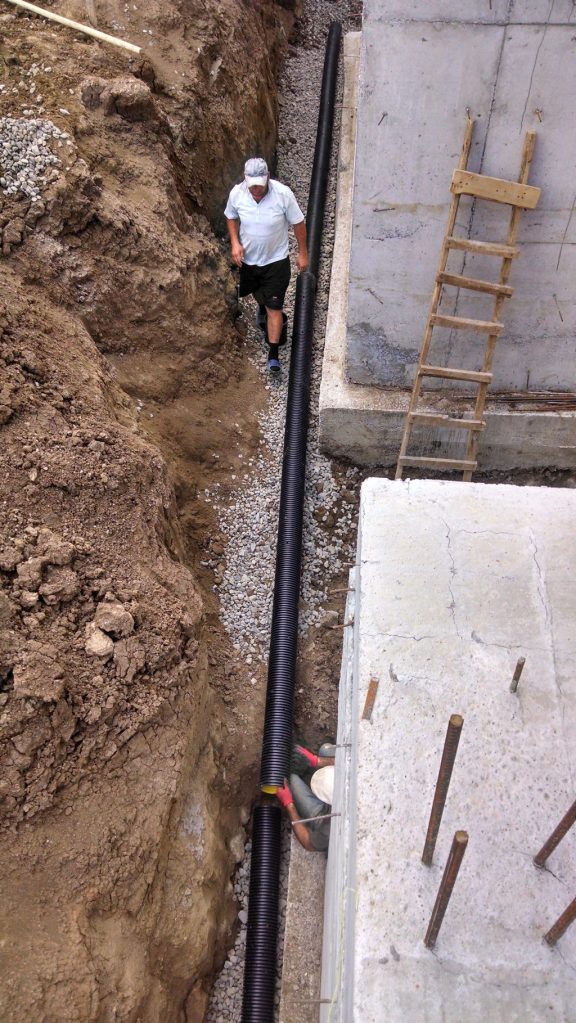
Laying of drainage pipes
Along the entire length of the plastic pipes, holes are drilled on top for water to enter them. After connecting the pipes to each other, they are covered with a layer of rubble.
Foundation insulation. How right and how wrong
Foundation: types, device, step-by-step instructions for laying a strip foundation with your own hands | Photo & Video +Reviews
 Read also: Veranda attached to the house - expanding the living space: projects, tips on how to create your own hands (200 original photo ideas)
Why is a blind area needed?
Since heaving of the soil occurs due to excess moisture, the builders decided one day to deal not with its consequence, but with its cause. Therefore, it was decided to protect the foundation. To do this, they began to use a blind area - a coating in the form of a strip of moisture-resistant materials passing along the perimeter of the building. To ensure the flow of water, such a strip is made at a slight slope. Its width is always equal to the freezing depth.
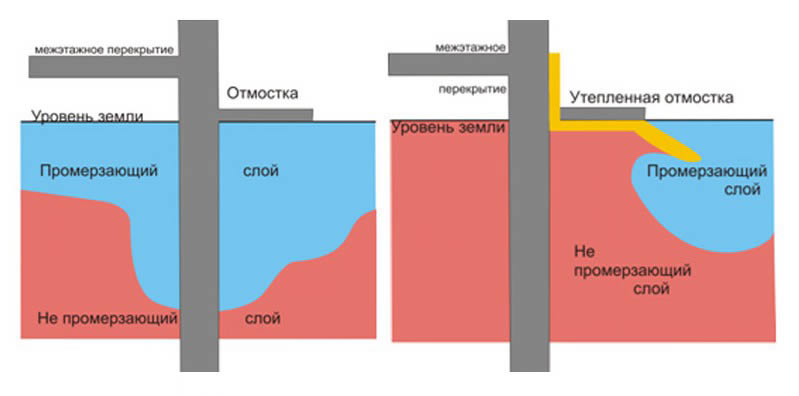
blind area scheme
To fill the blind area, it is sufficient to use cement M200-300.First, the upper part of the soil is removed along the perimeter of the building and markings are made using pegs and a rope. To protect against moisture, it is desirable to make a hydraulic lock from a 10-15 cm layer of clay. Next, a 5-10 cm layer of crushed stone and a 10 cm layer of sand are poured.
To insulate the blind area, materials that are not susceptible to decay are used - polystyrene foam, foam plastic, etc. They are laid on a layer of sand in 2 layers with a displacement of the previous one. After the formwork is prepared, reinforcement is carried out using a metal mesh with cells of 50 or 100 mm in size, and then the solution is poured.
6 tips for a shallow strip foundation (MZLF).
Foundation: types, device, step-by-step instructions for laying a strip foundation with your own hands | Photo & Video +Reviews
Strip foundation. How and when to choose for a home? Part 1.
Foundation: types, device, step-by-step instructions for laying a strip foundation with your own hands | Photo & Video +Reviews
Strip foundation (when to use, how to deepen, types of foundation). Part 2
Foundation: types, device, step-by-step instructions for laying a strip foundation with your own hands | Photo & Video +Reviews


Last year, a cottage was built on a strip foundation. It turned out quickly and relatively cheaply and, most importantly, not at the expense of quality !!! First, they did a complete waterproofing in the old fashioned way, although some said that now there are additives in the solution that give the concrete the necessary qualities in which it does not absorb moisture, but we decided to go the proven route. Then they insulated 1.5 meters of soil freezing.