

angle grinder is a versatile tool. Without it, it is difficult to imagine almost any work on metal. However, its scope is not limited to this - not a day passes without a new purpose being invented for it.
How to make from a grinder hacksaw on wood is the topic of today's article.
Content:
- What is required for the manufacture
- Making an electric saw
- Step number 1 - making an eccentric
- Step number 2 - we make a blank for attaching the nozzle
- Step number 3 - make the mount
- Step number 4 - making a body for a hacksaw
- Step number 5 - preparing the hacksaw blade
- Step number 6 - assembly of the saw body
- Step number 7 - install the hacksaw blade
- Step 8 - final assembly
- Testing an electric saw from a grinder
 Read also: Veranda attached to the house - expanding the living space: projects, tips on how to create your own hands (200 original photo ideas)
What is required for the manufacture
Reciprocating saw from grinder
To make an electric saw you will need:
- wood saw
- a small piece of pipe 1.5 inches
- bearing – inner diameter approx. 22 mm
- metal sheet 2 mm
- nut M8
- bolts and nuts M6
- reinforced washers M14
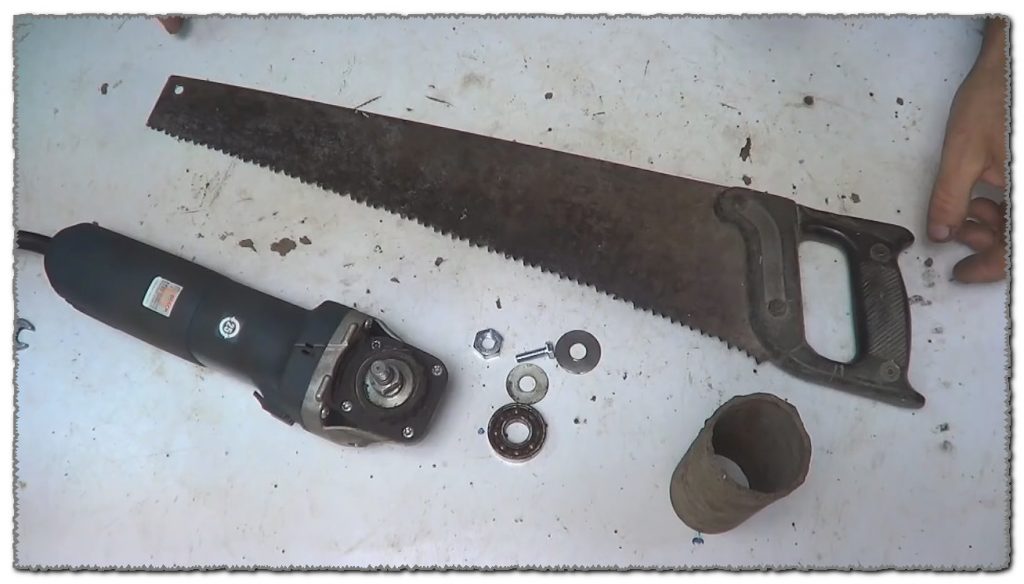
Saw elements
You will also need:
- welding inverter
- Bulgarian
- vise
- drilling machine or drill
 Read also: Making a greenhouse with your own hands from a profile pipe and polycarbonate: a complete description of the process, drawings with dimensions, watering and heating (Photo & Video)
 Making an electric saw

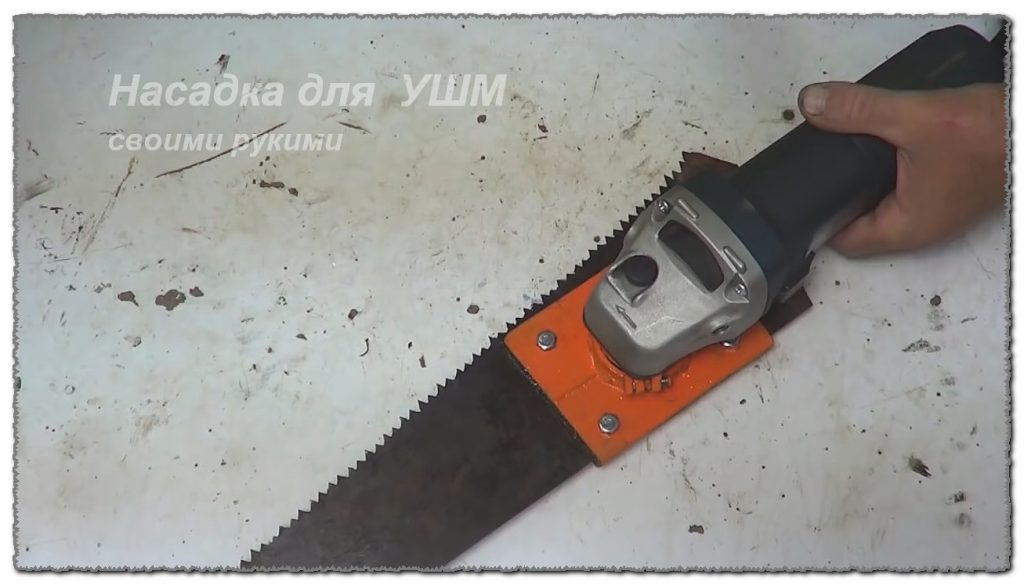
Homemade electric hacksaw from a grinder
When working with a grinder, torque is used. We need progressive movements for a hacksaw. We will transform the rotation with the help of an eccentric.
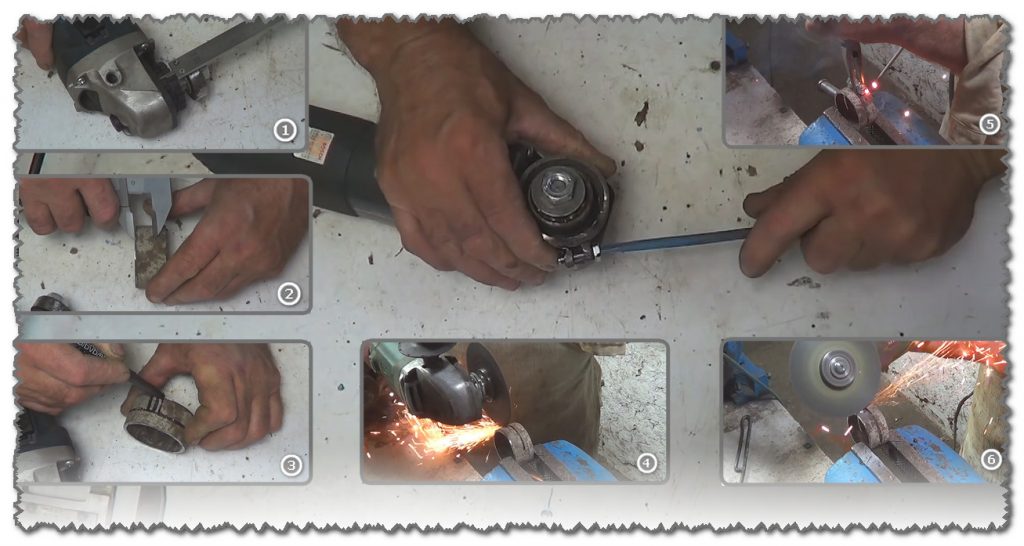
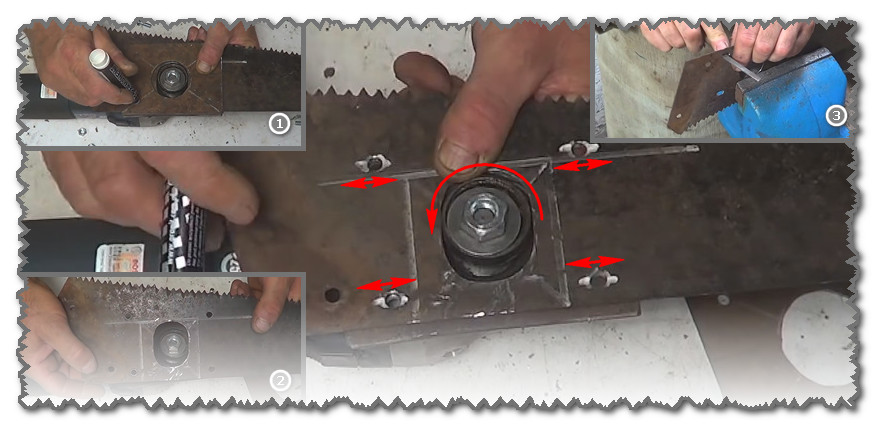
Step number 1 - making an eccentric
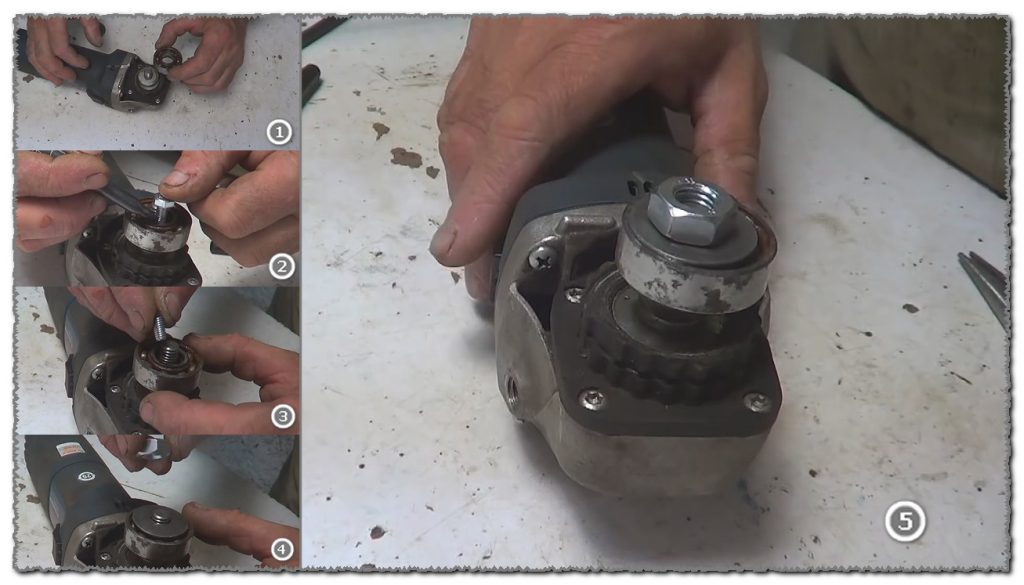
Making an eccentric
This step will not cause problems.
We install a reinforced washer on the grinder spindle and put a bearing on top of it.
The center of rotation of the bearing will be displaced with a bolt. We note the excess.
Having sawed off the bolt, we place its shortened rod inside the bearing.
We lay a second reinforced washer on top and tighten it with an M8 nut;
The eccentric is ready. You can move on to the next step.
Step number 2 - we make a blank for attaching the nozzle
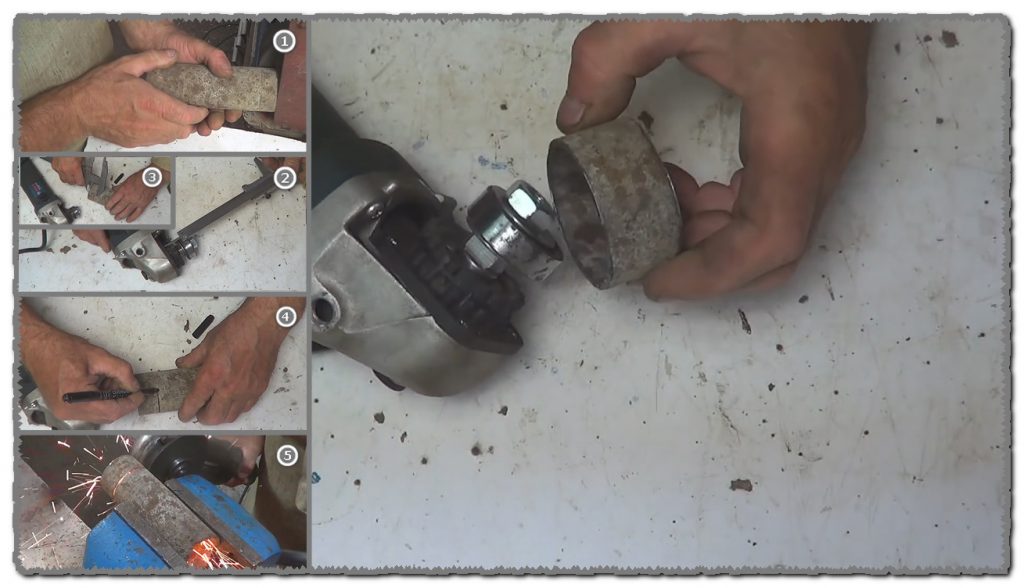
Fastening preparation
We will make it from a steel pipe.
We end the edge of the pipe on sandpaper.
We measure the distance to the lower level of the bearing.
Draw with a caliper.
Duplicate the markup with a marker.
We cut off according to the markings with a grinder.
Step number 3 - make the mount
Nozzle holder
At this stage, the workpiece from the pipe will need to be cut in half.
We measure the length of the seat for attaching the nozzle.
Using a compass, draw a transverse marking.
We circle it with a marker and make markings for the cut, which is needed to fix the mount on the grinder.
We make a cut on the markup, incl. transverse.
We weld two bolts on the fixing propylene ring to fix the mount.
We clean up the weld.
We put the mount on the grinder, and fix it.
Step number 4 - making a body for a hacksaw
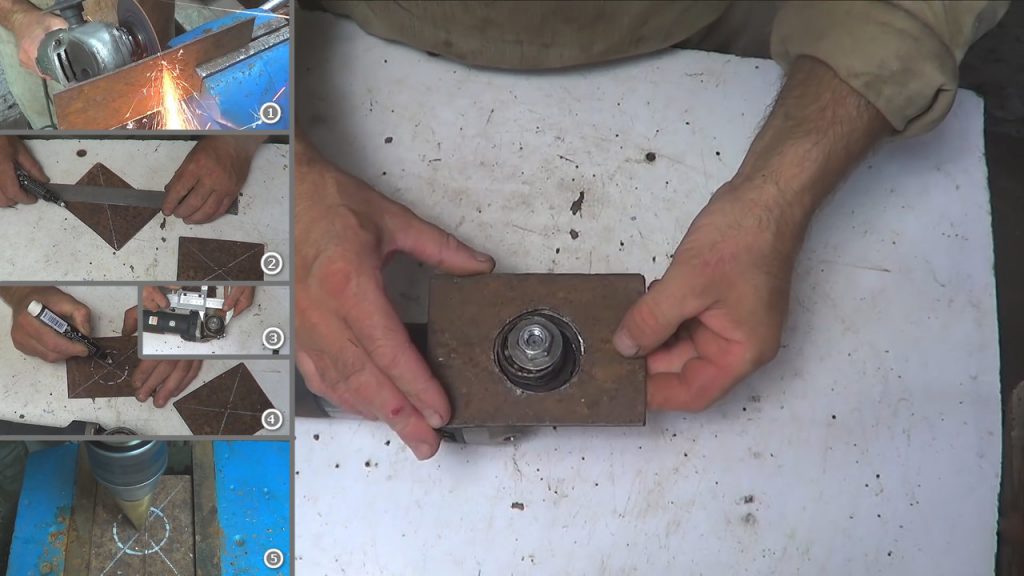
Hull preparation
The body will consist of 2 steel plates. Their dimensions are arbitrary, but should not be less than 2 diameters of the bearing used.
Cut off the plates.
We find their center and mark it.
We specify the outer diameter of the bearing and divide it in half on the caliper.
From the center of the plates we make control points with the help of a rod, apply the bearing and outline it.
We drill holes on a drilling machine.
Holes in the plates can be cut out. To do this, use a drill with small drills and a chisel. The geometry is adjusted with a round file.
Step number 5 - preparing the hacksaw blade
Preparing the woodwork
The markup is carried out in arbitrary sizes.
We remove the handle from the saw for wood.
We determine the place of contact of the hacksaw blade with the bearing. We mark the center.
Using a compass, we make the primary marking for the bearing - 3-4 points from the center.
We attach the bearing and circle it with a marker.
We form a hole according to the markup.
The resulting hole must be flared along the vertical level of the saw blade.
The hole must be formed into an oval. The dimensions of its diameters are approximately 1 to 1.3. To accurately determine the shape of the hole, you need to try on the canvas in place.
Step number 6 - assembly of the saw body
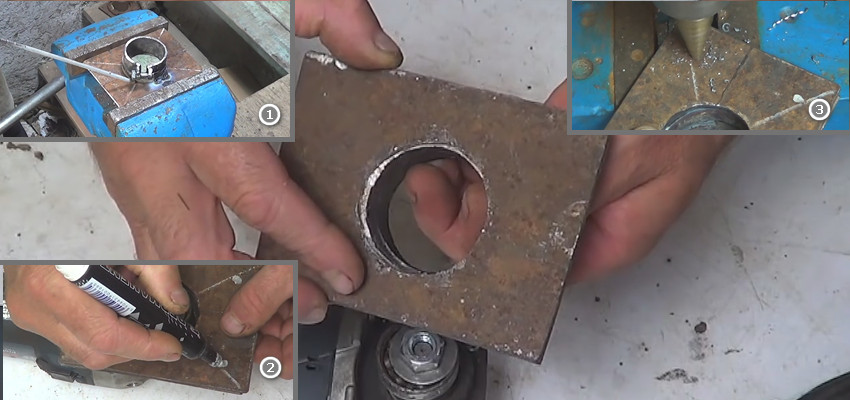
We form a bolted connection on the nozzle body
At this stage, you need to weld the cuff (fastening) to one of the metal plates and form holes for fasteners.
We fix the workpiece in a vice, apply fasteners and weld it to the plate. The bolts welded to the ring must be at the top.
We mark 4 holes for bolting in each plate.
We drill.
Let's move on to the next step.
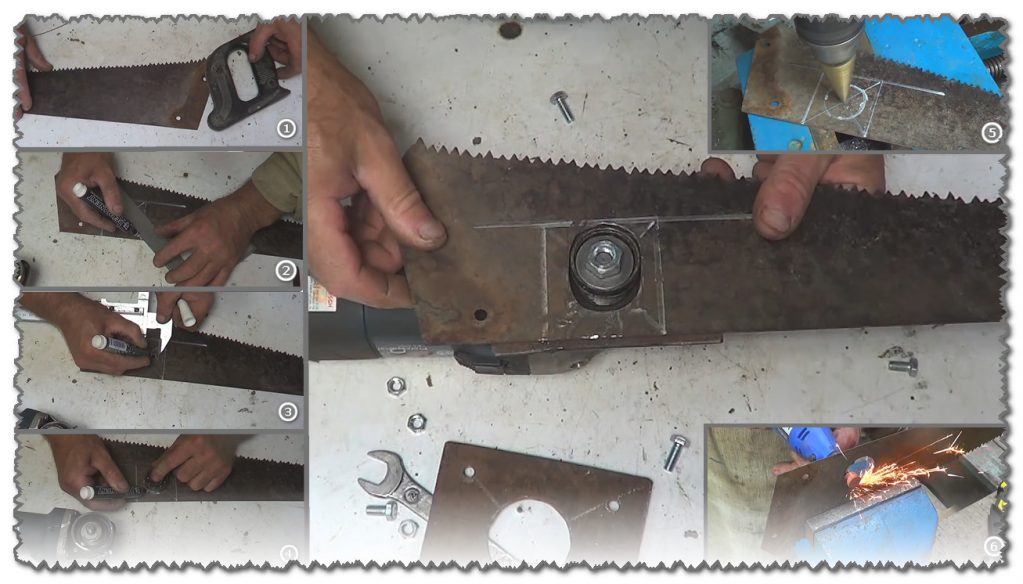
Step number 7 - install the hacksaw blade
Installing a canvas on wood
According to the body plates, we make markings in the hacksaw blade.
Drilling.
For sawing, you need a hacksaw blade move, so the holes need to be bored along the saw by 1-1.5 cm, this must be done observing symmetry.
Periodically check the sufficiency of the holes for the stroke by scrolling the eccentric.
Step 8 - final assembly
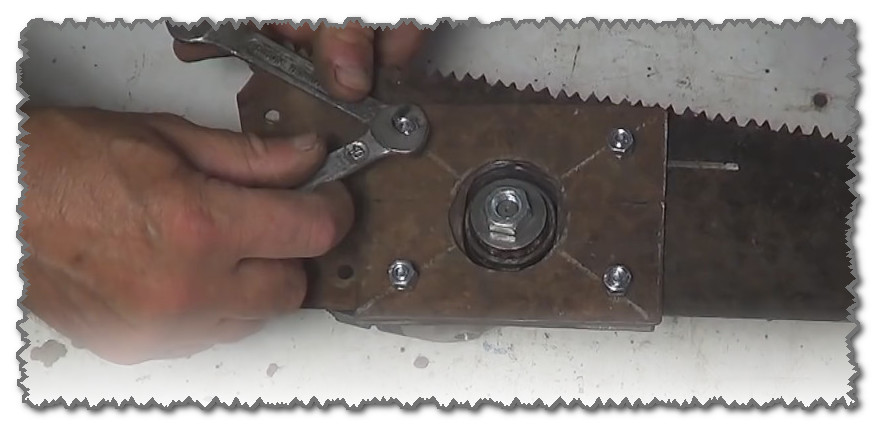
final assembly
After you have made sure that the rotation of the eccentric is stable, you can finally assemble the attachment for the grinder. Do this with two nuts for each hole.
For appearance, the product can be painted. Before assembly, the inner parts of the plate must be thickly greased with lithol.
 Read also: Cabbage: types (white, Savoy, broccoli, Brussels sprouts), description of the 33 best varieties, features of agricultural technology (Photo & Video) + Reviews
Testing an electric saw from a grinder
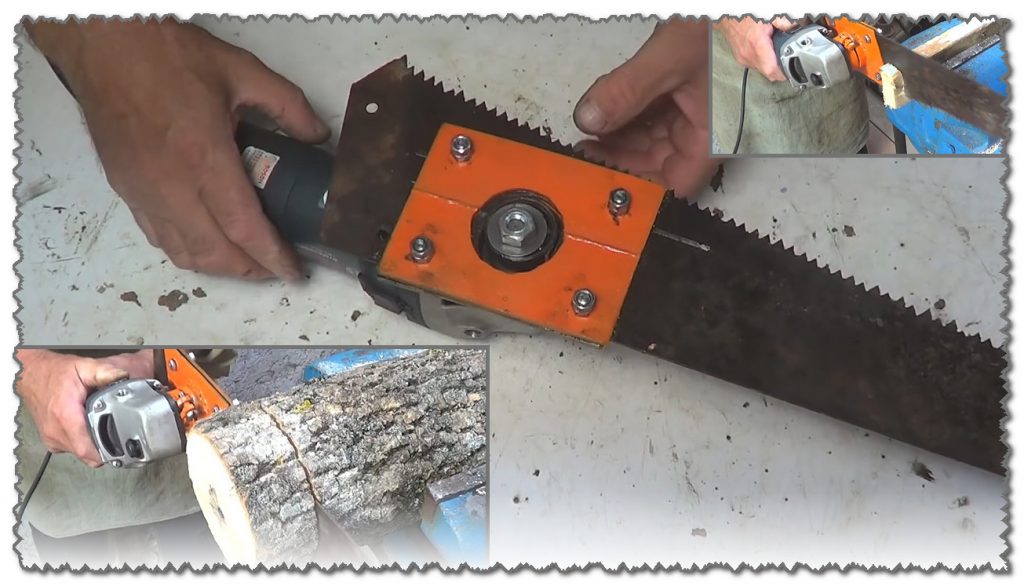
Nozzle works
The tests were successful. This saw is surprisingly good at sawing small logs in a couple of minutes.
VIDEO: Do-it-yourself electric saw for wood
![Powerful do-it-yourself wood saw [LIFE HACK]](data:image/gif;base64,R0lGODlhAQABAIAAAAAAAP///yH5BAEAAAAALAAAAAABAAEAAAIBRAA7)
AMAZING! Brilliant ideas & DIY
Powerful do-it-yourself wood saw [LIFE HACK]
![Powerful do-it-yourself wood saw [LIFE HACK]](https://iherb.bedbugus.biz/wp-content/uploads/thumbs_dir/lite-plastikovyh-detalej-oetvupq93ul9han1kx08fglztprvizafcas8q586kc.jpg)
![Powerful do-it-yourself wood saw [LIFE HACK]](https://iherb.bedbugus.biz/wp-content/uploads/thumbs_dir/ruchka-dlya-napilnika-oes7dch5rpxrfddzvqjskwutxlqt3raenbt07dmrzw.jpg)


