
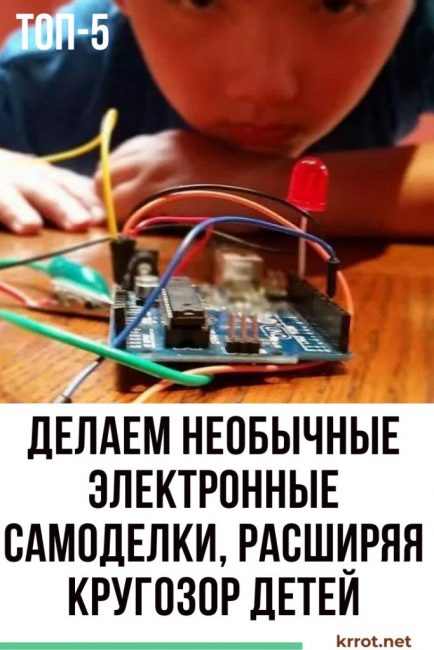
Quarantine time, as well as summer holidays, is an occasion to devote extra time to family and children. Often the question arises: what can you do with your children? In the article we will tell you how to diversify family leisure by creating various electronic homemade products with your own hands. You will not only have a great time with your children, but also significantly expand their horizons.
Content:
 Read also: Need to install an outlet, but the wires are too short? Simple life hack
Materials for work
No. 1. We light the LED lamp from “Krona”
In order to light a light bulb from a battery, you will need:
- step-up transformer from 12 to 220 V;
- 5 V DC motor;
- LED lamp for 220 V, 3 W;
- battery "Krona";
- insulated wires;
- soldering iron.
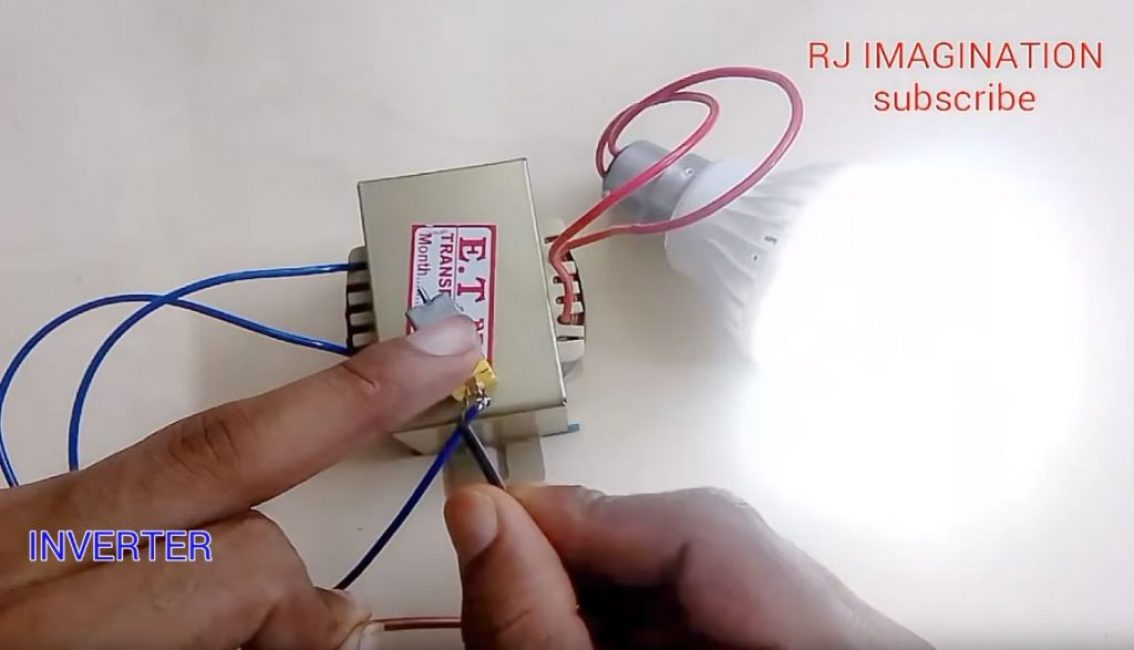
We solder the wires of the secondary winding of the transformer to the light bulb.
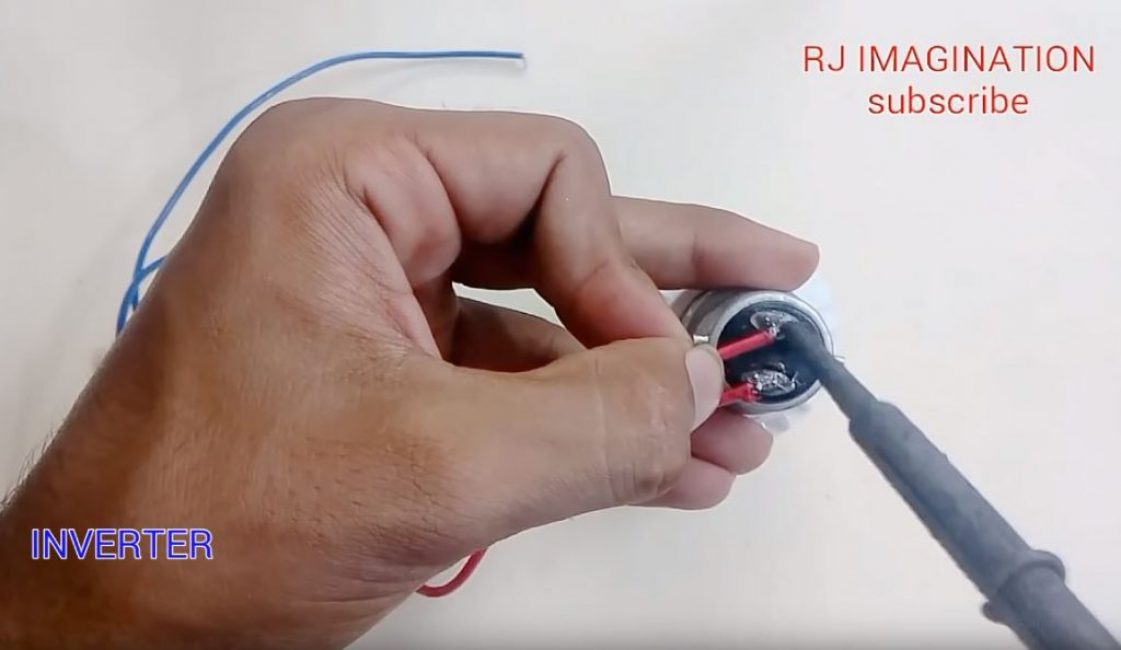
We solder the battery and the engine in series to the primary winding, which can be taken from any broken toy. The light bulb is on.
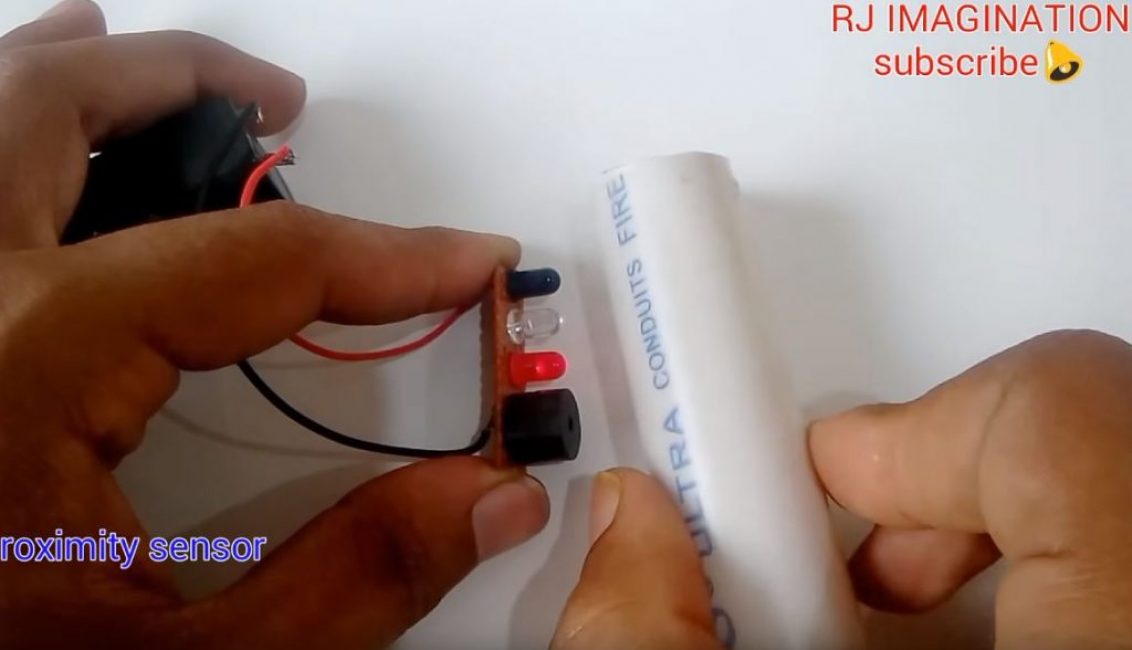
No. 2. Motion sensor
To create a sensor, you will need:
- infrared receiver;
- red LED;
- phototransistor 500 lux;
- buzzer;
- soldering iron;
- insulated wires;
- 4 V battery;
- universal board.
We will assemble the sensor according to the following scheme on a universal board.
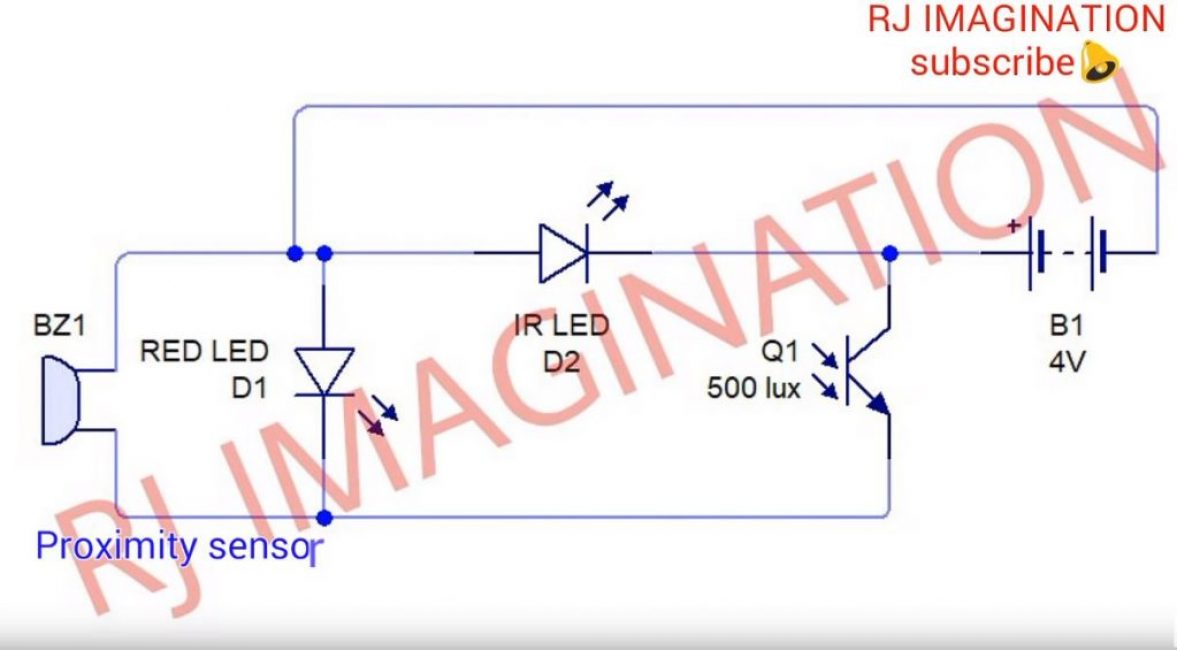
We solder all the details on the universal board.
Observing the polarity, we connect the battery with wires.
When an object approaches the sensor, the LED lights up and the buzzer sounds.
No. 3. Voltage level indicator
To create an indicator, you will need:
- four 1.5 V LEDs of different colors;
- resistors 580 Ohm, 1 kOhm (2 pcs.), 2.2 kOhm;
- insulated wires;
- soldering iron;
- universal board.
We will assemble the indicator on a universal board according to the following scheme.
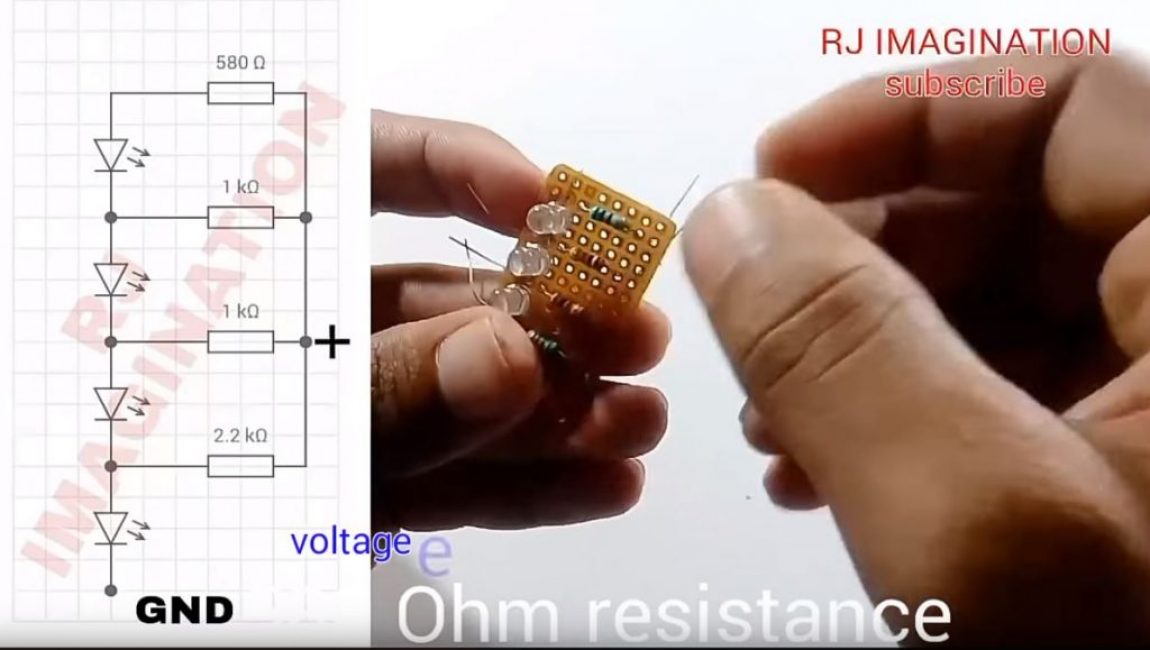
We solder all the details on the board, observing the polarity of the LEDs.
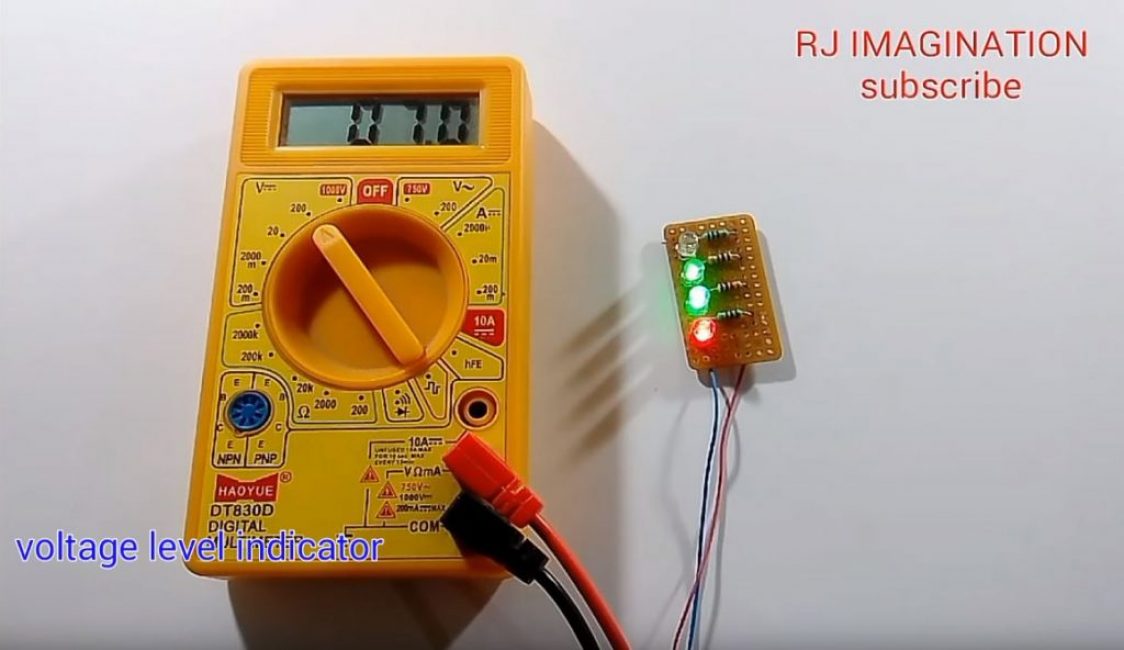
We solder the wires from the power source and connect the multimeter.
With a consistent increase in voltage, we see the operation of certain LEDs.
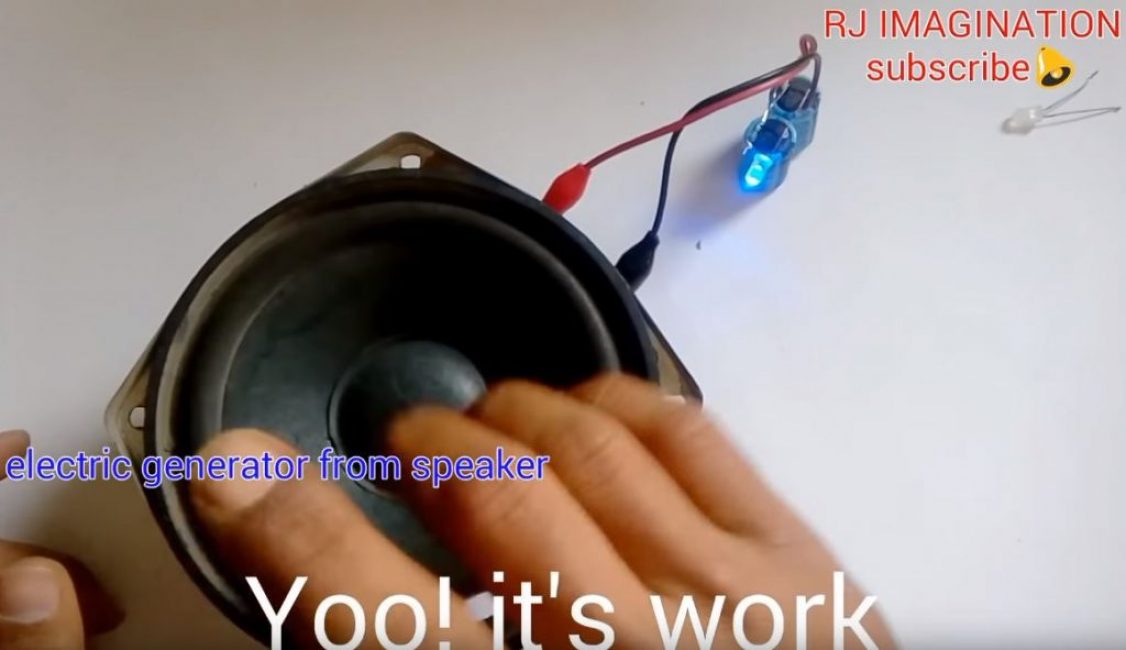
No. 4. Electric generator from an old speaker
To create a generator, you will need:
- speaker from an old music center;
- two electrolytic capacitors with a capacity of 4700 microfarads, 10 V;
- Light-emitting diode;
- 10 ohm resistor;
- diode;
- soldering iron;
- connecting wires with alligator clips on one side.
We solder two capacitors in parallel.
We solder the LED through the resistance.
On the other hand, solder the diode.
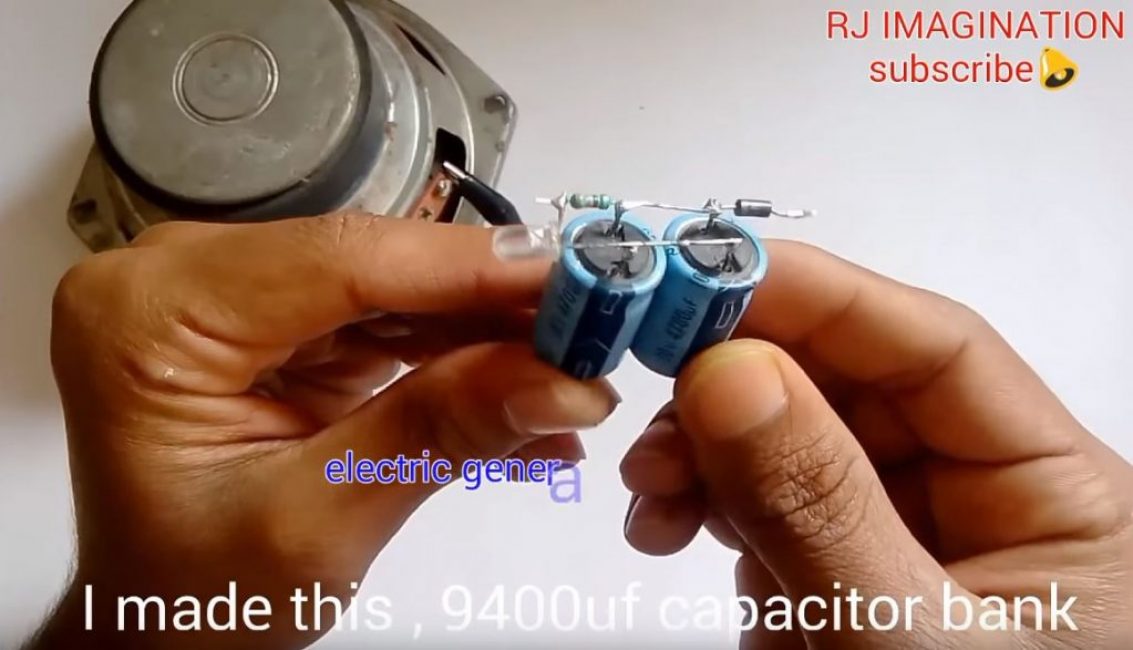
We solder the wires.
We connect the wires to the diffuser and start rhythmically tapping on it with our hand. After a few seconds, the LED will light up.
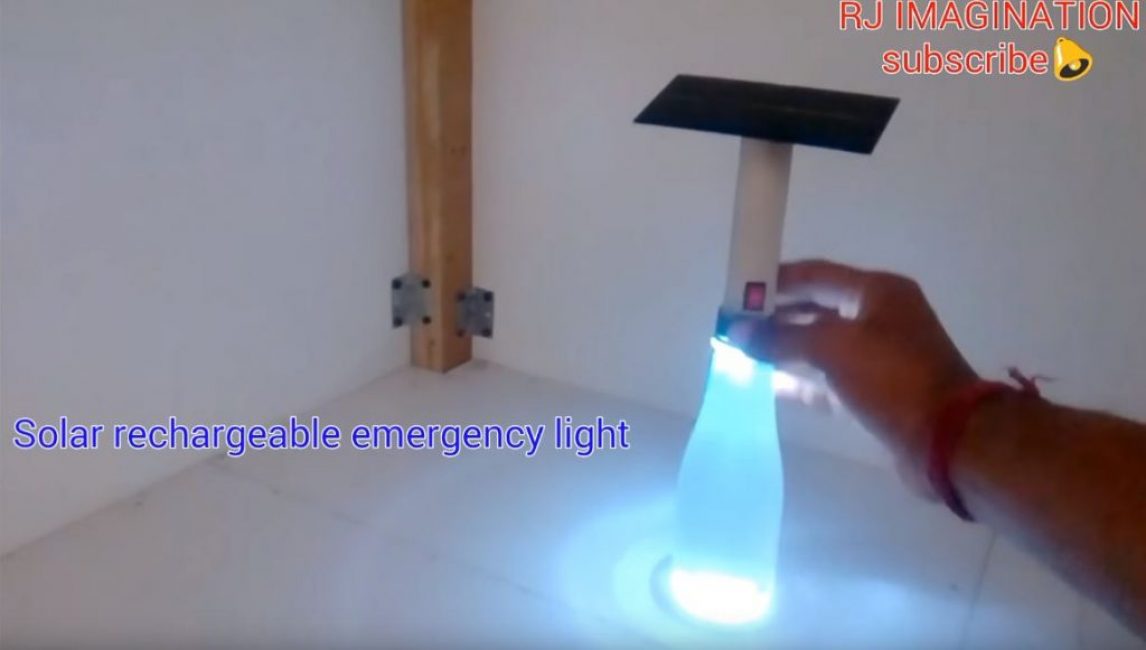
No. 5. Rechargeable solar-powered night light
To create a night light, you will need:
- solar panel JY 110x56 for 5 V;
- resistors for 330 and 10 ohms;
- diode IN4007;
- 18650 battery;
- insulated wires;
- piece of plastic pipe
- glue gun;
- switch;
- wire cutters;
- soldering iron;
- led indicator;
- 1 W LED;
- knife.
We will assemble the nightlight according to the following scheme.
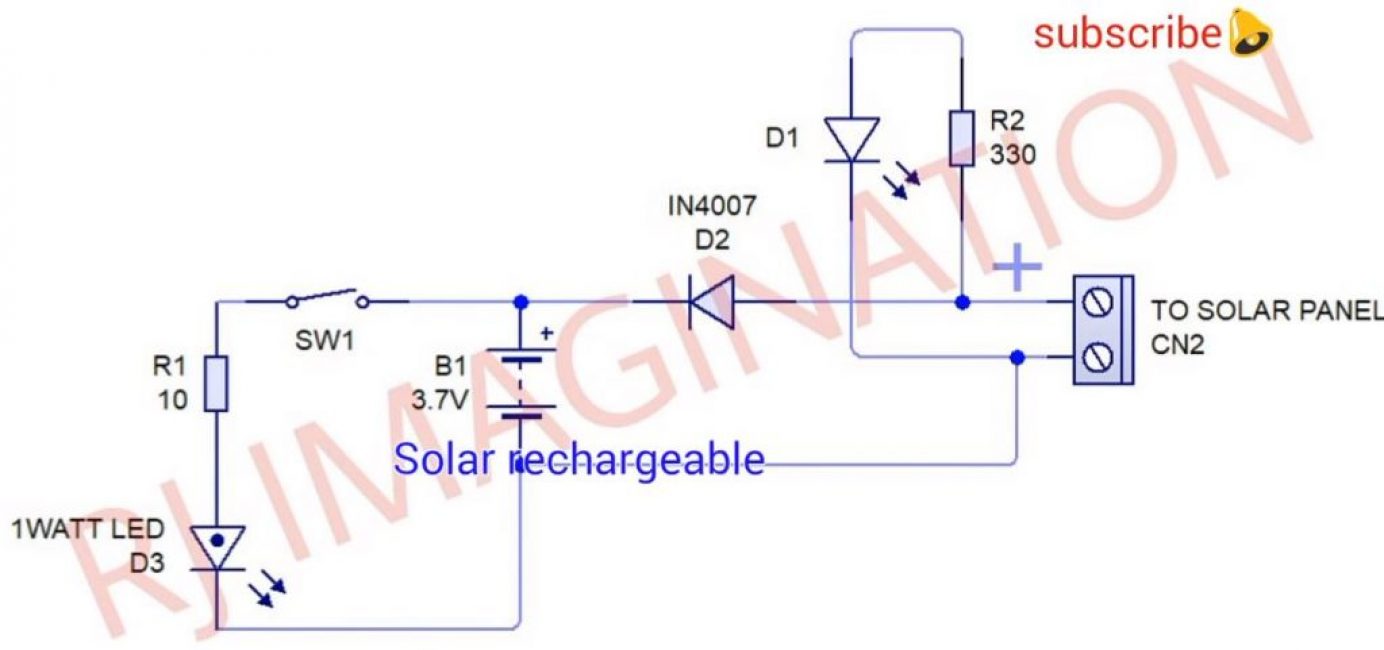
We bite the leg of the 330 Ohm resistor a little and solder it to the plus of the solar battery.
To the other end of the resistor, observing the polarity, solder the indicator. We solder its second end to the negative output of the solar panel.
We connect the plus of the solar panel to the anode of the diode. We solder the cathode of the diode with a wire to the plus of the battery.
We connect the minuses of the solar panel and the battery with the second wire.
We solder two wires to the battery to the light bulb.
We cut a hole for the switch in the plastic pipe, insert the battery into it, bring out the wires and glue the end of the pipe to the panel with a glue gun.
We make a hole in the cap of a small plastic bottle with a soldering iron.
Attach an LED to it. We solder the wires to it (one negative from the battery - the second to the switch) and isolate it with glue from the gun.
Through a resistance of 10 ohms, we connect the switch and insert it into the pipe.
We twist the bottle into the cork, our night light is ready.

Do-it-yourself electronic homemade products
Do-it-yourself electronic homemade products? | +Schemes


