
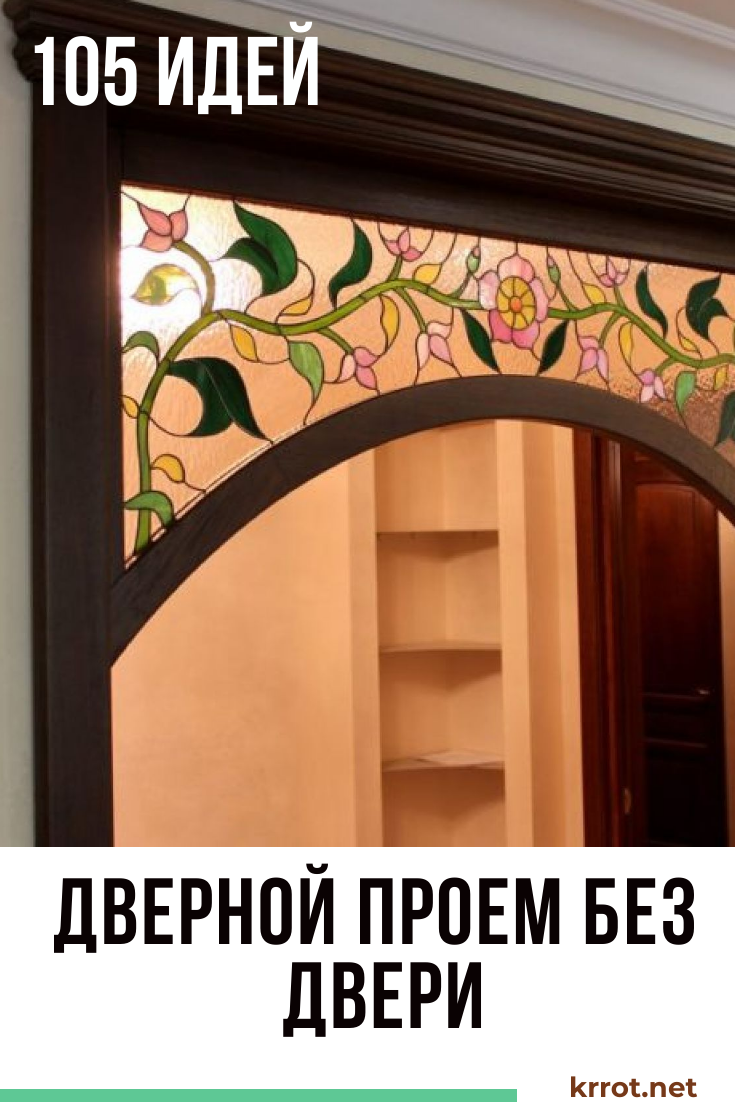
Hinged and even some types of sliding doors take up too much free space, so in recent years such structures have been installed less frequently, mainly in bedrooms. The advantages of doorways without a door are obvious - with the help of them you can visually combine the premises into a single whole, visually expand them or even "raise" the height of the ceilings. Moreover, such structures will cost a minimum amount.
Content:
 Read also: Landscaping your site with your own hands - (130+ Photo Ideas & Videos) + Reviews
Which is better, classic or arched opening?

Types of arched openings
The use of arches is justified in cases where it is required to change the visual perception of the interior. There are many such structures. They can be convex or concave, flat, lancet, elliptical or trapezoidal, asymmetrical, decorated with lobes (several semicircles), parabolic or keeled.
Classic arches, in which the corner radius is half the width of the opening itself, are more often used in rooms with high ceilings. If you want to increase their height, it is better to stop at more gentle structures. The living room and the corridor can be connected by an arch with slopes in the form of semi-columns, which will give the room more solemnity.
Just keep in mind that richly decorated baroque or empire doorways or conspicuous beveled structures are best used to decorate spacious rooms - in houses of a small area, they look ridiculous. In the latter case, it is better to stop at symmetrical arches with discreet polyurethane moldings or plaster overlays on top.
 Read also: Projects of country houses for 6-10 acres: 120 photos, description and requirements | The most interesting ideas
 Finishing materials
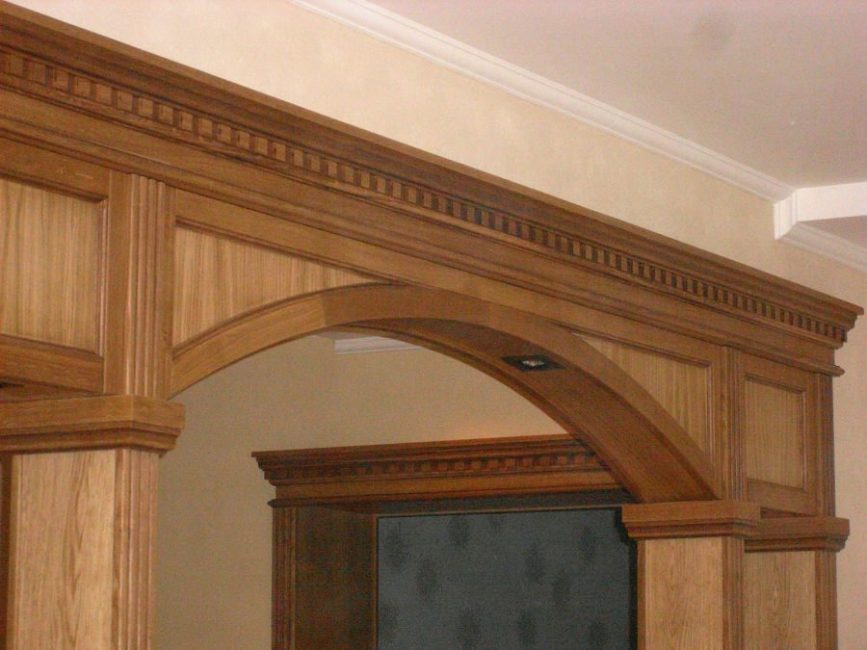
solid wood arch
For the design of doorways without doors use:
- standard openings made of eco-friendly natural or veneered wood, which are still relevant today
- drywall constructions: lightweight, inexpensive material with which you can easily create smooth curves, arches and three-dimensional structures; to give rigidity, it is mounted on a durable metal or wooden frame
- polyurethane products imitating stucco molding: used in cases where slopes need to be given more lightness and grace; depending on the design idea, the “stucco molding” on them may have a deep or slightly pronounced relief; the increased flexibility of the material allows it to be used to create structures of various shapes
- gypsum stucco: luxurious relief patterns, friezes and ornaments from it are more reminiscent of natural stone; however, some skills are required to work with it; used to decorate rooms in the Renaissance, Baroque, Empire, Classicism styles; simultaneously with doorways, columns, cornices, ceiling rosettes, balustrades are trimmed with plaster
- plastic panels (usually PVC): a material that goes well with modern interior details; such panels do not require special care and are easy to clean with conventional means; in addition to ordinary smooth PVC panels, products are produced with textile trim, special decorative glue, artificial leather, with metal overlays, coated with paints imitating gold leaf
 Read also: Terrace attached to the house: 150+ Best photo ideas | Do-it-yourself step-by-step arrangement
Surface preparation
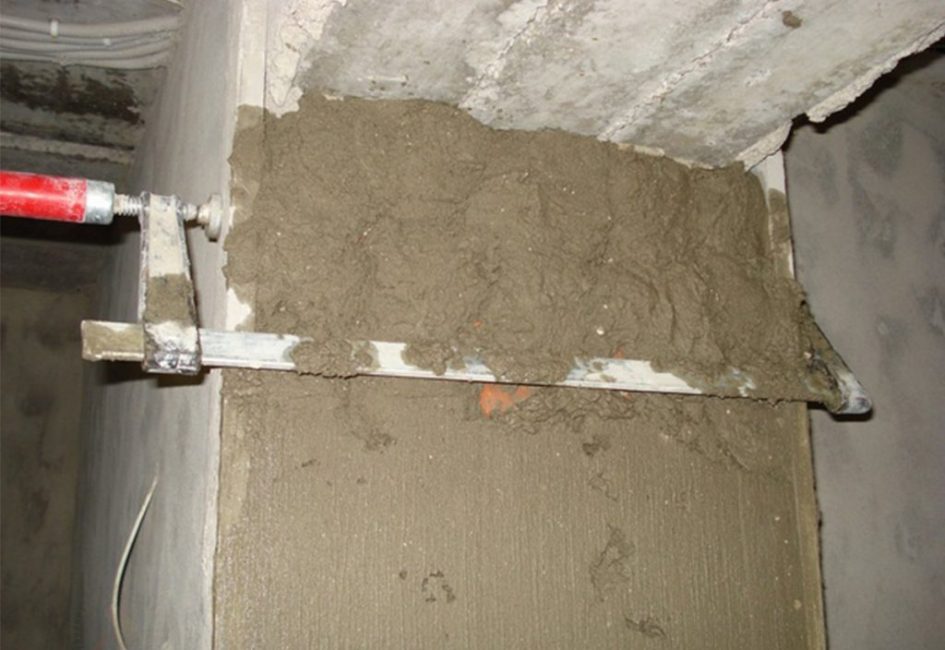
Leveling door jambs with a clamp
Before finishing a doorway without a door, the slopes should be cleaned of old finishing materials, crumbling plaster and dust. Large cracks are pre-primed, and to increase adhesion, they are reinforced with a plaster mesh and covered with a layer of mortar (you can use ordinary cement-sand). All extra protrusions are pre-stuck.
When finishing with soft polyurethane stucco molding or gluing gypsum stucco molding, the surface should be leveled with drywall or plastered, and after drying, wipe it with sandpaper. Such preparation for the installation of drywall or wood panels is not required - it is enough just to knock down loose pieces of plaster and large irregularities.
 Read also: Veranda attached to the house - expanding the living space: projects, tips on how to create your own hands (200 original photo ideas)
 Slopes and arches made of drywall
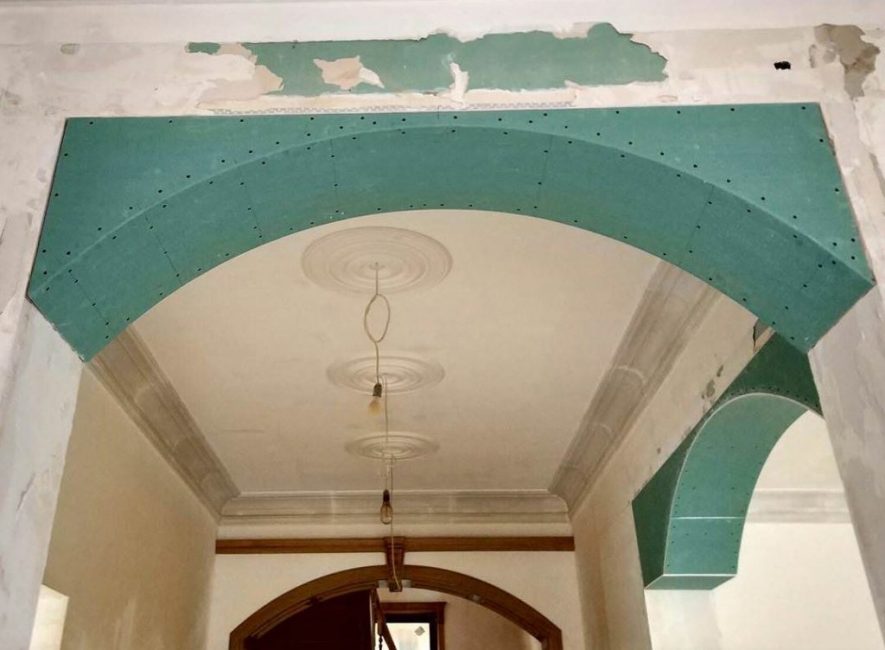
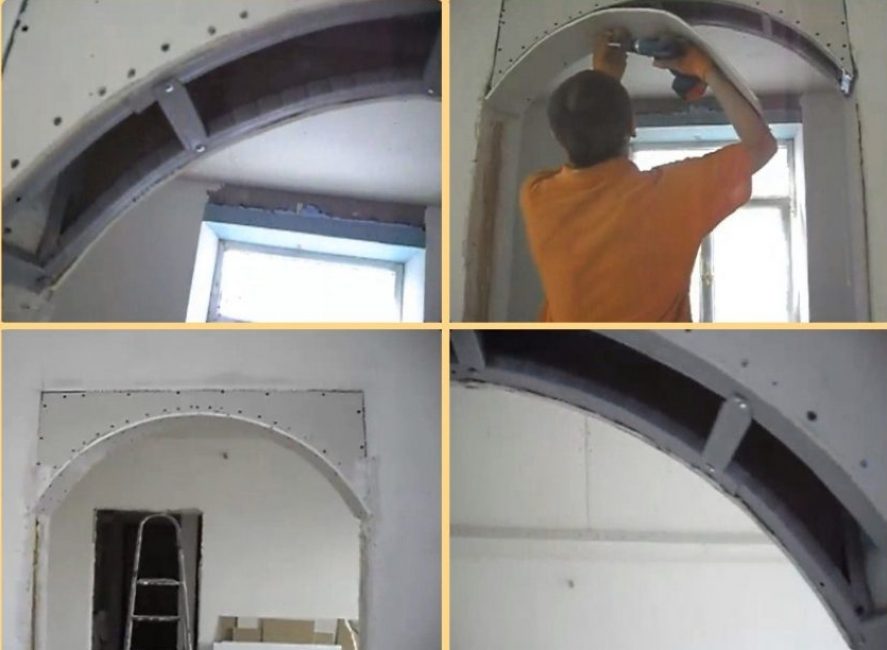
Drywall arch frame
With this inexpensive material, you can get very original designs, even in the absence of any experience in construction.. There are three ways to fix drywall: frame, glue and fastening on polyurethane foam.
Frame method
Jumper fixing
Most often, doorways are finished using this method:
When creating a frame, it is better to use not a wooden beam, but a metal profile. It is more even and has an ideal geometry. Plus, even with a change in humidity, the material will not warp
Cut it with ordinary metal scissors
Metal rails are mounted around the perimeter of the slope on both sides of the doorway
To work, you need a guide profile (it is marked with the letters PN). To strengthen the installation of racks, a PS profile or wooden bars are used, which are inserted inside the racks. In the upper part above the door, the frame is reinforced with vertical lintels.
Hangers are used to fix the profile to the wall. – strips of metal with many holes. Distance between dowels and screws - 20 cm
The horizontal and vertical arrangement of the frame elements is verified by the building level
If necessary, lighting cables or communication wires are laid in the frame
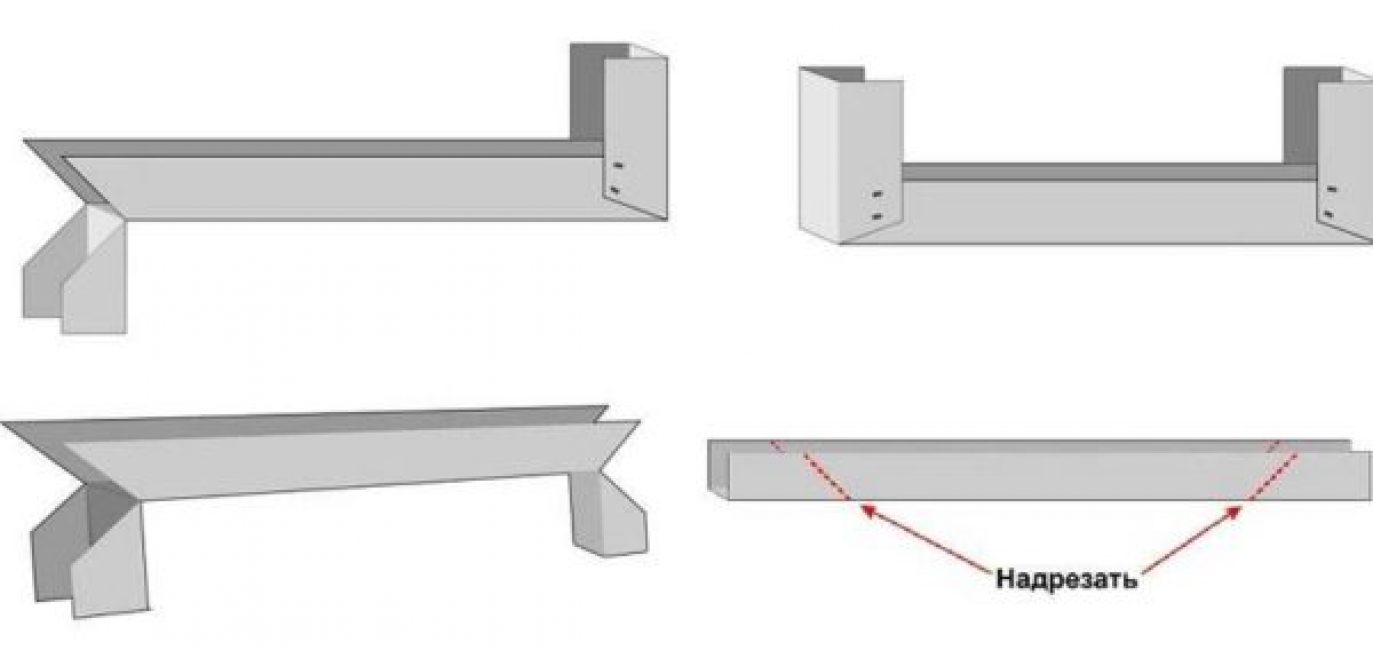
To create arches, you can purchase a special arched profile. You can also bend the usual one if you make multiple cuts on one of its sides
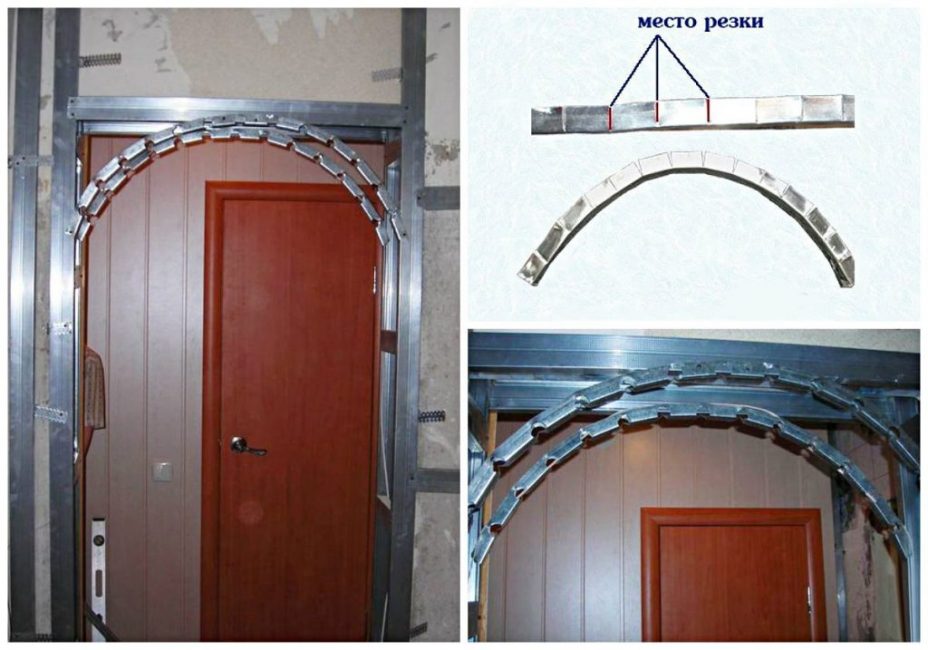
Metal profile bending
When cutting drywall, measurements must be taken for each side of the doorway: after all, there are simply no perfectly even walls
Cut this material with a sharp clerical knife. Drywall consists of 3 layers, each of which needs to be cut. To do this, it is laid on a flat table, a cut is made at the beginning of one layer of cardboard. At the same time, the gypsum layer, located in the center between the two sheets, is also partially cut. The place of the cut is shifted to the edge of the table, a bar is placed and, lightly tapping, the plaster is broken off. It remains to turn the sheet over and cut the second layer of cardboard

cutting drywall
Drywall is fixed with self-tapping screws so that the seam between the sheets falls exactly on the center of the metal profile. Distance between fasteners 20 cm
Screws should not be screwed along the edges of the sheet, otherwise the drywall will crack. You need to step back a little from the edge
Drywall finishing
Arched drywall of smaller thickness is used to create arches. You can also bend ordinary sheets. This is done in two ways (see photo). With the dry method, multiple cuts are made on one side of the sheet. Moreover, the more often they are located, the smoother and steeper the bend will turn out.
With the wet method, many punctures are applied to one side using a spiked roller. Then the sheet is moistened, bent and fixed until completely dry with construction tape to a template that repeats the shape of the bend.
After installing the drywall, all seams are glued with sickle tape, and then sealed with plaster
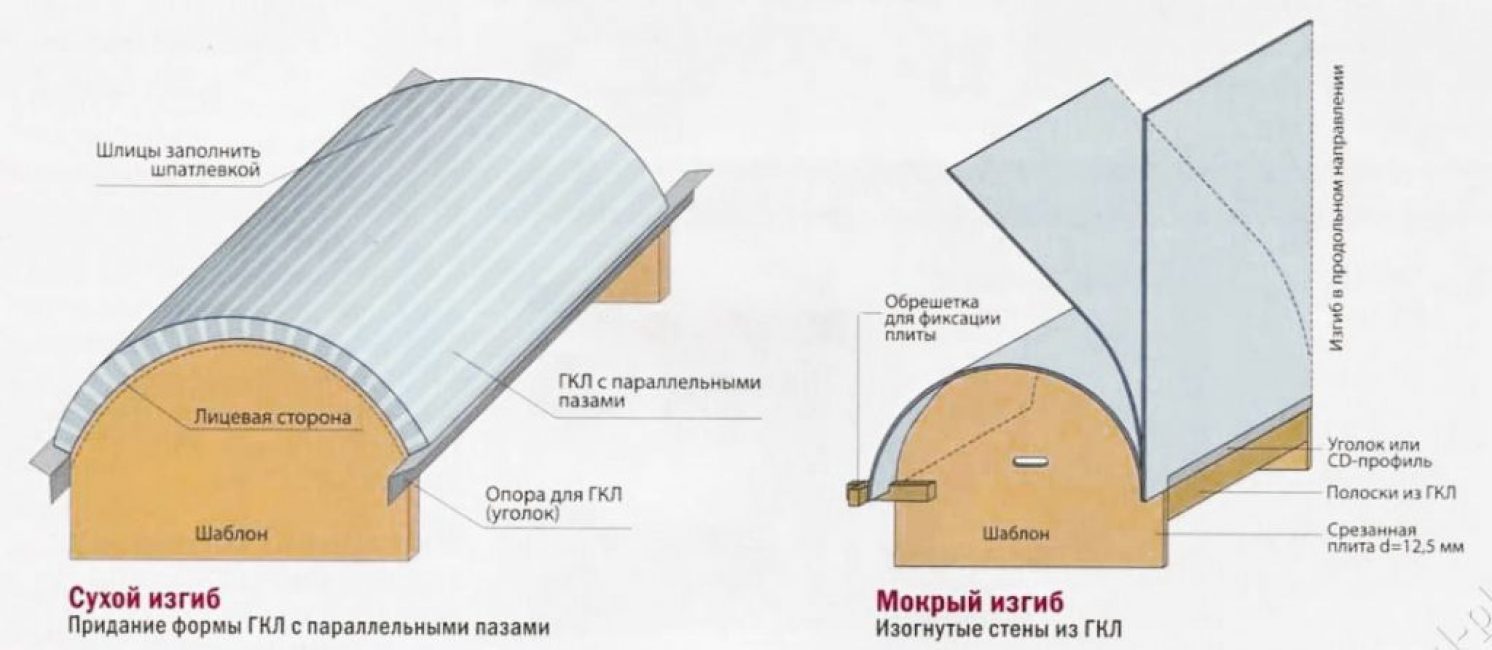
How to bend drywall
Adhesive way
To save space, drywall can be simply glued to the surface with putty or special glue without using a frame..
But for this, the opening needs to be ideally leveled with a cement-sand mortar or putty:
To improve the adhesion of the drywall bonding area, it is necessary to paint over with a deep penetration primer
The adhesive composition is applied to the sheets with small slaps
In order for the glue to be well distributed over the surface, it is better to move the sheet a little first in one direction and then in the other direction. Excess glue is immediately removed with a rag or sponge.
All seams between sheets are sealed with the same composition.
The glue dries in about two days. At this time, drywall at the edges and center is fixed with wooden planks.

Putty is applied to drywall with slaps
 Read also: Making a greenhouse with your own hands from a profile pipe and polycarbonate: a complete description of the process, drawings with dimensions, watering and heating (Photo & Video)
Finishing the opening with plastic
A doorway without a door to the kitchen is best trimmed with plastic. Indeed, in this room, even with a good hood, there is always a child. Plastic is easy to clean with a regular cloth dipped in soapy water.
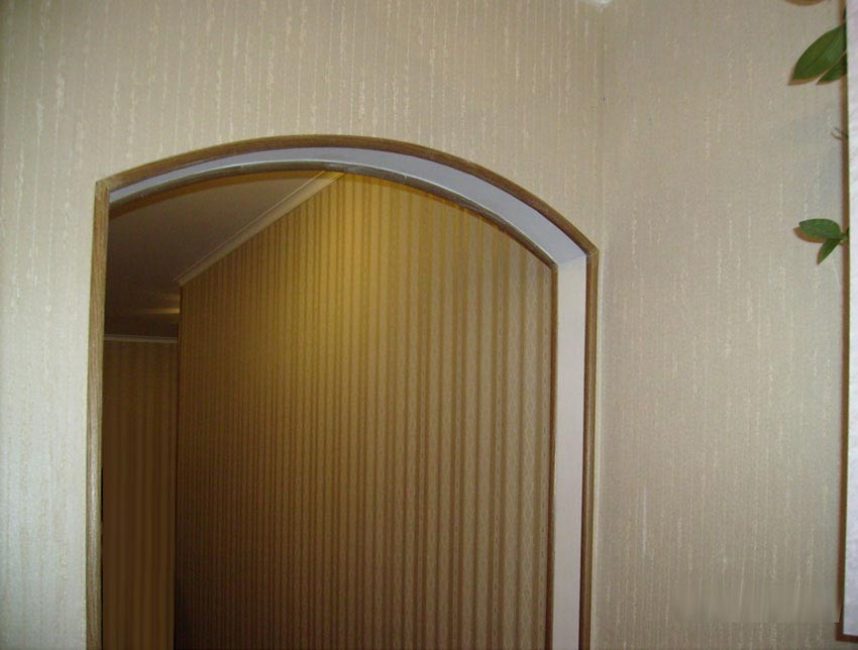
Arched corner trim
The range of PVC products is quite wide - doorways can be trimmed with plastic that imitates precious woods, stone and other expensive materials.
The panels are fastened both to drywall and to a well-leveled and plastered surface using mounting glue or liquid nails. As in the case of drywall, you can use mounting foam.
The adhesive composition is distributed in a thin layer over the surface of the panel. The door jamb itself also needs to be greased. Next, you need to wait about five minutes for the composition to grab, and then press the panel well against the surface to be glued.
It is not worth fixing plastic on self-tapping screws - when making holes in it, fragile material can crack
The most vulnerable places of plastic structures are the corners. Over time, they can chip. To prevent this from happening, use decorative arched corners. You can also use slopes for plastic windows. They are placed under the panel to strengthen and stiffen the structure.
Standard panels have a width of 300 mm, so they often have to be cut not only horizontally, but also vertically. Builders cut them with a special cutter. By the way, it is inexpensive, so if you decide to seriously do repairs, you can buy it for home use or even make it from a well-sharpened strip of metal.
Archway made of plastic
You can cut the panel quite evenly with a hacksaw with low teeth, a grinder or a jigsaw. In order not to melt the plastic, the last two tools must be set at low speeds
Small cuts can be made with a regular or construction knife
Panels should be left at room temperature for 24 hours before cutting. Otherwise, cold plastic will chip off.
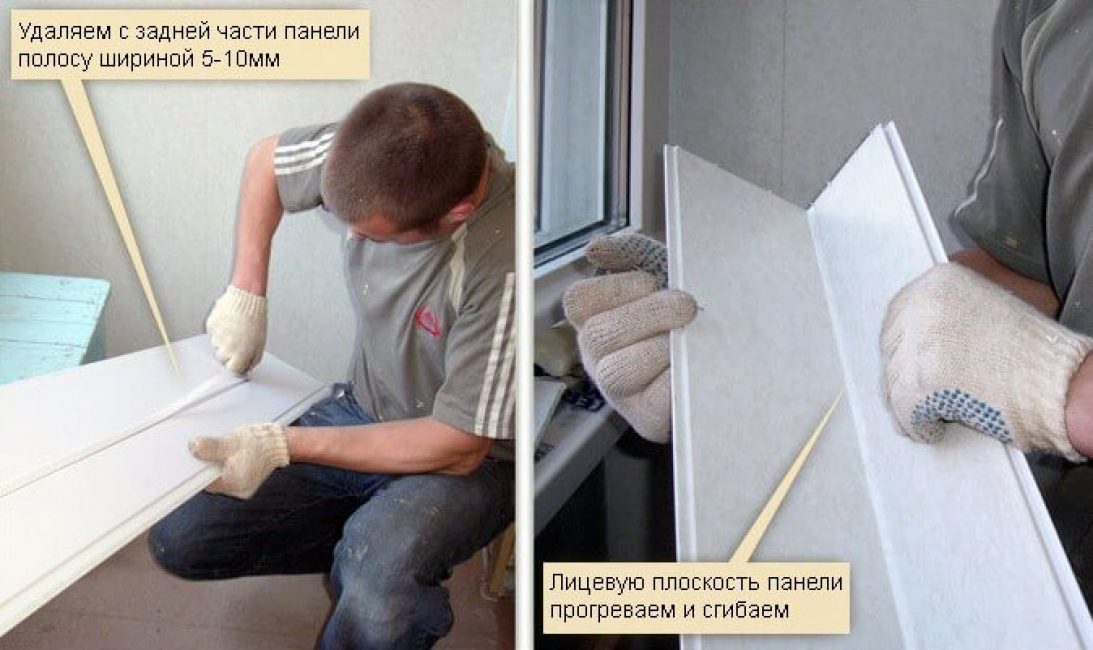
Plastic in the corners can be easily bent.Since such panels consist of two PVC sheets connected by stiffeners, for bending you will need to cut and remove a 5-10 mm strip from the wrong side (undecorated), and then form a corner. True, this will require some skill - in the absence of experience, the fold line may turn out to be nervous. In this case, it can be closed with decorative corners.
PVC panel bending
When creating arches, plastic needs to be bent. To do this, it is heated with a building hair dryer. You can also simply dip the sheet in hot water
When using a hair dryer, the central part of the panel is fixed with a clamp or strong adhesive tape. After warming up this place on the sides, they begin to carefully move further, securing the bent part with a clamp or tape every 20 cm
After bending and fixing each of the parts, the panel is left in this state for a couple of days so that the material gets used to the new shape.
 Read also: How to make a patio in the country with your own hands: a variety of design options, decoration and arrangement (85+ Photo Ideas & Video)
 Foam mounting
Gluing drywall
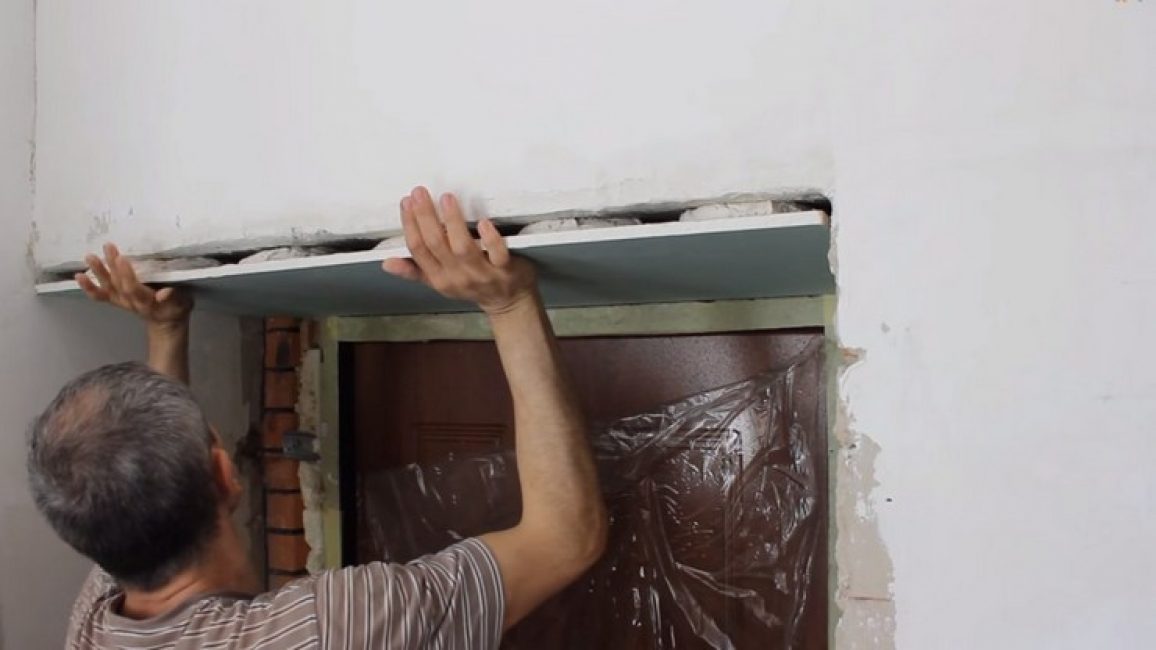
Another way to finish doorways without doors (see photo) is to attach drywall to mounting foam:
- After dismantling the old coating and leveling it, a layer of foam 1 cm thick is applied to the drywall with a snake
- Sheets are tightly pressed against the surface with great force.
- Then drywall should be torn off and wait 10 minutes for the foam to increase in size.
- Again we press the sheets against the wall, fix them with spacers and leave them in this position for a day
- After drying and strengthening the foam, it remains to seal the seams between the sheets with a plaster mortar using a sickle tape
- To protect the corners from spilling out, it is better to install perforated plastic corners on them. They are attached to the mortar, squeezing out its excess through the holes, and then plastered
- In the future, the slopes can be painted with acrylic or water-based paint, pasted over with stucco molding or trimmed with plastic
 Read also: Do-it-yourself furniture and other wood products: drawings of benches, tables, swings, birdhouses and other household items (85+ Photos & Videos)
 Opening made of polyurethane stucco molding
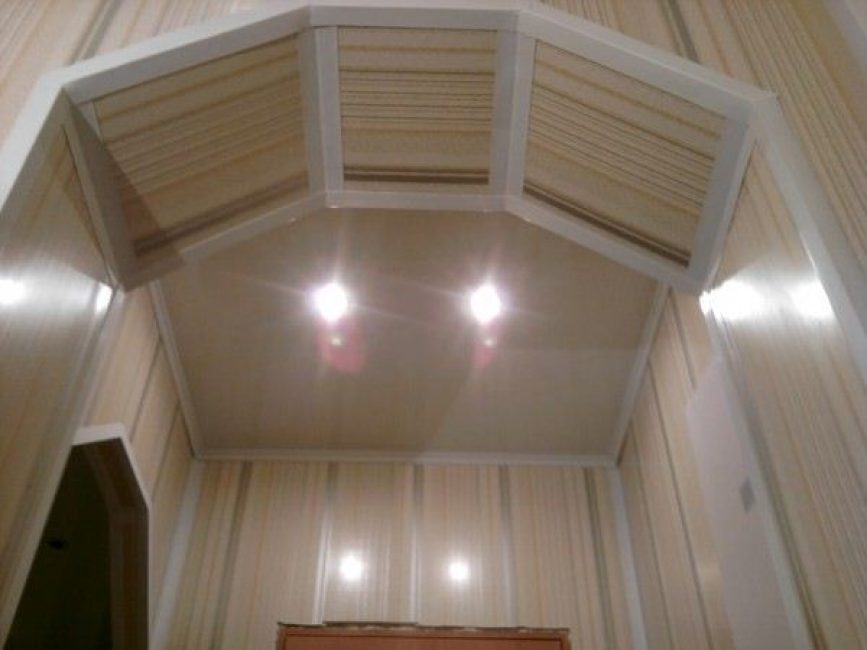
The use of stucco in decor
Visually, polyurethane overlays (moldings) resemble stucco.
But in order for such a finish to look perfect, the surface must first be leveled with drywall or plaster mortar.
- In order for the decorative elements to be sufficiently plastic and flexible, it is necessary to withstand some time in the room before gluing
- The stucco molding is fastened according to the pre-applied markings using a special mounting adhesive. It is applied to the reverse side of the moldings
- To prevent the decor from slipping, it is additionally attached to dowels. To do this, holes are pre-prepared for them. The caps of the self-tapping screws need to be pressed a couple of millimeters into the stucco molding so that they do not stick out
- After the adhesive has completely dried for 24 hours, the holes for such fasteners must be sealed with a putty that matches the color
- If necessary, the stucco molding can be painted to match the walls or a contrasting shade. For this, dyes are used, which do not include acetone.
- Wall painting or wallpapering is carried out after stucco decor has been pasted. In this case, you do not have to adjust the edges of the molding to the edge of the wallpaper or re-plaster and paint over accidental damage.
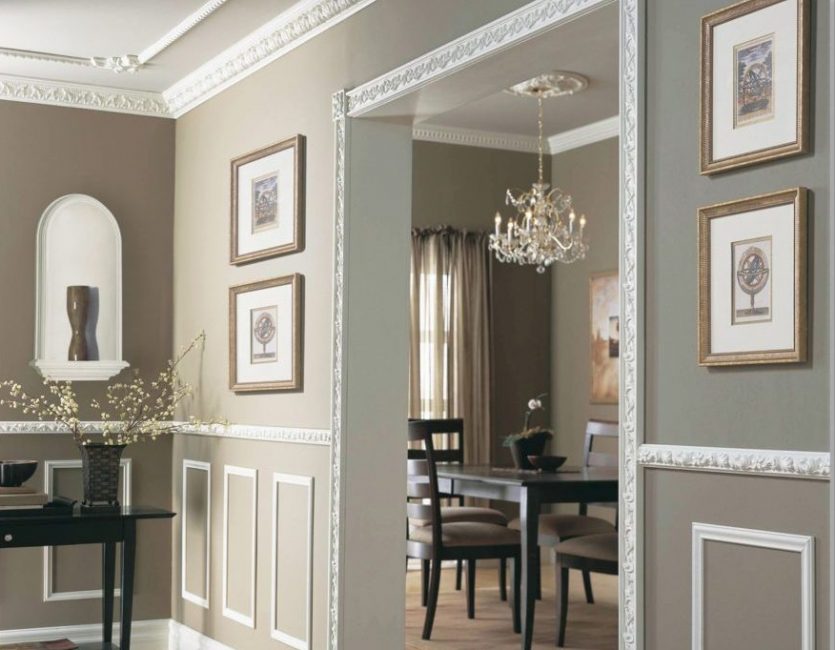
- Polyurethane stucco will look good if a similar decor is present in other parts of the decor - ceiling panels, ceiling rosette, columns. Part of the walls can also be trimmed with polyurethane molding
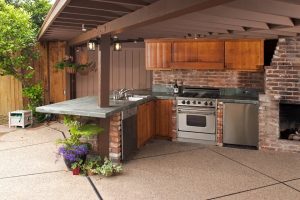 Read also: Do-it-yourself construction and arrangement of a summer kitchen in a country house: projects, design, device, with barbecue and barbecue (60+ Photos & Videos) + Reviews
 Decoration with artificial stone
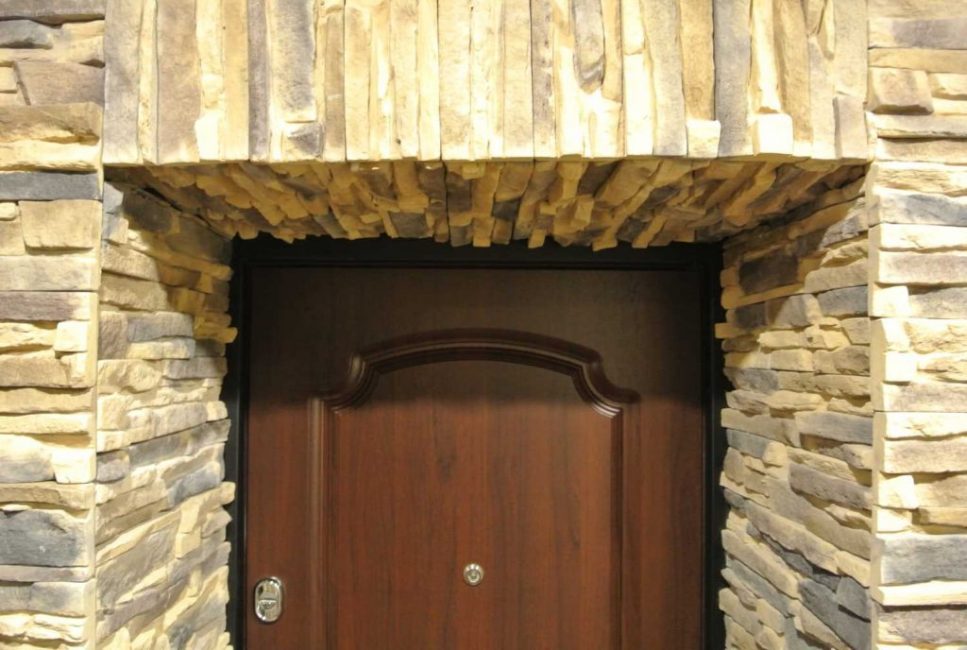
Finishing the doorway with artificial stone
Light weight, affordable price, a huge selection of textures and shades makes this material simply indispensable for decorating rooms in country styles, chalets, minimalism or loft. Such decor will ideally fit into Mediterranean or ethnic styles.
It is easy to work with such material - it easily bends, cuts, adheres well to surfaces. You can decorate a doorway without a door using this material without the help of specialists, with your own hands.
So, we will describe how to decorate a doorway without a door using artificial stone:
- After dismantling the old door, the slopes should be leveled with plaster or drywall
- Floor plinths will interfere with installation, so they must be removed for a while. At the end of the work, the skirting boards are glued again or screwed to their original place.
- Before sticking, draw a mounting diagram "stones". They can be placed in any order. The simplest is the strict option, when the edging is made even, without torn edges. If there is a need to draw attention to the doorway, the artificial stone is designed in the form of uneven old masonry, “destroyed” by time.
- To enhance adhesion on the wall and slopes, it is better to make small notches. Next, the surface is treated with a primer.
- The tile must first be laid out on the floor in order to select a pattern according to the selected pattern. In order for the seams to pass along the same line, you should first draw the location of their location, and only then start laying the “stones”
- Panel fastening starts from the corners. For these purposes, liquid nails or special formulations recommended by the manufacturer are used.
- To give an artificial stone a natural look, you can spray a mixture prepared on the basis of acrylic lacquer and color on its surface.
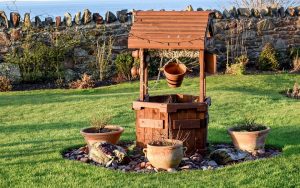 Read also: Making a well in the country with your own hands: detailed instructions, plumbing from a well, original ideas for decorative design (75 Photos & Videos) + Reviews
 Installation of plaster moldings
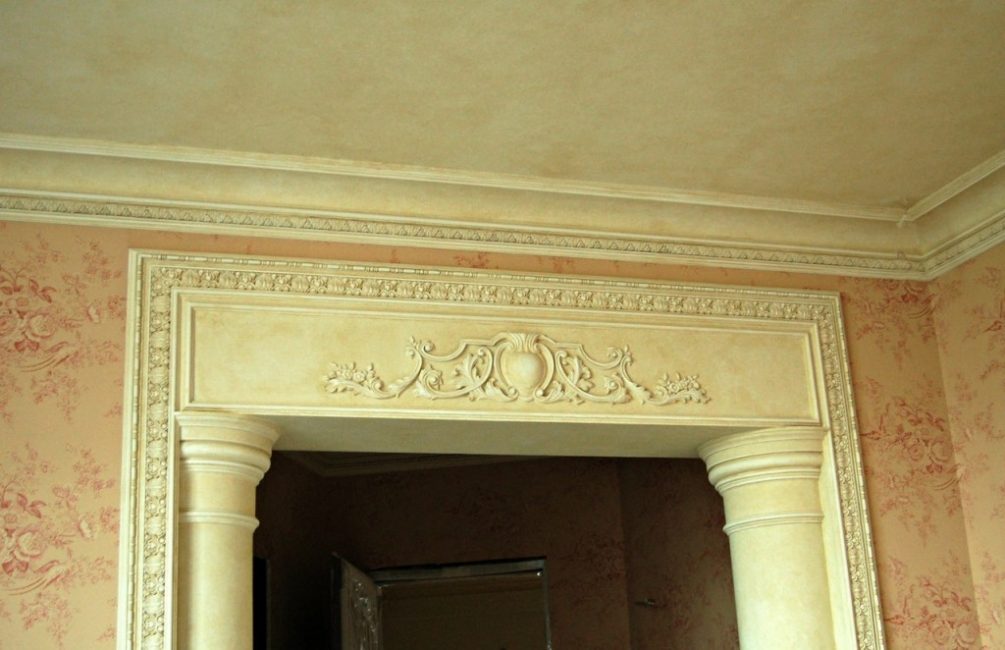
Plaster finish
It is quite difficult to work with this material.
In the absence of work experience, its installation can be a serious problem:
- In order to avoid cracking of gypsum elements, all work is carried out at a temperature of + 18 ° C
- Details should fit to the slopes as tightly as possible. Therefore, the surface on which the stucco will be attached must be leveled and then rubbed with sandpaper. All cavities must be sealed with putty.
- To increase the adhesion of heavy gypsum to the surface, notches are made on it.
- After treatment with a primer, the opening is well dried for 2-3 days. A very good adhesion effect is given by special mixtures called "Betonokontakt"
- In order to correctly lay out a drawing from disparate gypsum elements, it is necessary to first apply markers to the slopes and part of the wall.
- Fastening is carried out using a mixture based on PVA glue. To do this, it is diluted with water (recommended proportions 4:6). To form a thick creamy mixture, gypsum G-7 or G-10 is added to it.
- The resulting adhesive composition is applied to gypsum elements, then tightly pressed to the slopes at the marking points.
- To keep the stucco molding stronger, holes for screws are prepared in it every 15-20 cm. Holes are made in advance in the walls. Galvanized fasteners must be used to prevent rust.
- In the future, the locations of the caps of the screws are rubbed with a gypsum mixture. It is necessary to cover the holes 2-3 days after gluing, so that the gypsum-adhesive mixture is well strengthened
- Gypsum is a rather heavy material, so it is better to stick it together. Otherwise, in case of sagging of individual parts, it may break off
There are many options for the design of slopes. How to arrange a doorway without a door is shown in the following video:

VIDEO: Design options for doorways
Doorway without a door: arrangement, ideas for decoration and decoration in the kitchen, balcony, in the hall (105+ Photo Video) + Reviews


