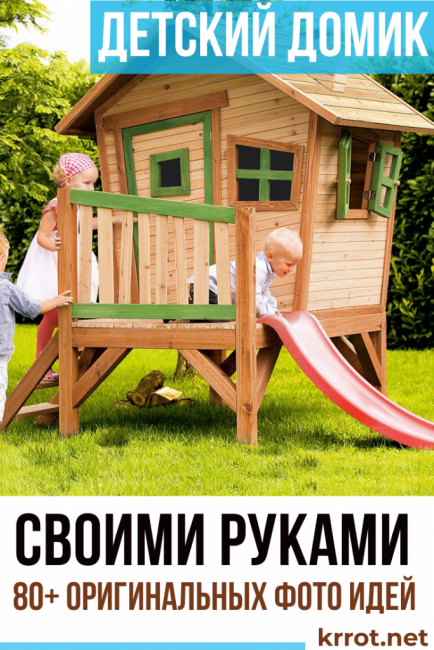
We used to build structures for games out of chairs, pillows and blankets. So why not help the younger generation today and build a real children's house with your own hands? You can use any materials at hand - wood, PVC or aluminum pipes, plywood, wooden pallets or thick cardboard.
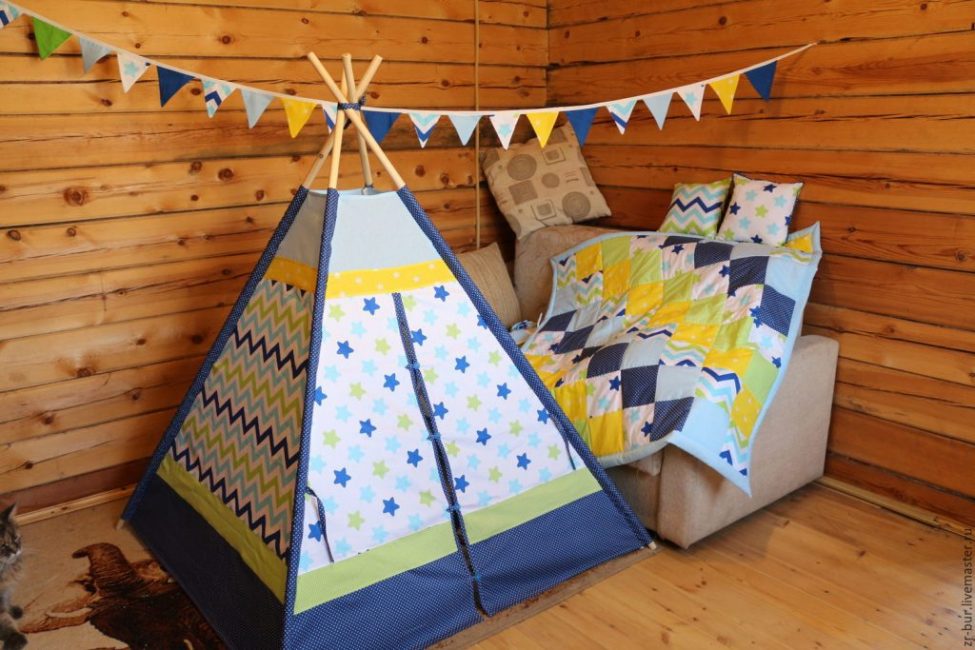
Even in a room of a small area, it is quite possible to install a small frame covered with fabric in the form of a tent or wigwam. If square meters allow, build a full-fledged wooden or plywood house in the nursery in the form of a fabulous hut, carriage, trailer, rocket or ship.
wigwam house
Playhouse-wigwam
As known, wigwam - a special design consisting of several long poles connected at the top and covered with dense fabric. Such a structure can be easily disassembled and put away for storage, moved from room to room, taken out into the fresh air, into the yard or packed in the trunk of a car and transported to a garden plot.
And it’s not difficult at all to make such a children’s play house wigwam.
As a framework, you can use:
carefully polished and varnished or varnished wooden slats 120 cm long and 2-4 cm thick; for outdoor installation, you can also use strong tree branches, but only if (!) If even the smallest knots are cut down from them
PVC plumbing pipes
light aluminum pipes, for example, left over from old curtains
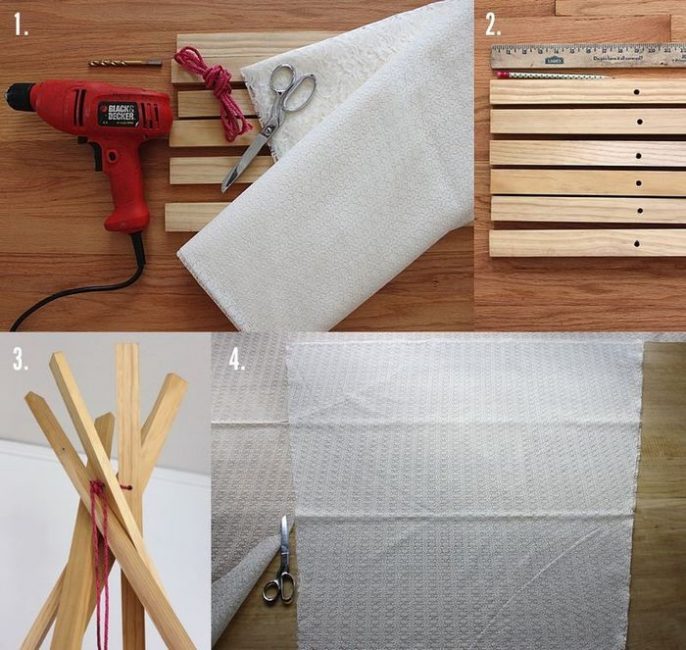
Wigwam manufacturing scheme
To fit the tent house, it is better to choose dense linen or cotton, which allow air to pass through well. Under such an awning, children will be comfortable and easy to breathe even on hot days.
The simplest building-wigwam - three poles, firmly connected in the upper part at a distance of 10-20 cm from the top. To make the fastening strong, it is still better to connect them with bolts by drilling holes in the upper part of the frame.
The design can be slightly complicated by making a rigid base for it from wooden slats or pipes, which will be installed on the floor. There is no need to make a crossbar from the side of the entrance to the wigwam - the children will constantly stumble about it.
Pattern for a tent-wigwam
In principle, you can build a full-fledged tent in the form of a quadrangle or a tent, but you will have to tinker with the frame fasteners a little longer. We will talk about this below.
A few small pillows made of colored fabric, a mattress or a soft fluffy carpet will decorate the children's wigwam and make it more comfortable.
Tent or tent made of PVC pipes
Craftsmen have long been using plastic water pipes not only for their intended purpose. After all, they make quite durable and comfortable garden chairs, tables and even greenhouses.
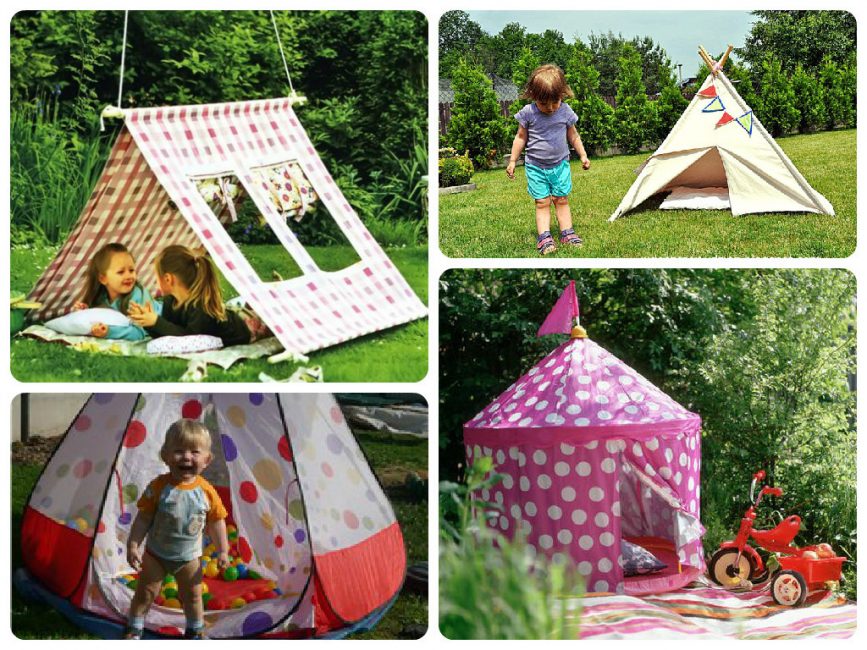
Types of outdoor children's tents
children's house from PVC pipes will come out very convenient. And the probability of getting hurt even if the naughty children overturn it on themselves is minimal - after all, the frame will turn out to be light.
By the way, that is why it should be screwed to the floor. Otherwise, he will constantly move from place to place.
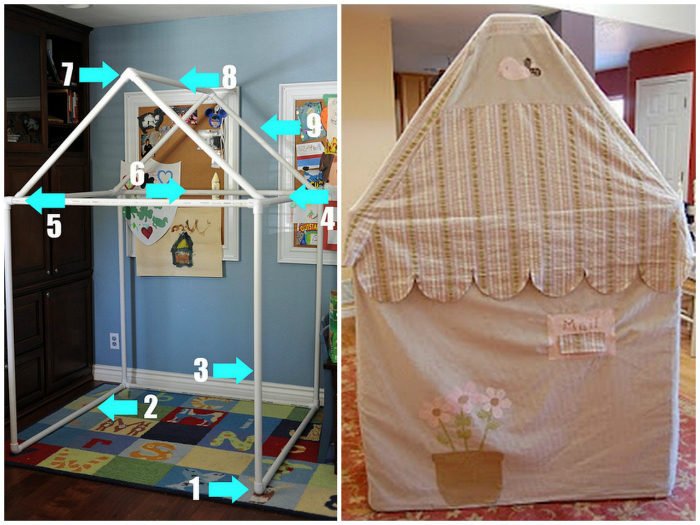
PVC pipe frame
So, we tell in detail how to build a children's house from PVC pipes:
1The scheme for making a tent can be found on the net. If the standard sizes do not suit you, proceed as follows. Glue an exact copy of the future structure from cardboard. Now measure the length of one of the sides. Let's say you get 10 cm. Increase this number by 10 times, that is, multiply it by 10. Get 100 cm or 1 m. The length of this side should be not one, but one and a half meters? Then multiply the number by 1.5. Zoom in on the rest of the sides in the same way.
2We cut the pipes into segments of the desired size. Do not forget to take into account the length of the connecting fittings (they can be purchased at the hardware store at the same time as plastic pipes, see photo).
3It is more convenient to cut this type of plastic with a hacksaw with fairly small teeth. To get an even cut, it is better to clamp the pipe with a vise.
4For laying water pipes, PVC pipes are usually connected by welding. But in our case, you can use ordinary glue. For this joint, degrease and process with sandpaper to obtain a rough surface. Before purchasing glue, be sure to read the instructions - it must be designed to connect PVC products.
5Lubricate with glue 2/3 of the inside of the connecting fitting and the pipe section that will be inserted into the socket. With force we screw it inside the connection. In order for the glue to spread evenly over the surface, turn the pipe 90 degrees and press it for a couple of minutes. The connection is ready. Let's start gluing the next parts.
6PVC pipes are easy to bend, so even a tent with a rounded top can be made from them. To create an arc, heat sand or salt on the stove and pour it into the pipe, after plugging one of the sides with a plug.
7It remains only to make an awning from dense fabric. Since few men know which side to approach the sewing machine from, it will be necessary to connect the mother of the children or the grandmother to the matter.
Tent for a street house is better to use waterproof. It will not only protect from rain, but will also repel dirt. In this case, the play tent will have to be washed less often.
How to sew an awning for a children's tent house
You can buy a new fabric or use unnecessary bedspreads or curtains for sewing an awning. A white sheet can be decorated with themed applications or painted with paints with the child.
Fold the thin fabric in half so that it does not sag. It's great if there are bright colored patches in the house - they can be sewn into a single canvas.
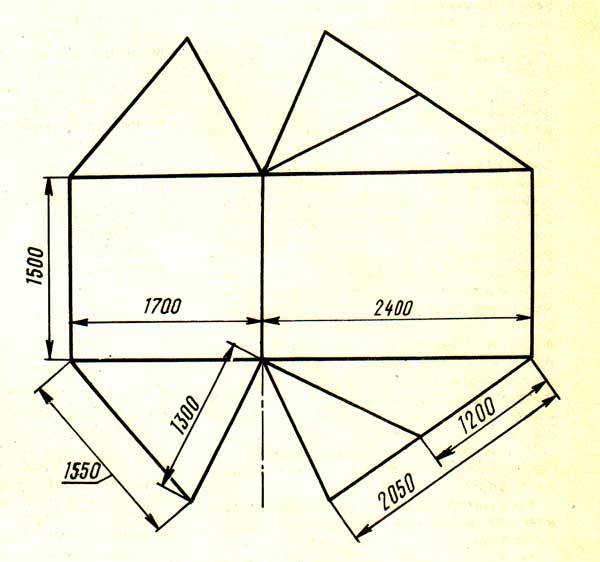
House tent pattern
You will need:
the cloth
scissors
fairly thick thread
braid for ties
So let's get to work:
1The fabric for the tent-house installed in the apartment can be any. If you take it with you to the country, it is better to use a waterproof one.
2Since any new fabric (including braid) shrinks, it must be soaked in warm water, dried and ironed, and only then proceed to cutting.
3We measure each of the sides of the frame of the house. We take into account the seam allowance - 1-1.5 cm is enough.
4For cutting complex models, it is more convenient to use tracing paper - the likelihood of spoiling the fabric will be less.
5You need to sew all the parts of the tent together, getting one large canvas.
6Along its edges, it will be necessary to attach a braid with which the awning will be attached to the frame of the house. To prevent the tie sewn to the canvas from tearing out over time, reinforce it with a small piece of fabric sewn at the location of the braid.
7Fold the fabric along the bottom and sew - it will be possible to insert an elastic band into such a hem so that the tent fits more firmly to the floor (this must be taken into account even when cutting the fabric).
8When sewing products from waterproof fabric, the seam is made tight (linen or double).
9If the fabric is not enough, combine it with another material and make some of the details sewn.
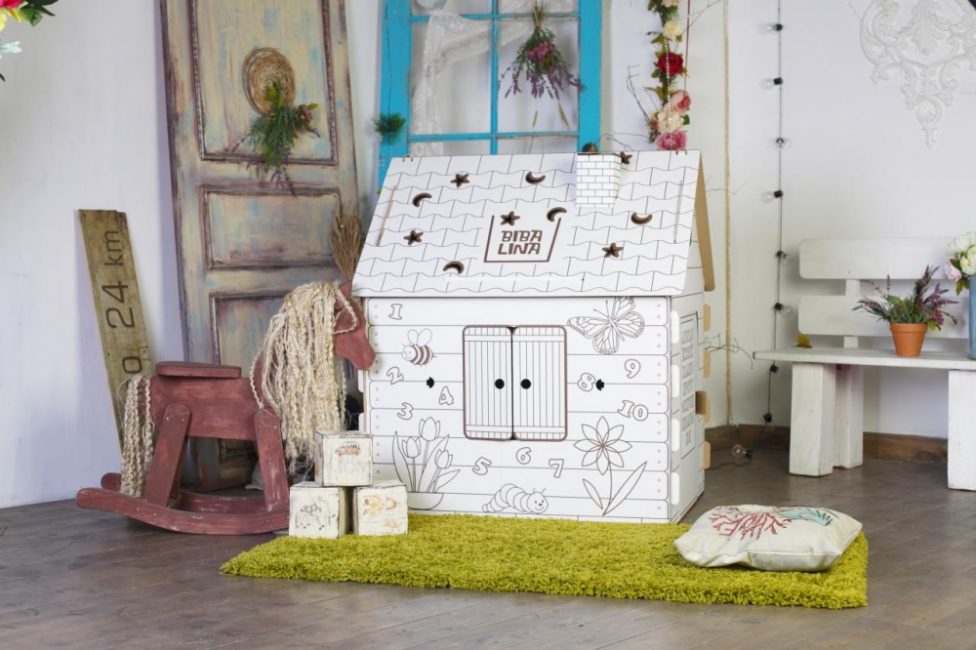
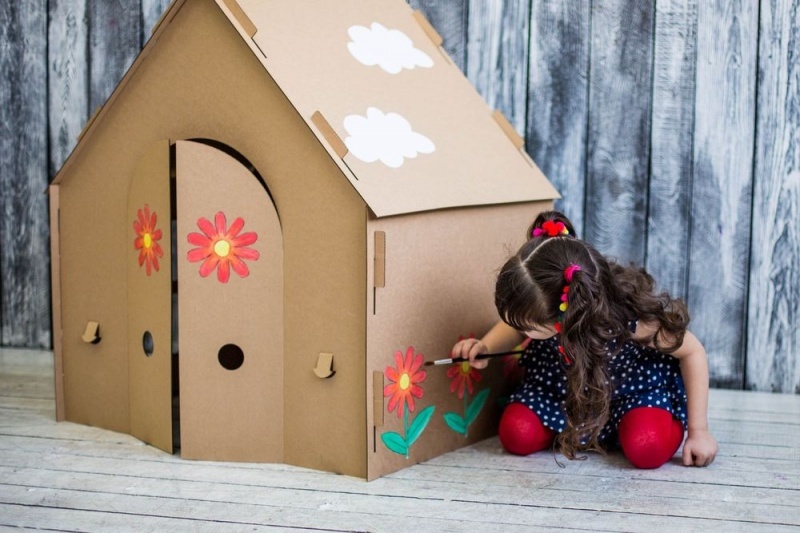
Fairy house made of cardboard
There are ready-made cardboard buildings on sale - you just have to decorate them at your discretion.But it will be better if you make and paint the house with the children from start to finish.
Children's house made of cardboard
Its design can be either simple, with a door and a window, or complex design. You can attach a tower, a porch to it, make a dwelling for children from several rooms with furniture, etc.
The cost of manufacturing such a structure is almost negligible. But the joy of the children from this is unlikely to be less.
To make a cardboard house, we need:
several large cardboard boxes (boxes from under the refrigerator, TV, etc. will do)
construction knife: it will be more convenient for them to cut the parts
stapler and tape for fastening separate parts
It is better not to cut through doors and windows to the end - let them be opening-closing. Although they can be hung on tape. Window and door openings are best done in the form of an arch or any thematic figure. The gable roof is also attached with adhesive tape. The joints must be glued on both sides.
For the manufacture of furniture, use a double layer of cardboard - so it will be stronger. If the dwelling turned out to be spacious enough, you can make not only tables, chairs and armchairs from cardboard, but also a washing machine, a kitchen stove with painted burners, a TV, a refrigerator, a bed for a doll, etc.
Attach a bright house to the house dog housein which your favorite toy puppy will settle. Build a cardboard fence next to the house and “plant” several carrots, flowers, or cut out of cardboard from colored paper. apple tree.
Young artist at work
Decorate the windows of such an impromptu house with chintz curtains and lay a rug. Outside, the dwelling can be pasted over with cloth, wallpaper residues or colored napkins, painted with paints, decorated with appliqué, bright balloons, flags and garlands.
Let the child participate in the finishing process by handing him a brush and paints.
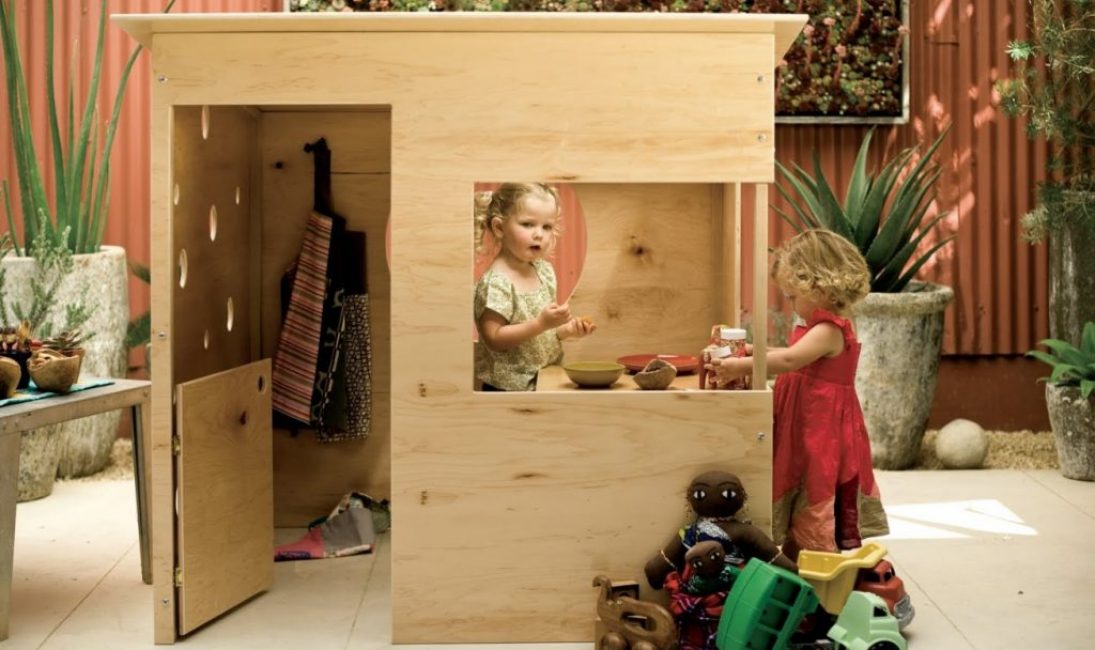
plywood construction
Plywood house
It will take no more than a couple of days to make such a house:
1There are a lot of drawings for making a children's house on the net. You can use any of them. We will describe only the assembly principle itself.
2The floors in the house are warm, and the house can do without them. But still, it is better to make a small elevation using wooden log bars with plywood screwed to it. It will be more convenient to attach the frame to such a base, and the structure itself will turn out to be more stable.
3We mount the frame from racks-beams attached to the floor. It is better not to use nails - they can loosen. Fastening with screws will be much more reliable and durable.
4Horizontal jumpers are screwed across the racks.
5A bar is attached between them, forming the ridge of the roof.
6For a gable roof, you will need to make a pediment - wooden slats knocked down in the shape of a triangle.
7It remains to sheathe the walls and roof with plywood, paint it with paint or paste over with wallpaper.
8The roof can also be made single-sided by sewing up the upper part of the structure with plywood at a slight slope.
8The door is made of wooden boards or only a frame is made for it, and the door leaf itself is cut out of plywood. They hang it using ordinary metal loops, which can be purchased at a furniture store.
9You can also paint or paste over the house with fabric, wallpaper or bright appliqué from the inside.
10Curvilinear figures from plywood at home are cut with a jigsaw. If you know how and love to work with wood, make furniture for your child that he can put in his new house.
11Plywood can even be bent if you pre-soak it in the bathroom. Thick sheets should lie in the water for a couple of hours. For thin plywood, a 10-15 minute soak is sufficient. The softened part is laid on the surface and fixed with self-tapping screws so that during drying it acquires the desired shape.
12Plywood is painted with ordinary oil or enamel paint.Don't forget to pre-prime the surface. The paint in this case will lie more evenly, and it will go away much less.
For children living in an apartment, a dacha can seem like a boring place. In order for the addiction process to go as quickly and imperceptibly as possible, take care of creating a playground and a cozy house with your favorite toys.
waterproof fabric stretched over a frame made of PVC or wooden slats
tree branches, etc.
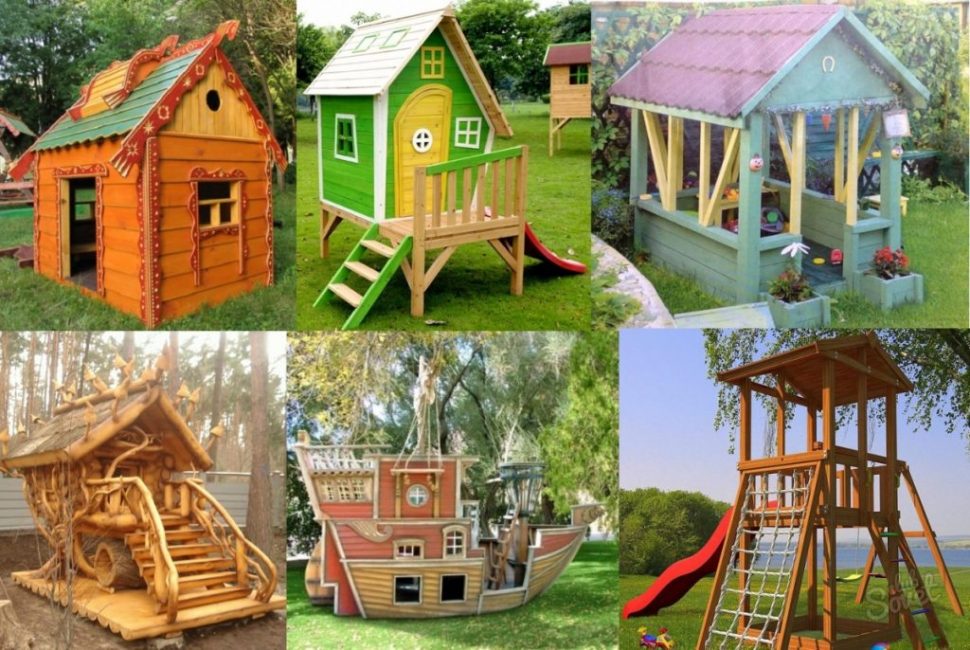
There are many ideas for children's houses. As a basis for the design, you can take not only images from the network, but also pictures from children's books. Attach a slide and swing to the house.
Swimming pool it is better to place it at a distance, otherwise water will constantly get into the children's home. Drywall for the construction of the roof and walls should not be used - even moisture resistant, it will quickly swell in the rain.
For a children's playground, it is necessary to choose a well-visible place without drafts. Do not start construction in a lowland, where rainwater constantly accumulates.
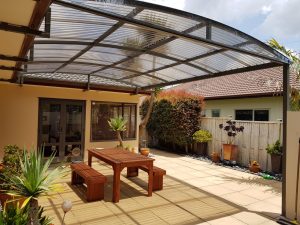
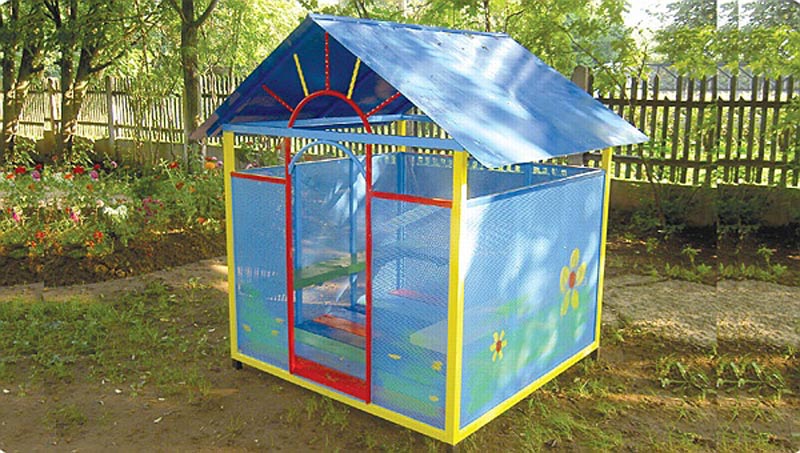
Polycarbonate
Polycarbonate used in construction greenhouses, won't work here. For a children's house for a summer residence, it is necessary to purchase colored plastic with a lesser degree of transparency.
House made of colored translucent polycarbonate
It is mounted on a frame made of metal, PVC pipes or wooden bars:
1For such a light structure foundation will not need. It is enough to dig four supports into the ground to a depth of 50-60 cm to ensure stability. Otherwise, during a strong wind it will turn over.
2To protect against moisture at the bottom of the pits prepared for the supports, pour a small layer of crushed stone. The lower part of the metal poles must be treated with anti-corrosion impregnation, and then wrapped with roofing material. The bottom of the wooden poles is covered with bitumen.
3The dimensions for the children's house are chosen arbitrary. It is more convenient if they match the dimensions of the sheets polycarbonate.
4The floors will need to be raised with wooden beams and floor slats - a long stay of children in the shade on damp ground is unacceptable.
5To prevent the tree from quickly becoming unusable, it is better to install the structure on bricks or concrete blocks. They are dug into the ground at the corners of the base on the spade bayonet.
6To obtain a durable structure, you will need polycarbonate with a thickness of 8 mm or more.
7Cut its sheets with a construction knife.
8The protective film is removed after construction is completed. Otherwise, scratches may appear on the plastic.
9Any arched structures can be made from polycarbonate - it bends easily, but only in length.
10The strength of this plastic is ensured by the special structure of the sheets. They are made in the form of honeycombs (stiffening ribs). However, this also has its drawbacks - if improperly fastened, water can accumulate inside. So that the polycarbonate does not darken from moisture and does not lose its attractiveness, cut the sheets so that the stiffeners are located vertically. The ends of the sheets are closed with a special end profile to prevent moisture from entering.
11To avoid exposure of the material to ultraviolet radiation, the sheets are attached with a protective layer to the outside. It is always marked with inscriptions and pictograms.
12If one sheet is not enough to close the wall, dig an additional support into the ground so that the joints of the sheets fall on its center.
13With temperature changes, the material is able to change dimensions, so you should not place the sheets right next to each other. It is necessary to leave a small technological gap. When installing, use thermal washers to help compensate for expansion.
14When drilling holes for fasteners, make them a couple of millimeters larger than the diameter of the screws. They should not be twisted tightly, otherwise the plastic will crack during thermal expansion.
15To make a gable roof, you need a ridge element made of the same plastic. You can buy it at a hardware store. You can also protect the skate from moisture with a strip of metal bent at the right angle.
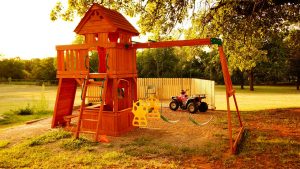
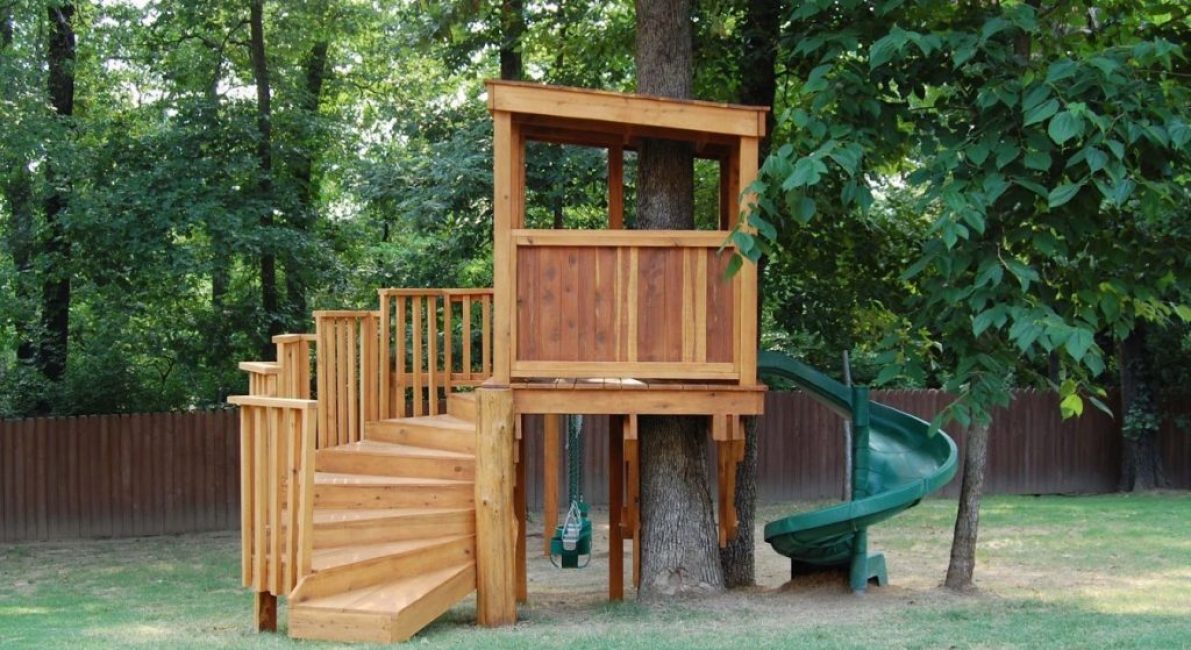
wooden structure
Wooden house with an attached slide
The height of such a structure depends on the growth of the child. But children grow up quickly, so it is better to build with a margin.
1A wooden children's house does not require a foundation. To protect the tree from moisture, you can install it on a brick base. You can also use low wooden or metal piles. It will be possible to attach a slide to the porch of the house, installed on such supports and raised above the ground.
2The floor must be strong enough and solid. It is better to use a floorboard or plywood. They are attached to the bars-lags. The side facing the ground is impregnated with an antiseptic.
3A thick beam 50x50 mm thick is mounted as a frame in the corners and at the location of windows and doors. To give the structure rigidity, horizontal bars are attached at the top and bottom.
4The corners are reinforced with spacer bars - slopes, racks - with metal corners.
5It is better to make a gable roof so that the child is not tempted to climb there. First, pediments are prepared from the bars - the end sides, having the shape of a triangle. Between them are horizontally running bars, on which the lining is stuffed or plywood is attached.
6To avoid splinters, the tree must be cleaned and sanded.
7To ensure ventilation, sufficient lighting and the convenience of observing children, several windows are made in it. They are located 50-60 cm from the floor.
8The height of the door should be at least 20-30 cm higher than the height of the child.
9Near the house you can equip swings, slides, install a sports corner. For a girl, you can equip a small flower bed, which she can take care of herself.
10It's great if you organize a grand opening of the house with a tea party, holiday posters and musical accompaniment.
It is unacceptable to close light structures with heavy slate. After all, in the event of a collapse, the child may suffer. Use lighter polycarbonate, wood or plywood covered with soft tiles for the roof of the children's house.
Tree house
Tree house for children
1How to make a children's tree house? Building such a structure is not as difficult as it seems at first glance. Of course, only a person who knows how to work with wood can create design structures. But here is the simplest structure, consisting of supporting pillars and a platform, in the center of which a cutout for a tree trunk is made, even a novice carpenter can do it. The tree on which the structure will be located should be powerful enough, but not old, with strong branches. All dry branches must be removed.
2The frame for the treehouse is made of well-sanded and primed timber. So that the tree does not lead, it must be dried well. The cross section of the beam is from 5 cm. It is better to use pine - it is less susceptible to decay.
3The connection of the supports should be as strong as possible. You should not use the usual connection on self-tapping screws - it will quickly loosen.
4In carpentry, for these purposes, a special type of “half-wood” overlap is used. To do this, recesses are cut out in wooden bars with a hacksaw and a chisel. The parts are superimposed on each other and additionally connected with bolts.
5The wooden platform should be as stable as possible. It is made of timber and leveled with plywood.
6The roof is covered with wooden slats, plywood or soft roofing.
7It is also necessary to make a ladder. To do this, you can nail several wooden blocks to the inclined board. It will be more convenient to climb such a ladder.
A metal house will quickly heat up in the sun, and the child will feel uncomfortable and uncomfortable in it. Therefore, even if you have a lot of metal profile left after installing the roof, use it somewhere else. For a children's home, choose a more environmentally friendly material.
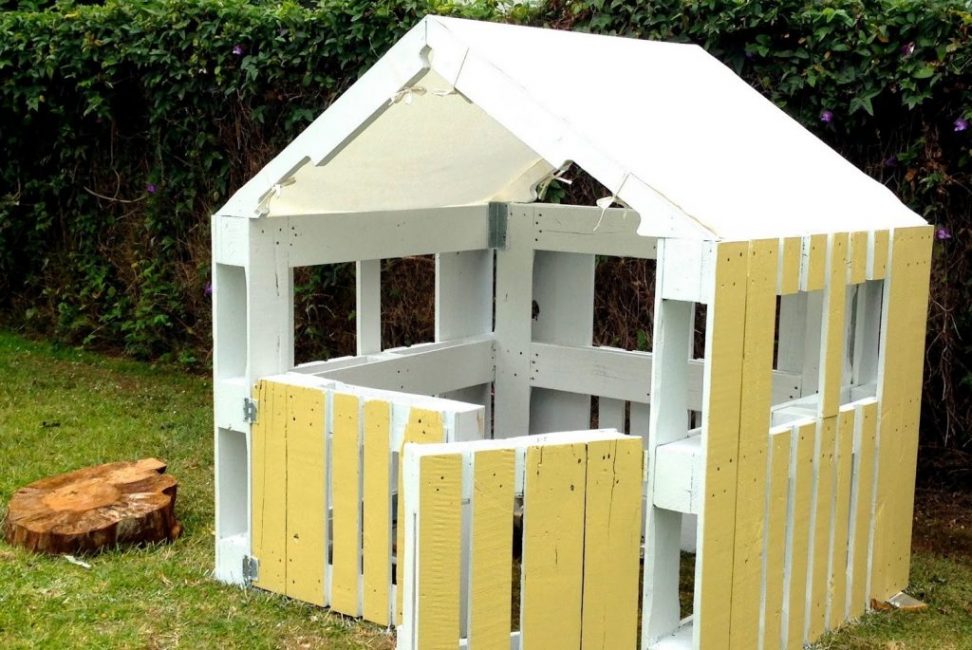
Pallet house
Pallet house
Wooden pallets (pallets) are an excellent building material. Since the solid boards in them are already knocked together, you can assemble a playhouse quickly enough. Although, if desired, pallets can be completely disassembled and only boards can be used in construction.
1Be sure to pay attention to the labeling. If the letters IPPC are marked on the pallets, it means that they have been treated with chemicals. The use of such products is highly discouraged. It is not necessary to build a children's house from painted pallets. After all, formulations containing formaldehyde are often used for their processing. It is better to paint the finished product yourself.
2Several pallets need to be disassembled - we will use their thick crossbars to create a frame. To do this, remove all the nails with a nail puller. From the side boards, the crossbars can simply be sawn off.
3Each of the pallets must be sanded, otherwise the children will quickly pick up splinters. To do this, you can use sandpaper with a large grain. It is inserted into the holder for sandpaper (grater). You can also use a grinder or grinder for cleaning.
4If the pallets are dirty, they are pre-washed with a stiff brush.
5First we collect the floor. For logs, we use thick cross-beams of pallets knocked together. For flooring, you can take chipboard or boards from disassembled pallets.
6In order for the do-it-yourself pallet house to last as long as possible, to protect it from moisture, we install it on a small elevation of bricks buried in the ground at the corners of the structure.
7Let's start assembling the frame. We attach vertical supports to the assembled base of the house - transverse pallet boards. We use metal corners and screws for this.
8We make a horizontal strapping from a planed board around the perimeter of the supports.
9It is better not to use heavy pallets for the roof. We collect it on the rafters with boards obtained after parsing.
10We attach pallet walls to the assembled frame.
11It is better to make a house with a veranda closed by a common roof. Such a structure will look more solid and comfortable.
12To make a window frame in 4 boards, we cut a groove, and then we select a tree with a chisel or grind it with a planer so as to get a “sill”.
13We cut off the edges of these boards at an angle of 45 degrees, tighten the boards with self-tapping screws, and glue them together for secure fastening.
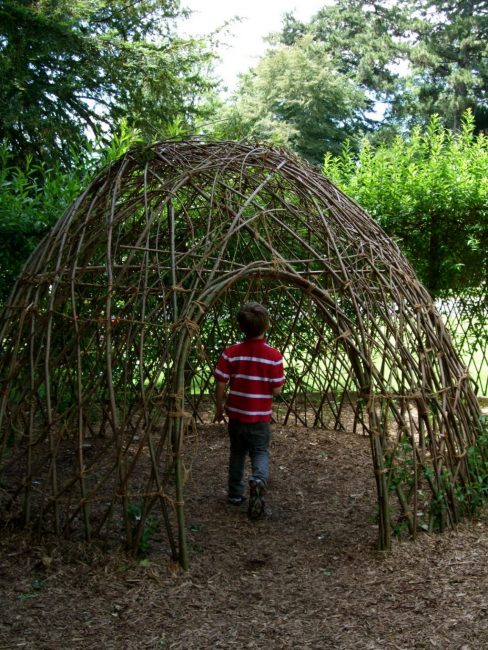
Hut of branches
Willow Tent House
It is better to place a children's hut near the house so that the games take place in front of adults. Place it near a fence or in the shade of tall trees to protect your building from drafts.
For construction, any types of branches of sufficient thickness are used:
1First you need to decide on the shape of the hut. Long branches can be arranged in a circle in the form of a wigwam, fastening them at the top and around the perimeter with strong twine.
2A classic gable hut made of branches is made as follows. At the chosen place, two strong thick poles are hammered into the ground, the end of which is bifurcated in the upper part in the form of a horn.
3To make them easier to enter the ground, one of the ends of the pole is sharpened with ax.
4A support pole is laid horizontally in the oarlocks and fastened with a rope.
5Wire for fastening is better not to use. It will take quite a lot, and it is unlikely that it will be possible to ideally bend all its tips so that the child does not accidentally get hurt. It is better to take polypropylene twine or thick cotton twine.
6Thinner poles are laid on the support at an angle of 45-60 degrees, first from one and then the other side of the hut. For strength, they are also fastened with twine.
7Across the horizontal spears, you can tie vertical ones, thus forming a lattice.
8Spruce branches (spruce branches) or hay are laid on top of the roof.To prevent rain from getting inside, laying starts from the bottom so that the next layer covers the previous one.
9To protect from the wind, stones are placed around the perimeter of the hut, which are covered with earth.
10Hay or deadwood is used as the floor. It can be covered with a thick, dense cloth or carpet so that children cannot prick themselves on branches.
11You will get a more durable structure if you make a wooden beam frame for the hut. Branches are also laid on top of it, and then spruce branches.
12If you have enough willow branches on hand, make a tent-shaped hut for the children. The rods of this tree bend very well, and it will not be difficult to “weave” a house out of them. For work, you will need a sufficient amount of twine, which fastens willow branches.
The process of building a childhood dream from A to Z
How to make a children's house with your own hands: from wood and other materials. Dimensional drawings | (80 Photo Ideas & Videos)
9Total Score
Do-it-yourself children's house
Feedback from our readers is very important to us. Leave your rating in the comments with the reasoning behind your choice. Your opinion will be useful to other users.