
If there are small children in a private house, you simply cannot do without a sandbox. After all, if older children can find something to do on their own, then for kids it is necessary to prepare a special place for games. When starting to build a children's sandbox with your own hands, keep in mind that its design must be completely safe.
Content:
 Read also: Do-it-yourself playground in the country: play, sports | (100 Original Photo Ideas & Videos)
Types of sandboxes
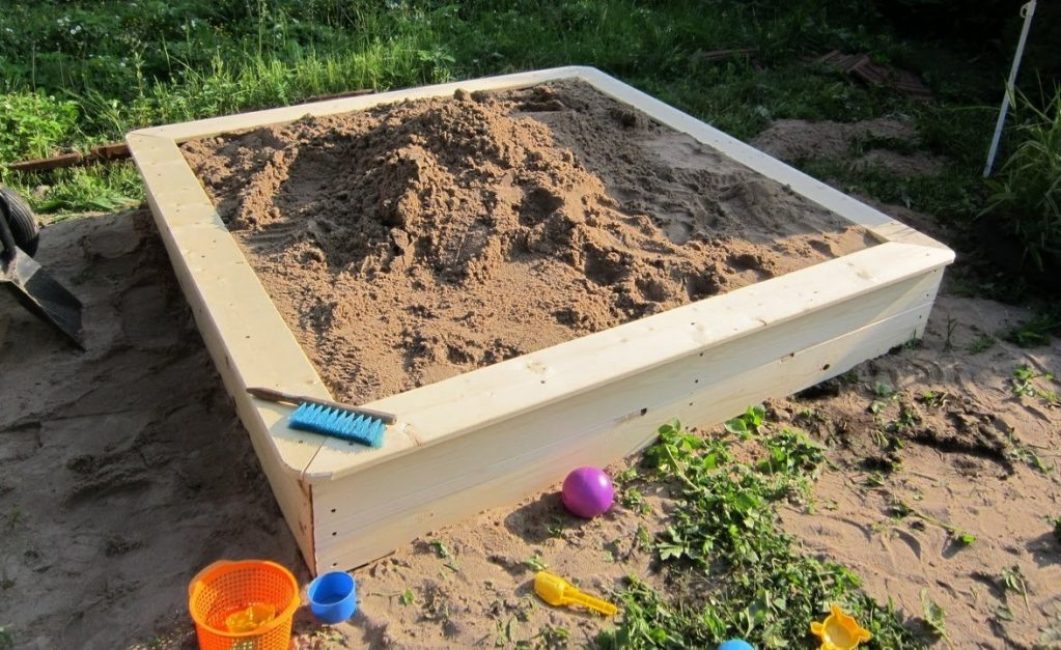
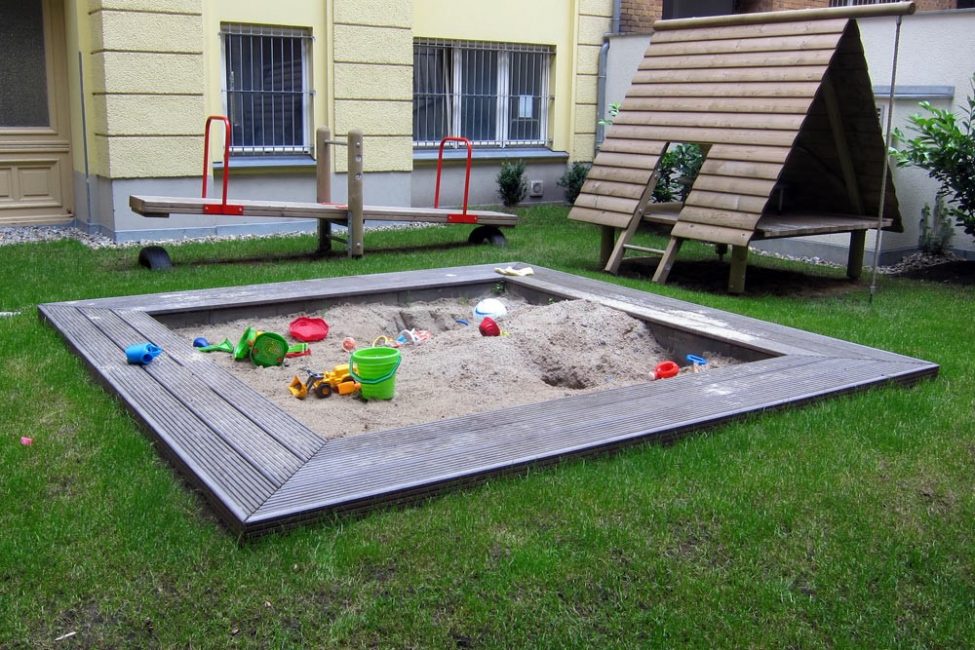
The simplest design with sides
Such products have a wide variety of forms. But most often they are made in the form of a rectangle, rhombus or pentagon. They can be:
- with or without roof
- open and have only sides
- semi-closed with lattice walls on all or several sides
A structure without a cover is not very convenient - to protect it from rain, it will have to be constantly covered with a film or tarpaulin. Be sure to also provide benches in the design so that children can play comfortably. Under the seat, you can place small boxes for toys, molds, scoops or spatulas. A chest for them can be placed outside the building.
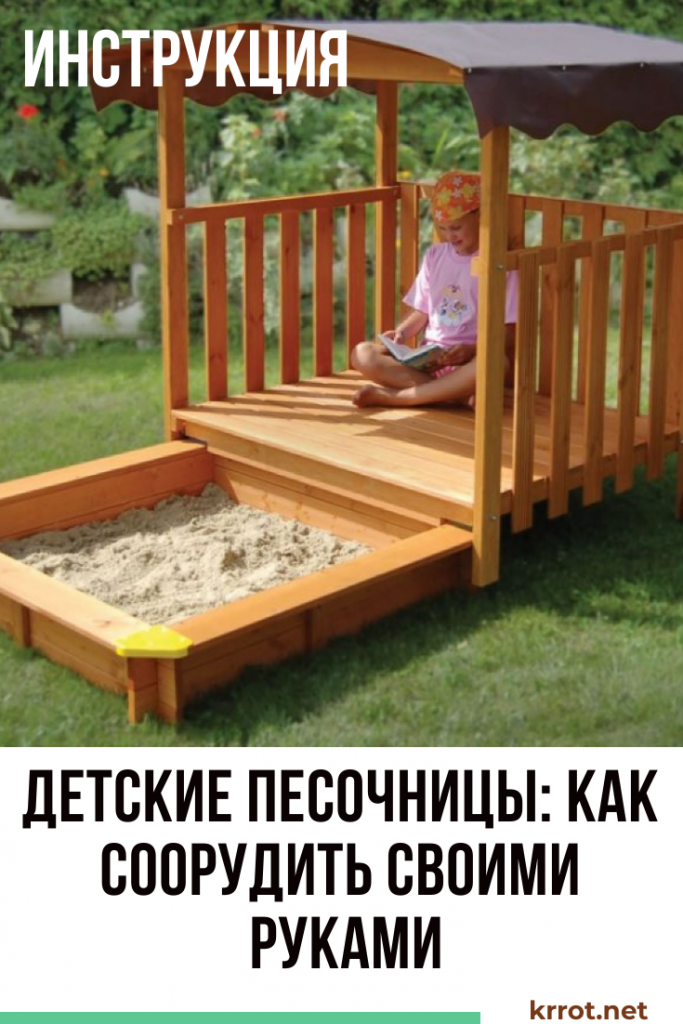
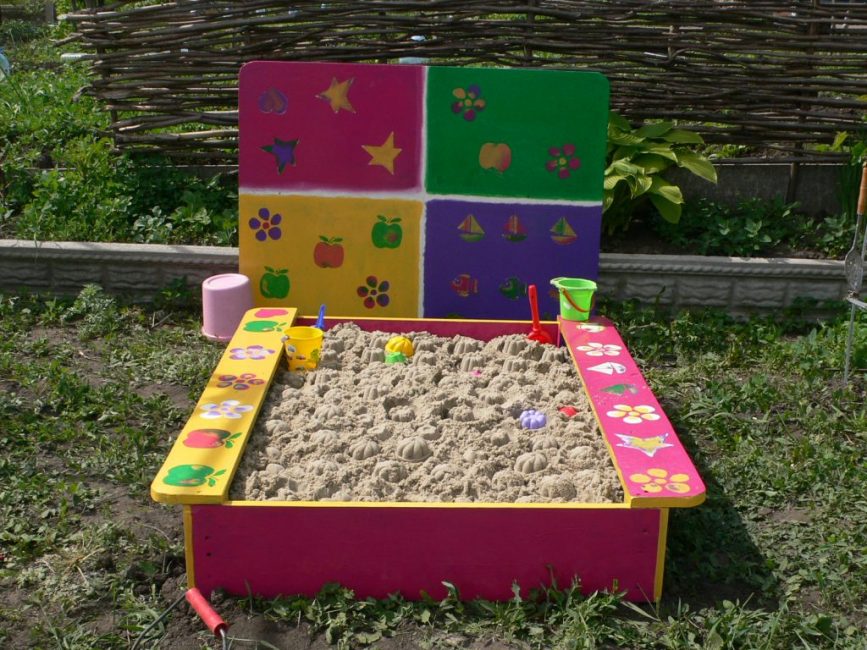
A children's sandbox can also have a rather complex shape. in the form of a boat, a truck, and also be part of entire gaming complexes with a table for games, a slide, house, bench, swing. There are products in the form of a small elevation - a table with sides and benches. Very convenient products, the seats of which are transformed into a cover.
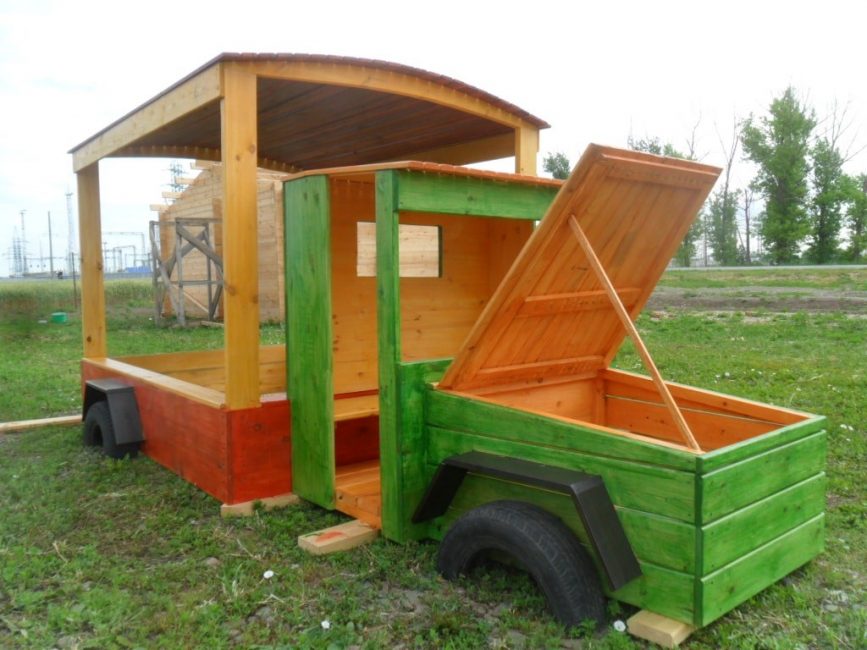
Machine-like design
 Read also: How to make a swing with your own hands: design features, step-by-step instructions (drawings with dimensions) | (100 Photos & Videos)
 Standard sizes
You can make a children's sandbox of any size. It is only necessary to take into account the number of children and their age.
- For one child it is enough to assemble a structure measuring 1.2x1.2x0.2 m. A couple of children under the age of 3 can also play in such a sandbox.
- Two 2-5 year old children fit perfectly in a sandbox 1.6x1.6x0.25 m.
- For three children it is better to make a slightly larger structure 1.7x1.7x0.3 m. You can make it a little wider - 1.2x1.5x0.25 m or even 1.5x1.5x0.3m.
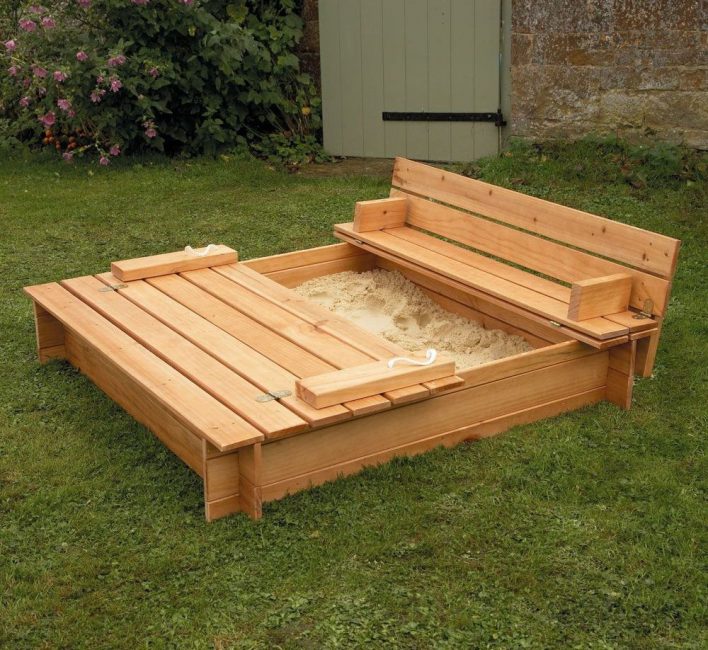
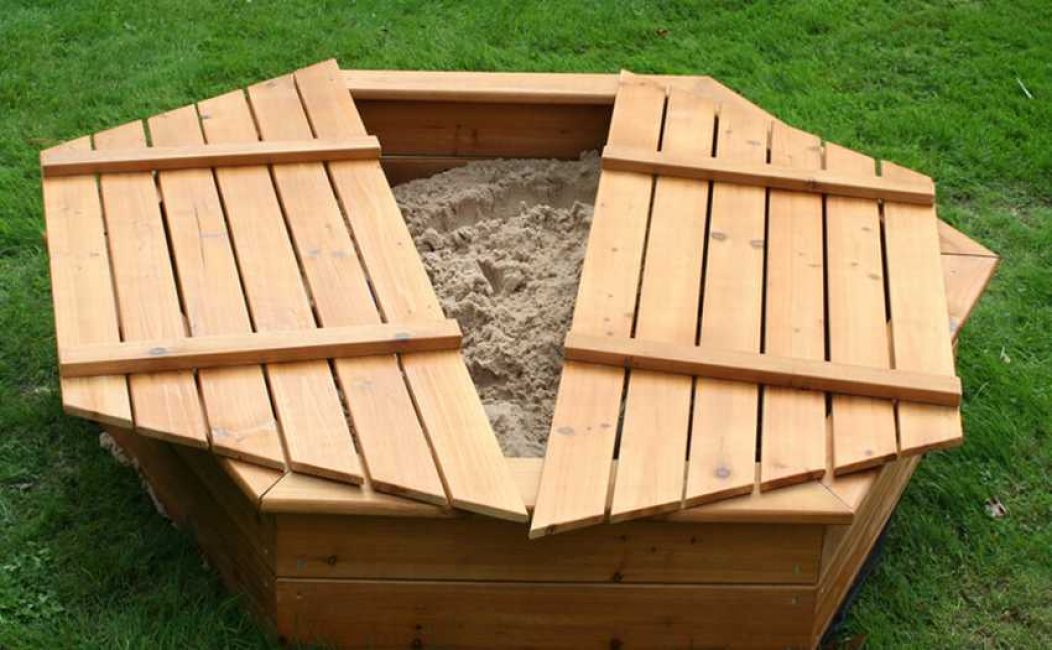
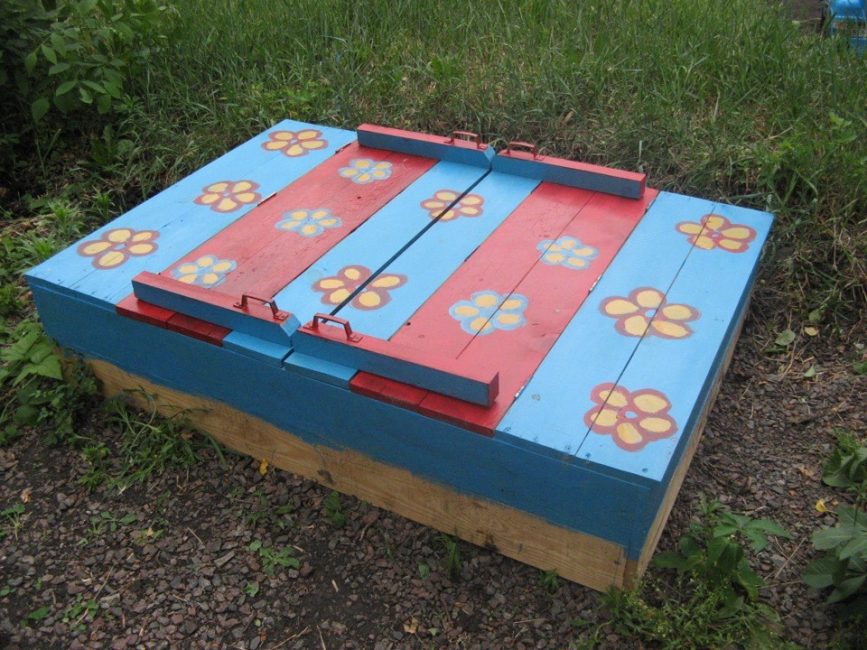
Sandbox with lid
Side height for 2-3-year-olds it should not be more than 20-25 cm. Otherwise, the kids will constantly stumble when stepping over it. But low sides are useless. After all, children, raking sand with a shovel, can get to the ground and get dirty in it.
The shape of the product can be any. It is necessary to focus not only on your own taste, but also on the general style of the local area and its size.
To protect from the sun and rain over the structure, it is better to make a fungus or a canopy. His high should be 180 cm. This will be enough even for an adult, bending down a little, to be able to go under the lid and pick up the child. It will not interfere with children either - even standing on the edge of the side, they will not touch the roof with their heads. It is not recommended to make the fungus too low, so that the child would not be tempted, and he would not try to climb onto the roof of the house.
 Read also: Landscaping your site with your own hands - (130+ Photo Ideas & Videos) + Reviews
Materials used for manufacturing
Construction with a hinged lid-shop
You can make such a structure from any available materials: polycarbonate, flat slate, plastic, metal, stone. But it is best to make a sandbox from eco-friendly wood or timber. These materials are easy to process, so if desired, a sandbox can be made from them with rounded corners and complemented with funny figures carved from wood.
To prevent children from getting burrs when playing, the boards used in the assembly of the structure must be carefully sanded. To protect them from moisture, they are covered with drying oil, and then painted or varnished. It is better to use frost-resistant bright oil paints intended for outdoor use or special enamel.
The designs of large car tires are quite convenient. It is better to turn over their edge with a hose. Painted in bright colors, durable rubber products will last for years. From small tires you can make a sandbox in the form of a flower. To do this, the cut blanks are connected with metal plates and bolts.
 Read also: Projects of country houses for 6-10 acres: 120 photos, description and requirements | The most interesting ideas
 What sand to choose?
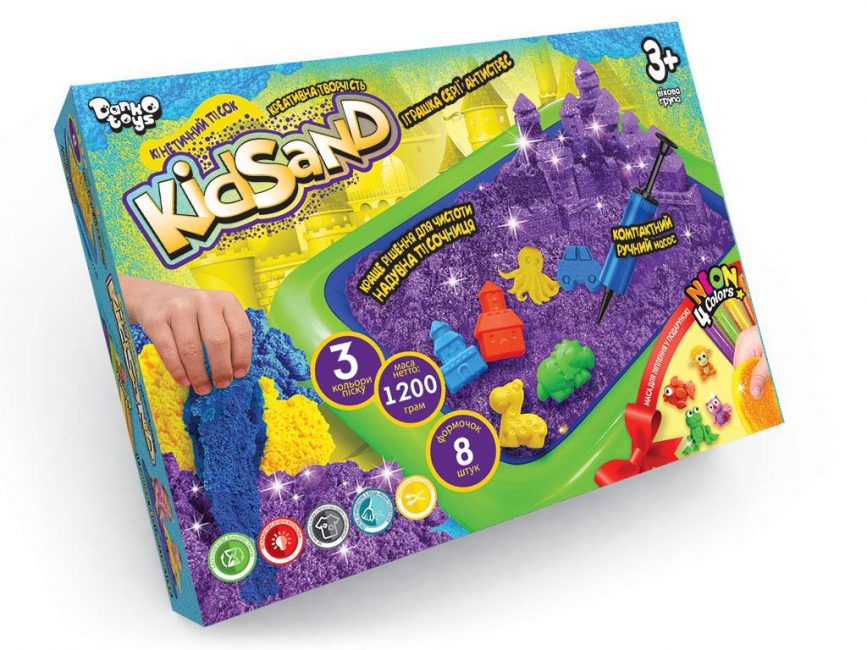
kinetic sand
Sand for children's sandboxes must be selected only clean, thoroughly washed and sifted, preferably extracted from the bottom of the river, without impurities of clay and pebbles. Ordinary sand extracted from a quarry may contain impurities of heavy metals, lead or zinc that are hazardous to children's health.
The quality of sand must comply with GOST 8736-93. When purchasing sand, ask the seller for a certificate. According to SNiP III-10-75, for the improvement of territories, including the arrangement of playgrounds, sand of the first class is used. If there is an excessive amount of mechanical impurities (more than 2%) in the form of clay or soil in the hot season, they will be dusty, which can lead to allergies in children.
 Read also: Veranda attached to the house - expanding the living space: projects, tips on how to create your own hands (200 original photo ideas)
Choosing a place for the sandbox
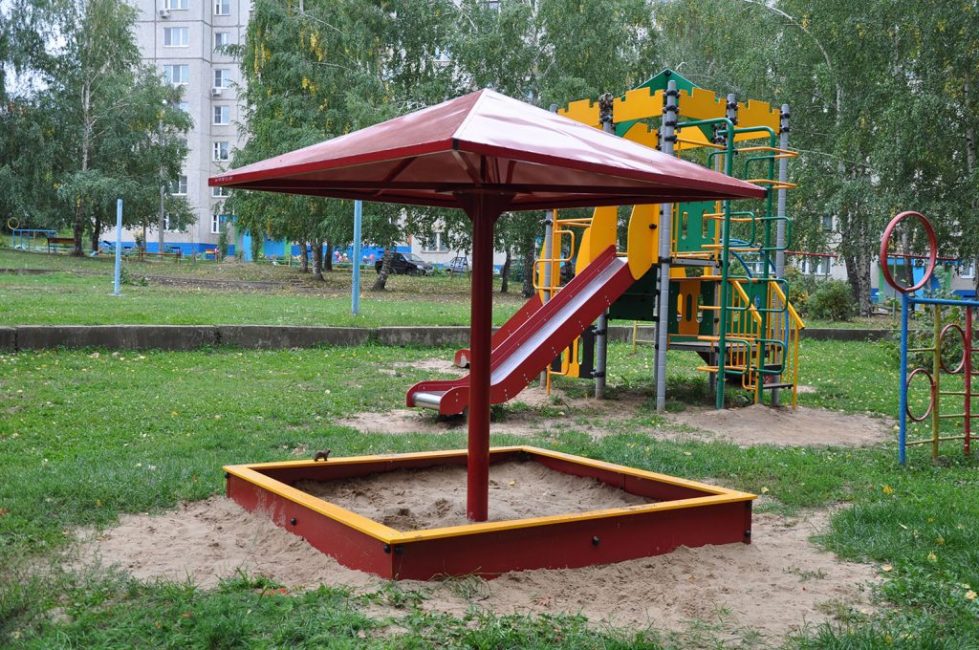
Playground
First of all, it must be taken into account that the children's sandbox (photo) should be located in front of adultsso that they can control their offspring at any time. It should be visible from the window or at least from the yard.
You must adhere to the following rules:
- the structure should be away from trees and shrubsso that falling leaves do not fall into the sandbox and do not clog it; plus in the shade, moisture after rain will dry much more slowly
- especially beware of old trees: even with small gusts of wind, broken branches can injure babies; for the same reason, dry branches of trees and shrubs located nearby should be cut off periodically
- in the hot scorching sun, it is not worth equipping a sandbox, especially an open one, it is better to install it in partial shade or make a canopy for it in the form of a bright umbrella; strong shading is not required, otherwise in cool weather the child will catch a cold
- don't put it on the bottom, where water constantly accumulates - it is better to choose a site on a small hillock for such a structure
- exhaust gases are very harmful to health, so do not place the sandbox near garage or driveway
- there should be no drafts at its location; it is better to choose a site closed from the side of the prevailing winds by a fence or building
 Read also: Making a greenhouse with your own hands from a profile pipe and polycarbonate: a complete description of the process, drawings with dimensions, watering and heating (Photo & Video)
 Making a sandbox in stages
Sandbox with lid
Sandbox for children can be stationary or portable. If there is sufficient free space in the local area, the first option is preferable. Having a permanent place to play disciplines children. Plus, in a stationary sandbox, it is possible to equip drainage to remove excess moisture from the sand.
Site preparation
Sandbox
In order for the sand in the children's sandbox to always remain dry, it is necessary to prepare drainage for it. In this case, even after heavy rain, it will dry quickly enough.
For this:
- in the intended place, the upper part of the soil is completely removed along with the turf to a depth of 30 cm and carefully leveled; be sure to get rid of the roots of large shrubs and trees - over time they can sprout again
- for marking the structure, pegs are used with string or a strong thread stretched between them; You can “draw” a round figure with the help of an impromptu compass - a small bag fixed on a rope with lime poured into it; so that it evenly falls on the ground, a small hole is cut in it
- in the center of the future sandbox, a small pit is prepared with a size of 50x50 cm and a depth of 70 cm
- the rest of the soil is cut in such a way that a slope forms to this pit
- a layer of rubble is poured into it, then expanded clay, and the last - a layer of sand
- then the pit is covered with agrofiber; it will protect the sand from blooming and protects it from soil pollution, grass germination, insect penetration; this material is strong enough, and even if a child digs a deep enough hole, he is unlikely to be able to damage it with a spatula
- if there is a canopy (fungus) above the sandbox, the agrofibre can be replaced with a tarpaulin or a thick film; and in that, and in another material, it is necessary to make holes, through which moisture will evaporate
- the bottom of the structure can be paved with paving slabs; replacing the sand in this case will be much easier.
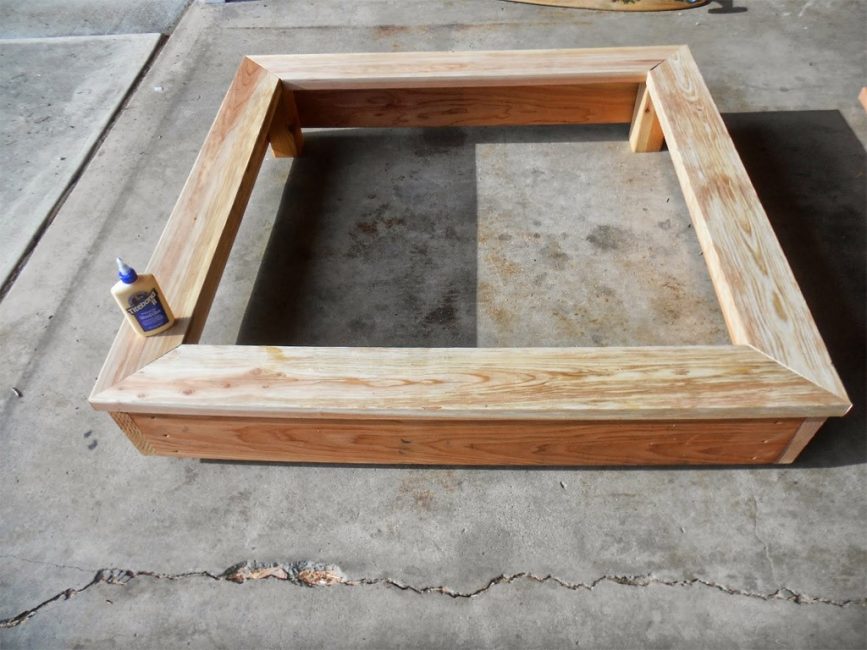
Base Assembly
Box assembly
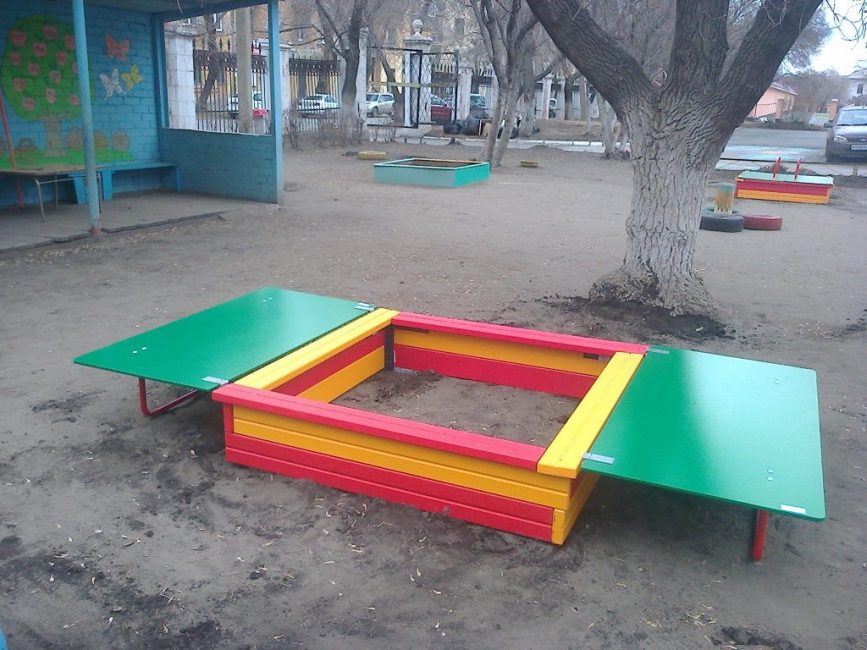
To make a sandbox, it is enough to dig racks into the ground, attach a base to them, and make a canopy to protect them from wind and rain. You will need boards of the required length (for example, 1.6 m) 12 mm wide and 3 cm thick. They can be knocked down in 2 rows into shields, getting a structure 24 cm high.
You will also need 4 bars with a section of 50 mm, to which the sidewalls will be attached, as well as 25 mm boards for making a bench. Before assembly, the tree is impregnated with compounds to protect it from decay. So that the product does not lead over time, it is better to use dried boards.
Let's describe the process of assembling a children's sandbox with a lid in stages:
- The cut blanks are carefully ground, coated with a primer, drying oil, and then painted.
- At the corners of the future structure, wooden blocks are driven into the ground to a depth of 15-20 cm. To protect against decay, their lower part, which will be in the ground, is pre-treated with bitumen
- We fasten the boards with the help of self-tapping screws to the bars driven into the ground. For each connection of self-tapping screws you will need 2 pieces. A similar design closer to winter can be easily untwisted and put away for storage.
- If there is no screwdriver at hand, drill holes in the boards and bars with a diameter slightly smaller than the diameter of the self-tapping screws. It will be much easier to screw them
- You can additionally fasten the joints with carpentry glue.Remove its excess immediately, otherwise the paint in these places will quickly fall behind.
- To make simple benches, it is enough to attach several boards around the perimeter or corners of the box. Since self-tapping screws that have jumped out of the tree can injure the child, metal corners are used as fasteners, which are located under the bench
- Full chairs and a table can be assembled from wooden boards and installed near the sandbox
- In the absence of benches, sides are attached around the perimeter of the structure. It is better to make them wide enough so that it is convenient for children to sculpt Easter cakes.
- If you install 4 rubber tires along the edges of a wooden box, and attach a steering wheel along the edge of one of the sides, you will get a sandbox in the form of a car
- Having made a box in the form of a rhombus and fastening a canvas sail on one of the sides on a pole, you will get a sandbox-boat
Cover making
Sandbox with lid
So that you do not have to scrape fallen leaves and cat excrement from the box every day (and cats are the source of many dangerous diseases), knock down a shield the size of the box from several boards 2 cm thick. Such a hinged cover is attached to ordinary door hinges. When it is opened, it is supported on handles knocked down from thick bars, thus obtaining comfortable seats. On them, children can build sand castles or relax in between games.
The simplest version of the cover is a tarpaulin stretched over the corners of the box on racks. For the winter, it can be rolled up and put away for storage. More difficult to manufacture are transformer structures made of wood or metal with a folding lid. The scheme of their manufacture can be easily found on the net.
Sand filling
Sandbox
The height of its layer should be sufficient so that children, digging in the sand, cannot get to the ground and get dirty. It should be at least 25-30 cm. For a medium-sized sandbox 1.6x1.6x0.25 m, you will need about 2-3 cubic meters of sand, that is, somewhere half a kamaz.
To calculate the required amount, you will need to calculate the volume of the structure. Moreover, only the height of the bulk layer is taken as the height, which is 2/3 of the height of the sandbox itself. Thus, its volume will be 1.6 x 1.6 x 0.17 \u003d 0.44 cubic meters. m.
Next, we multiply the resulting volume by the specific gravity of the material (it is equal to 1.5): 0.44 x 1.5 \u003d 660 kg or 0.66 tons. Pure river sand is often sold in 40 kg bags. We divide the number 660 by 40. We get 16.5 bags.
Making a fungus
So that children do not get their heads baked during games on hot days, be sure to take care of the roof. Her sandbox options can vary endlessly. You can even protect the building from the rain with a large beach umbrella. The disadvantage of this canopy is the weak resistance to gusts of wind. Therefore, be sure to attach the umbrella with a clamp to any of the sides. You should not stick the umbrella leg into the center of the sandbox so as not to damage the agrofibre. It is installed outside the structure.
Sandbox with fungus
You can also make a roof out of tarpaulin in the form of a tent or wigwam. In this case, even in extreme heat, children will not overheat in the sun. The simplest version of a tent is a pair of poles with a cross member between them. A dense fabric or tarpaulin is thrown over the crossbar and tied with cords to hammered pegs or loops. For the winter, such a canopy will be easy to remove.
If you spend a little more time and dig a few racks next to the structure, upholster them with boards and stretch a tarpaulin over it, you will get a real sandbox house. If desired, you can make for him a full-fledged roof with a tiled roof.
Finished plastic products
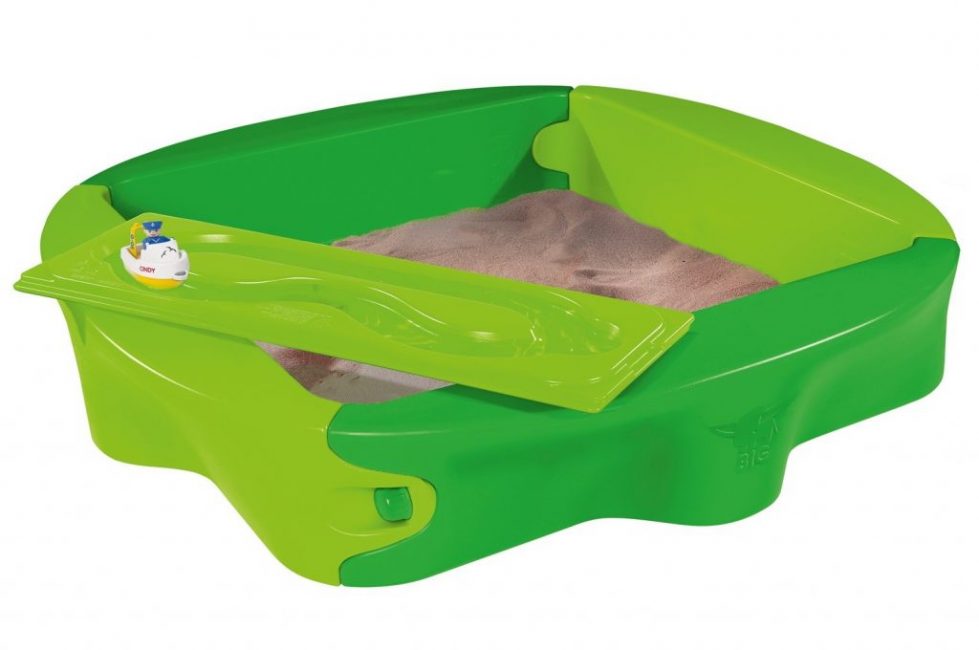
Finished plastic construction
Sandboxes sold in stores are most often made of lightweight plastic, which is the most suitable material for a playground. It is easy to clean, smooth enough and does not form scoring. When hitting a plastic structure, the likelihood of injury to a child is minimal.
Such a product is not afraid of bad weather, is easy to clean and has a small weight. If necessary, it can be easily moved to another location. The only drawback of plastic is low resistance to ultraviolet radiation. Even the brightest products can quickly fade in the sun. But children grow up quickly, and after a couple of years you simply won’t need a sandbox. It is better to buy a children's sandbox for giving or at home with a lid - such products are more convenient to use.
 Read also: How to make a beautiful and inexpensive fence in the country with your own hands: wood, metal and polycarbonate | (70+ Photos & Videos) + Reviews
 Tips for parents
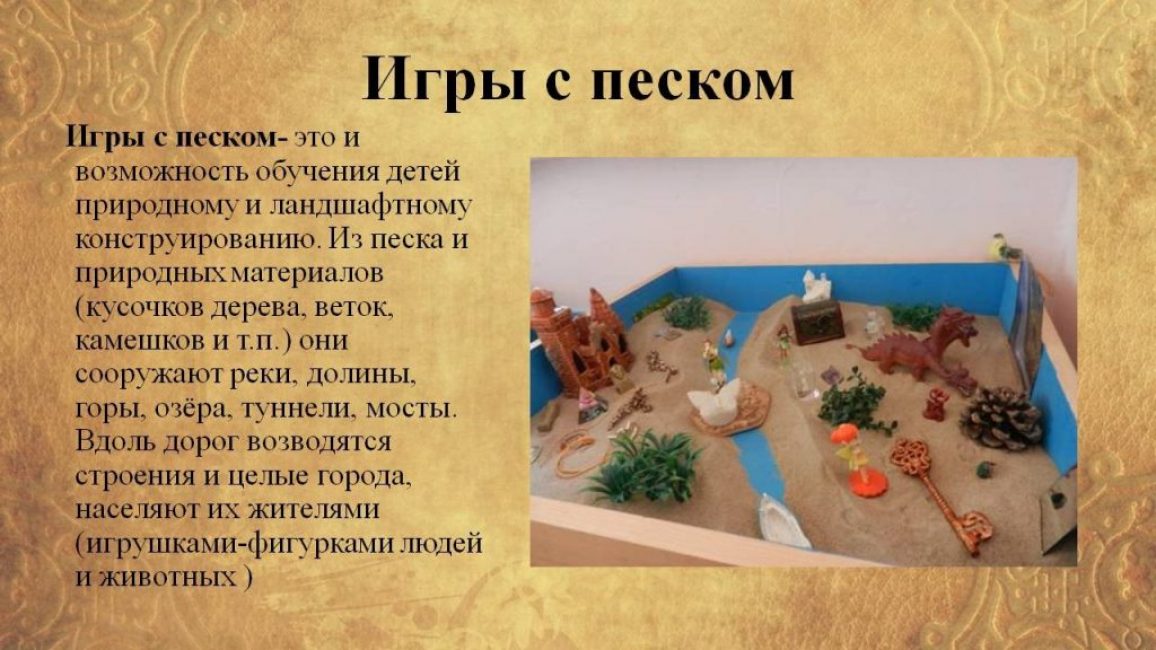
sand games
At the age of 2-3 years, the child still does not know how to play independently. Therefore, at first, you should show him how interesting it is to play with sand:
- Immerse your hands with it in the sand, rub it with your palms, squeeze it in a fist, sift between your fingers. Share your feelings with the baby: “I feel the warmth of the sand and small, small grains that prick nicely”
- Leave footprints and handprints with him on the court. Draw a funny image with a stick. Do the same with the prints of the bucket, molds, spatula.
- Draw a picture with him in the sand with a twig
- Hide a small pebble or toy in it, and then unearth the “treasure” together
- Arrange a competition who can pour sand with their palms or a shovel into the largest pile
- Use molds to build a sand castle. Arrange a competition to see who can come up with the bigger and better building
- Pour the sand with bottled water. Ask the baby which sand, dry or wet, is better to sculpt Easter cakes. Mix it with pebbles, shells, earth. Watch together what happens in this case
- Feed the dolls with cakes made of sand or "porridge" poured into a saucepan
Do not forget that in the game the child needs freedom. Try to help him only if necessary. Control the work less - let him create on his own. Do not put the baby "super tasks". As soon as you feel that he is bored, immediately switch him to a new game.
Be sure to invite your child's peers to visit. Let him learn to communicate with them, share toys and work in a team.
You can see clearly the process of assembling a sandbox from wood on the next video:

VIDEO: How to make a sandbox with your own hands
Children's sandboxes: description, types, sizes, step-by-step instructions on how to build your own hands (90+ Photos & Videos) + Reviews


