

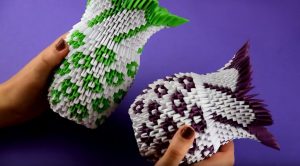
Making figures using the origami technique is not only a way to have a good time. This hobby is great for developing spatial thinking. Therefore, it is not only interesting, but also useful. In addition, origami fish can serve as material for decorating the bathroom, especially if they are made in a whole flock.
Content:
 Read also: How to make a paper vase? | Amazing gift? from just a few sheets of paper
Materials for manufacturing
In order to make a cute origami fish, you will need:
- double-sided colored paper;
- pencil;
- glue;
- eye sticker.
Step 1. Getting Started
Take a square sheet of paper measuring 20x20 cm. Fold it diagonally.

Unfold, rotate 90 degrees and fold along the second diagonal.

Unfold the sheet and turn it over to the other side.

Fold it in half.

Unfold and fold in half again.

We take the leaf in our hands by one of the diagonals and, pressing on the folds on both sides, we fold the diagonals to each other.

We get a small square. We smooth out the folds well.

We take the lower right side of the square and bend it to the center line (diagonal of the square).

Then we also bend the lower left side of the square to the center.

We open our blank by bending it up.

Align the fold lines.

We get an elongated rhombus.

Step 2. Making the fins
We take one paper corner by the edge and lay it up so that the fold line runs from the center of the rhombus to one of its vertices (the edge of the paper corner).

In the same way, we set aside the second paper corner.

Now we bend the right edge of the first triangle to the center.

We bend and our triangle becomes twice as narrow. These will be the fins of our fish.

Source: https://youtu.be/c1zYnvOQRbc
In the same way, we bend the left edge to the center. We press the folds well.

Step 3. Making a ponytail
Using a ruler, measure 6 cm from the center up and down. Making notes with a pencil.

Source: https://youtu.be/c1zYnvOQRbc
Now we make a fold from the top mark to the edge of the fin.

And we make exactly the same fold on the other side from the fin to our mark.

We collect two folds together. We get a narrow triangle.

Let's put it aside.

Do the same with the bottom triangle. At the bottom is our label. From this point we draw a fold to a point that does not reach an angle of 2 cm.

We make the same second fold. It must be symmetrical.

We collect paper along these folds.

We get a triangle. We put it on the other side.

We got two parts of the tail. Now carefully take the fins and fold the upper part in half.

The top corner is aligned with the bottom. We've got a fish.

Step 4. Making an eye
Glue the eye on the fish. If there is no volume, you can cut out a small circle from white paper and draw a pupil in the center with a felt-tip pen.


Origami paper fish
Paper origami fish for preschoolers? | Scheme + Video


