
A rationally adjusted life will save you from problems and simplify your vacation in the country. It will be calmer if the tools with which they work in the garden “live” in a special shed, the toilet and shower are at hand, and you and your friends will fit in the country house.
Even in a small area, you can place all the country buildings and structures you need. You just need to think in advance what you will need for comfort and convenience.
Content:
 Read also: Projects of country houses for 6-10 acres: 120 photos, description and requirements | The most interesting ideas
Introduction
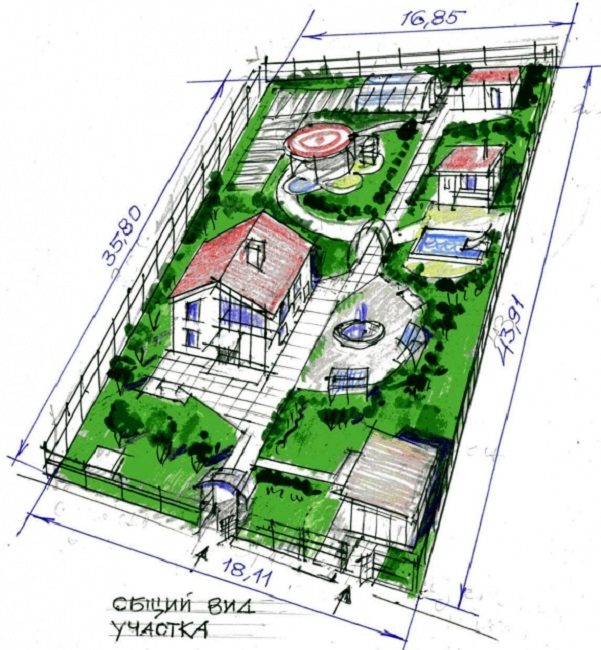
General view of the building
Yard outbuildings in the country - it is not only a shed for tools and inventory, garage and bath. This phrase includes cellar, greenhouse, summer cuisine, outbuildings with a barbecue or barbecue, a swimming pool, attractive fences, a place for a restroom. Outbuildings next to a residential building porch, outdoor toilet, animal rearing buildings, playgrounds, etc.
Many buildings and structures are erected at the dacha, they are chosen taking into account the needs of the owners, the area of \u200b\u200bthe plot, the country house built and the amount of money available for construction. Certain designs can be selected from the photo of the hozblok, common on the Internet.
Prior to construction, site planning is carried out and its drawing is drawn up. This step-by-step instruction will help to do this work:
- The drawing is made on a sheet in a box or millimeter paper on a scale (for example, 1: 100, that is, each of the cells of the sheet indicates a distance of 1 meter). If you have a large plot, then increase the scale - 1: 200 or 1: 300.
- Draw the boundaries and line of the road, mark the dimensions of the site with a pencil, indicate the south side.
- Mark the distance from the edge of the site to the buildings of the neighbors.
- Using a tape measure, measure the buildings on the site and apply the dimensions to the drawing.
- On the plan indicate the location of the entrance gate. If there are trees that you will not remove, also indicate them on the drawing.
Maximum use of space on the site
When the exact dimensions of the house and buildings on the site are known, it is convenient to calculate which of the desired you can place. In order not to draw a new plan several times, “patterns” are prepared from cardboard, allowing you to mark spots in the place of summer cottages.
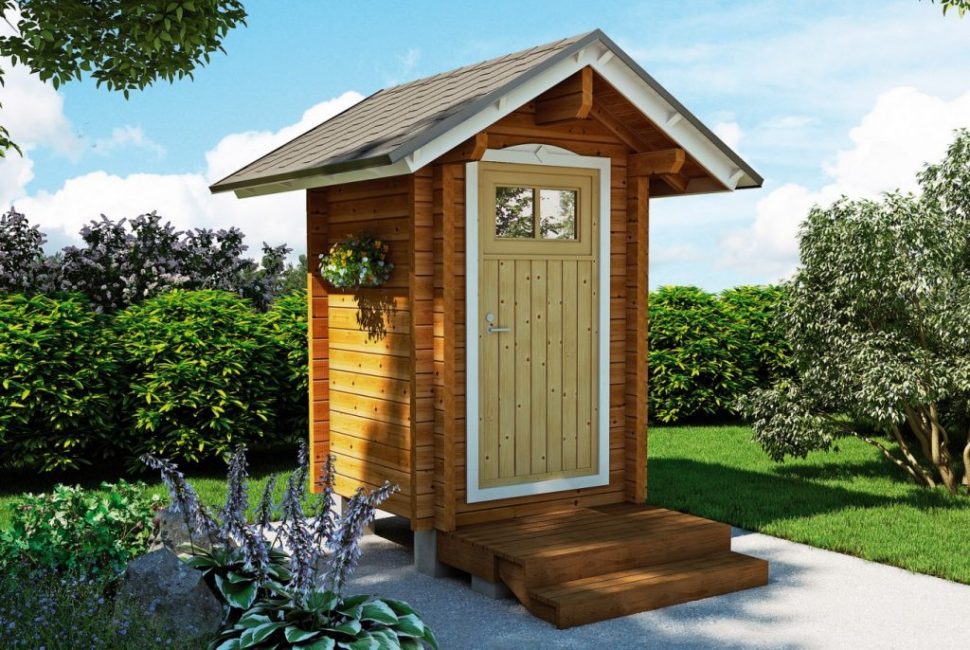
Toilet in the corner
After that, moving the "models" according to the plan, it is easy to change the location of buildings on the site, calculate the appropriate path for laying tiles on the paths and find the most convenient place. If you have the necessary knowledge and skills, this is done on a computer or drawn by hand.
 Read also: Terrace attached to the house: 150+ Best photo ideas | Do-it-yourself step-by-step arrangement
 Rules and Regulations

When the plan is ready, you need to study the documents that regulate the placement of buildings on land. At this stage, many additional questions often arise.
Most often among them:
- the required distance between buildings on the site;
- distance between buildings according to fire regulations;
- distance from the garage to the road and fence;
- distance from buildings to the carriageway;
- sanitary requirements for accommodation well, wells and septic tank.
The main distances between objects can be seen in the image.
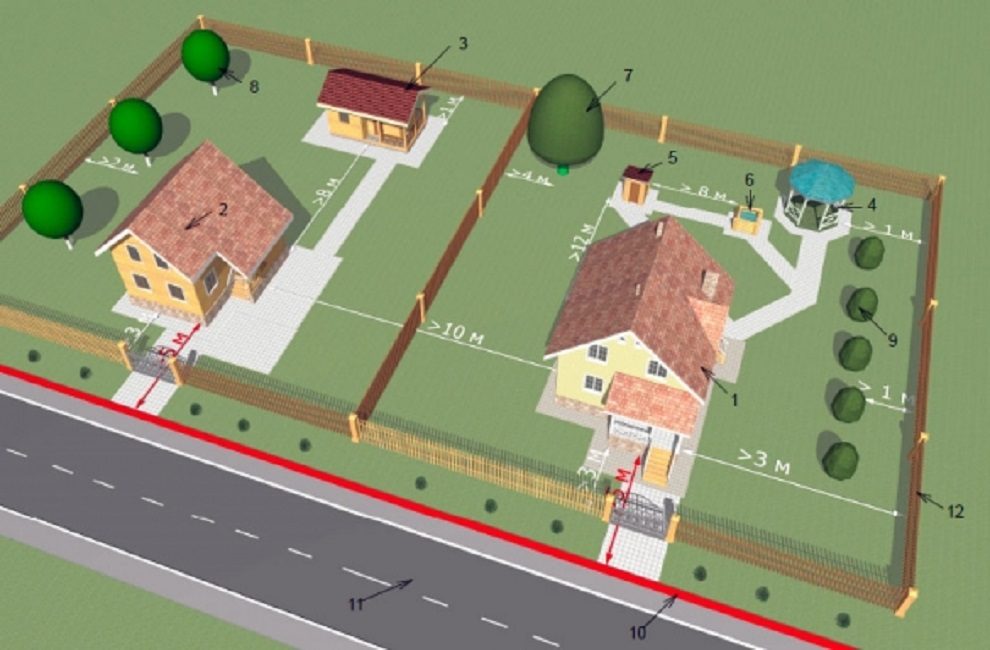
Plot scheme
If 5 m is maintained between the fence and the road, it is permissible to build a country house 3 m from the fence.
The minimum distance from a neighboring house to a septic tank, garbage pit or toilet - 4 m, from an open parking lot to a neighboring site - 1 m, from a separate garage to the border of another site - 1 m.
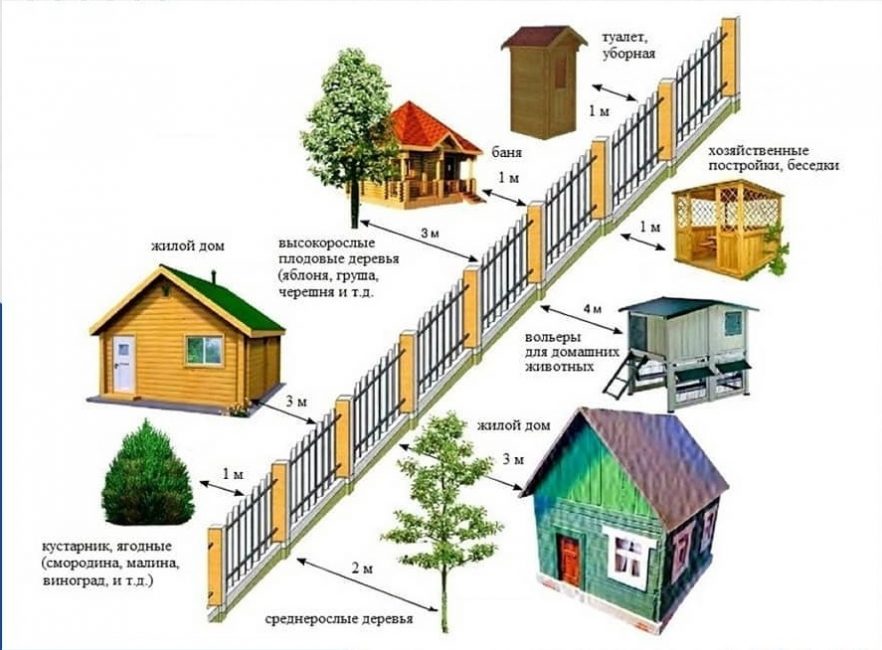
Norms for buildings (distance from the fence)
Maintain the distances required by the rules between outbuildings and a residential building. For example, when disputes arise with neighbors and when registering a house for cadastral registration, they must check the compliance of your and neighboring buildings with the requirements of the law.
 Read also: Veranda attached to the house - expanding the living space: projects, tips on how to create your own hands (200 original photo ideas)
Common country houses
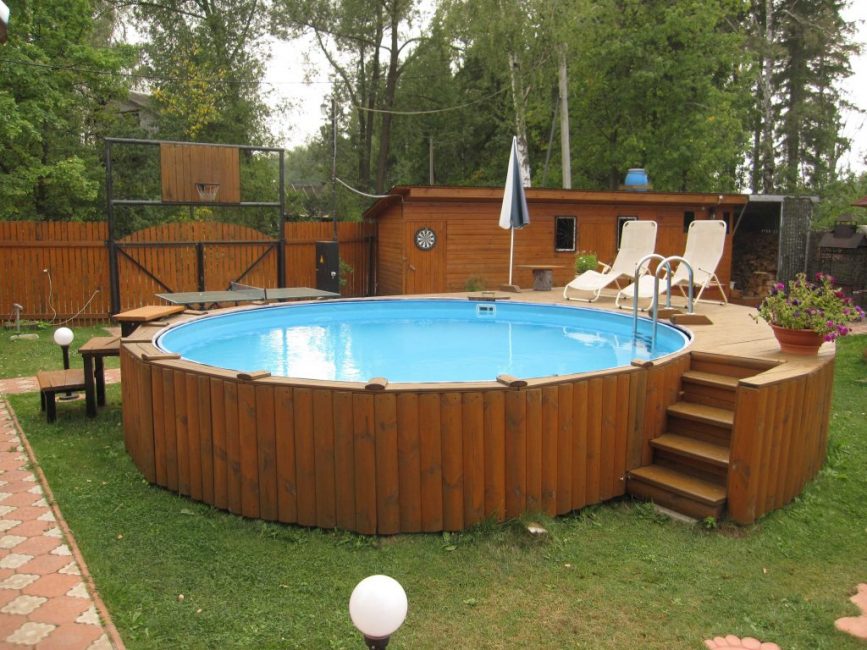
Swimming pool in the country
Summer residents often have different ideas about rest. Some people like to play sports or relax by the pool, others prefer garden beds and animals, and others only need barbecue cooked with friends.
But each of these objects requires its own place and suitable arrangement.
Alcove
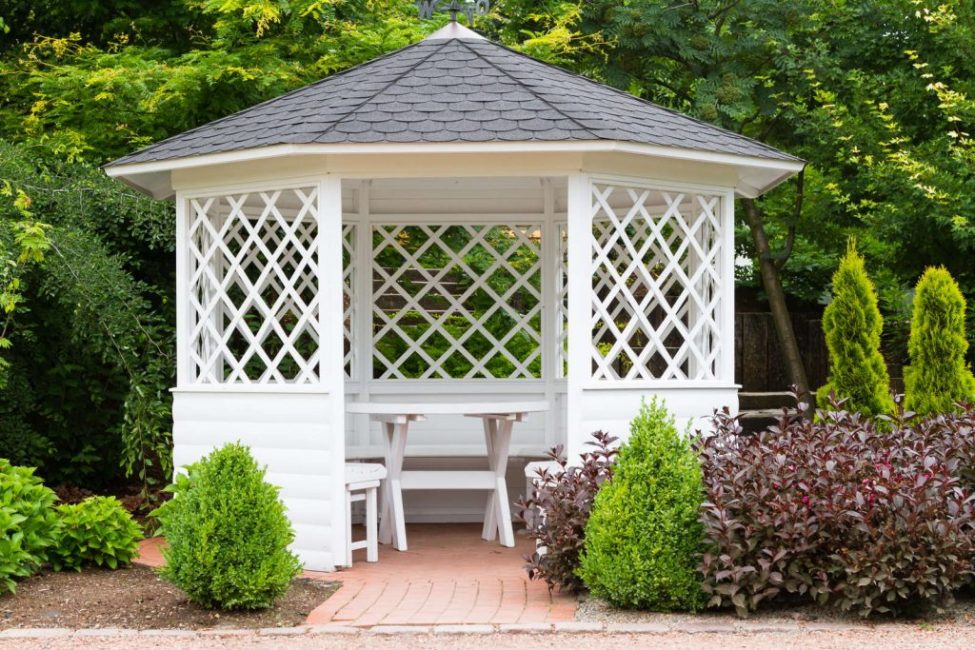
gazebo
A simple gazebo in a summer cottage can be built in 1-2 days. Various materials will do - metal, wood, brick, and even straw and plastic bottles.
If you find used steel profiles, pipe cuts and know how to use welding, it is more convenient to weld a metal gazebo, sheathe it with suitable material and make a roof out of polycarbonate. If you have pieces of boards and timber, a few slats, it is better to build a wooden gazebo.
The gazebo can be:
- stand alone;
- attached to a residential building.
Separately located gazebos are mobile and stationary. The attached stationary is assembled on a strip foundation, it is easy to move a small light gazebo, depending on the mood and weather, to a convenient place on the site.
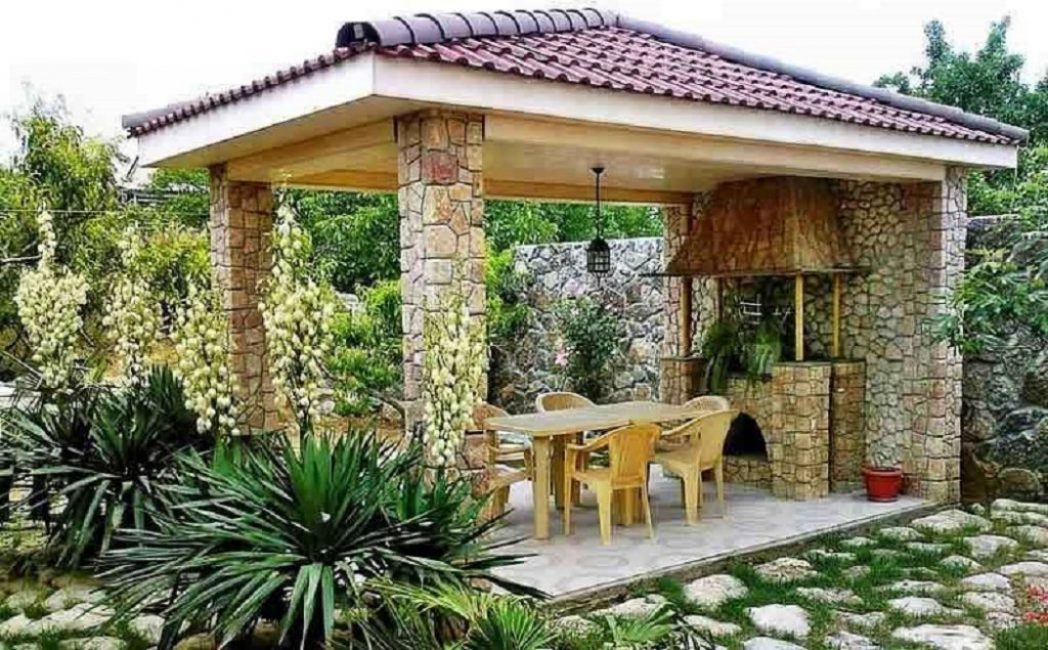
Arbor made of stone
Decide whether the gazebo will serve only as a rain canopy or you will raise small walls and install a barbecue, barbecue, table and benches in it. There are swings for children nearby.
The shape of the building is also important, it is easier to make a gazebo in the form of a rectangle or square. It is more difficult to build 6-, 8-, 10-sided structures. Complex roofs, including asymmetrical and curved and broken slopes, as well as working with slate, require professional knowledge and experience in work.
It is necessary that any gazebo:
- match the landscape of the site,
- was cozy and comfortable
- liked by the owners of the house,
- served for a long time and did not need annual restoration.
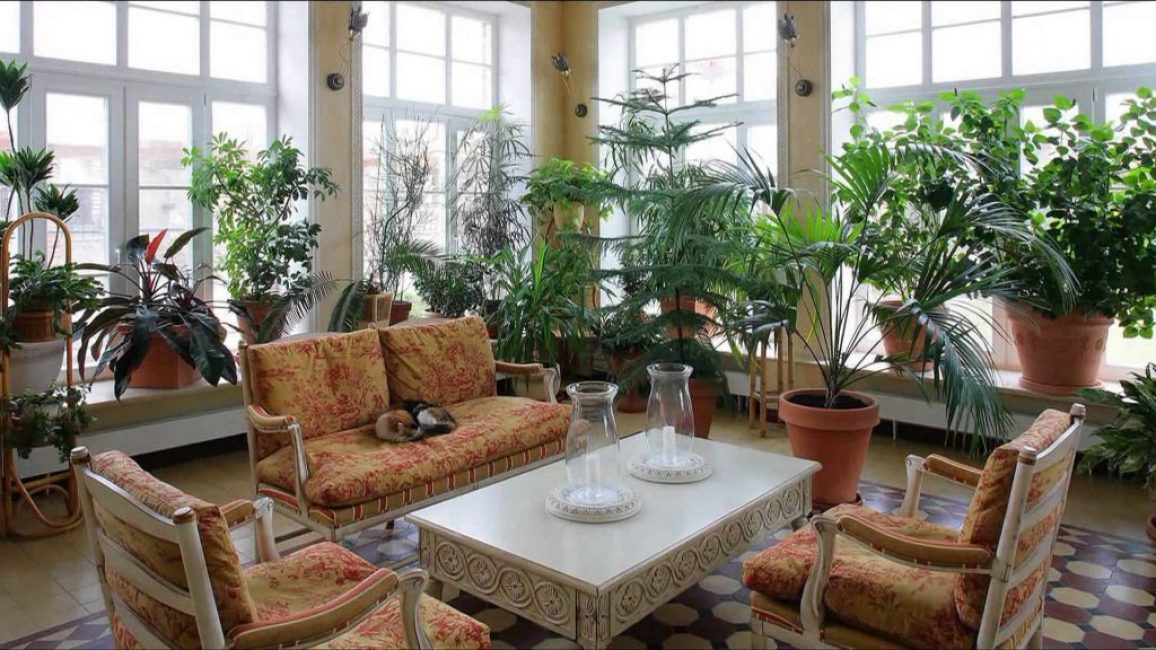
Winter Garden
Winter Garden
When winter comes and the area outside the window is covered with snow, summer bright sensations are very lacking. A person lacks fresh greenery and the smell of flowers, doctors have long found out that green plants cope with the blues and cheer up. Therefore, they often make a winter garden.
You need to immediately decide what you want to receive - real winter garden, greenhouse or conservatory.
Each of these buildings has its own differences, they need to be considered in more detail.
| A type | Distinctive features |
|---|---|
| Greenhouse | It is located on the roof of a residential building or near it. Used for planting flowers, vegetables and low-growing fruit trees. It is important to create conditions in the greenhouse that are suitable for the development of grown plants. |
Greenhouse | A small building located near a residential building. It is used for cultivation of heat-loving vegetable plants. Has no external decorations, often inexpensive |
Winter Garden | It is part of the dwelling, designed together with the house.Mostly subtropical crops are planted inside, it is intended for receiving guests and relaxing. The building must be functional and visually attractive. |
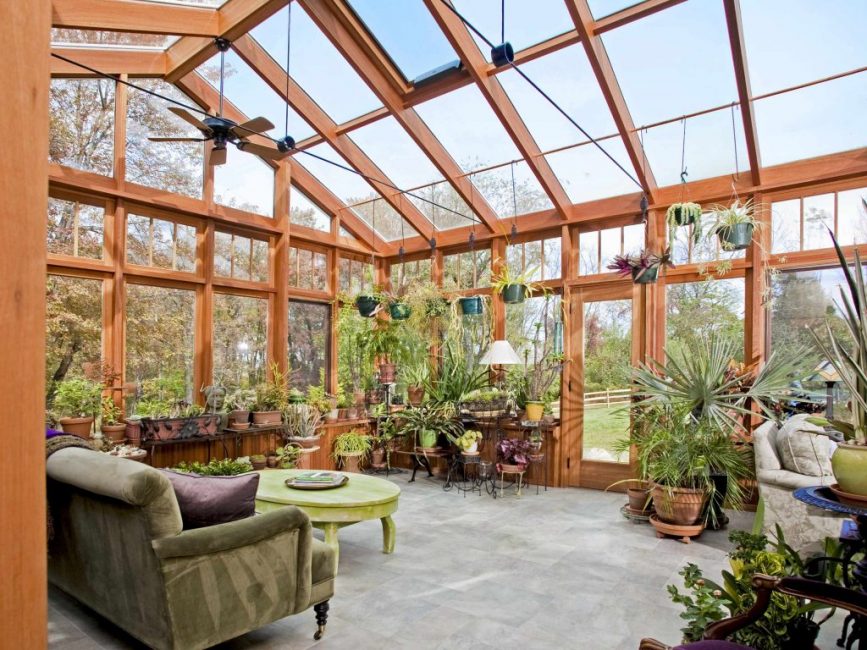
Residential conservatory
Winter gardens are of several types:
- Buffer. It adjoins a residential building (sometimes they use a veranda). They enter such a garden both from the yard and from the house. Often it serves as a link between the dwelling and the street, it is square or rectangular (occasionally angular). The advantage of this building is simplicity - the power grid, heating and plumbing are connected from home. Disadvantages: poor ventilation, sudden changes in temperature possible (buffer garden gets cold at night), not all crops can survive there
- Residential. Good for plant lovers. It is built as a full-fledged living room in which you can arrange a recreation area, living room or even a dining room. It is comfortable and convenient for humans and plants. They arrange a residential garden only during the construction of the house, or you can place it in an already finished room. The main thing is that window openings of a large area should be made in it to illuminate plants.
- Separate building. In another way, this building is called the winter greenhouse. On a large summer cottage, you can build a spacious winter garden at a short distance from a residential building. It is important to choose a sunny place for construction, a water conduit, lighting and heating are provided to the garden. It is convenient to combine a greenhouse garden with a covered passage with a house or draw beautiful paths to it. This is a complex building, and it will require large financial costs, but it will serve as a real decoration of the garden plot and fit well into almost any landscape.
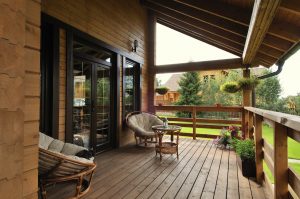
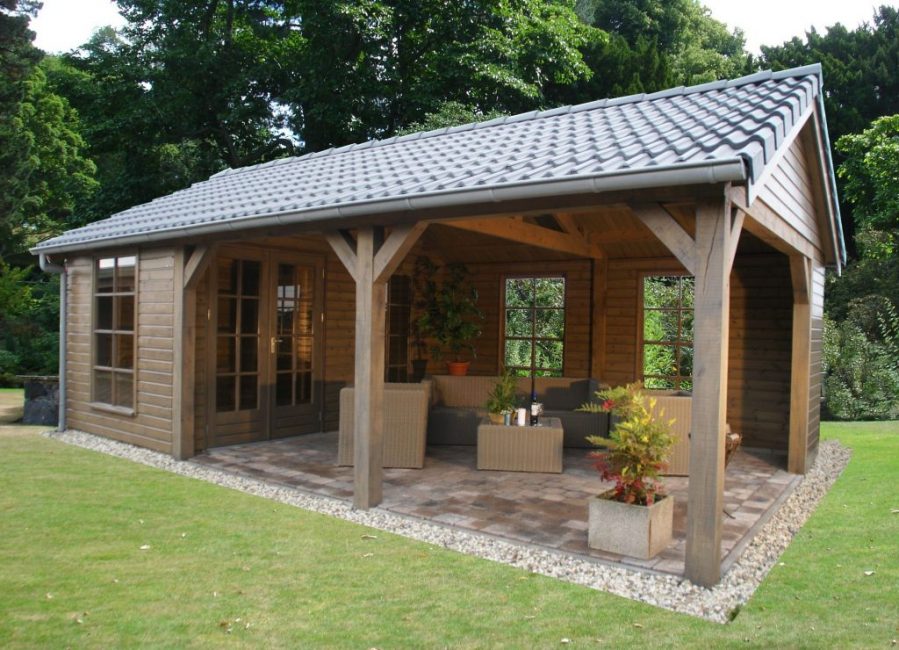
Attached veranda
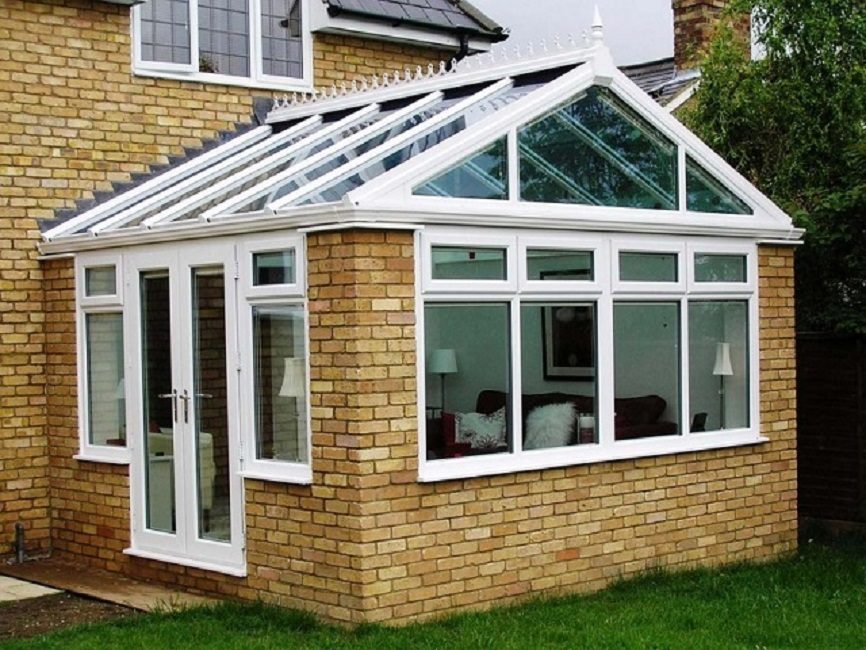
brick veranda
They make closed and open verandas attached to a residential building under one roof. Most often they are built closed - so that the entrance to the dwelling is protected from dust, flying leaves, snow and rain. But sometimes the owners prefer to create a shaded open area or terrace on the SNT site, which serves mainly for summer holidays.
Any owner of a summer house who has at least small skills in construction work can equip it on his own. It is important to prepare a well-thought-out and convenient project for residents in advance. Based on this, planning is carried out, it is calculated how much materials will be needed, and after that construction work begins.
First you need to choose the right materials, the veranda should be a natural part of the house. For this reason, the material must be chosen carefully.
Wood is always a versatile material; it is combined not only with lumber elements, but also with brickwork, siding trim, plastered walls and sheathing with various corrugated boards. It is important to choose the right design style so that the veranda is combined with the roofing and facade of the house.
Of course, an extension made of blocks or bricks will look out of place near a wooden house. And it will be difficult to dock it to the main building.
But to the house for summer living, built of blocks or bricks, it is not difficult to attach a wooden veranda.
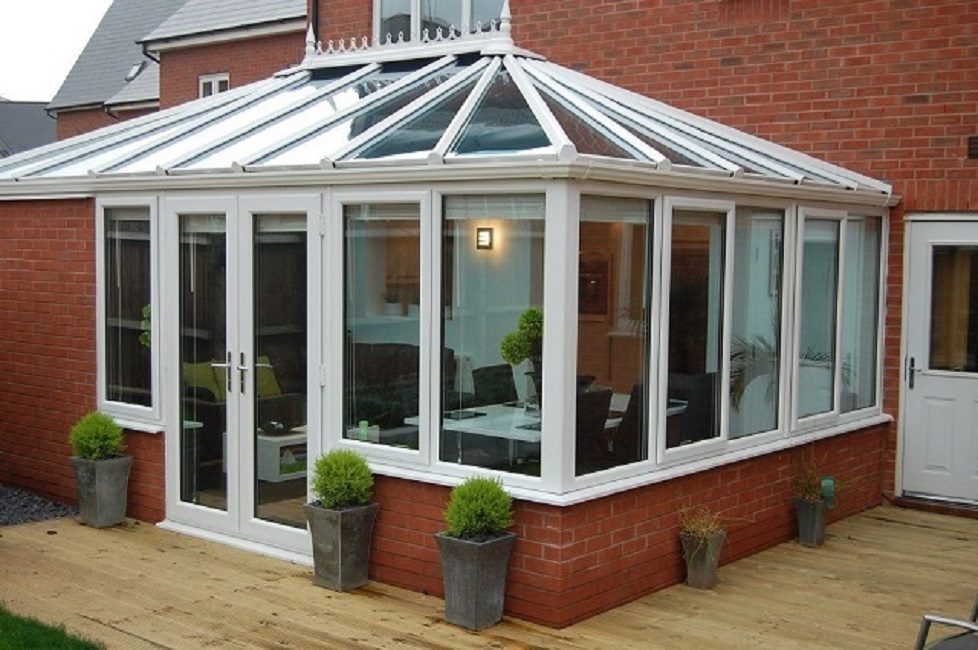
Metal-plastic veranda
No need to make a metal frame - steel has a high heat capacity and thermal conductivity. In summer, the veranda will begin to overheat, a lot of heat will enter the room, and in winter it will begin to freeze, serving as a whole "highway" for the penetration of cold into the home.
With temperature drops, condensate will begin to settle on metal elements. Moisture will drip onto the flooring, which will reduce the life of the floor and be unpleasant for people. For glazing, wooden window frames and PVC windows are often used.
A metal-plastic construction is used if a veranda with large windows is made. In summer, window openings are opened in it, leaving only mosquito nets.It is problematic to build such a veranda with your own hands; this work will require professional knowledge and equipment, and therefore additional money.
A good veranda is obtained by combining several materials. For example, a stone plinth is attached to a brick house and lumber walls are assembled.
A good veranda is obtained with panoramic glazing, its walls are assembled from huge metal-plastic windows. They look stylish and organically fit the house with a stucco facade. The advantage of this design is that the entrance to the house is maximally protected from dirt and atmospheric influences. This veranda will not become an obstacle to the flow of sunlight, in the daytime you will not have to spend electricity. The downside is the high cost of materials, the complexity of self-construction.
And of course, it is expensive and problematic to arrange efficient heating of this utility room. If necessary, make a drain to drain dirty water.
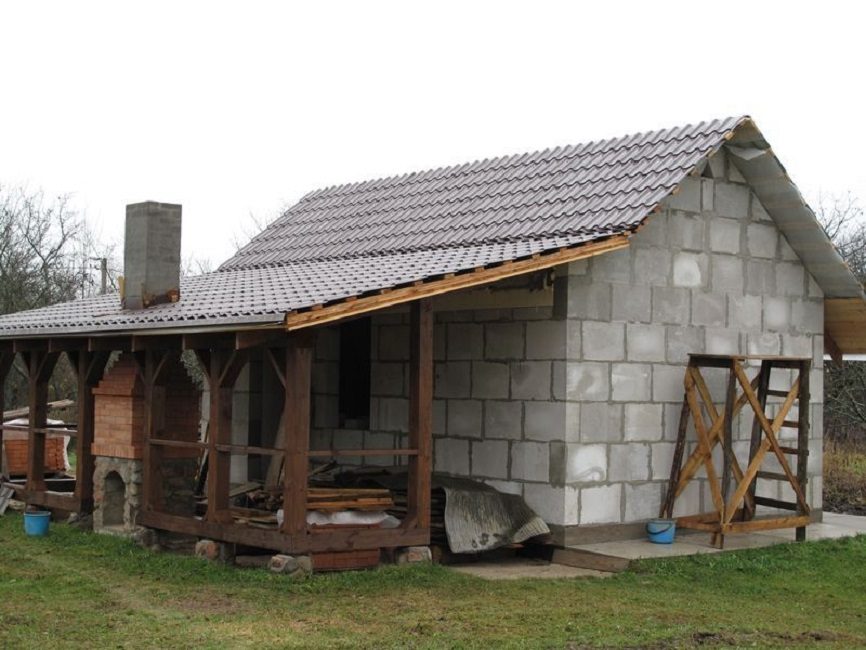
Bath
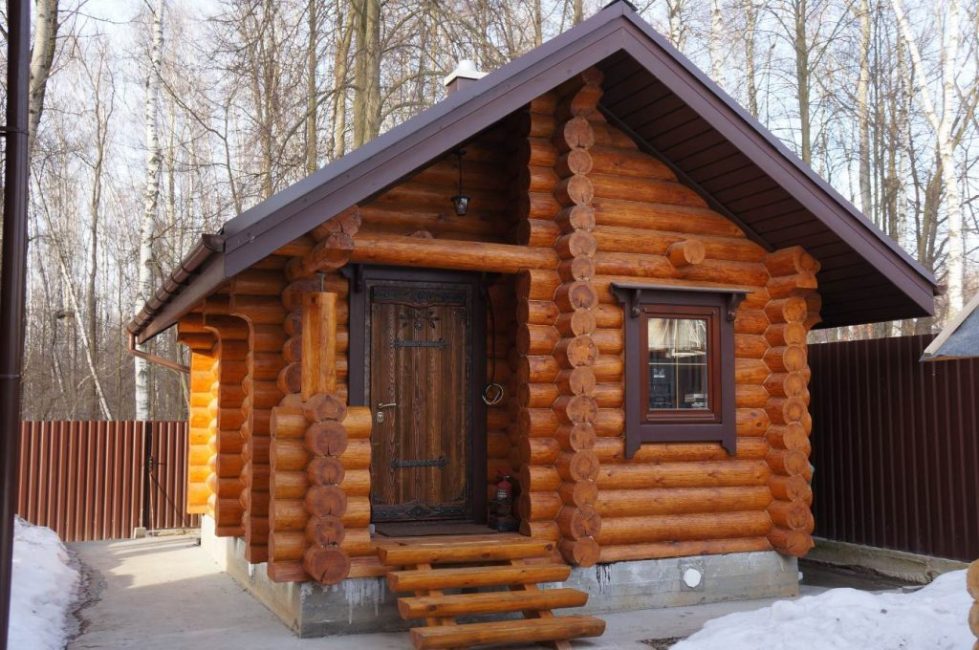
Log bath
Your own bathhouse in your summer cottage is what many dream of. Healing steam gives strength, improves blood circulation, cleanses the pores of the skin and improves its appearance. This building often plays the role of a "club" where they relax with friends.
The question arises before the owners - what is better to use for construction, so that the necessary microclimate can be maintained without high costs. The materials used in construction directly affect the performance and efficiency of the bath. Suitable material will increase the durability of the building. Temperature fluctuations and heated moist air constantly affect the internal surfaces.
When choosing, you need to take into account that the construction of any objects is carried out taking into account the rules of SNiP 30-02-97 and fire safety. The requirements and standards for baths are noticeably stricter than for residential buildings with gas heating. The reason is that these buildings are heated by stove heating.
Materials for the bath, in addition to strength, must have:
- high thermal insulation capacity required for the microclimate without additional fuel costs;
- resistance to humidity and high temperature.
In addition, the dimensions of the bath, location, and the amount of money the owner has for construction are important. The wood should have moderate moisture content and good workmanship.
Traditionally, the walls of the bath are made of wood, it should be of moderate humidity and well processed. In the past, only debarked logs were used for this, later they began to use timber. Now frame baths are often erected from different materials. Red burnt brick is widespread; in recent decades, baths have sometimes been built from foam concrete, gas blocks and cinder blocks.
Each of these materials has its own pros and cons. Before choosing, it is advisable to study the properties of building materials and find out what problems may arise during construction.
Wood has the best characteristics for this purpose, it has been used in the construction of baths for centuries. The main positive properties of this material:
- The wood is vapor-permeable, the walls are "breathable", moisture is gradually removed from the room in a natural way.
- This material has low thermal conductivity, as a result, warm air does not cool for a long time even in winter. Log cabins often do not even insulate, heat is stored in an old-fashioned way. In this way, it is possible to create a traditional atmosphere that only a Russian steam room can give.
- Often log cabins are not even insulated, they only caulk the interventional space.
- The material is well tolerated by severe temperature changes.
For construction, different types of wood are used, each of them has its own characteristics.
The most common types include:
- Pine. This breed has a natural protection against the development of insects and mold fungi, this role is played by the resin contained in the wood. This is a moisture resistant material, pine is inexpensive and common in the construction market.The disadvantages include "crying" with strong heating, after which it becomes necessary to process the logs against the development of rot.
- Linden. Comfortable and easy to process, ideal for baths due to high heat resistance and low warpage. But without finishing it acquires a dark shade, absorbs moisture well.
- Aspen. Dense wood, impervious to moisture, shrinks slightly during construction. It lasts a long time, has an attractive red color. The disadvantages include high cost and complex processing.
- Fir. Rarely used, lacks strength and is susceptible to rot.
- Alder. It is expensive, but it is quality wood. Shrinks a little, the wood has an attractive reddish color. It is easy to work with it, the layers of material do not twist. But after a while it darkens and can begin to rot.
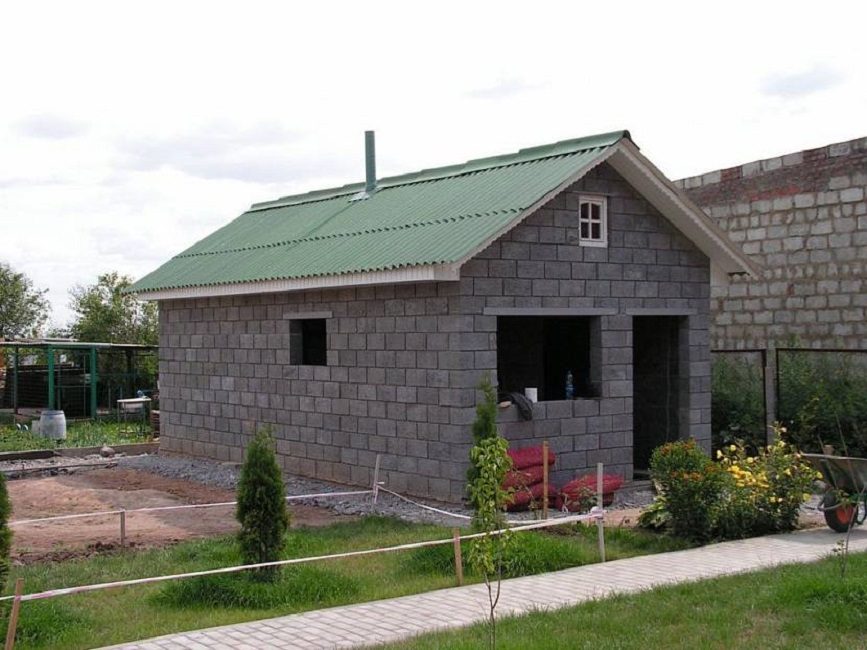
Often, aerated concrete is chosen for the construction of a bath; such blocks are made from cement, quartz sand with the addition of special foaming agents. The products are additionally processed to give the blocks extra strength.
Aerated concrete bath
The positive properties include:
- resistance to open fire is the most important characteristic for the material used to build a bath;
- high strength, only increasing during operation;
- low weight - facilitates construction work, allows the use of the lightest foundations (columnar, pile or tape);
- easy processing - easy to saw and drill.
The disadvantage is the high cost and the ability to absorb moisture well. Before the construction of the bath, it is necessary to process with special compounds. In addition, you will additionally have to do hydro and vapor barrier.
For laying walls made of aerated concrete, instead of cement mortar, you need to use a special glue. Pure cement should not be used: the blocks absorb moisture, this weakens the solution and reduces the thermal insulation characteristics of the walls.
Brick walls serve for a very long time, they are not even sheathed for protection, they will stand on a reliable foundation for up to 100 years. Wooden structures can withstand no more than 20 years. Externally, brick walls look good, they do not require additional decorative finishing. Brick is not afraid of open fire.
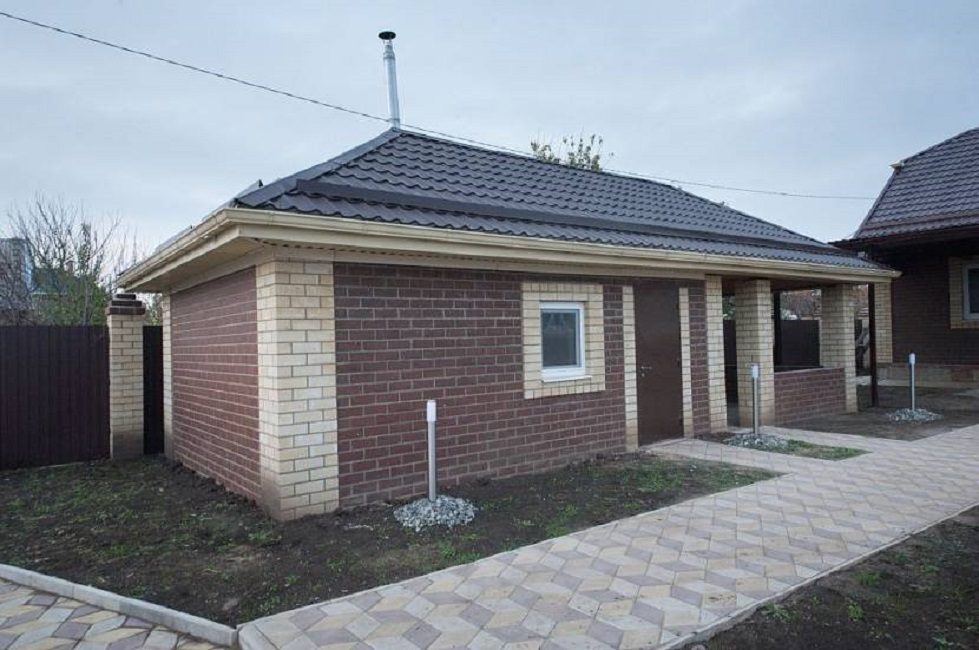
brick bath
But the brick has several disadvantages, among them are:
- you need to prepare a reliable foundation, this will take time and money;
- it will take a lot of time and fuel to warm up brick walls;
- brick does not let air through;
- the material is expensive.
It takes a lot of time to build a bath, you will need to spend energy on masonry, wait for the solution to dry. To eliminate some of the shortcomings, the masters recommend:
- to reduce costs, buy a one and a half red brick;
- provide a reliable ventilation system, prepare in advance for it special gaps in brick walls;
- buy cement of a grade not lower than M300 - only in this case you will get reliable masonry;
- insulate the brick bath from the inside.
The cheapest material for building a bath - cinder block
It is made from concrete mortar filled with sawdust, coal and blast furnace slag. They produce solid and hollow blocks.
They are good because the cinder block:
- cinder block lasts about 50 years;
- walls are not afraid of open fire;
- blocks are very cheap compared to other building materials;
- you can prepare your own cinder block suitable for your conditions using different fillers.
The disadvantages of such a building include high hygroscopicity, so this bath needs reliable waterproofing. The cinder block transfers heat well, so the building needs to be insulated. A convenient firewood shed is being built nearby, and a small attic is being arranged under the roof. Instead of a bath, you can simply build an outdoor shower.
Garage
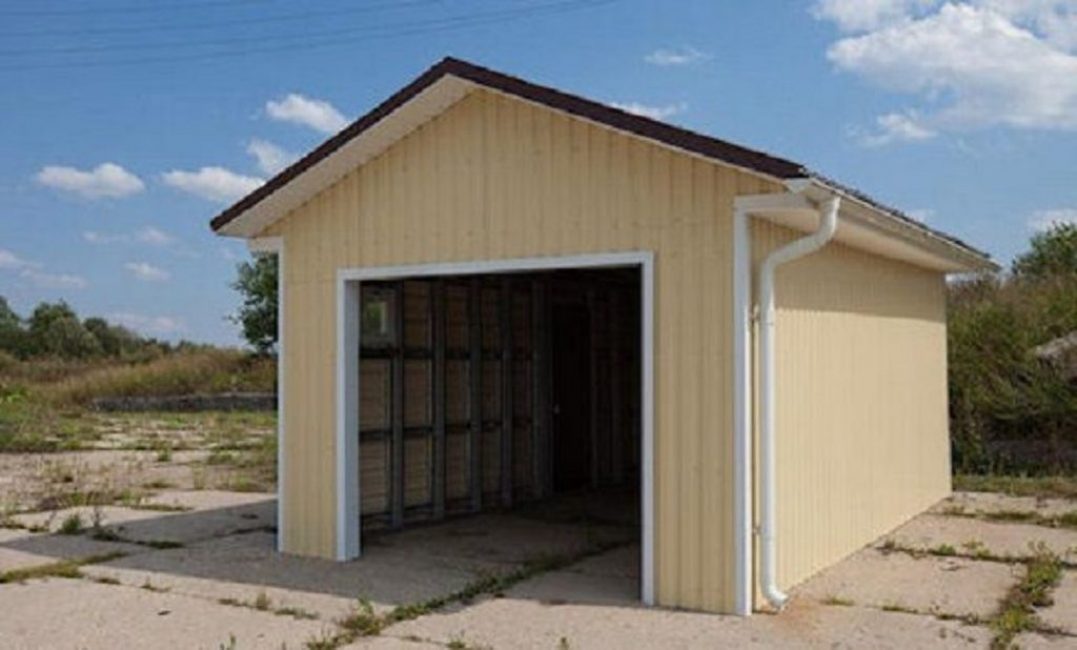
Any motorist dreams of a garage in the country, if the site is large enough. But often the construction of this building is postponed "until better times", the reason is the large amount of work and the high cost of building materials.
But you can make your own frame garage and a small workshop - at low cost in a short time you will get a reliable and durable structure.
A solid foundation, reliable fastening with a corner of a metal frame and other parts of the garage, and good insulation will allow you to build a durable and practical garage, no worse than buildings made of blocks or bricks.
The advantages of this building include:
- the convenience of assembling the frame, the ability to do the work yourself, without spending money on hiring a construction team;
- low cost of building materials;
- the ability to simultaneously easily install boxes and make a workbench;
- small volume and mass of materials - this makes it possible to save on transport costs and do without specialized equipment;
- the possibility of building a garage both from lumber and from metal or other suitable material.
If you wish and have basic building skills, you can build a frame garage in the country with your own hands. The advantage of this building is that the ease of operation and the ability to use almost any finishing materials make it possible to provide the garage with the appearance of a completely capital building.
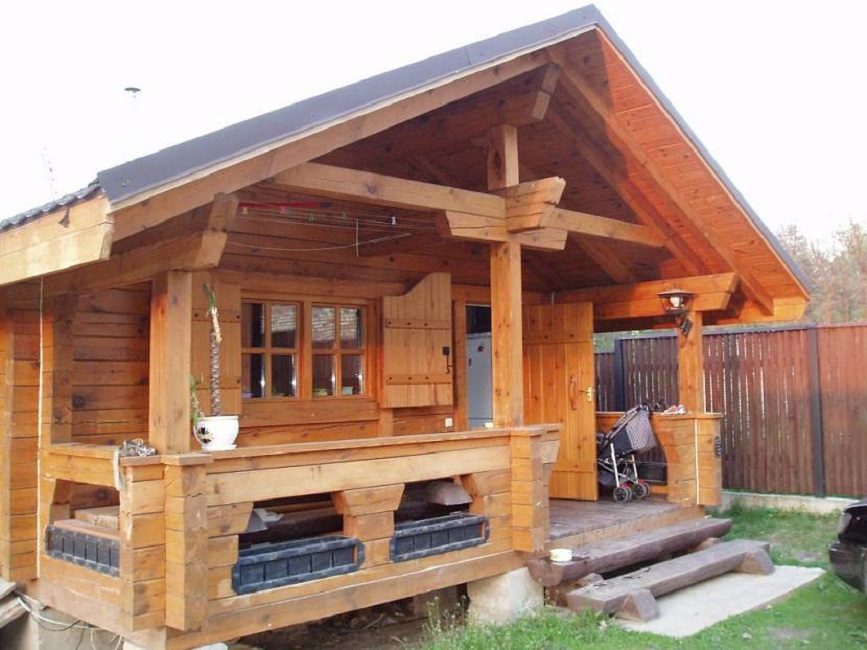
Summer cuisine
At the dacha, people spend a lot of time outside. A small self-built summer kitchen will provide an opportunity to arrange family dinners in the fresh air. If you completely close the walls and install partitions, dividing the room, then food is cooked in it only on an electric or gas oven.
This utility room on a personal plot begins with the arrangement of a beautiful platform, natural stone is suitable for this. First, pillars are installed and concreted for shed roofing made of metal tiles or other material (supports must be installed in the corner of the building).
A desktop (support posts) is made of blocks and covered with a tabletop, it is necessary to provide a water supply and a drain pipe in the place where the sink will stand. Sewerage is discharged into a septic tank, cesspool or drain pit. Additionally, you can install a convenient cabinet for storing supplies. Nearby it is convenient to lay a flower bed and build a small shed for firewood.
The structure is sheathed with clapboard, plywood or profiled sheet. The easiest way is to cover the roof with transparent polycarbonate and surround the hozblok with a small fence to give it a completely finished look. An inexpensive, simple and comfortable summer kitchen with a gable or sloping roof will allow you to enjoy your dinner outdoors!
Greenhouse
Before building a greenhouse in a summer cottage, you first need to decide what exactly it is for. Need only a little space to grow seedlings? Do you need a comfortable greenhouse that allows you to move to your full height and grow tall tomatoes? Do you want to make rising shutters for temperature control? How many acres do you need to protect? Perhaps you don't need a greenhouse, but just build greenhouses? All this needs to be thought out in advance, only after that start construction.
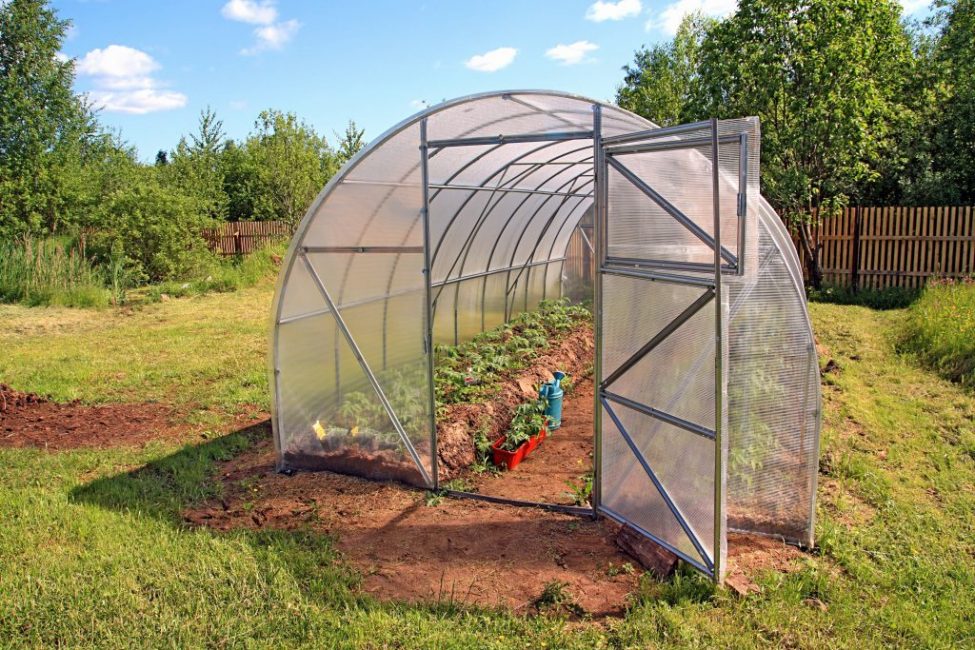
The easiest thing to do PVC pipe greenhouse, it will allow you not to spend a lot of money, protect plants from cold, strong winds, summer residents in the northern regions will help prepare early seedlings of vegetables and flowers.
To place the greenhouse, choose a flat, well-lit place, nearby there is a place for a compost heap. Keep in mind that even a constantly blowing small wind will greatly affect the temperature in the greenhouse, it is better to stay in an area protected from it. Orient the greenhouse so that the prevailing wind is directed towards the end of the building.
Arches are bent from plastic pipes, connected to each other and covered with a film. This design is convenient for small greenhouses. The photo shows the ratio of the size of the structure and the cross section of the pipes.
You can use galvanized pipes instead of PVC, in which case you will need special tools for bending and connecting pipes. Although the construction becomes more expensive and more difficult with the purchase of steel pipes, the reliability of the structure increases - it can withstand a lot of snow in the winter.
Cellar
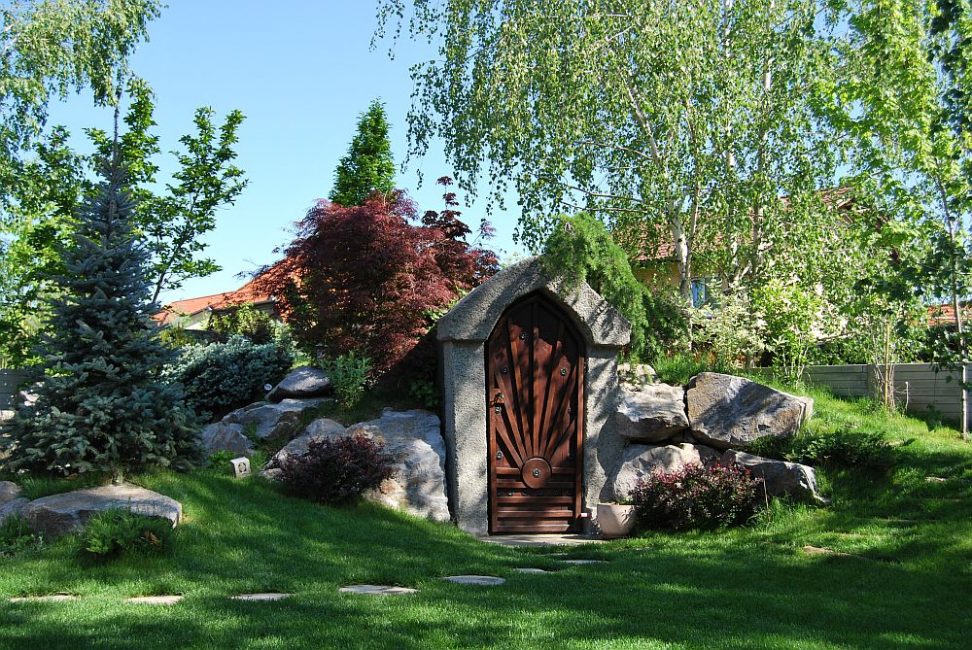
A cellar built in a summer cottage is a familiar element to many. It is convenient to store grown crops and homemade preparations in it.
It is better to provide a separate cellar than to use the underground of a residential building for this. A well-made cellar constantly maintains a suitable storage temperature. It should not exceed 8 degrees in summer and fall below 4 degrees in winter.
Most often, they try to make the cellar so that it is invisible on the site. It is necessary to plan construction work in the warm season.
But in advance (in spring or autumn) you need to measure the actual level of groundwater in the country. The high location of the water level in the soil will become an obstacle to the construction of a conventional cellar without enhanced waterproofing of the outer surface of the walls. If there is a lot of moisture in the soil, it is better to build a ground or semi-buried version.
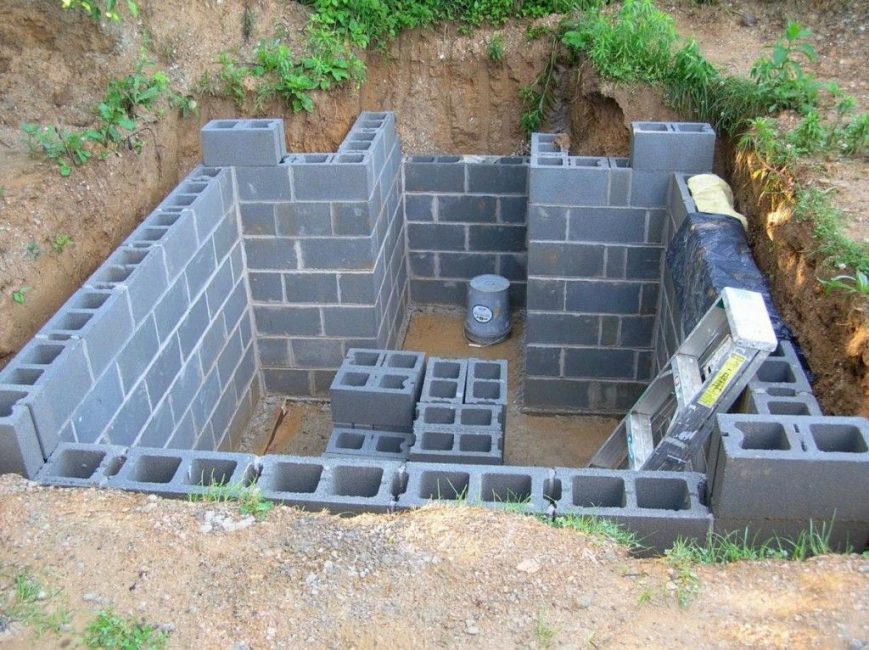
First, a foundation pit is prepared, the floor in the cellar should be below the freezing level in winter, in most regions this parameter is 1-1.5 m.
A hole along the perimeter is dug 50 cm wider than the cellar is planned. This space will be required for waterproofing with roofing material.
To protect the floor in the pit, a gravel-sand pillow is made, on it, mixing the solution with gravel, create a monolithic foundation slab 15-20 cm thick.
An ordinary vaulted cellar is laid out with brick walls 1 m thick, the vaults withstand external loads well. Such a cellar will be expensive, therefore, to reduce costs, several reinforced concrete pillars are poured to increase the bearing capacity of the walls.
When erecting walls, the film is immediately laid on the outer surface of the wall. The space between the wall and the ground is filled with previously excavated soil, the backfill is immediately well tamped.
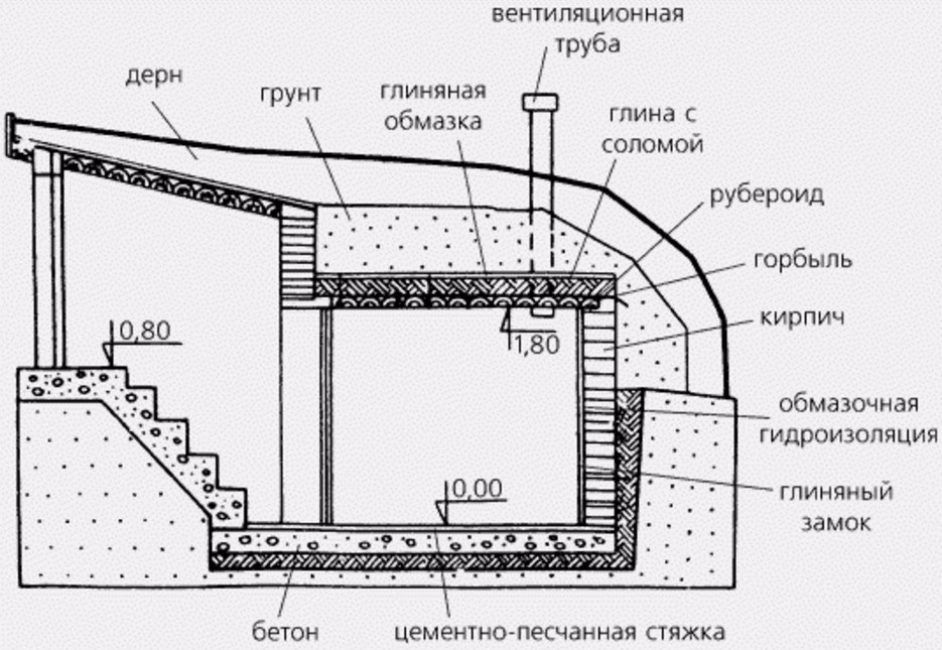
Cellar scheme
To create a vault, a wooden formwork is made. For insulation, the cellar is covered with earth from above; the uniform distribution of the load on the walls and ceiling depends on a properly made vaulted structure. This will reduce the cost of thermal insulation.
Make a ceiling, reinforcing it with reinforcement, a concrete screed is made on top of the ceiling, creating additional protection for the structure.
A flat ceiling in the cellar creates an additional significant load on the walls. Therefore, a "simple rectangular" cellar will cost more than a traditional vaulted cellar. At the end, you need to fix the required number of shelves with nails or screws and conduct electricity to the cellar.
Unprotected from rain and snow, steps to the cellar in winter can become dangerous for people. Therefore, you need to protect the entrance with a visor or canopy.
Often the steps are located in the vestibule of the cellar. This way, precipitation will not fall on them and you will create a temperature buffer that stabilizes the temperature inside the cellar. In a cellar without a canopy or buffer chamber, and in warm winters, the door may stop opening during icy conditions.
chicken coop
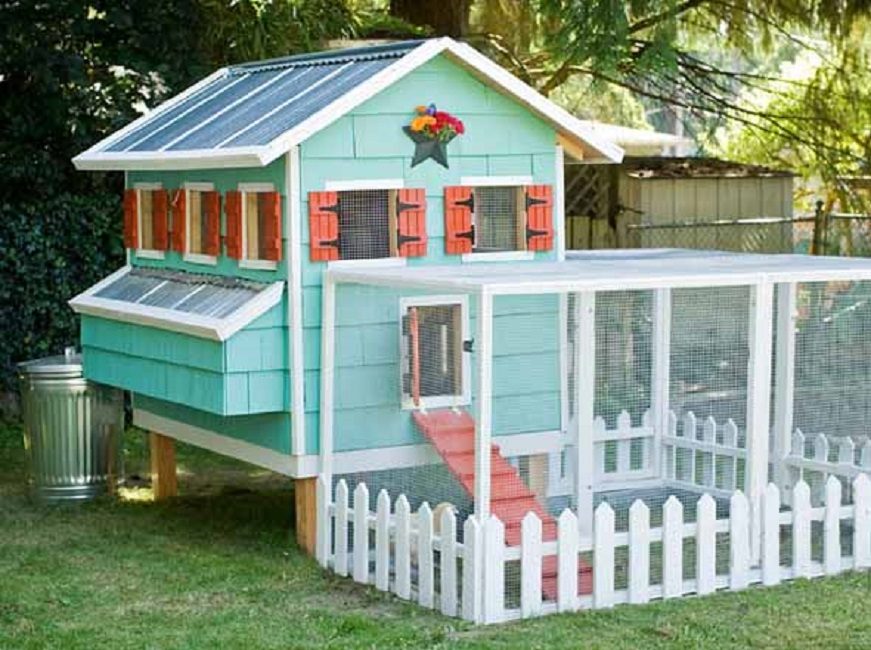
If you want to get fresh eggs in the country, you can breed chickens. The small dimensions of the building and good thermal insulation will give the bird the opportunity to heat the room with its warmth. It is not difficult to build such a chicken coop, any householder can do it.
It is important to consider several points. Chicken coop - and an outbuilding, and comfortable housing for pets. It is needed to simplify the care of the bird and increase its productivity.
Dampness is the main enemy of birds and wooden buildings. In dampness, the chickens will get sick, and the wood will begin to rot, for this reason the chicken coop must be raised above the soil level. Sometimes it is raised high - a meter or more. If there is no high humidity in your region, then it is enough to raise it by 25-40 cm.
A suitable location for a poultry house is a 50% success rate.Therefore, you need to follow a few rules:
- the convenience of assembling the frame, the ability to do the work yourself, without spending money on hiring a construction team;
- speed of construction work;
- low cost of building materials;
- the ability to simultaneously easily install boxes and make a workbench;
- small volume and mass of materials - this makes it possible to save on transport costs and do without specialized equipment;
- the possibility of building a garage both from lumber and from metal or other suitable material.
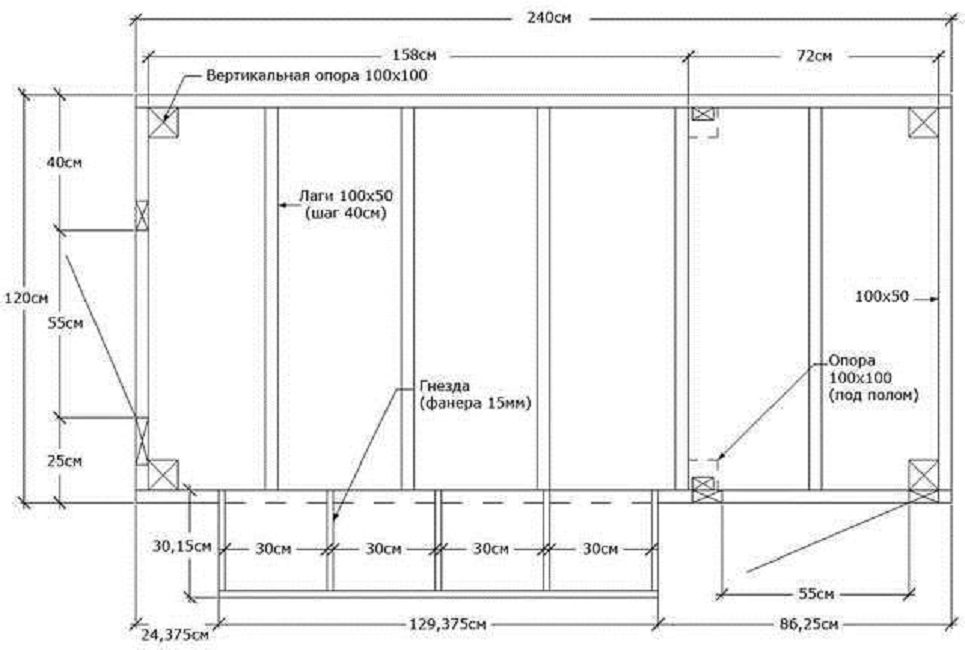
The poultry house should have access to care for living creatures, do not forget that the room should be equipped with nests where chickens will lay eggs. They should be comfortable for chickens and for caring for them. The most suitable nest size is 30 cm in height and 30 × 30 cm in width and length.
Make an inclined cover for the nests, which will protect you from the rain.
Birds need perches, 1 chicken will require at least 25 cm of perch length. If you will keep 10 chickens, then it is enough to fix the crossbar 2.5 m long.
Chickens rush poorly, with a lack of light, this problem is solved with the help of electric lighting or windows are installed. It is better to install them on 3 sides so that the house is lit all day. Provide a ventilation window, it is convenient to make it on the back wall. It is better if it closes in the winter - a lot of heat will go through it.
Below we provide drawings of our chicken coop. For construction, we used timber and boards of coniferous wood, as well as plywood 15 mm thick. It is quite possible to use OSB for the floor and the substrate under the roof. When specifying the step between the lags and rafters, the distances are indicated between the centers of the bars.
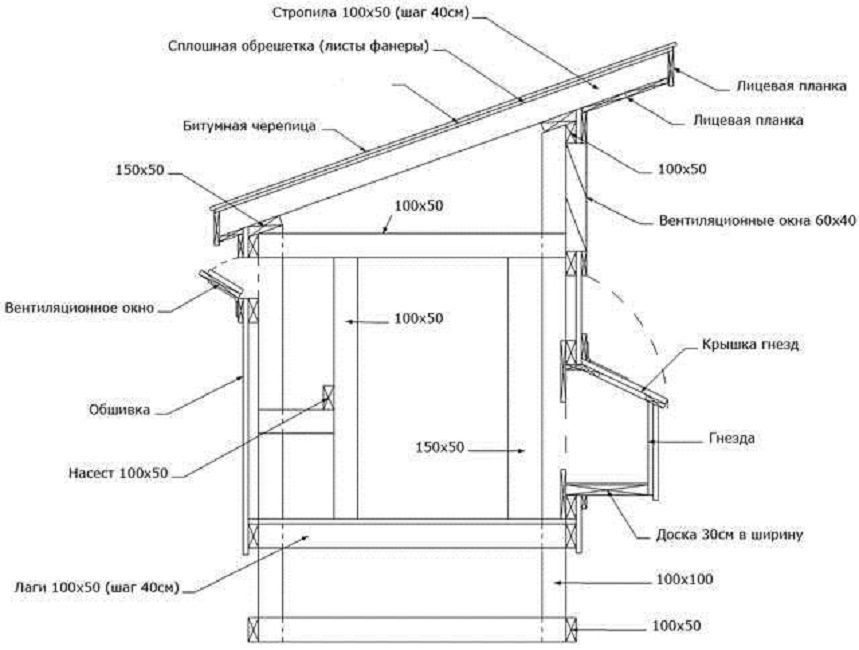
Chicken coop drawing
The chicken coop must be insulated, mineral wool, polystyrene, and in extreme cases, use old blankets or cardboard.
Chicken coop drawing
Heat-insulating material is placed between the bars, everything is covered with plywood or clapboard from above. Without protection, the birds will peck out the insulating material (they especially like the foam).
In summer, birds need more free space, they are happy to walk on the street. To do this, make an open corral, the area should be 1 m2 for one chicken. Close the pen on all sides with a metal mesh, it will protect the bird from predators. It is advisable to dig the net 20-30 cm into the ground.
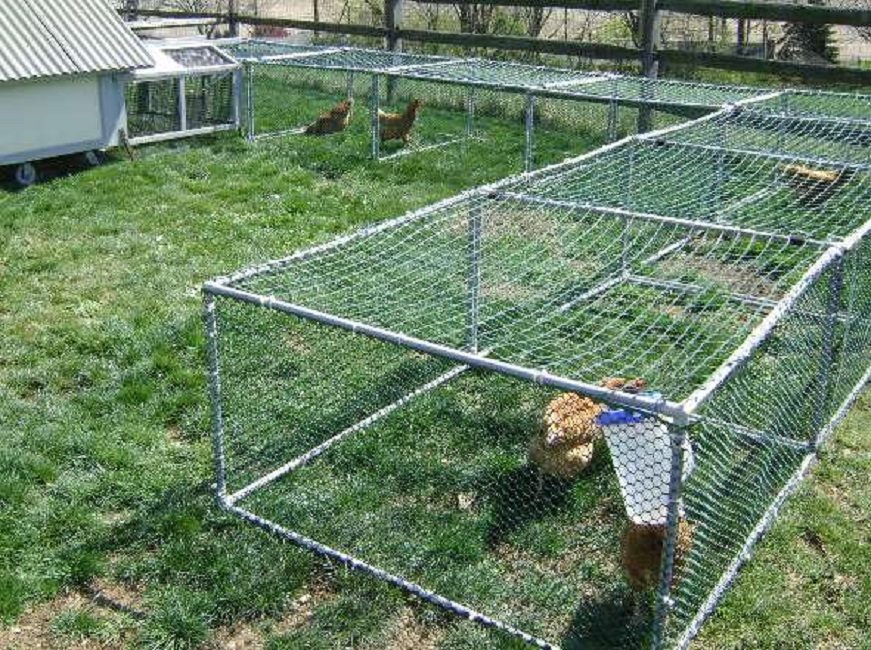
Part of the paddock
Part of the corral is located in a shady place - chickens need somewhere to hide from the hot sun at noon. If natural shade cannot be found, then a small canopy will have to be built.
VIDEO: RULES FOR LOCATION OF BUILDINGS ON THE SITE

RULES FOR LOCATION OF BUILDINGS ON THE PLOT
What can be built on a summer cottage? | TOP-9 Common country houses | (75 Photos & Videos) +Reviews
 Read also: Lobelia: description, planting and care, when it should be sown, description of varieties (50 Photos & Videos) + Reviews


On the garden plot, you can build both a residential building and a seasonal one. Garage, bathhouse and other auxiliary buildings can be built there on the foundation. But these will be capital buildings that need to be registered in the property.
top 1 bath, top 2 greenhouse