
Often people hire specialists to equip their private house or apartment. However, design and repair services are expensive. Therefore, many people prefer to do their own cosmetic repairs using different materials.
Considering the most economical ways to decorate walls, fireplaces, doorways, ceilings or other surfaces, bas-relief should be noted. With their own hands, anyone can decorate a living room or another room with such compositions without professional skills.
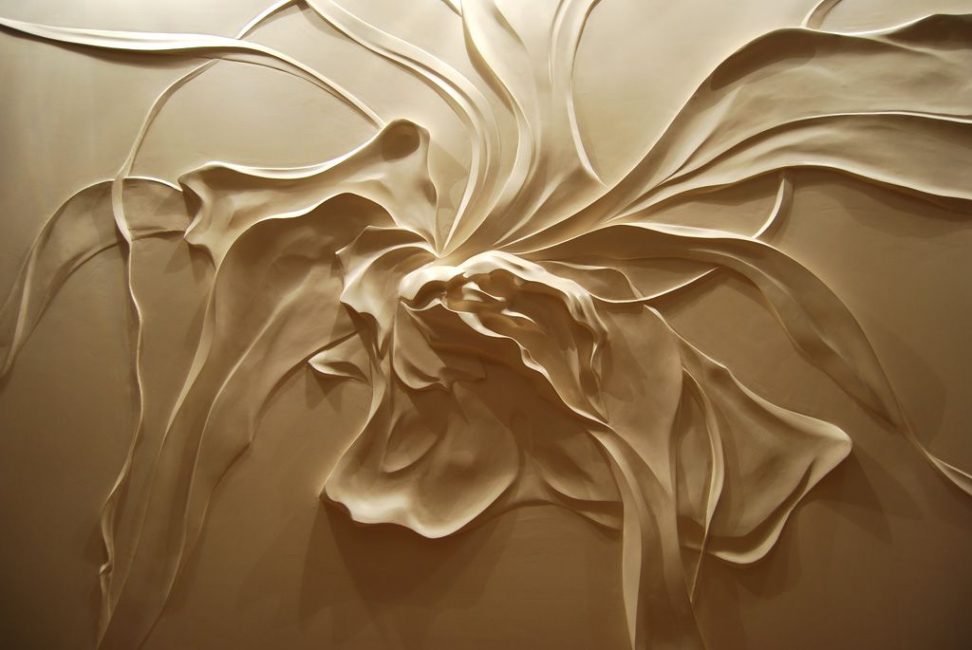
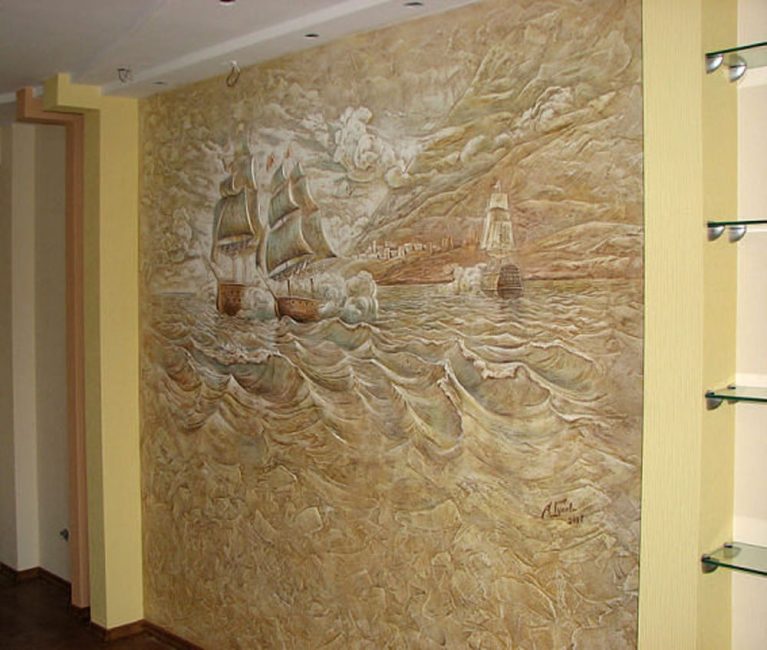
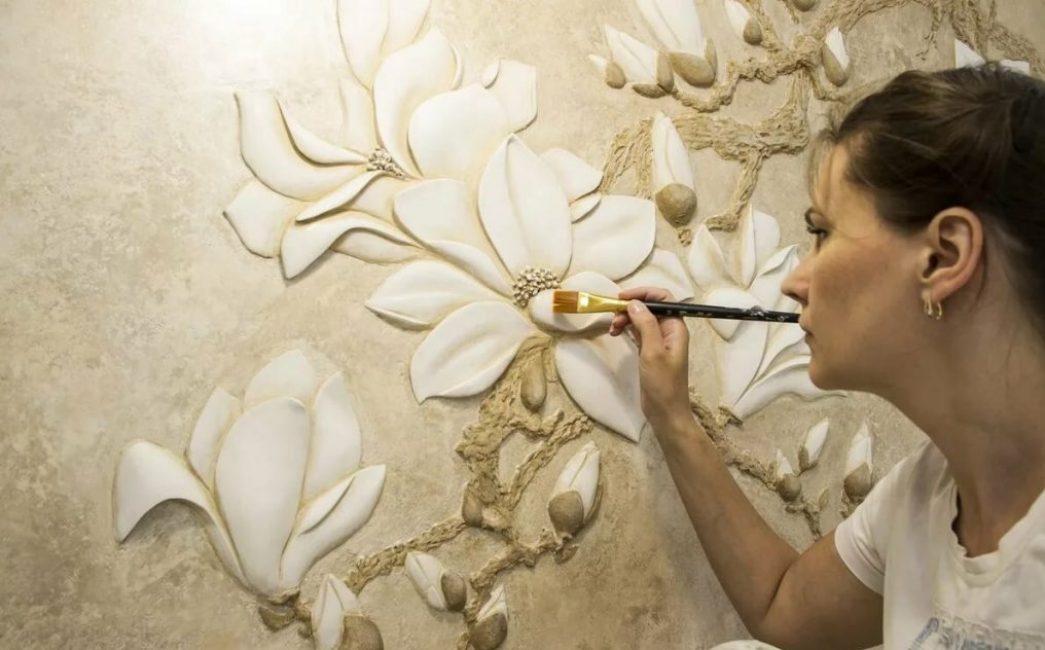
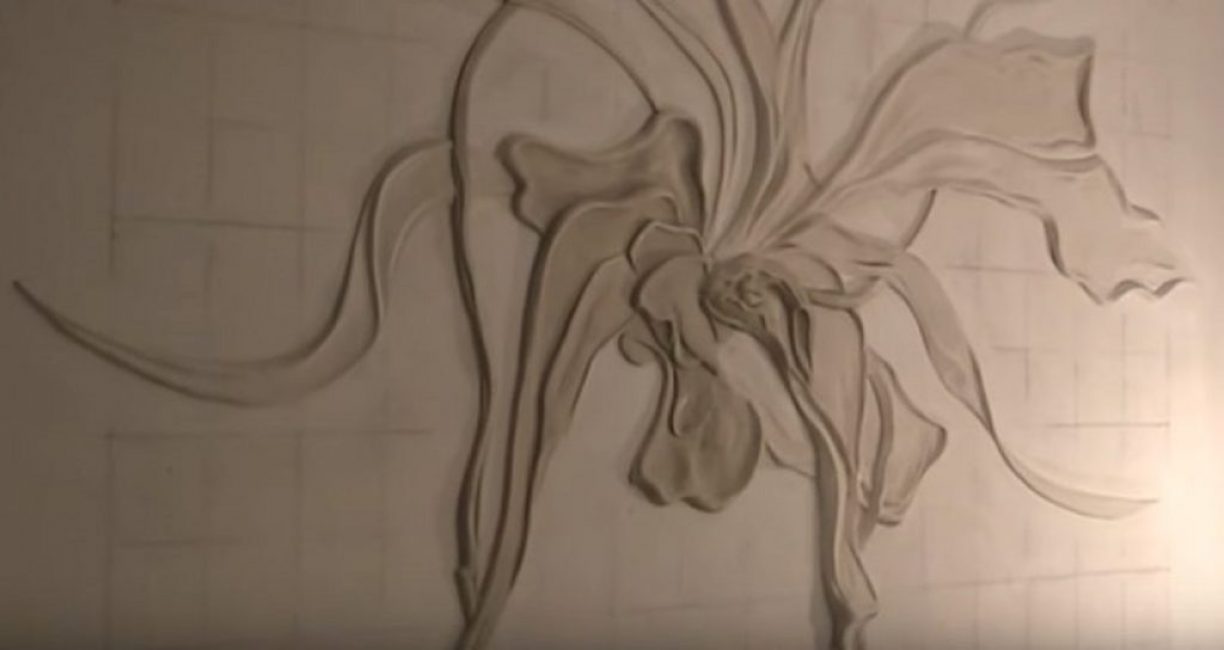
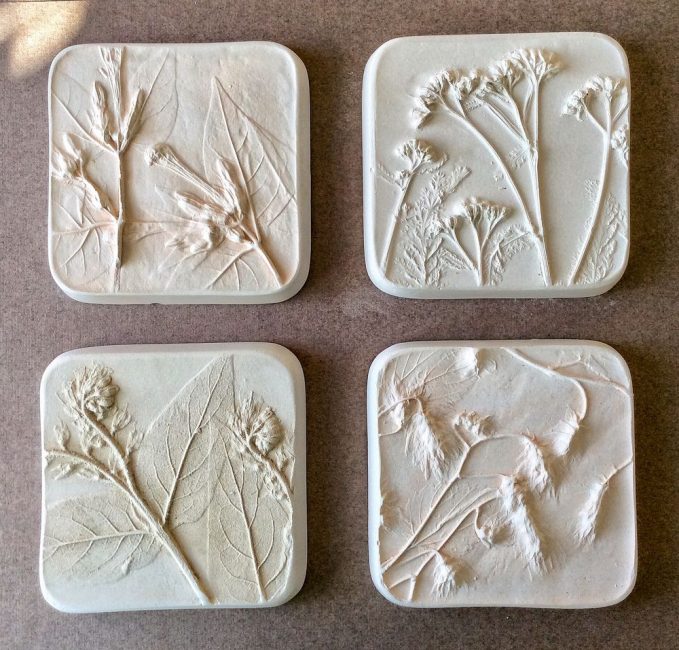
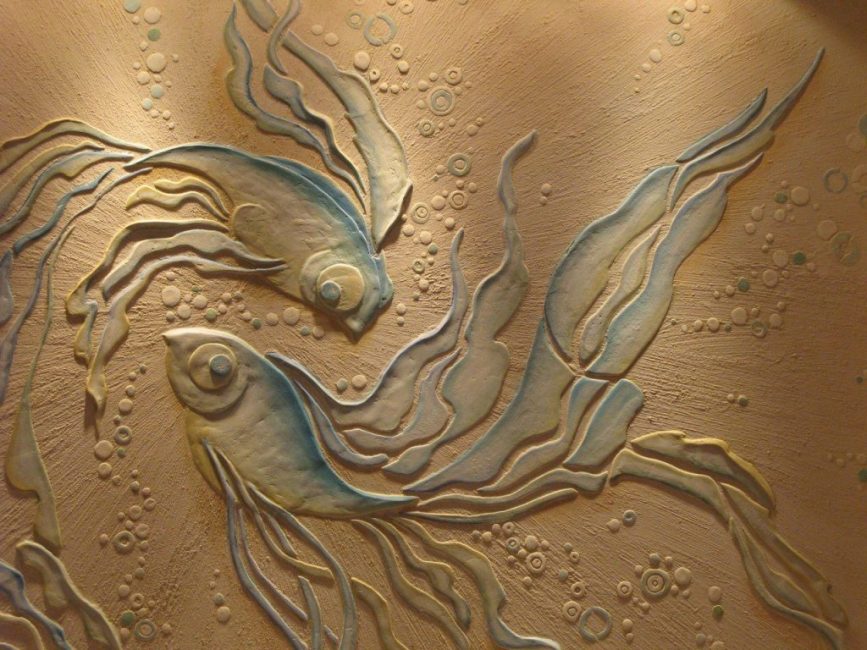
In the photo of the bas-relief, you can see what beautiful lilies, tulips and other masterpieces are obtained in the end. You can place a three-dimensional image on a vertical surface in any place prepared in advance. Such an original element of the interior visually changes the room, eliminates the flaws on the wall.
The bas-relief can be made in any room, whether it be a kitchen, an entrance hall or a bedroom. It can be presented as a separate ornament or a single composition. You can place a three-dimensional image both in the center of the wall, and break it into several elements. Both of them look great, decorating the room.
Content:
 Read also: Veranda attached to the house - expanding the living space: projects, tips on how to create your own hands (200 original photo ideas)
Varieties of bas-reliefs
bas-relief
Before proceeding with the creation of a bas-relief, you should familiarize yourself with its varieties. The image should protrude above the wall surface by no more than half the volume. If the composition will act more than half, then it is customary to call it a high relief.
You can create a three-dimensional pattern on the surface of the wall with the help of a cast of a solid form, as well as assemble it from individual elements. Other types of bas-relief include:
- ornamental - a composition consisting of ornaments and patterns
- Plot-pictorial - bas-reliefs, in the center of which there is some kind of picture
- flattened - three-dimensional images, between the details and the plane of which it is customary to observe the minimum distance
- Facing - compositions that are used when carrying out facing works. Most often, such bas-reliefs are created as ornamental
- Picturesque - flat figures on which elements of nature can be seen
- Multifaceted – different components are applied during work, shadow effect, contrasts
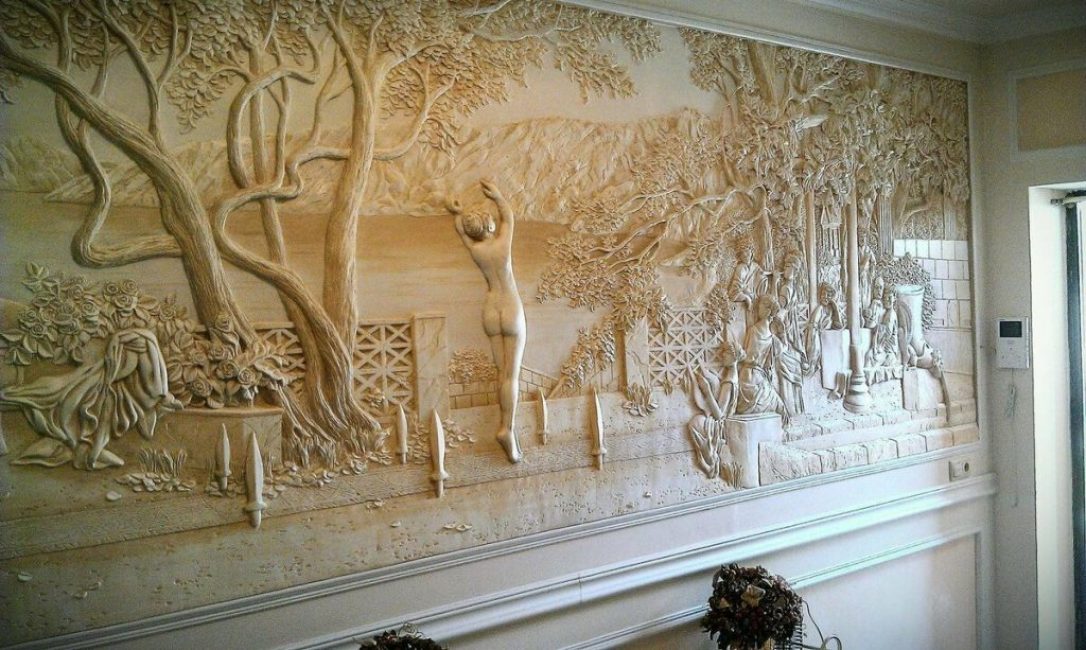
Volumetric composition
In the kitchen, voluminous compositions depicting pets, utensils, vegetables and fruits will be a suitable option. To decorate a children's bedroom, it is better to choose light and bright panels with characters from fairy tales and cartoons, which, like statues, are located in the wall.
 Read also: How to make flower pots with your own hands: outdoor, indoor, hanging | Step by Step Charts (120+ Original Photo Ideas & Videos)
 Peculiarities
Bas-relief on the wall
Bas-reliefs have some features that distinguish them from other types of decorative painting. They include:
- High price. The creation of convex images is carried out using high-cost materials. Even the putty substance must have the highest level of quality, but the costs are justified by the appearance of a unique interior.
- The use of prefabricated slabs. To reduce the duration of installation work, apartment owners sometimes use completely finished slabs, which are installed immediately on a leveled base. And the bas-relief formed on the surface of the wall itself plays the role of a monolithic stucco molding
- No highlighting of colors. The three-dimensionality is created by the backlight reflecting off the bulges in the image. Properly placed lamps will allow you to focus on the details of the composition after turning on artificial lighting for a certain period of time
- Functionality. Acting as a decorative finish, bas-relief compositions also cope well with other tasks. For example, they mask minor irregularities in the base, smooth out transitions between functional areas, visually increase or decrease the area of the surrounding space, and make the room unique.
 Read also: How to make a patio in the country with your own hands: a variety of design options, decoration and arrangement (85+ Photo Ideas & Video)
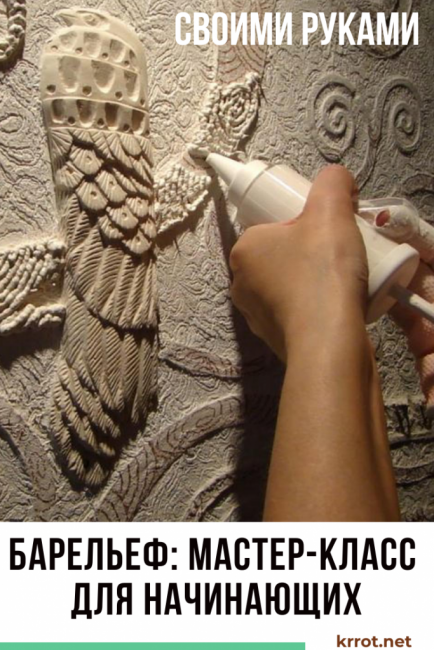
Master class for beginners
Creation of a bas-relief
In most cases, gypsum is used to create an exclusive bas-relief. Before starting the main work, you should carefully think about the drawing, prepare a sketch in advance. At the same time, the future composition should be combined with the general background of the wall, the rest of the interior. The work is painstaking, but the result is worth the time and effort spent.
Necessary tools and materials
For sculpting, you will need special tools that can be bought at any hardware store or in the department with art supplies.
For further work you will need:
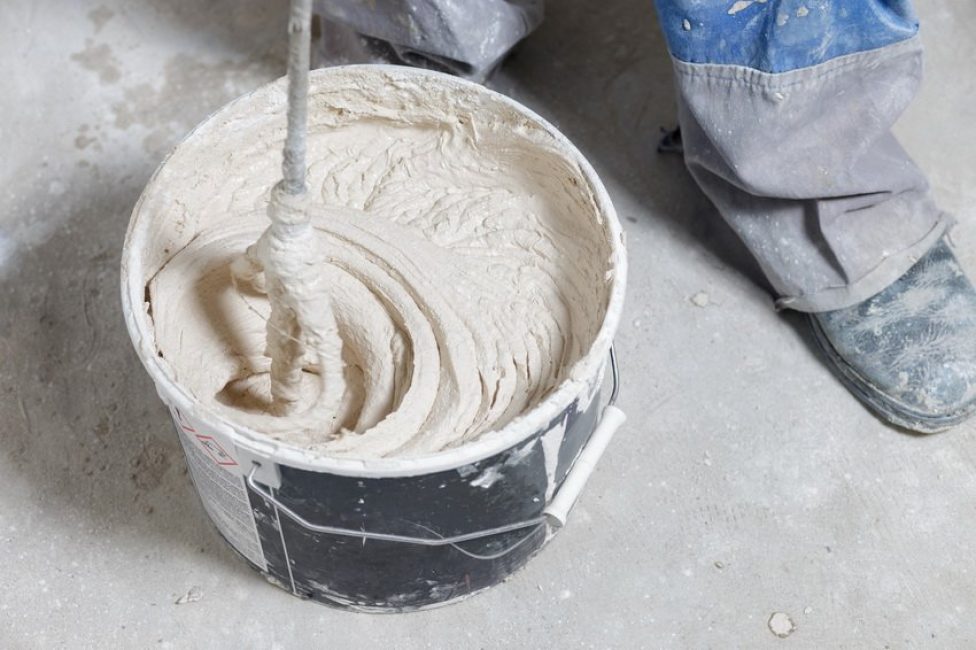
- bucket or any other container for preparing the mixture
- abrasive sponges
- paints
- brushes
- knives
- sandpaper
- trowel
- palette knife to create three-dimensional images
- polyethylene film
- pen, marker, pencil
- masking tape
- putty knife
- scrapers
- primer
- gloves
- stencils
To create a bas-relief manually, you can use different materials
Most often used for this:
- gypsum
- alabaster
- clay
- putty
- plaster or decorative plaster
- polyurethane
Most often, gypsum is used to make images. This material is environmentally friendly and easy to use. From it you can make both simple and more complex compositions.
It is easy to apply acrylic paint to plaster, which will help protect the bas-relief from damage. EIf a layer of varnish, glue or primer is applied to the composition, this will increase its strength.
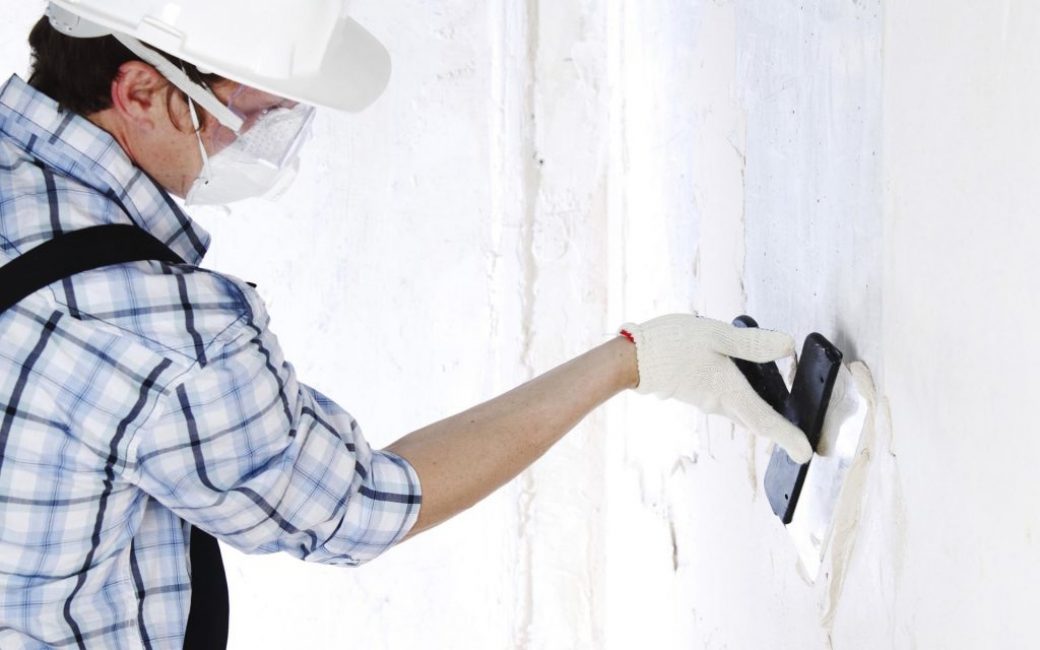
Preparatory work
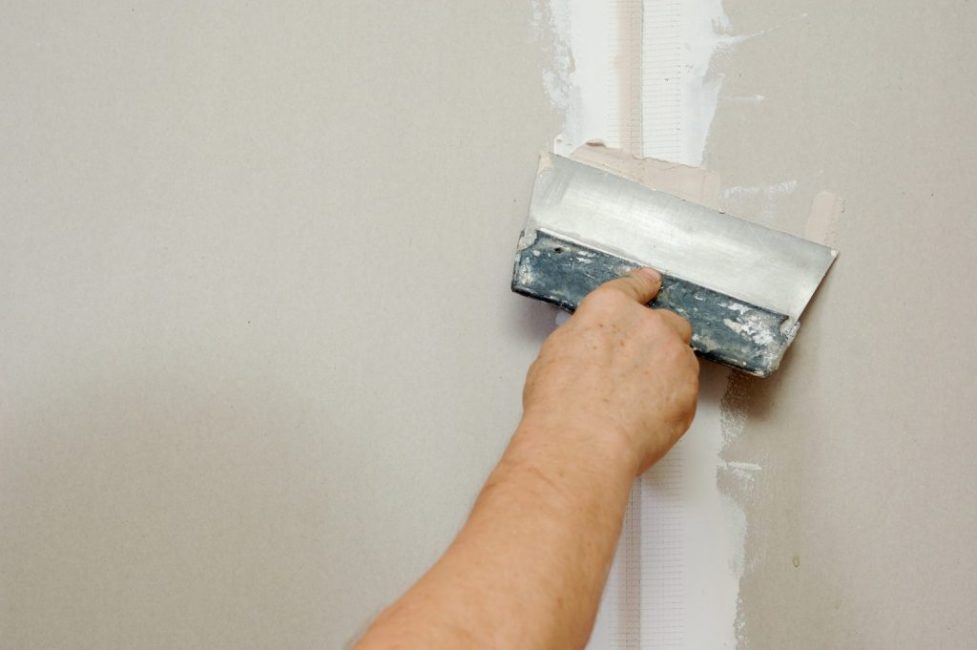
Applying putty
At the first stage of the composition master class, cleaning work is performed, which involves the removal of a coating that has already lost its decorative effect. Then the wall is cleaned of accumulated dirt and dust, defects found are eliminated, holes on the surface are smoothed out so that it is even.
When the applied layers of mortar or other building material are completely dry, the wall is treated with a primer and dried. At the next stage putty is applied. The wall must be completely dry for further work.
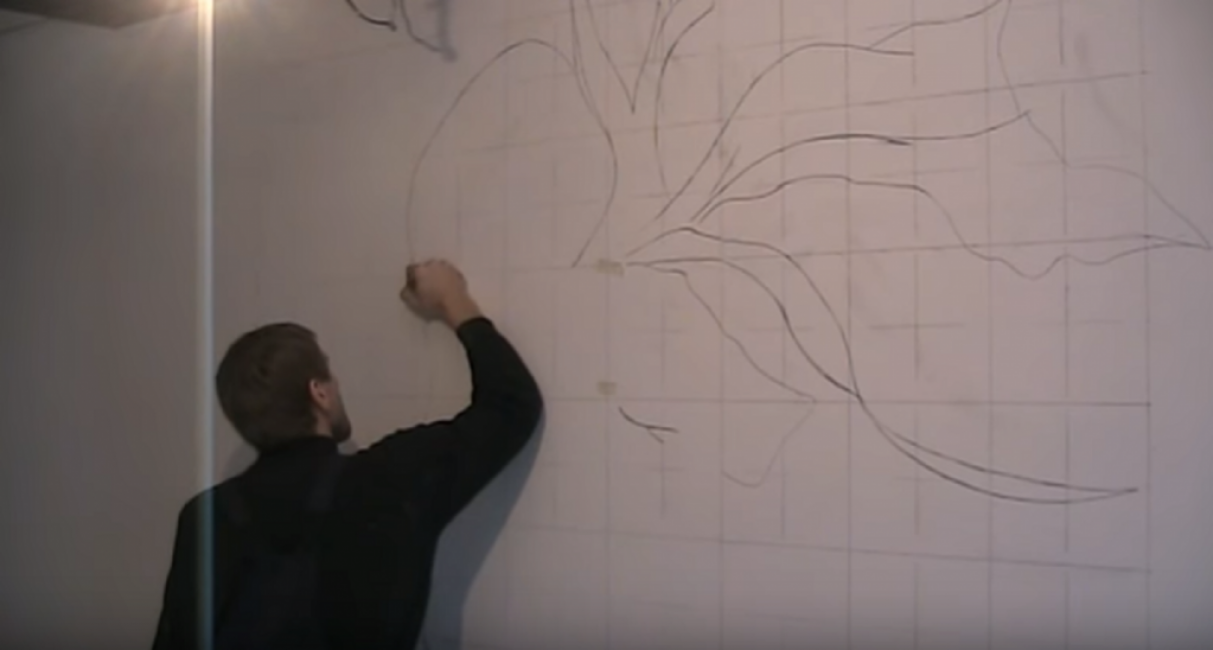
Sketching
It is recommended to choose a future composition in advance, and then sketch it on the wall with a pencil. To please the result, it is better for inexperienced craftsmen to use images of birds, plants and simple geometric shapes.
The size of the drawing on the template must clearly correspond to the volume of the future bas-relief. In addition, you can not draw the whole picture in detail at once, but only the outlines of the main objects.
Main Process
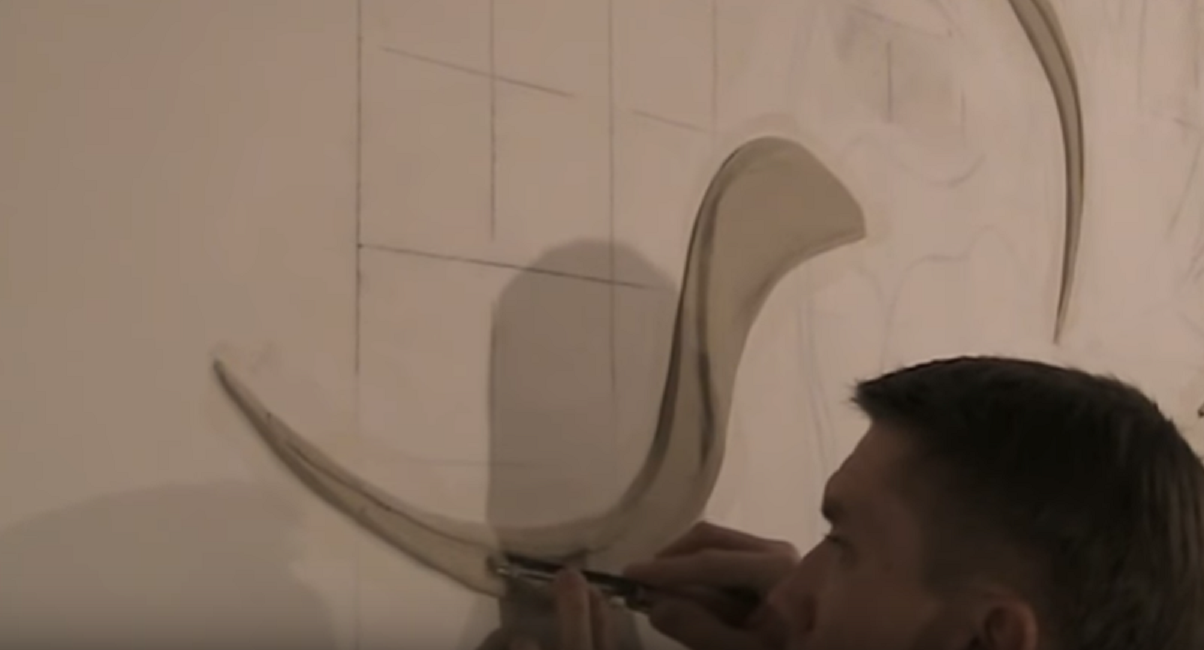
Shaping small parts
After the preparation stage, you should proceed to the main work. Walkthrough:
- First, a low box is made from four plywood slats or pieces of drywall, the width, length and depth of which must correspond to the future bas-relief. You can use thick cardboard
- Its inner surface is covered with a plastic film. It must be straightened so that the number of folds is minimal, or they are completely absent.
- Next, a solution prepared from plaster, gypsum or cement-sand composition is poured inside in compliance with the appropriate proportions.
- Carefully transfer the resulting mixture into a plywood or wooden box with a film pre-laid there.
After the pouring procedure, you should wait for some time until the mixture has completely hardened. If the composition contains cement, then the drying process will last about 10–12 hours, otherwise the concrete layer will not adhere to the vertical surface.
Layer creation
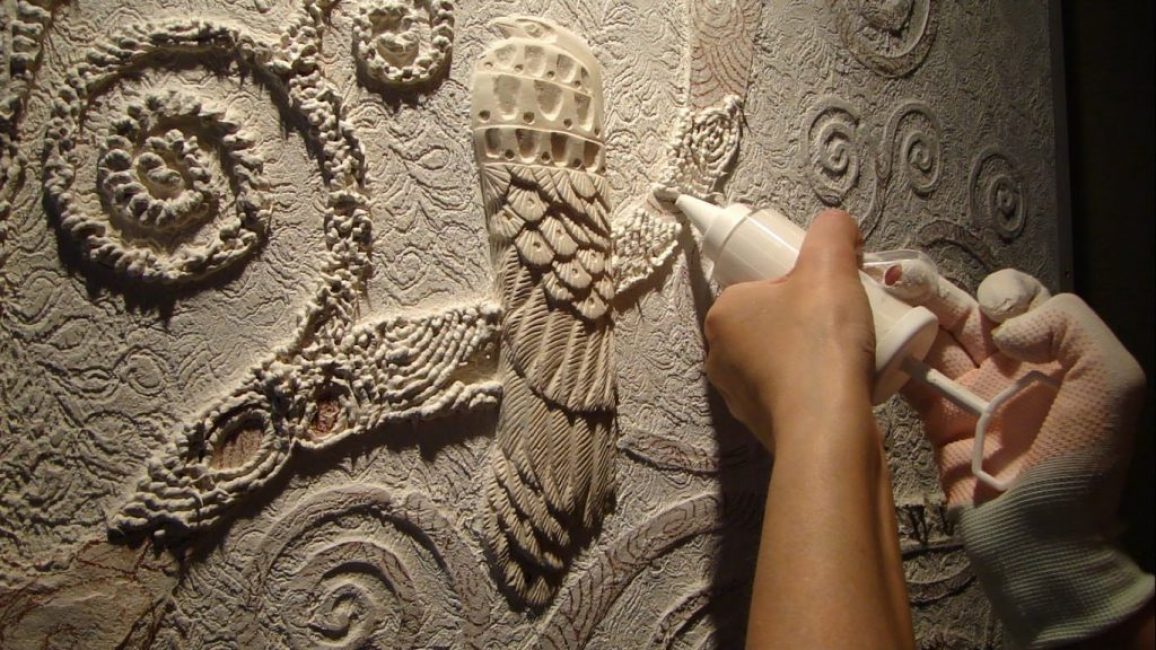
Small details of the image are formed on the prepared bas-relief, in the contours of which volumetric bulges are built up with the help of a newly prepared mixture. In order for each of the layers to seize and harden, similar procedures will have to be carried out several times.
The master must remember that excess alabaster is removed with a knife. This is done when the material has not yet had time to grab.

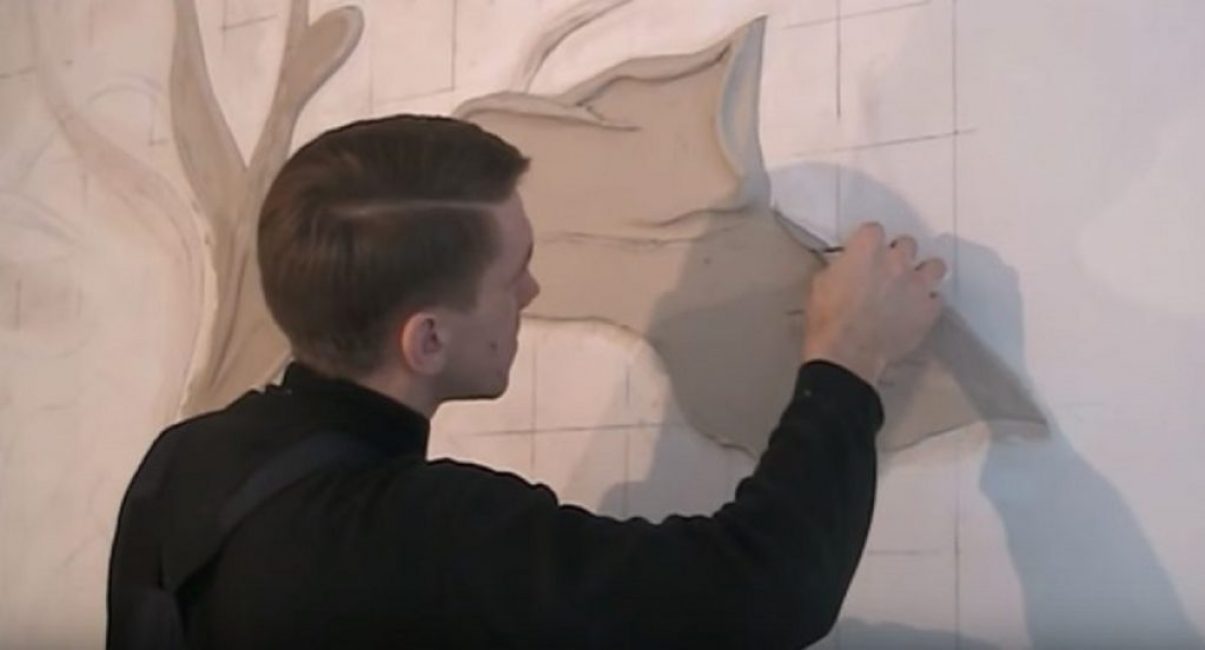
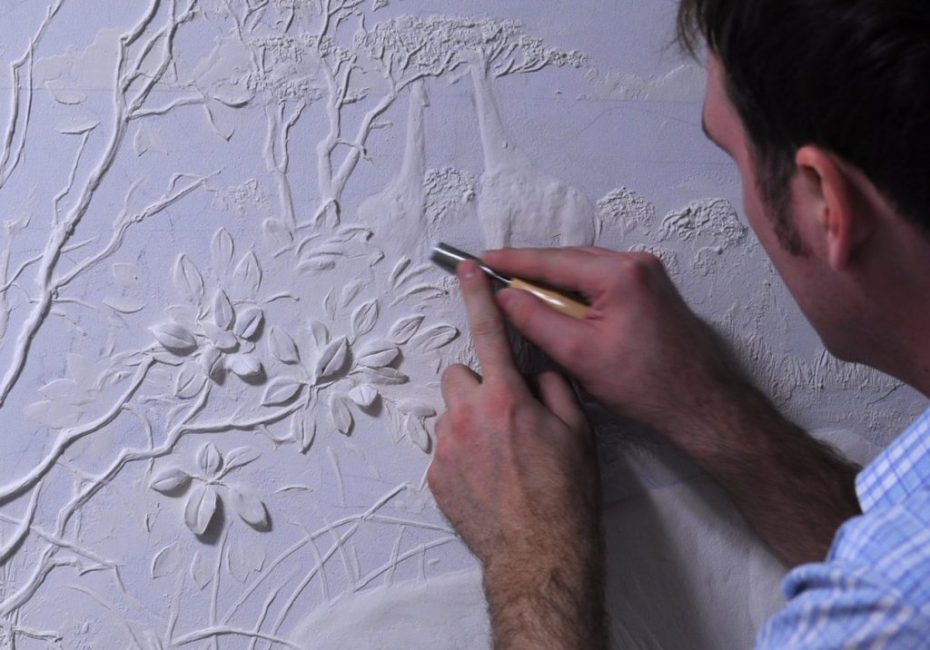
Composition Adjustment
The lines of the elements of the composition are corrected with cutters, and the surfaces are smoothed with sandpaper. If an in-depth drawing is created, the material is removed with chisels and chisels. During the procedure, the surface of the bas-relief can be wetted for easier extraction of the mixture.
Wall mounting
Wall mounting
The next step is to attach the molded parts to the base or mount directly to the wall itself. In the process of such work, the joints between the elements are sealed with plaster and leveled with sandpaper.
To attach individual parts of the bas-relief to the wall, you will need special fasteners. Walkthrough:
- You will need corrugated nails with fine threads 80-120 mm long. They should be driven into plastic dowels.
- Attachment points should be made in the thickest places on the wall surface. They must be marked in advance with a pencil or marker at approximately the same distance from each other.
- Drive nails into the wall to a depth of about 50-60 mm
- Above the surface, the nails should protrude by about 15-20 mm
- A finished bas-relief is attached from above
reverse casting
reverse casting
Another fixing method is reverse casting. The craftsmen using it remove the freshly frozen slab from the mold and make a counter-relief on its front side.
This is done as follows:
- To begin with, elements made of gypsum or alabaster are created.
- Next, they must be laid out on a flat surface, which is previously covered with plastic wrap.
- Each element is lubricated with lanolin, due to which the parts adhere well to the surface. This composition is absorbed 2 hours after application. At the same time, a characteristic oily sheen appears on the surface of the models.
- The fourth step is to prepare a gypsum or alabaster mortar, with which the manufactured elements are subsequently coated. The thickness of the layer should be about 1 cm.
- The fifth step - the coating is processed with a soft wire frame, and the branches are fastened together with copper wire
- Make a mortar out of sand and cement, coat the parts with it. The layer thickness must be at least 5 cm.
- The next step forms the supporting surface, which is commonly called the mold.
- Details are separated from the material on which the elements were laid out. You can do this with a wedge.
- The inner part of the supporting surface is cleaned with a copper brush, and the resulting defects are eliminated with alabaster or gypsum
- Remove flash from the mold, chamfer from the inner rib
- Lubricate the inside of the mold with lanolin
- The inner part is filled with layered balls of mass for casting
- Then, eyelet molds with handles are inserted, with the help of which the composition is easier to carry.
- The last layer of the solution is poured when the eyes fit snugly into the composition
cosmetic work
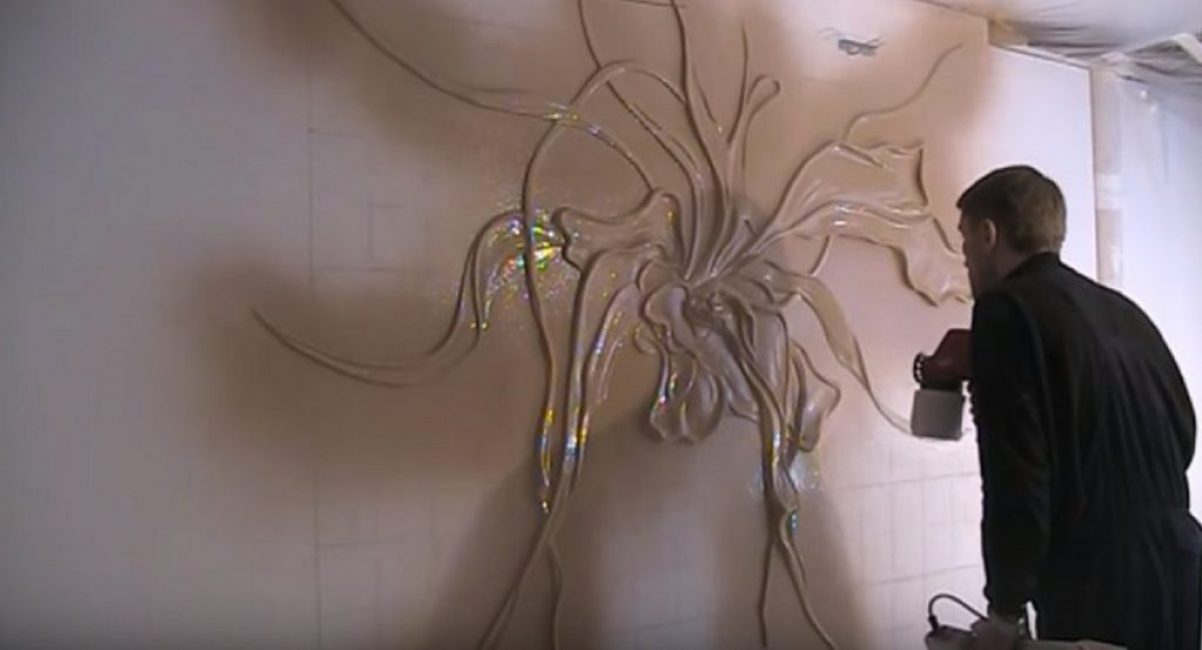
cosmetic work
The resulting seams and holes are eliminated with a grout, putty or alabaster mortar, and then polished. At the finish line of installation work, the bas-relief is varnished and covered with paint.
These substances strengthen the surface of the composition, improve its resistance to high air humidity and make the appearance of the decorative wall more attractive.
 Read also: How to make a children's house with your own hands: from wood and other materials. Dimensional drawings | (80 Photo Ideas & Videos)
 Cord application
Dried composition
This method of making a bas-relief is considered the simplest. It involves the use of gypsum mortar and a simple clothesline. The drawing should be applied to a piece of foam or fiberboard.
Then it is necessary to lay the rope in the lines drawn in a special way. Before this action, it must be moistened in a gypsum solution.
When the product is completely dry, the surface must be treated with a gypsum solution. This is done with a brush. A similar decor can be used for decoration by sticking it on a vertical surface.
In the same way, you can decorate various kinds of furniture, such as benches. To do this, you need to lay the bench as comfortably as possible, then apply a bas-relief on one side. When the composition dries, the same is done with the opposite side.
In conclusion, the texture can be painted and toned in any shade.
 Read also: How to make a greenhouse with your own hands: for seedlings, cucumbers, tomatoes, peppers and other plants. From polycarbonate, window frames, plastic pipes (75 Photos & Videos) + Reviews
Safety Precautions, Tips & Tricks
Before proceeding with the manufacture of a bas-relief, it must be taken into account that alabaster and gypsum (in the form of dust) are materials harmful to human skin.
They provoke irritation, peeling, therefore, during work, the master must follow some safety rules:
- Use of protective rubber gloves
- Wearing safety goggles to keep dust and small particles out of your eyes
- Use of a respirator while working with the solution
Such security measures perfectly protect the bronchi and lungs from the dust that appears when working with putty and plaster. Protective equipment must be on the person throughout the entire work process.
It is very important to correctly organize all the stages of creating a bas-relief
To do this, it is recommended to adhere to the following rules:
- It will be correct to install a good light source next to the wall so that all the shortcomings can be seen, which are very important to eliminate before the material hardens.
- Compliance with the recipe when mixing the solution
- Optimal solution consistency. If the mixture is too thick, add a small amount of water. But it shouldn't be too liquid.
- Before working with the wall, inexperienced craftsmen should practice a little with applying plaster to a wooden surface.
- All necessary tools and materials must be prepared in advance
 Read also: How to make a booth for a dog with your own hands: building a home in the yard and in the apartment. Drawings, dimensions and original ideas (55+ Photos & Videos) + Reviews
 Restoration and care of the bas-relief
Painted bas-relief
Sometimes there are various kinds of troubles, for example, breaking off individual parts of the bas-relief. In addition, over time, the composition loses its original appeal. Gaps may form at the attachment points to the wall.
To correct the situation, it is necessary to carry out the restoration of the composition. Breaking elements are restored using a similar composition of the solution, which must be made exactly the same consistency. The resulting gaps are simply smeared with the finished mixture.
If the bas-relief was painted with saturated colors, which have lost their brightness over time, then a new layer of acrylic is applied to the drawing. In order for the composition to retain its attractiveness longer, it should be covered with a layer of varnish.
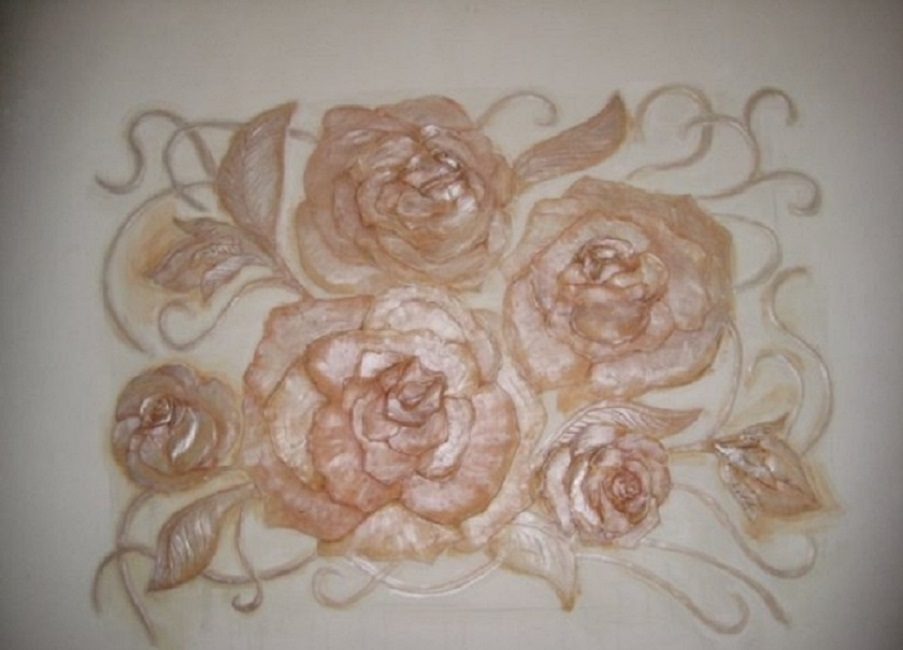
A relief image with plaster or other similar material highlights part of the wall or becomes the central element of the whole room. The bas-reliefs in the room will always surprise and attract the attention of guests.
It is not necessary to spend a lot of money to make them. If you follow the instructions, then you can create a masterpiece on your wall yourself.
The video tutorial is below.

Bas-relief for beginners with their own hands | Artist Natalya Bobrova
Do-it-yourself bas-relief: a master class for beginners - a sculptural masterpiece on the wall | (100 Photos & Videos)
![[Instructions] How to make beautiful and unusual wall shelves with your own hands: for flowers, books, TV, kitchen or garage (100+ Photo Ideas & Videos) + Reviews](https://iherb.bedbugus.biz/wp-content/uploads/2018/05/19-6-300x213.jpg) Read also: [Instructions] How to make beautiful and unusual wall shelves with your own hands: for flowers, books, TV, kitchen or garage (100+ Photo Ideas & Videos) + Reviews
Read also: [Instructions] How to make beautiful and unusual wall shelves with your own hands: for flowers, books, TV, kitchen or garage (100+ Photo Ideas & Videos) + Reviews 


